dsl-210 usb adsl modem user’s guide - cs loxinfosupport.csloxinfo.com/adsl/pdf/dlink210.pdf ·...
TRANSCRIPT

DSL-210 USB ADSL Modem User’s Guide
i
DSL-210
USB ADSL Modem
User’s Guide
(First Edition April 2003)

DSL-210 USB ADSL Modem User’s Guide
i
FCC Warning
This equipment has been tested and found to comply with the limits for a Class B digital device, pursuant to part 15 of the FCC Rules. These limits are designed to provide reasonable protection against harmful interference in a residential installation. This equipment generates, uses and can radiate radio frequency energy and, if not installed and used in accordance with the instructions, may cause harmful interference to radio communications. However, there is no guarantee that interference will not occur in a particular installation. If this equipment does cause harmful interference to radio or television reception, which can be determined by turning the equipment off and on, the user is encouraged to try to correct the interference by one or more of the following measures:
-Reorient or relocate the receiving antenna.
-Increase the separation between the equipment and receiver.
-Connect the equipment into an outlet on a circuit different from that to which the receiver is connected.
-Consult the dealer or an experienced radio/ TV technician for help.
CE Mark Warning This is a Class B product. In a domestic environment, this product may cause radio interference, in which case the user may be required to take adequate measures
Warnung! Dies ist in Produkt der Klasse B. Im Wohnbereich kann dieses Produkt Funkstoerungen verursachen. In diesem Fall kann vom Benutzer verlangt werden, angemessene Massnahmen zu ergreifen.
Advertencia de Marca de la CE Este es un producto de Clase B. En un entorno doméstico, puede causar interferencias de radio, en cuyo case, puede requerirse al usuario para que adopte las medidas adecuadas.
Attention! Ceci est un produit de classe B. Dans un environnement domestique, ce produit pourrait causer des interférences radio, auquel cas l`utilisateur devrait prendre les mesures adéquates.
Attenzione! Il presente prodotto appartiene alla classe B. Se utilizzato in ambiente domestico il prodotto può causare interferenze radio, nel cui caso è possibile che l`utente debba assumere provvedimenti adeguati.

DSL-210 USB ADSL Modem User’s Guide
ii
TABLE OF CONTENTS
About This User’s Guide ........................................................................................IV Guide Overview .............................................................................................................................................iv
Before You Start .......................................................................................................V Operating System ........................................................................................................................................... v
USB Port ................................................................................................................................................. v
Additional Software ....................................................................................................................................... v
Additional PVC Settings ................................................................................................................................ v
Microfilters and Splitters ............................................................................................................................... vi
Microfilters ............................................................................................................................................. vi
Line Splitter ............................................................................................................................................vii
ADSL Service ...............................................................................................................................................vii
Network Protocol and the Software Driver ...................................................................................................vii
Encapsulation Method ..................................................................................................................................viii
Modulation Technique .................................................................................................................................viii
Unpacking .......................................................................................................................................................x
Chapter 1 - Introduction ..........................................................................................1 What is ADSL? ...............................................................................................................................................1
Modem Description and Operation .................................................................................................................1
Product Features ..............................................................................................................................................2
Rear Panel ........................................................................................................................................................2
Front Panel ......................................................................................................................................................2
LED Indicators ................................................................................................................................................2
Chapter 2 - Modem Installation ..............................................................................3 Connect the ADSL ..........................................................................................................................................3
Chapter 3 - Software Installation ............................................................................4 Installing the Driver Software .........................................................................................................................5
Which Driver to Install? ..................................................................................................................................5
Installing the Software Driver .........................................................................................................................6
Windows XP ............................................................................................................................................6
Windows ME/2000 ..................................................................................................................................8
Windows 98SE .......................................................................................................................................10

DSL-210 USB ADSL Modem User’s Guide
iii
Chapter 4 - Connecting to the Internet .................................................................13 Connect with PPPoE and PPPoA Drivers .....................................................................................................13
Windows 98SE, 2000, ME and XP (PPPoA and PPPoE driver) ...........................................................13
Connect with EoA Drivers ............................................................................................................................14
Configure Modem with EoA Driver for Windows XP ..........................................................................15
Configure Modem with EoA Driver for Windows 2000 .......................................................................19
Configure Modem with EoA Driver for Windows 98SE, ME ...............................................................23
Chapter 5 - Monitoring the Modem ......................................................................29
Appendix A - Technical Specifications .................................................................30
Appendix B - Technical Specifications ..................................................................31 Uninstall for Windows XP ............................................................................................................................31 Uninstall for Windows 98SE, ME, 2000 .......................................................................................................32

DSL-210 USB ADSL Modem User’s Guide
iv
About This User’s Guide
This user’s guide provides instructions on how to install the DSL-210 USB ADSL Modem and use it to connect a computer and connect to the Internet.
If you are using a computer with a functioning USB port, you can use the Quick Installation Guide to quickly establish your ADSL connection and access the Internet.
ADSL services are provided by, and sold by a variety of businesses. Your ADSL service provider may be your telephone company, an Internet service provider (ISP), a business that specializes in providing network services or a combination of any of these. This guide uses the generic terms DSL service provider and network service provider, to refer to any business or agent that provides DSL service.
Guide Overview Chapter 1 – Introduction provides a brief description of ADSL technology and a general description of the Modem and its features.
Chapter 2 – Modem Installation provides instructions for the physical installation of the Modem and cable connections.
Chapter 3 – Software Installation is a step-by-step description of the installation of the software driver needed for Modem operation.
Chapter 4 – Provides information on how to configure the Modem and establish the ADSL connection using the web-based manager.
Appendix A - Technical Specifications is a list of specifications for the Modem.
Appendix B - Uninstalling the Modem describes the steps necessary to uninstall the Modem and its driver.

DSL-210 USB ADSL Modem User’s Guide
v
Before You Start
In addition to the Modem hardware and software drivers, you will to gather information before you begin to install the device. Your DSL service provider will give you information required for a successful ADSL connection. You will use this information when you decide which driver to install and when you configure the Modem. In order to avoid problems please read this section and make sure you understand all the prerequisites for proper installation of your new Modem.
Operating System The D-Link DSL-210 can be used with PCs running Microsoft® Windows 98 Second Edition, Windows 2000, Windows Millennium Edition (ME), Windows XP.
USB Port In addition to the Windows OS, you will need an available USB (Universal Serial Bus) port, compliant with the USB 1.1 specification, on your computer. These are commonly installed on newer computers, however older PCs may require the installation of a suitable USB port.
Additional Software It may be necessary to install software on your computer that enables the computer to access the Internet (through computers operated by your ISP or service provider). Additional software must be installed if you are using what is called a “bridged” connection. For a bridged connection, the information needed to make and maintain the Internet connection is stored on your computer, not in the Modem. This type of connection is similar to the arrangement used for analog dial-up modems, but the connection speed is much faster. Various terms are to describe a bridged ADSL connection including the term “RFC 1483 Bridge” which is used in this guide.
If your ADSL service is delivered through a PPP (Point to Point Protocol) connection, the information needed to establish and maintain the Internet connection is stored in the Modem. In this case, it is not necessary to install software on your computer.
Additional PVC Settings If you are using multiple virtual connections it will be necessary to provide additional VPI and VCI values for the device. These numbers define a unique route used on the ATM backbone of the WAN. Chapter 5 contains instruction on how to set up additional PVCs for accounts using more than one virtual connection.

DSL-210 USB ADSL Modem User’s Guide
vi
Microfilters and Splitters Most ADSL clients will be required to install a simple device that prevents the ADSL line from interfering with regular telephone services. These devices are commonly referred to as microfilters or sometimes called (inaccurately) line splitters. They are easy to install and use standard telephone connectors and cable.
Some DSL service providers will send a telecommunications technician to modify the telephone line, usually at the point where the phone line enters the building. If a technician has divided or split your telephone line into two separate lines - one for regular telephone service and the other for ADSL – then you do not need to use any type of filter device. Follow the instructions given to you by your DSL service provider about where and how you should connect the Modem to the ADSL line.
Microfilters Unless you are instructed to use a “line splitter” (see below), it will be necessary to install a microfilter (low pass filter) device for each telephone or telephone device (answering machines, Faxes etc.) that share the line with the ADSL service. Microfilters are easy-to-install, in-line devices, which attach to the telephone cable between the telephone and wall jack. Microfilters that install behind the wall plate are also available. A typical in-line microfilter installation is shown in the diagram to the right.
In-Line Microfilter
Note: Do not install the microfilter between the Modem and the telephone jack. Microfilters are only intended for use with regular telephones, Fax machines and other regular telephone devices.

DSL-210 USB ADSL Modem User’s Guide
vii
Line Splitter If you are instructed to use a “line splitter”, you must install the device between the Modem and the phone jack. Use standard telephone cable with standard RJ-11 connectors. The splitter has three RJ-11 ports used to connect to the wall jack, the Modem and if desired, a telephone or telephone device.
The connection ports are typically labeled as follows:
Line - This port connects to the wall jack.
ADSL – This port connects to the Modem.
Phone – This port connects to a telephone or other telephone device.
This diagram illustrates how a line splitter should be installed.
DSL “Splitter” Device
ADSL Service In order to use the Modem you must first have ADSL service established with a DSL service provider. There are four standards used for ADSL connections known as ANSI T1.413 issue 2, G.Lite, G.dmt and G.hs. The standards differ somewhat as to data transfer speed or bit rate. For user convenience, the Modem supports the G.hs Auto-handshake ADSL standard. This allows the Modem to operate with either type of connection.
Network Protocol and the Software Driver The protocol used for your ADSL service will determine the particular software driver to be installed. You will need to select one driver to operate the Modem. Ask your DSL service provider to assist you in selecting either the EoA (Bridged/routed Ethernet over ATM (RFC 2684/1483), Classical IP over ATM (RFC 2225/1577)), PPPoA (PPP over ARM (RFC 2364)) or PPPoE (PPP over Ethernet (RFC 2516)) driver to operate the Modem.

DSL-210 USB ADSL Modem User’s Guide
viii
If your ADSL service uses PPP (Point-to-Point Protocol) to establish the connection, you will install the PPPoA or PPPoE driver. Using a PPP connection will be familiar to anyone who has used a conventional dial-up analog modem for Internet connection. PPP is used to verify the user’s identity and to control access to the network. A PPP session requires that a user name and password be given before gaining access to network services. PPP sessions are ended when you log-off and terminate your connection to the service provider’s network. Specifically, if your ADSL service uses the protocol defined by RFC 2364, PPP over ATM Adaptation Layer 5, or RFC 2516, PPP over Ethernet, install the PPPoA or PPPoE driver.
If the protocol used for your ADSL service is defined by RFC 1483, Multiprotocol Encapsulation over ATM Adaptation Layer 5 (Bridged Ethernet), then you will need to install the EoA driver. EoA driver users may be required to manually configure your IP settings. Your DSL service provider will tell you if you need to configure your PCs IP settings. The drivers are fundamentally different in the way they relate to operating system of the computer. The computer/Modem relationship can be summarized as follows:
PPPoA or PPPoE driver – To your computer, the Modem appears as a conventional dial-up modem device. There is no actual dialing or any activity in the voice band frequencies on the telephone line, but you must still provide a user name and password to log-on.
EoA driver – To your computer, the Modem appears as an Ethernet device. Connection is automatic, similar to a connection to an Ethernet device.
Encapsulation Method It may be necessary to use an encapsulation method that is different from the default method. The protocol used for your connection, and thus the driver you use will determine which encapsulation method is used. If your DSL service provider does not specify, use the default encapsulation method.
Modulation Technique It may be necessary to use a modulation method that is different from the default method. If your DSL service provider does not specify, use the default modulation method called Multimode.

DSL-210 USB ADSL Modem User’s Guide
ix
Use the tables provided here to record the information you need to install the Modem.
SETTINGS TABLE (all users) VPI: VCI:
Software Driver: The driver used depends on the connection protocol used for your network services.
Select the PPPoA / PPPoE driver if your connection is a PPP connection. That is if you are using RFC 2364 PPP over ATM or RFC 2516 PPPoE PPP over Ethernet.
Select the EoA driver if you are using RFC 1483 Ethernet over ATM.
Encapsulation Method: (choose one)
PPPoA / PPPoE Driver:
RFC 2364 PPPoATM NULL Encapsulation
RFC 2364 PPPoATM LLC Encapsulation
RFC 2516 PPPoE Encapsulation
EoA Driver:
RFC 1483 IPoATM Bridged LLC Encapsulation
RFC 1483 IPoATM Bridged VC Encapsulation
RFC 1483 IPoATM Routed LLC Encapsulation
RFC 1483 IPoATM Routed VC Encapsulation
Modulation Method: (choose one)
T1.413
Multimode
G.Lite
G.DMT
ACCOUNT INFORMATION (PPPoA / PPPoE driver users only)
User Name:
Password:
IP CONFIGURATION (EoA driver only)
IP Address:
Subnet Mask:
Gateway:
DNS Host Name:
DNS Domain:
DNS Server:

DSL-210 USB ADSL Modem User’s Guide
x
Unpacking Open the shipping carton and carefully remove all items. In addition to this User's Guide, ascertain that you have:
1. One DSL-210 USB ADSL Modem
2. One CD-ROM with this User’s Guide and the Quick Installation Guide
3. One twisted-pair telephone cable used for ADSL connection
4. One USB cable used for PC connection.
5. One Quick Installation Guide hardcopy

DSL-210 USB ADSL Modem User’s Guide
1
Chapter 1 - Introduction ADSL modem technology is a relatively new technology and may be unfamiliar to the reader. In this section, we introduce you to ADSL technology and give a brief description of its key attributes. We also give a general description of the D-Link DSL-210 USB ADSL Modem and its main features.
What is ADSL? Asymmetric Digital Subscriber Line (ADSL) is an access technology that utilizes ordinary copper telephone lines to enable broadband high-speed digital data transmission and interactive multimedia applications for business and residential customers. Using existing phone lines avoids the need for adding expensive new cable.
ADSL modems use digital coding techniques that greatly increase the bandwidth capacity of telephone lines without interfering with regular telephone services. For the ADSL modem user, this means much faster data communications. ADSL modems make it possible to enjoy benefits such as high-speed Internet access, telecommuting, collaborative computing, distance learning, movies on demand and multi-player video gaming without experiencing any loss of quality or disruption of voice/fax telephone capabilities.
ADSL provides a dedicated service over a single telephone line operating at speeds of up to 8 Mbps downstream (to the user) and up to 640 Kbps upstream, depending on the type of service and local telephone line conditions. These conditions are ideal for many user applications. A secure point-topoint connection is established between the user and the central office of the local telephone company. The user is always connected, thus eliminating dial-up time and simplifying connectivity issues.
D-Link ADSL devices incorporate the recommendations of the ADSL Forum (www.adsl.com) regarding framing, data format, and upper layer protocols.
Modem Description and Operation The DSL-210 USB ADSL Modem is easy to install and use. Please note that you must first install the software driver for the device by following the instructions in Chapter 3. Once the driver has been installed you can connect the Modem to your computer. The Modem connects directly to any functional USB port on a PC with standard USB cable.
Software drivers for D-Link ADSL USB Modems can be fully upgraded by simply loading newer versions onto your PC. This will allow you to update the modem and use new features and enhancements as they are developed and standardized. Online information regarding the latest downloadable software and improvements can be found at http://tsd.dlink.com.tw.

DSL-210 USB ADSL Modem User’s Guide
2
Product Features The D-Link DSL-210 USB ADSL Modem provides the following features:
G.dmt full rate compliant
G.lite compliant
RFC 1483 (Bridged Ethernet) compliant
RFC 2364 PPP over ATM compliant
RFC 2516 PPP over Ethernet compliant
Compatible with all T1.413 issue 2 (full rate DMT over analog POTS), and CO DSLAM equipment
Compliant with USB Specification Revision 1.1
USB interface to PC host
Plug and Play installation
Easy to upgrade software
GUI based configuration and diagnostic tool
Supports up to sixteen simultaneous ATM virtual connections
Rear Panel
Connect both the ADSL cable and the USB cable at the rear of the Modem.
Front Panel
LED Indicators There are three LED indicators on the Modem:
♦ USB Link - Indicates the USB de-active status.
♦ ADSL Link – Indicates a valid ADSL link has been established when lit.
♦ ADSL Act – Indicates a valid ADSL line interface data receive status.

DSL-210 USB ADSL Modem User’s Guide
3
Chapter 2 - Modem Installation Before you connect the USB cable, you must install the driver. See the next chapter for driver installation instructions. The only cable you should connect initially is the ADSL cable.
Place the Modem in a location so that you are able to view the LEDs. It should be placed in an area that is clean, dry and ventilated. Make certain it is not placed near a heat source.
Connect the ADSL You can begin installing the Modem by performing the following steps:
1. Insert the Installation CD into the CD-ROM drive.
2. Insert one end of the ADSL cable (26 AWG twisted-pair telephone cable) into the telephone wall jack (RJ-11 port).
3. Insert the other end of the ADSL cable into the ADSL port (RJ-11 port) on the Modem.
4. Follow the software installation instructions in Chapter 3.
DO NOT CONNECT THE USB CABLE! You must install the software driver before you connect the device to your computer via the USB cable. You will be prompted to connect the device during the installation. Connecting the USB cable at this point will initiate the Found New Hardware process.

DSL-210 USB ADSL Modem User’s Guide
4
Chapter 3 - Software Installation
The DSL-210 can be used with the following operating systems:
♦ Microsoft Windows 98 Second Edition
♦ Microsoft Windows 2000
♦ Microsoft Windows Millennium Edition
♦ Microsoft Windows XP
The procedures for each system are slightly different so be sure to follow the instructions provided for your PC’s operating system.
The Microsoft Plug and Play feature will automatically detect the modem after it has been installed. A new window will appear for each step of the installation.
Once you have the driver installed and the Modem is connected, you should verify that the ADSL service is working.
If you wish uninstall the Modem see Appendix B for instructions.

DSL-210 USB ADSL Modem User’s Guide
5
Installing the Driver Software Your new DSL-210 USB ADSL modem is supplied with three different drivers – the CLIP, EoA, PPPoA, and PPPoE drivers. You only need to install one of these three drivers. Do not install more than one driver for you new DSL-210. The correct driver to install is determined by the type of service your ADSL service provider offers. Read the following section to determine the correct driver to install.
The installation requires two distinct steps. First, the correct driver is installed and your PC restarted. Once your PC has restarted, you connect the DSL-210 modem to your USB port. Your PC will recognize the modem and load the appropriate software into your system. You can then configure the software to the appropriate settings for your ADSL service provider.
Which Driver to Install? The selection of the driver for your new DSL-210 modem is dependent upon the type of service offered by your ADSL service provider or ISP. The EoA driver makes your DSL-210 modem appear as an Ethernet connection and may requires only the static IP address information (including subnet mask, gateway IP address, and DNS server IP address) provided by your ADSL service provider. The PPPoE and PPPoA drivers use Windows Dial-up support to establish and manage the ADSL connection (no additional software is required). The PPPoE driver provides Point-to-Point Protocol over Ethernet (PPPoE) support while the PPPoA driver provides Point-to-Point Protocol over ATM (PPPoA) support. Consult your ADSL service provider to determine which protocol is appropriate for your connection.
EoA - driver (RFC 1483) creates a software emulation of a standard Ethernet connection between your computer and the DSL-210 USB ADSL modem. If your ADSL service provider assigns you a static IP address, you can configure the LAN driver to use this address (along with a subnet mask, gateway IP address, and DNS server address). No additional software is required, but you must have the appropriate addresses for your connection supplied by your ADSL service provider. Contact your ADSL service provider to determine the proper PPPoE software to use and for documentation on the installation and configuration of the third-party software.
PPPoE - driver (RFC 2516) adds PPPoE support. The PPPoE driver uses Windows Dial-up networking support to establish and manage the connection between your computer and the ADSL service provider. This driver is used to establish and manage a connection to an ADSL service provider that uses the PPPoE protocol.
PPPoA - driver (RFC 2364) adds PPPoA support. The PPPoA driver uses Windows Dial-up networking support to establish and manage the connection between your computer and the ADSL service provider. This driver is used to establish and manage a connection to an ADSL service provider the uses the PPPoA protocol.

DSL-210 USB ADSL Modem User’s Guide
6
Installing the Software Driver Install the software driver on a computer using the Windows 98 Second Edition, Windows 2000, Windows Millennium Edition (Windows Me) or Windows XP operating system. There are four different drivers, the CLIP, EoA (Bridged/Router), PPPoA or PPPoE driver. The instructions in this chapter can be used for either the CLIP, EoA, PPPoA or PPPoE driver, the installation procedure is identical for four. If you are not sure which driver you should install, see the previous section What Driver to Install for more information.
Windows XP 1. When the USB ADSL modem pass through USB cable connect to PC, Windows will detect the modem
automatic, please click Cancel button.
IMPORTANT: DO NOT CONNECT THE USB CABLE UNTIL INSTRUCTED TO DO SO. INSTALL THE MODEM SOFTWARE BEFORE YOU CONNECT THE USB CABLE.

DSL-210 USB ADSL Modem User’s Guide
7
2. Insert the DSL-210 Installation CD into the CD-ROM drive. The system should detect the installation program and run the program automatically. Please click “Driver Install” icon. If installation does not begin automatically after a few seconds, find the “AutoRun.exe” icon located on the CD and double-click this. To view the contents of the CD, open My Computer from the desktop, and right-click on your CD-ROM. Select the “Explore” option and this will reveal the folders and files on the CD.
3. In the Select DSL Provider window appears. Please contact your Internet Service and click Next button.
DSL-210 USB ADSL Modem User’s Guide
8
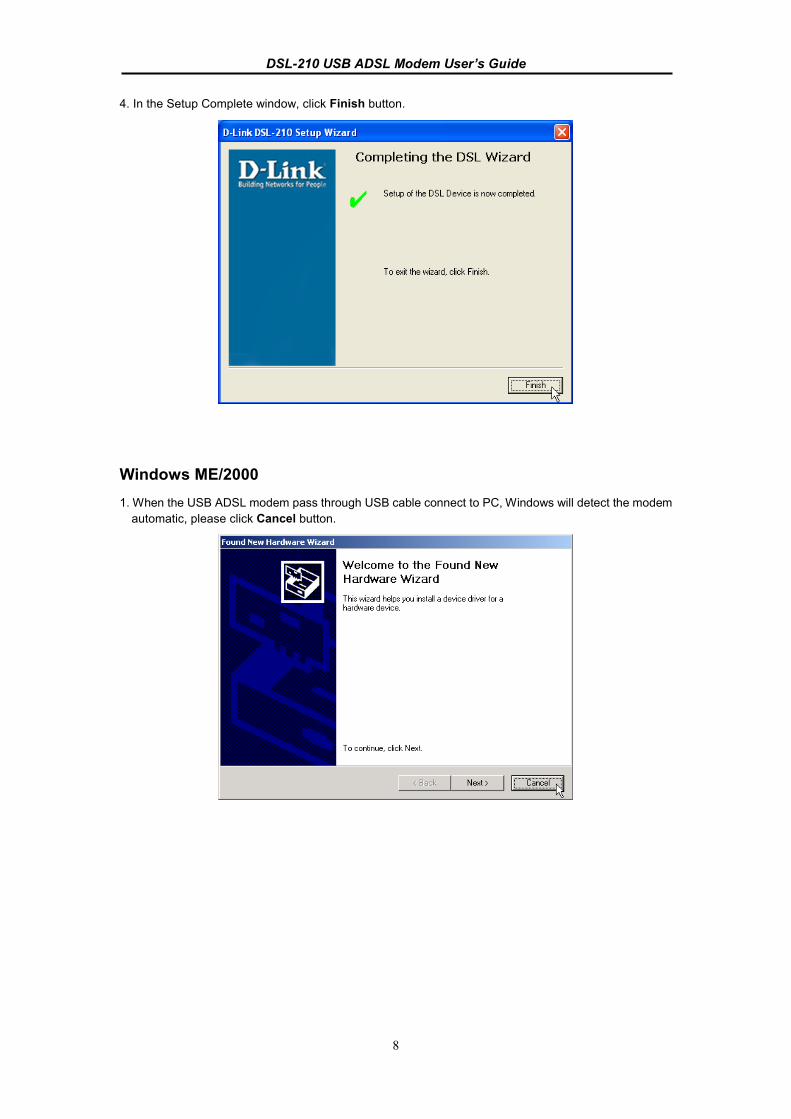
4. In the Setup Complete window, click Finish button.
Windows ME/2000 1. When the USB ADSL modem pass through USB cable connect to PC, Windows will detect the modem
automatic, please click Cancel button.

DSL-210 USB ADSL Modem User’s Guide
9
2. Insert the DSL-210 Installation CD into the CD-ROM drive. The system should detect the installation program and run the program automatically. Please click “Driver Install” icon. If installation does not begin automatically after a few seconds, find the “AutoRun.exe” icon located on the CD and double-click this. To view the contents of the CD, open My Computer from the desktop, and right-click on your CD-ROM. Select the “Explore” option and this will reveal the folders and files on the CD.
3. In the Select DSL Provider window appears. Please contact your Internet Service and click Next button.

DSL-210 USB ADSL Modem User’s Guide
10
4. In the Setup Complete window, click Finish button.
Windows 98SE 1. When the USB ADSL modem pass through USB cable connect to PC, Windows will detect the modem
automatic, please click Cancel button.

DSL-210 USB ADSL Modem User’s Guide
11
2. Insert the DSL-210 Installation CD into the CD-ROM drive. The system should detect the installation program and run the program automatically. Please click “Driver Install” icon. If installation does not begin automatically after a few seconds, find the “AutoRun.exe” icon located on the CD and double-click this. To view the contents of the CD, open My Computer from the desktop, and right-click on your CD-ROM. Select the “Explore” option and this will reveal the folders and files on the CD.
3. In the Select DSL Provider window appears. Please contact your Internet Service and click Next button.
4. The "Insert Disk" window appears. Please insert the disk labeled “Windows 98 Second Edition CD-ROM”, and then click OK button.

DSL-210 USB ADSL Modem User’s Guide
12
5. In the Setup Complete window, click Finish button.

DSL-210 USB ADSL Modem User’s Guide
13
Chapter 4 - Connecting to the Internet
Now that the driver software has been installed, you are ready to establish a connection to the Internet. The connection from your computer to the Internet is actually an indirect connection. You must first get connected to the computers that control the connection to the larger network or Internet. Usually, the ADSL service provider or ISP own the servers that control network access. Follow the instructions for the driver (CLIP, EoA, PPPoE or PPPoA) you have installed and the operating system you use on your computer.
If you have installed the PPPoE or PPPoA driver, you are using PPP to connect to your network service provider. The procedure you follow will be familiar if you have ever installed a dial-up modem. The EoA driver requires additional PPP client software (usually provided by your ADSL service provider) to establish and manage the ADSL connection.
Connect with PPPoE and PPPoA Drivers For PPP connections you simply double-click on the Modem icon and type in your network access user name and password, just as if you were using a conventional analog dial-up modem.
Windows 98SE, 2000, ME and XP (PPPoA and PPPoE driver) 1. Double-click the icon "DSL-210 Dialup" on the Desktop.
2. The "Connect D-Link DSL-210 Dialup" dialog box appears. Type in the User name and Password given to you by your ADSL service provider or ISP. Computers on the ISP’s network use this information to confirm the identity of your account. Click “Dial”.

DSL-210 USB ADSL Modem User’s Guide
14
3. Once your account information is verified, the computers will complete the connection to the network. This process or “negotiation” can take a few seconds to complete. When the negotiation process is finished a “Connection Established” dialog box will appear to confirm that you have successfully connected to the network. You can close this dialog box and proceed to use the Internet.
Connect with EoA Drivers If your ADSL connection uses the RFC1483 protocol, TCP/IP settings must be configured in your system in order to connect to your service provider’s network (and ultimately connect to the Internet).
Your ADSL service provider or ISP should give the following information to you:
IP Address . . . . . .
Subnet Mask
Gateway IP Address
DNS Host Name
DNS Domain Name
DNS Server IP Address
Use the information to configure the Modem. Follow the instructions for your operating system.
IP Address Assignment
IP addresses are 32-bit numbers (in the form xxx.xxx.xxx.xxx) from 0.0.0.0 to 255.255.255.255 that uniquely identify every location on the Internet. In order to communicate with sites on the Internet, your PC must be assigned a unique IP address.
If your ADSL service provider or ISP uses the Dynamic Host Configuration Protocol (DHCP), your computer can be assigned an IP address automatically. Checking the Obtain an IP address automatically box will enable your PC to receive an IP address automatically from your service provider through DHCP. This is often referred to as a “dynamic” IP address because it can change over time.
If your ADSL service provider or ISP does not use DHCP, you must manually enter your PC’s IP address. Your service provider supplies this address. Check the Use the following IP address box and enter the IP address of the DNS server in the form xxx.xxx.xxx.xxx (as an example, 172.19.10.91). This is often referred to as a “static” IP address because it will not change over time.
Subnet Mask
This is a bit mask that determines the extent of the subnet that the PC is on. It is used in combination with an IP address to define areas of the local network that are logically separated from the rest of the network (subnets). It is in the form xxx.xxx.xxx.xxx, where each xxx is a number (represented in decimal) between 0 and 255. The value should be 255.0.0.0 for a Class A network, 255.255.0.0 for a Class B network, and 255.255.255.0 for a Class C network, but custom subnet masks are allowed.
It is recommended that you accept the default Subnet Mask suggested by Windows that corresponds to the class of IP address you entered above.
Gateway Address
This is the IP address of a network device where packets with a destination address outside the current subnet should be sent. This is usually the address of a router or a host acting as an IP gateway. If your network is not part of an intranet, or you do not want the Switch to be accessible outside your local network, you can leave this field unchanged. Sometimes called the Default Gateway.
DNS Server Address
The Domain Name System (DNS) was designed by the Internet Engineering Steering Group (IESG) to allow locations on the Internet to be identified by a name. A DNS server maintains a database of URLs (Internet location names) and their corresponding IP addresses. When you type a URL in the Go To field of your web browser, your PC will contact a DNS server to determine the corresponding IP address. To

DSL-210 USB ADSL Modem User’s Guide
15
do this, your PC must know the DNS server’s IP address.
If your ADSL service provider or ISP uses the Dynamic Host Configuration Protocol (DHCP), your computer
Configure Modem with EoA Driver for Windows XP 1. From the Start menu go to Programs ->>>> D-Link DSL-210 ->>>> DSL-210 Control Panel.
2. In the windows please Key in “Alt+P”.

DSL-210 USB ADSL Modem User’s Guide
16
3. Clink Protocol Setup button. Enter the VPI and VCI value (Note : please get this data information from your ISP or phone company), and configure the Encapsulation Mode refer to the data from your ISP or phone company. Click OK.
1. From the Start menu, select Settings, click Control Panel, and double-click then click Network Connections icon.
2. The Network Connections window appears. Right click on the Local Area Connection for the
D-Link DSL-210 USB ADSL LAN Adapter.

DSL-210 USB ADSL Modem User’s Guide
17
3. The Local Area Connection Properties window appears. Select the General tab, then choose on the This connection uses the following items: list for the Internet Protocol (TCP/IP) and click the Properties button.
4. The Internet Protocol (TCP/IP) Properties window appears. Under the General tab, select Use the
following IP address:, enter the IP address, Subnet Mask, and Default Gateway given to you by your ISP or ADSL service provider, then select Use the following DNS server addresses:, enter the DNS settings given to you by your ISP or ADSL service provider. Click OK.

DSL-210 USB ADSL Modem User’s Guide
18
5. The Local Area Connection Properties window appears. Click OK.
DSL-210 USB ADSL Modem User’s Guide
19
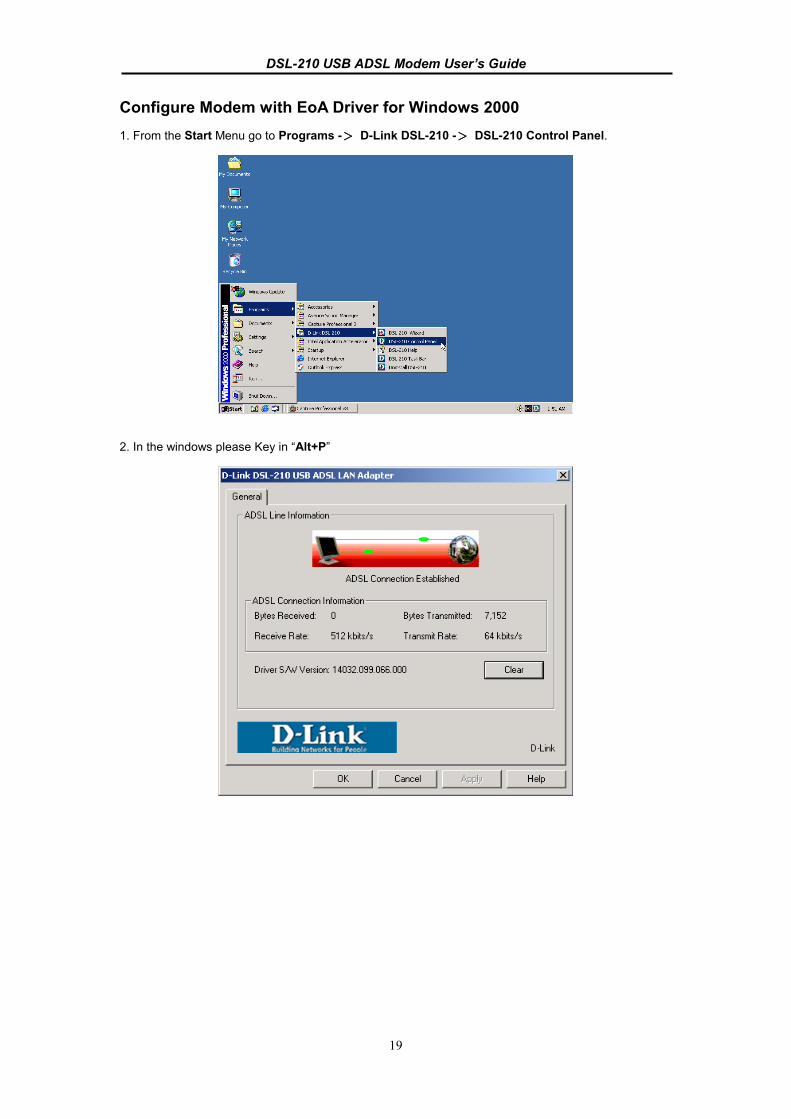
Configure Modem with EoA Driver for Windows 2000
1. From the Start Menu go to Programs ->>>> D-Link DSL-210 ->>>> DSL-210 Control Panel.
2. In the windows please Key in “Alt+P”

DSL-210 USB ADSL Modem User’s Guide
20
3. Clink Protocol Setup button. Enter the VPI and VCI value (Note : please get this data information from your ISP or phone company), and configure the Encapsulation Mode refer to the data from your ISP or phone company. Click OK.
1. Double-click on the My Computer icon, the Control Panel icon, and then the Network and Dial-up Connections icon.
2. The Network and Dial-up Connections window appears. Right click on the Local Area Connection for the D-Link DSL-210 USB ADSL LAN Adapter.

DSL-210 USB ADSL Modem User’s Guide
21
3. The Local Area Connection window appears. Click on Internet Protocol (TCP/IP), then click on Properties.
4. The Internet Protocol (TCP/IP) window appears. Under the General tab, select Use the following IP address. Enter the IP address, Subnet Mask, and Default Gateway given to you by your ISP or ADSL service provider, then select Use the following DNS server addresses:, enter the DNS settings given to you by your ISP or ADSL service provider. Click OK.

DSL-210 USB ADSL Modem User’s Guide
22
5. The General tab will again appear. Click OK.
6. The Network and Dial-up Connections window appears. Close this window to complete the connection.

DSL-210 USB ADSL Modem User’s Guide
23
Configure Modem with EoA Driver for Windows 98SE, ME 1. From the Start Menu go to Programs ->>>> D-Link DSL-210 ->>>> DSL-210 Control Panel.
2. In the windows please Key in “Alt+P”.

DSL-210 USB ADSL Modem User’s Guide
24
3. Clink Protocol Setup button. Enter the VPI and VCI value (Note : please get this data information from your ISP or phone company), and configure the Encapsulation Mode refer to the data from your ISP or phone company. Click OK.
4. From the Start menu, select Settings, open Control Panel, and double-click on the Network icon.

DSL-210 USB ADSL Modem User’s Guide
25
5. The Network window appears. Select the Configuration tab, scroll down the installed network components list and click on TCP/IP-> D-Link DSL-210 USB ADSL LAN Adapter, and click the Properties button.
6. The TCP/IP Properties window appears. Select the IP Address tab and then select the Select an IP address option. Enter the IP Address and Subnet Mask settings given to you by your ISP or ADSL service provider.

DSL-210 USB ADSL Modem User’s Guide
26
7. Select Gateway tab and enter the IP settings in the New gateway field. Click Add.
8. Select the DNS Configuration tab. Select the Enable DNS option.
9. Type in your host name in the Host: field.
10. Type in your domain name in the Domain: field.

DSL-210 USB ADSL Modem User’s Guide
27
11. Enter the DNS settings in the DNS Server Order field and click Add. If you have more than one DNS IP address, repeat this step. You can have up to 3 DNS servers listed here.
12. After all the TCP/IP information has been entered, click OK.

DSL-210 USB ADSL Modem User’s Guide
28
13. The Network window again appears, click OK.
14. The System Settings Change window appears. You need to restart your computer for the changes to go into effect. Click Yes.

DSL-210 USB ADSL Modem User’s Guide
29
Chapter 5 - Monitoring the Modem
Once you have installed the Modem you can monitor the status of the ADSL connection by clicking on the connection icon in your System Tray (usually at the bottom-right corner of screen - on the Task Bar). This will open the DSLMON utility to aid you in tracking the activity and status of your DSL-210 USB ADSL Modem.
Clicking on the icon will bring up the following window:
The figure to show the ADSL link status as indicate a valid link. The message will show “ADSL Connected” that the ADSL link is valid and function.
The figure to show the ADSL status as that indicate there is not activity on the ADSL link or that link is not valid (disconnected).
The message will show “ADSL Connecting” the your modem is in the process of establishing the ADSL link.

DSL-210 USB ADSL Modem User’s Guide
30
Appendix A - Technical Specifications
General
Standards:
ANSI T1.413 issue 2
ITU G.992.1 (G.dmt)
ITU G.992.2 (G.lite)
USB 1.1 specifications
Protocol:
RFC 2364 PPP over ATM Adaptation Layer 5
RFC 2516 PPP over Ethernet
RFC 1483 Multiprotocol Encapsulation over ATM Adaptation Layer 5
Data Transfer Rate:
G.dmt full rate downstream: up to 8Mbps
G.dmt full rate upstream: up to 1 Mbps
G.lite ADSL downstream: up to 1.5Mbps
G.lite ADSL upstream: up to 512Kbps
Software Drivers: Windows 98 Second Edition, Windows 2000
Windows Millennium Edition, Windows XP
Media Interface Exchange:
ADSL interface: RJ-11 connector for connection to 26 AWG twisted-pair telephone line
Host interface: USB Type B port for upstream connection to USB host
Physical and Environmental
Power Consumption: Below 2.5W (USB)
Operating Temperature: 0º to 70º C
Storage Temperature: -55º to 125º C
Dimensions: 115mm * 142mm * 28.5mm
Weight: 200gm (0.422lbs)
EMI: FCC Class B, CE, LVD, CB, UL and C-Tick
Safety: CSA International

DSL-210 USB ADSL Modem User’s Guide
31
Appendix B - Uninstall The Modem
If you need to uninstall the Modem, use the Uninstall program available in the DSL-210 Modem folder. Failure to use the Uninstall program can leave files in the system that can cause problems with future installations, including problems with reinstallation of the Modem.
Uninstall for Windows XP 1. From the Start menu go to Programs ->>>> D-Link DSL-210 ->>>> Uninstall DSL-210.
3. The window appears to inquire you for message. Are you sure you want to uninstall the DSL Device and all stored profiles? And click the Yes button.
4. The window appears to show DSL Device and DSL Wizard been successfully uninstalled, Click OK button.
IMPORTANT: Do not remove the Modem using the device manager. You must use the Uninstall Program to remove the device.

DSL-210 USB ADSL Modem User’s Guide
32
Uninstall for Windows 98SE, ME, 2000 1. From the Start Menu go to Programs ->>>> D-Link DSL-210 ->>>> Uninstall DSL-210.
2. The window appears to inquire you for message. Are you sure you want to uninstall the DSL Device and all stored profiles? And click the Yes button.
4. The window appears to show DSL Device and DSL Wizard been successfully uninstalled, Click OK button.