e3(i h#xû^ùó êr. ùly eôf%°f ý&
TRANSCRIPT


http://www.kfourmetrics.com/
PDF vs. KindleWhile the book itself is designed for Amazon’s Kindle, this PDF “preview” is intended for readers who haven’t used Kindles. If you already have a Kindle, try using the “mobi” preview file (here), or “look inside” the book at Amazon.com (here).
The reading “experience” can be markedly different. In the first place, what you see on the PDF is not quite what you will see when you read the book using either a Kindle or a Kindle-app for the device of your choice.
Will this matter? If you haven’t used a Kindle yet, and are used to working with PDFs on a laptop or desktop computer, it might. Consider these comments from two readers of one of the books in this series:
From a reader who prefers PDFs on a PC:
“[It] was not as convenient as a continuous PDF. Normally (as far as possible) it is best to have the picture and explanation in the same page. So I had to do back and forward many times to read about the image I see in a page. I saw a lot of white space which I think is better to use in some way or the other.”
From a reader who used the Kindle app on an Android device and on a PC:
“I think the Kindle for PC is a little inconvenient since the pics/text are reformatted depending on the screen size. [F]or instance, if I expand the Highlight/Notes Column at the left side of the screen, the images would get a little scattered. Looks far better on smaller screens (read the doc on a 4.3” screen mobile phone, looks great)”
This PDF is laid out to resemble what you can expect to see on a Kindle, but does nothing to reproduce the effect of changing the font size, zooming, etc. that you can do with Kindle or Kindle-apps on different devices. If you want to experiment with the Kindle-experience, you can download the relevant software from Amazon.com – you do not need to purchase or own a Kindle.
Prefer a PDF?We currently sell this book only on the Kindle. If you’re interested in another format (PDF, other eBook, etc.) drop us a line and we’ll see what we can do.

http://www.kfourmetrics.com/
TABLE OF CONTENTS
Preface
1: A Closer Look at the UI
2: The INP file
3: Mesh Generation - Some Theory
4: Meshing - the User Interface
5: Mesh Verification
6: Quality of the Solution
7: Assignments in Linear, Static Analysis
8: Is There More to Mesh Generation?
Summing Up
References

http://www.kfourmetrics.com/
Getting Started With Abaqus
Workbook 1
Linear Static Analyses and Basic Mesh Generation
by
C.Venkatesh
http://www.kfourmetrics.com/
Preface These Workbooks consist of a series of examples presented as a mixture of text and images. They're intended to be used along with the "theory" book in this series - Getting Started with Abaqus - Essential Theory - and are therefore deliberately low on text and rich on images. The workbooks are self-contained, but you may want to read the "theory" if you're new to the finite element method itself. The other Workbooks are listed in the references section at the end of this book.
The general presentation approach I have used is to write a few lines of text then follow these up with one or more images. This approach works on all Kindles, even the ones with the smallest black-and-white screens. It certainly looks nicer on color devices (such as Kindle for PC).
Abaqus' interface, of course, looks best on a large screen - and Kindles, of course, have small screens. The convenience of buying and reading a book on the Kindle is of no use if the images are scaled down to the point of illegibility. To get around this, each scaled-down "large image" is immediately followed by a "clipped" image of the highlighted area. This seems like the best solution to the problem. It does take you an extra click to move to the next page, but is worth the added legibility.
Why not drop the larger images and retain only the "zoomed in" ones? Remember that if you're reading this book, you're new to Abaqus/CAE. And one of the problems with using a new software interface is that you can't always locate that pesky menu. The larger image, then, serves to show you where the command / menu is located on the overall screen. The zoomed-in image makes it a little more legible.
In some cases, though, you will find (at least on the 6" Kindles) that you will need to "zoom-in" even on the zoomed-in image. To do this move the Kindle's cursor to the image and click on it for the Kindle to rotate the image by 90-degrees. Then use the Kindle's Back button to restore the earlier view and orientation. I've tried to preempt this by flipping some images in the book itself, which means you have to rotate either the Kindle or your neck, but I figured this is easier than the clicks-to-zoom-in-and-back. It's harder to rotate a desktop or laptop computer, of course, so this does make things a little worse on those devices.
Finally, the Kindle lets you select your font size. At larger font sizes, the captions for some images spill over to the next page - and in some cases, are entirely on the next page. Please keep this in mind when reading the book.
I recommend that you page through the sets of images more than once, then return to the preceding text and re-read it. This is not a very easy way to read on the Kindle, which is designed more for sequential paging back and forth. I've used a number of hyperlinks to

http://www.kfourmetrics.com/
make it easier to jump around between pages. You will probably use the Kindle's "Previous / Next" section controls a lot more than with a "serial" book.
Your goal, of course, is not just to reproduce the illustrated procedures on Abaqus. You should be able to extend the documented procedures to your own scenarios. Note that all the examples presented in this series can be worked out using even the student version of Abaqus.
The models used in this book can be downloaded from www.kfourmetrics.com – email the author if you have any trouble finding the files or using them.

http://www.kfourmetrics.com/
1: A Closer Look at the UIIn the first Workbook we took a look at the logical structure of the interface of Abaqus/CAE, constructed a simple model and traced the route from initial-geometry to final-results. In this book we'll go a little deeper into specific areas - which is why we're starting with a closer look at the interface.
You should be familiar enough with the interface to create-and-edit sketches, parts, instances, meshes, materials, sections, loads, restraints and jobs. All these were covered in the previous Workbook and are not repeated here. With the bare-essentials out of the way, this Workbook encourages you to look at your models and the results with a sceptical eye. By the time you complete this book, you should be able not just to evaluate the accuracy of models for linear static analysis, but also to figure out ways to get better results.
If you're comfortable with the theory of the finite element method, you can skip the first section below (the recap of the theory), but I recommend you run over the other parts of this chapter. The presentation of the modules, menus, toolbars and files is slightly different from that in the previous Workbook - by virtue of finishing which you have, of course, progressed - and can help you check your familiarity with the interface.
The introduction to the user interface stressed the need to focus on the logical structure. It's a good idea to maintain the same perspective on the different topics presented in this book too.
It's worth noting that as you progress further, you will sooner or later need to look beyond Abaqus/CAE. It's a nice application, but it still hasn't caught up entirely with the solver itself. So chances are very good that as your modeling gets more ambitious you'll have to edit the solver's input file itself.
In the earlier Workbook we introduced this file - the "inp" file - towards the end, but didn't go into very much detail. By the time you're done with this Workbook, you should be able to read and understand the contents of "inp" files. Don't underestimate the importance of this!
A Recap of the Theory
The "Modules" and their Icons

http://www.kfourmetrics.com/
Visualization - Toolbar and Menu
Dockable Toolbars
Export and Import - the "File" Menu
The Files themselves
A Recap of the Theory
You should note the basic principles of building finite element models: the relevance of the underlying theory, the contents of a model, and the importance of viewing the results with a sceptical eye. You should also note that the elements determine both the domain itself and the behavior of variables within that domain. The number of elements in the model determines, among other things, the time taken to build the model, the time taken to compute the solution, and the accuracy of the solution.
At the most basic level of continuum mechanics of solids (the study of solid-mechanics using differential equations), pretty much any structure (or "domain") can be described in terms of 4 differential equations. These differential equations are represented by elements that are often referred to by the names of the structural-members whose behaviors they describe:
1. truss elements for pin-jointed, long and thin (uni-dimensional) shapes that can only support tensile and compressive forces - no bending moments (because of the pin-joint)
2. beam elements for long and thin (uni-dimensional) shapes that can support a bending moment, tensile and compressive forces
3. plate elements for thin plate-like or shell-like members that can support both in-plane and out-of-plane forces and moments
4. general 3D stress-distribution for members in which shear stress cannot be neglected, and to which moments cannot be applied directly (since the elements only have 3 translational degrees of freedom per node)
There are very many elements that are refinements of the above, or implementations of specialized behavior. Cable elements, for instance, are like beams - except that they have no compressive stiffness. Thick-shell elements are like general-3D elements - except that they have 6 degrees of freedom per node.
Element shapes are also usually pretty standard: triangles or quadrilaterals for the 2D elements (plate) and hexahedra / tetrahedra / wedges / pyramids for the 3D elements.
Selecting the types of elements to use requires some understanding of the mechanics.
http://www.kfourmetrics.com/
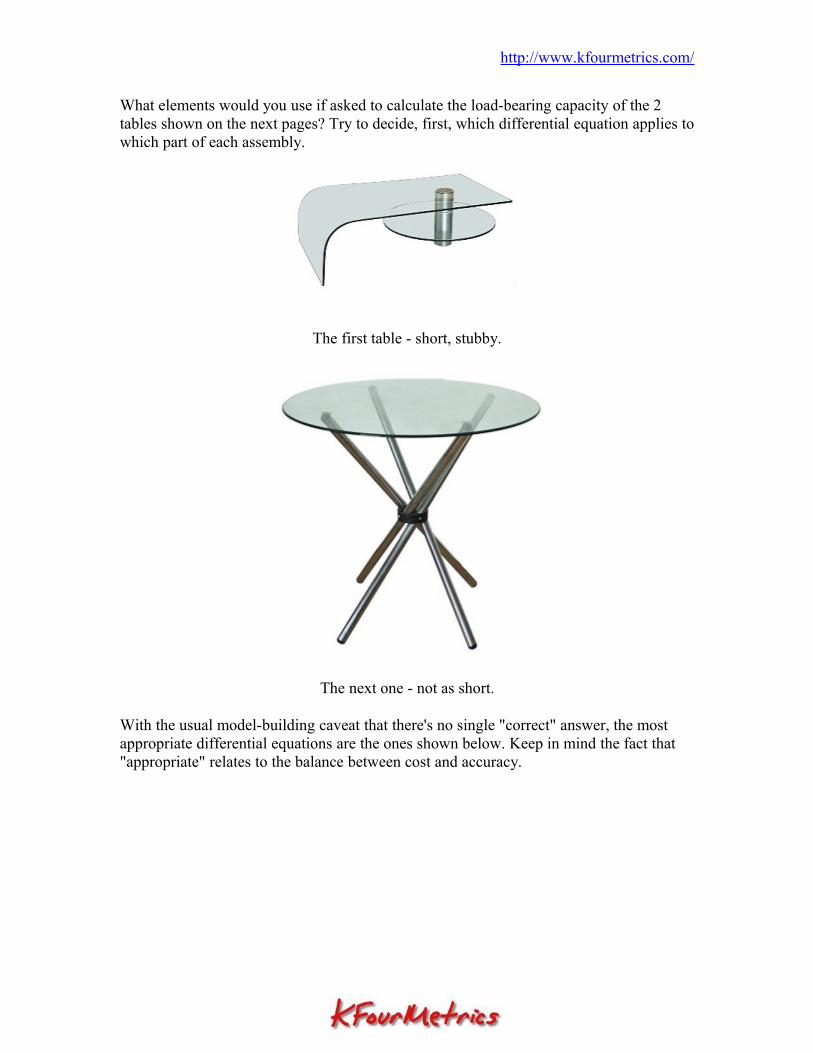
What elements would you use if asked to calculate the load-bearing capacity of the 2 tables shown on the next pages? Try to decide, first, which differential equation applies to which part of each assembly.
The first table - short, stubby.
The next one - not as short.
With the usual model-building caveat that there's no single "correct" answer, the most appropriate differential equations are the ones shown below. Keep in mind the fact that "appropriate" relates to the balance between cost and accuracy.

http://www.kfourmetrics.com/
Which elements match these differential equations?
"Plate" and "shell" elements are equivalent - a curved surface (i.e. a shell) can be approximated as a collection of flat plates.
What's the justification for using "1D" for this table's supports, vs. "general 3D" for the support of the previous one?
This concludes the brief recap of the theory of the finite element method. Use the references listed at the end of this book if you need, or want, to learn more.
http://www.kfourmetrics.com/
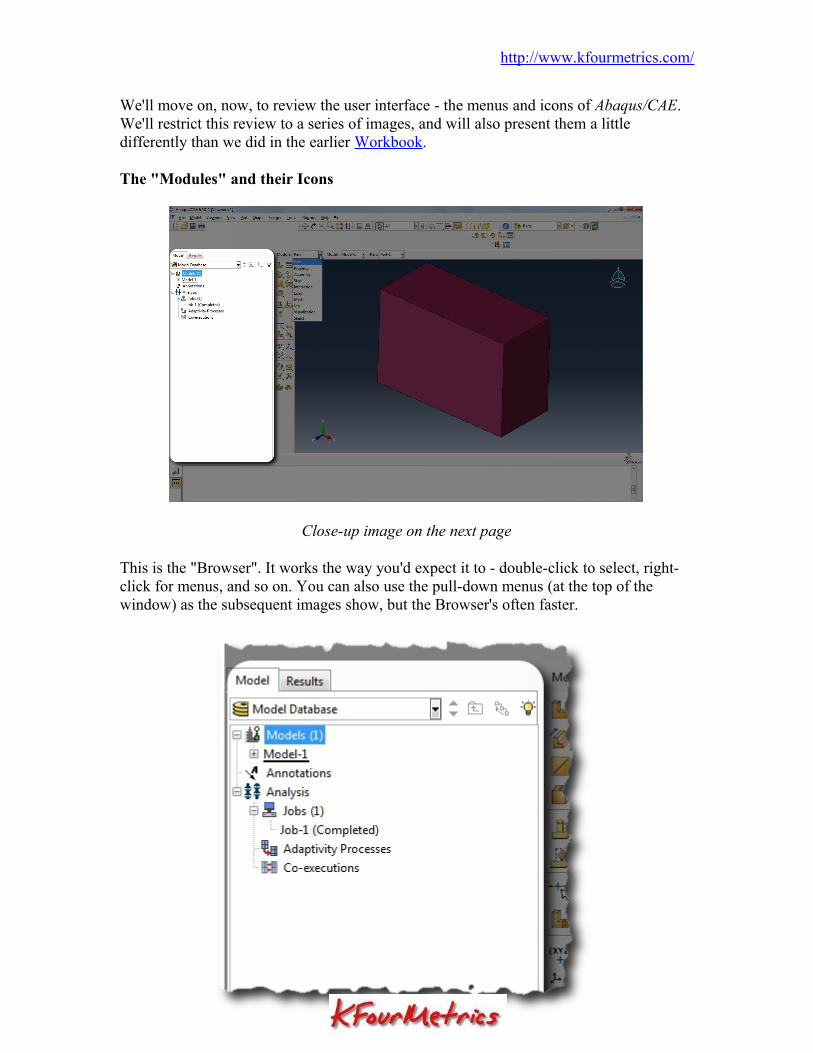
We'll move on, now, to review the user interface - the menus and icons of Abaqus/CAE. We'll restrict this review to a series of images, and will also present them a little differently than we did in the earlier Workbook.
The "Modules" and their Icons
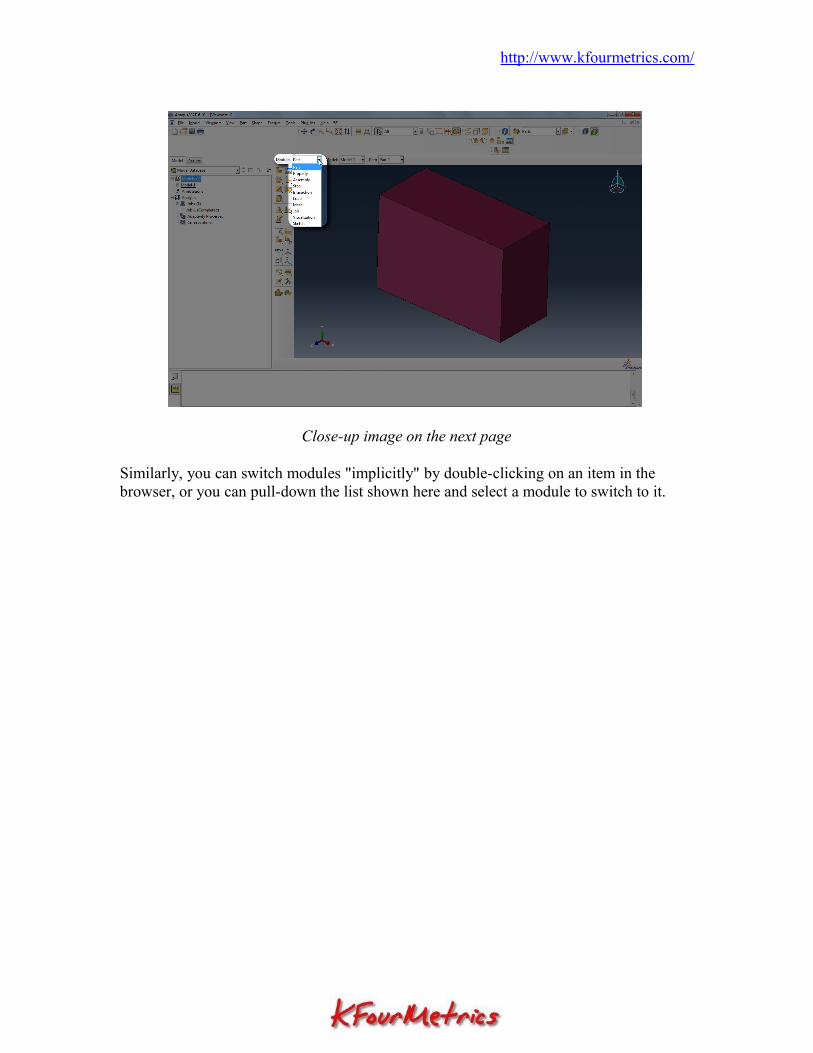
Close-up image on the next page
This is the "Browser". It works the way you'd expect it to - double-click to select, right-click for menus, and so on. You can also use the pull-down menus (at the top of the window) as the subsequent images show, but the Browser's often faster.

http://www.kfourmetrics.com/
Close-up of image on the previous page
Pretty much all pre-processing functions are in the "Model" tab of the Browser. The "Results" tab is used for post-processing.
Note that the pull-down menus are arranged slightly differently than the icons.
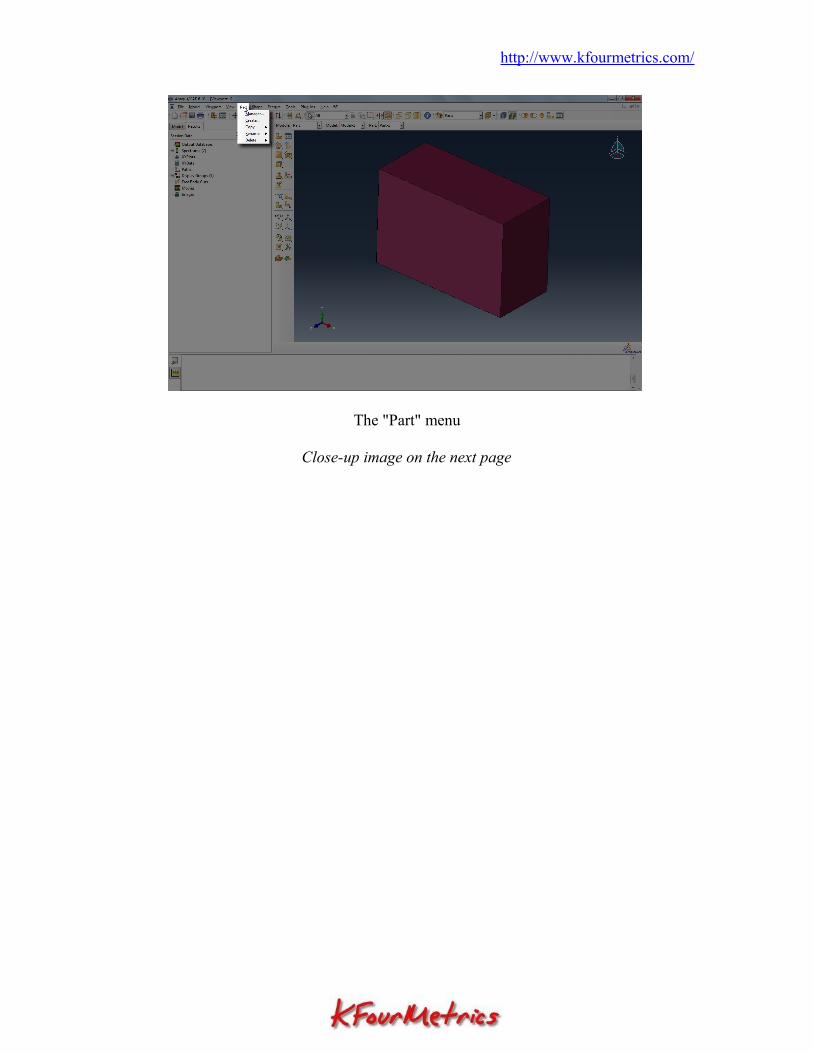
For instance, the next 3 images show the menus labeled "Part", "Shape" and "Feature": if you've followed the logical sequence of modeling outlined in the earlier Workbook, you should be able to predict which item (assembly, part, material, etc.) you have to click on in the Browser to access the same options.
http://www.kfourmetrics.com/
The "Part" menu
Close-up image on the next page

http://www.kfourmetrics.com/
The "Part" menu - note the two menus to the right
Close-up of image on the previous page

http://www.kfourmetrics.com/
The "Shape" menu - immediately to the right of the "Part" menu

http://www.kfourmetrics.com/
The "Feature" menu - immediately to the right of the "Shape" menu
http://www.kfourmetrics.com/
Close-up image on the next page
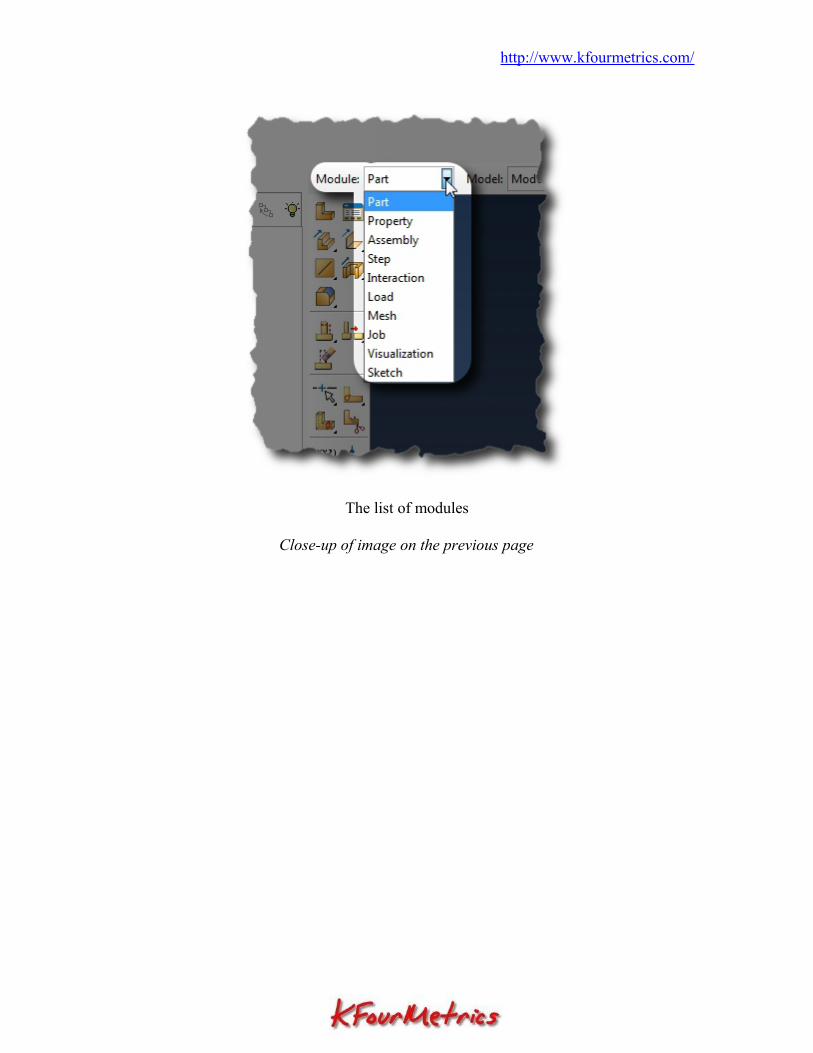
Similarly, you can switch modules "implicitly" by double-clicking on an item in the browser, or you can pull-down the list shown here and select a module to switch to it.
http://www.kfourmetrics.com/
The list of modules
Close-up of image on the previous page

http://www.kfourmetrics.com/
Close-up image on the next page
Depending on which module you're in, the module-specific icons change. This image shows the icons for the "Part" module.

http://www.kfourmetrics.com/
The "Part" module's icons
Close-up of image on the previous page

http://www.kfourmetrics.com/
Visualization - Toolbar and Menu
Close-up image on the next page
You should be comfortable with at least some, if not all, the icons on the Visualization toolbar. Some were covered in the earlier Workbook. Most of them are pretty standard - leave your mouse over an icon for a "tip" to pop up.

http://www.kfourmetrics.com/
Close-up of image on the previous page
The different groups in the toolbar are for zoom/pan/rotate, projection, selection, wireframe / shaded display, information, and color, respectively.

http://www.kfourmetrics.com/
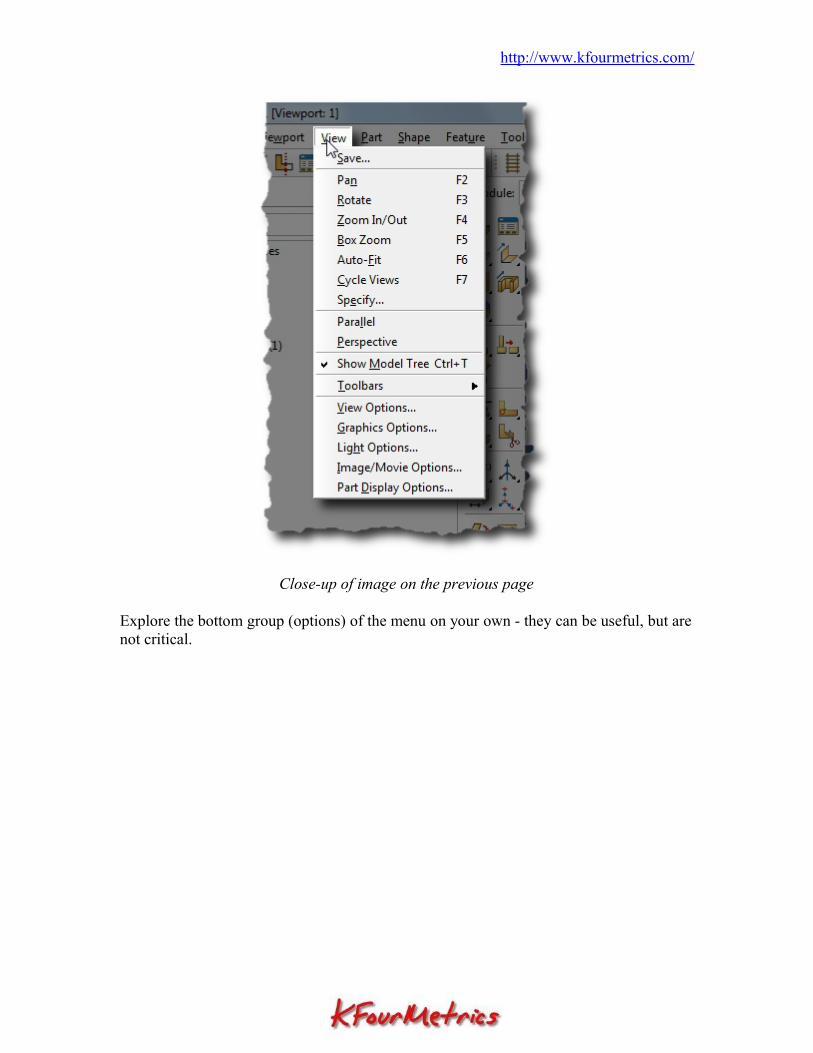
Close-up image on the next page
The "View" pull-down menu is also something you will - and should - get comfortable with as you work forwards.
http://www.kfourmetrics.com/
Close-up of image on the previous page
Explore the bottom group (options) of the menu on your own - they can be useful, but are not critical.
http://www.kfourmetrics.com/
Dockable Toolbars
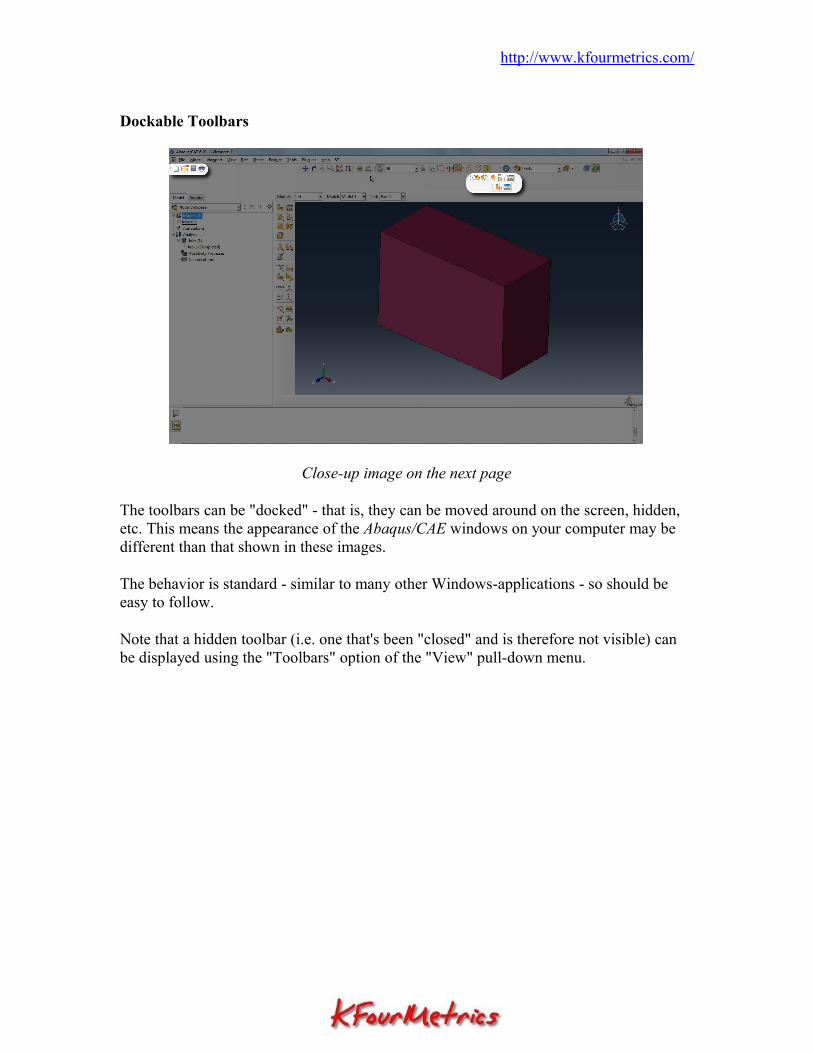
Close-up image on the next page
The toolbars can be "docked" - that is, they can be moved around on the screen, hidden, etc. This means the appearance of the Abaqus/CAE windows on your computer may be different than that shown in these images.
The behavior is standard - similar to many other Windows-applications - so should be easy to follow.
Note that a hidden toolbar (i.e. one that's been "closed" and is therefore not visible) can be displayed using the "Toolbars" option of the "View" pull-down menu.
http://www.kfourmetrics.com/
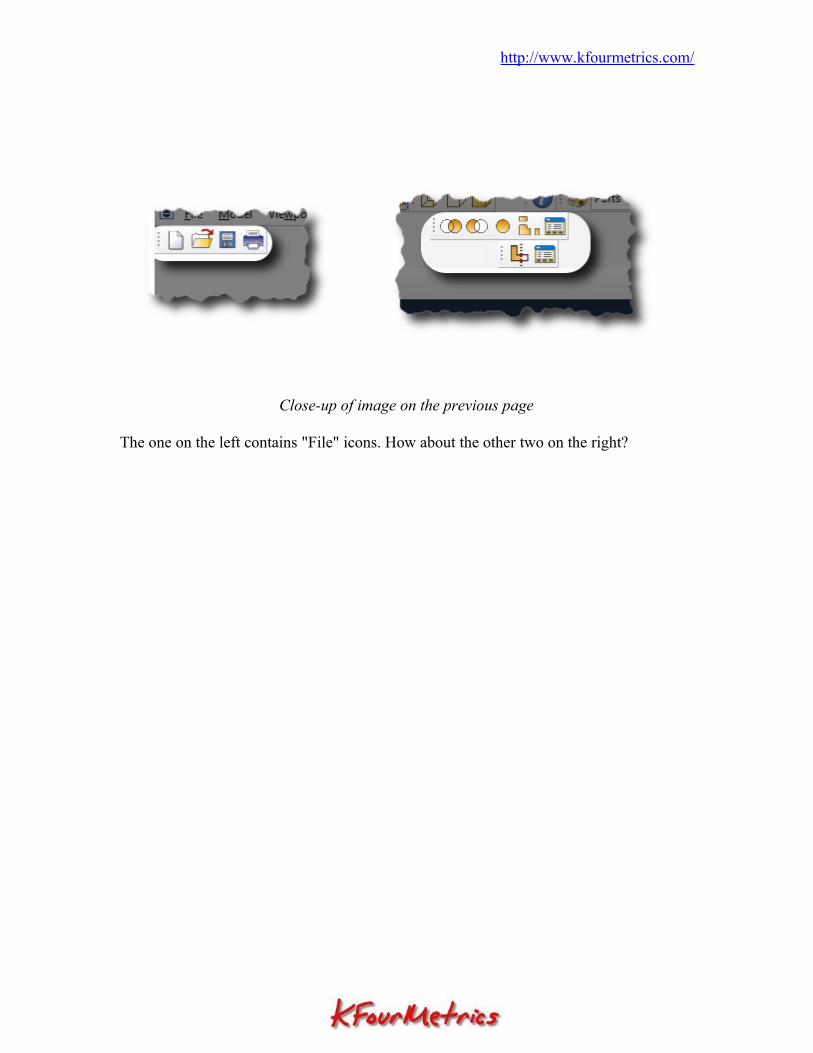
Close-up of image on the previous page
The one on the left contains "File" icons. How about the other two on the right?

http://www.kfourmetrics.com/
Export and Import - the "File" Menu
Close-up image on the next page
You should already know how to create new "CAE" files and open existing ones. How about accessing data from CAD? In the next few images we'll look at the Import and Export options under the "File" menu.

http://www.kfourmetrics.com/
Close-up of image on the previous page
Most of these commands are pretty advanced. What do you think the difference is between the "Set Work Directory" option shown in this menu, and the "start in" properties of the Abaqus/CAE shortcut (presented in the previous Workbook)?

http://www.kfourmetrics.com/
Close-up image on the next page
You can import not just CAD data but data from other Abaqus models too.
The former is similar to pretty much every application in CAD/CAM/CAE today, and its use for FE modeling is immediately obvious - it gives you a headstart on defining the domain. However, importing data from CAD can sometimes cause more trouble than it's worth - this is an aspect we'll discuss later in this series.
The latter (i.e. exchange of data with other Abaqus models) can be useful as your skill with Abaqus grows and you find yourself building multiple models of the same object.

http://www.kfourmetrics.com/
Close-up of image on the previous page
Importing "native" data (i.e. data exported from another Abaqus model) is usually error free.

http://www.kfourmetrics.com/
Close-up image on the next page
Export options - to take data out of Abaqus, to other applications

http://www.kfourmetrics.com/
Close-up of image on the previous page
VRML and 3DXML are options that are not widely used today, but were once thought important. The other options are both relevant and useful: can you think of scenarios where you'd like to copy sketches, parts or assemblies from one Abaqus model to another?
The Files themselves
Pretty much every FE model has multiple files associated with it, regardless of which commercial application you're using. Abaqus is no exception.
Like most Windows-applications, Abaqus uses file extensions to differentiate the files. The first part of the filename is derived from the name of the Job submitted to the solver (not the name of either the CAE file or the "Model" within the CAE file), while the last 3 letters denote the file's purpose.
http://www.kfourmetrics.com/
Before we go further, at the risk of being repetitive, I must stress once more that it's a good idea to use a different folder for each CAE file you create.
Why?
Because filenames are derived from the job, and the same job names can be (and usually are) used in different CAE files. A commonly used job name is the default one: "Job-1". Unless you take extra care to name jobs when you create them the chances are very good that you'll have 2 different CAE files (with different names), but both of which contain a job named "Job-1".
Now suppose you solve the job in the first CAE file. Some time later, in the same folder, you open Abaqus/CAE and ask it to solve the job in the second CAE file: Abaqus warns you that files with that name exist, but most users don't read these warnings and just tell the software to go ahead. So the output files for the second solve overwrite those of the first. This can lead to disaster: mixing up models and results.
An ounce of prevention vs. a pound of cure. Which would you prefer?
(Recall that the earlier Workbook showed how to set the "start in" folder, and the "File" menu above also provided an option.)
So what files can you expect to find in your "working" folder?
Broadly, the files are in 3 classes:
• input data • scratch (or solver) files • output files
Let's look at them in turn. (In the explanations below, the extension has been capitalized only for convenience.)
• filename.CAE: you create these using Abaqus/CAE and are not supposed to open (i.e. edit) them using any other application. They're binary files, so you won't be able to open them using a text-editor.
• filename.JNL: Abaqus/CAE creates (and updates) one of these for every CAE file you create. These are text files and can be edited with a text editor, but take care - you should only do so if you know what you're doing (in which case you don't fit the readership-profile for this book!). JNLs are Abaqus/CAE's record of what you did in the modeling session and can be useful to recover your work if Abaqus/CAE crashes (such recovery from crashes is not covered in these books - if you have access to technical support on Abaqus, chances are you will be asked to submit your JNL file for diagnosis). If you want to send a CAE file to a colleague (or to use it on another computer), you should copy both, ideally. If you

http://www.kfourmetrics.com/
only have the CAE file Abaqus/CAE complains when you first retrieve it, but things work OK.
• filename.INP: when you submit a job to the solver, Abaqus/CAE writes the finite-element related information from the CAE file to the INP file, and hands it over to the solver. You can, and should, be able to read and edit these files using a text-editor. You probably won't need to edit them for the problems presented in these series, but are very likely to need to as you progress. We'll discuss them in some detail in the next section.
• filename.ODB: if the solver finds no errors, it writes the results to this file. You use Abaqus/CAE's "Results" module to view these results. This is a binary file, and it's pretty unlikely you'll need to edit it.
The "scratch" files make up the rest of the list, with extensions such as com, sta, sim, msg, prt, ipm and log.
These are, strictly speaking, output files rather than scratch files. However the Job Manager does a pretty good job of showing you the important stuff from these files, so we can (at least when new to Abaqus) ignore them and treat them as the other "true" scratch files. (Be aware that if you need to troubleshoot, taking a look at the contents of these can help.)
The "true" scratch files are deleted by the solver when its job is done. For instance, Abaqus creates a lck file when the solver is running: if the solver crashes (or is otherwise terminated forcefully) this file will remain in the folder - and you have to delete it manually before you can resubmit the same job. ("Lck", evidently, is short for "lock".) At this stage, it's not necessary to worry about these files, though you will run into them if you have to troubleshoot.
http://www.kfourmetrics.com/
2: The INP fileAt the heart of every finite element application is the solver itself. Historically, solvers came first and graphics "utilities" such as the pre and post-processor followed. While there have been tremendous advances in graphics over the past few years (decades, in fact) the solvers haven't quite stood still. They have advanced too, taking advantage of the improvements in CPU speeds, memory-capacity, etc.
Pretty much every commercial finite element application on the market today, as a result, is marked by a mismatch between the abilities of the graphics-utilities and the solvers. When you get down to advanced use, there are plenty of things the solver can do which the graphics interface can't address.
This means that as you get more familiar with Abaqus - and therefore start taking advantage of its stronger aspects - you will invariably have to "directly" edit the INP file.
You can use pretty much any "plain-text" editor to edit the INP file, but make sure you use one that displays line numbers. The one I use is Notepad++, which is available under a GNU license from http://www.notepad-plus-plus.org.
The Syntax
Nodes
Elems
Elsets
Assemblies
Materials
Load Steps
BCs
Loads
End of File

http://www.kfourmetrics.com/
The next few images show some of the contents of the INP file. Make sure you can correlate these with the corresponding functions / tasks in Abaqus/CAE. (Note that the procedure for setting up a job, creating the INP file for the job, and solving it was outlined in the earlier Workbook.)

http://www.kfourmetrics.com/
ReferencesNumerical Grid Generation. Foundations and ApplicationsJ.F.Thompson, Z.U.A.Warsi, C.W.Mastin, North Holland
If you're interested in mesh generation as a subject, rather than being overwhelmed by the difficulty of the task, you could do worse than this classic. In fact, if you do feel overwhelmed, you should read the preface of the book! Many of the principles enunciated in this book are valid even today, and find expression in commercial software. Written in enough detail for the reader to program the methods presented, you should expect to find many parts intimidating. But on the whole, a very useful reference on the subject. The edition I have (1985) is in a disconcerting typewriter-font, but that's the only flaw I can find with it.
A First Course in Finite ElementsJ.Fish, T.Belytschko, John Wiley and Sons
This is a comprehensive text-book and is a good addition to your reference-shelf. Chances are you won't read it completely unless it's a text-book for a course you're doing. But if you do choose to pursue a career in FEA, chances are very good that you will end up reading every bit of it sooner, rather than later.
An Analysis of the Finite Element MethodW.G.Strang, G.J.Fix, Wellesley-Cambridge Press
While not directly related to Abaqus, this is an outstanding book by an outstanding teacher (you can, and should, view Dr.Strang's video lectures off the MIT website). Immensely readable, invaluable, well worth the price of purchase and the time to read it.
Python Scripts for Abaqus. Learn by ExampleG.Puri, Wellesley-Cambridge Press
Considering I'm writing for Abaqus-beginners, why am I recommending a book on scripting (i.e. customising or programming) Abaqus? The book does require that you know a fair deal about Abaqus. However, the author has created some nice videos on some common applications. You could do worse than check these out.
The 3DS "Community" - http://iam.3ds.com
Licensed users can access paid support, but how about academic users or others? This is a recent (June 2011 onwards) attempt by Dassault and / or Simulia to address such needs. You can use any email address to create an account, then (in theory) tap into the wisdom

http://www.kfourmetrics.com/
of the crowds. Once you login, your browser is redirected (at the time this book was published) to https://swym.3ds.com.
There are some tutorials, etc. so perhaps you'll find what you want. But I suspect the password-protected approach is too heavy-handed for light-fingered internet users.
The Yahoo-group for Abaqus
This is a relatively lively (by CAE standards) group, averaging a few posts a day. It doesn't seem to have any affiliations with Dassault, but does have some pretty erudite members. However, on the downside, many of the questions tend to be advanced: well beyond the profile of the intended reader of this book. Also, perhaps because of their erudition, some of the gurus can be quite acid at times. "Stupid" questions are sometimes snapped at, sometimes ignored. But if you do your homework and establish this fact when you ask your question, chances are you'll get an answer.
Finally, there are the other books in this Getting Started With Abaqus series (clicking on a link takes you to the corresponding Amazon page):
• Essential Theory • Workbook 0: User Interface and Modeling Overview • Workbook 2: Thermal and Thermo-mechanical Analyses • Workbook 3: Mode Shapes • Workbook 4: Non-linear Analyses • Workbook 5: Explicit Analysis

http://www.kfourmetrics.com/
CopyrightThis book was created by, and is copyright to, KFour Metrics (http://www.kfourmetrics.com).

http://www.kfourmetrics.com/
About the AuthorC.Venkatesh lives in Hyderabad, India. His email address is [email protected]