easy science experiments: the earth’s...
TRANSCRIPT


Easy Science Experiments: The Earth’s Surface
ii© Mark Twain Media, Inc., Publishers
Introduction/How to Use This Book ....................................................................................................... 1Sample Experiment/Demonstration Form ............................................................................................. 2Experiment/Demonstration Form ........................................................................................................... 4How Can We Collect and Study Rocks? ................................................................................................ 7How Can Rock Collections Be Made? ................................................................................................... 8What Is the Test for Limestone? ............................................................................................................ 9What Do Crystals Look Like? ................................................................................................................ 9What Are the Effects of Water on Rocks? ........................................................................................... 10How Are New Rocks Formed? ............................................................................................................ 11How Are Fossils Formed? ................................................................................................................... 13What Effects Do Plants Have on Rocks? ............................................................................................ 15How Does Water Wear Away the Earth’s Surface in Some Places and Build It Up in Others?.................................................................................................................................................... 16How Can We Demonstrate the Formation of Stalactites and Stalagmites in Caves? .......................... 20What Determines How Big Crystals Will Get? ..................................................................................... 20How Can We Demonstrate Some of the Geological Features Formed by a Stream? ......................... 21How Can We Demonstrate the Action of Ice in Changing the Earth’s Surface? .................................. 21How Do We Know That Ice Contains Particles? .................................................................................. 22Was This Area Covered by Glaciers? .................................................................................................. 22How Are Kettle Holes Formed? ........................................................................................................... 23Does Air Carry Sediments? ................................................................................................................. 23What Does Wind Do to Debris on the Ground? ................................................................................... 23How Are Sand Dunes Formed? ........................................................................................................... 24What Makes Up Sand? ........................................................................................................................ 24What Are the Forces That Help Make Soil?......................................................................................... 25Mohs Hardness Scale ......................................................................................................................... 25What Are the Constituencies of Soil?/What Are the Layers of Soil? ................................................... 26How Is Soil Tested?/pH Levels Chart .................................................................................................. 27How Can We Demonstrate Soil Erosion and Conservation? ............................................................... 29How Can a Model of the Earth’s Surface Be Made From Modeling Clay? .......................................... 30How Can a Model of the Earth’s Surface Be Made From Plaster of Paris? ......................................... 31How Can a Model of the Earth’s Surface Be Made From Papier Mâché? ........................................... 32How Can a Scale Model Be Made? ..................................................................................................... 33How Is the Earth’s Surface Built Up? ................................................................................................... 34How Can We Show a Cause for Faulting? ........................................................................................... 34How Can a Glass-Sided Trough Be Made? ......................................................................................... 35What Is the Cause of Unequal Heating of the Land? .......................................................................... 36Why Are Sidewalks Laid in Sections of Concrete? .............................................................................. 39Is Water a Poor Conductor of Heat? .................................................................................................... 40How Many Inches of Snow Equal One Inch of Rain? .......................................................................... 42How Can We Demonstrate Dew? ........................................................................................................ 43How Can We Make Frost? ................................................................................................................... 44How Can We Make a Simple Rain Gauge? ......................................................................................... 45Answer Keys ........................................................................................................................................ 46
Table of Contents
Table of Contents

1© Mark Twain Media, Inc., Publishers
Easy Science Experiments: The Earth’s Surface Introduction/How to Use This Book
The world of information is expanding at such an unbelievable rate due to technology. Satellites allow instant communication between every nook and cranny throughout the world. Television coverage can be instantaneous, and computers, through the Internet, give access to millions of pieces of information, covering every conceivable subject.
Students living in this exploding age of technology are fortunate that so much is avail-able to them. However, sometimes the glut of information can completely overwhelm students, causing them to throw up their hands and become discouraged. This is where the teacher can help the learner focus on the basics. This science experiments book is designed to enable the student to focus on basic science principles that seem obvious to some students but are elusive to others. A structured approach to learning these principles is important to each individual.
Students need to develop the habit of looking at the world around them, using an orga-nized approach to learning. This will serve them well throughout their lives.
Introduction
How to Use this Book It is suggested that students develop the habit of looking at “things” in the world using a form of the “scientific method.” We suggest that the students use the following steps to organize their experiments/demonstrations/projects. This is just one of the many forms of the scientific method. Possible steps are as follows:
1. Ask a question.
2. Review what is known about the topic.
3. Formulate a hypothesis.
4. Experiment to test the hypothesis.
5. Observe the experiment; record and organize the results.
6. Analyze the results and draw conclusions.
7. Share the results with others.
Each activity may be completed as an individual student experiment, demonstration, or project, or activities may be completed by student teams. Activities may also be done as whole-class experiments, demonstrations, or projects. Some of the activities might be best done by teacher demonstration. Choice of method many times will depend on lab facilities, availability of equipment and supplies, time, and most importantly, student safety. Regardless of whether the activity is conducted as an experiment or demonstration, the students will need to follow the steps of an identified scientific method. We have provided a suggested method above that may be modified to fit your classroom needs. It is suggested that you duplicate and make readily available to your students a supply of the Experiment/Demonstration Forms found on pages 2–6 of this book. Students may then add the completed Experiment/Demonstration Forms to their ongoing science journals.

Easy Science Experiments: The Earth’s Surface
2© Mark Twain Media, Inc., Publishers
Sample Experiment/Demonstration Form
Sample Experiment/Demonstration Form
Question:
How can we prove that sediment settles out of water?
Review what is known about the question:
Obtain information about this topic in the library and on the Internet.
Formulate a hypothesis:
“The heavier the sediment, the more it sinks to the bottom.”
Experiment/Demonstration to test your hypothesis:
Step 1: Stir a small amount of coarse sand or gravel with some finer sand and soil and
add water.
Step 2: Pour mixture into a wide-mouth jar.
Notice that the coarser particles settle to the bottom first, followed by the finer
particles.
Step 3: When the water above the sediment becomes clear, siphon most of it off and
add another layer in the same way.

3© Mark Twain Media, Inc., Publishers
Easy Science Experiments: The Earth’s Surface
Sample Experiment/Demonstration Form (cont.)
Sample Experiment/Demonstration Form
The heaviest rocks settle at the bottom, then the next heaviest above them, etc.
Step 4:
Repeat the experiment if necessary for further data:
Analyze results and draw conclusions:
Share the results with others and add this information to your science journal.

Easy Science Experiments: The Earth’s Surface
4© Mark Twain Media, Inc., Publishers
Experiment/Demonstration Form
Experiment/Demonstration #
Question:
Review what is known about the question:
Formulate a hypothesis:
Experiment/Demonstration to test your hypothesis:
Step 1:
5© Mark Twain Media, Inc., Publishers
Easy Science Experiments: The Earth’s Surface
Experiment/Demonstration # (cont.)
Experiment/Demonstration Form
Step 2:
Step 3:
Step 4:
Repeat the experiment if necessary for further data:

Easy Science Experiments: The Earth’s Surface
6© Mark Twain Media, Inc., Publishers
Analyze results and draw conclusions:
Share the results with others and add this information to your science
journal.
Experiment/Demonstration # (cont.)
Experiment/Demonstration Form

7© Mark Twain Media, Inc., Publishers
Easy Science Experiments: The Earth’s Surface
How Can We Collect and Study Rocks?
How Can We Collect and Study Rocks?
EXPERIMENT/DEMONSTRATION #1
MATERIALS NEEDED:
Ask each student to bring in one rock. A satisfactory sampling of local rocks can usually be obtained.
PROCEDURE: Step 1: Place similar specimens of rocks together, dividing the rocks into groups
according to differences in shape, color, and other characteristics. Try to discover several different ways in which the rocks that have been collected can be grouped.
Step 2: Select a single rock and try to learn as much about it as possible by careful observation alone. If a rock is flat, it is probably a piece of a layer of sediment that was laid down in water long ago and has since hardened. If it appears to be made up of sand grains cemented together, it is probably sandstone. If the rock is rounded, the wearing off of sharp corners is very likely the re-sult of stream action. Granite-like rocks that have crystals of different colors were pushed up from deep in the earth long ago and cooled slowly. Rocks that differ greatly from most of the rocks found in the community were probably carried in by a glacier.
Careful observation of rock specimens using the de-velopmental technique will serve to interest students in the further study of rocks. Many beginners will be curious to know the names of different rocks, but the identification of rocks will be of far less value than the development of their stories through careful observation of their characteristics. Identifica-tion, except for the most common kinds, might be avoided with beginners, since even experts cannot be sure of the name of a rock without testing it in a laboratory.

Easy Science Experiments: The Earth’s Surface
8© Mark Twain Media, Inc., Publishers
How Can Rock Collections Be Made?
How Can Rock Collections Be Made?
EXPERIMENT/DEMONSTRATION #2
MATERIALS NEEDED:
Box String Nail Hammer Rocks Adhesive tape
PROCEDURE: Encourage students to start small rock collections of their
own. A good rock collection box can be purchased at a discount store or made from a cardboard box with a lid. For beginners, it is best to keep the collections small and to confine them largely to local rocks. Students who have a special interest might want to learn how to use more elaborate techniques.
To make a rock collection box:
Step 1: Use a hammer and nail to punch evenly spaced holes in the box a short distance from the bottom.
Step 2: Run strings through the holes and around the bottom of the box and tie them
tightly on the outside. The strings will then hold the specimens in position.
Step 3: Cut small squares of adhesive tape and paste one square on each of the specimens collected and number each specimen.
Step 4: Next, make a key with a space for the name of each rock. Write in the names of any rocks that are known and paste the key on the cover of the box. Blank spaces can be filled in later if and when the names of the rocks are learned.
** Egg cartons are also convenient for small rock collections. Keys showing the position
of each rock can be pasted on the inside or outside cover.
9© Mark Twain Media, Inc., Publishers
Easy Science Experiments: The Earth’s Surface
What Is the Test for Limestone?
Limestone/Crystals
EXPERIMENT/DEMONSTRATION #3
MATERIALS NEEDED:
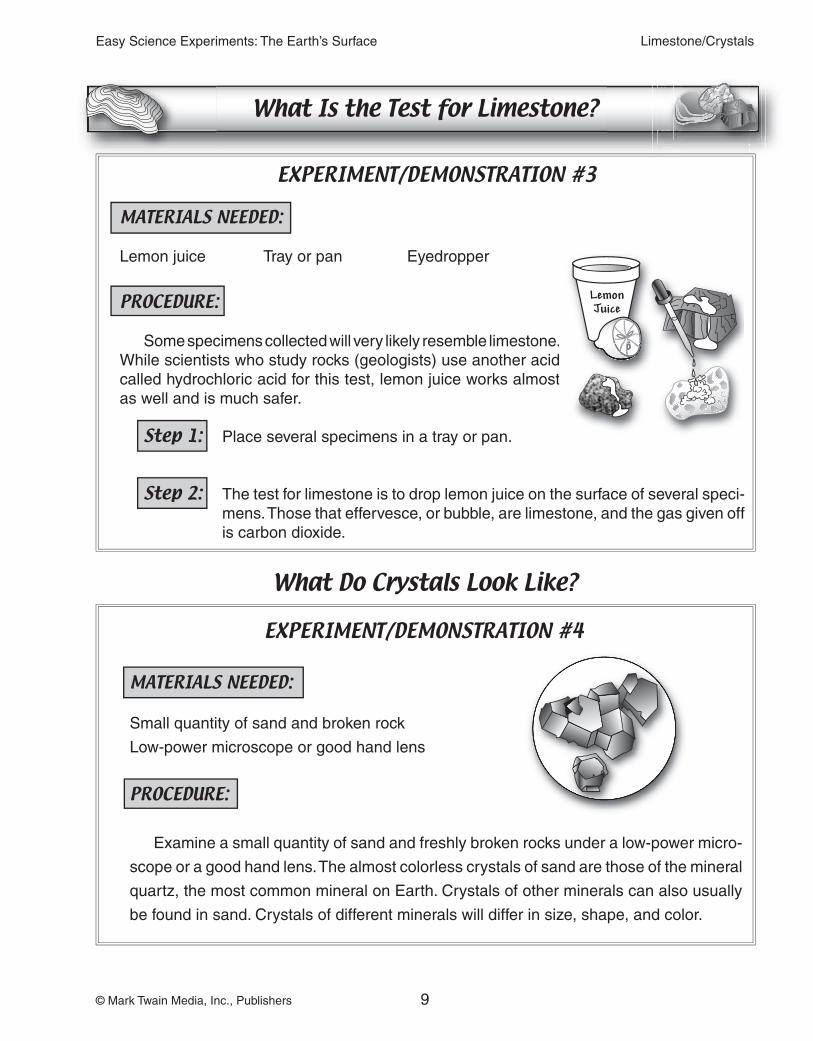
Lemon juice Tray or pan Eyedropper
PROCEDURE:
Some specimens collected will very likely resemble limestone. While scientists who study rocks (geologists) use another acid called hydrochloric acid for this test, lemon juice works almost as well and is much safer.
Step 1: Place several specimens in a tray or pan.
Step 2: The test for limestone is to drop lemon juice on the surface of several speci-mens. Those that effervesce, or bubble, are limestone, and the gas given off is carbon dioxide.
What Do Crystals Look Like?
EXPERIMENT/DEMONSTRATION #4
MATERIALS NEEDED:
Small quantity of sand and broken rock
Low-power microscope or good hand lens
PROCEDURE:
Examine a small quantity of sand and freshly broken rocks under a low-power micro-
scope or a good hand lens. The almost colorless crystals of sand are those of the mineral
quartz, the most common mineral on Earth. Crystals of other minerals can also usually
be found in sand. Crystals of different minerals will differ in size, shape, and color.

Easy Science Experiments: The Earth’s Surface
10© Mark Twain Media, Inc., Publishers
What Are the Effects of Water on Rocks?
What Are the Effects of Water on Rocks?
EXPERIMENT/DEMONSTRATION #5
MATERIALS NEEDED:
Small, freshly broken pieces of rockJar with a lid, half-filled with clear water
PROCEDURE:
Step 1: Place some small, freshly broken pieces of rock in a jar half-filled with clear water.
Step 2: Close the lid of the jar and shake it 100 times.
What happens to the water in the jar?
What happens after the jar has been shaken 1,000 times?
(Use the form at the beginning of this book or your own paper.)
EXPERIMENT/DEMONSTRATION #6
MATERIALS NEEDED:
A brick or part of a curb that shows evidence of weathering
Pebbles from a stream that runs over a gravel or rock bed
PROCEDURE:
Find a brick or part of a curb that shows evidence of
weathering. Collect pebbles from a stream that runs over
a gravel or rock bed. Note their shapes and textures. Rub
pieces of different rocks together and note that all rocks are
not of the same hardness.

Easy Science Experiments: The Earth’s Surface
46© Mark Twain Media, Inc., Publishers
Acknowledgement: The Illinois Department of Education
Experiment/Demonstration #5 (p. 10) The water becomes cloudy. The sharp edges have been rounded and worn away.
Experiment/Demonstration #11 (p. 15) Roots of the bean seeds start to penetrate the plaster, causing the plaster to crack or scale off.
Experiment/Demonstration #12 (p. 16) The unprotected soil is washed and splashed away, whereas the soil forms columns under the coins.
Experiment/Demonstration #16 (p. 18)Erosion occurs differently in each metal pan, depend-
ing on the protection from rain.
Additional Activity #3 (p. 19) The lighter and smaller pieces are suspended the longest, making them the easiest to get carried away.
Experiment/Demonstration #18 (p. 20) The drops farthest away from the flame form the largest crystals.
Experiment/Demonstration #20 (p. 21) The ice line should be higher. Water expands as it freezes in cracks of rocks causing the rocks to break more.
Experiment/Demonstration #21 (p. 22) Ice cubes pick up soil particles, and when they slide downhill and melt, the soil is deposited where they melt.
Experiment/Demonstration #30 (p. 29) 1. The tray with loose soil loses the most soil. 2. The tray without sod loses the most soil. 3. The tray with the most slope loses the most soil.
Experiment/Demonstration #38 (p. 36) The beaker with soil heats faster. Soil heats and cools more rapidly than water.
Answer Keys
Answer Keys
Experiment/Demonstration #39 (p. 37) Water in the white can should be the coolest, while the water in the black can should be the warmest. The white can reflects the heat, while the black can absorbs the heat.
Experiment/Demonstration #40 (p. 38) The water in the test tube that has been colored should be the hottest. The black test tube absorbs more heat from the sun.
Experiment/Demonstration #41 (p. 39) 1. During the cold temperatures of the winter, the tiny
molecules of water in sidewalks and roads freeze and expand, then warm and contract depending on temperatures. If the roads and sidewalks aren’t in sections with spaces left for the expansion, cracks and holes can appear.
2. The freezing and thawing create cracks and holes in the road over the winter.
3. When air is trapped within tires and is heated, causing the air to expand, tires can become overfilled, and it is more likely for a blowout to occur if some air is not released.
4. When metal is warmed or heated, it also expands, making a metal lid looser on a jar, therefore easier to remove.
Experiment/Demonstration #42 (p. 40) Region A will boil, but region B will remain cold. The test tube could be held with your hand in region B, while region A is boiling. This shows that both water and glass are poor conductors of heat.
Experiment/Demonstration #43 (p. 41)The ice will melt slowly. The top part of the tube will gradu-ally get hot. The wire could get warm depending on the amount of time to melt the size of the ice cube.