ecdl v4 mod4 office-2000 manual
TRANSCRIPT

8/8/2019 Ecdl v4 Mod4 Office-2000 Manual
http://slidepdf.com/reader/full/ecdl-v4-mod4-office-2000-manual 1/74
8/8/2019 Ecdl v4 Mod4 Office-2000 Manual
http://slidepdf.com/reader/full/ecdl-v4-mod4-office-2000-manual 2/74
8/8/2019 Ecdl v4 Mod4 Office-2000 Manual
http://slidepdf.com/reader/full/ecdl-v4-mod4-office-2000-manual 3/74
8/8/2019 Ecdl v4 Mod4 Office-2000 Manual
http://slidepdf.com/reader/full/ecdl-v4-mod4-office-2000-manual 4/74
8/8/2019 Ecdl v4 Mod4 Office-2000 Manual
http://slidepdf.com/reader/full/ecdl-v4-mod4-office-2000-manual 5/74

8/8/2019 Ecdl v4 Mod4 Office-2000 Manual
http://slidepdf.com/reader/full/ecdl-v4-mod4-office-2000-manual 6/74

8/8/2019 Ecdl v4 Mod4 Office-2000 Manual
http://slidepdf.com/reader/full/ecdl-v4-mod4-office-2000-manual 7/74

8/8/2019 Ecdl v4 Mod4 Office-2000 Manual
http://slidepdf.com/reader/full/ecdl-v4-mod4-office-2000-manual 8/74

8/8/2019 Ecdl v4 Mod4 Office-2000 Manual
http://slidepdf.com/reader/full/ecdl-v4-mod4-office-2000-manual 9/74
8/8/2019 Ecdl v4 Mod4 Office-2000 Manual
http://slidepdf.com/reader/full/ecdl-v4-mod4-office-2000-manual 10/74
8/8/2019 Ecdl v4 Mod4 Office-2000 Manual
http://slidepdf.com/reader/full/ecdl-v4-mod4-office-2000-manual 11/74

8/8/2019 Ecdl v4 Mod4 Office-2000 Manual
http://slidepdf.com/reader/full/ecdl-v4-mod4-office-2000-manual 12/74

8/8/2019 Ecdl v4 Mod4 Office-2000 Manual
http://slidepdf.com/reader/full/ecdl-v4-mod4-office-2000-manual 13/74
8/8/2019 Ecdl v4 Mod4 Office-2000 Manual
http://slidepdf.com/reader/full/ecdl-v4-mod4-office-2000-manual 14/74

8/8/2019 Ecdl v4 Mod4 Office-2000 Manual
http://slidepdf.com/reader/full/ecdl-v4-mod4-office-2000-manual 15/74

8/8/2019 Ecdl v4 Mod4 Office-2000 Manual
http://slidepdf.com/reader/full/ecdl-v4-mod4-office-2000-manual 16/74
8/8/2019 Ecdl v4 Mod4 Office-2000 Manual
http://slidepdf.com/reader/full/ecdl-v4-mod4-office-2000-manual 17/74

8/8/2019 Ecdl v4 Mod4 Office-2000 Manual
http://slidepdf.com/reader/full/ecdl-v4-mod4-office-2000-manual 18/74
8/8/2019 Ecdl v4 Mod4 Office-2000 Manual
http://slidepdf.com/reader/full/ecdl-v4-mod4-office-2000-manual 19/74
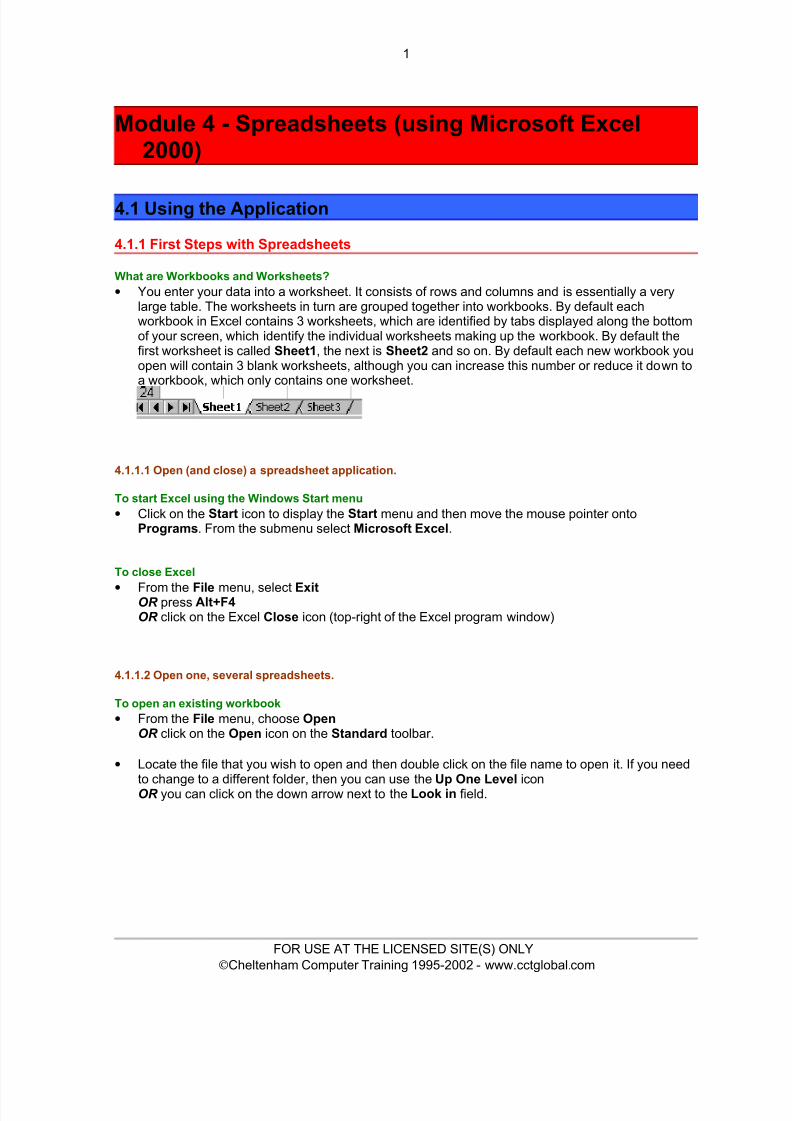
10
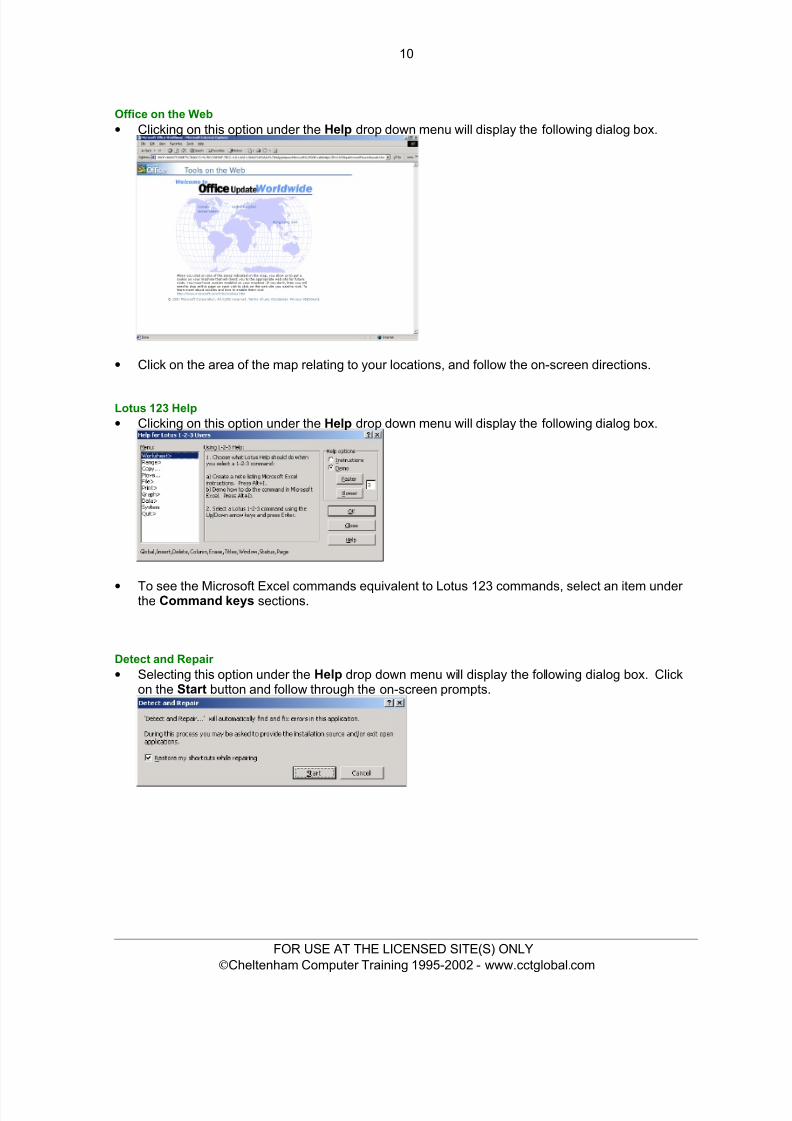
Office on the Web• Clicking on this option under the Help drop down menu will display the following dialog box.
• Click on the area of the map relating to your locations, and follow the on-screen directions.
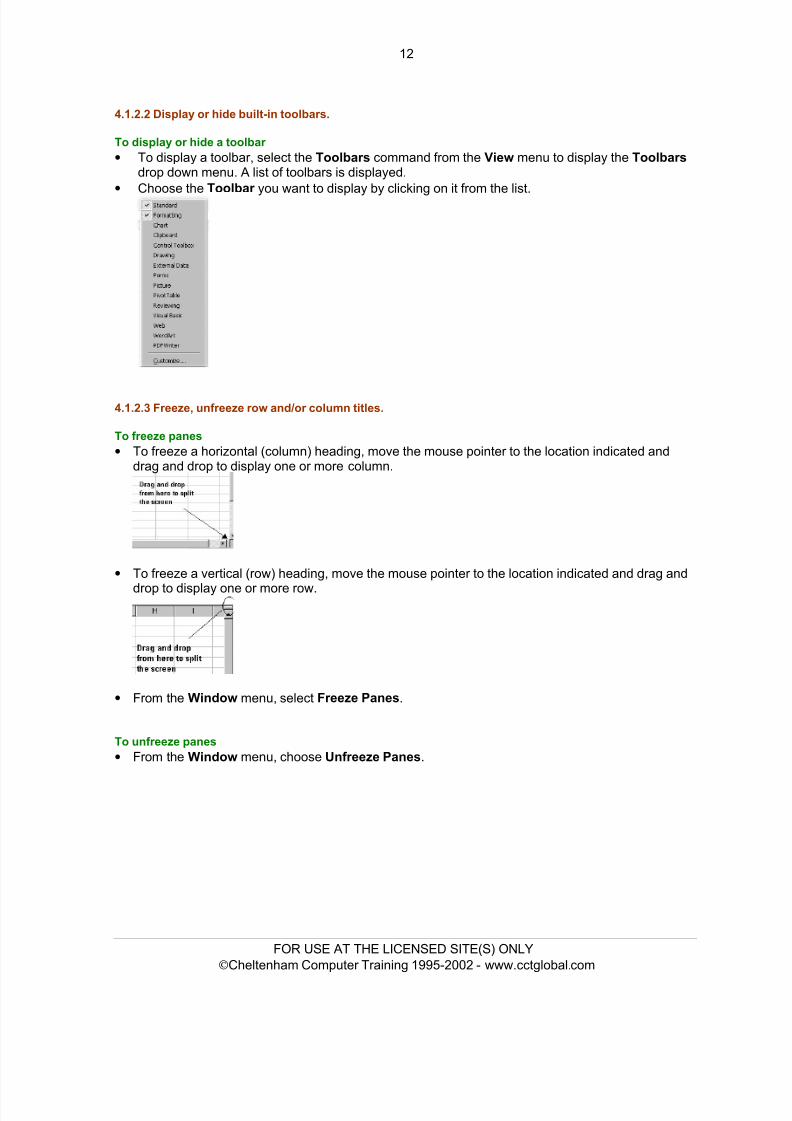
Lotus 123 Help• Clicking on this option under the Help drop down menu will display the following dialog box.
• To see the Microsoft Excel commands equivalent to Lotus 123 commands, select an item under the Command keys sections.
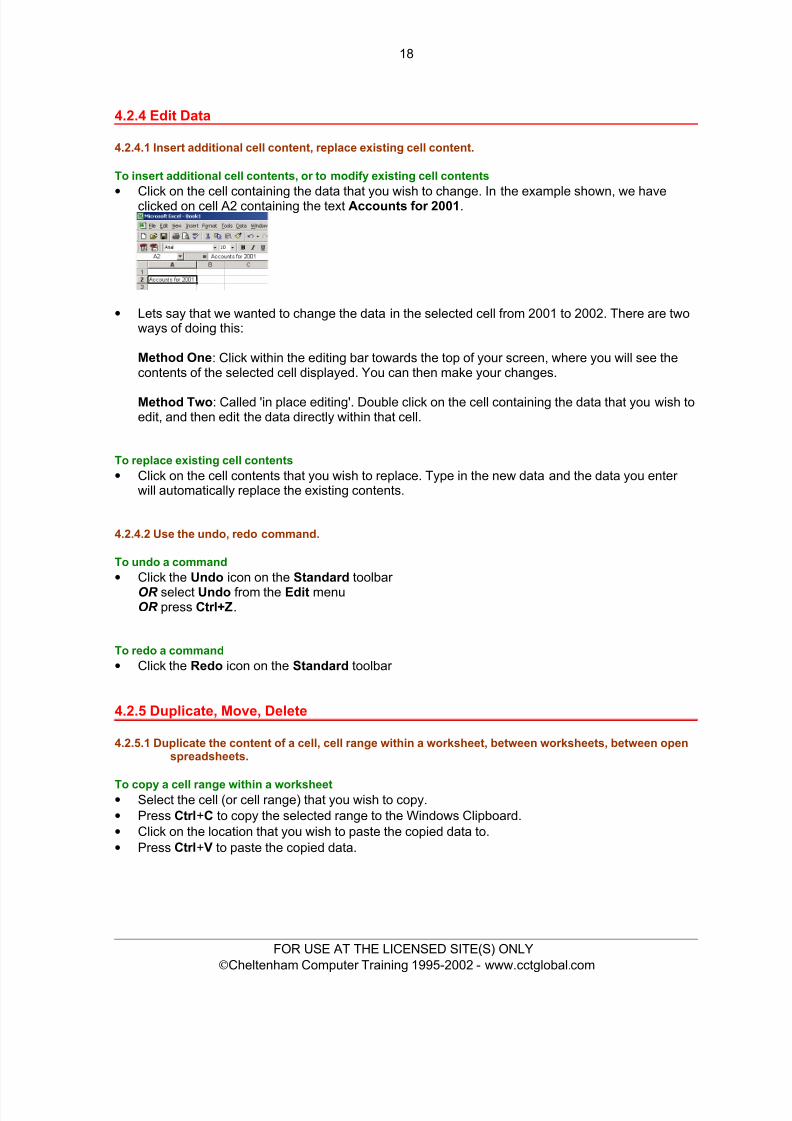
Detect and Repair • Selecting this option under the Help drop down menu will display the following dialog box. Click
on the Start button and follow through the on-screen prompts.
FOR USE AT THE LICENSED SITE(S) ONLY© Cheltenham Computer Training 1995-2002 - www.cctglobal.com

8/8/2019 Ecdl v4 Mod4 Office-2000 Manual
http://slidepdf.com/reader/full/ecdl-v4-mod4-office-2000-manual 20/74
11
About Microsoft Excel• Clicking on this option under the Help drop down menu will display the following dialog box. This
screen will display the exact release version of the application. It will also display your Product ID(removed in the illustration for security reasons).
4.1.1.9 Close a spreadsheet.
To close a spreadsheet• From the File menu, select Close . You will be asked if you wish to save any changes you have
made to the file. Select Yes to save, or No to ignore the changes. If you are saving a new file, theSave As dialog box will be displayed. In the File name text box, enter a name and click on theSave button.
4.1.2 Adjust Settings
4.1.2.1 Use magnification/zoom tool.
To zoom the view• Use the Zoom icon within the Standard Excel toolbar.
FOR USE AT THE LICENSED SITE(S) ONLY© Cheltenham Computer Training 1995-2002 - www.cctglobal.com
8/8/2019 Ecdl v4 Mod4 Office-2000 Manual
http://slidepdf.com/reader/full/ecdl-v4-mod4-office-2000-manual 21/74
12
4.1.2.2 Display or hide built-in toolbars.
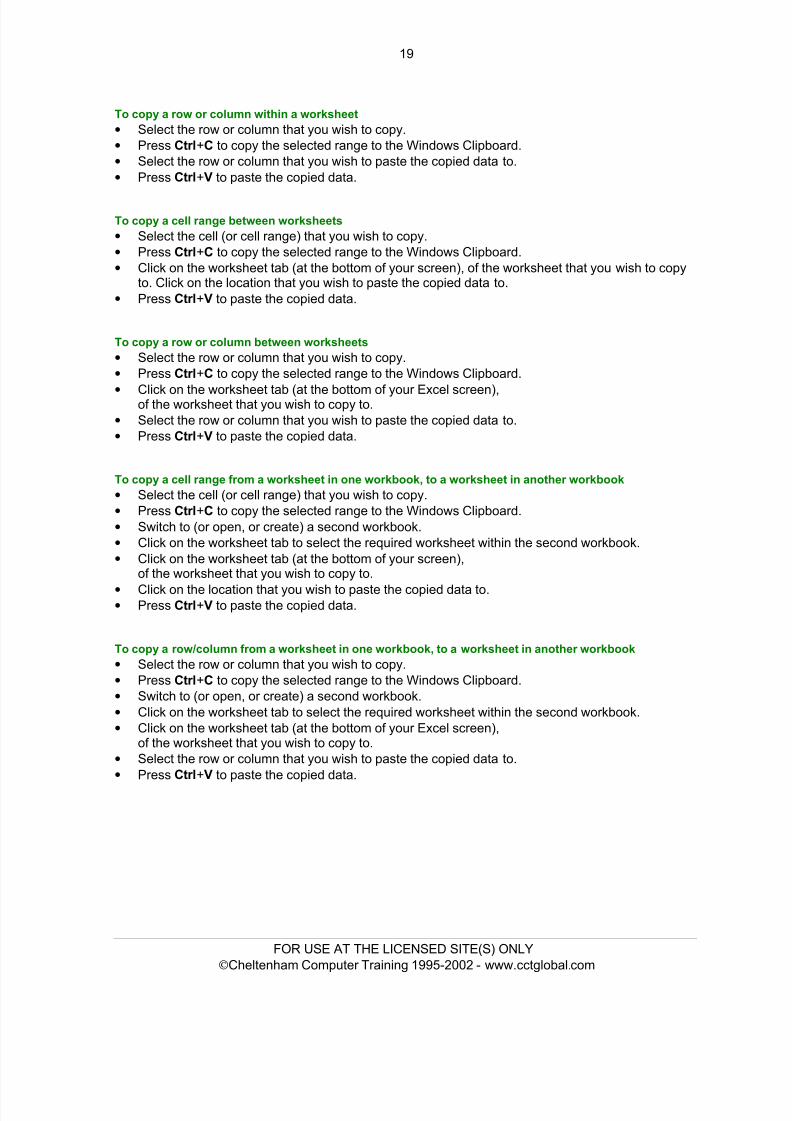
To display or hide a toolbar • To display a toolbar, select the Toolbars command from the View menu to display the Toolbars
drop down menu. A list of toolbars is displayed.• Choose the Toolbar you want to display by clicking on it from the list.
4.1.2.3 Freeze, unfreeze row and/or column titles.
To freeze panes• To freeze a horizontal (column) heading, move the mouse pointer to the location indicated and
drag and drop to display one or more column.
• To freeze a vertical (row) heading, move the mouse pointer to the location indicated and drag and
drop to display one or more row.
• From the Window menu, select Freeze Panes .
To unfreeze panes• From the Window menu, choose Unfreeze Panes .
FOR USE AT THE LICENSED SITE(S) ONLY© Cheltenham Computer Training 1995-2002 - www.cctglobal.com

8/8/2019 Ecdl v4 Mod4 Office-2000 Manual
http://slidepdf.com/reader/full/ecdl-v4-mod4-office-2000-manual 22/74
13
4.1.2.4 Modify basic preferences in the application: user name, default folder to open/save.
To modify basic preference options• Click on the Tools drop down menu and select the Options command, which will display a dialog
box. Click on the General tab.
To set the user name : Enter your name in the User Name section of the dialog box.
To set the default directory : Enter the path to the directory that you wish to set up as the defaultdirectory, in the Default file location section of the dialog box. Once applied this default directorywill be the one displayed in opening and saving dialog boxes within Excel
4.2 Cells
4.2.1 Insert Data
4.2.1.1 Enter a number, a date, text in a cell.
To enter numbers• Select the cell in which you want to enter a number and type in the number. If you want to make
the number a negative, type a minus sign in front of it or enclose it in parentheses (i.e. brackets).• To indicate decimal places, you type a full stop.• The numbers will be right aligned by default. If you wish to enter a number or formula as text, type
an apostrophe before it.
To enter dates or times• Select the cell in which you want to enter the date or time and then type in the date or time.
Separate the date with either hyphens or slashes.• To enter the current date, press Ctrl+; to enter the current time, press Ctrl+:
To enter text into a cell• Simply click on the cell and start typing the text that you wish to appear in that cell. Remember
that to move to the next cell use the Tab key. To move down a cell press the Enter key.
FOR USE AT THE LICENSED SITE(S) ONLY© Cheltenham Computer Training 1995-2002 - www.cctglobal.com

8/8/2019 Ecdl v4 Mod4 Office-2000 Manual
http://slidepdf.com/reader/full/ecdl-v4-mod4-office-2000-manual 23/74
14
4.2.2 Select Cells
4.2.2.1 Select a cell, range of adjacent cells, range of non-adjacent cells, entire worksheet.
To select a cell•
Click on the cell you wish to select.
To select non-adjacent cells• Click on the first cell you wish to select.• Depress the Control key• Click on the other cells that you wish to select.• Release the Control key when you have finished.
To select a range of cells by dragging the mouse• Click on the first cell in the range.• Hold down the left-hand mouse button and drag over the cells you wish to include in the selection.
To select a range of adjacent cells (making up a rectangular block)• Click on the first cell of the rectangular block that you wish to select (i.e. the top-left hand corner).• Move down to the cell that marks the bottom-right corner of the rectangular block.• Depress the Shift key (and keep it depressed).• Click once on the last cell of the required block.• Release the Shift key.
To select an entire worksheet• Click the Select All icon in the top, left-hand corner of the worksheet where the row heading and
column heading meet
OR press Ctrl+A .
To select several worksheets• Click on the first sheet tab.• Click on other sheet tabs you wish to select whilst depressing the Ctrl key.
FOR USE AT THE LICENSED SITE(S) ONLY© Cheltenham Computer Training 1995-2002 - www.cctglobal.com

8/8/2019 Ecdl v4 Mod4 Office-2000 Manual
http://slidepdf.com/reader/full/ecdl-v4-mod4-office-2000-manual 24/74
15
To select all worksheets• Click on a sheet tab using the right-hand mouse button to display the shortcut menu.• Choose Select All Sheets .
4.2.2.2 Select a row, range of adjacent rows, range of non-adjacent rows.
To select a row• Click the row heading number.
To select a range of adjacent rows•
Click the row heading number of the first row that you wish to select.• Position the mouse button at the last row in the range that you wish to select.• Depress the Shift key and keep it depressed.• Click on the last row in the range that you wish to select.• Release the Shift key.
To select a range of non-adjacent rows• Click the row heading number of the first row that you wish to select.• Position the mouse button at another row heading of a row that you wish to select.• Depress the Control (Ctrl) key and keep it depressed.• Click on further row heading numbers that you wish to select• Release the Control (Ctrl) key. The selected row(s) will remain selected, as illustrated.
4.2.2.3 Select a column, range of adjacent columns, range of non-adjacent columns.
To select a column• Click on the column-heading letter.
To select a range of adjacent columns• Click the column heading number of the first column that you wish to select.• Position the mouse button at the last column in the range that you wish to select.• Depress the Shift key and keep it depressed.• Click on the last column in the range that you wish to select.• Release the Shift key.
FOR USE AT THE LICENSED SITE(S) ONLY© Cheltenham Computer Training 1995-2002 - www.cctglobal.com

8/8/2019 Ecdl v4 Mod4 Office-2000 Manual
http://slidepdf.com/reader/full/ecdl-v4-mod4-office-2000-manual 25/74
16
To select a range of non-adjacent columns• Click the column heading number of the first column that you wish to select.• Position the mouse button at another column heading of a column that you wish to select.• Depress the Control (Ctrl) key and keep it depressed.• Click on further column heading numbers that you wish to select
• Release the Control (Ctrl) key. The selected columns will remain selected, as illustrated.
4.2.3 Rows and Columns
4.2.3.1 Insert rows, columns in a worksheet.
To insert a row into a worksheet• Select the row you want to move down when the new row is inserted above it.• To select more than one row, drag the mouse pointer across the required row headings (with the
mouse button depressed).• Right click over the selected row(s) to display a popup menu.• Select Insert . Any existing data will move down to accommodate the new rows.
To insert a column into a worksheet• Select the column you want to move to the right when the new row is inserted.• To select more than one column, drag the mouse pointer across the required column headings
(with the mouse button depressed).• Right click over the selected column(s) to display a popup menu.•
Select Insert . Any existing data will move right to accommodate the new columns.
4.2.3.2 Delete rows and columns in a worksheet
To delete a row or column• Select the row(s) or column(s) you wish to delete.• Right click on a selected row or column and choose Delete from the popup menu.
FOR USE AT THE LICENSED SITE(S) ONLY© Cheltenham Computer Training 1995-2002 - www.cctglobal.com

8/8/2019 Ecdl v4 Mod4 Office-2000 Manual
http://slidepdf.com/reader/full/ecdl-v4-mod4-office-2000-manual 26/74
17
4.2.3.3 Modify column widths and row heights.
To change the width of a column• Find the right-hand border of the column you wish to change and follow it to the top of the
worksheet into the area of the column heading.• When the mouse pointer is moved in this area, it changes to a thick crosshair.• Click on the right-hand column heading border and drag the mouse to the left to reduce the
column, or to the right to increase the column size.
NOTE: If you enter text, which exceeds the column width, it will spill over into the next column aslong as the cell does not contain any data. If it contains data the entry will be truncated at the edgeof the cell. Although the entire entry does not appear, it will still be intact. If you enter a number which exceeds the width of a column, ### signs will be displayed in the cell to let you know that thecolumn is not wide enough.
To set the column width to match the data automatically• Find the right-hand column border in the column heading area.• Double click on the border to make the column change to fit the data in it. The column will beas wide as the largest entry in it.
To change the width of multiple columns to match the data• Click on the heading (column letter) of the first column you want to change, and drag tohighlight the other columns. Double click on the right-hand border of the column heading of any of the highlighted columns. The column widths will change to match their largest entry.
To set new default column widths• From the Format menu, choose Column Standard Width to display the Standard Widthdialog box. Enter a new width for standard columns (measured in characters). Select OK .
To change the height of a row• Select the row(s) you wish to change. From the Format menu, select Row and choose Heightfrom the Format Row menu. The Row Height dialog box is displayed. Enter the value you want(from 0-409) in the Row Height text box. The value represents the row height in points. SelectOK.
To automatically change a row height to match the data• Select the row(s) you wish to change.• From the Format menu, select Row and choose AutoFit from the Format Row menu.
FOR USE AT THE LICENSED SITE(S) ONLY© Cheltenham Computer Training 1995-2002 - www.cctglobal.com
8/8/2019 Ecdl v4 Mod4 Office-2000 Manual
http://slidepdf.com/reader/full/ecdl-v4-mod4-office-2000-manual 27/74
18
4.2.4 Edit Data
4.2.4.1 Insert additional cell content, replace existing cell content.
To insert additional cell contents, or to modify existing cell contents•
Click on the cell containing the data that you wish to change. In the example shown, we haveclicked on cell A2 containing the text Accounts for 2001 .
• Lets say that we wanted to change the data in the selected cell from 2001 to 2002. There are twoways of doing this:
Method One : Click within the editing bar towards the top of your screen, where you will see thecontents of the selected cell displayed. You can then make your changes.
Method Two : Called 'in place editing'. Double click on the cell containing the data that you wish toedit, and then edit the data directly within that cell.
To replace existing cell contents• Click on the cell contents that you wish to replace. Type in the new data and the data you enter
will automatically replace the existing contents.
4.2.4.2 Use the undo, redo command.
To undo a command• Click the Undo icon on the Standard toolbar
OR select Undo from the Edit menuOR press Ctrl+Z .
To redo a command• Click the Redo icon on the Standard toolbar
4.2.5 Duplicate, Move, Delete
4.2.5.1 Duplicate the content of a cell, cell range within a worksheet, between worksheets, between openspreadsheets.
To copy a cell range within a worksheet• Select the cell (or cell range) that you wish to copy.• Press Ctrl +C to copy the selected range to the Windows Clipboard.• Click on the location that you wish to paste the copied data to.• Press Ctrl +V to paste the copied data.
FOR USE AT THE LICENSED SITE(S) ONLY© Cheltenham Computer Training 1995-2002 - www.cctglobal.com
8/8/2019 Ecdl v4 Mod4 Office-2000 Manual
http://slidepdf.com/reader/full/ecdl-v4-mod4-office-2000-manual 28/74
19
To copy a row or column within a worksheet• Select the row or column that you wish to copy.• Press Ctrl +C to copy the selected range to the Windows Clipboard.• Select the row or column that you wish to paste the copied data to.• Press Ctrl +V to paste the copied data.
To copy a cell range between worksheets• Select the cell (or cell range) that you wish to copy.• Press Ctrl +C to copy the selected range to the Windows Clipboard.• Click on the worksheet tab (at the bottom of your screen), of the worksheet that you wish to copy
to. Click on the location that you wish to paste the copied data to.• Press Ctrl +V to paste the copied data.
To copy a row or column between worksheets• Select the row or column that you wish to copy.• Press Ctrl +C to copy the selected range to the Windows Clipboard.
• Click on the worksheet tab (at the bottom of your Excel screen),of the worksheet that you wish to copy to.• Select the row or column that you wish to paste the copied data to.• Press Ctrl +V to paste the copied data.
To copy a cell range from a worksheet in one workbook, to a worksheet in another workbook• Select the cell (or cell range) that you wish to copy.• Press Ctrl +C to copy the selected range to the Windows Clipboard.• Switch to (or open, or create) a second workbook.• Click on the worksheet tab to select the required worksheet within the second workbook.• Click on the worksheet tab (at the bottom of your screen),
of the worksheet that you wish to copy to.• Click on the location that you wish to paste the copied data to.• Press Ctrl +V to paste the copied data.
To copy a row/column from a worksheet in one workbook, to a worksheet in another workbook• Select the row or column that you wish to copy.• Press Ctrl +C to copy the selected range to the Windows Clipboard.• Switch to (or open, or create) a second workbook.• Click on the worksheet tab to select the required worksheet within the second workbook.• Click on the worksheet tab (at the bottom of your Excel screen),
of the worksheet that you wish to copy to.• Select the row or column that you wish to paste the copied data to.• Press Ctrl +V to paste the copied data.
FOR USE AT THE LICENSED SITE(S) ONLY© Cheltenham Computer Training 1995-2002 - www.cctglobal.com

8/8/2019 Ecdl v4 Mod4 Office-2000 Manual
http://slidepdf.com/reader/full/ecdl-v4-mod4-office-2000-manual 29/74
20
4.2.5.2 Use the Autofill tool/copy handle tool to copy, increment data entries.
To use AutoFill• Enter a starting value for the series that you wish to create.• Enter the second value in the next cell.•
Move the mouse pointer to the "fill handle" (this is the small black square at the bottom, right of theselected area). When the mouse pointer is over the fill handle, it will change shape, from a largewhite cross to a small black cross.
• Depress the mouse button and drag as far as you wish to extend the range.• When you release the mouse button the range will have been filled with incremental values.
Autofill can be used for number sequencing, days of the week, or months of the year.
To see what AutoFill options are available• Click on the Tools drop down menu and select the Options command. From the dialog box
displayed select the Custom Lists tab. You will see a number of pre-lined lists displayed here.
4.2.5.3 Move cell range contents, entire row(s), entire column(s) within a worksheet, between worksheets,between open spreadsheets.
To move a cell range within a worksheet• Select the cell (or cell range) that you wish to move.• Press Ctrl +X to move the selected range to the Windows Clipboard.• Click on the location that you wish to paste the copied data to.• Press Ctrl +V to paste the copied data.
FOR USE AT THE LICENSED SITE(S) ONLY© Cheltenham Computer Training 1995-2002 - www.cctglobal.com

8/8/2019 Ecdl v4 Mod4 Office-2000 Manual
http://slidepdf.com/reader/full/ecdl-v4-mod4-office-2000-manual 30/74
21
To move a row or column within a worksheet• Select the row or column that you wish to move.• Press Ctrl + X to move the selected range to the Windows Clipboard.• Select the row or column that you wish to paste the copied data to.• Press Ctrl +V to paste the copied data.
To move a cell range between worksheets• Select the cell (or cell range) that you wish to move.• Press Ctrl + X to move the selected range to the Windows Clipboard.• Click on the worksheet tab (at the bottom of your screen), of the worksheet that you wish tocopy to. Click on the location that you wish to paste the copied data to.• Press Ctrl +V to paste the copied data.
To move a row or column between worksheets• Select the row or column that you wish to move.• Press Ctrl + X to move the selected range to the Windows Clipboard.
• Click on the worksheet tab (at the bottom of your Excel screen),of the worksheet that you wish to copy to.• Select the row or column that you wish to paste the copied data to.• Press Ctrl +V to paste the copied data.
To move a cell range from a worksheet in one workbook, to a worksheet in a different workbook• Select the cell (or cell range) that you wish to move.• Press Ctrl + X to move the selected range to the Windows Clipboard.• Switch to (or open, or create) a second workbook.• Click on the worksheet tab to select the required worksheet within the second workbook.• Click on the worksheet tab (bottom of your screen), of the worksheet that you wish to copy to.• Click on the location that you wish to paste the copied data to.• Press Ctrl +V to paste the copied data.
To move a row or column from a worksheet in one workbook, to a worksheet in a different workbook• Select the row or column that you wish to move.• Press Ctrl + X to move the selected range to the Windows Clipboard.• Switch to (or open, or create) a second workbook.• Click on the worksheet tab to select the required worksheet within the second workbook.• Click on the worksheet tab (bottom of your screen), of the worksheet that you wish to copy to.• Select the row or column that you wish to paste the copied data to.• Press Ctrl +V to paste the copied data.
4.2.5.4 Delete cell contents.
To delete the contents of a cell or range• Select the cell or range that you want to delete. Press the Delete key. If you delete values from
cells, which are used in formulas, the formulas will return errors.
FOR USE AT THE LICENSED SITE(S) ONLY© Cheltenham Computer Training 1995-2002 - www.cctglobal.com

8/8/2019 Ecdl v4 Mod4 Office-2000 Manual
http://slidepdf.com/reader/full/ecdl-v4-mod4-office-2000-manual 31/74
22
4.2.6 Search and Replace
4.2.6.1 Use the search command for specific content in a worksheet.
To find text in a worksheet•
Place the insertion point where you want to begin the search.• Select the Find command from the Edit menu, or press Ctrl+F to display the Find dialog box.• Type the text you wish to find in the Find what text box.
• Click on the Find Next button to find the next occurrence of the text you are looking for.
4.2.6.2 Use the replace command for specific content in a worksheet.
To find and replace text within a worksheet• Place the insertion point where you want to begin the search.• Select the Replace command from the Edit menu, or press Ctrl+H to display the Replace dialog
box.• Type the text you wish to find and replace in the Find what text box, this can be up to 255
characters in length.
• Type the replacement text in the Replace with text box. Select from the following:
- Find Next: Finds the next occurrence of the text.- Replace: Replaces this instance of the text.- Replace All: Will replace all occurrences of the text in
the Find What section with the text in the Replace With section.
• Select Cancel to stop the search or to close the dialog box.
FOR USE AT THE LICENSED SITE(S) ONLY© Cheltenham Computer Training 1995-2002 - www.cctglobal.com

8/8/2019 Ecdl v4 Mod4 Office-2000 Manual
http://slidepdf.com/reader/full/ecdl-v4-mod4-office-2000-manual 32/74
23
4.2.7 Sort Data
4.2.7.1 Sort a cell range by one criterion in ascending, descending numeric order, ascending, descendingalphabetic order.
To sort a list using the Sort icons• Within your data, click within the column that you wish to sort by, then click on either the Sort
Ascending or Sort Descending icons.
4.3 Worksheets
4.3.1 Handling Worksheets
4.3.1.1 Insert a new worksheet.
To insert a worksheet tab• Right click on the worksheet that you wish to insert a new worksheet in front of. In this case we
have selected sheet two. From the popup menu displayed, select Insert , as illustrated.
• You will see a dialog box displayed, click on the OK button.
The effect is illustrated below, where the new sheet four has been inserted before sheet two.
FOR USE AT THE LICENSED SITE(S) ONLY© Cheltenham Computer Training 1995-2002 - www.cctglobal.com

8/8/2019 Ecdl v4 Mod4 Office-2000 Manual
http://slidepdf.com/reader/full/ecdl-v4-mod4-office-2000-manual 33/74
24
4.3.1.2 Rename a worksheet.
To rename a worksheet tab• Right click on the worksheet tab that you wish to rename. From the popup menu displayed select
the Rename command.
• You can then type over the default worksheet name, which will become highlighted.
• In this case the worksheet name Dave has been used.
4.3.1.3 Delete a worksheet.
To delete a worksheet (by right-clicking)• Click on the relevant worksheet tab with the right-hand mouse button.• Select Delete from the popup menu displayed.
A warning dialog box is displayed. Select OK to continue.
FOR USE AT THE LICENSED SITE(S) ONLY© Cheltenham Computer Training 1995-2002 - www.cctglobal.com
8/8/2019 Ecdl v4 Mod4 Office-2000 Manual
http://slidepdf.com/reader/full/ecdl-v4-mod4-office-2000-manual 34/74
25
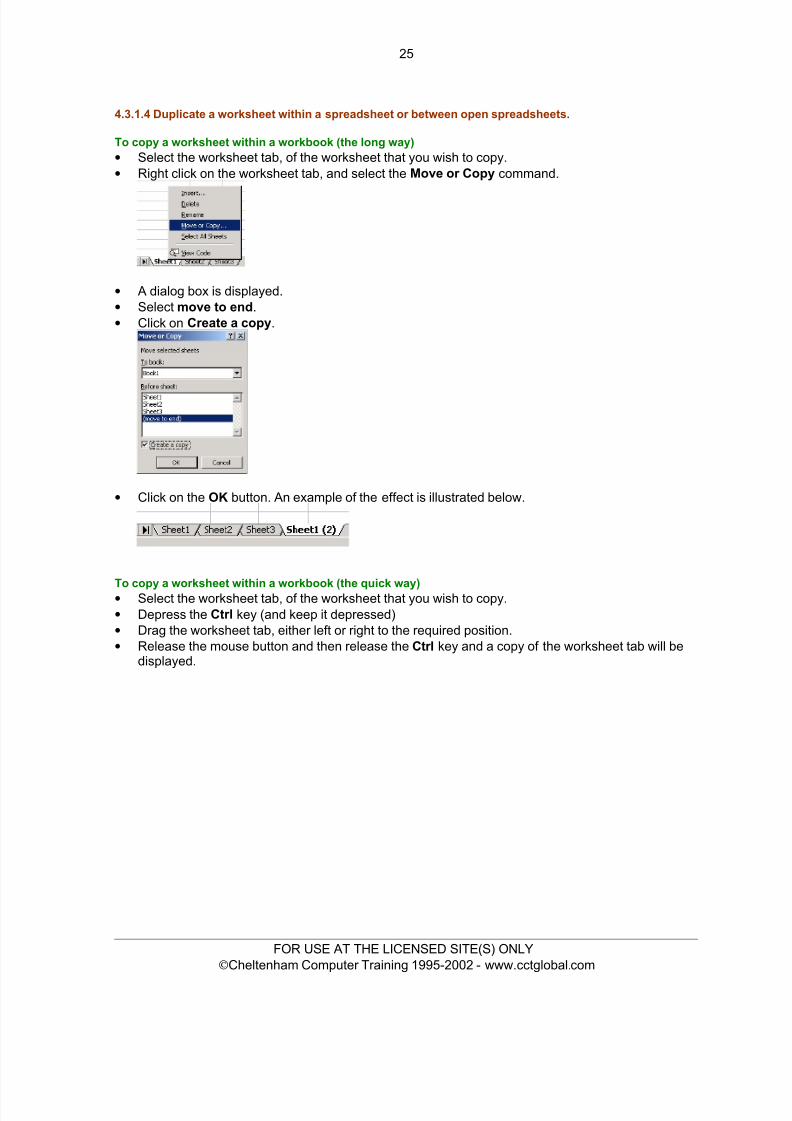
4.3.1.4 Duplicate a worksheet within a spreadsheet or between open spreadsheets.
To copy a worksheet within a workbook (the long way)• Select the worksheet tab, of the worksheet that you wish to copy.• Right click on the worksheet tab, and select the Move or Copy command.
• A dialog box is displayed.• Select move to end .• Click on Create a copy .
• Click on the OK button. An example of the effect is illustrated below.
To copy a worksheet within a workbook (the quick way)• Select the worksheet tab, of the worksheet that you wish to copy.• Depress the Ctrl key (and keep it depressed)• Drag the worksheet tab, either left or right to the required position.• Release the mouse button and then release the Ctrl key and a copy of the worksheet tab will be
displayed.
FOR USE AT THE LICENSED SITE(S) ONLY© Cheltenham Computer Training 1995-2002 - www.cctglobal.com
8/8/2019 Ecdl v4 Mod4 Office-2000 Manual
http://slidepdf.com/reader/full/ecdl-v4-mod4-office-2000-manual 35/74
26
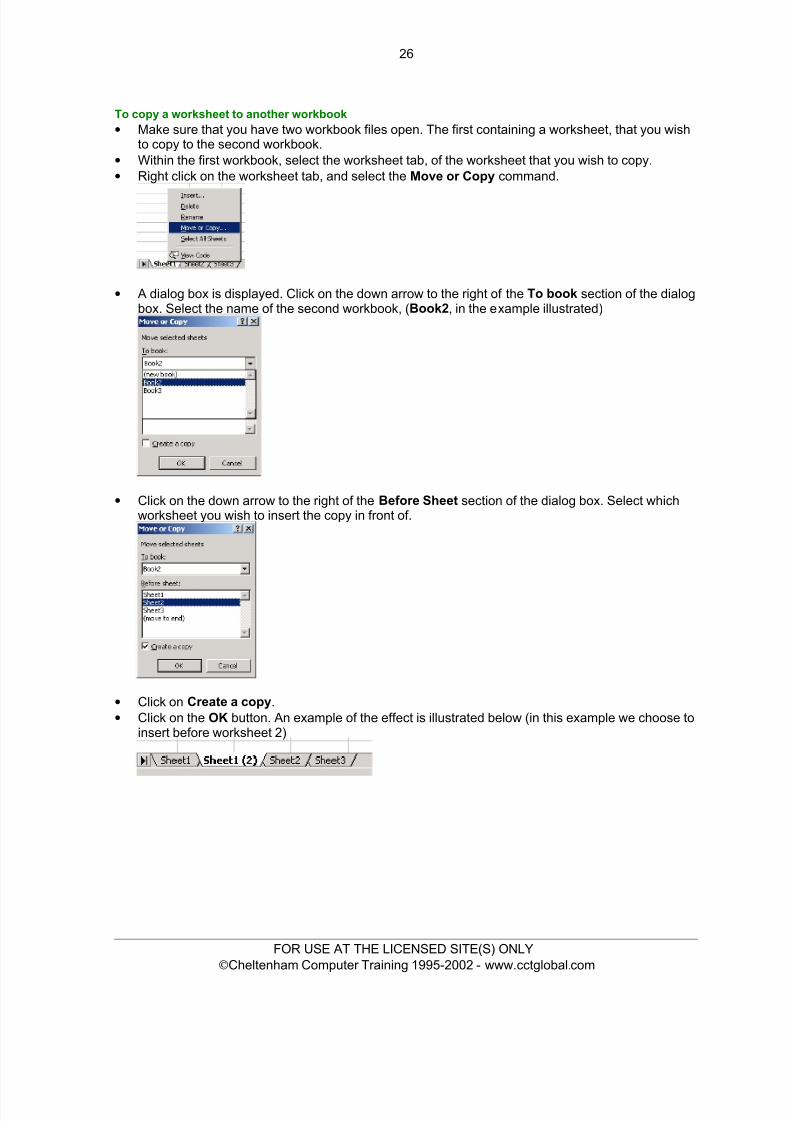
To copy a worksheet to another workbook• Make sure that you have two workbook files open. The first containing a worksheet, that you wish
to copy to the second workbook.• Within the first workbook, select the worksheet tab, of the worksheet that you wish to copy.• Right click on the worksheet tab, and select the Move or Copy command.
• A dialog box is displayed. Click on the down arrow to the right of the To book section of the dialogbox. Select the name of the second workbook, ( Book2 , in the example illustrated)
• Click on the down arrow to the right of the Before Sheet section of the dialog box. Select whichworksheet you wish to insert the copy in front of.
• Click on Create a copy .• Click on the OK button. An example of the effect is illustrated below (in this example we choose to
insert before worksheet 2)
FOR USE AT THE LICENSED SITE(S) ONLY© Cheltenham Computer Training 1995-2002 - www.cctglobal.com

8/8/2019 Ecdl v4 Mod4 Office-2000 Manual
http://slidepdf.com/reader/full/ecdl-v4-mod4-office-2000-manual 36/74
27
4.3.1.5 Move a worksheet within a spreadsheet or between open spreadsheets.
To move a worksheet within a workbook (the long way)• Select the worksheet tab, of the worksheet that you wish to move.• Right click on the worksheet tab, and select the Move or Copy command.
• A dialog box is displayed. Use the Before sheet section of the dialog box, to decide where tomove the worksheet to. Make sure that the Create a copy is not selected.
• Click on the OK button. An example of the effect is illustrated below.In the example shown, Sheet 1 was moved to before Sheet 3 .
To move a worksheet within a workbook (the quick way)• Select the worksheet tab, of the worksheet that you wish to move.• Drag the worksheet tab, either left or right to the required position. As you can see a small,
downwards pointing, arrow indicates where the worksheet will be moved to, when you release themouse button.
• Release the mouse button and the worksheet will be moved to the required location
FOR USE AT THE LICENSED SITE(S) ONLY© Cheltenham Computer Training 1995-2002 - www.cctglobal.com
8/8/2019 Ecdl v4 Mod4 Office-2000 Manual
http://slidepdf.com/reader/full/ecdl-v4-mod4-office-2000-manual 37/74
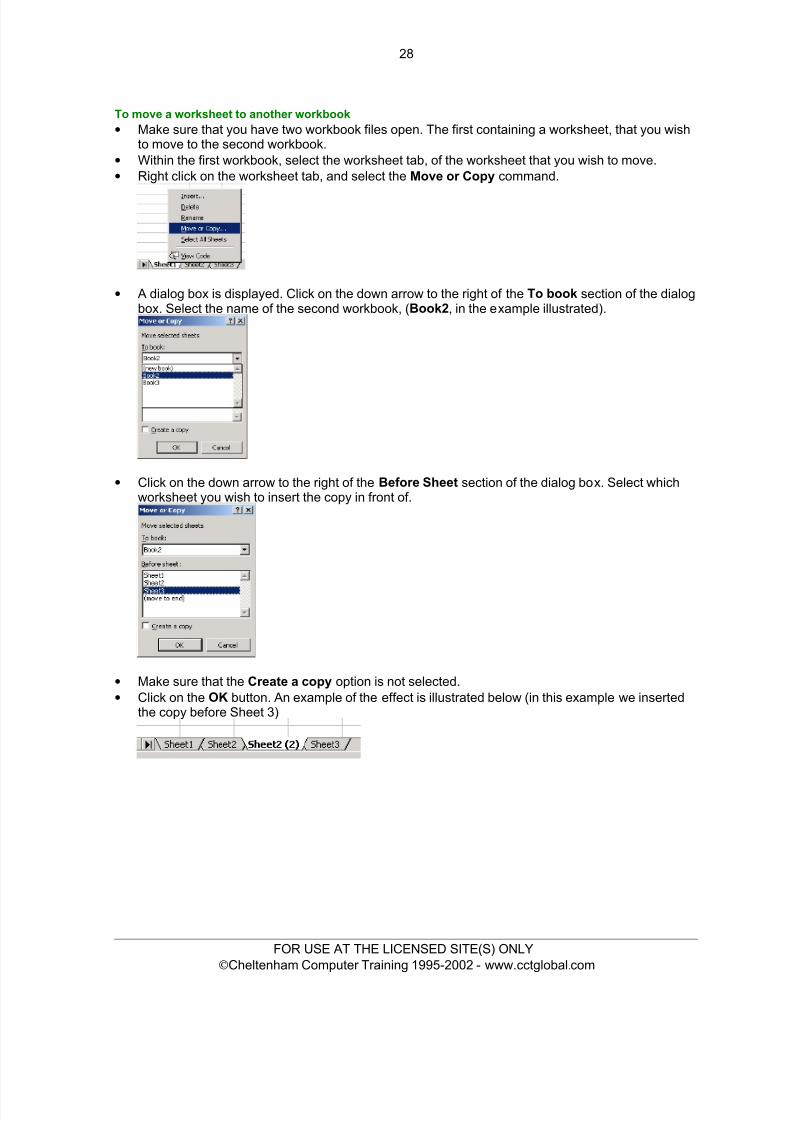
28
To move a worksheet to another workbook• Make sure that you have two workbook files open. The first containing a worksheet, that you wish
to move to the second workbook.• Within the first workbook, select the worksheet tab, of the worksheet that you wish to move.• Right click on the worksheet tab, and select the Move or Copy command.
• A dialog box is displayed. Click on the down arrow to the right of the To book section of the dialogbox. Select the name of the second workbook, ( Book2 , in the example illustrated).
• Click on the down arrow to the right of the Before Sheet section of the dialog box. Select whichworksheet you wish to insert the copy in front of.
• Make sure that the Create a copy option is not selected.• Click on the OK button. An example of the effect is illustrated below (in this example we inserted
the copy before Sheet 3)
FOR USE AT THE LICENSED SITE(S) ONLY© Cheltenham Computer Training 1995-2002 - www.cctglobal.com

8/8/2019 Ecdl v4 Mod4 Office-2000 Manual
http://slidepdf.com/reader/full/ecdl-v4-mod4-office-2000-manual 38/74
29
4.4 Formulas and Functions
4.4.1 Arithmetic Formulas
4.4.1.1 Generate formulas using cell references and arithmetic operators (addition, subtraction,multiplication, division).
To enter formulas into the worksheet cell• Place the cursor in the cell where the formula will appear.• Enter an = (equal) sign.• Enter the expression that will produce the result you want. This can consist of operands, values,
variables, and symbols which represent mathematical procedures such as A5+E5.
You can use the following symbols: -
• When the formula is complete, press Enter . The result of the formula will be calculated anddisplayed in the cell.
• You can display the formula itself in the Formula bar at the top of the screen by placing the cellpointer on the cell.
• If there is an error in a formula, an error message is displayed which will begin with a # sign.
NOTE: If you cannot find the cause of the error in a function you can use the Paste Function todebug it. Highlight the problem cell and click on the Paste Function icon on the formula bar or Standard toolbar.
To enter a cell or range reference by pointing• Enter the formula up to the point of the cell or range reference, e.g. to enter the formula =E2+E5,
only enter the equal (=) sign.• Move the cell pointer to the first cell reference using the arrow keys. The formula will track your
progress and enter the current address into the formula.• Press Enter to complete the formula when you have reached the cell you require.
FOR USE AT THE LICENSED SITE(S) ONLY© Cheltenham Computer Training 1995-2002 - www.cctglobal.com

8/8/2019 Ecdl v4 Mod4 Office-2000 Manual
http://slidepdf.com/reader/full/ecdl-v4-mod4-office-2000-manual 39/74
30
Operator evaluation order within Excel• In Microsoft Excel operators are executed in this order:
4.4.1.2 Recognize and understand standard error values associated with using formulas.
Common formula error messages• When writing formulas it is easy to make a mistake: listed below are some common error
messages.
The contents of the cell cannot be displayed correctly as the column is too narrow.
Indicates that a cell reference is invalid. This is often displayed when you delete cells thatare involved in a formula.
Excel does not recognize text contained within a formula.
On-line Help with formula error messages• You can use the on-line Help to get further information about errors within formulas and the
meaning of the error messages. Click on the Microsoft Excel Help icon. When the Office Assistantis displayed, enter the word error , and then click on the Search button. Select " Troubleshootformula and error values ".
FOR USE AT THE LICENSED SITE(S) ONLY© Cheltenham Computer Training 1995-2002 - www.cctglobal.com
8/8/2019 Ecdl v4 Mod4 Office-2000 Manual
http://slidepdf.com/reader/full/ecdl-v4-mod4-office-2000-manual 40/74
31
• You will then see the following displayed. From this screen you can get detailed information abouteach type of error message.
4.4.2 Cell Referencing
4.4.2.1 Understand and use relative, mixed, absolute cell referencing in formulas.
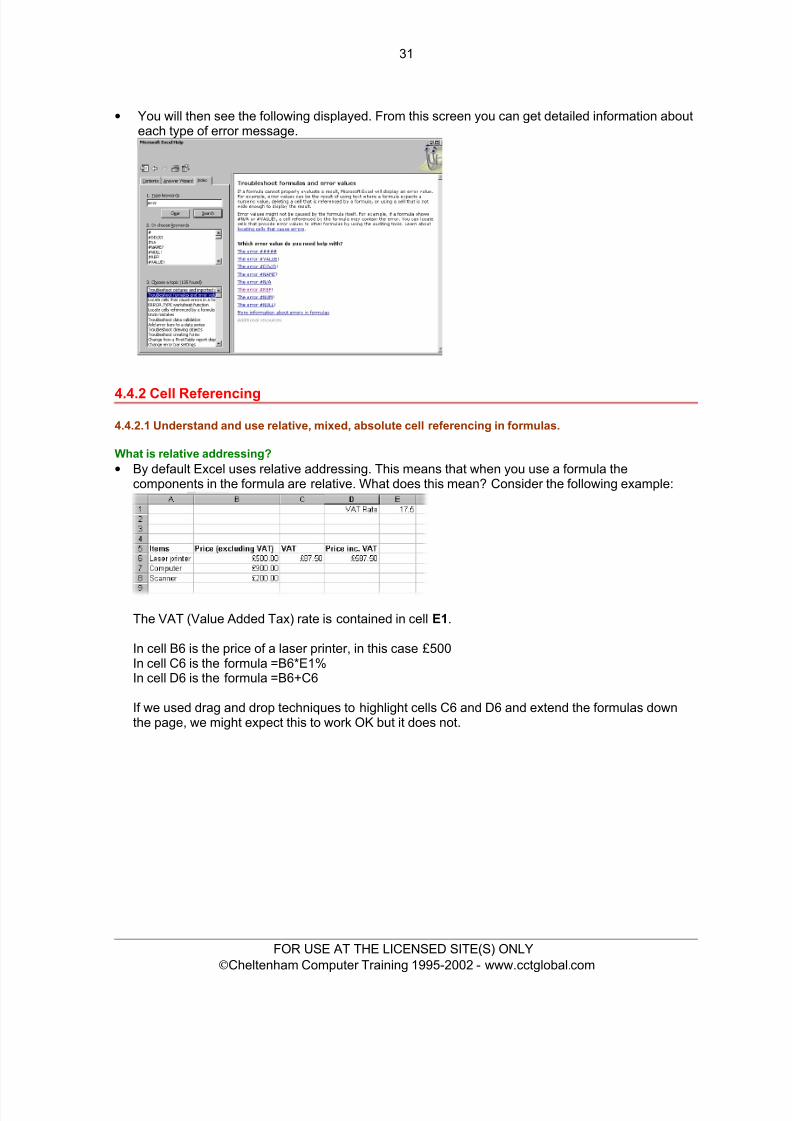
What is relative addressing?• By default Excel uses relative addressing. This means that when you use a formula the
components in the formula are relative. What does this mean? Consider the following example:
The VAT (Value Added Tax) rate is contained in cell E1 .
In cell B6 is the price of a laser printer, in this case £500In cell C6 is the formula =B6*E1%In cell D6 is the formula =B6+C6
If we used drag and drop techniques to highlight cells C6 and D6 and extend the formulas downthe page, we might expect this to work OK but it does not.
FOR USE AT THE LICENSED SITE(S) ONLY© Cheltenham Computer Training 1995-2002 - www.cctglobal.com

8/8/2019 Ecdl v4 Mod4 Office-2000 Manual
http://slidepdf.com/reader/full/ecdl-v4-mod4-office-2000-manual 41/74
32
• To try this click on cells C6 and while keeping the Control key depressed click on cell D6 . Releasethe Control key and the two cells will remain selected.
• Move the mouse pointer to the fill handle, i.e. the small, square black dot at the bottom right corner of the selected range.
• Depress the mouse button and drag down for two rows, then release the mouse button.
What you see is the following. If you look in cells C7 and C8 there is no VAT calculated!
Clicking on cell C7 gives us the clue as to why this did not work. It contains a formula as follows:=B7*E2%
I.e. instead of picking up the VAT rate from cell E1, the formula is pointing to E2 (which is blank).
This illustrates relative referencing: The referencing is using an X (i.e. right-left) and Y (i.e. up-down) set of co-ordinates rather that an absolute addressing system, that would always point to thecontents of a particular cell.
What is absolute addressing?• Following on from the previous example, were relative reference was used we can fix the problem
by using an absolute address. Remember that we had a VAT percentage amount in a cell, andwhen this was referenced in a relative manor while dragging and dropping formulas, then theformula no longer worked. Again we will start with the following:
The VAT rate is contained in cell E1 .
In cell B6 is the price of a laser printer, in this case £500In cell C6 is the formula =B6*$E$1%In cell D6 is the formula =B6+C6
If we used drag and drop techniques to highlight cells C6 and D6 and extend the formulas downthe page, we might expect this to work OK and this time it does!
FOR USE AT THE LICENSED SITE(S) ONLY© Cheltenham Computer Training 1995-2002 - www.cctglobal.com

8/8/2019 Ecdl v4 Mod4 Office-2000 Manual
http://slidepdf.com/reader/full/ecdl-v4-mod4-office-2000-manual 42/74
33
• To try this click on cells C6 and while keeping the Control key depressed click on cell D6 . Releasethe Control key and the two cells will remain selected.
• Move the mouse pointer to the fill handle, i.e. the small, square black dot at the bottom right corner of the selected range.
• Depress the mouse button and drag down for two rows, then release the mouse button.
As you can see to use absolute addressing, you prefix both parts of the cell address, by a dollar ($)symbol.
While entering formula into a worksheet you can use the F4 key to quickly convert a relative cellreference to absolute, e.g. Select a cell and type =B4 and press the F4 key, Excel will insert thedollar symbols for you.
4.4.3 Working with Functions
4.4.3.1 Generate formulas using sum, average, minimum, maximum, count, functions.
What is a function?• A function allows you to calculate a result such as summing numbers together, or finding the
average of a range of numbers.
Common functions• Some commonly used functions include:
AVERAGE: Used to determine the average number of the selected cells.
COUNT: Used to count how many numbers are in the list of arguments.
MAX: Used to return the maximum number from a list of arguments.
MIN: Used to return the minimum number from a list of arguments.
ROUND: Used to round off numbers to a specified number of decimal points.
SUM: Used to add the contents of selected cells.
• Commonly used functions, as displayed within the Paste Function
FOR USE AT THE LICENSED SITE(S) ONLY© Cheltenham Computer Training 1995-2002 - www.cctglobal.com
8/8/2019 Ecdl v4 Mod4 Office-2000 Manual
http://slidepdf.com/reader/full/ecdl-v4-mod4-office-2000-manual 43/74
34
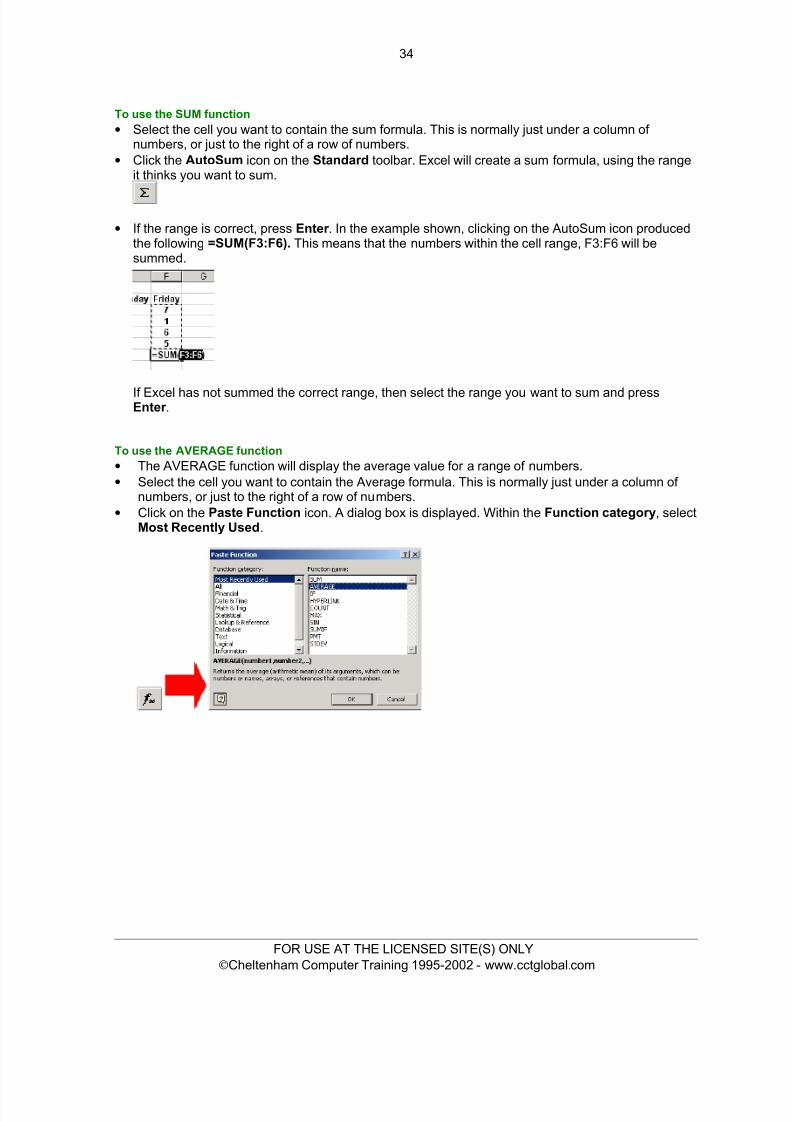
To use the SUM function• Select the cell you want to contain the sum formula. This is normally just under a column of
numbers, or just to the right of a row of numbers.• Click the AutoSum icon on the Standard toolbar. Excel will create a sum formula, using the range
it thinks you want to sum.
• If the range is correct, press Enter . In the example shown, clicking on the AutoSum icon producedthe following =SUM(F3:F6). This means that the numbers within the cell range, F3:F6 will besummed.
If Excel has not summed the correct range, then select the range you want to sum and pressEnter .
To use the AVERAGE function• The AVERAGE function will display the average value for a range of numbers.• Select the cell you want to contain the Average formula. This is normally just under a column of
numbers, or just to the right of a row of numbers.• Click on the Paste Function icon. A dialog box is displayed. Within the Function category , select
Most Recently Used .
FOR USE AT THE LICENSED SITE(S) ONLY© Cheltenham Computer Training 1995-2002 - www.cctglobal.com

8/8/2019 Ecdl v4 Mod4 Office-2000 Manual
http://slidepdf.com/reader/full/ecdl-v4-mod4-office-2000-manual 44/74
35
• In the Function Name section, select AVERAGE .• Click on the OK button. In the example illustrated, the function has automatically selected the
range F3 :F6 , and will calculate the average value.
• Click on the OK button. The result is displayed, as illustrated.
To use the MAX function• The MAX function will display the maximum number within a range.• Select the cell you want to contain the Max formula. This is normally just under a column of
numbers, or just to the right of a row of numbers.• Click on the Paste Function icon. A dialog box is displayed. Within the Function category , select
All. In the Function Name section, select MAX.
FOR USE AT THE LICENSED SITE(S) ONLY© Cheltenham Computer Training 1995-2002 - www.cctglobal.com

8/8/2019 Ecdl v4 Mod4 Office-2000 Manual
http://slidepdf.com/reader/full/ecdl-v4-mod4-office-2000-manual 45/74

8/8/2019 Ecdl v4 Mod4 Office-2000 Manual
http://slidepdf.com/reader/full/ecdl-v4-mod4-office-2000-manual 46/74
37
• Click on the OK button.• In the example illustrated, the function has automatically selected the range F3 :F6 , and will
calculate the minimum value.
• Click on the OK button. The result is displayed, as illustrated.
To use the COUNT function• The COUNT function will count up the number of cells that contain numbers.• Select the cell you want to contain the Count formula. This is normally just under a column of
numbers, or just to the right of a row of numbers.• Click on the Paste Function icon. A dialog box is displayed. Within the Function category , select
All. In the Function name section, select COUNT .
FOR USE AT THE LICENSED SITE(S) ONLY© Cheltenham Computer Training 1995-2002 - www.cctglobal.com

8/8/2019 Ecdl v4 Mod4 Office-2000 Manual
http://slidepdf.com/reader/full/ecdl-v4-mod4-office-2000-manual 47/74
38
• Click on the OK button.• In the example illustrated, the function has automatically selected the range F3 :F6 . The following
formula has been produced automatically =COUNT(F3:F6)
• Click on the OK button. The result is displayed, as illustrated.
The result, i.e. 4, indicates that there are 4 values within the range, F3 :F6 . If we were to delete oneof these values, say in F4 , the result would change as illustrated.
FOR USE AT THE LICENSED SITE(S) ONLY© Cheltenham Computer Training 1995-2002 - www.cctglobal.com

8/8/2019 Ecdl v4 Mod4 Office-2000 Manual
http://slidepdf.com/reader/full/ecdl-v4-mod4-office-2000-manual 48/74
39
4.4.3.2 Generate formulas using the logical function if (yielding one of two specified values)
The IF Function• Excel has a number of functions that allow us to evaluate values and make decisions based on
the result of the evaluation. The IF( ) Function is one of these.
IF( ) SyntaxThe format (Syntax) of the IF( ) function is as follows:IF(Logical_test, Action_if_true, Action_if_false)
Logical_testThe logical_test evaluates an expression to see if it passes the test, i.e. is TRUE or does not passthe test, i.e. is FALSE
Action_if_trueAction_if_true can be a value or an operation. Whichever, the result is placed in the cell thatcontains the IF( ) Function if the logical_test is true.
Action_if_falseAction_if_false can be a value or an operation. Whichever, the result is placed in the cell thatcontains the IF( ) Function if the logical_test is false.
FOR USE AT THE LICENSED SITE(S) ONLY© Cheltenham Computer Training 1995-2002 - www.cctglobal.com

8/8/2019 Ecdl v4 Mod4 Office-2000 Manual
http://slidepdf.com/reader/full/ecdl-v4-mod4-office-2000-manual 49/74
40
The IF( ) Function - an example• Lets look at an example for calculating a discount based on order quantity. The company offers its
customers a 5% discount if the value of an order is above £500. There is no discount if the valueis below £500.
One way of simplifying the above statement is as follows:
If the sale value is greater than £500 give 5% discount otherwise give no discount.
When translated into the IF( ) function it looks like the following:
IF(SalesValue>500,SalesValue * 5%,0)
SalesValue can be either a value or a cell location.
To enter an IF( ) function• Click on the cell to contain the IF( ) function.
• Click the Paste Function iconOR press the Shift+F3 key combination.
• Select the IF option from the Paste Function dialog box and then click OK.
• Enter the required expression to be evaluated into the logical_test text area. Press the Tab key.• Enter the required expression to be evaluated into the value_if_true text area. Press the Tab key.• Enter the required expression to be evaluated into the value_if_false text area and then click OK .
FOR USE AT THE LICENSED SITE(S) ONLY© Cheltenham Computer Training 1995-2002 - www.cctglobal.com

8/8/2019 Ecdl v4 Mod4 Office-2000 Manual
http://slidepdf.com/reader/full/ecdl-v4-mod4-office-2000-manual 50/74
41
Another example using the IF function• Look at the example shown below. In order to pass the average student mark must be over 70%.
The average grades are displayed in cell H8:H13
In cells I8:I13 we need to display the word Pass or Fail , depending on whether the average isover 70%. We first need to click on cell I8. Then we need to click on the Paste Function icon.Next select the IF function within the Paste Function dialog box and click on the OK button.
In the Locical_test section of the dialog box, we enter the logical test, i.e. H8>70
In the Value_if_true section of the dialog box, we enter the word Pass
In the Value_if_false section of the dialog box, we enter the word Fail
Click on the OK button to continue. Use the normal Excel drag techniques to extend this functionto the cells I9:I13 .
The results will be as illustrated.
FOR USE AT THE LICENSED SITE(S) ONLY© Cheltenham Computer Training 1995-2002 - www.cctglobal.com
8/8/2019 Ecdl v4 Mod4 Office-2000 Manual
http://slidepdf.com/reader/full/ecdl-v4-mod4-office-2000-manual 51/74
42
4.5 Formatting
4.5.1 Numbers/Dates
To change number formatting• You can quickly change the formatting of a cell or selected range by using the following icons on
the Formatting toolbar:
Currency 23456 will become £23,456.00 (or your local currency equivalent)
NOTE: In the United States/Canada this icon will contain a $ symbol.
Percent .25 will become 25%
Comma 12345 will become 12,345.00
Increase Decimal 23,456.00 will become 23,456.000
Decrease Decimal 23,456.00 will become 23,456.0
4.5.1.1 Format cells to display numbers to a specific number of decimal places, to display numbers with,without commas to indicate thousands.
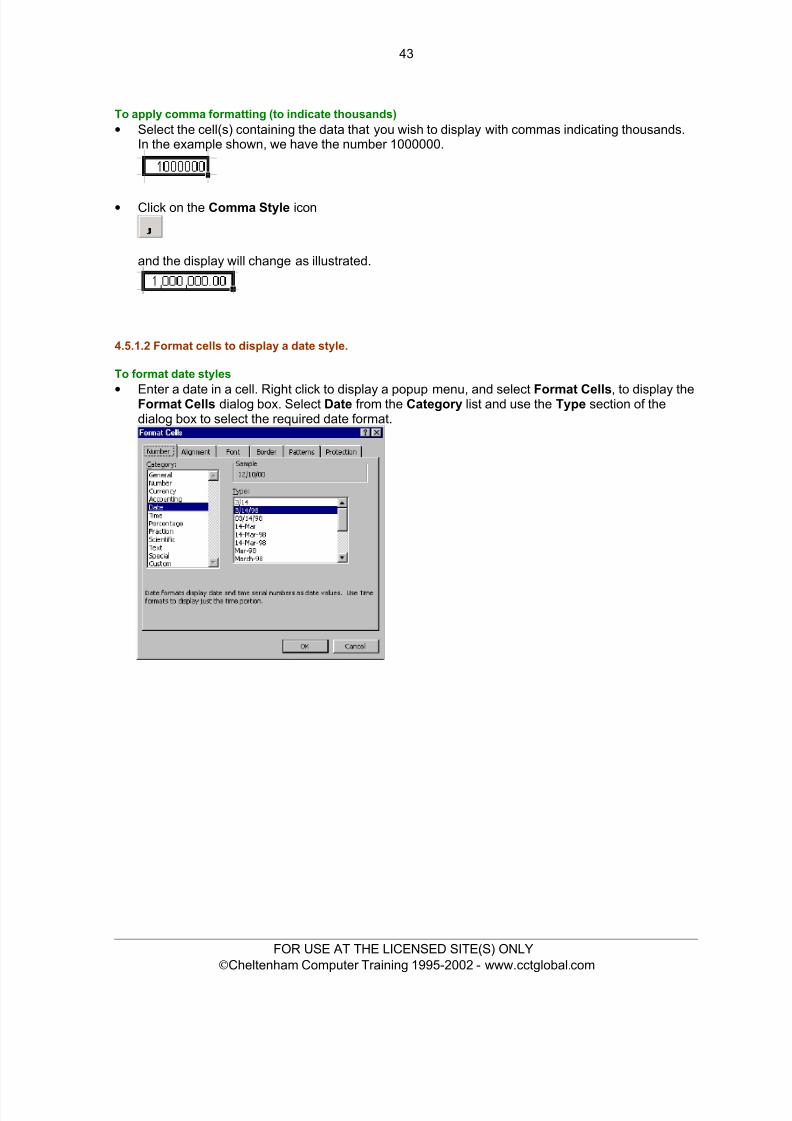
To establish a fixed number of decimal places for cell formats• Select the cell, or range, you wish to format with a fixed number of decimal places.• To add a decimal point to the selection, click on the Increase Decimal icon on theFormatting toolbar. You can continue to click to add as many decimals as required.
• To remove a decimal point from the selection, click on the Decrease Decimal icon on theFormatting toolbar. Again, you can continue to click to remove as many decimals as required.
FOR USE AT THE LICENSED SITE(S) ONLY© Cheltenham Computer Training 1995-2002 - www.cctglobal.com
8/8/2019 Ecdl v4 Mod4 Office-2000 Manual
http://slidepdf.com/reader/full/ecdl-v4-mod4-office-2000-manual 52/74
43
To apply comma formatting (to indicate thousands)• Select the cell(s) containing the data that you wish to display with commas indicating thousands.
In the example shown, we have the number 1000000.
• Click on the Comma Style icon
and the display will change as illustrated.
4.5.1.2 Format cells to display a date style.
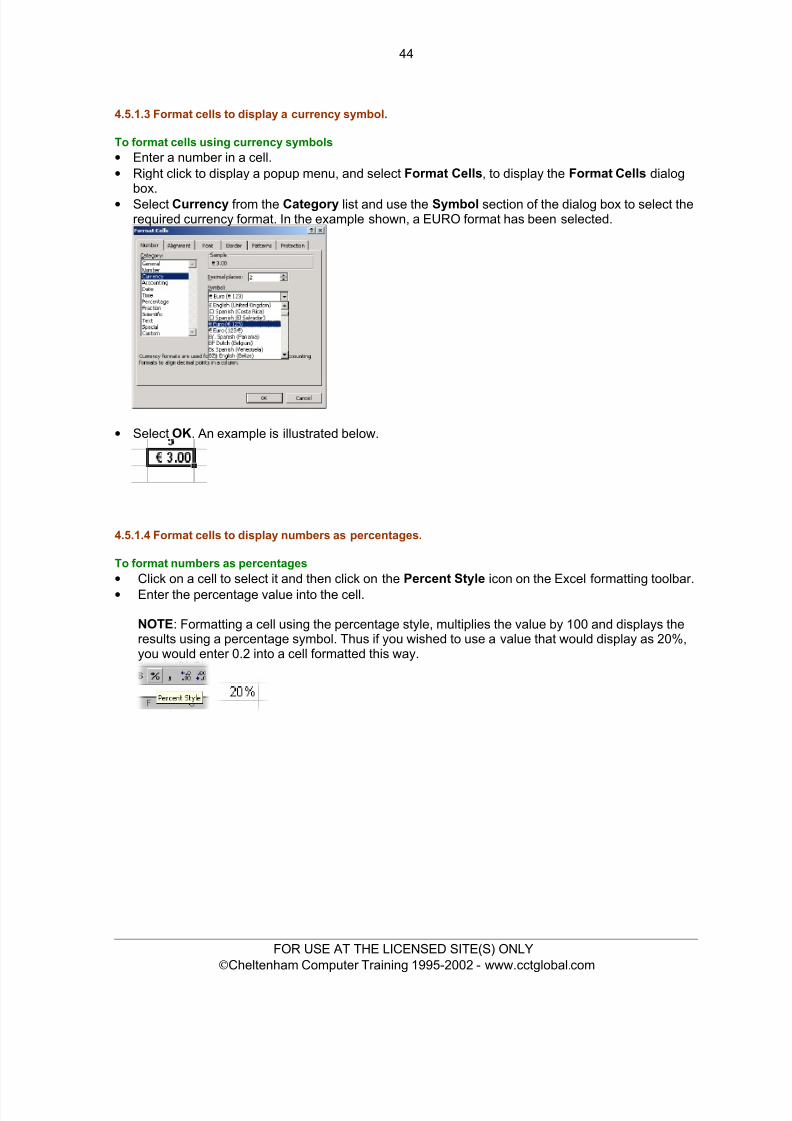
To format date styles
• Enter a date in a cell. Right click to display a popup menu, and select Format Cells , to display theFormat Cells dialog box. Select Date from the Category list and use the Type section of thedialog box to select the required date format.
FOR USE AT THE LICENSED SITE(S) ONLY© Cheltenham Computer Training 1995-2002 - www.cctglobal.com
8/8/2019 Ecdl v4 Mod4 Office-2000 Manual
http://slidepdf.com/reader/full/ecdl-v4-mod4-office-2000-manual 53/74
44
4.5.1.3 Format cells to display a currency symbol.
To format cells using currency symbols• Enter a number in a cell.• Right click to display a popup menu, and select Format Cells , to display the Format Cells dialog
box.• Select Currency from the Category list and use the Symbol section of the dialog box to select the
required currency format. In the example shown, a EURO format has been selected.
• Select OK . An example is illustrated below.
4.5.1.4 Format cells to display numbers as percentages.
To format numbers as percentages• Click on a cell to select it and then click on the Percent Style icon on the Excel formatting toolbar.• Enter the percentage value into the cell.
NOTE : Formatting a cell using the percentage style, multiplies the value by 100 and displays theresults using a percentage symbol. Thus if you wished to use a value that would display as 20%,you would enter 0.2 into a cell formatted this way.
FOR USE AT THE LICENSED SITE(S) ONLY© Cheltenham Computer Training 1995-2002 - www.cctglobal.com

8/8/2019 Ecdl v4 Mod4 Office-2000 Manual
http://slidepdf.com/reader/full/ecdl-v4-mod4-office-2000-manual 54/74
45
4.5.2 Contents
4.5.2.1 Change cell content appearance: font sizes, font types.
To change text size•
Select the cell or range that you wish to change the text size of.• Click on the down arrow to the right of the Font Size icon located on the Excel formatting toolbar.• Select the required font size.
To modify the font type used by text• Select the cell or range that you wish to apply text formatting to.• Click on the down arrow in the Font section of the Excel formatting toolbar. Select the required
font.
4.5.2.2 Apply formatting to cell contents such as: bold, italic, underline, double underline.
To format text as bold
• Select the cell or range that you wish to apply text formatting to.• Use the Bold icon located on the Excel formatting toolbar.
To format text as italic• Select the cell or range that you wish to apply text formatting to.• Use the Italic icon located on the Excel formatting toolbar.
To format text as underlined• Select the cell or range that you wish to apply text formatting to.• Use the Underline icon located on the Excel formatting toolbar.
FOR USE AT THE LICENSED SITE(S) ONLY© Cheltenham Computer Training 1995-2002 - www.cctglobal.com

8/8/2019 Ecdl v4 Mod4 Office-2000 Manual
http://slidepdf.com/reader/full/ecdl-v4-mod4-office-2000-manual 55/74
8/8/2019 Ecdl v4 Mod4 Office-2000 Manual
http://slidepdf.com/reader/full/ecdl-v4-mod4-office-2000-manual 56/74
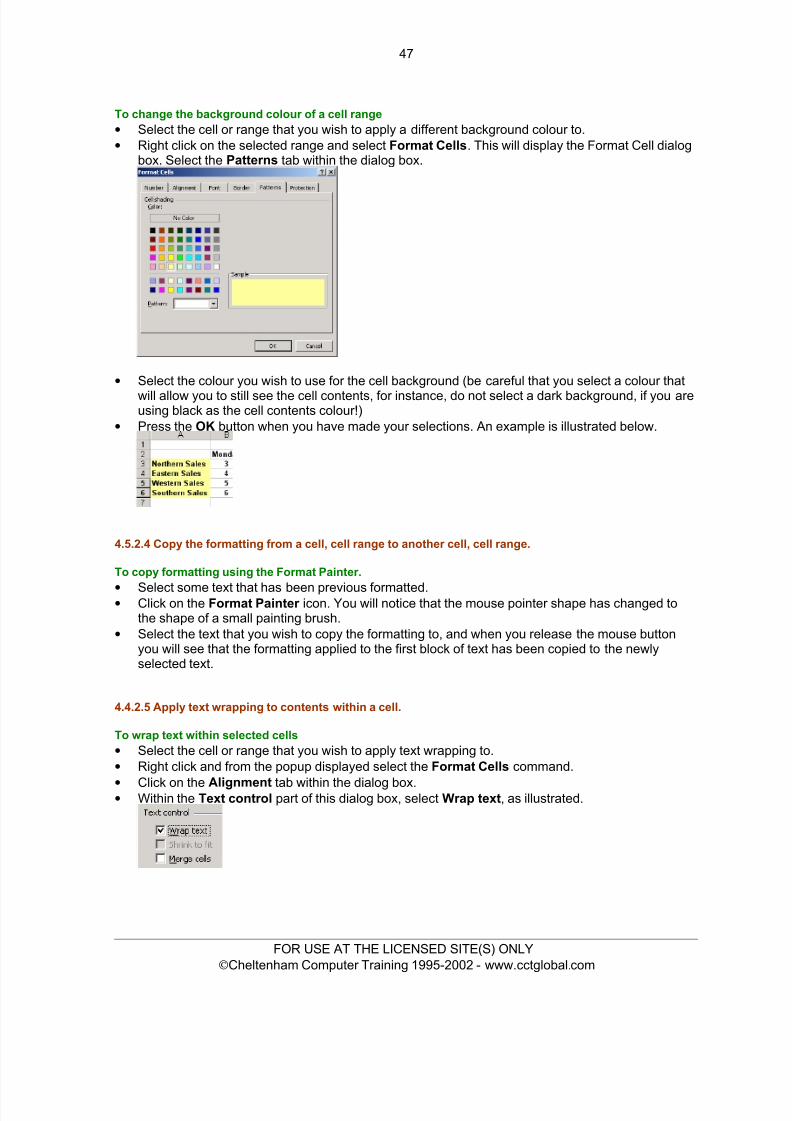
47
To change the background colour of a cell range• Select the cell or range that you wish to apply a different background colour to.• Right click on the selected range and select Format Cells . This will display the Format Cell dialog
box. Select the Patterns tab within the dialog box.
• Select the colour you wish to use for the cell background (be careful that you select a colour thatwill allow you to still see the cell contents, for instance, do not select a dark background, if you areusing black as the cell contents colour!)
• Press the OK button when you have made your selections. An example is illustrated below.
4.5.2.4 Copy the formatting from a cell, cell range to another cell, cell range.
To copy formatting using the Format Painter.
• Select some text that has been previous formatted.• Click on the Format Painter icon. You will notice that the mouse pointer shape has changed to
the shape of a small painting brush.• Select the text that you wish to copy the formatting to, and when you release the mouse button
you will see that the formatting applied to the first block of text has been copied to the newlyselected text.
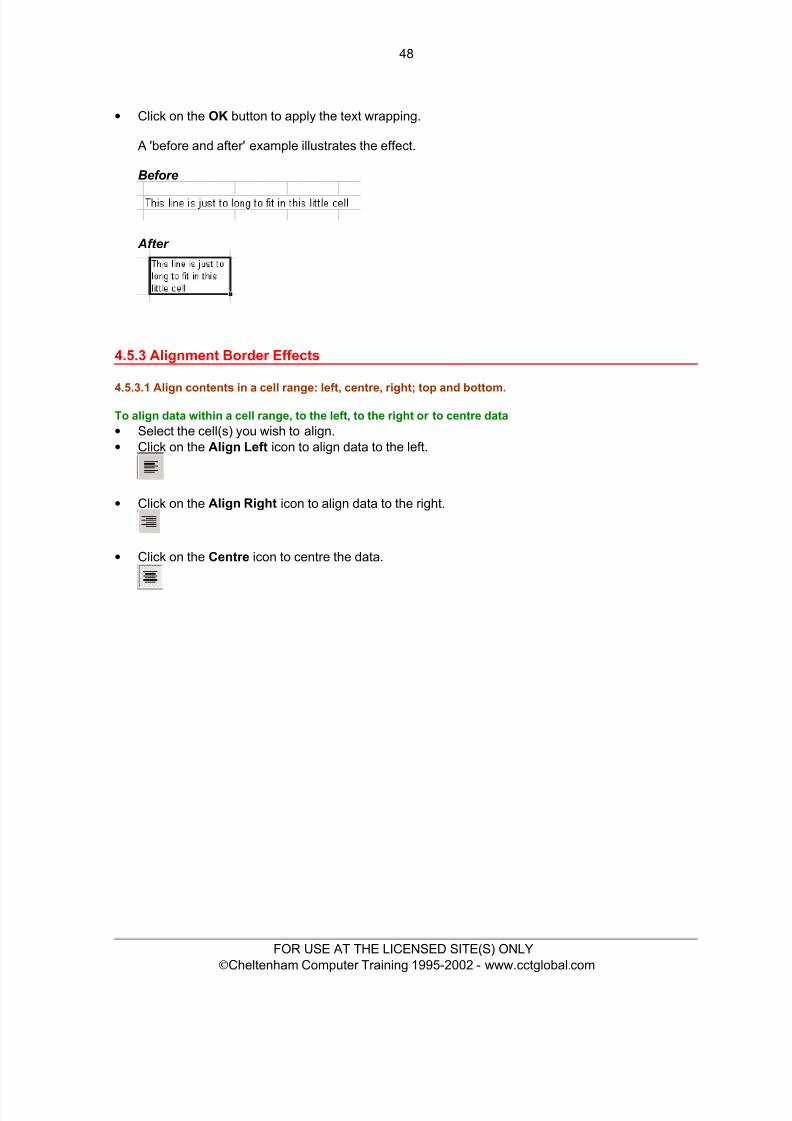
4.4.2.5 Apply text wrapping to contents within a cell.
To wrap text within selected cells• Select the cell or range that you wish to apply text wrapping to.• Right click and from the popup displayed select the Format Cells command.
• Click on the Alignment tab within the dialog box.• Within the Text control part of this dialog box, select Wrap text , as illustrated.
FOR USE AT THE LICENSED SITE(S) ONLY© Cheltenham Computer Training 1995-2002 - www.cctglobal.com
8/8/2019 Ecdl v4 Mod4 Office-2000 Manual
http://slidepdf.com/reader/full/ecdl-v4-mod4-office-2000-manual 57/74
48
• Click on the OK button to apply the text wrapping.
A 'before and after' example illustrates the effect.
Before
After
4.5.3 Alignment Border Effects
4.5.3.1 Align contents in a cell range: left, centre, right; top and bottom.To align data within a cell range, to the left, to the right or to centre data• Select the cell(s) you wish to align.• Click on the Align Left icon to align data to the left.
• Click on the Align Right icon to align data to the right.
• Click on the Centre icon to centre the data.
FOR USE AT THE LICENSED SITE(S) ONLY© Cheltenham Computer Training 1995-2002 - www.cctglobal.com

8/8/2019 Ecdl v4 Mod4 Office-2000 Manual
http://slidepdf.com/reader/full/ecdl-v4-mod4-office-2000-manual 58/74
49
To align data between the top and bottom of a cell• Select the cell(s) you wish to align. From the Format menu, select Cells to display the Format
Cells dialog box.• To view the Alignment options, click on the Alignment tab at the top of the dialog box.• Choose the Top , Centre , or Bottom option in the Vertical area to align the data in the cell.
• Click on OK.
4.5.3.2 Centre a title over a cell range.
To merge and centre over a range• Lets say you had the following data within a worksheet.
• Now lets say that you wanted the word WEEKDAY, to be centred within the range C3 to G3.• Enter the word WEEKDAY in cell C3 and press Return .• Select the range C3 to G3 .• Click on the Merge and Centre icon.
The result will be as illustrated
FOR USE AT THE LICENSED SITE(S) ONLY© Cheltenham Computer Training 1995-2002 - www.cctglobal.com

8/8/2019 Ecdl v4 Mod4 Office-2000 Manual
http://slidepdf.com/reader/full/ecdl-v4-mod4-office-2000-manual 59/74
50
4.5.3.3 Adjust cell content orientation.
To rotate text to any angle• First select the cell(s) that you wish to apply the rotation formatting to.• Right click to display the popup box, and from the list displayed, select Format Cells . This will
display the Format Cells dialog box. Select the Alignment tab.• From the Orientation section either enter the exact amount of rotation required into the Degrees
box, or drag the Text dial to give the desired level of rotation.• Select OK .
4.5.3.4 Add border effects to a cell, cell range.
To apply a border to a cell range (using the Border icon)• Select the cell(s) to which you want to add a border.• To view border options, click on the down arrow next to the Borders icon on the Formattingtoolbar.
• Select the option you require. Once you have added a border using the Borders icon, theborder you selected will appear on the Borders icon. You can add the same border simply byclicking on the icon after you have selected the cell(s) to which you wish to apply the border.
FOR USE AT THE LICENSED SITE(S) ONLY© Cheltenham Computer Training 1995-2002 - www.cctglobal.com

8/8/2019 Ecdl v4 Mod4 Office-2000 Manual
http://slidepdf.com/reader/full/ecdl-v4-mod4-office-2000-manual 60/74
51
To apply a border to a cell range (using the Format Cells/Border dialog box)• You could select a cell, or range of cells, and then click on the Format drop down menu, fromwhich you can select the Cells command. This will display the Format Cells dialog box.• Select the Border tab, as illustrated.
• You can use this dialog box to apply borders and also to vary the type of border applied.• First choose a preset format to apply a border style.• Then click on the Border icons within the dialog box.• Finally use the Style and Colour options to customize your borders. An example is illustrated
below.
• Click on the OK button to apply the border formatting and close the dialog box.
To remove a border from cells or ranges• Select the cell(s) that contain the border you wish to remove. If you have a border thatappears to be on the left side of a cell, but may actually be on the right side of the adjacent cell,select both of the cells.• To reveal the border options, click the arrow next to the Borders icon on the Formattingtoolbar.• Click on the first border option. This contains no border selection and all highlighted borderswill be removed.
FOR USE AT THE LICENSED SITE(S) ONLY© Cheltenham Computer Training 1995-2002 - www.cctglobal.com

8/8/2019 Ecdl v4 Mod4 Office-2000 Manual
http://slidepdf.com/reader/full/ecdl-v4-mod4-office-2000-manual 61/74
52
4.6 Charts / Graphs
4.6.1 Using Charts/Graphs
4.6.1.1 Create different types of charts/graphs from spreadsheet data: column chart, bar chart, line chart,pie chart.
To use the Chart Wizard to create a chart• Select the cells you want to include in a chart. If you want to highlight a non-contiguous range,
highlight the first range with the mouse, and hold down the Ctrl key and click on any other cells.• On the Standard toolbar, click on the Chart Wizard icon.
• Step 1 of the Chart Wizard dialog box is displayed.
• From within the Chart Type section of the dialog box, select the required chart type, such ascolumn chart, bar chart, line chart or pie chart. In this example we have selected the Column . Clickon the Next button. The next page of the Chart Wizard is displayed. You can make changes if
required.
FOR USE AT THE LICENSED SITE(S) ONLY© Cheltenham Computer Training 1995-2002 - www.cctglobal.com

8/8/2019 Ecdl v4 Mod4 Office-2000 Manual
http://slidepdf.com/reader/full/ecdl-v4-mod4-office-2000-manual 62/74
53
• Click on the Next button. The next page of the Chart Wizard allows you to add items such as charttitles, gridline etc.
• You can make changes as required, and then click on the Next button. The final page of the ChartWizard is displayed. You would normally click on the Finish button at this point to insert the chartas an object into your worksheet.
The chart is displayed, as illustrated.
FOR USE AT THE LICENSED SITE(S) ONLY© Cheltenham Computer Training 1995-2002 - www.cctglobal.com
8/8/2019 Ecdl v4 Mod4 Office-2000 Manual
http://slidepdf.com/reader/full/ecdl-v4-mod4-office-2000-manual 63/74
54
4.6.1.2 Add a title or label to a chart/graph. Remove a title or label from a chart/graph.
To add a title or label to a chart• Click on the chart that you have created. You will notice that when the chart is selected the drop
down menus change:
I.e. the Data drop down menu is replaced by a Chart drop down menu.
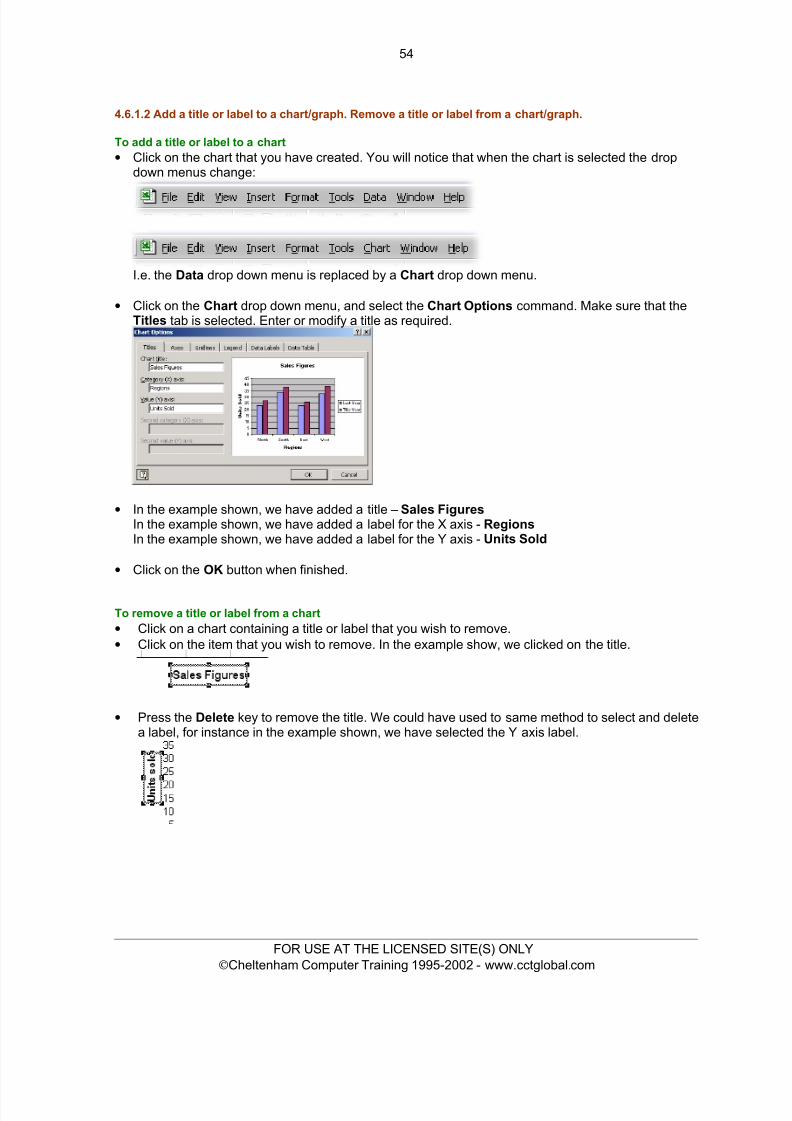
• Click on the Chart drop down menu, and select the Chart Options command. Make sure that theTitles tab is selected. Enter or modify a title as required.
• In the example shown, we have added a title – Sales FiguresIn the example shown, we have added a label for the X axis - RegionsIn the example shown, we have added a label for the Y axis - Units Sold
• Click on the OK button when finished.
To remove a title or label from a chart• Click on a chart containing a title or label that you wish to remove.• Click on the item that you wish to remove. In the example show, we clicked on the title.
• Press the Delete key to remove the title. We could have used to same method to select and deletea label, for instance in the example shown, we have selected the Y axis label.
FOR USE AT THE LICENSED SITE(S) ONLY© Cheltenham Computer Training 1995-2002 - www.cctglobal.com

8/8/2019 Ecdl v4 Mod4 Office-2000 Manual
http://slidepdf.com/reader/full/ecdl-v4-mod4-office-2000-manual 64/74
55
4.6.1.3 Change the background colour in a chart/graph.
To change the background colour of a chart• Click once on a chart to select it.• Double click over a portion of the background that you wish to change the colour of. This will
display the Format Chart Area dialog box. If necessary select the Patterns tab of this dialog box.
• Select the required background colour, and then click on the OK button.
4.6.1.4 Change the column, bar, line, pie slice colours in a chart/graph.
To change the colour of a column, bar, line or pie slice within a chart• Click on the chart to select it.• Click on the chart column, bar, line or pie slide to select it.
FOR USE AT THE LICENSED SITE(S) ONLY© Cheltenham Computer Training 1995-2002 - www.cctglobal.com
8/8/2019 Ecdl v4 Mod4 Office-2000 Manual
http://slidepdf.com/reader/full/ecdl-v4-mod4-office-2000-manual 65/74
56
• Double click over the selected item.• From the dialog box displayed, select the Patterns tab, and then select the required colour.
• Click on the OK button to apply your changes.
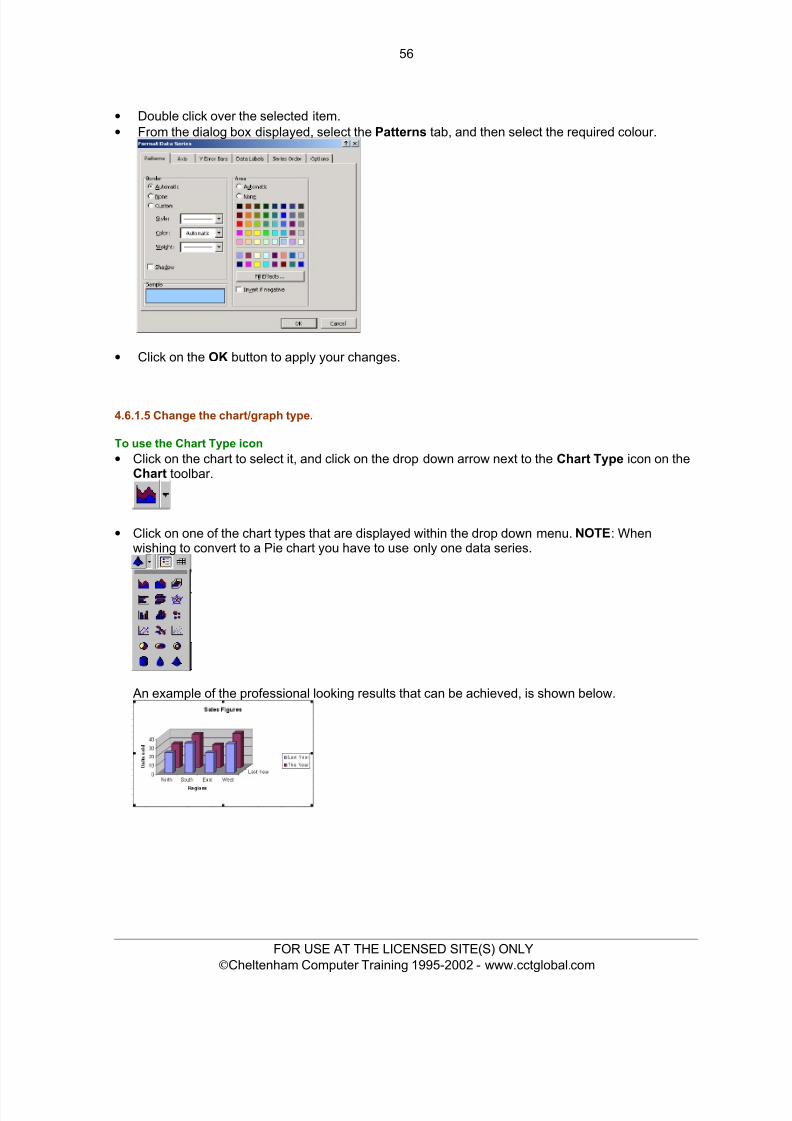
4.6.1.5 Change the chart/graph type.
To use the Chart Type icon• Click on the chart to select it, and click on the drop down arrow next to the Chart Type icon on the
Chart toolbar.
• Click on one of the chart types that are displayed within the drop down menu. NOTE : Whenwishing to convert to a Pie chart you have to use only one data series.
An example of the professional looking results that can be achieved, is shown below.
FOR USE AT THE LICENSED SITE(S) ONLY© Cheltenham Computer Training 1995-2002 - www.cctglobal.com

8/8/2019 Ecdl v4 Mod4 Office-2000 Manual
http://slidepdf.com/reader/full/ecdl-v4-mod4-office-2000-manual 66/74
57
4.6.1.6 Duplicate, move charts/graphs within a worksheet, between open spreadsheets.
To copy a chart within a worksheet• Click on the chart that you wish to copy, so that small rectangular black selection handles are
displayed around the border of the chart. This indicates that the chart is selected.
• Click on the Edit drop down menu and select the Copy command.• Click elsewhere within the worksheet, click on the Edit drop down menu and select the Paste
command. You may have to move the chart to the required position.
To copy a chart to a different worksheet within a workbook•
Click on the chart that you wish to copy.• Click on the Edit drop down menu and select the Copy command.• Click on the worksheet tab of the worksheet that you wish to copy the chard to.• Click within the selected worksheet and then click on the Edit drop down menu and select the
Paste command. You may have to move the chart to the required position.
To copy a chart to a worksheet within a different workbook• Click on the chart that you wish to copy.• Click on the Edit drop down menu and select the Copy command.• Switch to, or open a second workbook that you wish to copy the chart to.• If necessary select the required worksheet within this second workbook.• Click on the Edit drop down menu and select the Paste command. You may have to move the
chart to the required position.
To move a chart within a worksheet• Click on the chart that you wish to move.• Click on the Edit drop down menu and select the Cut command.• Click elsewhere within the worksheet, click on the Edit drop down menu and select the Paste
command. You may have to move the chart to the required position.
To move a chart to a different worksheet within a workbook• Click on the chart that you wish to move.• Click on the Edit drop down menu and select the Cut command.
• Click on the worksheet tab of the workbook that you wish to move the chart to.• Click within the selected worksheet and then click on the Edit drop down menu and select thePaste command. You may have to move the chart to the required position.
FOR USE AT THE LICENSED SITE(S) ONLY© Cheltenham Computer Training 1995-2002 - www.cctglobal.com

8/8/2019 Ecdl v4 Mod4 Office-2000 Manual
http://slidepdf.com/reader/full/ecdl-v4-mod4-office-2000-manual 67/74
58
To move a chart to a worksheet within a different workbook• Click on the chart that you wish to move.• Click on the Edit drop down menu and select the Cut command.• Switch to, or open a second workbook that you wish to move the chart to.• If necessary select the required worksheet within this second workbook.
• Click on the Edit drop down menu and select the Paste command. You may have to move thechart to the required position.
4.6.1.7 Resize, delete charts/graphs.
To re-size a chart• Move the mouse to one of the corner selection handles (the small square black boxes) and drag
and drop. The chart is re-sized in the same way that any graphic is re-sized within the Microsoftsuite of applications.
To delete a chart• Click on the chart you wish to delete to select it and press Delete . The chart will be deleted.
4.7 Prepare Outputs
4.7.1 Worksheet Setup
4.7.1.1 Change worksheet margins: top, bottom, left, right
To modify margin values• Click on the File drop down menu and select the Page Setup command. This will display the
Page Setup dialog box. Select the Margins tab and modify your margins as required.
FOR USE AT THE LICENSED SITE(S) ONLY© Cheltenham Computer Training 1995-2002 - www.cctglobal.com

8/8/2019 Ecdl v4 Mod4 Office-2000 Manual
http://slidepdf.com/reader/full/ecdl-v4-mod4-office-2000-manual 68/74
59
4.7.1.2 Change worksheet orientation: portrait, landscape. Change paper size.
To set orientation and page size• Click on the File drop down menu and select the Page Setup command. This will display the
Page Setup dialog box. Select the Page tab. Select Portrait or Landscape orientation, as well asthe desired paper size.
4.7.1.3 Adjust page setup to fit worksheet contents on one page, on a specific number of pages.
To force a worksheet to print on a single page• Click on the File drop down menu and select the Page Setup command. This will display the
Page Setup dialog box. Select the Page tab and modify the Fit to section of the dialog box toprint on a single page.
FOR USE AT THE LICENSED SITE(S) ONLY© Cheltenham Computer Training 1995-2002 - www.cctglobal.com

8/8/2019 Ecdl v4 Mod4 Office-2000 Manual
http://slidepdf.com/reader/full/ecdl-v4-mod4-office-2000-manual 69/74

8/8/2019 Ecdl v4 Mod4 Office-2000 Manual
http://slidepdf.com/reader/full/ecdl-v4-mod4-office-2000-manual 70/74

8/8/2019 Ecdl v4 Mod4 Office-2000 Manual
http://slidepdf.com/reader/full/ecdl-v4-mod4-office-2000-manual 71/74
62
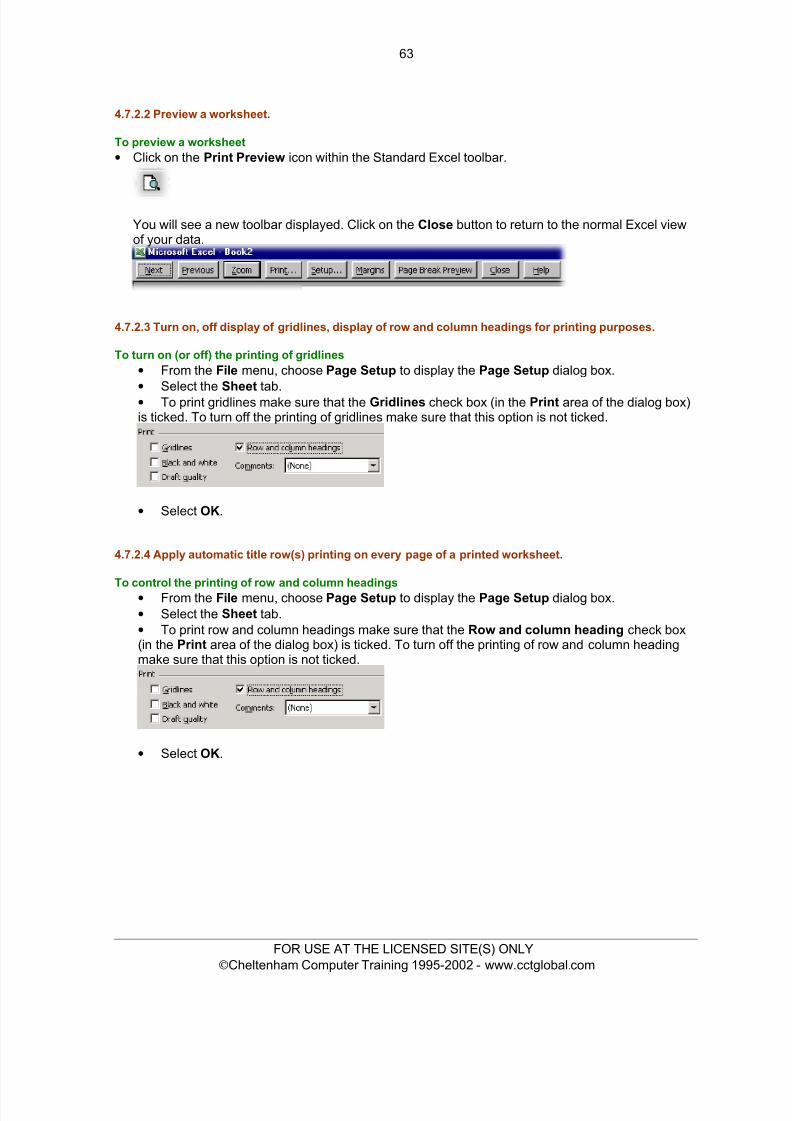
• Click within the section of the header or footer that you wish the field number to be displayed, i.e.left, centre or right.
• Click on the required icon.
Font : Allows you to modify the font type and font attributes.
Page Number : Inserts automatic page numbering
Total Pages : Inserts the total number of pages into the footer/header. By using this inconjunction with Page Number you can have a header that would, for instance, display in theformat Page 7 of 20 .
Date : Inserts the current date.
Time : Inserts the current time.
File Name : Insert the name of the current workbook (i.e. file name).
Sheet Name : Inserts the name of the current worksheet.
• When you have made your selections, click on the OK button, and then click on the OK button of the Page Setup dialog box, so that all the dialog boxes are now closed.
4.7.2 Preparation
4.7.2.1 Understand the importance of checking spreadsheet calculations and text before distribution.
Always check your work prior to sending it to someone else!• Do not assume that Excel knows what you mean. If you enter the wrong data, then Excel will use
this data and produce incorrect information. You must ALWAYS check your spelling and do arough check that the calculations performed by Excel are as you intended!
FOR USE AT THE LICENSED SITE(S) ONLY© Cheltenham Computer Training 1995-2002 - www.cctglobal.com
8/8/2019 Ecdl v4 Mod4 Office-2000 Manual
http://slidepdf.com/reader/full/ecdl-v4-mod4-office-2000-manual 72/74
8/8/2019 Ecdl v4 Mod4 Office-2000 Manual
http://slidepdf.com/reader/full/ecdl-v4-mod4-office-2000-manual 73/74
64
4.7.3 Printing
4.7.3.1 Print a cell range from a worksheet, an entire worksheet, number of copies of a worksheet, theentire spreadsheet, a selected chart.
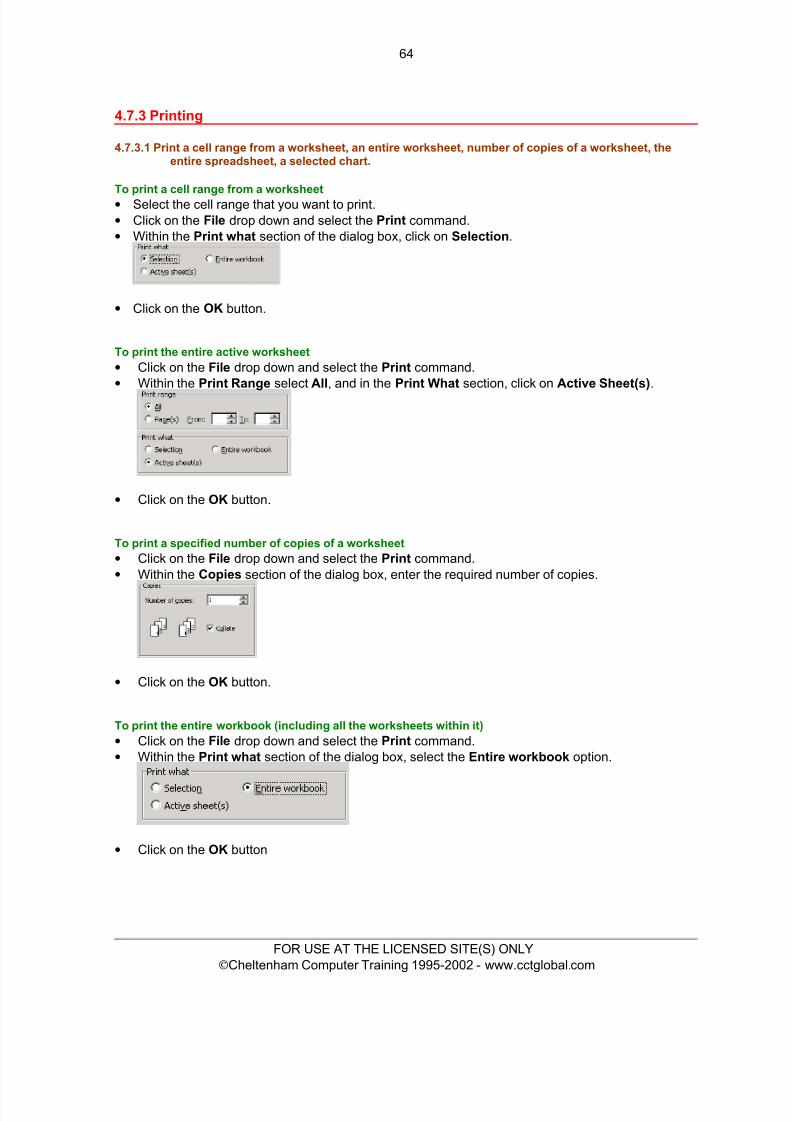
To print a cell range from a worksheet• Select the cell range that you want to print.• Click on the File drop down and select the Print command.• Within the Print what section of the dialog box, click on Selection .
• Click on the OK button.
To print the entire active worksheet• Click on the File drop down and select the Print command.• Within the Print Range select All, and in the Print What section, click on Active Sheet(s) .
• Click on the OK button.
To print a specified number of copies of a worksheet• Click on the File drop down and select the Print command.• Within the Copies section of the dialog box, enter the required number of copies.
• Click on the OK button.
To print the entire workbook (including all the worksheets within it)• Click on the File drop down and select the Print command.• Within the Print what section of the dialog box, select the Entire workbook option.
• Click on the OK button
FOR USE AT THE LICENSED SITE(S) ONLY© Cheltenham Computer Training 1995-2002 - www.cctglobal.com
8/8/2019 Ecdl v4 Mod4 Office-2000 Manual
http://slidepdf.com/reader/full/ecdl-v4-mod4-office-2000-manual 74/74
65
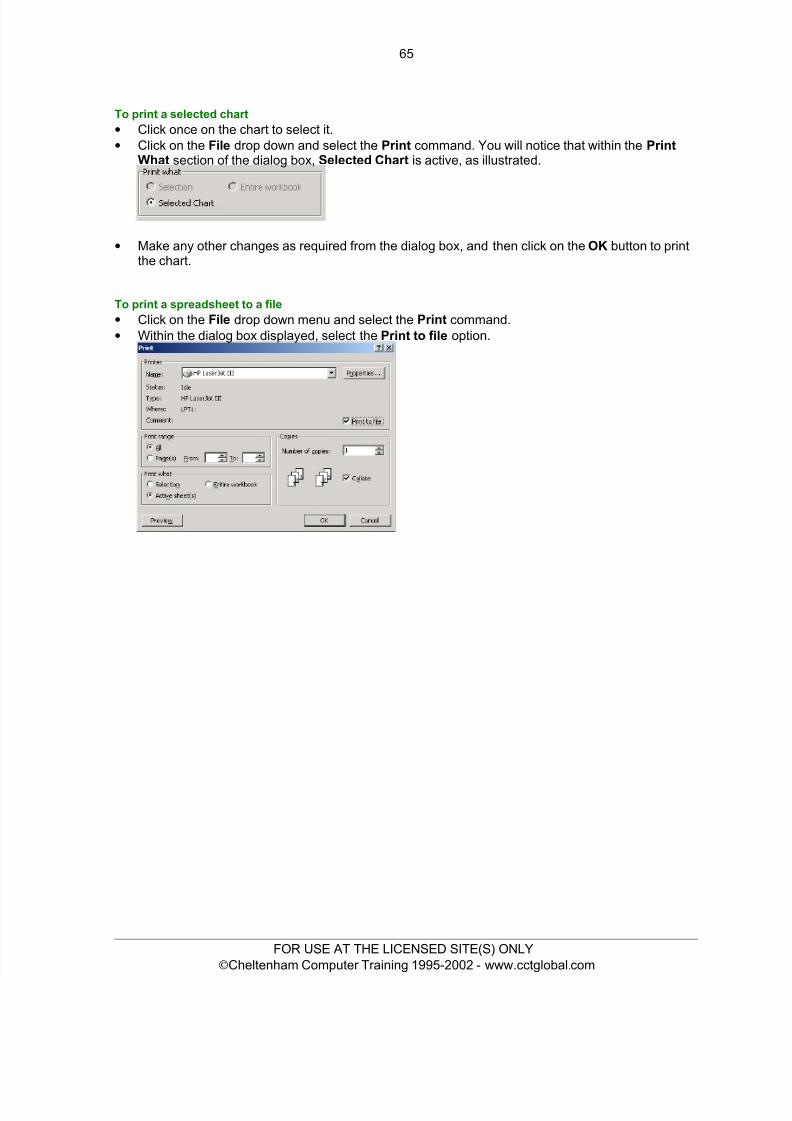
To print a selected chart• Click once on the chart to select it.• Click on the File drop down and select the Print command. You will notice that within the Print
What section of the dialog box, Selected Chart is active, as illustrated.
• Make any other changes as required from the dialog box, and then click on the OK button to printthe chart.
To print a spreadsheet to a file• Click on the File drop down menu and select the Print command.• Within the dialog box displayed, select the Print to file option.