education k-12 resources | … to help them plan their models. session 12: planning for models and...
TRANSCRIPT
Intel® Education K-12 Resources | www.intel.com/teachers
Design and Discovery
1 Copyright © Intel Corporation. All rights reserved. Intel, the Intel logo and the Intel Education Initiative are trademarks of Intel Corporation or its subsidiaries in the U.S. and other countries. *Other names and brands may be claimed as the property of others.
Curriculum Experiencing Engineering Through Design
These sessions prepare students for making a model of their design idea. In Session 10:
Bicycle Breakdown: Systems, Components, and Parts, the bicycle is used as an example for
helping students think about the systems in a product and how to identify the systems,
components, and parts of their own project ideas. In Session 11: Design Requirements and
Drawings, students develop design requirements for their projects and draw their ideas in
order to help them plan their models. Session 12: Planning for Models and Tests, further
prepares students for building their models as they think through materials and consider the
principles of collapsibility. Session 13: Making It! Models, Trials, and Tests is a model-making
working session.
Curriculum
Making, Modeling,
and Materializing
Overview:
A) Session 10: Bicycle Breakdown: Systems, Components, and Parts
B) Session 11: Design Requirements and Drawings
C) Session 12: Planning for Models and Tests D) Session 13: Making It! Models, Trials, and Tests

Intel® Education K-12 Resources | www.intel.com/teachers
Design and Discovery
2 Copyright © Intel Corporation. All rights reserved. Intel, the Intel logo and the Intel Education Initiative are trademarks of Intel Corporation or its subsidiaries in the U.S. and other countries. *Other names and brands may be claimed as the property of others.
Session 10
Bicycle Breakdown: Systems, Components and Parts Making, Modeling, and Materializing
This session uses the
mechanisms of a bicycle to help
students think about the
systems in a product that must
be designed. It offers student
engineers a strategy for tackling
a complex solution that they
might have in mind. It provides practice with breaking big ideas
into manageable, designable parts by identifying systems and/or
components that need design and engineering. This session
requires either a field trip to a bike shop or assistance from adult
bicycle enthusiasts among the leaders, parents, mentors, or other volunteers. If a field trip
is not possible, then you will need to have students bring in bicycles for demonstration and
study.
In the first activity, 10A: Systems and Synergy, students learn the difference between
systems, components, and parts as they identify them on a bicycle. The second activity,
10B: Sum of the Parts, involves a field trip to a bike store or a demonstration on a bicycle's
systems, components, and parts.
Supplies
8-10 bicycles and tricycles of different kinds, shapes, and sizes (brought by the
students and mentors)
Additional specialty bicycles (recumbent, folding or collapsible, track and racing
bikes, BMX freestyle, fat tire coaster bikes)
Bike repair stands (to raise and support bikes off the floor for study)
Bicycle parts, 1 or 2 examples of each system or a few parts in each system:
1. Drive systems: pedals, cranksets (crank and chainwheel), chains, axles,
wheels
2. Steering system: handlebars, front wheel, headset bearings
3. Brake systems: brake levers, cables, and calipers (attached as a system)
In This Session:
A) Systems and Synergy (50 minutes)
- Student Handout
- Student Reading
B) Sum of the Parts (100 Minutes)
- Student Handout

Intel® Education K-12 Resources | www.intel.com/teachers
Design and Discovery
3 Copyright © Intel Corporation. All rights reserved. Intel, the Intel logo and the Intel Education Initiative are trademarks of Intel Corporation or its subsidiaries in the U.S. and other countries. *Other names and brands may be claimed as the property of others.
Session 10, Bicycle Breakdown: Systems, Components, and Parts (continued)
4. Structural system parts:
Frames: without any components attached—any size, style
Wheels: different sizes and designs (some missing spokes or out of
true is fine)
Handlebars: downswept and straight
Seats (or saddles): different shapes and designs
Markers (highlighters) of different colors
Old rags or paper towels for wiping grease and dirt off hands and bikes
Optional: Erector* set (toy construction set)

Intel® Education K-12 Resources | www.intel.com/teachers
Design and Discovery
4 Copyright © Intel Corporation. All rights reserved. Intel, the Intel logo and the Intel Education Initiative are trademarks of Intel Corporation or its subsidiaries in the U.S. and other countries. *Other names and brands may be claimed as the property of others.
Bicycle Breakdown: Systems Components and Parts Key Concepts: Session 10
Students begin planning the development of their design solutions by first looking at how
designed objects can be broken down into systems, components, and parts. In Session
10, students look at a familiar object—the bicycle—in order to understand how this process
happens. Students get hands-on experience with bicycle systems either by visiting a bike
shop or by bringing experts in to demonstrate the systems.
Key Concepts
Designed things can be deceiving. At first glance, they can appear functional and seem so
simple to use. But being simple to use does not necessarily mean something is easy to
engineer. An important skill is the ability to analyze, to break a design solution into the
smaller systems, subsystems, components, and parts that work together to make a
functioning product. A valuable design step is having students look at devices as systems
and start asking and answering questions—What are the subsystems that make up the my
design? What kinds of components and parts will I need to design to build the system as a
whole?
Systems are important to engineering and design. They make the design and production
processes much easier. Imagine if you had to design a Boeing 777 airplane, a huge and
complex task. However, the task becomes more manageable if the Boeing 777 system is
divided into subsystems and then further into components and parts. One team might be
assigned to design the wing system, another team of engineers designs the landing gear
system, another team designs the fuselage system, and so on.
A mechanical system is made up of subsystems, components, and parts that connect to
perform a function. Help your students understand these terms:
System: A group of related subsystems or components that form a whole
functioning device.
Subsystem: A system of components and parts that is part of a larger system.
Component: A group of parts that work together that perform a specific function in
a system or subsystem. Part: The smallest piece of a design.
In the case of mechanical systems, the boundaries between a system, subsystem,
component, and part are relative and are determined by the complexity of the starting
system. Think about using the brakes on a bike—the braking subsystem of the bicycle
system. There are several components (each with parts) that make up the brake
subsystem. On most bikes today, you stop by grasping brake levers. The lever is a
component that has parts to attach to the frame and other parts that connect to cables that
move as you pull. As cables are pulled, the brake arm component has parts that squeeze

Intel® Education K-12 Resources | www.intel.com/teachers
Design and Discovery
5 Copyright © Intel Corporation. All rights reserved. Intel, the Intel logo and the Intel Education Initiative are trademarks of Intel Corporation or its subsidiaries in the U.S. and other countries. *Other names and brands may be claimed as the property of others.
together on brake shoe parts that grip on the wheel and slow it down.
In the case of a simpler device, a flip-top toothpaste cap, the system could be the
toothpaste dispenser. A subsystem is the cap. There is no real separation between the final
part or component, the hinged cap.
Key Concepts: Session 10 (continued)
More About Systems
The American Association of the Advancement of Science states the following science
literacy benchmarks in its Project 2061
(www.project2061.org/tools/benchol/ch11/ch11.htm*): "By the end of the 8th grade,
eighth grade, students should know that
"A system can include processes as well as things.
"Thinking about things as systems means looking for how every part relates to
others.
"Any system is usually connected to other systems, both internally and externally.
Thus a system may be thought of as containing subsystems and as being a
subsystem of a larger system."
Exploratorium Science of Cycling, www.exploratorium.edu/cycling/index.html*
At this site, explore the wheel, drivers and gears, frames and materials, braking and
steering, aerodynamics, and human power.

Intel® Education K-12 Resources | www.intel.com/teachers
Design and Discovery
6 Copyright © Intel Corporation. All rights reserved. Intel, the Intel logo and the Intel Education Initiative are trademarks of Intel Corporation or its subsidiaries in the U.S. and other countries. *Other names and brands may be claimed as the property of others.
Session 10, Activity A
Systems and Synergy
Goal
Learn about analyzing a complex product for its designed systems and components.
Outcome
Students understand the difference between systems, components, parts, and connections
that make up designed products.
Description
Following a warm-up activity about what the students already know about bicycles, students
discuss a short reading about bicycles and compare the systems, components, and parts of
a bicycle to other "wholes."
Supplies
Markers (highlighters) of different colors
Preparation
1. In advance, send home information or announce that students should bring or ride
bicycles to this session—one bike for every two to four students will work. Let them
know that you are interested in a variety of bikes: all sizes, types, state of repair,
etc. Ask for or send home information requesting help to locate bike enthusiasts to
help out with this session. Ask for any parts on the materials list.
2. Get familiar with bicycles, the history of their development, and how they work:
The Exploratorium: www.exploratorium.edu/cycling/index.html*
HowStuffWorks: www.howstuffworks.com/bicycle.htm* The Pedaling History Museum: www.pedalinghistory.com*
Procedures
Debrief Home Improvement
1. Check in with student's progress on the Home Improvement for Session 9, Project
Analysis.
2. Discuss how students will test their projects. Have them share their ideas with the
group.
Bicycle Brainstorm
1. Warm up with a 15-minute discussion to collect what the group knows about bicycles
in two areas. Write questions on flip chart paper or the board and add responses:
Intel® Education K-12 Resources | www.intel.com/teachers
Design and Discovery
7 Copyright © Intel Corporation. All rights reserved. Intel, the Intel logo and the Intel Education Initiative are trademarks of Intel Corporation or its subsidiaries in the U.S. and other countries. *Other names and brands may be claimed as the property of others.
10A: Systems and Synergy (continued)
What do we know about what bicycles do?
What do we know about bicycle parts?
What do we know about what makes bicycles work?
2. Conduct this as a brainstorm—anything that anyone knows is fair game. The goal is
to get students thinking about bicycles. Save the responses for the wrap up to the
next activity, 10B: Sum Of the Parts.
Systems, Components, and Parts
1. Introduce the purpose of the activity: To analyze a designed product and separate it
into systems and components, and practice with a strategy for breaking complex
solutions into manageable, designable parts by identifying systems and/or
components that need design and engineering.
2. Have students read 10A Reading: What's a System? Take turns reading aloud.
Discuss and share understanding about the difference between systems,
components, and parts in other contexts:
Analyze systems in another means of transportation such as a car or boat.
Analyze systems in a different context: For example, a house and the
systems it has, such as plumbing or heating. Try analyzing a non-mechanical
context such the body and its systems (skeletal, circulatory, and digestive
systems).
Bicycle Systems, Components, and Parts
1. Using the chart on the handout and any bicycle systems, components, and parts that
you have, explain the chart.
2. Once they have an understanding for systems, components, and parts, students
should color code the systems of the bicycle on their handout.
Wrap Up
Call students' attention to the definition of synergy at the top of the reading. Ask them:
What does this mean in relation to a bicycle? In relation to a design team?
Follow With
The activity 10B: Sum Of the Parts gives students a hands-on exploration and study of four
bicycle systems.

Intel® Education K-12 Resources | www.intel.com/teachers
Design and Discovery
8 Copyright © Intel Corporation. All rights reserved. Intel, the Intel logo and the Intel Education Initiative are trademarks of Intel Corporation or its subsidiaries in the U.S. and other countries. *Other names and brands may be claimed as the property of others.
Systems and Synergy Handout: Session 10, Activity A
Sample Title
The bicycle can be organized into four major systems (see table below). Sometimes a
bigger system is made up of smaller systems, or subsystems. Systems can also share the
same components. For example, every system listed below makes use of the wheels.
A bicycle has four major systems:
Major System Purpose Example Components
1. Drive System Power you along efficiently under your own steam
Pedals, chain, gears, wheels, transmission subsystem
a. Transmission Subsystem Shift gears and allow you to adjust for changes in terrain
Gear shifter, cables, derailleur, derailleur gears, hub gears
2. Braking System Make the bicycle stop reliably at a moment's notice
Wheels, caliper brake subsystem, or coaster brake subsystem
a. Caliper Brake Subsystem Apply pressure to rim of tire Brake lever, cables, caliper arms, brake pads
3. Steering System Turn the bicycle Handlebars, stem, wheels, frame system
4. Structural System Support and connect you and the other
systems together during operation
Frame, handlebars, wheels,
suspension subsystem
a. Suspension Subsystem Allow wheels to move up and down to absorb bumps in a road
Shock absorber with spring and damper parts
Using the diagram below, highlight the different systems. Each system should be one
color—include a color key.

Intel® Education K-12 Resources | www.intel.com/teachers
Design and Discovery
9 Copyright © Intel Corporation. All rights reserved. Intel, the Intel logo and the Intel Education Initiative are trademarks of Intel Corporation or its subsidiaries in the U.S. and other countries. *Other names and brands may be claimed as the property of others.
What’s a System? Reading: Session 10, Activity A
System: A group of related subsystems or components that form a whole functioning
device.
Synergy: The combined power of a group of things when they are working together which
is greater than the total power achieved by each working separately.
Important problems often have very simple solutions. But what is simple? A solution may
be very elegant and seem obvious until you start to examine how to make it. Designed
things can be deceiving. At first glance, they are so functional and seem so simple to use.
But being simple to use does not necessarily mean it is easy to engineer. A very important
skill is the ability to analyze, to break down your design solution into the smaller systems
and components that work together to make a functioning product. It will help you to think
about systems within your product as you design and create a prototype.
Systems are very important to engineering and design. They make the design process
much easier. Imagine if you had to design a Boeing 777 airplane, a huge and complex
task. However, the task becomes more manageable if you were on a team to design the
wing system, another team of engineers designs the landing gear system, another team
designs the fuselage system, etc.
Are Bicycles Simple?
Bicycles are everywhere; they are so familiar you almost take them for granted, right?
Most of us have ridden bicycles or tricycles. It's pretty easy to think about different things
you expect a bicycle to do. Take a minute to analyze how you use a bicycle: You sit on it
comfortably, make it go, you make it stop, you make it go fast on flat places, and you
make it go up steep hills. In many ways bikes seem so simple. Yet each of these things
that you expect a bicycle to do requires a different system. Each system has essential
components, and each component may be made of several parts.
What Makes a System?
A mechanical system is made up of components and parts that connect to perform a
function. Think about using the brakes on a bike. There are several components (each with
parts) that make up the brake system. On most bikes today, you stop by grasping brake
levers that have parts to attach the levers to the frame and other parts that connect them
to cables that move as you pull. As cables are pulled, brake arms squeeze together on
brake shoes that grip on the wheel and slow it down.

Intel® Education K-12 Resources | www.intel.com/teachers
Design and Discovery
10 Copyright © Intel Corporation. All rights reserved. Intel, the Intel logo and the Intel Education Initiative are trademarks of Intel Corporation or its subsidiaries in the U.S. and other countries. *Other names and brands may be claimed as the property of others.
Session 10, Activity B
Sum of the Parts
Goal
Learn about the mechanisms of four bicycle systems: Study the components, the parts, and
connections for each.
Outcome
Students identify and distinguish systems (drive, braking, steering, and structural) and
components (frame, wheels, and seats) in a bike.
Description
During a field trip to a bike shop or on-site with students' own bikes and loaned parts,
students study four systems on a bicycle: power, braking, steering, and structural. They
isolate and observe the operation of each system. They also study examples of individual
components and parts removed from the bicycle in a rotation through "study stations"
organized around the four systems.
Supplies
8-10 bicycles and tricycles of different kinds, shapes, and sizes (brought by the
students and mentors)
Additional specialty bicycles (recumbent, folding or collapsible, track and racing
bikes, BMX freestyle, fat tire coaster bikes)
Bike repair stands (to raise and support bikes off the floor for study)
Bicycle parts, 1 or 2 examples of each system or a few parts in each system:
1. Drive systems: pedals, cranksets (crank and chainwheel), chains, axles,
wheels
2. Steering system: handlebars, front wheel, headset bearings
3. Brake systems: brake levers, cables, and calipers (attached as a system)
4. Structural system parts:
Frames: without any components attached—any size, style
Wheels: different sizes and designs (some missing spokes or out of true
is fine)
Handlebars: downswept and straight
Seats (or saddles): different shapes and designs
Old rags or paper towels for wiping grease and dirt off hands and bikes
Optional: Erector* set (toy construction set)

Intel® Education K-12 Resources | www.intel.com/teachers
Design and Discovery
11 Copyright © Intel Corporation. All rights reserved. Intel, the Intel logo and the Intel Education Initiative are trademarks of Intel Corporation or its subsidiaries in the U.S. and other countries. *Other names and brands may be claimed as the property of others.
10B: Sum of the Parts (continued)
Preparation
1. Set up an outside location where the bike study will take place.
2. Gather all bike materials. Arrange for four facilitators to lead bicycle systems "study
stations" among the bicycle enthusiasts who are willing to help (parents, mentors,
leaders).
3. Send guest facilitators copies of the session materials. Have them be prepared to
facilitate a short hands-on demonstration/experience of the components and parts
for the system at their "study station" of a system: drive, braking, steering, and
structural systems.
4. Organize placement of bikes and parts for hands-on study of systems, components,
and parts. Set up workspace for:
Bike systems study: teams of two to three students to study four systems on
one bike
Components and parts study: "study stations" of components and parts
grouped by each of the four systems
Specialty bicycle study: recumbent, racing or track, folding, coaster, BMX,
and unicycle
Optional: Bike Shop Field Trip
As an option to having students bring bicycles, it may be easier to arrange a field trip to a
bicycle shop where students can study bike systems, components, and parts as outlined in
the procedures. If this is possible, be sure to familiarize the bike shop manager with the
purpose of the field trip. Meet together and plan the experience ahead of time together.
Procedures
Examining Bicycles
1. Have students read the handout and get organized for studying the bicycles.
2. Divide students into teams to examine and observe the mechanisms (components,
parts, and connections) for four systems on the available bicycles. If bicycle stands
are not available, demonstrate how to turn the bike over and with one person
supporting it so that the wheels turn freely during the observations. Or, with smaller
bikes demonstrate how to be a human bike stand: Hold the rear tire off the ground
by straddling the rear tire and raising the bike with the seat. Hold on firmly.
3. Rotate teams to each study station to examine and operate components and parts.
Have students jot down notes about how parts connect and work together in each
system. Their notes may be sketches.

Intel® Education K-12 Resources | www.intel.com/teachers
Design and Discovery
12 Copyright © Intel Corporation. All rights reserved. Intel, the Intel logo and the Intel Education Initiative are trademarks of Intel Corporation or its subsidiaries in the U.S. and other countries. *Other names and brands may be claimed as the property of others.
10B: Sum of the Parts (continued)
4. In a whole group, have a rider demonstrate each specialty bike. Have students
identify each of the systems.
Optional: Erector Set Vehicles
In the classroom, students can use Erector sets for hands-on construction and application
of systems. Ask students to build model vehicles (cars, scooter, bicycles, and so forth) to
demonstrate their understanding of systems
Wrap Up
Return to the classroom and revisit the three lists that were generated during the 10A:
Systems and Synergy activity. Ask, what do we know about what bicycles do? What do we
know about bicycle parts? What do we know about what makes bicycles work?
Ask students to share or write about new understanding of bicycles as a result of studying
its systems, components, and parts.
Discuss what do you know about bicycles now?
Take a bike ride!
Follow With
In Session 11, Design Requirements and Drawings, students develop design requirements
and technical drawings for their design and engineering project.

Intel® Education K-12 Resources | www.intel.com/teachers
Design and Discovery
13 Copyright © Intel Corporation. All rights reserved. Intel, the Intel logo and the Intel Education Initiative are trademarks of Intel Corporation or its subsidiaries in the U.S. and other countries. *Other names and brands may be claimed as the property of others.
Sum of the Parts Handout: Session 10, Activity B
Chances are you have had some experience with bicycle mechanisms. Perhaps you've had
to fix or adjust something on a bicycle or have watched while someone else did quick
maintenance during a ride. Have you ever really looked at a bike and studied how it works?
A bicycle has a set of mechanical systems that are familiar and easy to observe.
Directions
Study four systems on your bicycle. You'll also be able to observe and operate the
components and parts of each system that are removed from a bike. This will give you
another way to observe how things connect and work together.
Systems Study
1. Drive system: Support the bike with the rear wheel off the ground (turn the bike on
its side, use a stand, or have a partner hold the bike up.) Slowly power the bike
using the pedals and study how the energy you add transfers through the drive
system to the wheels. Switch partners.
2. Braking system: Study how the brakes work as you press and release the brake
lever. Trace the operation of the brakes through components and their parts. Notice
the connections.
3. Steering system: Study how you steer a bike. Trace the steering through the
handlebar to the wheels. Notice the connections.
4. Structural system: Study the frame and how all the systems connect to it.
Components and Parts Study
Observe and take notes about how parts connect and work together in each of the
systems. Which systems seem simple and require few parts? Which systems seem complex
and require more parts and complicated connections? Which systems seem easy to break
down? Which systems seem easy to repair? Your notes may consist of words or sketches.
Drive system:
Braking system:
Steering system:
Structural system:

Intel® Education K-12 Resources | www.intel.com/teachers
Design and Discovery
14 Copyright © Intel Corporation. All rights reserved. Intel, the Intel logo and the Intel Education Initiative are trademarks of Intel Corporation or its subsidiaries in the U.S. and other countries. *Other names and brands may be claimed as the property of others.
10B: Sum of the Parts (continued)
Specialty bikes: Identify and study the four systems in each of the specialty bikes.
Compare them to the systems in the more traditional bicycle. What did you observe?
Optional: Using an Erector* set for parts, make your own model vehicle. Try to incorporate
the four systems you studied: structural, drive, steering, and braking.
Intel® Education K-12 Resources | www.intel.com/teachers
Design and Discovery
15 Copyright © Intel Corporation. All rights reserved. Intel, the Intel logo and the Intel Education Initiative are trademarks of Intel Corporation or its subsidiaries in the U.S. and other countries. *Other names and brands may be claimed as the property of others.
Session 11
Design Requirements and Drawings Making, Modeling, and Materializing
In this session, students refine
their design efforts with product
requirements and drawings.
In 11A: Checking in on the
Design Process, they look at a
checklist of steps that follow the
design process to determine how far they've come, and look
ahead to the next steps. Next, in activity 11B: The Perfect Fit:
Meeting Needs Through Design, students learn how a designer
considers the needs of the user to define minimum requirements
for a design, and students then develop design requirements for
their own projects. In a third activity, 11C: Conceptual Drawing:
Thinking on Paper, students learn how drawing helps the thinking
process, then put pen to paper to make a series of conceptual
drawings. By the end of the session, students have a more fully
developed project and are ready for the next steps, modeling and testing their ideas.
Supplies
Pencils and pens, rulers, graph paper (if not in design notebooks)
In This Session:
A) Checking in on the Design Process (45 minutes)
- Student Handout
B) The Perfect Fit: Meeting Needs Through Design (45 Minutes)
- Student Handout
- Student Reading
C) Conceptual Drawing: Thinking on Paper (60 Minutes)
- Student Handout - Student Reading

Intel® Education K-12 Resources | www.intel.com/teachers
Design and Discovery
16 Copyright © Intel Corporation. All rights reserved. Intel, the Intel logo and the Intel Education Initiative are trademarks of Intel Corporation or its subsidiaries in the U.S. and other countries. *Other names and brands may be claimed as the property of others.
Design Requirements and Drawings Key Concepts: Session 11
Session 11 aids students in furthering their design plans by helping them to come up with
design requirements for their project and by providing instruction for translating their
ideas into drawings. The session helps students develop a better understanding of the
visual aspects of the project as they make detailed drawings of their projects to
communicate needs and to help refine the project.
Key Concepts
A key component of the design process is the making of sketches and diagrams to go along
with the project. In fact, many products have come about because of "napkin drafting," a
more crude and simplistic way to communicate ideas. Encourage students to doodle, sketch,
and make diagrams before the actual construction occurs. This session concentrates on
using elements of mechanical drawing to show the students how the visualization of a
project can help to refine the needs of the design.
Although mechanical drawing is commonly carried out by computers now, especially in the
revision stage of design, drawings are still the most widely used communication tool in the
engineering community. The primary reason for this is because drawings often serve as
documentation of requirements. Drawings are used to produce quotes, determine
manufacturing methods or processes, and inspect parts to ensure they meet the
requirements defined within the drawings. Making a readable drawing is key to assuring
that design team members can look at it and understand what's required.
Drawing the design of the project is an important step in refining the project and identifying
some issues with the design. It is a good idea to stress to the students that if they change
something in the design to get around an issue, they should write out what the issue was
and why they changed it. Remind the students that in three months, they might not
remember why they made that change and might try to change it back.
Drawing Methods
This session serves as an introduction to basic drawing techniques. It begins with students
learning to draw lines and circles using graph paper. Students should come to understand
that showing their project from all angles and with component parts will help them to
identify potential problems and to refine the project without having to build it first. It is
useful to have a basic understanding of the different types of sketches.
Orthographic sketches show a three-dimensional object in two dimensions by displaying
the front, top, and side view. When drawn, each view is evenly in line with each other. The
front view is located at the bottom left. The top view is directly above the front view. The
side view is directly to the right of the front view.
Other types of sketches include (not addressed in the session) include: isometric, oblique,
and perspective. An isometric sketch is a three-dimensional drawing in which the

Intel® Education K-12 Resources | www.intel.com/teachers
Design and Discovery
17 Copyright © Intel Corporation. All rights reserved. Intel, the Intel logo and the Intel Education Initiative are trademarks of Intel Corporation or its subsidiaries in the U.S. and other countries. *Other names and brands may be claimed as the property of others.
Key Concepts: Session 11 (continued)
horizontal axes form a 30-degree angle with the true horizontal line. An oblique sketch is
a pictorial drawing in which the front view of an object is shown as true size and shape. The
top and side view is at a 30-degree angle. A perspective sketch is a pictorial drawing in
which lines move "away" from the view and converge.
More About Conceptual Drawing
Lo, Jack. The Patent Drawing Book. Berkeley, CA: Nolo Press, 1997.
Walker, J. R. Exploring Drafting. Tinley Park, IL: Goodheart-Wilcox, 1996.

Intel® Education K-12 Resources | www.intel.com/teachers
Design and Discovery
18 Copyright © Intel Corporation. All rights reserved. Intel, the Intel logo and the Intel Education Initiative are trademarks of Intel Corporation or its subsidiaries in the U.S. and other countries. *Other names and brands may be claimed as the property of others.
Session 11, Activity A
Checking in on the Design Process
Goal
Understand the design project timeline.
Outcome
Students know where they are and what comes next on their design project.
Description
Students review a checklist for their design project and look ahead to what they will be
doing. It is not a direct and linear progression through the series of steps. The steps may be
repeated, and there may be small cycles between some of the steps. While they see that
checklist steps follow the design process, students also discuss the non-linear nature of
design.
Supplies
None
Preparation
None
Procedures
1. Introduce the session by asking students to think about where they are with their
project—closer to the beginning, or to the end? Somewhere near the middle? How
can they tell? Introduce the checklist handout as an organizer for the work they have
done and will be doing in order to complete the design project—a refined working
prototype.
2. Discuss the steps in the checklist and point out that while the checklist follows the
design process, the design process is not linear with one step always following
another. Some steps are revisited time and again; others cause the designer to
change direction. The process changes as the designer's ideas change.
3. Review the schedule. Discuss goals and work time available in and out of class time.
4. Allow time for students to review their progress, complete the checklist, and discuss
any questions that come up.
Wrap Up
Discuss any questions about the design process and review expectations for the project
work ahead.

Intel® Education K-12 Resources | www.intel.com/teachers
Design and Discovery
19 Copyright © Intel Corporation. All rights reserved. Intel, the Intel logo and the Intel Education Initiative are trademarks of Intel Corporation or its subsidiaries in the U.S. and other countries. *Other names and brands may be claimed as the property of others.
11A: Checking in on the Design Process (continued)
Follow With
In 11B: The Perfect Fit: Meeting Needs Through Design, students define design
requirements for their project that focus on the needs of the user.

Intel® Education K-12 Resources | www.intel.com/teachers
Design and Discovery
20 Copyright © Intel Corporation. All rights reserved. Intel, the Intel logo and the Intel Education Initiative are trademarks of Intel Corporation or its subsidiaries in the U.S. and other countries. *Other names and brands may be claimed as the property of others.
Checking in on the Design Process Handout: Session 11, Activity A
The Design Process: Getting From "Think" To "Thing"
The checklist below is adapted from the design process steps. This is a tool to keep you
organized and thinking about where you have been and where you want to go.
1. Identify a design opportunity. (Session 7)
Identified many design opportunities (needs, problems, or cool things to design).
Narrowed the list of opportunities to three for further research.
2. Research the design opportunity. (Session 7)
Refined my design opportunities with interviews and other data-gathering
research.
Selected one design opportunity to address.
Wrote a problem statement to clarify and explain to anyone what I will solve
with a design solution.
3. Brainstorm possible solutions to the problem. (Session 7)
Expanded my possible solutions using SCAMPER and other research.
Evaluated my solutions using criteria that we determined.
Narrowed my solutions to three possibilities.
Began thinking about the types of materials I could use for my solutions.
4. Draft a Design brief. (Session 8)
Wrote a design brief with a problem statement, a description of user needs, a
proposed solution, and a sketch of the solution.
5. Research and refine your solution. (Session 9)
Researched and refined my proposed solution using the U.S. Patent Office Web
site and other resources.
Took notes and wrote down information from my research.
Interviewed experts and possible users to analyze my project for feasibility,
safety, and other implications of my solution.
Researched materials and methods that would be appropriate for constructing
my project.

Intel® Education K-12 Resources | www.intel.com/teachers
Design and Discovery
21 Copyright © Intel Corporation. All rights reserved. Intel, the Intel logo and the Intel Education Initiative are trademarks of Intel Corporation or its subsidiaries in the U.S. and other countries. *Other names and brands may be claimed as the property of others.
11A Handout: Checking in on the Design Process (continued)
Conducted a project analysis to consider any changes to my solution.
6. Prepare design requirements and conceptual drawings. (Session 11)
Developed design requirements that focused on the needs of the user.
Completed conceptual drawings.
7. Build models and component parts. (Sessions 12, 13, and 14)
Analyzed my project design for its systems, components, and parts.
Planned models to build and what each model would test or be able to
demonstrate.
Built a model or models of components of my design.
Developed a project plan for completing my design.
8. Build the solution prototype. (Session 15)
Conducted further research, model building, and testing, as needed to complete
a working prototype.
Developed specifications.
Completed first working prototype.
Analyzed prototype for functional improvements.
9. Test, evaluate, and revise your solution. (Session 16)
Prioritized improvements needed and built new or revised prototype to meet
priorities.
Evaluated prototype for function, feasibility, safety, aesthetics, and other
criteria.
10. Communicate the solution (Session 18)
Presented my solution to an audience.
Gathered feedback and made appropriate changes to prototype.

Intel® Education K-12 Resources | www.intel.com/teachers
Design and Discovery
22 Copyright © Intel Corporation. All rights reserved. Intel, the Intel logo and the Intel Education Initiative are trademarks of Intel Corporation or its subsidiaries in the U.S. and other countries. *Other names and brands may be claimed as the property of others.
Session 11, Activity B
The Perfect Fit: Meeting Needs Through Design Goal
Fine-tune a project design by taking a closer look at the needs of the user.
Outcome
Students fine-tune their project design by producing parallel lists of user needs and the
project design requirements that address those needs.
Description
The activity starts with an example of a product—the Terry* bicycle—that was improved
when the needs of the user were given a closer look. Students look at the design
innovations that improved this product and the user needs that prompted the
improvements. Next, students consider the needs of their intended users and write design
requirements for their own projects.
Supplies
Print pictures of the Terry bicycle from http://www.terrybicycles.com/Bicycles*.
Preparation
None
Procedures
A Look at Design Requirements: The Terry Bicycle, http://www.terrybicycles.com/Bicycles*.
1. On 11B Reading: The Perfect Fit: Meeting Needs Through Design, read together the
story of Georgina Terry, a bike racer who saw that there was no production of
women-specific bikes and started her own company to produce bikes for women.
Ask: Given the woman bicyclist's physical needs, what design features should be
considered in making a better bike for her? List these user features on the board one
at a time.
User Needs Design Requirements
Shorter arms and
torso
Shorten the distance from the handlebars to the seat (the cockpit length) by making the top tube length
shorter.
Smaller hands Shorten reach to brake levers.
Narrower shoulders
Make narrower handlebars.
Shorter legs Shorten crank arms for more efficient spin.

Intel® Education K-12 Resources | www.intel.com/teachers
Design and Discovery
23 Copyright © Intel Corporation. All rights reserved. Intel, the Intel logo and the Intel Education Initiative are trademarks of Intel Corporation or its subsidiaries in the U.S. and other countries. *Other names and brands may be claimed as the property of others.
11B: The Perfect Fit: Meeting Needs Through Design (continued)
2. Explain: Many everyday bikes have a good deal of adjustability. The seat can be
moved forward, the brake lever reach adjusted, and the seat stem raised. Higher
performance road bikes are another problem. The big difference is when a bike is
sized more compactly for women, a new problem arises. The tight geometry of the
racing bike doesn't work with regular racing wheels; you run into toe-wheel overlap,
where the tips of your shoes hit the front wheel when turning and pedaling at the
same time. This was the biggest problem Terry took on in her new design.
3. Discuss how she might have solved this problem. Then explain that she solved the
problem by designing a new, smaller front wheel, allowing the bike to have the same
geometry with the smaller frame. Suggest that this new problem get added to the
list.
4. Ask: What was her new problem? What was the design solution? Show students
pictures of the Terry bike.
Terry's biggest innovation:
User Needs Design Requirements
Smaller bicycle frame causes
toe-wheel overlap Smaller front wheel
Your Design Requirements
1. Have student designers look at their users' needs, and turn them into minimum
requirements. Suggest that they refer back to the user characteristics and scenario
that they came up with in 8A Handout: User Profile.
2. Suggest that students use the same process that Georgina Terry used. She looked at
the users' needs to determine the requirements. Discuss specific factors that
designers consider when they look at their users' needs, and suggest that students
consider these as well:
Appropriate weight and size
Durability
Ease of use (functionality)
Safety
3. Have students fill out the chart on their handout.
4. Provide work time, and encourage students to discuss their ideas with one another
as they work. When they finish, have students get in groups of four or five and
explain their users' needs and design requirements to each other. Feedback from
members of the group will help designers refine their efforts.

Intel® Education K-12 Resources | www.intel.com/teachers
Design and Discovery
24 Copyright © Intel Corporation. All rights reserved. Intel, the Intel logo and the Intel Education Initiative are trademarks of Intel Corporation or its subsidiaries in the U.S. and other countries. *Other names and brands may be claimed as the property of others.
11B: The Perfect Fit: Meeting Needs Through Design (continued)
Wrap Up
Have students refer to the design process checklist and ask them which step they are on
(Step
6). Ask if there are any steps they want to revisit after looking at design requirements—a
common next step is a return to a previous step!
Follow With
The next activity, 11C: Conceptual Drawing: Thinking on Paper, gives students a chance to
analyze their projects in a visual way.

Intel® Education K-12 Resources | www.intel.com/teachers
Design and Discovery
25 Copyright © Intel Corporation. All rights reserved. Intel, the Intel logo and the Intel Education Initiative are trademarks of Intel Corporation or its subsidiaries in the U.S. and other countries. *Other names and brands may be claimed as the property of others.
The Perfect Fit: Meeting Needs Through
Design Handout: Session 11, Activity B
Your Design Requirements
Now consider the user of your product and what requirements might be necessary in order
to meet the needs of the user. Refer back to the character identities and scenarios that you
did in 8A Handout: User Profile. Make a chart like the one below in your notebook and fill
out the requirements.
User Needs Design Requirements
Intel® Education K-12 Resources | www.intel.com/teachers
Design and Discovery
26 Copyright © Intel Corporation. All rights reserved. Intel, the Intel logo and the Intel Education Initiative are trademarks of Intel Corporation or its subsidiaries in the U.S. and other countries. *Other names and brands may be claimed as the property of others.
The Perfect Fit: Meeting Needs Through Design Reading: Session 11, Activity B
Many products have been improved when the needs of the user were given a closer look,
including the Terry* bicycle. After looking at this design innovation based on the users'
needs, you'll consider the needs of your intended users.
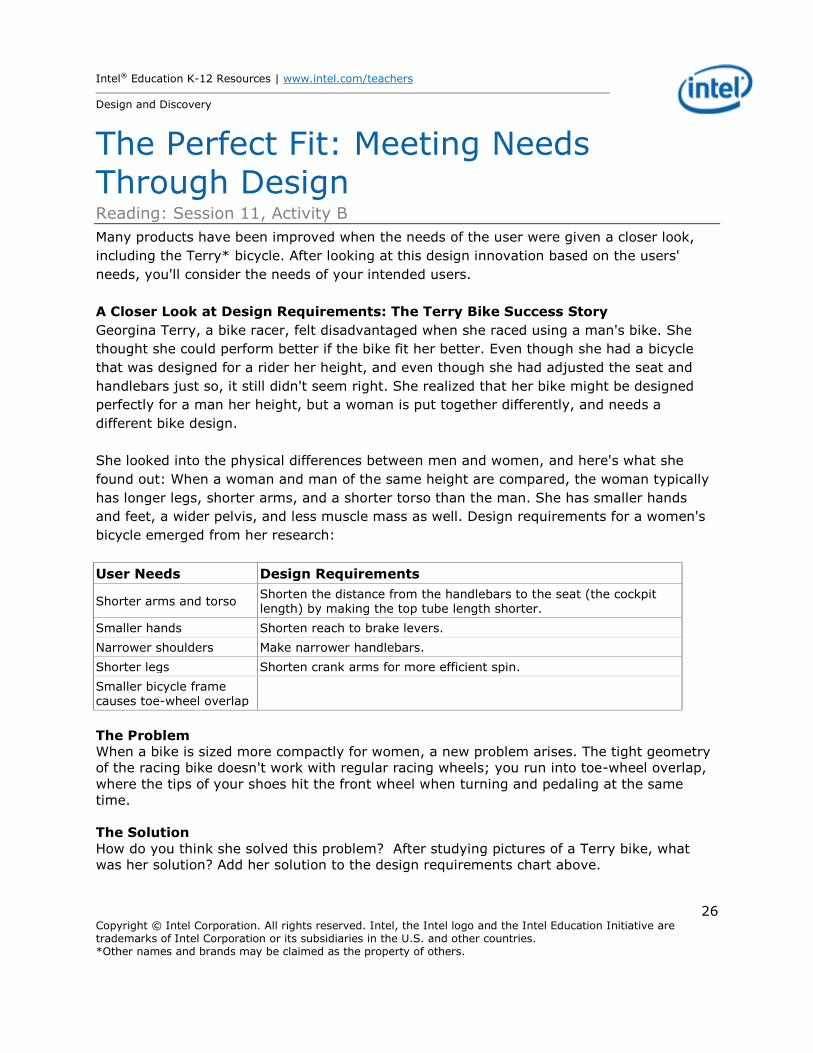
A Closer Look at Design Requirements: The Terry Bike Success Story
Georgina Terry, a bike racer, felt disadvantaged when she raced using a man's bike. She
thought she could perform better if the bike fit her better. Even though she had a bicycle
that was designed for a rider her height, and even though she had adjusted the seat and
handlebars just so, it still didn't seem right. She realized that her bike might be designed
perfectly for a man her height, but a woman is put together differently, and needs a
different bike design.
She looked into the physical differences between men and women, and here's what she
found out: When a woman and man of the same height are compared, the woman typically
has longer legs, shorter arms, and a shorter torso than the man. She has smaller hands
and feet, a wider pelvis, and less muscle mass as well. Design requirements for a women's
bicycle emerged from her research:
User Needs Design Requirements
Shorter arms and torso Shorten the distance from the handlebars to the seat (the cockpit length) by making the top tube length shorter.
Smaller hands Shorten reach to brake levers.
Narrower shoulders Make narrower handlebars.
Shorter legs Shorten crank arms for more efficient spin.
Smaller bicycle frame causes toe-wheel overlap
The Problem
When a bike is sized more compactly for women, a new problem arises. The tight geometry
of the racing bike doesn't work with regular racing wheels; you run into toe-wheel overlap,
where the tips of your shoes hit the front wheel when turning and pedaling at the same
time.
The Solution
How do you think she solved this problem? After studying pictures of a Terry bike, what
was her solution? Add her solution to the design requirements chart above.

Intel® Education K-12 Resources | www.intel.com/teachers
Design and Discovery
27 Copyright © Intel Corporation. All rights reserved. Intel, the Intel logo and the Intel Education Initiative are trademarks of Intel Corporation or its subsidiaries in the U.S. and other countries. *Other names and brands may be claimed as the property of others.
The Terry bicycle is popular with women, because, as she puts it, "a woman isn't just a
smaller version of a man." In her first year, 1985, she sold 20 women's bikes; the following
year, 1,300;then 5,000, and today it's a multimillion-dollar enterprise.

Intel® Education K-12 Resources | www.intel.com/teachers
Design and Discovery
28 Copyright © Intel Corporation. All rights reserved. Intel, the Intel logo and the Intel Education Initiative are trademarks of Intel Corporation or its subsidiaries in the U.S. and other countries. *Other names and brands may be claimed as the property of others.
Session 11, Activity C
Conceptual Drawing: Thinking on Paper Goal
Learn how conceptual drawings help fine-tune a design.
Outcome
Learners make conceptual drawings of their projects that show all the parts of the design.
Description
Student designers take their project another step farther along the design process as they
make conceptual drawings of their project ideas. They learn that the drawing process is a
helpful part of refining a design concept, bringing to light practical concerns that need to be
resolved, such as how component parts fit together. Drawing from a variety of perspectives
helps illustrate all the features of a design and helps the designer communicate ideas to
others.
Supplies
Pencils, pens, rulers, graph paper (if not in design notebooks)
Preparation
None
Procedures
Drawing Basics
1. Pass out rulers and pencils for initial drawing. Students are usually more comfortable
drawing, initially, in something that can be erased and corrected. Rulers help with
straight lines.
2. Learning how to use graph paper is a good first step in developing mechanical
drawing skills. The grid provides a ready scale that aids in sketching proportionally
by counting the squares within the object to be drawn.
3. Explain and have students practice drawing a straight line using the following
method:
Place a dot where you want the line to begin and one where you want the
line to end. In sketching long lines, place one or more dots between the end
dots.
Intel® Education K-12 Resources | www.intel.com/teachers
Design and Discovery
29 Copyright © Intel Corporation. All rights reserved. Intel, the Intel logo and the Intel Education Initiative are trademarks of Intel Corporation or its subsidiaries in the U.S. and other countries. *Other names and brands may be claimed as the property of others.
11C: Conceptual Drawing: Thinking on Paper (continued)
Tell students to swing their hand in the direction that they want the line to
go, and then back again a couple of times before touching pencil to paper. In
this way, they get the feel of the line. They should then use the dots to
guide their eye and hand to draw the line.
Draw lines with a series of short strokes instead of one stroke. This provides
better control of the direction of the line and the pressure of the pencil to
paper.
Suggest holding the pencil about an inch from the point to help with seeing
the drawing. Vertical lines are usually sketched downward on the paper.
Slanted lines may be drawn from either end toward the other. For better
control, students can rotate the paper.
4. Tell students to sketch lightly at first. Essential lines can then be darkened.
5. To sketch circles and arcs, instruct students to do the following:
To draw a circle on grid paper, decide the diameter of the circle and the
placement and then make tick marks at the 12 o'clock, 6 o'clock, 9 o'clock,
and 3 o'clock positions.
Draw the arcs between the tick marks. Alternatively, use a straight line to
draw a circle. Do this by drawing two straight lines that cross each other at
right angles. The point at which they cross is the center of the circle. The
four lines radiating from the center will serve as the radii of the circle.
Measure an equal distance on the on each radius from the center. Sketch a
square.
Now sketch a circle, using the angles of the square as a guide for each arc.
6. Use this as practice to get the students out of the "I can't draw" mindset. Have
students draw three different views of an object with a lot of straight lines—like an
overhead projector or the blackboard or an easel and stress to them that you do not
want a 3-D view of the object, but you want to see what it looks like from the side,
the top, and the front. Using the graph paper, they can apply the basic drawing
techniques.
7. Have students trade drawings with someone else that they normally don't work with,
and see if each student can identify parts.
Drawing Different Views
1. Discuss how that, in addition to drawings made along the way, final drawings are
made, too, before a product can go into production. Why? Drawings are needed if
the designer applies for a patent; also, before the product is manufactured, drawings
aid communication between the designers, engineers, and the manufacturer.

Intel® Education K-12 Resources | www.intel.com/teachers
Design and Discovery
30 Copyright © Intel Corporation. All rights reserved. Intel, the Intel logo and the Intel Education Initiative are trademarks of Intel Corporation or its subsidiaries in the U.S. and other countries. *Other names and brands may be claimed as the property of others.
11C: Conceptual Drawing: Thinking on Paper (continued)
2. Discuss how seeing the object as a set of shapes is important to sketching ideas. If
you know how to draw each of the shapes, then drawing the object is easier. Explain
that designers show an object from several views. Have students look at the first
drawing on the handout and discuss what the different views show about the object.
Tell students that drawing their project might involve two or three drawings, one of
each unique side, and maybe the inner workings as well. They may want to label
parts and use arrows to show how parts move.
3. For the second set of drawings, have students to try to match the objects shown in
3-D on the top row in their front, side, and top views.
(answers: A=3, B=2, C=1, D=4, E=9, F=8, G=5, H=6, and I=7)
4. Ask students if they recognize the next set of drawings (different views of the
crankshaft toy). Can they tell what views they are seeing? Have them label each
figure with its viewpoint: top, interior, and side. Each drawing helps show different
aspects of the device. Then, direct them to look at the last drawings done by former
Design and Discovery students.
Imagine...
1. Before having students draw their projects, do a visual imagery activity. Have
students close their eyes or rest their heads on their arms and try to picture their
project. Speak slowly with thinking time between the questions and statements.
Try to get a picture of your project in your mind. Can you see it?
Try to picture the user using the product. Can you picture the device doing
its job?
Imagine its size. How big is it?
Can you picture the materials it's made of?
How about the parts? Try to imagine each of them. Imagine one part
connecting to another. Can you see how they work together?
2. Ask students to look up and talk about their ability to visualize their design. Ask how
knowing what it looks like helps a person design a product (knowing the end result
makes it easier to design; it's a way of refining and improving a design; lets the
person look at parts in relation to the whole; conceptual and practical problems that
need work will become evident).
Begin Drawing
1. Decide if you prefer students to use pencil or pen at this point. However, it is
recommended that students get used to drawing with pen so that they keep a record
of their drawings and changes made to their drawings.
Intel® Education K-12 Resources | www.intel.com/teachers
Design and Discovery
31 Copyright © Intel Corporation. All rights reserved. Intel, the Intel logo and the Intel Education Initiative are trademarks of Intel Corporation or its subsidiaries in the U.S. and other countries. *Other names and brands may be claimed as the property of others.
11C: Conceptual Drawing: Thinking on Paper (continued)
2. Start students on drawing a series of sketches of their design in their design
notebooks. The first sketches will help them think through their design; others will
be attempts at showing it as they see it in their mind's eye. Suggest that they may
want to start with the most obvious features of the design and then move toward the
ones that have not been resolved. Labels, notes, and arrows showing the motion of
moving parts are helpful.
3. If the student doesn't know what the internal workings of their project will be, have
them concentrate on the outside views and what is needed for the project to interact
with the user. Have them go through the user needs and requirements (11B
Handout: The Perfect Fit: Meeting Needs Through Design) and make sure all of them
are addressed.
4. Discuss that drawings are used to describe and document designs. It is important
that the sketch is easy to understand and tells the story behind your design intent.
5. Encourage students to draw repeatedly and not worry about making a perfect
rendering—this is a thinking step, and the successive drawings are a helpful record
of their thinking process. Remind them to draw the device from top, side, and front
views, and even an interior cutaway view if it is helpful.
6. After 10 or 15 minutes of drawing, have students pause for a moment, and
encourage them to talk about their efforts. Ask them to recommend tricks and tips
they are finding that might be helpful to their fellow drafters—their suggestions can
be really encouraging at this stage. Remind students to draw their design from all
sides, and draw each view large enough to label parts and motion, and then have
them continue.
7. Emphasize that the drawing doesn't have to be perfect, but that the resulting figure
should be clear and detailed enough to tell someone who doesn't know anything about their project what it is and does.
Wrap Up
Have students talk about their drawings and show them to one another. What do they like
about them? What new design considerations came up as a result of drawing? Is there a
drawing technique they can recommend? The next step will be to model their design, and
having a strong image of it will be helpful. Suggest that students continue drawing and
refining their ideas before the next session.
Also suggest that students may want to make other visual representations of their ideas
such as collages.
Read 11C Reading: Meet a Communication Designer.
Follow With
Session 12, Planning for Models and Tests, has students planning models to test their ideas.

Intel® Education K-12 Resources | www.intel.com/teachers
Design and Discovery
32 Copyright © Intel Corporation. All rights reserved. Intel, the Intel logo and the Intel Education Initiative are trademarks of Intel Corporation or its subsidiaries in the U.S. and other countries. *Other names and brands may be claimed as the property of others.
Conceptual Drawing: Thinking on Paper
Handout: Session 11, Activity C
Drawing From All Sides
Drawing your ideas can help you visualize your plan and will be very useful when you make
your model. You may find it helpful to draw the different components and parts of your
project—from different perspectives. You will probably have several drawings of your project
as your ideas evolve.
This activity begins by learning some basic mechanical drawing techniques. You'll learn how
to draw a line and a circle on graph paper. You will then use these techniques to draw an
object in the room. This should be done in your design notebook.
1. Compare the 3-D drawing of the object below to the three views of the object on the
right. What do the three views show you about the object that you didn't know from
the 3-D version?
2. Match the object in the top row with its orthographic sketch.

Intel® Education K-12 Resources | www.intel.com/teachers
Design and Discovery
33 Copyright © Intel Corporation. All rights reserved. Intel, the Intel logo and the Intel Education Initiative are trademarks of Intel Corporation or its subsidiaries in the U.S. and other countries. *Other names and brands may be claimed as the property of others.
11C Handout: Conceptual Drawing: Thinking on Paper (continued)
3. What object is shown here? Label the different figures: interior, top and side.
___________________ ___________________ ___________________
4. Here are some samples of past Design and Discovery students' drawings. Can you
tell what they are?

Intel® Education K-12 Resources | www.intel.com/teachers
Design and Discovery
34 Copyright © Intel Corporation. All rights reserved. Intel, the Intel logo and the Intel Education Initiative are trademarks of Intel Corporation or its subsidiaries in the U.S. and other countries. *Other names and brands may be claimed as the property of others.
11C Handout: Conceptual Drawing: Thinking on Paper (continued)
5. Now, in your design notebook, try your hand at conceptual drawings for your project.
Be sure to draw different views as well as individual drawings of the components and
parts. Make many drawings. You can't have too many. Make your drawings large
enough to label components and show the direction of any movement that may be appropriate to your design.

Intel® Education K-12 Resources | www.intel.com/teachers
Design and Discovery
35 Copyright © Intel Corporation. All rights reserved. Intel, the Intel logo and the Intel Education Initiative are trademarks of Intel Corporation or its subsidiaries in the U.S. and other countries. *Other names and brands may be claimed as the property of others.
Meet a Communication Designer Reading: Session 11, Activity C
Chelsea Vandiver
Senior Communication Designer
ZIBA Design
Introduction
Hello, my name is Chelsea Vandiver. I am a senior graphic designer at ZIBA Design. I
studied graphic design at the University of Washington. After graduation, I worked as a
conventional graphic designer, designing packaging, letterheads, and brochures that were
destined for the recycling bin days after coming off the printing press. I didn't find the
work satisfying. I knew that I wanted to add value, not clutter to people's lives.
Fortunately, I found a job at a product development firm. Now, at ZIBA Design, I work on
projects like signage systems, user interfaces, and products that improve people's day-to-
day lives.
A Typical Day
I spend a large part of my day participating in collaborative brainstorms and work sessions
with an inspiring group of product designers, environmental designers, brand specialists,
and engineers. The beauty of working together on a multidisciplinary team is that the
result is larger and greater than what any of us could have developed on our own.
Challenges
I've worked at ZIBA Design since 1997, and every day I learn something new. Each project
has its own set of unique challenges that force me to continually grow and expand in new
ways.
Advice
My advice to younger people entering the design or engineering field is to not be afraid to
collaborate and share your work with your friends and teachers.
About ZIBA Design
ZIBA Design is an international design firm that has designed products for many global
companies, including FedEx, Microsoft, Intel, Fujitsu, Black & Decker, Sony, Pioneer North
America, Dial, and Clorox. www.ziba.com*

Intel® Education K-12 Resources | www.intel.com/teachers
Design and Discovery
36 Copyright © Intel Corporation. All rights reserved. Intel, the Intel logo and the Intel Education Initiative are trademarks of Intel Corporation or its subsidiaries in the U.S. and other countries. *Other names and brands may be claimed as the property of others.
Session 12
Planning for Models and Tests Making, Modeling, and Materializing
This session prepares students
for building models and testing
systems or components of their
design project. This is Step 7 of
the design process. In an
opening activity, 12A: Thinking
Again About Design, students review their experience of the
design process and think about their revisions up to now. They
see that the design process is not linear; there are cycles or
iterations of review, testing, revision, and change. In the second
activity, 12B: Materials and Modeling Plans, students survey
available materials for constructing models and plan their first
constructions. In the final activity 12C: Structural Considerations,
students learn about collapsible objects and the principles of
collapsibility. They then review structural considerations related to
storing, moving, and assembling their projects.
Supplies
A variety of materials to build models.
Supplies for Structure
Foam (Styrofoam* in sheets and several shapes, including foam tubes for pipe
insulation)
Foam core board
Balsa wood (sheets and pre-cut strips from craft supply stores)
Modeling clay
Aluminum foil
Pipe cleaners and plastic straws
Cardboard (tubes, boxes of all sizes, flat pieces)
Paper (including poster board or card stock weights)
Erector* set
Lego* set
Dowels, bamboo skewers
Wheels
In This Session:
A) Thinking Again About Design (45 minutes)
- Student Handout
B) Materials and Modeling Plans (45 Minutes)
- Student Handout
- Student Reading
C) Structural Considerations (60 Minutes)
- Student Handout

Intel® Education K-12 Resources | www.intel.com/teachers
Design and Discovery
37 Copyright © Intel Corporation. All rights reserved. Intel, the Intel logo and the Intel Education Initiative are trademarks of Intel Corporation or its subsidiaries in the U.S. and other countries. *Other names and brands may be claimed as the property of others.
Session 12, Planning for Models and Tests (continued)
Other Optional Structural supplies
Recyclable materials such as wine corks, aluminum soda cans, bubble wrap,
packaging peanuts, and twist ties
Sample items (for students to acquire and use in larger constructions): PVC pipe
and connectors, lumber (plywood and 2x4s) of different sizes
Parts and Materials To Connect Things
String
Wire
Rubber bands
Rubber tubing
Tape (duct, masking, packaging, and electrical)
Glues (epoxy, superglue, glue sticks, glues for hot glue gun, and rubber cement)
Hinges
Nuts and bolts, washers, assorted screws
Nails, thumbtacks
Tools
Several sets of each: pliers, saw, hammer, screwdriver, hot glue gun, and tin snips
Collapsible Items Suggestions
Umbrella, folding chair, window blinds, stackable cups, sleeping bag, fold away rain
jacket, tent, fold up map, pop-up book, paper lantern, easel, ladder, pocket
scissors, glasses, Swiss Army knife, measuring tape, stackable measuring cups and
spoons, balloon, inflatable raft, rubber band, plastic bag, jump rope

Intel® Education K-12 Resources | www.intel.com/teachers
Design and Discovery
38 Copyright © Intel Corporation. All rights reserved. Intel, the Intel logo and the Intel Education Initiative are trademarks of Intel Corporation or its subsidiaries in the U.S. and other countries. *Other names and brands may be claimed as the property of others.
Planning for Models and Tests Key Concepts: Session 12
In Session 12, students begin to make their ideas tangible—going from what's in their mind
to things in their hand. They build initial models. This could be a model of the overall
design, a model of a single working component, or a test of materials for a single part.
Later, students will build working prototypes to test form and function of their designs.
Key Concepts
Both models and prototypes are constructions that determine if a design or components of a
design will work in both form (how does it look and feel) and function (does it work?). Both
models and prototypes are used to:
Test and trial a concept.
Test and trial the way something looks or feels to the user.
Try out dimensions and fit between components.
Test a mechanism or subsystem of a design.
Models tend to be smaller in scope than prototypes; they are not as concerned with
representing a final product in functionality, size, materials, and scope.
Model: Models can be visual representations of a total design that is nonfunctional. Or, they
represent some aspect (form or function) of a specific component.
Prototype: Prototypes tend to demonstrate some aspect of the design as a whole, either its
form, function, or both.
More on Models and Prototypes
The Intel QX3 progression of models and prototypes in 12A Handout: Thinking Again About
Design. In Session 12, students study the progression of models and prototypes in the
development of the QX3 digital microscope.
Dial* soap dispenser models and working prototypes in 14A Reading: ZIBA Designs a Soap
Dispenser. In Session 14, students study the progression of models and prototypes in the
development of the Dial soap dispenser.
Models Plus
www.modelsplusinc.com/html/body_prototypes.html*
The company, Models Plus, Inc., has a nice display of prototypes. View prototypes for a
Motorola cell phone and learn what materials were used to make the prototype.

Intel® Education K-12 Resources | www.intel.com/teachers
Design and Discovery
39 Copyright © Intel Corporation. All rights reserved. Intel, the Intel logo and the Intel Education Initiative are trademarks of Intel Corporation or its subsidiaries in the U.S. and other countries. *Other names and brands may be claimed as the property of others.
Session 12, Activity A
Thinking Again About Design
Goal
Understand that the design process involves many cycles of revision as each step presents
new information and ideas for refinement of a design.
Outcome
Students know that change and possibly even complete redesign of their solutions are part
of the process of good engineering and design.
Description
This activity begins with a review of the design process as students have experienced it up
to now. A group reflection and discussion encourages them to think about the value of the
revisions to their idea along the way. The design process has many cycles or iterations that
lead to changes and improvements to their original solution. A review of Intel QX3
microscope prototypes reinforces the process of modeling, testing, and prototyping.
Supplies
None
Preparation
1. Students will need their notebook, design brief, design requirements, drawings, and
any other notes about their design project.
2. Try to arrange for mentors to attend this session.
3. Optional: Arrange for actual prototypes and/or models from a design firm, if
possible.
Procedures
Project Progress
1. Have students take a few minutes to review and think about the changes to their
projects as they have moved through the design process. Discuss and share
examples:
Do you have exactly the same solution in mind since the beginning?
Which steps take longer?
Which steps produced the most change to your original idea?
Developing a design brief (Step 4)?
Getting research and feedback from others (Step 5)?
Analyzing feasibility of solution (Step 5)?
Developing design requirements and drawings (Step 6)?

Intel® Education K-12 Resources | www.intel.com/teachers
Design and Discovery
40 Copyright © Intel Corporation. All rights reserved. Intel, the Intel logo and the Intel Education Initiative are trademarks of Intel Corporation or its subsidiaries in the U.S. and other countries. *Other names and brands may be claimed as the property of others.
12A: Thinking Again About Design (continued)
2. It is likely that all students will have modified and revised their projects to some extent already. Discuss how this is an important part of the process:
The design process is really not a set of linear steps but has many
cycles (or iterations) of revision and change that lead to improvements
to their original solution. In fact, with each step that makes the idea
more real (moving from "think" to "thing"), revisions get more
comprehensive—even to throw out a solution and back up to an earlier idea.
Models and Prototypes
1. Distinguish prototypes and models
Model: Models can be visual representations of a total design that is
nonfunctional. Or, they can represent some aspect (form or function)
of a specific component.
Prototype: Prototypes tend to demonstrate some aspect of the design
as a whole, either its form, function, or both.
Students will eventually build a working prototype of their idea, but at this step, they
construct models. These allow students to test or trial their concept, try out
dimensions and fit between components, or test a mechanism or some system in
their project.
2. Review QX3 microscope development. Discuss the progression of prototypes shown
in the images on the handout.
3. Review other examples of models and prototypes. Take a look at the Leatherman*
Web site to see the history of this useful product, from idea to inception,
www.leatherman.com* (Go to About Leatherman and select History.)
Follow with
Activity 12B: Materials and Modeling Plans has students surveying the materials for building
models and planning what they will build.
Intel® Education K-12 Resources | www.intel.com/teachers
Design and Discovery
41 Copyright © Intel Corporation. All rights reserved. Intel, the Intel logo and the Intel Education Initiative are trademarks of Intel Corporation or its subsidiaries in the U.S. and other countries. *Other names and brands may be claimed as the property of others.
Checking in on the Design Process Handout: Session 12, Activity A
The steps of the design process rarely happen one after another but often are repeated or
revisited in many cycles (or iterations) of change that lead to improvements. For example,
drawing your idea may have caused you to revise your requirements in some way. In fact,
with each step in the process that makes your idea more real (moving from "think" to
"thing"), revisions can get more comprehensive as you see new ways of looking at your
idea—you might even throw out a solution and go back to an earlier idea.
It's time to make project ideas tangible—to go from what's in your mind to things in your
hands. You are now at the stage of building models—a way to test, revise, and improve
your design. Models allow you to see your idea as a "trial run." You might build a model to
test dimensions and fit between components. Or you might build a model to test a
mechanism or some system in your project. Eventually you will build a prototype—a model
that works.
Model: A small but exact copy of something
Prototype: A working model of a machine or other object used to test it before producing
the final version
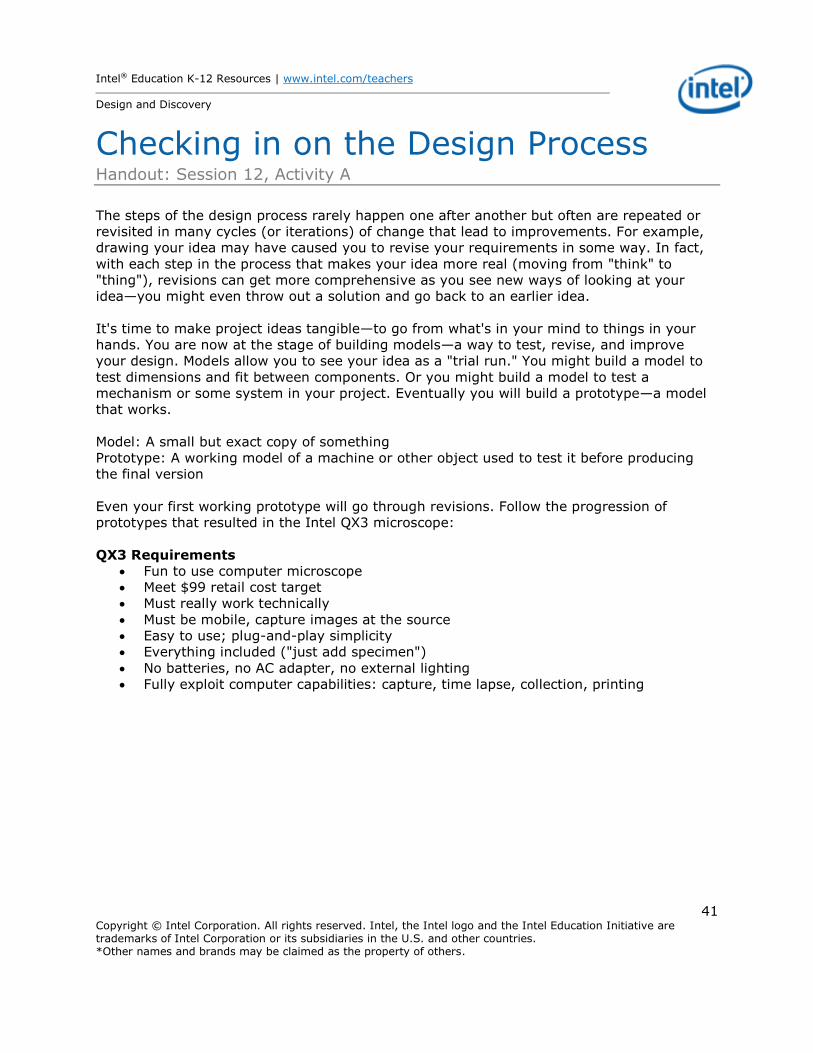
Even your first working prototype will go through revisions. Follow the progression of
prototypes that resulted in the Intel QX3 microscope:
QX3 Requirements
Fun to use computer microscope
Meet $99 retail cost target
Must really work technically
Must be mobile, capture images at the source
Easy to use; plug-and-play simplicity
Everything included ("just add specimen")
No batteries, no AC adapter, no external lighting
Fully exploit computer capabilities: capture, time lapse, collection, printing

Intel® Education K-12 Resources | www.intel.com/teachers
Design and Discovery
42 Copyright © Intel Corporation. All rights reserved. Intel, the Intel logo and the Intel Education Initiative are trademarks of Intel Corporation or its subsidiaries in the U.S. and other countries. *Other names and brands may be claimed as the property of others.
12A Handout: Thinking Again About Design (continued)
Proof Of Concept, May 1998
This is the first model to test the concept of
transferring a magnified image to a
computer for viewing, saving, and
manipulating. This is a demonstration or
"works-like" prototype. It used a standard
off-the-shelf microscope, external lighting,
with circuitry and a ribbon cable for
connection to the computer. It was tested
with kids to see if they felt that a computer-
connected microscope had "play value" (was
fun). It also allowed the engineers to ask
kids questions about what they would want
to look at and what magnifications were
interesting to them.
Microscope in a Box, May 1998
This version was an exciting breakthrough... in function.
The box fit in your hand and included the necessary
lighting and electronics for capturing the image. It proved
that you could take the microscope to what you want to
see instead of bringing the object to the microscope.
Clearly, this version proved the function (with form to
follow). The key was that this prototype had the light
source on the top (as opposed to the bottom for
conventional microscopes). It didn't have a base and could
be pointed at just about anything in the environment. It
allowed children to explore objects that were opaque or too
large or heavy to fit under a traditional microscope. This
was a major fun feature. Kids wanted to look inside their
mouth, in their ears, and the weave on their sweaters,
their pets, and so on. This later became the "handheld"
mode of operation of the QX3 product, where the unit can
be lifted out of the base and used exactly like that.

Intel® Education K-12 Resources | www.intel.com/teachers
Design and Discovery
43 Copyright © Intel Corporation. All rights reserved. Intel, the Intel logo and the Intel Education Initiative are trademarks of Intel Corporation or its subsidiaries in the U.S. and other countries. *Other names and brands may be claimed as the property of others.
12A Handout: Thinking Again About Design (continued)
A First Look, June 1998
This version is all form and no functionality; it was the very
first industrial design foam model to combine the
traditional microscope mode (in the base) and handheld
mode into a single design. The vertical piece is removable.
This model represents desired form (without function). This
version was developed prior to knowing the size and
dimension specifications.
A Working Prototype,
October 1998
Here is the first working prototype with full functionality. It
works, but the wires on the outside belong inside. The
ideal shape or color weren't right yet, and the designers
didn't know yet what they should be.
Getting Closer, January 1999
This second working prototype has functionality, but the
power supply is still on the outside. This one was called the
"albino" model. The shape is very close to final. The
engineers knew that everything inside (electronics, optics)
would fit inside this shape; it also fit the size of kids' hands
well, and looked good.

Intel® Education K-12 Resources | www.intel.com/teachers
Design and Discovery
44 Copyright © Intel Corporation. All rights reserved. Intel, the Intel logo and the Intel Education Initiative are trademarks of Intel Corporation or its subsidiaries in the U.S. and other countries. *Other names and brands may be claimed as the property of others.
12A Handout: Thinking Again About Design (continued)
Looking Good, February 1999
This version tested a new look for a debut at a national toy
tradeshow. It looks good with transparent plastic, but it
wasn't fully functional—the power supply was still external.
Presenting QX3,
September 1999
The final product—the QX3 is born!

Intel® Education K-12 Resources | www.intel.com/teachers
Design and Discovery
45 Copyright © Intel Corporation. All rights reserved. Intel, the Intel logo and the Intel Education Initiative are trademarks of Intel Corporation or its subsidiaries in the U.S. and other countries. *Other names and brands may be claimed as the property of others.
Session 12, Activity B
Materials and Modeling Plans Goal
Learn about available materials and plan model(s) to build.
Outcome
Know about available materials, select those useful for their needs, and plan model building.
Description
After a brief introduction to the variety of materials available for modeling, students have
time to study the materials and plan what models they want to build. The materials are
organized into three groups: materials for structure, materials for connections, and tools.
Supplies
A variety of materials to build models.
Supplies for Structure
Foam (Styrofoam* in sheets and several shapes, including foam tubes for pipe
insulation)
Foam core board
Balsa wood (sheets and pre-cut strips from craft supply stores)
Modeling clay
Aluminum foil
Pipe cleaners and plastic straws
Cardboard (tubes, boxes of all sizes, flat pieces)
Paper (including poster board or card stock weights)
Erector* set
Lego* set
Dowels, bamboo skewers
Wheels
Other Optional Structural Supplies
Recyclable materials such as wine corks, aluminum soda cans, bubble wrap,
packaging peanuts, and twist ties
Sample items (for students to acquire and use in larger constructions): PVC pipe
and connectors, lumber (plywood and 2x4s) of different sizes

Intel® Education K-12 Resources | www.intel.com/teachers
Design and Discovery
46 Copyright © Intel Corporation. All rights reserved. Intel, the Intel logo and the Intel Education Initiative are trademarks of Intel Corporation or its subsidiaries in the U.S. and other countries. *Other names and brands may be claimed as the property of others.
12B: Materials and Modeling Plans (continued)
Parts and Materials To Connect Things
String
Wire
Rubber bands
Rubber tubing
Tape (duct, masking, packaging, and electrical)
Glues (epoxy, superglue, glue sticks, glues for hot glue gun, and rubber cement)
Hinges
Nuts and bolts, washers, assorted screws
Nails, thumbtacks
Tools
Several sets of each: pliers, saw, hammer, screwdriver, hot glue gun, and tin snips
Preparation
1. Gather the materials well in advance of this session. Send home information to
parents and request donations of used building materials or any of the suggested
recyclable items. Purchase what is not supplied or donated.
2. On the day of the session, lay out the modeling materials organized by: a) things to
build with, b) things for connecting and attaching, and c) the tools.
Procedures
Planning
1. Introduce the modeling materials. Explain, demonstrate, and answer students'
questions about any unusual or unfamiliar materials or tools. Build a common
vocabulary as you introduce and students study the materials.
2. Plan what to model. Have students write down the following questions and answers
in their design notebooks:
What do you want or need a model of? (List at least three possibilities.):
For each model possibility
Is this a system or a component of your design project?
What will this model help you understand about your idea?
Will it be a small or full-scale version?
What will you need to build it?
What materials on hand will work for your model?
12B: Materials and Modeling Plans (continued)

Intel® Education K-12 Resources | www.intel.com/teachers
Design and Discovery
47 Copyright © Intel Corporation. All rights reserved. Intel, the Intel logo and the Intel Education Initiative are trademarks of Intel Corporation or its subsidiaries in the U.S. and other countries. *Other names and brands may be claimed as the property of others.
What is not on hand for building your model?
3. During this planning time, students should select and manipulate different materials
as they plan. Encourage them to make notes about the materials that they study:
their flexibility, strength, and their suitability as a modeling material. Note: It may
be helpful to have students review the 13A Handout: Making Models.
Sharing
1. While students are planning, have mentors meet with students and discuss their
plans. Mentors should help students articulate the purpose of the model and answer
the above questions as they plan. It is important that students are intentional during
the model building. They should have a purpose, something they'd like to test or trial
in each model.
2. Remind them that they can model different systems, subsystems, and components
as well as the whole product. Encourage them to make large enough models so that
they can see, test, and understand the systems, parts, and components.
Wrap Up
Ensure that each student has a plan and a clear purpose for constructing at least one
model.
Have the students read 12B Reading: Meet a Modelshop Manager.
Follow With
Activity 12C: Structural Considerations provides the opportunity for students to consider the
structure of their projects.

Intel® Education K-12 Resources | www.intel.com/teachers
Design and Discovery
48 Copyright © Intel Corporation. All rights reserved. Intel, the Intel logo and the Intel Education Initiative are trademarks of Intel Corporation or its subsidiaries in the U.S. and other countries. *Other names and brands may be claimed as the property of others.
Materials and Modeling Plans Handout: Session 12, Activity B
In this activity, you will start to plan your model. Like anything, the more planning you do in
advance, the better your chances of achieving what you want. It's best to put answers to
the questions below in your design notebooks.
1. What do you want or need a model of? (List at least three possibilities.)
2. For each model possibility, consider the following questions and answer them in your
design notebooks:
Is this a system or a component of your design project?
What will this model help you understand about your idea?
Will it be a small or full-scale version?
What will you need to build it?
What materials on hand will work for your model?
What is not on hand for building your model?
3. As you plan, you may select and manipulate different materials. Be sure to make
notes about the materials that you study: their flexibility, strength, and suitability as a modeling material.
Tip: When planning your model, it is better to plan to build a bigger model so that the
details can be seen, tested, and understood.
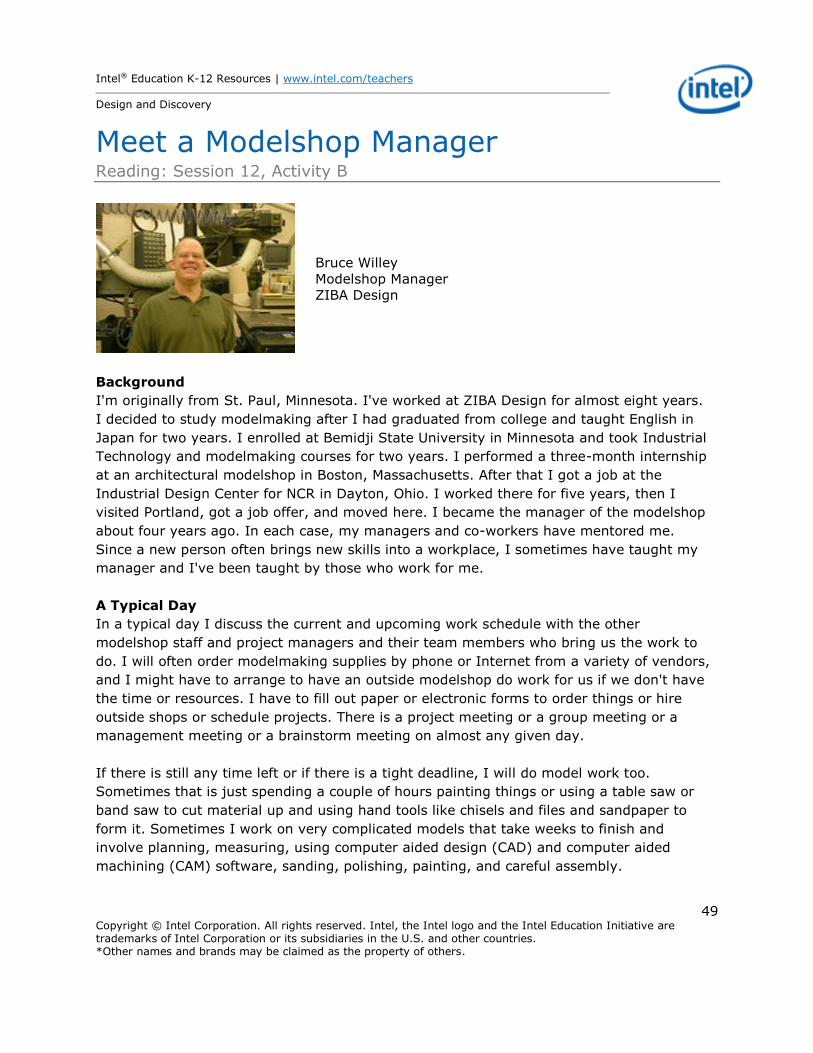
Intel® Education K-12 Resources | www.intel.com/teachers
Design and Discovery
49 Copyright © Intel Corporation. All rights reserved. Intel, the Intel logo and the Intel Education Initiative are trademarks of Intel Corporation or its subsidiaries in the U.S. and other countries. *Other names and brands may be claimed as the property of others.
Meet a Modelshop Manager Reading: Session 12, Activity B
Bruce Willey
Modelshop Manager
ZIBA Design
Background
I'm originally from St. Paul, Minnesota. I've worked at ZIBA Design for almost eight years.
I decided to study modelmaking after I had graduated from college and taught English in
Japan for two years. I enrolled at Bemidji State University in Minnesota and took Industrial
Technology and modelmaking courses for two years. I performed a three-month internship
at an architectural modelshop in Boston, Massachusetts. After that I got a job at the
Industrial Design Center for NCR in Dayton, Ohio. I worked there for five years, then I
visited Portland, got a job offer, and moved here. I became the manager of the modelshop
about four years ago. In each case, my managers and co-workers have mentored me.
Since a new person often brings new skills into a workplace, I sometimes have taught my
manager and I've been taught by those who work for me.
A Typical Day
In a typical day I discuss the current and upcoming work schedule with the other
modelshop staff and project managers and their team members who bring us the work to
do. I will often order modelmaking supplies by phone or Internet from a variety of vendors,
and I might have to arrange to have an outside modelshop do work for us if we don't have
the time or resources. I have to fill out paper or electronic forms to order things or hire
outside shops or schedule projects. There is a project meeting or a group meeting or a
management meeting or a brainstorm meeting on almost any given day.
If there is still any time left or if there is a tight deadline, I will do model work too.
Sometimes that is just spending a couple of hours painting things or using a table saw or
band saw to cut material up and using hand tools like chisels and files and sandpaper to
form it. Sometimes I work on very complicated models that take weeks to finish and
involve planning, measuring, using computer aided design (CAD) and computer aided
machining (CAM) software, sanding, polishing, painting, and careful assembly.

Intel® Education K-12 Resources | www.intel.com/teachers
Design and Discovery
50 Copyright © Intel Corporation. All rights reserved. Intel, the Intel logo and the Intel Education Initiative are trademarks of Intel Corporation or its subsidiaries in the U.S. and other countries. *Other names and brands may be claimed as the property of others.
12B Reading: Meet a Modelshop Manager (continued)
Favorite Thing About Job
I like having such a wide variety of different activities to do every day.
Advice To Young People
You have to decide if you are interested in how things go together and work. You should be
comfortable using tools and working with your hands. You will be using math and science
and art skills. Any kind of commercial and industrial arts classes and art or craft classes or
hobbies will help you a lot. All designers and engineers and almost all modelmakers use
computers very frequently. Take computer classes and classes that expose you to
advanced technology. Watch carpentry shows and similar programs to see if you are
interested in solving problems by designing and making things.
About ZIBA Design
ZIBA Design is an international design firm that has designed products from many global
companies, including FedEx, Microsoft, Intel, Fujitsu, Black & Decker, Sony, Pioneer North
America, Dial, and Clorox. www.ziba.com*

Intel® Education K-12 Resources | www.intel.com/teachers
Design and Discovery
51 Copyright © Intel Corporation. All rights reserved. Intel, the Intel logo and the Intel Education Initiative are trademarks of Intel Corporation or its subsidiaries in the U.S. and other countries. *Other names and brands may be claimed as the property of others.
Session 12, Activity C
Structural Considerations Goal
Consider structural decisions about the project before making a model.
Outcome
Students consider and make structural decisions about their project.
Description
Will it fold? Expand? Roll? Inflate? Many products are collapsible; they fold out for action
and fold up for storage. Students take a look at some of these objects and consider
collapsibility issues for their project.
Supplies
Samples of collapsible items such as umbrella, folding chair, window blinds, stackable cups,
sleeping bag, fold-away rain jacket, tent, fold up map, pop-up book, paper lantern, easel,
ladder, pocket scissors, glasses, Swiss Army knife, measuring tape, stackable measuring
cups and spoons, balloon, inflatable raft, fireplace bellows, rubber band, plastic bag, or
jump rope.
Preparation
Bring in as many samples of collapsible items as possible. Alternatively, have students bring
in collapsible items. Spread them all out on a table.
Prepare cards with the collapsible principles below for students to sort the objects.
Procedures
Collapsible Items
1. Have students gather around the collapsible objects on a table.
2. Ask what the items have in common. Define collapsible: Objects that can be folded
and unfolded again and again.
3. Review the chart below. Ask them to sort the items into different mechanical
categories by collapsible principles (written on cards). Many collapsible objects apply
more than one of these principles
Collapsible
Principles
Definition Examples
Stress 1. Something that is stressed
(compressed) for storage
Sleeping bag, rubber band

Intel® Education K-12 Resources | www.intel.com/teachers
Design and Discovery
52 Copyright © Intel Corporation. All rights reserved. Intel, the Intel logo and the Intel Education Initiative are trademarks of Intel Corporation or its subsidiaries in the U.S. and other countries. *Other names and brands may be claimed as the property of others.
and relaxed for action
2. Something that is stressed
(stretched) for action while
relaxed for storage
12C: Structural Considerations (continued)
Collapsible
Principles
Definition Examples
Folding Soft materials that are flexible
and directionless can be folded
Clothes, blankets, towels, tents,
curtains, flags, plastic bags,
jump ropes
Creasing Something that can be folded
along preset lines or creases
giving an object (folded and
unfolded) neater appearance,
may also facilitate the act of
folding and unfolding
Maps, pup-up books,
newspapers, boxes
Bellows Used where a flexible and sealed
connection is needed
Airport bellows gates, hanging
fabric shoe-shelving, paper
lanterns
Assembling The whole is separated into parts
for storage
Jigsaw puzzles, Lego* blocks,
motorized wheel chairs
Hinging Objects with flexible joints Laptop computers, pianos,
mobile phones, handheld
computers, umbrellas, ladders,
glasses, folding scissors,
scooters, folding bicycles,
strollers, pocket knives
Rolling Objects that are rolled and
unrolled repeatedly
Extension cords, tape measures,
roll-up dog leashes
Sliding Collapsibles that expand and
contract as their parts slide open
or closed
Telescopes, car antenna, sliding
ladders, autofocus camera
lenses, lipstick
Nesting Two or more objects that fit
together to occupy less space
than they do individually
Russian dolls, measuring
spoons/cups, shopping carts
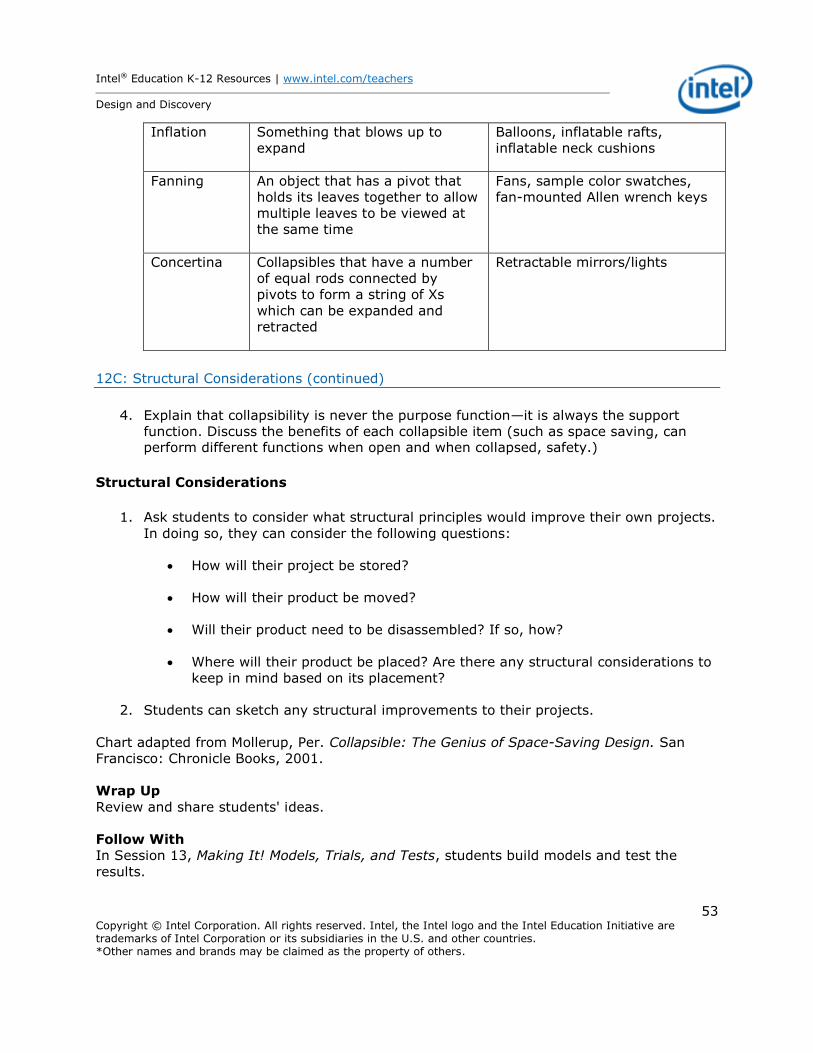
Intel® Education K-12 Resources | www.intel.com/teachers
Design and Discovery
53 Copyright © Intel Corporation. All rights reserved. Intel, the Intel logo and the Intel Education Initiative are trademarks of Intel Corporation or its subsidiaries in the U.S. and other countries. *Other names and brands may be claimed as the property of others.
Inflation Something that blows up to
expand
Balloons, inflatable rafts,
inflatable neck cushions
Fanning An object that has a pivot that
holds its leaves together to allow
multiple leaves to be viewed at
the same time
Fans, sample color swatches,
fan-mounted Allen wrench keys
Concertina Collapsibles that have a number
of equal rods connected by
pivots to form a string of Xs
which can be expanded and
retracted
Retractable mirrors/lights
12C: Structural Considerations (continued)
4. Explain that collapsibility is never the purpose function—it is always the support
function. Discuss the benefits of each collapsible item (such as space saving, can perform different functions when open and when collapsed, safety.)
Structural Considerations
1. Ask students to consider what structural principles would improve their own projects.
In doing so, they can consider the following questions:
How will their project be stored?
How will their product be moved?
Will their product need to be disassembled? If so, how?
Where will their product be placed? Are there any structural considerations to
keep in mind based on its placement?
2. Students can sketch any structural improvements to their projects.
Chart adapted from Mollerup, Per. Collapsible: The Genius of Space-Saving Design. San
Francisco: Chronicle Books, 2001.
Wrap Up
Review and share students' ideas.
Follow With
In Session 13, Making It! Models, Trials, and Tests, students build models and test the
results.
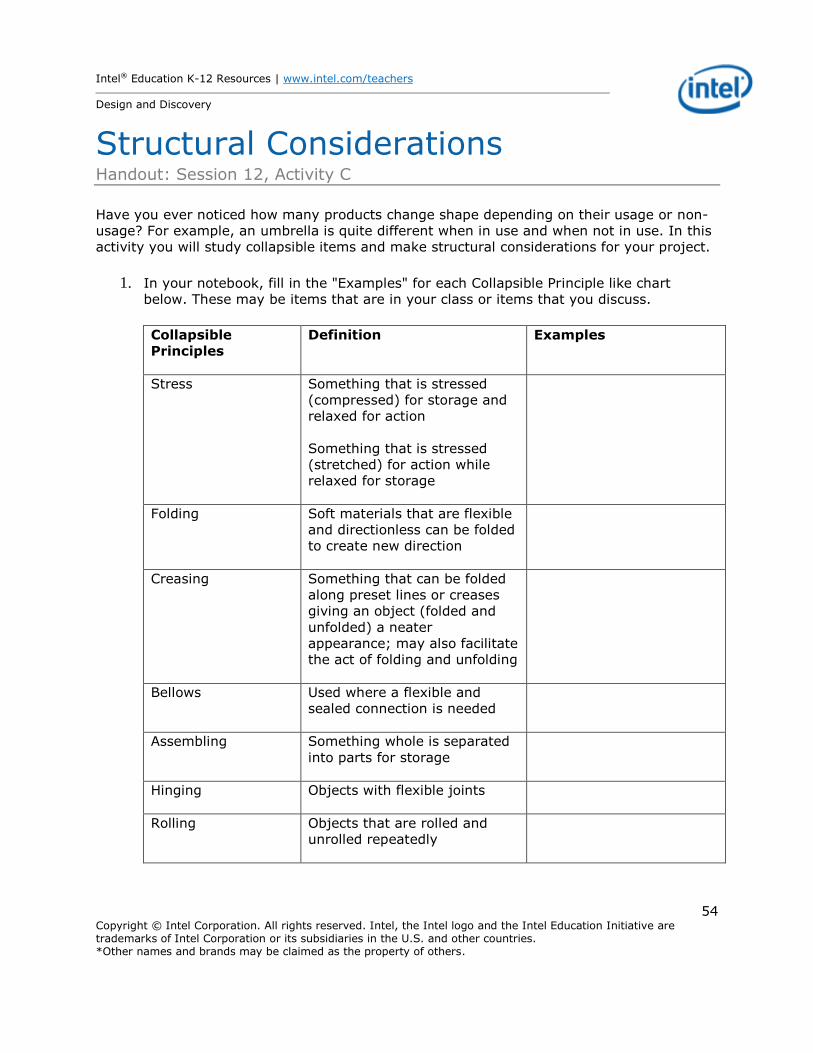
Intel® Education K-12 Resources | www.intel.com/teachers
Design and Discovery
54 Copyright © Intel Corporation. All rights reserved. Intel, the Intel logo and the Intel Education Initiative are trademarks of Intel Corporation or its subsidiaries in the U.S. and other countries. *Other names and brands may be claimed as the property of others.
Structural Considerations Handout: Session 12, Activity C
Have you ever noticed how many products change shape depending on their usage or non-
usage? For example, an umbrella is quite different when in use and when not in use. In this
activity you will study collapsible items and make structural considerations for your project.
1. In your notebook, fill in the "Examples" for each Collapsible Principle like chart
below. These may be items that are in your class or items that you discuss.
Collapsible
Principles
Definition Examples
Stress Something that is stressed
(compressed) for storage and
relaxed for action
Something that is stressed
(stretched) for action while
relaxed for storage
Folding Soft materials that are flexible
and directionless can be folded
to create new direction
Creasing Something that can be folded
along preset lines or creases
giving an object (folded and
unfolded) a neater
appearance; may also facilitate
the act of folding and unfolding
Bellows Used where a flexible and
sealed connection is needed
Assembling Something whole is separated
into parts for storage
Hinging Objects with flexible joints
Rolling Objects that are rolled and
unrolled repeatedly

Intel® Education K-12 Resources | www.intel.com/teachers
Design and Discovery
55 Copyright © Intel Corporation. All rights reserved. Intel, the Intel logo and the Intel Education Initiative are trademarks of Intel Corporation or its subsidiaries in the U.S. and other countries. *Other names and brands may be claimed as the property of others.
12C Handout: Structural Considerations (continued)
Collapsible
Principles
Definition Examples
Sliding Collapsibles that expand and
contract as their parts slide
open or closed
Nesting Two or more objects that fit
together to occupy less
space than they do
individually
Inflation Something that blows up to
expand
Fanning An object that has a pivot
that holds its leaves together
to allow multiple leaves to be
viewed at the same time
Concertina Collapsibles that have a
number of equal rods
connected by pivots to form
a string of Xs which can be
expanded and retracted
2. What structural principles would improve your project? Consider the following
questions:
How will your project be stored?
How will your product be moved?
Will your product need to be disassembled? If so, how?
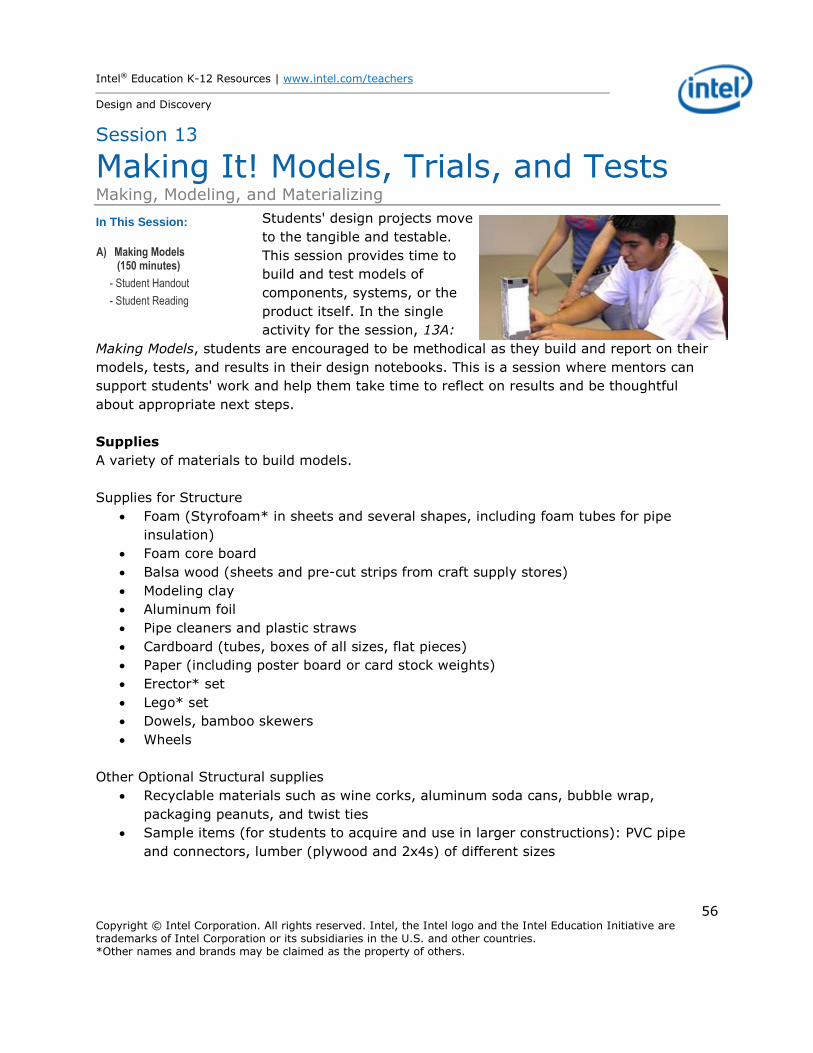
Intel® Education K-12 Resources | www.intel.com/teachers
Design and Discovery
56 Copyright © Intel Corporation. All rights reserved. Intel, the Intel logo and the Intel Education Initiative are trademarks of Intel Corporation or its subsidiaries in the U.S. and other countries. *Other names and brands may be claimed as the property of others.
Session 13
Making It! Models, Trials, and Tests Making, Modeling, and Materializing
Students' design projects move
to the tangible and testable.
This session provides time to
build and test models of
components, systems, or the
product itself. In the single
activity for the session, 13A:
Making Models, students are encouraged to be methodical as they build and report on their
models, tests, and results in their design notebooks. This is a session where mentors can
support students' work and help them take time to reflect on results and be thoughtful
about appropriate next steps.
Supplies
A variety of materials to build models.
Supplies for Structure
Foam (Styrofoam* in sheets and several shapes, including foam tubes for pipe
insulation)
Foam core board
Balsa wood (sheets and pre-cut strips from craft supply stores)
Modeling clay
Aluminum foil
Pipe cleaners and plastic straws
Cardboard (tubes, boxes of all sizes, flat pieces)
Paper (including poster board or card stock weights)
Erector* set
Lego* set
Dowels, bamboo skewers
Wheels
Other Optional Structural supplies
Recyclable materials such as wine corks, aluminum soda cans, bubble wrap,
packaging peanuts, and twist ties
Sample items (for students to acquire and use in larger constructions): PVC pipe
and connectors, lumber (plywood and 2x4s) of different sizes
In This Session:
A) Making Models (150 minutes)
- Student Handout
- Student Reading

Intel® Education K-12 Resources | www.intel.com/teachers
Design and Discovery
57 Copyright © Intel Corporation. All rights reserved. Intel, the Intel logo and the Intel Education Initiative are trademarks of Intel Corporation or its subsidiaries in the U.S. and other countries. *Other names and brands may be claimed as the property of others.
Session 13, Making It! Models, Trials, and Tests (continued)
Parts and Materials To Connect Things
String
Wire
Rubber bands
Rubber tubing
Tape (duct, masking, packaging, and electrical)
Glues (epoxy, superglue, glue sticks, glues for hot glue gun, and rubber cement)
Hinges
Nuts and bolts, washers, assorted screws
Nails, thumbtacks
Tools
Several sets of each: pliers, saw, hammer, screwdriver, hot glue gun, and tin snips

Intel® Education K-12 Resources | www.intel.com/teachers
Design and Discovery
58 Copyright © Intel Corporation. All rights reserved. Intel, the Intel logo and the Intel Education Initiative are trademarks of Intel Corporation or its subsidiaries in the U.S. and other countries. *Other names and brands may be claimed as the property of others.
Session 13, Activity A
Making Models
Goal
Learn how models contribute to design.
Outcome
Build models, evaluate results, and consider design modifications.
Description
Students work on their models of the project or trials of components, systems, or
subsystems. They are encouraged to be methodical by keeping records of what they plan to
construct and why, and what the results show for next steps or modifications to their
design. Mentors assist with constructing and testing their models by helping students
analyze design issues as they build their models.
Supplies
A variety of materials to build models.
Supplies for Structure
Foam (Styrofoam* in sheets and several shapes, including foam tubes for pipe
insulation)
Foam core board
Balsa wood (sheets and pre-cut strips from craft supply stores)
Modeling clay
Aluminum foil
Pipe cleaners and plastic straws
Cardboard (tubes, boxes of all sizes, flat pieces)
Paper (including poster board or card stock weights)
Erector* set
Lego* set
Dowels, bamboo skewers
Wheels
Other Optional Structural supplies
Recyclable materials such as wine corks, aluminum soda cans, bubble wrap,
packaging peanuts, and twist ties
Sample items (for students to acquire and use in larger constructions): PVC pipe
and connectors, lumber (plywood and 2x4s) of different sizes

Intel® Education K-12 Resources | www.intel.com/teachers
Design and Discovery
59 Copyright © Intel Corporation. All rights reserved. Intel, the Intel logo and the Intel Education Initiative are trademarks of Intel Corporation or its subsidiaries in the U.S. and other countries. *Other names and brands may be claimed as the property of others.
13A: Making Models (continued)
Parts and Materials To Connect Things
String
Wire
Rubber bands
Rubber tubing
Tape (duct, masking, packaging, and electrical)
Glues (epoxy, superglue, glue sticks, glues for hot glue gun, and rubber cement)
Hinges
Nuts and bolts, washers, assorted screws
Nails, thumbtacks
Tools
Several sets of each: pliers, saw, hammer, screwdriver, hot glue gun, and tin snips
Safety Guidelines
1. Cut away from the body.
2. Never push into the palm.
3. Stabilize what is being cut.
Preparation
Invite mentors to this session
Procedures
1. Have students review the handout.
2. Discuss some model building tips:
Use found materials to construct models. Point out that the initial model for
the Apple* computer mouse, for example, was a butter dish with parts glued
to hold the rolling ball.
It is easy to get carried away by the fun of making an exciting model, but
the materials must not outshine the design concept.
The range of materials used in model making is endless. Experiment with
different materials or use them in inventive new ways.
Respect the physical properties of materials. Revisit the materials' test
results from 3A: Properties of Materials. Try running materials' property
tests for materials you may be considering.

Intel® Education K-12 Resources | www.intel.com/teachers
Design and Discovery
60 Copyright © Intel Corporation. All rights reserved. Intel, the Intel logo and the Intel Education Initiative are trademarks of Intel Corporation or its subsidiaries in the U.S. and other countries. *Other names and brands may be claimed as the property of others.
13A: Making Models (continued)
Know the differences between adhesives. Read labels on glue to understand
which glues work best for different applications. Use the least amount of
glue possible.
Always place cardboard or some sort of cutting board underneath the
material being cut.
For straight cuts, cut against a metal edge.
3. Emphasize the value of good records as students build and learn about their design.
Point out that they need to take the time to be methodical and write down what they
plan to do and why. As they build and think about what the modeling process shows
them, they should keep records about what the design issues come up as they build
models. When students complete a model, they "test" it, gather data about results,
and write notes about modifications and next steps which may be another model,
depending on time available.
4. Clean up and organize storage or transport of models home for further work.
Wrap Up
Have all model makers show what they built and state one or two things that they learned
in the process.
Optional: Have students read 13A Reading: Meet Materials Engineers.
Follow With
Session 14, Prototype Practicalities, allows students to develop the next stages of the
project.
Note: If you are running a two-week summer camp, you may need to end project work with
this session and move to Session 17: Fairly There.

Intel® Education K-12 Resources | www.intel.com/teachers
Design and Discovery
61 Copyright © Intel Corporation. All rights reserved. Intel, the Intel logo and the Intel Education Initiative are trademarks of Intel Corporation or its subsidiaries in the U.S. and other countries. *Other names and brands may be claimed as the property of others.
Making Models Handout: Session 13, Activity A
It is helpful to keep good records of your model-building efforts. Good records allow you to
adjust your design based on what you learn from each model you build. For each model
record your plans, purpose, tests and results, and next steps using the questions below.
Use your design notebook for these records.
Plans
What do you want to build a model of? Is this a system or component of the product? Is
this a full-scale model?
Purpose
What will this model help you understand about your design?
Tests and Results
What did your model show you about your design? What features did you test? Does it
meet requirements? Did it function as intended? Did the form suit you? Are the materials
suitable? What modifications do you need to make? What new ideas do you have for your
design?
Next Steps
What do you want to do next? Adjust this model? Build another version of this model?
Build a model of something else?

Intel® Education K-12 Resources | www.intel.com/teachers
Design and Discovery
62 Copyright © Intel Corporation. All rights reserved. Intel, the Intel logo and the Intel Education Initiative are trademarks of Intel Corporation or its subsidiaries in the U.S. and other countries. *Other names and brands may be claimed as the property of others.
Meet Materials Engineers Reading: Session 13, Activity A
Pratima Rao and Jill Barrett
Materials Engineers
When it comes to designing or improving a product, finding just the right material is a
critical step. From artificial knees to firefighters' uniforms to fiber optic cables for the ocean
floor, everything that gets manufactured benefits from the expertise of materials
engineers. Two Design and Discovery mentors developed an early interest in materials
engineering.
Early Interests
When Jill Barrett was growing up, she and her two sisters routinely turned their garage
into a laboratory for conducting science and engineering investigations. Their enthusiasm
wasn't dampened even when they ruined the family pots and pans by cooking up a pot of
paper pulp. Looking back, Barrett can see how developing projects for school science fairs
was a natural step toward her career in materials engineering. She earned a bachelor's
degree in materials science from North Carolina State University and did master's studies
in metallurgical and materials engineering at the Colorado School of Mines.
For Pratima Rao, being on a high school Science Olympiad team motivated her to pursue
scientific studies in college. She originally planned to become a doctor. During her
undergraduate studies at Rensselaer Polytechnic Institute in New York, she decided that
materials engineering was a better fit for her interests. She also liked the idea of
contributing to the development of new and improved materials that would benefit society.
Rao eventually earned a Ph.D. in materials science and engineering.
On the Job
Materials engineers work on a range of projects, from large industrial plants to laboratories
where research focuses on the molecular structure of substances. Plastics, metals, wood,
textiles, medicine, ceramics, and semiconductors are only a few of the fields where
breakthroughs have come about through the efforts and insights of materials engineers.

Intel® Education K-12 Resources | www.intel.com/teachers
Design and Discovery
63 Copyright © Intel Corporation. All rights reserved. Intel, the Intel logo and the Intel Education Initiative are trademarks of Intel Corporation or its subsidiaries in the U.S. and other countries. *Other names and brands may be claimed as the property of others.
13A Reading: Meet Materials Engineers (continued)
"Materials engineers are on the cutting edge in almost every field," says Rao.
Barrett's career has involved her in everything from steelmaking to testing the properties
of components that go into basketball shoes. She typically gets involved after initial
product development is underway and brings her expertise to focus on process
improvement during manufacturing.
Rao has worked in the field of photonics, improving photosensitive glass used in the
telecommunications industry. She enjoys taking scientific research concepts and applying
them in practical ways in manufacturing. She also likes the hands-on nature of her work,
from melting powders to making glass samples to operating a transmission electron
microscope. While she worked at Corning, Inc., in New York, she was part of a research
team that received a patent for an invention called "Lens Array and Method for Fabricating
the Lens Array."
Materials engineers often work as part of a team, contributing their technical knowledge to
evaluate a product or improve the production process. As Barrett explains, "You talk with
the design team about how a product is supposed to work. You ask a lot of questions about
different materials: Is it too sharp? Too brittle? Will it break easily? Will it melt if exposed
to heat? Can it be molded?" Engineers also pay attention to costs, evaluating whether
using a certain material will be economical or drive production costs over budget.
Designing tests to evaluate whether different materials will meet design specifications is
another part of the job. The engineer's role is not only to find what works but to rule out
what doesn't. "You should never be afraid of failure," Barrett stresses. "Failure teaches you
more than success ever will."
Being able to communicate and ask good questions are important job skills, too.
"Communicating your ideas clearly is crucial to your success," Barrett says.
Career Preparation
Barrett and Rao credit their career success to family support and encouragement. "My
parents always told me I could be anything I wanted. I heard that early and often," says
Barrett. During college, they found themselves in the minority as women in engineering.
Both women say they benefited from internships and hands-on experiences that gave
them insights into the real world of engineering. Rao says persistence is a quality worth
cultivating, and so is "learning how to ask for help. This is a valuable lesson. Support from
others is important as we work to overcome obstacles." Barrett shares a final tip for
anyone considering a career in engineering: "Make friends. Make lots of friends. They'll
help you every step of the way."