efis 2.0 - user set up guide version 1 support/efis 2.0 setup... · 3.1 recommended version firefox...
TRANSCRIPT

Ministry of Education
EFIS 2.0 - User Set Up Guide Version 1.3
February 11, 2015

Table of Contents 1 Document History .................................................................................................... 1
2 Description and System Requirements ................................................................. 2
2.1 Description .................................................................................................. 2
2.2 User System Requirements ........................................................................ 2
3 Firefox setup ............................................................................................................. 3
3.1 Recommended Version .............................................................................. 3
3.2 Download Files ........................................................................................... 3
3.3 Install Firefox .............................................................................................. 3
3.4 Block Firefox Update ................................................................................... 6
3.4.1 Firefox Navigation Bar ..................................................................... 6
3.4.2 Firefox Menu Bar ............................................................................. 6
3.5 Install Add-on .............................................................................................. 8
3.5.1 Firefox Navigation Bar ..................................................................... 8
3.5.2 Firefox Tool Bar ............................................................................... 8
3.6 Set URL .................................................................................................... 11
3.6.1 Firefox Navigation Bar ................................................................... 11
3.6.2 Firefox Tool Bar ............................................................................. 11
3.7 Adobe settings in Firefox .......................................................................... 14
3.7.1 Firefox Navigation Bar ................................................................... 14
3.7.2 Firefox Menu Bar ........................................................................... 14
4 Internet Explorer setup .......................................................................................... 16
4.1 Recommended Version ............................................................................ 16
4.2 IE Setup – Mandatory ............................................................................... 16
4.2.1 Disable default pop-up blocking ..................................................... 16
4.2.2 Customize security settings ........................................................... 17
4.2.3 Disable option "Do not save Encrypted Pages to Disk" ................. 19
4.2.4 Configure browser NOT to use Compatibility View ........................ 19
4.3 IE Setup – Recommended ........................................................................ 20
4.3.1 Add Workspace URL to trusted sites ............................................. 20
4.3.2 Minimize security setting for trusted sites ...................................... 21
4.3.3 Enable Mixed Content ................................................................... 23

4.3.4 Configure browser to check for new version every time user visits a page 25
4.3.5 Enable option "Always allow session cookies" .............................. 26
5 Smart View .............................................................................................................. 28
5.1 Download File ........................................................................................... 28
5.2 Verify the installation ................................................................................. 30
5.3 Setting up the connection ......................................................................... 31
5.4 Setting up the Options in Smart View ....................................................... 31

1
1 Document History Version Date Changed by Description of changes
1.0 Nov 27, 2014 EFIS Team Initial Release
1.1 Dec 11, 2014 EFIS Team Added ‘and Training’ to URL description “NOTE: For UAT and Training user’s only, use this URL:”
1.2 Dec 17, 2014 EFIS Team Removed “NOTE: For UAT and Training user’s only, use this URL:” from pages 15, 25 and 34
1.3 Feb 11, 2015 EFIS Team Removed reference to ‘Child Care’ / ‘Board User’ to make a generic Setup Guide
2
2 Description and System Requirements
2.1 Description The following information describes the setup and configuration requirements that need to be made to the end user workstation in order to use the Planning application for EFIS 2.0 correctly.
In this ‘User Setup Guide’ you will find the detailed step-by-step instructions and location of software needed:
to setup and configure a supported browser (either Internet Explorer 9 or Firefox 17)
to setup and configure the Smart View (Microsoft Excel Plug-In) software on the end user workstation.
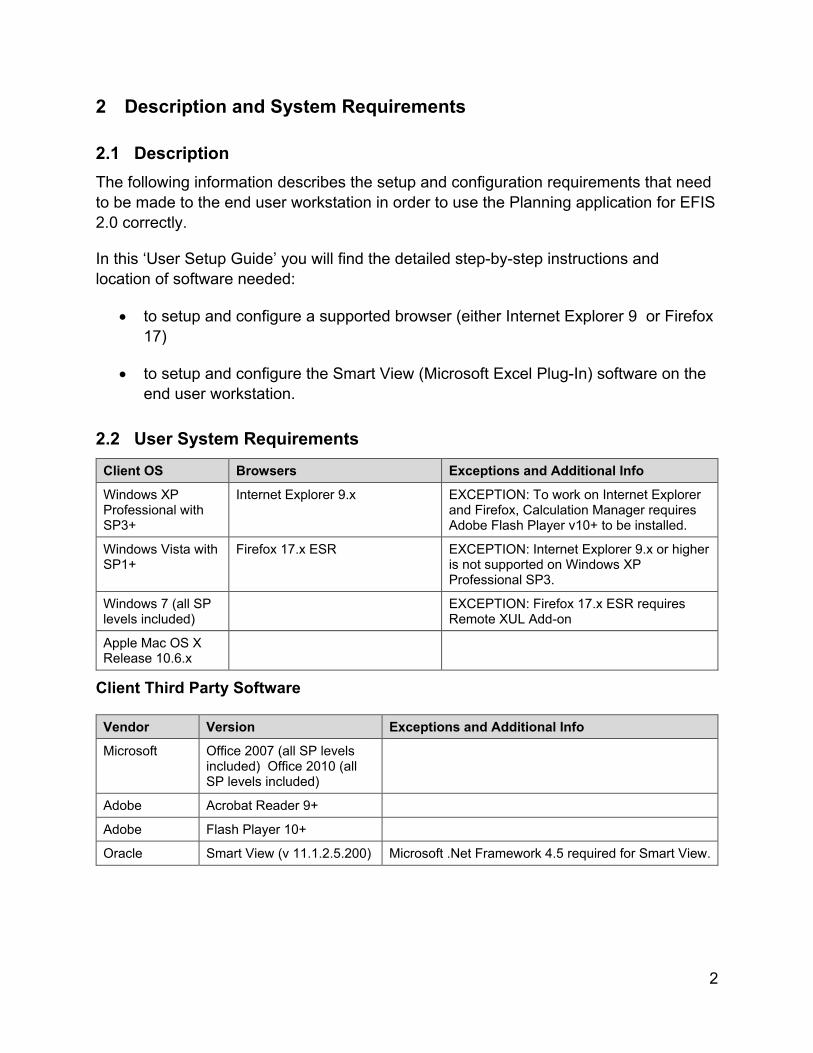
2.2 User System Requirements Client OS Browsers Exceptions and Additional Info
Windows XP Professional with SP3+
Internet Explorer 9.x EXCEPTION: To work on Internet Explorer and Firefox, Calculation Manager requires Adobe Flash Player v10+ to be installed.
Windows Vista with SP1+
Firefox 17.x ESR EXCEPTION: Internet Explorer 9.x or higher is not supported on Windows XP Professional SP3.
Windows 7 (all SP levels included)
EXCEPTION: Firefox 17.x ESR requires Remote XUL Add-on
Apple Mac OS X Release 10.6.x
Client Third Party Software
Vendor Version Exceptions and Additional Info
Microsoft Office 2007 (all SP levels included) Office 2010 (all SP levels included)
Adobe Acrobat Reader 9+
Adobe Flash Player 10+
Oracle Smart View (v 11.1.2.5.200) Microsoft .Net Framework 4.5 required for Smart View.

3
3 Firefox setup
3.1 Recommended Version Firefox v17 is the recommend version for use with Oracle Hyperion Planning.
Versions later than v17 (up to and including the current version – v32) may also work, however, these versions are not officially supported by Oracle. If you already have v32 installed you may wish to try it first. If you experience any problems it is recommended that you downgrade to v17.
3.2 Download Files The following files are required:
o Firefox Setup 17 and
o Remote XUL manager.
They are both located in this one file:
https://efis.fma.csc.gov.on.ca/Firefox/Firefox.zip
3.3 Install Firefox After clicking on the above link, you can download and install the file or elect to install the files without downloading them.
You may need to have Administrator rights to install Firefox. Please contact your local IT support desk to provide the Administrator access.

4
If you decide to save the file, the zipped file will be saved to your local computer and the files will appear in your download folder.
Click on ‘Firefox Setup…’ file to select a location to extract the file to. The location doesn’t matter, so you can accept the default if you choose.
Click on ‘Extract’ to extract the file and install it. You will be prompted to extract both files at the same time. Do so at this time.
Click on ‘Firefox Setup…’ file to run the installation file. When prompted, click on ‘Run’ to start the installation.
The Firefox installation will now start.

5
After Firefox has finished installation, open Firefox if it has not launched automatically

6
3.4 Block Firefox Update This step is to be run right after the installation in order to block the update.
3.4.1 Firefox Navigation Bar In Firefox click on Firefox Options Options
3.4.2 Firefox Menu Bar In Firefox click on Tools Options
Under Advanced Update select “Never check for updates…” and click OK

7

8
3.5 Install Add-on
3.5.1 Firefox Navigation Bar Click on Firefox Add-ons
3.5.2 Firefox Tool Bar Click on Tools Add-ons
On the Add-ons screen click the “Settings” (cog) icon, and select
“Install Add-on From File…”

9
Here is where you will install the Remote XUL manager. In the browse window select the location of the file
“remote_xul_manager-1.2.3-an+fn+fx+sm.xpi” and click “Open”.

10
In the Software Installation box wait for few seconds for the “Install Now” button to appear, then click “Install Now”
Once the install is completed, a message to restart Firefox will appear. Click
“Restart Now” and wait for Firefox to reopen.

11
3.6 Set URL
3.6.1 Firefox Navigation Bar Once the browser restarts, go to Firefox Web Developer Remote XUL Manager
3.6.2 Firefox Tool Bar Tools Web Developer Remote XUL Manager
In the XUL manager menu click “Add”, then paste in the planning URL https://efis.fma.csc.gov.on.ca/workspace/index.jsp and click OK

12
The address will now appear in the list of domains. Close out of this window by clicking on “x” on the right corner window.
Once in Firefox, paste the same URL into the address bar and hit Enter. Firefox will block a popup and will not allow for the application to open. Click the “Options” button and “Allow pop-ups for …”

13
If the application does not open automatically, re-paste the URL and open the application.
GO Secure logon screen will appear. This step is now complete.

14
3.7 Adobe settings in Firefox
3.7.1 Firefox Navigation Bar In Firefox go under Options
3.7.2 Firefox Menu Bar In Firefox click on Tools Options
Under Applications make sure that everything under the Adobe Acrobat has “Use Adobe Acrobat (in Firefox)”

15

16
4 Internet Explorer setup
4.1 Recommended Version Internet Explorer 9 (IE9) is the recommend version for use with Oracle Hyperion Planning.
IE8 is also compatible. However, users may experience performance degradation in data entry activities using IE8. Therefore, it is not recommended.
IE10, IE11, Chrome and Safari are not yet supported and should not be used.
4.2 IE Setup – Mandatory Specific IE settings are recommended by Oracle for the Hyperion products.
4.2.1 Disable default pop-up blocking
Open Internet Explorer
Go to “Tools“--> “Internet options“--> “Privacy“ tab
Uncheck "Turn on Pop-up Blocker"

17
4.2.2 Customize security settings
Open Internet Explorer
Go to “Tools“--> “Internet options“ --> “Security“ Tab
Select Custom Zone containing your Oracle Hyperion servers and click on "Custom level..." button
In "ActiveX controls and plug-ins" section enable "Run ActiveX controls and plug-ins" and "Script ActiveX controls marked safe for scripting".

18
"ActiveX controls and pug-ins" allow workspace to open
In "Miscellaneous" section enable options "Access data sources across domains" and "Allow script-initiated windows without size or position constraints"
The "Access data sources across domains" and "Allow script-initiated windows without size or position constraints" allow proper menu display

19
4.2.3 Disable option "Do not save Encrypted Pages to Disk"
Open Internet Explorer
Go to “Tools” --> “Internet options” --> “Advanced” Tab. In "Security" section uncheck the option "Do not save Encrypted Pages to Disk".
4.2.4 Configure browser NOT to use Compatibility View
Open Internet Explorer
Go to “Tools” --> “Compatibility View".
Make sure that all checkboxes are Unchecked

20
4.3 IE Setup – Recommended
4.3.1 Add Workspace URL to trusted sites
Open Internet Explorer
Go to “Tools“--> “Internet options“--> “Security“ tab
Select "Trusted sites" from "Select a zone to view or change security settings" window, then click on "Sites" button.
In "Add this website to the zone” enter the following URL: https://efis.fma.csc.gov.on.ca
Uncheck "Require server verification (https:) for all sites in this zone"

21
Click Add, then Close.
Click OK
Repeat for the following URLS (if they are not already entered)
*.gov.on.ca
http://*.gov.on.ca
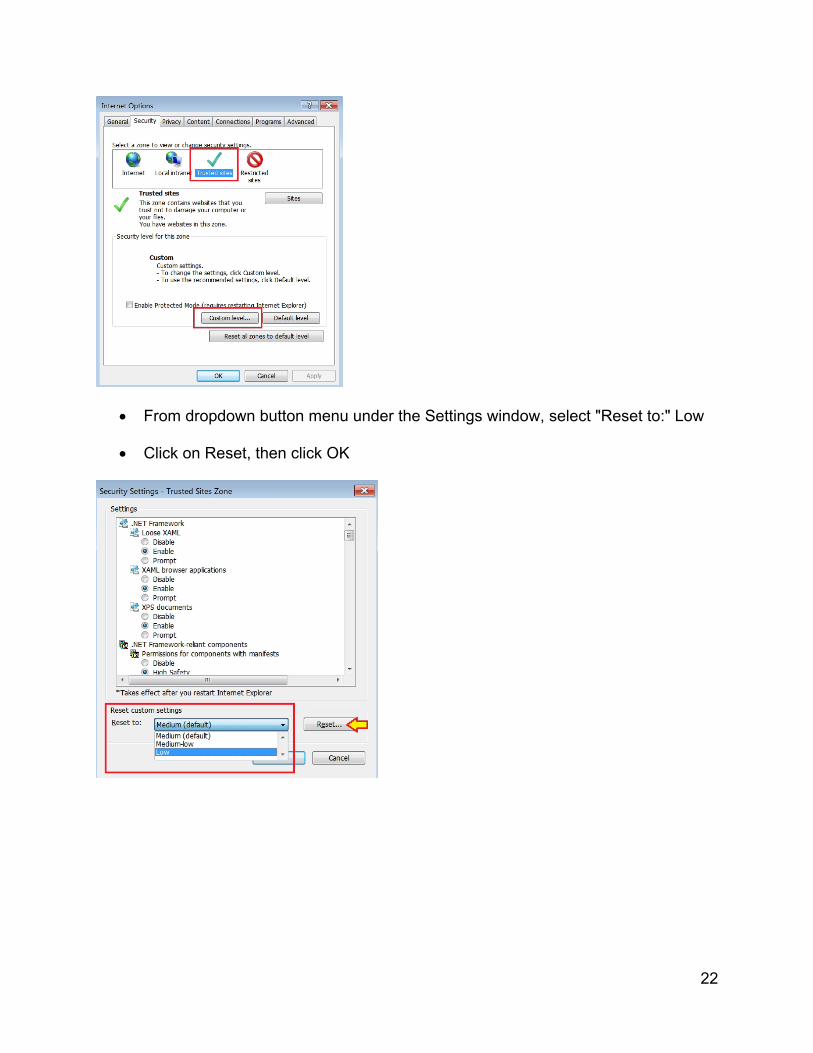
4.3.2 Minimize security setting for trusted sites
Open Internet Explorer
Go to “Tools“ --> “Internet options“ -->“Security“ tab
Select "Trusted sites" from "Select a zone to view or change security settings" window
Select Custom level
22
From dropdown button menu under the Settings window, select "Reset to:" Low
Click on Reset, then click OK

23
4.3.3 Enable Mixed Content
Open Internet Explorer
Go to “Tools“ --> “Internet options“ -->“Security“ tab
Select "Trusted sites" from "Select a zone to view or change security settings" window
Select Custom level
In Miscellaneous section under “Display mixed content” -> changed from “Prompt” to “Enable” then clicked on “OK”

24
Repeat the above procedure for the “Internet” zone
o Select Custom level
o In Miscellaneous section under “Display mixed content” -> changed from “Prompt” to “Enable”
o Click on “OK”

25
4.3.4 Configure browser to check for new version every time user visits a page
Open Internet Explorer
Go to “Tools“--> “Internet options“--> “General“
In "Browsing history" section click on "Settings" button and then select "Every time I visit the webpage" option
Click Apply then OK

26
4.3.5 Enable option "Always allow session cookies"
Open Internet Explorer
Go to “Tools“--> “Internet options“--> “Privacy“ --> “Advanced“. Check the "Override automatic cookie handling", accept the first and third party cookies and check the "Always allow session cookies" option.
Click OK

27
Prevents unwanted time-outs (logouts); Recommended if user gets logged out from the application too often and too soon

28
5 Smart View To use the Smart View add-in you must be using Microsoft Office 2007, 2010 or 2013.
If you only have access to MS Office 2003 please contact [email protected] for instructions.
You need to have Administrator rights to install Smart View. Please contact your local IT support desk to provide the Administrator access.
5.1 Download File There are two methods of installing Smart View.
Method 1 – From a zip file:
https://efis.fma.csc.gov.on.ca/SmartView/SmartView.zip
Copy or type in the above URL and press Enter. The following screen will appear.
If you Save the file, once it has been downloaded, proceed to open it.
If you decided to Open the file, or to Save it, the following screens are the same.
Double click on the Smart View icon to run it.
You will be prompted to run the file, click on Run.

29
Open your Excel to ensure that the Smart View tab is present. Continue with step 6.2.
Method 2: From Within EFIS
Access the EFIS application as usual. Once you are signed in, click on ‘Tools’ -> ‘Install’ -> ‘Smart View’.
The following dialogue box will appear.
Click on ‘Run’ to install the software now or ‘Save’ to save the program and install later.
If any pop-up screens show up during the installation, click on ‘Run’.
You will be prompted for the Administrator name and password. Please enter them to continue with the installation.
Follow the next steps to complete the installation.
30
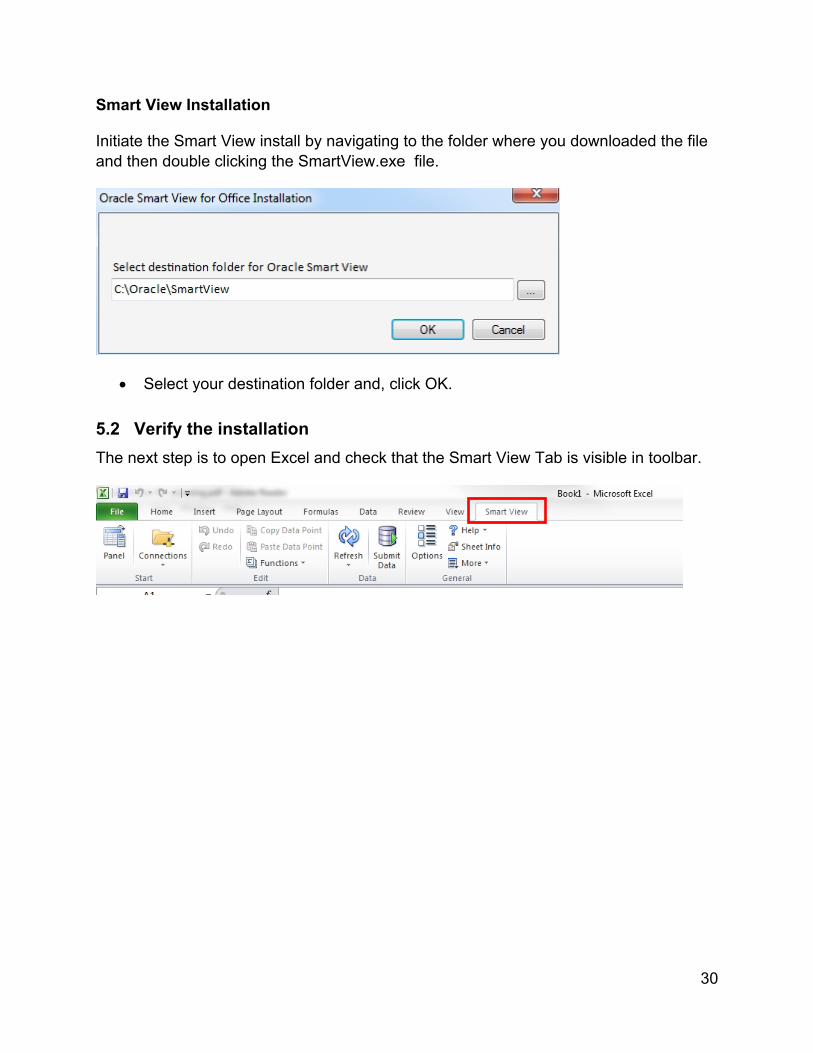
Smart View Installation
Initiate the Smart View install by navigating to the folder where you downloaded the file and then double clicking the SmartView.exe file.
Select your destination folder and, click OK.
5.2 Verify the installation The next step is to open Excel and check that the Smart View Tab is visible in toolbar.

31
5.3 Setting up the connection In Smart View, go to Options, Click on Advanced and specify the shared Connections URL:
https://efis.fma.csc.gov.on.ca/workspace/SmartViewProviders
5.4 Setting up the Options in Smart View To access the Options click on Smart View – Options
Under Data Option remove the check marks from following boxes under Suppress Rows and Columns.
No Data/Missing
Zero

32
No Access
After you make changes if any, click on the arrow beside OK and select Save as default option.

33
Last step is to close excel and reconnect again, to make sure all the changes took effect.