elch - amilovesgurumi · 1 elch crochet pattern seahorse by karin godinez difficulty: medium size:...
TRANSCRIPT

1
Elch
Crochet PatternSeahorse
by Karin Godinez
www.amilovesgurumi.com
Difficulty: Medium Size: The seahorse has a height of 18 cm / 7,09 inches
Material:1. crochet hook: 2.5 mm, sewing needle2. Catania wool by Schachenmayr in any color or any other yarn3. Fiberfill4. optional: Safety Eyes
Abbreviations:ch – chainR – round or rowsc – single crochetNumber x sc – the number tells you how many times you make a single crochet in each stitchinc - make two single crochet in one stitchdec - two stitches crochet together with a schdc - half double crochet dc - double crochet sl st - slip stitchBLO: back loops only
Note: - The seahorse is crocheted in rows. Ch 1 and turn at the end of each row.- Do not crochet the seahorse with invisible decrease. Crochet the regular decrease: Insert your hook into the stitch and pull the yarn. Insert hook into next stitch and pull. Yarn over, pull the yarn through all 3 loops on hook.- It is important that your work is as tight as you can make it, because you don’t want to see the stuffing through your work. If you see holes try working with a tighter tension or go down a hook size.- Yarn ends do not need to be sewn; you can hide them inside the seahorse
2
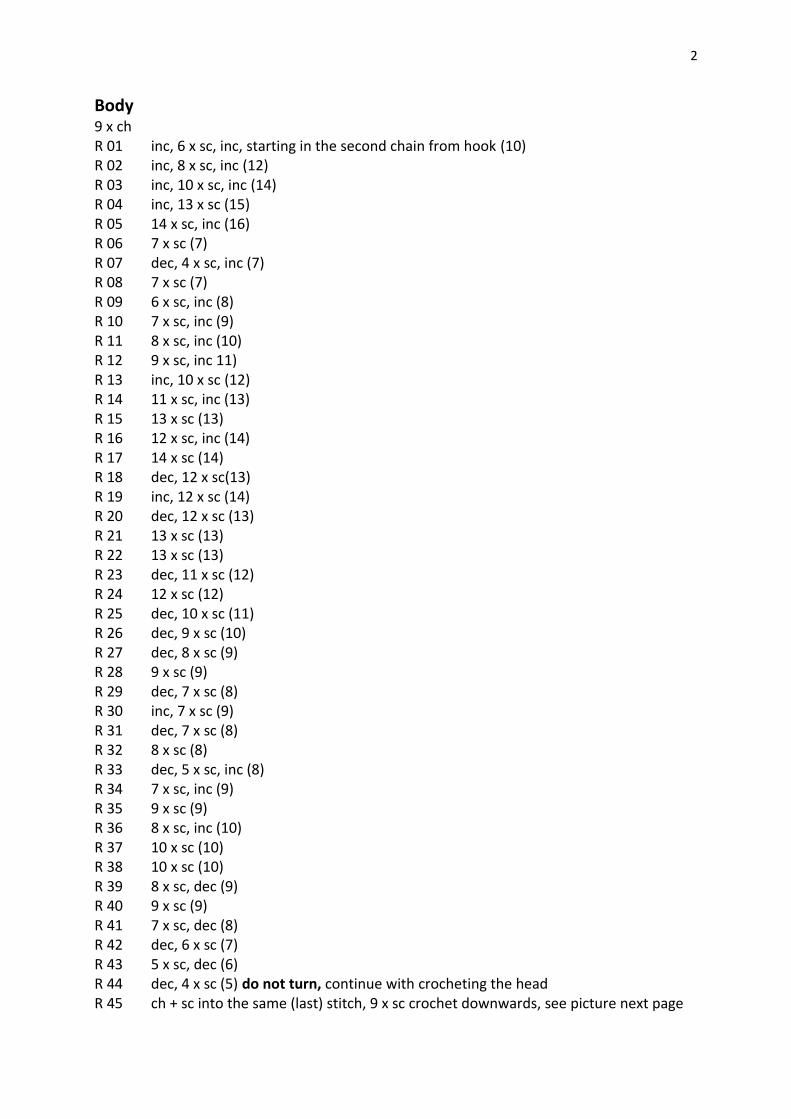
Body9 x chR 01 inc, 6 x sc, inc, starting in the second chain from hook (10)R 02 inc, 8 x sc, inc (12)R 03 inc, 10 x sc, inc (14)R 04 inc, 13 x sc (15)R 05 14 x sc, inc (16)R 06 7 x sc (7)R 07 dec, 4 x sc, inc (7)R 08 7 x sc (7)R 09 6 x sc, inc (8)R 10 7 x sc, inc (9)R 11 8 x sc, inc (10)R 12 9 x sc, inc 11)R 13 inc, 10 x sc (12)R 14 11 x sc, inc (13)R 15 13 x sc (13)R 16 12 x sc, inc (14)R 17 14 x sc (14)R 18 dec, 12 x sc(13)R 19 inc, 12 x sc (14)R 20 dec, 12 x sc (13)R 21 13 x sc (13)R 22 13 x sc (13)R 23 dec, 11 x sc (12)R 24 12 x sc (12)R 25 dec, 10 x sc (11)R 26 dec, 9 x sc (10)R 27 dec, 8 x sc (9)R 28 9 x sc (9)R 29 dec, 7 x sc (8)R 30 inc, 7 x sc (9)R 31 dec, 7 x sc (8)R 32 8 x sc (8)R 33 dec, 5 x sc, inc (8)R 34 7 x sc, inc (9)R 35 9 x sc (9)R 36 8 x sc, inc (10)R 37 10 x sc (10)R 38 10 x sc (10)R 39 8 x sc, dec (9)R 40 9 x sc (9)R 41 7 x sc, dec (8)R 42 dec, 6 x sc (7)R 43 5 x sc, dec (6)R 44 dec, 4 x sc (5) do not turn, continue with crocheting the headR 45 ch + sc into the same (last) stitch, 9 x sc crochet downwards, see picture next page
3
R 46 inc, 9 x sc (11)R 47 dec, 8 x sc, inc (11)R 48 inc, 8 x sc, dec (11)R 49 9 x sc, dec (10)R 50 8 x sc, dec (9)R 51 2 x dec, 4 x sc, inc (8)R 52 5 x sc, sl st (6)R 53 skip first stitch, 4 x sc, inc (6)R 54 4 x sc, dec (5)R 55 dec, 2 x sc, inc (5) R 56 3 x sc, dec (4)R 57 2 x sc, dec (3)R 58 dec, sl st (2), cut the yarn
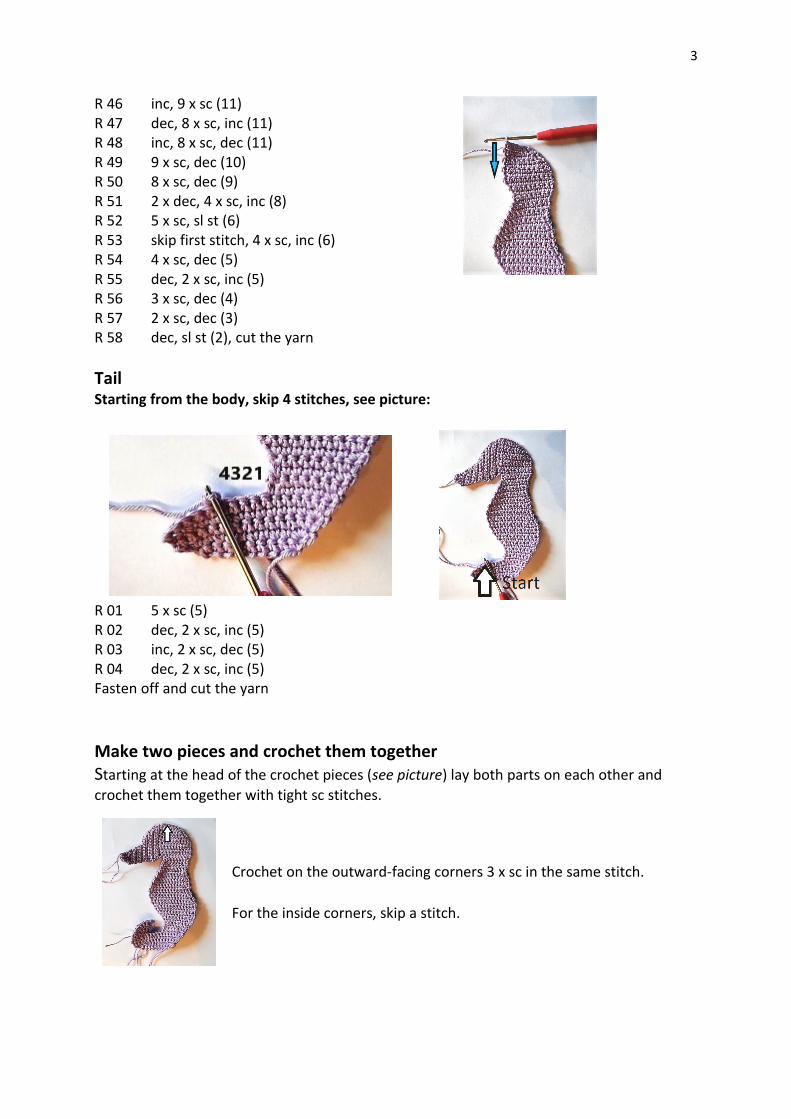
TailStarting from the body, skip 4 stitches, see picture:
R 01 5 x sc (5)R 02 dec, 2 x sc, inc (5)R 03 inc, 2 x sc, dec (5)R 04 dec, 2 x sc, inc (5)Fasten off and cut the yarn
Make two pieces and crochet them togetherStarting at the head of the crochet pieces (see picture) lay both parts on each other and crochet them together with tight sc stitches.
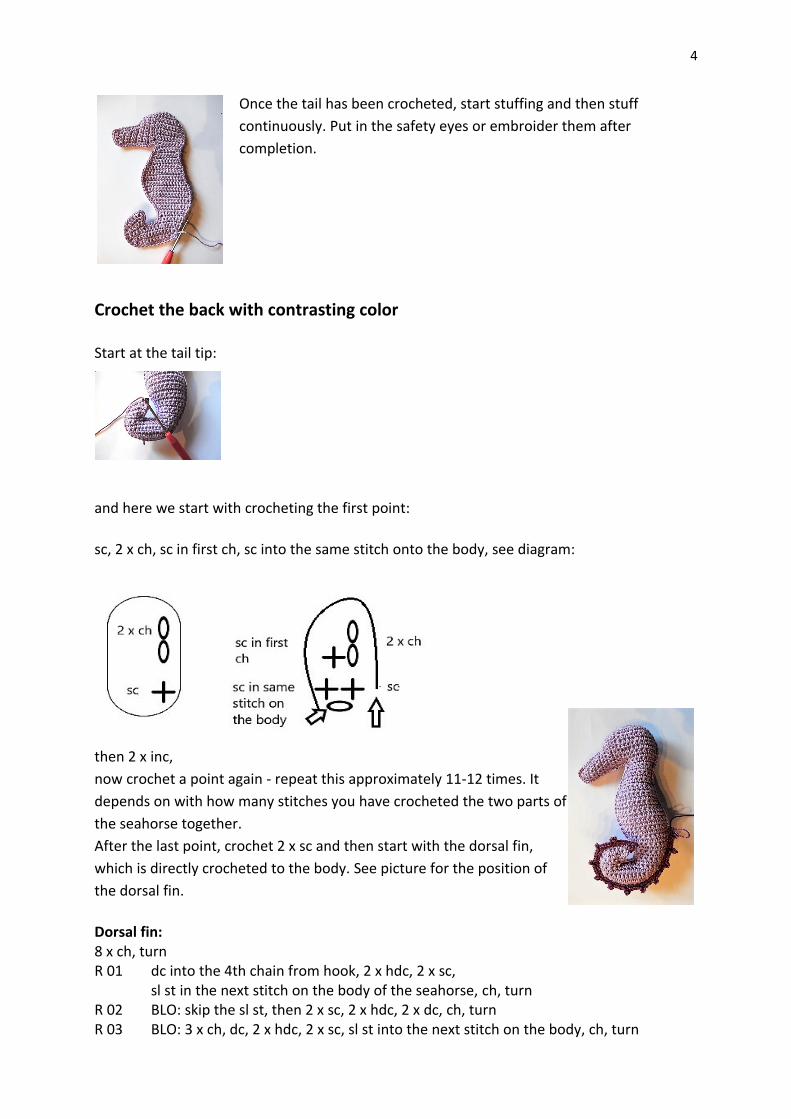
Crochet on the outward-facing corners 3 x sc in the same stitch.
For the inside corners, skip a stitch.
4
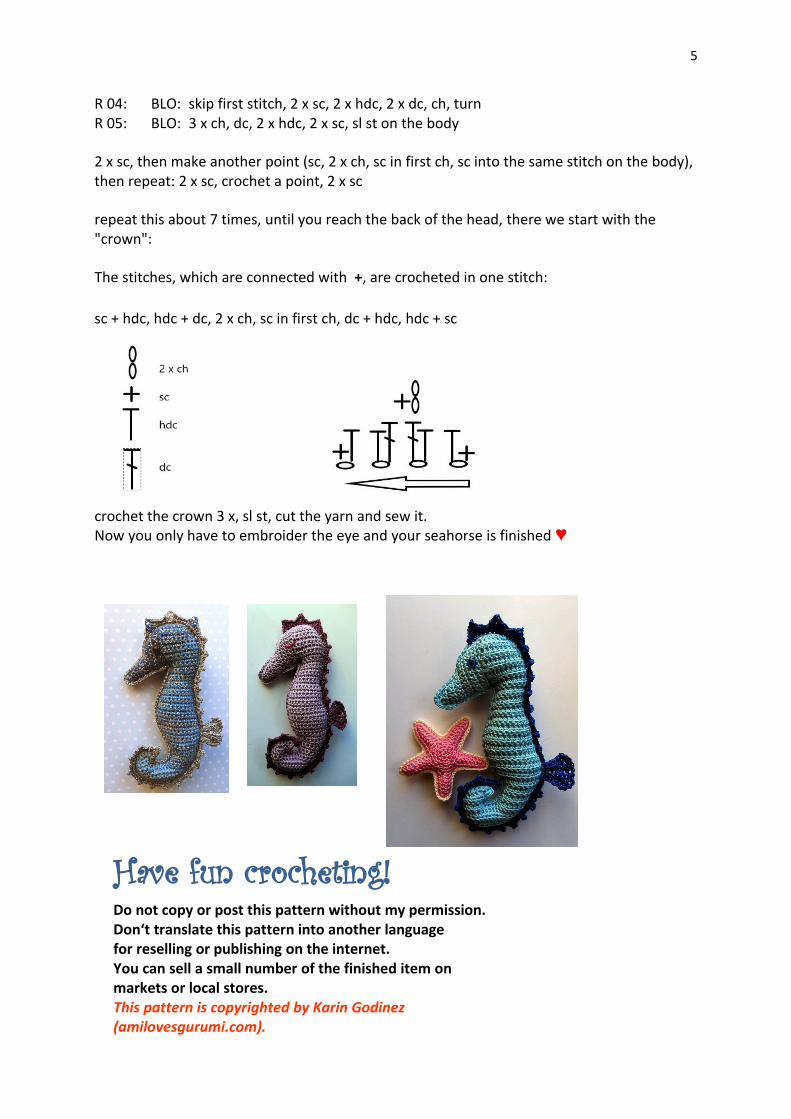
Once the tail has been crocheted, start stuffing and then stuff continuously. Put in the safety eyes or embroider them after completion.
Crochet the back with contrasting color
Start at the tail tip:
and here we start with crocheting the first point:
sc, 2 x ch, sc in first ch, sc into the same stitch onto the body, see diagram:
then 2 x inc,now crochet a point again - repeat this approximately 11-12 times. Itdepends on with how many stitches you have crocheted the two parts ofthe seahorse together.After the last point, crochet 2 x sc and then start with the dorsal fin,which is directly crocheted to the body. See picture for the position ofthe dorsal fin.
Dorsal fin:8 x ch, turnR 01 dc into the 4th chain from hook, 2 x hdc, 2 x sc,
sl st in the next stitch on the body of the seahorse, ch, turnR 02 BLO: skip the sl st, then 2 x sc, 2 x hdc, 2 x dc, ch, turnR 03 BLO: 3 x ch, dc, 2 x hdc, 2 x sc, sl st into the next stitch on the body, ch, turn
5
R 04: BLO: skip first stitch, 2 x sc, 2 x hdc, 2 x dc, ch, turnR 05: BLO: 3 x ch, dc, 2 x hdc, 2 x sc, sl st on the body
2 x sc, then make another point (sc, 2 x ch, sc in first ch, sc into the same stitch on the body), then repeat: 2 x sc, crochet a point, 2 x sc
repeat this about 7 times, until you reach the back of the head, there we start with the "crown":
The stitches, which are connected with +, are crocheted in one stitch:
sc + hdc, hdc + dc, 2 x ch, sc in first ch, dc + hdc, hdc + sc
crochet the crown 3 x, sl st, cut the yarn and sew it.Now you only have to embroider the eye and your seahorse is finished ♥
Have fun crocheting!
Do not copy or post this pattern without my permission. Don‘t translate this pattern into another language for reselling or publishing on the internet. You can sell a small number of the finished item on markets or local stores. This pattern is copyrighted by Karin Godinez (amilovesgurumi.com).