embroidered mouse pad - embroidery library · a majestic alphabet design pack (redwork, 2 inch...
TRANSCRIPT

Embroidered Mouse Pad
Embroidered Mouse Pad
Add some flair to your desktop with an embroidered mouse pad!
Mouse pads are easily customizable when you add your favorite embroidery designs and thread colors. They also make wonderful gifts!
Read below for these free project instructions.
Supplies Needed:
**Foam mouse pad (2mm thick or a bit less than 1/8 inch thick, without a hard plastic coating)
**Medium weight cutaway stabilizer
**Temporary spray adhesive
**Masking tape
file:///F|/Source/ELProjects/html/PR1524.html (1 of 8)7/28/2009 11:18:05 AM
1

Embroidered Mouse Pad
Designs used: Celtic Unicorn Circle (small), Majestic Letter K (Redwork) - 3 Inch
These designs are available in the following design packs: A Celtic Fantasy Design Pack - XLA Celtic Fantasy Design Pack - LgA Celtic Fantasy Design Pack - MdA Celtic Fantasy Design Pack - Sm
A Majestic Alphabet Design Pack (Redwork, 5 Inch Height)A Majestic Alphabet Design Pack (Redwork, 4 Inch Height)A Majestic Alphabet Design Pack (Redwork, 3 Inch Height)A Majestic Alphabet Design Pack (Redwork, 2 Inch Height)A Majestic Alphabet Design Pack (Redwork, 1 1/2 Inch Height)
Important Project Notes:**It's important to choose a mouse pad that is made of soft foam and does not have a hard plastic top. Also, our mouse pad was about 2mm or about 1/8 inch thick.
**We found our mouse pad at an office supply store (like Office Max or Office Depot). The Sewphisticated Stitcher also has some great blank mouse pads: http://www.thesewphisticatedstitcher.com/emmopa.html
**Choose a design that has a medium to light stitch count (around 20,000 stitches or less with a some open areas and few solid stitched areas). Designs with large stitch counts tend to pucker and distort the mouse pad.
file:///F|/Source/ELProjects/html/PR1524.html (2 of 8)7/28/2009 11:18:05 AM
2

Embroidered Mouse Pad
To begin, cut a piece of medium weight cutaway stabilizer a bit larger than your hoop. Then, using a straight edge, draw a crosshair in the center.
Create a paper template of the design by printing it at full size using embroidery software. If you don't have embroidery software, you can cut a piece of paper the shape and dimensions of the designs to help with placement and centering.
Position the template on the mouse pad where you want it. Then, lay strips of masking tape under the axis lines on the template. Poke a hole in the center of the template and mark the tape. Also, mark the horizontal and vertical axis points.
file:///F|/Source/ELProjects/html/PR1524.html (3 of 8)7/28/2009 11:18:05 AM
3

Embroidered Mouse Pad
Remove the template and draw lines to connect the axis points.
Hoop the stabilizer tightly by aligning the marks on the hoop with the lines on the stabilizer. Then, generously spray the stabilizer with temporary adhesive.
file:///F|/Source/ELProjects/html/PR1524.html (4 of 8)7/28/2009 11:18:05 AM
4

Embroidered Mouse Pad
Align the lines on the tape with the lines on the stabilizer and press the mouse pad in place.
Attach the hoop to the machine and load the design. Move the hoop so that the needle is directly over the center point on the tape. Remove the tape and embroider the design. Avoid using metallic thread and white or very light colored thread - these types may cause optical mice to not perform properly.
file:///F|/Source/ELProjects/html/PR1524.html (5 of 8)7/28/2009 11:18:05 AM
5

Embroidered Mouse Pad
After the design has finished, unhoop the stabilizer and trim away the excess on the back of the embroidery.
We noticed that after the stabilizer is trimmed away the mouse pad was just a bit warped. To correct this, you may press the mouse pad using a pressing cloth and an iron set on its lowest heat setting.
file:///F|/Source/ELProjects/html/PR1524.html (6 of 8)7/28/2009 11:18:05 AM
6

Embroidered Mouse Pad
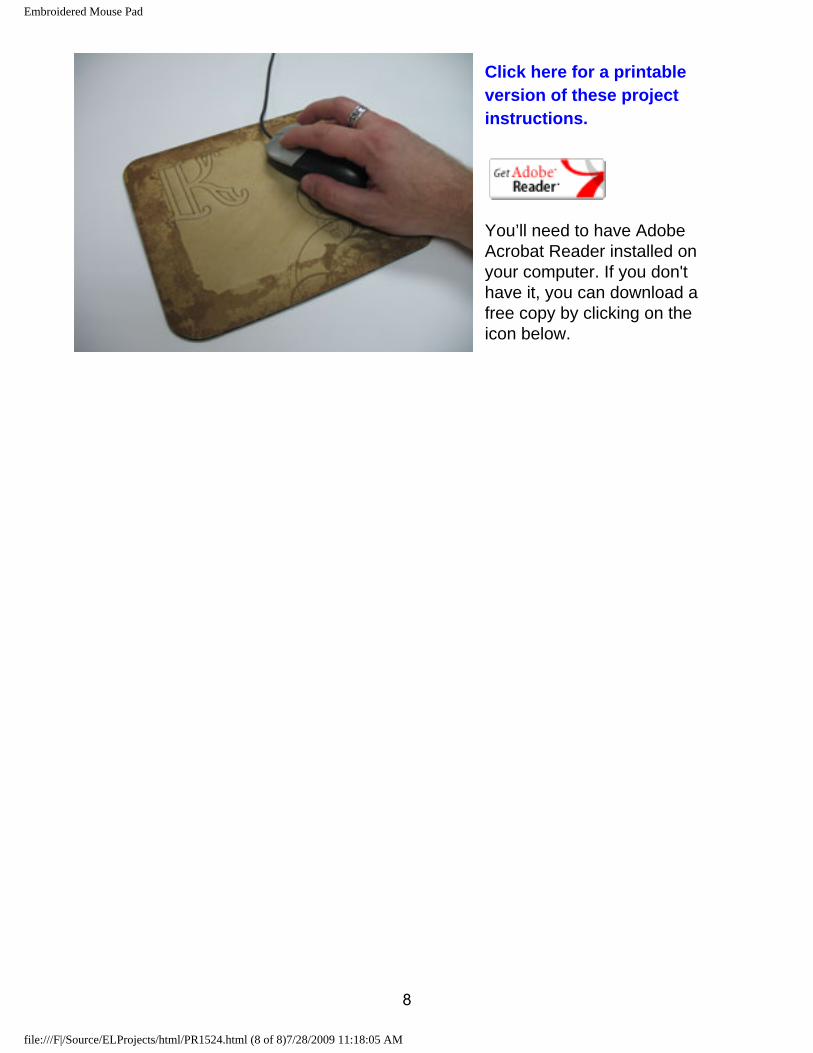
Your mouse pad is now complete!
We monogrammed this mouse pad with a Majestic Letter K (Redwork) - 3 Inch. This design is very light and works perfectly for a creating a quick easy gift!
file:///F|/Source/ELProjects/html/PR1524.html (7 of 8)7/28/2009 11:18:05 AM
7
Embroidered Mouse Pad
Click here for a printable version of these project instructions.
You’ll need to have Adobe Acrobat Reader installed on your computer. If you don't have it, you can download a free copy by clicking on the icon below.
file:///F|/Source/ELProjects/html/PR1524.html (8 of 8)7/28/2009 11:18:05 AM
8