embroidery magic - allbrands · tutorial embroidery magic version 1.0 july 1999 created by your...
TRANSCRIPT
TUTORIAL
EmbroideryMagic
VERSION 1.0 July 1999
Created by your Pantograms Software Team
Please read this very carefully as it is a LEGAL AGREEMENT between YOU the software end userand PANTOGRAMS MANUFACTURING CO. INC. By installing this package you are agreeingto be bound by the terms of this contract. If you do not wish to enter this contract, please do not openthis SOFTWARE package. Simply return it to your dealer.
You have the right to use one copy of the enclosed Pantograms Manufacturing Co. Inc. softwareprogram but must abide by the terms that follow:
COPYRIGHT. This software is owned by Pantograms Manufacturing Co. Inc. and is protected byUnited States copyright laws and international treaty provisions.
GRANT OF LICENSE. Purchasers of this software are granted the right to use one copy of thespecific software program that they receive from Pantograms Manufacturing Co. Inc.
RESTRICTIONS. You agree not to or allow anyone else to reverse engineer, de-compile, or disas-semble the software.
OUR WARRANTY TO YOU: The Pantograms Manufacturing Co. Inc. Limited Warranty certifiesto you that this software will perform substantially in accordance with the accompanying documen-tation for a period of 12 months from the date of receipt. We further certify that the installationdisks, security device and reference manual accompanying this software will be substantially freefrom defects in materials and workmanship under normal use and service for a period of 12 monthsfrom the date of receipt.
IF YOU HAVE A PROBLEM: Pantograms Manufacturing Co. Inc. will repair or replace thesoftware and/or its security device if they do not meet Pantograms Manufacturing Co. Inc. LimitedWarranty. We reserve the right, however, to void this Limited Warranty if failure of the softwareand/or security device has resulted from accident or misuse. We will, of course warranty any re-placement software and security device for the remainder of the original warranty period or for 30days, whichever is longer.
THERE ARE NO OTHER WARRANTIES: The above constitutes our entire warranty to you andthe exclusive remedy. Pantograms Manufacturing Co. Inc. will disclaim any other warranties,whether expressed or implied. This includes but does not limit any implied warranties of merchant-ability and fitness for a particular purpose. This encompasses the software, the written materialsand the security device that are enclosed.
THERE IS NO LIABILITY FOR CONSEQUENTIAL DAMAGES: Under no circumstances willPantograms Manufacturing Co. Inc., its suppliers and dealers be held liable for damages arisingfrom the use of or inability to use this Pantograms Manufacturing Co. Inc. product, even ifPantograms Manufacturing Co. Inc. has been advised of the possibility of such damages. Thisincludes any damages for loss of business profits, business interruption, loss of business informa-tion, or other pecuniary loss.
Licensing Agreement betweenPantograms Manufacturing Co. Inc.
and the Purchaser
6/99Pantograms Embroidery Magic i
Pantograms Embroidery Magic ii
PANTOGRAMS LICENSE AGREEMENT......................................... i
TABLE OF CONTENTS.......................................................................... ii
OVERVIEW TABLE OF CONTENTSWELCOME.......................................................................................... 1
MENU AREA.................................................................................... 1
FILE MENU........................................................................................ 1
EDIT MENU...................................................................................... 3
TOOLS MENU.................................................................................... 4
DISPLAY MENU................................................................................ 5
SYSTEM MENU................................................................................. 6
WINDOWS MENU............................................................................. 7
HELP MENU....................................................................................... 7
TOOLBARS.......................................................................................... 8
MAIN..................................................................................... 8
EDITING................................................................................ 10
DESIGN AREA................................................................................... 12
NEEDLES............................................................................... 12
RULERS................................................................................ 12
GUIDE LINES ...................................................................... 12
UNITS.................................................................................. 13
SCROLL BARS...................................................................... 13
COLOR SEQUENCE BAR................................................... 13
STATUS BAR...................................................................... 14
OPENING DESIGNS.............................................................................. 15
TABLE OF CONTENTS
6/99

To try these options you must first have an opened design in the
design area.
MANIPULATING DESIGNS TABLE OF CONTENTSCUT, COPY PASTE............................................................................ 16
ROTATE.............................................................................................. 18
MOVING............................................................................................. 19
SCALING............................................................................................ 20
MIRROR.............................................................................................. 22
ADDING TEXT TO DESIGNS........................................................... 23
SAVING DESIGNS.................................................................................. 28
DISPLAY OPTIONS............................................................................... 29
PRINTING DESIGNS............................................................................. 32
SYSTEM OPTIONS................................................................................ 33
DESIGN DATABASE ............................................................................ 36
6/99Pantograms Embroidery Magic iii
The File Menu allows you to create new designs, open existingdesigns, and save designs, as well as giving access to the designdatabase.
To select a menu item move the mouse over your choice and pressthe left mouse button. This is called a mouse click. This will causethe menu to open and show it’s available options.
New - Creates a clear work area that you can paste designs into.
Open - Opens an existing design into a new work area.
6/99
WELCOME
FILE MENU
Welcome to Embroidery Magic by Pantograms. This tutorial willgive you an overview of the features of the software such as the basicoperation of menus and toolbars, opening designs, manipulating de-signs, adding lettering and saving designs.
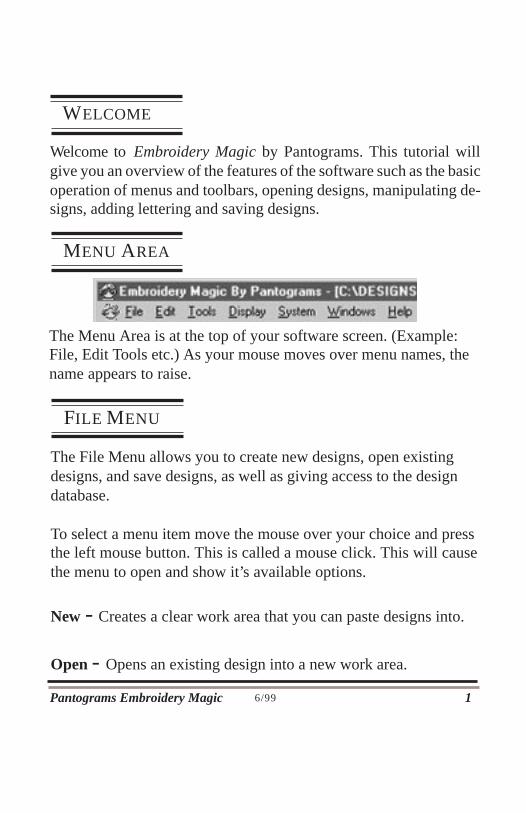
MENU AREA
The Menu Area is at the top of your software screen. (Example:File, Edit Tools etc.) As your mouse moves over menu names, thename appears to raise.
Pantograms Embroidery Magic 1
6/99
Close - Closes the active work area.
Save - Saves the design in the active work area.
Save As - Allows you to save the design in the active work area
under a different name or file format.
Design Database - Accesses the design database.
Add Design To Database - Adds the design in the current workarea to the design database.
Add Directory of Designs To Database - Allows you to add acomplete set of designs to a database.
Batch Conversion - Allows you to open multiple files in one step
and convert them to a different type of file.
Print - Prints the design in the active work area.
Exit - Exits the program.
Most Recent Files Opened - Shows you the last four designs you
opened, and allows you to reopen them simply by clicking on oneof them.
Pantograms Embroidery Magic 2
The Edit Menu allows you to manipulate designs.
Cut - Copies the selected design to the clipboard and removes it
from the work area.
Copy - Copies the selected design to the clipboard.
Paste - Pastes a copied design to the work area.
Delete - Deletes the selected design from the work area.
Mirror - Allows you to mirror the selected design horizontally or
vertically.
Rotate - Allows you to rotate the selected design.
Move - Moves the selected design in the work area.
Scale - Allows you to enlarge or reduce the selected design.
Select All - Selects all designs and text in the current work area.
6/99
EDIT MENU
Pantograms Embroidery Magic 3
6/99
Paste From - Pastes a design from another file into the current
work area.
Center - Centers the design in the work area.
Delete Short Stitches - Removes short stitches from the design
that could cause sewing problems.
Pantograms Embroidery Magic 4
TOOLS MENU
The Tools Menu allows you to select one of the following tools:
• Object Selector
• Lettering
Object Selector - Is the tool used to select designs or text on thescreen.
Lettering - This option allows you to select the point in the design
for adding lettering.
6/99
DISPLAY MENU
The Display Menu allows you to select and set the different view-ing options for the current work area.
Refresh - Redraws the design in the work area.
Real View - Allows you to view the current design as simulated
embroidery on a fabric background.
Actual Size - Views the design at actual size.
Fit To Screen - Zooms in so that the entire design just fits on the
screen.
Display Hoop - Allows you to select a hoop size to determine the
size needed for sew out.
Create New Hoop – allows you to create a custom size hoopneeded for sew out.
Pantograms Embroidery Magic 5
6/99Pantograms Embroidery Magic 6
SYSTEM MENU
The System Menu allows you to customize some software settingsto your preference.
Grid - Shows or hides the grid lines in the work area.
Work Area Background - Allows you to change the backgroundcolor of the work area.
Cursors - Allows changes to the cursor used in the work area.
Set Design Colors To Default - Set the twelve needle colors to the
preset default colors.
Set Default Colors - Allows you to set the default design colors.
Screen Scale - Allows you to change the scale on the screen.
Units Of Measurement - Allows you to select which units to
display measurements.
Language - Allows you to select a different language for the
software.
6/99
WINDOWS MENU
The Widows Menu allows you to select how design work areas aredisplayed.
Cascade - Cascades design windows.
Tile - Tiles design windows.
Most Recent Files Opened - Shows all open designs, allowingyou to easily select a work area.
HELP MENU
The Help Menu runs the tutorial.
Help - Displays the tutorial.
About - Provides technical information about the software.
Pantograms Embroidery Magic 7

TOOLBARS
The Toolbars at the top and left of the work area allow you toeasily access many of the most commonly used tools.
To select an option from the toolbars, move your mouse over thetool bar button and press your left mouse button. If you leave themouse over the toolbar button for 2 or more seconds you will begiven a description of what the tool is.
The Main Toolbar at the top of the work area allowsaccess to the tools used to load and save designs aswell as display options.
New Design - Opens a new empty work area.
Open Design - Opens a design in the work area.
Close Design - Closes the active design in the work
area.
Save Design - Saves the design. To save the file to a
new name select the Save As option.
Design Database - Allows access to the design data-
base.
Pantograms Embroidery Magic 86/99
MAIN TOOLBAR
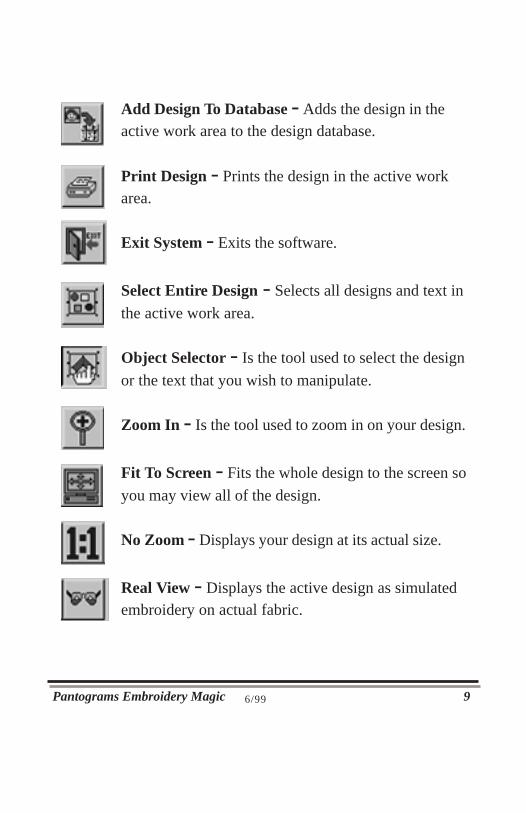
Add Design To Database - Adds the design in theactive work area to the design database.
Print Design - Prints the design in the active workarea.
Exit System - Exits the software.
Select Entire Design - Selects all designs and text in
the active work area.
Object Selector - Is the tool used to select the design
or the text that you wish to manipulate.
Zoom In - Is the tool used to zoom in on your design.
Fit To Screen - Fits the whole design to the screen so
you may view all of the design.
No Zoom - Displays your design at its actual size.
Real View - Displays the active design as simulatedembroidery on actual fabric.
6/99Pantograms Embroidery Magic 9
EDIT TOOLBAR
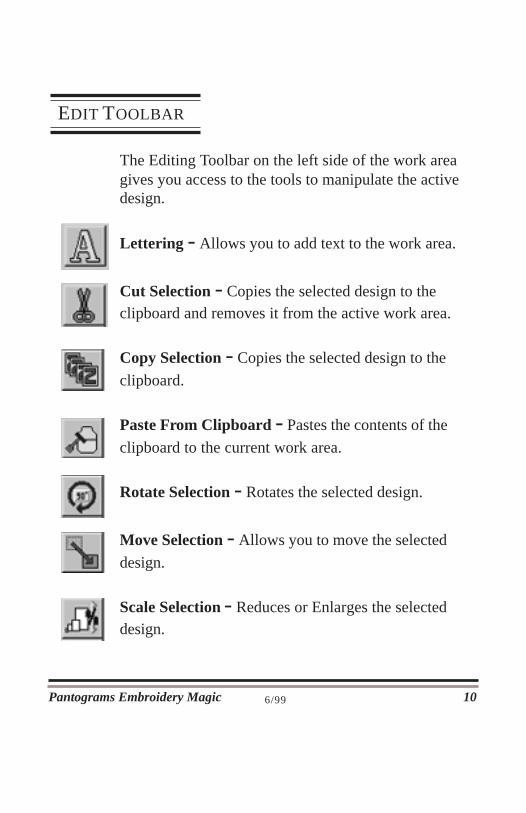
The Editing Toolbar on the left side of the work areagives you access to the tools to manipulate the activedesign.
Lettering - Allows you to add text to the work area.
Cut Selection - Copies the selected design to theclipboard and removes it from the active work area.
Copy Selection - Copies the selected design to the
clipboard.
Paste From Clipboard - Pastes the contents of the
clipboard to the current work area.
Rotate Selection - Rotates the selected design.
Move Selection - Allows you to move the selected
design.
Scale Selection - Reduces or Enlarges the selecteddesign.
Pantograms Embroidery Magic 106/99
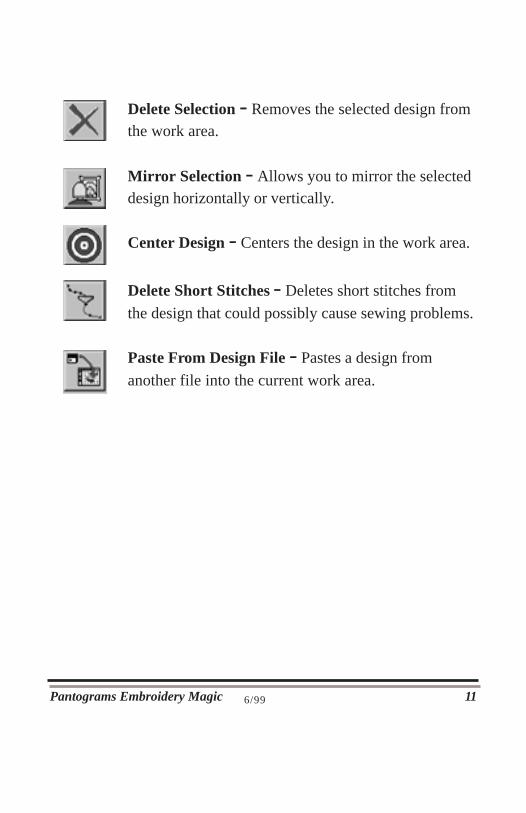
Delete Selection - Removes the selected design fromthe work area.
Mirror Selection - Allows you to mirror the selecteddesign horizontally or vertically.
Center Design - Centers the design in the work area.
Delete Short Stitches - Deletes short stitches from
the design that could possibly cause sewing problems.
Paste From Design File - Pastes a design from
another file into the current work area.
6/99Pantograms Embroidery Magic 11
The Rulers are at the right and top of the design area. They allowyou to guage the size of your design. The increments on the rulerare based on your units of measurement selection.
DESIGN AREA
RULERS
The Design Area is the blank area inside the top and left rulers andthe right and bottom scroll bars. This is the area where you insertand work on designs.
NEEDLE BUTTONS
These are the twelve needle colors on the right side of the EditToolbar to use in the creation of a design. Select a needle numberand click on the palette to change the color for that needle.
GUIDE LINES
Click the gray area in the horizontal or vertical rulers to display aguide line. Position the guide line by clicking and holding the leftmouse button on the black guide and dragging it to the desiredposition.Turn off a guide line, by clicking on the black guide withthe right mouse button.
Pantograms Embroidery Magic 126/99
The Sequence bar located at the bottom of the vertical ruler showsall the colors in the design. Select a color in the bar. The needlenumber and corresponding color in the design will flash red. Thisindicates which area of the design and needle are assigned thatcolor.
UNIT BUTTON
COLOR SEQUENCE BAR
This button is located at the top of color needle buttons betweenthe horizontal and vertical rulers. It provides an easy way tochange the units of measurement. Click and release the left mousebutton to change the selection.
SCROLL BARS
The scrollbars at the bottom and right of design area allow you toscroll your design so you may view different portions of yourdesign.
6/99Pantograms Embroidery Magic 13
STATUS BAR
The Status bar at the very bottom of the software screen showsinformation about the design.
X Position - The X Position displays the current X coordinates ofthe mouse.
Y Position - The Y Position displays the current Y coordinates ofthe mouse.
Length - Length shows the distance from the last point that was
clicked on to the current position of the mouse.
Stitches - This shows the total number of stitches in the design.
Design Size H: W: - This shows the height and width of the
design.
Pantograms Embroidery Magic 146/99
OPENING DESIGNS
To open a design you may click on either the Open Button on theMain Toolbar or select Open from the File Menu.
The Open Design File dialog box is then displayed.
Click on the Folder where the design is located.
Now click on the design you wish to open.
When you click on the design the name will show up in the filename box.
Now, click on Open to bring the design into Embroidery Magic.
That’s how easy it is to open a design in Embroidery Magic.
6/99Pantograms Embroidery Magic 15
CUT, COPY & PASTE
The Cut, Copy & Paste features of Embroidery Magic give you theflexibility to easily change a design. Let me show you how itworks.
Cut Example:
First, click on the object selector in the Main Toolbar.
Now click on the design to select it.
Then click on the Cut Button in the Edit Toolbar.
Notice, that the design we had selected has disappeared, but don’tworry it has been copied to the clipboard.
Click on the Paste Button to retrieve the design from the clipboard.
When you paste from the clipboard, the design will always appearin the top left corner of the design area.
To move the pasted design click & hold down your left mousebutton and drag it to the desired position.
That’s how Cut & Paste works, now lets see how Copy and Pastecan help you create more interesting designs.
6/99Pantograms Embroidery Magic 16
Copy Example:
With the design selected lick on the Copy Button in the EditToolbar.
Even though it appears nothing happened, the design was copied tothe clipboard. Click on Paste to add the copied design to the designin the work area.
Once again, to move the pasted design, Click & hold down the leftmouse button and move it to the desired position.
When you deselect the pasted design you will see that both peicesof the design become one. Move them both to their new position.
That’s how easy it is to use the Cut, Copy and Paste features ofEmbroidery Magic.
Pantograms Embroidery Magic 176/99
ROTATING DESIGNS
To rotate a design click on the object selector in the Main Toolbar.
Then click on the opened design in the work area to select it.
Now click on the Rotate Button in the Edit Toolbar.
The Roate Selection screen is displayed.
Click on the arrows to get the desired amount of rotation. For thisexample set rotation to 45 degrees by either typing in the value inteh Angle of Rotation text box or by clicking ont he right arrow onthe scroll bar.
When you have the angle you want click on Ok to apply it.
As you can see your design has been rotated to the requested angle.
That’s how easy it is to rotate designs in Embroidery Magic.
6/99Pantograms Embroidery Magic 18
MOVING DESIGNS
To move a design click on the Select All Button on the MainToolbar.
Now click on the Move Button on the Edit Toolbar.
The Move Selected Objects screen is displayed
Notice there are two different move methods, Relative Move andAbsolute Move. Use the Relative Move first.
Enter values to move the design approximately 1 inch to the rightand a quarter inch down.
Click on Ok to apply the change.
You can see how the values that were entered affected the design.Now lets use the other move method.
Click on the Move Button on teh Edit Toolbar.
Click on the Absolute Move option.
Enter -2 in teh X coordinates box and -1 in teh Y coordinates box.
Click the left bottom option button to indicate that the lower leftcorner of the design should move to the coordinates entered.
Click on Ok to make the move.
Pantograms Embroidery Magic 196/99
Notice that the left bottom corner of the design has moved to thecoordinates entered.
Remember that you can also move selected objects by clicking andholding down the left mouse button and moving to the new posi-tion.
That’s how easy it is to move objects in Embroidery Magic.
SCALING DESIGNS
To scale a design click on the object selector on the Main Toolbar.
Now click on the opened design in the work area to select it.
Then click on the Scale Design Button on the Edit Toolbar.
The Sacle Selected Objects screen is displayed.
notice there are two different scale methods, Sclae by Percentage,and Scale by Size. Use the Scale by Percentage first.
Change the horizontal scale to 120 percent of the original size.
Notice that the vertical scale changed at the same time. Thishappened because Maintain Aspect Ration was checked at thebottom of the screen.
Click Ok to apply the scaling.
6/99Pantograms Embroidery Magic 20
You can see how the scaling was applied.
Click on the Scale Design Button from the Edit Toolbar again.
Click on Scale by Size.
Enter the new horizontal size of 1.0039 In.
Once again notice how the vertical size changed since we hadMaintain Aspect Ration checked.
Click on Ok to apply the scaling.
You can see how the scaling was applied.
Another way to scale selected designs is to click and hold downthe left mouse button on one of the selection handles then drag itto the desired size and release the mouse button.
This also allows you to add some artistic flair since you can causesome neat distortions.
That’s how easy it is to scale designs in Embroidery Magic.
Pantograms Embroidery Magic 216/99
MIRROR DESIGNS
To Mirror a design click on the object selector on the MainToolbar.
Now click on the opened design in the work area.
Click on the Mirror Button on the Edit Toolbar.
The Mirror Selected Objects screen is displayed.
For the first example, do a horizontal mirror. Click on the Horizon-tal Mirror check box.
Click on Ok.
As you can see the design has flipped from left to right.
Click on the Mirror Button on the Edit Toolbar again.
Click the Vertical Mirror check box this time.
Click on Ok to apply the mirror.
As you can see our design has now flipped top to bottom.
Click on Mirror one more time from the Edit Toolbar.
Click on the Vertical Mirror check box.
6/99Pantograms Embroidery Magic 22
And now click on the Leave Original check box option.
Click on Ok to mirror the design.
This is the effect of Leave Original. A copy of the design wasmade and mirrored leaving the original unaffected.
You can now move the copy to create an artistic effect.
That’s how easy it is to mirror designs with Embroidery Magic
ADDING LETTERING
To add lettering to a design, click on the Lettering Tool in the EditToolbar.
Now click where you would like to place the text in the designarea, remember the text will be centered on this point.
The Lettering Screen is displayed.
This Lettering Screen is where you will make selections on thelook of your text.
Text - This is the Text Box, where you will type in the lettering.
Pantograms Embroidery Magic 236/99
Spacing - These are your spacing selections. The setting you makehere will affect how close together your characters and lines are.
Standard (Kerning) - If you select Standard (Kerning) forspacing your letters will be spaced according to the lettersthat follow.
Mono Spacing - If you select Mono Spacing each letter
will take up the same amount of space in the line.
Lettering Spacing - This is the amount of space you want
to have between characters in your lettering.
Line Spacing - This is the amount of space you want tohave between the bottom of one line of text to the bottomof the next line.
Special Spacing - Special spacing is used for characters in
connected scripts which are not actually connected.
Baseline - Line Type - These options determine the appearance
of the text’s baseline.
Line will keep the letters in a straight line, while Arc willplace them on an arc.
6/99Pantograms Embroidery Magic 24
Rotation - This will allow you to rotate the lettering to any angle.
Rotation Options - This box becomes available when you select
the Arced Baseline, it allows you to select up or down arc as wellas the arcs radius.
Available Characters - These are the Available Characters for thecurrent font. You will notice that some fonts have more charactersthan others.
If you click on one of the characters you will be shownwhat it looks like in the display.
Located under the display is the Keystroke assigned to thecharacter.
Density - The density setting affects the spacing between stitches
that fill the character.
Column Width - Column width affects the appearance of each
letter. If you make this value larger your letters will appear bolder.
Letter Width - Letter width will make the characters in the textwider or narrower.
Letter Angle - The letter angle adjustment will allow you tocreate italicized effects with your lettering.
Pantograms Embroidery Magic 256/99

Preview - This preview window will give you an idea of how the
settings will affect your lettering.
Fonts - These are the list of fonts that you have available to use.
Lettering Type - The lettering type option allows you to create
normal lettering or 3 letter monograms.
If you have selected normal then the top box of Letter Sizeis used for the size.
If you selected monogramming then all the boxes of LetterSize correspond to each character in the monogram.
Digitized Size - The digitized size allows you to make a judmentabout how large or small you can make your lettering.
Lock Stitch & Trim - These options will allow you to choose
where you place lock stitches and trims in your lettering after eachletter, word or line.
Now add some lettering. First choose the font you wish to use.
Click on the Fonts down arrow to show the list of fonts.
Select the font of your choice.
Now type in some text.
6/99Pantograms Embroidery Magic 26
Click on Arc. The Arc Options selection box becomes enabled.
Change the radius of the arc to 3 to make it curve less.
Click on Ok to insert the text.
As you can see the lettering was inserted at the point you clickedon in the design area.
Click on Text Properties located at the lower right corner of thedesign area.
Now make the lettering slightly smaller by changing the letter size.Change it to .5 In.
Click on Ok to apply the change.
By pressing and holding the left mouse button within the letteringyou can move it to any position on the design.
Once you are happy with your lettering, click on End Text at thelower right corner of the design area.
That is how easy it is to add and manipulate lettering with Embroi-dery Magic.
Pantograms Embroidery Magic 276/99
SAVING DESIGNS
To save your opened design click on the Save Button on the MainToolbar.
The Save Design File dialog box is displayed.
Select the folder where you want to save your design.
Now type in the name that you will save the design as in teh Filename text box.
Then select the type of file you wish to save the design as. Click onteh down arrow on the “Save as Type” combo box and select atype.
Click on Ok to save the design.
You should always check the title bar at the very top of the soft-ware screen to see that the design was saved in the correct place.
That’s how easy it is to save a design in Embroidery Magic.
6/99Pantograms Embroidery Magic 28
To zoom in or out on your design so that it just fits in the screen,click on the Fit To Screen Button on the Main Toolbar.
To see your design at actual size click on the 1 to 1 Button in theMain Toolbar.
Another way to zoom in on a piece of a design is to select thezoom tool on the Main Toolbar.
Then drag a box around the area you want to zoom in on.
To see your design as simulated embroidery on an actual fabricswatch, click on the Real View Button on the Main Toolbar.
The Real View screen is displayed
Embroidery Magic comes with many different samples of fabric.Click on the down arrow on the Fabric Combo Box to see some ofthe choices.
Click on the down arrow to get to the fabric you wish to use.
Click on your choice to select it.
As you can see at the bottom of the screen you have the choice toprint the real view or to save it as a bitmap that you could includein a document.
Pantograms Embroidery Magic 296/99
DISPLAY OPTIONS

Click on Close to continue.
Another important feature in Embroidery Magic is the ability toCreate and Display Hoops over your designs. Click on Display inthe Main Menu.
Click on Display Hoop.
Now click on Create New Hoop.
The Create New Hoop screen is displayed.
The 1st step to creating a new hoop is to give it a name, preferablya descriptive one.
Type a name for the new hoop in the Hoop Name text box.
Select a hoop style. For this example the default rectangular hasbeen selected.
Now reduce the width of the hoop to 4 inches in the Hoop Sizeselection box.
Notice the safety margins. These will allow you to make sure thatyour design fits safely in the hoop.
Attachment Point Selection Box - Click on Right to change theattachment point to the right side.
Save As Hoop Number Selection Box - Click #7 to save this hoopin the 7th position.
6/99Pantograms Embroidery Magic 30
Pantograms Embroidery Magic 316/99
Click on Ok to save the hoop information.
Click on Display from the Main Menu.
Click on Display Hoop to select the hoop.
Click on the hoop you just created.
As you can see, the design should fit nicely in this hoop. If not goback to Create New Hoop. Chane your size and save the new hoopover the same #7 hoop.
That’s how easy it is to use the Display Options in EmbroideryMagic.
Pantograms Embroidery Magic 32
To print a design click on the Print Button in the Main Toolbar.
The Print Design Screen is displayed.
First, click on fit to page in the Page selection box, so that thedesign will print at it’s largest size.
Now select Print in Color from the Color selection box to get thefull effect of the design.
Click Simulated Embroidery check box, for better representationuse the real view option.
Select the Preview button to see the view of the design beforeprinting.
The Preview screen is displayed.
Select whole page option button on Preview Screen, to see the“Whole Page”.
Click Print to send the page to the printer.
That’s how easy it is to print in Embroidery Magic.
PRINTING DESIGNS
SYSTEM OPTIONS
Embroidery Magic has many options that you can customize. Tobegin click on System from the Main Menu.
To turn the Grid on or off click on Grid.
As you can see the grid has been turned off, to turn it back onrepeat the same steps.
Click on System from the Main Menu again for the next option.
Click Work Area Background Color to change the color of theWork Area Background.
The Color screen is displayed.
Click a color for the background.
Click on Ok to apply your color choice.
As you can see the background has changed to your selected color.
The next menu choice is Cursor where you can select the type ofcursor you want to use.
Click Small Cross Hairs to see the cursor look like a small cross.
From the same steps above now select the Full Screen Cross Hair.
6/99Pantograms Embroidery Magic 33
The Full Screen Cross Hair Cursor fills the whole work area.
From the System Menu select Set Design Colors To Default. Thischoice will set the twelve needle colors back to their defaultvalues.
The Design Colors message box is displayed.
Click Yes on the message box to set the colors to their defaults.
As you can see the needle colors have all changed back to a defaultcolor. To set these default colors, click on System again from theMain Menu.
Click Set Default Colors to set the colors.
The Default Colors screen is displayed.
Click on a color number to change the color of that needle.
The Color screen is displayed.
Click on a color to select it.
Click on Ok to apply the new color.
Click on Ok to save this new default color.
The next menu option is Screen Scale.
Pantograms Embroidery Magic 346/99
Click on Screen Scale
The Set Screen Scale screen is displayed.
Screen Scale allows you to adjust the scaling on the screen to getmore accurate measurements. Click on Ok to continue.
The next menu option is Units of Measurement. Click to select theUnits Of Measurement you wish to use while in EmbroideryMagic.
The Units of Measurement Screen is displayed.
You can select any of the three units to work in Millimeters,Centimeters or Inches. Click on Ok to continue.
The last option is Language. To select a new Language, simplyclick on your choice. All text in the software will change to theselected language. Click on English for no change.
That’s how easy it is to customize Embroidery Magic.
6/99Pantograms Embroidery Magic 35

DESIGN DATABASE
To add a design to the design database click on the Add to Data-base Button in the Main Toolbar.
The Design Database - Add screen is displayed.
Select the category for the design you are adding. By clicking onthe down arrow you can see the existing categories.
If there is not a category that you wish to use, simply type in thenew category in the combo box.
Select the customer who you did the design for. By clicking on thedown arrow in the Customer Name combo box, you can see theexisting customers.
If this is a new customer, simply type in the name in the combobox.
Select the design creator. By clicking on the down arrow in theDesign Created By combo box you can see the existing list ofcreators. Again to add a name, simply type the name in the combobox.
Select or type in a name.
Enter the designs selling price.
Pantograms Embroidery Magic 366/99
Thread Colors/Stock #’s - This area is to keep track of threadcolors. These can be entered in any format you like. Type in yourtread colors and stock numbers.
Click Ok to save the information.
To view and/or retrieve designs from the database click on theDesign Database Button in the Main Toolbar.
The Design Database screen is not displayed.
Click on the down arrow in the Categories combo box to view thelist of design categories.
If you can’t remember the category for a specific design you canuse the Custom Selection option.
The Design Database - Custom Selection Criteria screen is dis-played.
To find the design we just added, lets look in all categories, ClickSelect All Categories to select all.
Click to look at all stitch counts in the “Where Stitch Count isBetween...” selection box.
Click Select All Names to select all creators in teh “Where DesignCreator’s Name is...” selection box.
6/99Pantograms Embroidery Magic 37
Click on the down arrow in the “Where Customer’s Name is...”selection box to see the remaining customers.
Click on the customers name you typed in previously to select it.
Now click on Ok to search the database for matching designs.
The Design Database screen is displayed.
As you can see, the search found your design, Click on the designto select it.
Now click on Edit to see the information you previously entered.
The Design Database - Edit screen is displayed.
Click on Ok to return to the previous screen.
Click on the Information button to see additional informationabout the design.
The Design Database - Design Information screen is displayed.
Click on Done to return to the previous screen.
Click on Open to open the design.
That’s how easy it is to use the design database in EmbroideryMagic.
Pantograms Embroidery Magic 386/99