energy in the wind - nrel are introduced to electrical concepts by using a hand ... science and...
TRANSCRIPT
Provi
and BP
Energy in the Wind -
Exploring Basic Electrical Concepts by Modeling Wind Turbines
Curriculum: Wind Power (simple machines, aerodynamics, weather/climatology, leverage, mechanics, atmospheric pressure, and energy resources/transformations) Grade Level: High School Small groups: 2 students Time: Introductory packet will take 2-3 periods. Scientific investigation will take 2-3 periods. (45-50 minute periods)
Summary: Students explore basic electrical concepts. Students are introduced to electrical concepts by using a hand held generator utilizing a multimeter, modeling, and designing a wind turbine in a wind tunnel (modifications are given if a wind tunnel is not available). Students investigate how wind nergy is used as a renewable energy resource. e
Developed by Wilbur Sameshima, Science and Technology Teacher,
Thunder Ridge High School, Highlands Ranch, Colorado. ded by the Department of Energy’s
National Renewable Energy Laboratory America Inc.

Energy in the Wind Exploring Basic Electrical Concepts by Modeling Wind Turbines
Author: Wilbur A Sameshima Science and Technology Teacher ThunderRidge High School Highlands Ranch, Colorado Grade Level / Subject: 9th - 12th grade / Primarily for Technology Lab, adaptable for a variety of science and math courses. Curriculum Standard: National Science Education Standards, Science Content Standards: 9-12: • Content Standard A: As results of activities in grades 9-12, all students should develop
o Abilities Necessary to do Scientific Inquiry
Identify questions and concepts that guide scientific investigations.
Design and conduct scientific investigations.
Use technology and mathematics to improve investigations and communications.
Formulate and revise scientific explanations and model using logic and evidence.
Recognize and analyze alternative explanations and models.
Communicate and defend a scientific argument.
o Understandings About Scientific Inquiry
• Content Standards B: As a result of activities in grades 9-12, all students should develop and understanding of
o Motions and Forces
Electricity and magnetism are two aspects of a single electromagnetic force. Moving electric charges produce magnetic forces, and moving magnets produce electric forces. These effects help students to understand electric motors and generators.
o Interactions of Energy and Matter
In some materials, such as metals, electrons flow easily, whereas in insulting materials such as glass they can hardly flow at all.
NREL 2003

• Content Standard D: As result of their activities in grades 9-12, all students should develop an understanding of
o Energy in the Earth System
Heating of earth’s surface and atmosphere by the sun drive convection within the atmosphere and oceans, producing winds and ocean currents.
• Content Standard E: As result of their activities in grades 9-12, all students should develop
o Abilities of Technological Design
Identify a problem or design an opportunity.
Propose design and choose between alternative solutions.
Implement a proposed solution.
Evaluate the solution and its consequences.
Communicate the problem, process, and solution.
Principles and Standards for School Mathematics: 9-12:
• Number and Operations Standards
o Understand numbers, ways of representing numbers, relationships among numbers, and number systems.
o Understand meanings of operations and how they relate to one another.
o Compute fluently and make reasonable estimates.
• Algebra Standards
o Understand patterns, relations, and functions
o Represent and analyze mathematical situations and structures using algebraic symbols.
o Use mathematical models to represent and understand quantitative relationships
• Measurements Standards
o Understand measurable attributes of objects and the units, systems, and processes of measurement
o Apply appropriate techniques, tools, and formulas to determine measurements.
• Problem Solving Standards
o Build new mathematical knowledge through problems solving.
o Solve problems that arise in mathematics and in other contexts
• Communication Standards
o Organize and consolidate their mathematical thinking through communication.
o Communicate their mathematical thinking coherently and clearly to peers, teachers, and others.
NREL 2003

Overview: In this portfolio-based scientific engagement, a pair of students (modifiable for a class) will explore basic electrical concepts of voltage, current, power, and characteristics of parallel and series circuits. This engagement will introduce the student to these concepts by manipulating a hand held generator, utilizing a multimeter and modeling and designing a wind turbine in a wind tunnel (modifications are given if a wind tunnel is not available). An understanding of how wind energy is used as a renewable energy resource is also gained by completing this engagement. This module is intended to be an independent exercise within a technology lab where students rotate through engagements. It may, however, be included in a regular classroom and placed in a curriculum addressing electricity, wind, renewable energy, or mathematical modeling. An outline of this weeklong engagement (for 45-50 minute daily class periods) is given below: 1) Introduction Packet (2-3 days)
a) Introduction Activities
(1) Getting to Know Your Genecon Generator.
(2) Electricity and How to Measure It.
b) Internet Activity from the Danish Wind Turbine Manufacturers Association “Wind with Miller.” Guided Questioning on wind turbine mechanics
2) Objective Packet (2-3 days)
Scientific investigation into one of the following
(1) Virtual Wind Turbine Experiments with a turbine simulator
(2) Comparing the power producing ability of two electric motors/generators as a wind turbine model.
(3) Design the most effective wind turbine from 2 different electric motors/generators and 2 different propellers/blades.
Purpose: This scientific engagement will introduce students to basic electrical concepts in an interactive hands-on way with real world applications. Interactive hands-on learning will reinforce and confirm the electrical concepts. Connecting real world applications to the concepts will enable the students see the relevancy of what they are studying. Learning Objectives: After completing this engagement, students will be able to: • Understand how mechanical energy can be transformed into electrical energy.
• Understand what electricity is and how it flows.
• Understand what voltage, current, and power measure.
NREL 2003

• Manipulate a multimeter to measure current and voltage.
• Understand how a wind turbine works.
• Model a wind turbine in a wind tunnel with an electric motor, propeller, and light bulb circuit.
• Calculate power generated by the wind turbine model by measuring voltage and current.
• Design a model wind turbine maximizing power production.
The rubric on the following page is provided as a suggested way to evaluate students’ work. The rubric is used to evaluate the engagement as one of a series of engagements within a portfolio. Pages referenced in parentheses are handouts that can be made up to your own specifications.
NREL 2003
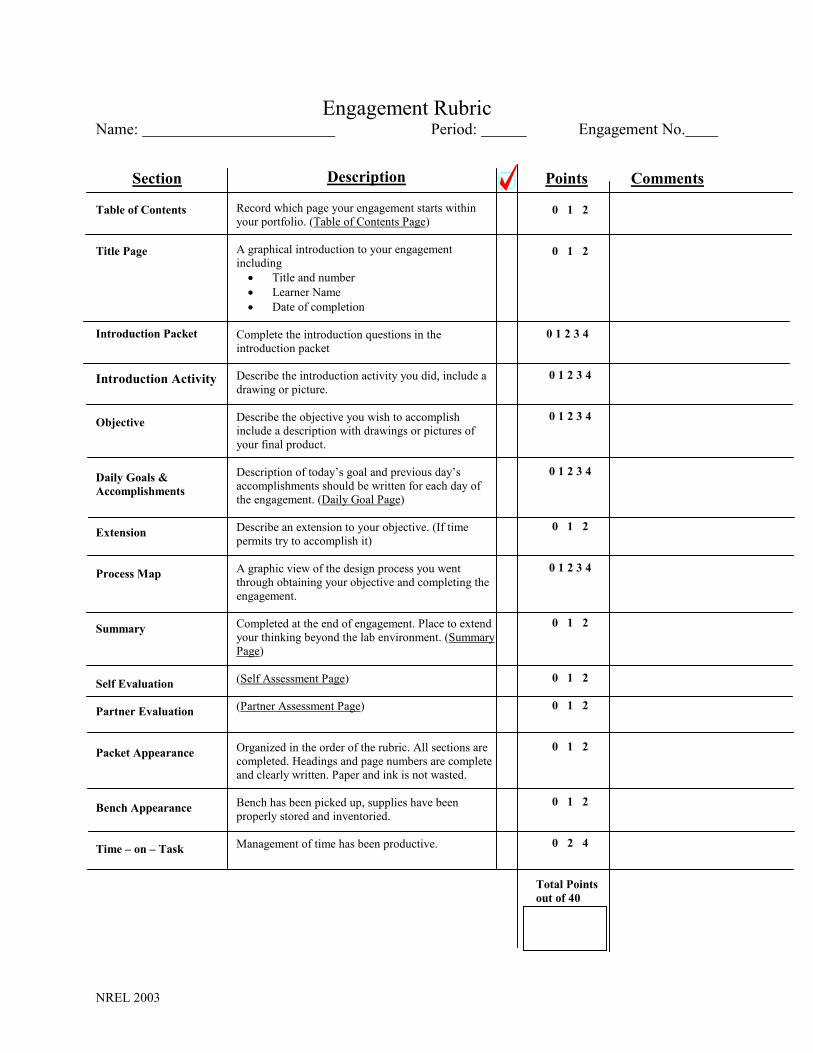
Engagement Rubric Name: Period: Engagement No.
Section
Table of Contents Title Page Introduction Packet Introduction Activity Objective Daily Goals & Accomplishments Extension Process Map Summary Self Evaluation Partner Evaluation Packet Appearance Bench Appearance Time – on – Task
Description
Record which page your engagement starts within your portfolio. (Table of Contents Page) A graphical introduction to your engagement including
• Title and number • Learner Name • Date of completion
Complete the introduction questions in the introduction packet Describe the introduction activity you did, include a drawing or picture. Describe the objective you wish to accomplish include a description with drawings or pictures of your final product. Description of today’s goal and previous day’s accomplishments should be written for each day of the engagement. (Daily Goal Page) Describe an extension to your objective. (If time permits try to accomplish it) A graphic view of the design process you went through obtaining your objective and completing the engagement. Completed at the end of engagement. Place to extend your thinking beyond the lab environment. (Summary Page) (Self Assessment Page) (Partner Assessment Page) Organized in the order of the rubric. All sections are completed. Headings and page numbers are complete and clearly written. Paper and ink is not wasted. Bench has been picked up, supplies have been properly stored and inventoried. Management of time has been productive.
Points
0 1 2
0 1 2
0 1 2 3 4
0 1 2 3 4
0 1 2 3 4
0 1 2 3 4
0 1 2
0 1 2 3 4
0 1 2
0 1 2
0 1 2
0 1 2
0 1 2
0 2 4
Total Points out of 40
Comments
NREL 2003
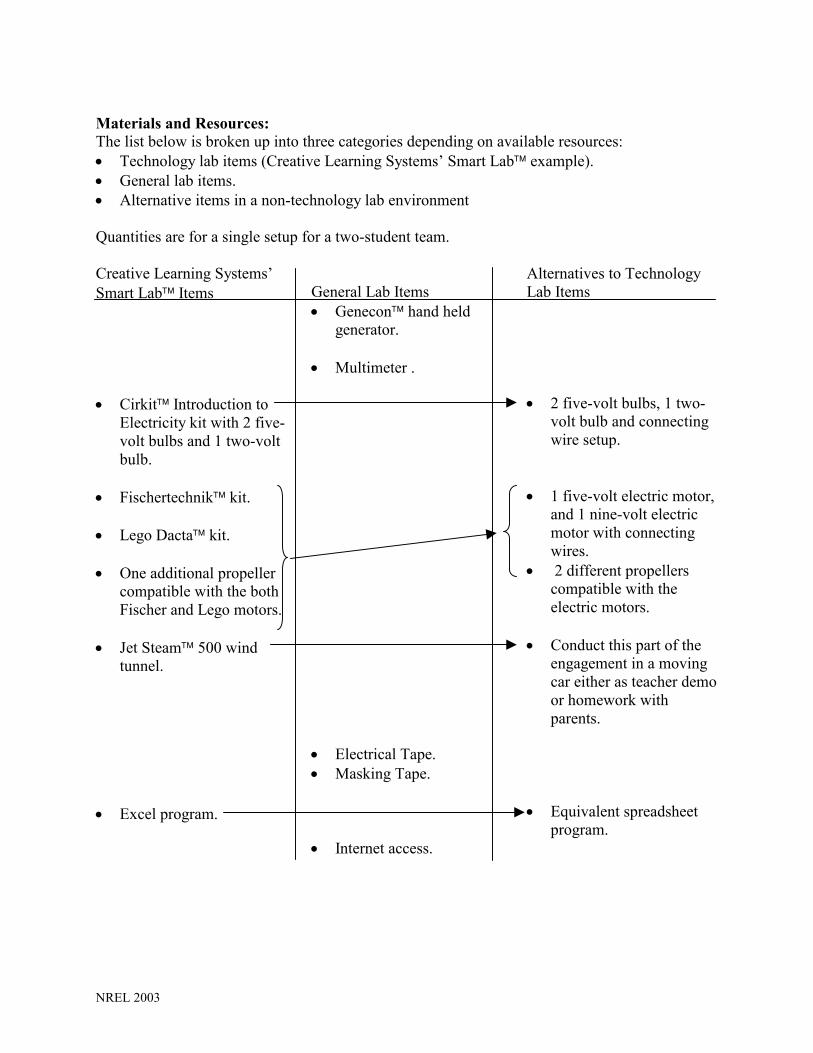
Materials and Resources: The list below is broken up into three categories depending on available resources: • Technology lab items (Creative Learning Systems’ Smart Lab example). • General lab items. • Alternative items in a non-technology lab environment Quantities are for a single setup for a two-student team. Creative Learning Systems’ Smart Lab Items • Cirkit Introduction to
Electricity kit with 2 five-volt bulbs and 1 two-volt bulb.
• Fischertechnik kit. • Lego Dacta kit. • One additional propeller
compatible with the both Fischer and Lego motors.
• Jet Steam 500 wind
tunnel. • Excel program.
General Lab Items • Genecon hand held
generator. • Multimeter . • Electrical Tape. • Masking Tape. • Internet access.
Alternatives to Technology Lab Items • 2 five-volt bulbs, 1 two-
volt bulb and connecting wire setup.
• 1 five-volt electric motor,
and 1 nine-volt electric motor with connecting wires.
• 2 different propellers compatible with the electric motors.
• Conduct this part of the
engagement in a moving car either as teacher demo or homework with parents.
• Equivalent spreadsheet
program.
NREL 2003

NREL 2003
Prerequisite Knowledge: Students shouldn’t need any prier knowledge in electricity but should have some exposure to the scientific method. The students are guided, with progressively less instruction, in scientific investigations using the scientific method. Introduction Packet: (Attachment 1 & 2) 2-3 Days The introduction packet will take the students through four introductory experiments and two introductory Internet activities. The experiments will use the Gencon generator and multimeter to explore basic principles of electricity. The Internet activities will take the students on a tour of wind turbine mechanics and have them perform virtual experiments on how turbine height and site selection effect the turbine’s power production. The introduction packet is completed individually, but students should work through the experiments and activities in pairs. Multiple setup of the introduction packet can be used for a regular classroom setting. A key to the introduction packet follows the packet. Objective Packet: (Attachment 3) 2-3 Days The objective packet will give students three choices on modeling a wind turbine in a wind tunnel. Choices are in increasing depth of study and intended to accommodate a diverse poll of student abilities. If time permits, working through more than one choice is possible and encouraged. The packet will give general instructions on using the equipment but the students are responsible for a complete lab write-up of the scientific method including, purpose, hypothesis, materials, procedure, data, data analysis, and conclusion. If a wind tunnel is not available, having the model wind turbine outside in the wind of a moving car can achieve the same results. The speed of the car is used as the wind speed. The teacher can do this modification and the data shared by the class. The students can also take the wind turbine model home and have a parent drive. Students should be reminded to use extreme caution when driving, the most remote and straightest road available should be used. The introduction packet can also be used without the objective packet as a stand-alone module if a wind tunnel is not available.

ELECTRICITY IN THE WIND INTRODUCTION PACKET
Name: Period:
ACTIVITY 1 GETTING TO KNOW YOUR GENECON
Materials and procedures in block parenthesis are tips for students in the Creative Learning Systems’ Smart Lab Environment Key Concepts: 1. A generator converts mechanical energy (the energy of moving parts) into electrical energy
(the flow of electrons through a conductor). 2. The brightness of the bulb is directly related to the amount of electrical energy passing
through it. Materials: 1. Genecon generator 2. One (6 V, 3W) bulb with socket and leads (Cirkit electricity kit) Procedure: 1. Connect the leads of the Genecon to the
leads of the bulb socket as shown in the diagram to the right. [Build the circuit diagramed to the right and connect the leads to the Genecon]
2. Slowly turn the Genecon handle with
increasing speed until the bulb lights up. Thought Questions: Whenever possible use terms from Key Concepts in your answers. 1. Why does the bulb become brighter as the Genecon is turned faster? 2. Name two more energy conversions occurring in this activity. Also explain where they are
occurring.
NREL 2003
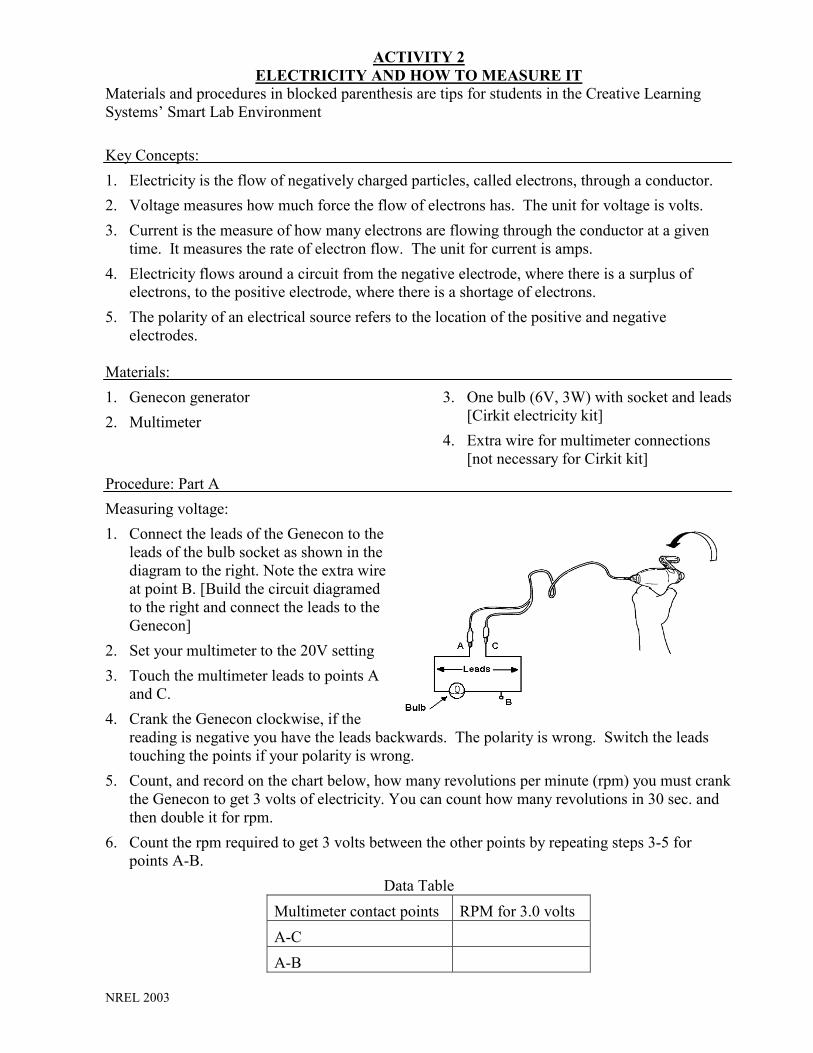
ACTIVITY 2 ELECTRICITY AND HOW TO MEASURE IT
Materials and procedures in blocked parenthesis are tips for students in the Creative Learning Systems’ Smart Lab Environment Key Concepts: 1. Electricity is the flow of negatively charged particles, called electrons, through a conductor. 2. Voltage measures how much force the flow of electrons has. The unit for voltage is volts. 3. Current is the measure of how many electrons are flowing through the conductor at a given
time. It measures the rate of electron flow. The unit for current is amps. 4. Electricity flows around a circuit from the negative electrode, where there is a surplus of
electrons, to the positive electrode, where there is a shortage of electrons. 5. The polarity of an electrical source refers to the location of the positive and negative
electrodes. Materials:1. Genecon generator 2. Multimeter
3. One bulb (6V, 3W) with socket and leads [Cirkit electricity kit]
4. Extra wire for multimeter connections [not necessary for Cirkit kit]
Procedure: Part A Measuring voltage: 1. Connect the leads of the Genecon to the
leads of the bulb socket as shown in the diagram to the right. Note the extra wire at point B. [Build the circuit diagramed to the right and connect the leads to the Genecon]
NREL 2003
2. Set your multimeter to the 20V setting 3. Touch the multimeter leads to points A
and C. 4. Crank the Genecon clockwise, if the
reading is negative you have the leads backwards. The polarity is wrong. Switch the leads touching the points if your polarity is wrong.
5. Count, and record on the chart below, how many revolutions per minute (rpm) you must crank the Genecon to get 3 volts of electricity. You can count how many revolutions in 30 sec. and then double it for rpm.
6. Count the rpm required to get 3 volts between the other points by repeating steps 3-5 for points A-B.
Data Table Multimeter contact points RPM for 3.0 volts A-C A-B

Thought Questions: Whenever possible use terms from Key Concepts in your answers. Part A 1. Describe how the electrons flow around the circuit. Include the direction that they flow. 2. Does the voltage change around different parts of the circuit? Use the data to support your
answer. 3. Does the force of the flow of electron change around different parts of the circuit? Explain. Procedure: Part B Measuring current: 1. Connect the leads of the Genecon
to the leads of the bulb socket as shown in the diagram to the right. Note the break in the circuit between points B & C. [Build the circuit diagramed to the right and connect the leads to the Genecon]
2. Set your multimeter to the 10A setting. You may also have to move the leads on the multimeter to measure current.
3. Touch the multimeter leads to points B and C. 4. Crank the Genecon clockwise, if the reading is negative you have the leads backwards. The
polarity is wrong. Switch the leads touching the points if your polarity is wrong. 5. Count, and record on the chart below, how many revolutions per minute (rpm) you must crank
the Genecon to get 0.2 amps of electricity. Remember you can count how many revolutions in 30 sec. and then double it for rpm.
6. Rewire the circuit so that B-C is on the other side of the bulb and repeat steps 3-5.
Data Table Multimeter contact points RPM for 0.2 amps B-C left of bulb B-C right of bulb
NREL 2003

Thought Questions: Whenever possible use terms from Key Concepts in your answers. Part B 1. Is there a difference in the way you connect the multimeter to the circuit when you measure
current and voltage? Explain. 2. Does the current change around different parts of the circuit? Use the data to support your
answer. 3. Does the rate of the flow of electron change around different parts of the circuit? Explain.
NREL 2003

ELECTRICITY IN THE WIND
INTRODUCTION PACKET
Name: Period:
INTERNET ACTIVITY HOW DOES A WIND TURBINE WORK
Accessing the Website
• Start the web browser on your computer. • Type in the following web site in the address window box and press the [enter] key to access
the web site. http://www.windpower.dk/core.htm
Wind With Miller Part One: Guided Questioning
• Click the left mouse button on the words “WIND WITH MILLER” • Click the left mouse button on the “Crash Course” sign on the post. • Follow the directions on the next couple of screens and you will get a good introduction into
wind energy. Once your done with the “Crash Course” lets take an in-depth look at wind turbine mechanics. • After you come back to Miller’s home page, left click the
“Nacelle” sign on the post. • Explore the different parts of the nacelle. To return to the nacelle home page left click on the
word “Nacelle” at the “You are here:” prompt.
NREL 2003

1) Name and give a one-sentence description of six different parts of the nacelle of a wind
turbine. a) Name:
b) Name:
c) Name:
d) Name:
e) Name:
f) Name: • Once you have learned about the nacelle, left click on the word “Home” at the “You are
here:” prompt. • On Miller’s home page left click the “Rotor” sign on the post. • Left click on the words “Air Pressure,” and follow Miller’s direction to understand how a
rotor works. 2) How can you feel a difference in air pressure? 3) How does a bird and a rotor use air pressure to fly and rotate? 4) What is the force that keeps a glider up in the air? 5) How does the shape of a wing create low pressure and how does this help keep a glider in the
air? 6) How would you put glider wings on a wind turbine to make the rotor spin around?
NREL 2003
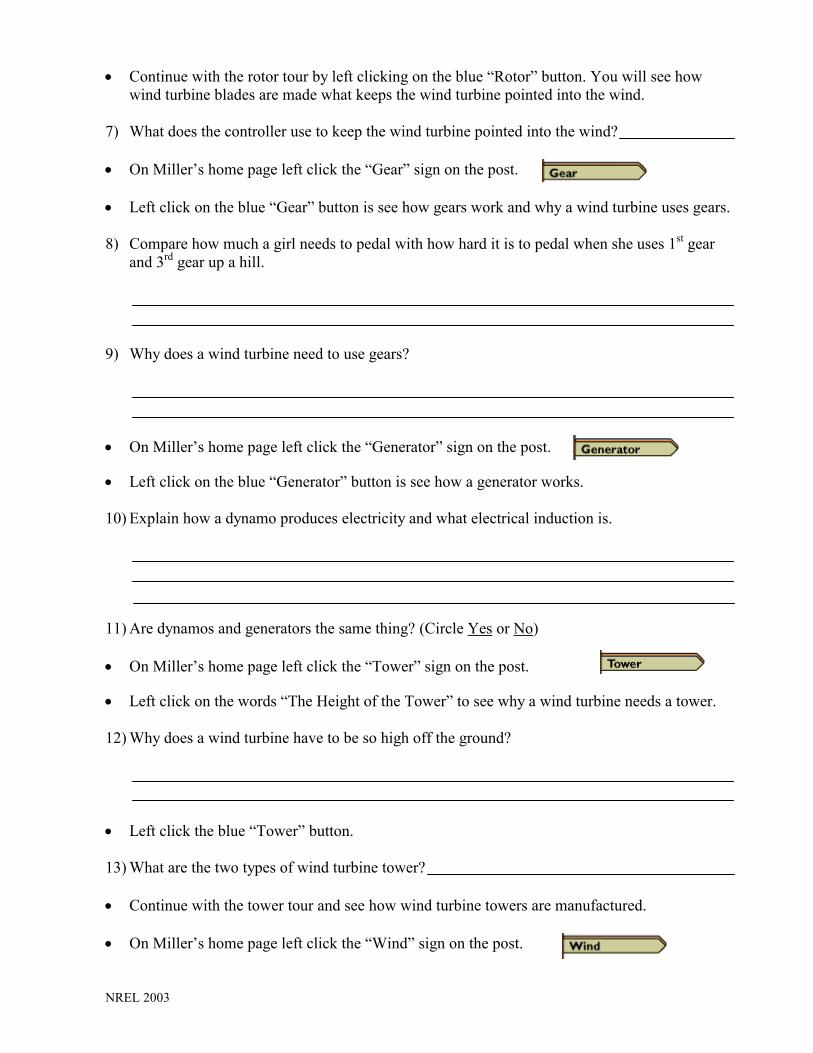
• Continue with the rotor tour by left clicking on the blue “Rotor” button. You will see how
wind turbine blades are made what keeps the wind turbine pointed into the wind. 7) What does the controller use to keep the wind turbine pointed into the wind? • On Miller’s home page left click the “Gear” sign on the post. • Left click on the blue “Gear” button is see how gears work and why a wind turbine uses gears. 8) Compare how much a girl needs to pedal with how hard it is to pedal when she uses 1st gear
and 3rd gear up a hill. 9) Why does a wind turbine need to use gears? • On Miller’s home page left click the “Generator” sign on the post. • Left click on the blue “Generator” button is see how a generator works. 10) Explain how a dynamo produces electricity and what electrical induction is. 11) Are dynamos and generators the same thing? (Circle Yes or No) • On Miller’s home page left click the “Tower” sign on the post. • Left click on the words “The Height of the Tower” to see why a wind turbine needs a tower. 12) Why does a wind turbine have to be so high off the ground? • Left click the blue “Tower” button. 13) What are the two types of wind turbine tower? • Continue with the tower tour and see how wind turbine towers are manufactured. • On Miller’s home page left click the “Wind” sign on the post.
NREL 2003

• Left click on the words “Where Does Wind Come From” to see where winds come from. Proceed through the tour of wind by left clicking on the blue “Wind” buttons.
14) Explain how the air moves between two rooms of different temperatures. 15) What are the two main causes of wind on earth? • On Miller’s home page left click the “Siting” sign on the post. • Left click on the words “Hill Effect” to see how differences in the shape of the earth’s surface
effect the wind. 16) Where is the wind the strongest? (Circle At the to of the hill or Next to the hill 17) Why is it not a good idea to place a wind turbine on a cliff? • On Miller’s home page left click the “Install a Turbine ” sign on
the post. • Left click on the word “Foundation” to see how a wind turbine is installed. Proceed through
the tour by left clicking on the blue “Install a Turbine” buttons.
NREL 2003

Wind With Miller Part Two: Virtual Wind Turbine Experiments with Turbine Simulator
• On Miller’s home page left click the “Turbine Simulator ” sign on the
post. • Left click on the words “When and How Quick” to simulate how a real wind turbine works.
Proceed through the tour by left clicking on the blue “Activities” buttons. Perform a virtual experiment with Miller’s Turbine Simulator. Choose between one of the following purposes. • To determine how hub height effects how much power a wind turbine produces. • To determine how the roughness of the ground effects how much power a wind turbine
produces. Graphical data should be used to support your conclusions. Include all of the parts of the scientific method: Purpose, Hypothesis, Materials, Procedure, Data, Data Analysis, and Conclusion.
NREL 2003

ELECTRICITY IN THE WIND INTRODUCTION PACKET [KEY]
ACTIVITY 1
GETTING TO KNOW YOUR GENECON Thought Questions: Whenever possible use terms from Key Concepts in your answers. 1. Why does the bulb become brighter as the Genecon is turned faster? The bulb becomes brighter because there is more mechanical energy being converted into electrical energy. 2. Name two more energy conversions occurring in this activity. Also explain where they are
occurring. Inside my hand and arm chemical energy to being converted into mechanical energy. Inside the bulb electrical energy is being transferred into light energy.
ACTIVITY 2 ELECTRICITY AND HOW TO MEASURE IT
Thought Questions: Whenever possible use terms from Key Concepts in your answers. Part A: Measuring Voltage 1. Describe how the electrons flow around the circuit. Include the direction that they flow. The electrons flow from the negative electrode, where there is a surplus of electrons, through the bulb to the positive electrode where there is a shortage of electrons 2. Does the voltage change around different parts of the circuit? Use the data to support your
answer. No, it took the same rpm to generate 3.0 volts between A-C and A-C. (Note: rpms will probably not be exactly the same, but if they are close the voltages are equal) 3. Does the force of the flow of electron change around different parts of the circuit? Explain. No, because voltage measures the force of the flow of electrons and if the voltage doesn’t change then the force doesn’t change. Thought Questions: Whenever possible use terms from Key Concepts in your answers. Part B: Measuring Current 1. Is there a difference in the way you connect the multimeter to the circuit when you measure
current and voltage? Explain. Yes, when we measure voltage the multimeter is connected on top of the circuit, when we measure current the multimeter is part of the circuit. The circuit is not complete when the multimeter is not connected. 2. Does the current change around different parts of the circuit? Use the data to support your
answer. No, it took the same rpm to get 0.2 amps before and after the bulb. (Note: rpms will probably not be exactly the same, but if they are close the currents are equal) 3. Does the rate of the flow of electron change around different parts of the circuit? Explain. No, because current is the measure of the flow of electrons, so if current doesn’t change than the rate of electrons doesn’t change.
NREL 2003

ELECTRICITY IN THE WIND INTRODUCTION PACKET [KEY]
Name: Period: Internet Activity How do Wind Turbines Work.
Accessing the Website • Start the web browser on your computer. • Type in the following web site in the address window box and press the [enter] key to access
the web site. http://www.windpower.dk/core.htm
Wind With Miller Part One: Guided Questioning
• Click the left mouse button on the words “WIND WITH MILLER” • Click the left mouse button on the “Crash Course” sign on the post. • Follow the directions on the next couple of screens and you will get a good introduction into
wind energy. Once your done with the “Crash Course” lets take an in-depth look at wind turbine mechanics. • After you come back to Miller’s home page, left click the
“Nacelle” sign on the post. • Explore the different parts of the nacelle. To return to the nacelle home page left click on the
word “Nacelle” at the “You are here:” prompt.
NREL 2003

1) Name and give a one-sentence description of six different parts of the nacelle of a wind
turbine. a) Name: Main Shaft
It is the shaft connecting the rotor to the gearbox.
b) Name: Mechanical Brake
It is an emergency brake on the small fast shaft.
c) Name: Gear Box
It changes the rotation of the slow shaft into a fast rotation of the generator.
d) Name: Anemometer
It is a device that measures wind speed.
e) Name: Yaw Motor
It is a motor that turns the nacelle so that the rotor faces the wind.
f) Name: Radiator It is a system that cools the generator by air or water.
• Once you have learned about the nacelle, left click on the word “Home” at the “You are
here:” prompt. • On Miller’s home page left click the “Rotor” sign on the post. • Left click on the words “Air Pressure,” and follow Miller’s direction to understand how a
rotor works. 2) How can you feel a difference in air pressure? You would feel your ear drum bulge out a bit. 3) How does a bird and a rotor use air pressure to fly and rotate? They create a pressure difference between the two sides of their wings. 4) What is the force that keeps a glider up in the air? Lift 5) How does the shape of a wing create low pressure and how does this help keep a glider in the
air? Air moving across the curved upper surface of the wing creates low pressure, which pulls the wing up. 6) How would you put glider wings on a wind turbine to make the rotor spin around? You would use the right wing and turn the topside towards the back of the rotor. This will make the turbine rotor to rotate clockwise.
NREL 2003
• Continue with the rotor tour by left clicking on the blue “Rotor” button. You will see how
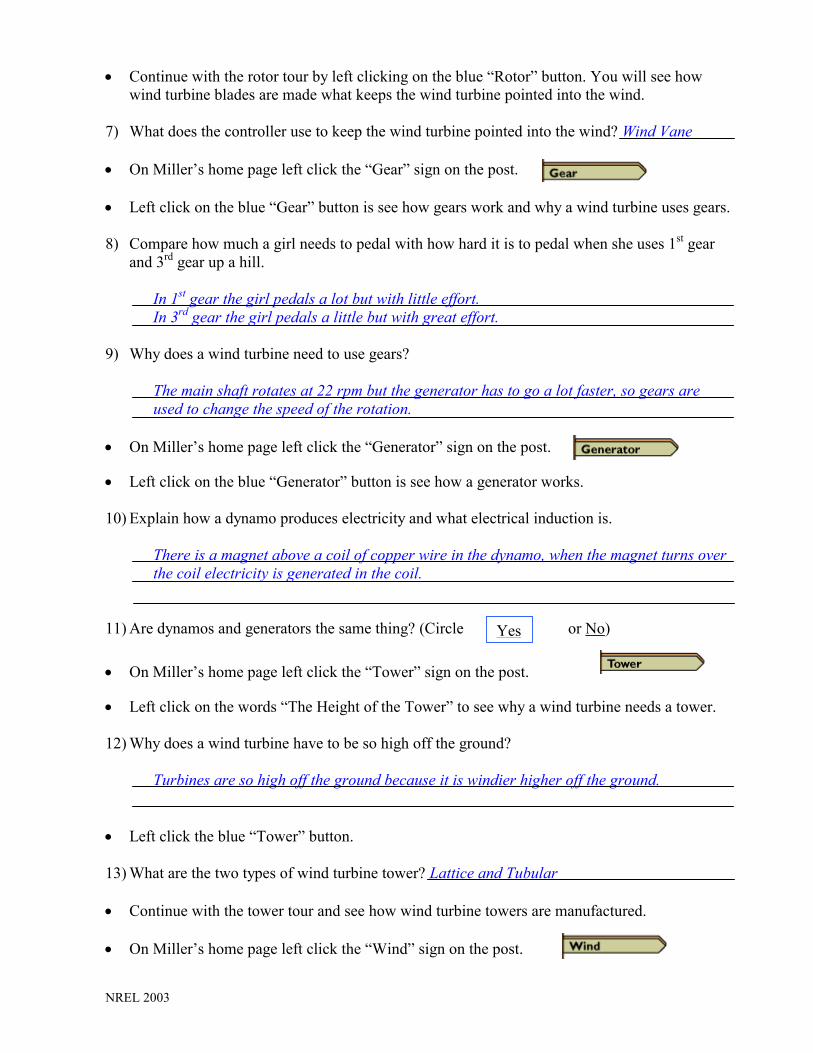
wind turbine blades are made what keeps the wind turbine pointed into the wind. 7) What does the controller use to keep the wind turbine pointed into the wind? Wind Vane • On Miller’s home page left click the “Gear” sign on the post. • Left click on the blue “Gear” button is see how gears work and why a wind turbine uses gears. 8) Compare how much a girl needs to pedal with how hard it is to pedal when she uses 1st gear
and 3rd gear up a hill. In 1st gear the girl pedals a lot but with little effort. In 3rd gear the girl pedals a little but with great effort. 9) Why does a wind turbine need to use gears? The main shaft rotates at 22 rpm but the generator has to go a lot faster, so gears are used to change the speed of the rotation. • On Miller’s home page left click the “Generator” sign on the post. • Left click on the blue “Generator” button is see how a generator works. 10) Explain how a dynamo produces electricity and what electrical induction is. There is a magnet above a coil of copper wire in the dynamo, when the magnet turns over the coil electricity is generated in the coil. 11) Are dynamos and generators the same thing? (Circle or No) • On Miller’s home page left click the “Tower” sign on the • Left click on the words “The Height of the Tower” to see 12) Why does a wind turbine have to be so high off the groun Turbines are so high off the ground because it is win • Left click the blue “Tower” button. 13) What are the two types of wind turbine tower? Lattice an • Continue with the tower tour and see how wind turbine t • On Miller’s home page left click the “Wind” sign on the
NREL 2003
Yes
post.
why a wind turbine needs a tower.
d?
dier higher off the ground.
d Tubular
owers are manufactured.
post.

• Left click on the words “Where Does Wind Come From” to see where winds come from. Proceed through the tour of wind by left clicking on the blue “Wind” buttons.
14) Explain how the air moves between two rooms of different temperatures. Warm air floats into the top of the cold room, and cold air floats into the warms room at the bottom of the doorway. 15) What are the two main causes of wind on earth? The wind blows on the earth because of the rotations of the earth and the differences in temperature on the earth. • On Miller’s home page left click the “Siting” sign on the post. • Left click on the words “Hill Effect” to see how differences in the shape of the earth’s surface
effect the wind. 16) Where is the wind the strongest? (Circle At the to of the hill or Next to the hill 17) Why is it not a good idea to place a wind turbine on a cliff? The wind turbine cannot catch the unsteady wind properly. • On Miller’s home page left click the “Install a Turbine ” sign on
the post. • Left click on the word “Foundation” to see how a wind turbine is installed. Proceed through
the tour by left clicking on the blue “Install a Turbine” buttons.
NREL 2003

ELECTRICITY IN THE WIND OBJECTIVE PACKET
Name: Period: Modeling a Wind Turbine You have a choice of three different objectives to accomplish. They all deal with modeling a wind turbine with an electric motor attached to a propeller or virtually testing a wind turbine with a computer simulation. A complete lab report using the scientific method is the product for each objective. Choose which objective you and your partner would like to do, then follow the proper directions. Objective Choices: • Conduct a virtual experiment with Miller’s Turbine Simulator • Compare the power producing ability of two electric motors/generators as a wind turbine
model. • Design the most effective wind turbine from 2 different electric motors/generators and 2
different propellers/blades.
Objective 1: Virtual Wind Turbine Experiments with Turbine Simulator
• On Miller’s home page left click the “Turbine Simulator ” sign on the
post. • Left click on the words “When and How Quick” to simulate how a real wind turbine works.
Proceed through the tour by left clicking on the blue “Activities” buttons. Perform a virtual experiment with Miller’s Turbine Simulator. Choose between one of the following purposes. • To determine how hub height affects how much power a wind turbine produces. • To determine how the roughness of the ground affects how much power a wind turbine
produces. Graphical data should be used to support your conclusions. Include all of the parts of the scientific method: Purpose, Hypothesis, Materials, Procedure, Data, Data Analysis, and Conclusion.
NREL 2003

Objective 2: The main function of a wind turbine is to convert wind energy into electrical energy. The more energy a wind turbine converts the more power it is able to generate. A wind turbine used on San Clemente Island, California can produce 225 kW (225,000 W) of power. Wind turbines on a wind farm in northern Colorado can produce 750 kW of power. For this objective you are going to compare the power producing ability of two electric motors/generators as a wind turbine model. Items and directions in block parenthesis are tips for students in the Creative Learning Systems’ Smart Lab Environment Materials: 1. Multimeter
2. A five-volt electric motor [Fischertechnik motor]
3. A nine-volt electric motor [Lego Dacta motor]
4. A two-volt light bulb with socket [socket can be found in Cirkit electricity kit]
5. One Propeller compatible with the electric motors.[Fischertechnik propeller]
6. Enough electrical wire to connect motor, bulb, and multimeter together. [Wire from the Lego and Fischer kits can be combined with the Cirkit electricity kit]
7. Electrical Tape
8. Car and driver [Jet Stream wind tunnel can be used]
Directions: 1. Attach the propeller to the five-volt electric motor, this is your wind turbine model. [Make a
small stand for the motor from Fischertechnik components, tall enough so that the propeller will not touch the base, but small enough for the assembly to fit in the wind tunnel.]
2. Connect the wind turbine model, multimeter, and light bulb in a parallel circuit. [Use the Cirkit electricity kit.]
3. Take the model to your waiting car and driver. [Take the model to the wind tunnel and tape the it to the wind tunnel testing mount.]
4. Measure and record the voltage produced by the wind turbine model at wind speeds from 25 to 65 mph in increments of 5 mph. Remember the car’s speed is the wind speed. Note that driving in windy conditions will skew the measurements. Remember to use extreme caution when driving, the most remote and straightest road available should be used.
5. Reconnect the wind turbine model, multimeter, and light bulb in a series circuit. [Use the Cirkit electricity kit.]
6. Repeat steps 3 and 4 but measure the current produced instead of voltage.
7. Calculate the power produced by the model: multiply the measured current by the measured voltage at each wind speed.
8. Repeat steps 1 – 6 for the nine-volt electric motor.
9. Analyze the data in Excel and formulate your conclusions. Include how your results compare to real wind turbine power output.
NREL 2003
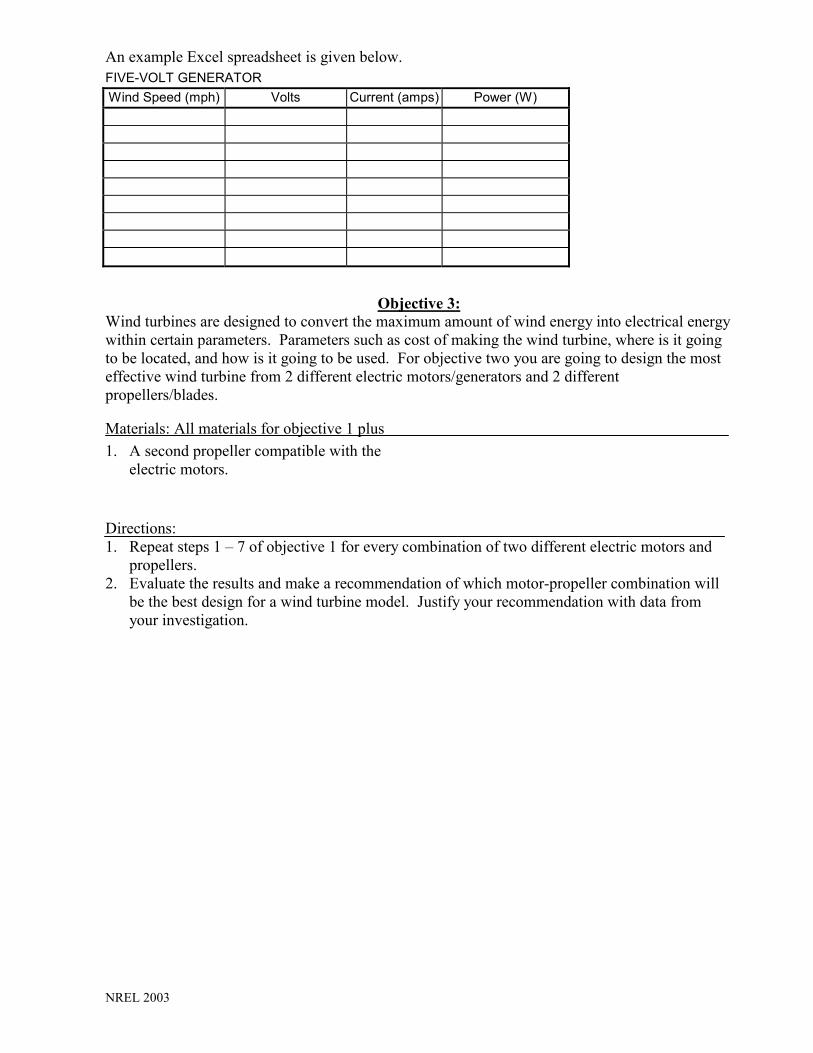
An example Excel spreadsheet is given below. FIVE-VOLT GENERATOR Wind Speed (mph) Volts Current (amps) Power (W)
Objective 3:
Wind turbines are designed to convert the maximum amount of wind energy into electrical energy within certain parameters. Parameters such as cost of making the wind turbine, where is it going to be located, and how is it going to be used. For objective two you are going to design the most effective wind turbine from 2 different electric motors/generators and 2 different propellers/blades. Materials: All materials for objective 1 plus 1. A second propeller compatible with the
electric motors.
Directions: 1. Repeat steps 1 – 7 of objective 1 for every combination of two different electric motors and
propellers. 2. Evaluate the results and make a recommendation of which motor-propeller combination will
be the best design for a wind turbine model. Justify your recommendation with data from your investigation.
NREL 2003