engage students in science through the creative use of...
TRANSCRIPT

Engage students in science
through the creative use of
technology!

Integrating Technology into Elementary Science tech4learning.com 2
Engage Primary Students in Science ....................................................................................................................................... 3
Support Science Learning with Clay Animation ...................................................................................................................... 5
Lesson Plans ............................................................................................................................................................................ 8
Soil - Diary of a Worm Comic .............................................................................................................................................. 9
Animal Riddles................................................................................................................................................................... 11
Create a Creature .............................................................................................................................................................. 13
Don’t Let the Earth Down ................................................................................................................................................. 16
Magical Metamorphosis: Butterfly Life Cycle Stories ....................................................................................................... 18
Design a Polar Park ........................................................................................................................................................... 21
Eureka! I've got an Idea! ................................................................................................................................................... 24
Visit Our Solar System ....................................................................................................................................................... 26
How Does Your Garden Grow? ......................................................................................................................................... 28
Additional ideas from real student projects ......................................................................................................................... 31
This kit is provided by:
Tech4Learning
10981 San Diego Mission Rd.
Suite 120
San Diego, CA 92116
tech4learning.com

Integrating Technology into Elementary Science tech4learning.com 3
Meet science standards with targeted activities and open -ended projects
Creative work with technology tools, like Pixie and
Wixie, can help you get primary students to embrace
the inquiry process while developing essential skills for
future science learning. Simple activities you do
together can teach and assess student
understanding of the five senses, animal
classification, and life cycles, helping you
address specific standards from
kindergarten to second grade. You can
further develop learners’ observation,
problem-solving, and critical thinking
skills with student-created projects that
incorporate painting, diagramming, writing, storytelling,
narration, and more.
Assess for Understanding
Building strong foundational knowledge about science is
crucial. Sorting activities can help you assess student
understanding on a topic. For example, after teaching
students about the differences between living and
nonliving things, have students classify objects to
evaluate comprehension. If you have an interactive
whiteboard, ask individual students drag a sticker to
classify an item, prompt them to explain the decision,
and then discuss with the rest of the class.
Take a more creative approach to
evaluate comprehension by asking
students to tell stories that show what
they know about the topics they are
learning. For example, after learning
about the pond habitat, have students
write and illustrate a one-page story that
includes animals and plants found in
ponds. Combine each student’s page into
a class book you can share in the school library and with
parents at home.
Record Classroom Observations One of the most important skills young students need
to learn is scientific observation, the foundation of the
scientific method and the reason students learn about
the five senses so early. It is important for young
scientists to learn that observing plants and animals

Integrating Technology into Elementary Science tech4learning.com 4
leads to questions (inquiry) and helps them draw
conclusions. After learning about the seasons, have
students write a five senses poem about one of the
seasons or paint what a tree looks like
during each season.
If you are studying weather, have
students look outside to observe the
weather each day. Have students
describe the daily weather using
pictures and weather vocabulary. Use a
classroom computer or an interactive
whiteboard to chart the weather for one week or even
a month.
Comparing and Classifying Students can apply their observation skills by comparing
and classifying. Give students multiple objects and then
ask them to use their five senses to identify how they
are different and how they are alike and then sort them
into groups. Then ask them to group them together and
share the “rules” they used to sort. Identifying
similarities and differences is one of the nine
instructional strategies found to improve student
achievement in Robert Marzano, Debra Pickering, and
Jane Pollock's Classroom Instruction that Works.
Another fun way to have students write and create to
identify similarities and differences is through the
creation of an If...But Report. For example, students can
compare different types of animals or weather by
writing sentences that begin with “If I were” to describe
the first object, followed by “But I would not” to
describe the second topic.
Getting Started with Inquiry
If your students grow bean plants to
learn about the life cycle of a plant and
the requirements for plant growth, ask
them to keep a science journal with text
and pictures. After they record their
observations, create a printed journal or
online life cycle site. Consider having individual students
capture their observations at a seed center in your
classroom and combine their reflections to create a
class journal.
As students write about their observations, work with
them to ask questions about what is happening and
what they think will happen next. This will help them
begin to use observations as the basis
for scientific inquiry. The scientific
process isn’t about finding the answer to
someone else’s questions, but learning
to ask questions and develop ways they
can experiment to find an answer. Start
with a simple inquiry process that leads
them to ask a question, make a guess
(hypothesis), determine how they can
test, and draw conclusions.
Put Students in the Driver’s Seat
Constructing their own models and diagrams requires
higher-order thinking skills and helps students organize
information. This type of project work also helps you
assess their comprehension. For example, after studying
the water cycle, have students paint the cycle. The
paintings make a great final assessment because the
activity does not provide hints or clues. Students can’t
guess using content and terms you have provided and
must have a thorough understanding of the water cycle
to complete this activity.
Students love to be part of the action. Asking them to
become an animal they are studying is motivating and a
great way to help them practice scientific observation
and writing in the first person. First, capture students’
faces using a web cam. Next, provide a few photographs
of animals they can use for reference as they draw
accurate body parts around their faces to transform
themselves into animals. Once the
drawing is complete, have students
write a story about their life as this
animal, including details to demonstrate
knowledge of the animals’ features and
habitats.
Painting images, diagramming cycles,
and creating stories gives students
agency in their learning and fosters the development of
important knowledge and skills to support future
science learning.

Integrating Technology into Elementary Science tech4learning.com 5
Make science concepts tangible with this fun and creative activity.
Clay animation is a motivating process you can use to
engage students as they explore and grapple with
complex scientific topics. Science education is designed
to provide students with the skills to become
independent inquirers about the natural world. The
National Academy of Science encourages teachers to
use collaboration as a tool so that students participate
in the sharing of data and development of group
reports. They also suggest that students should be given
opportunities to make presentations of their work and
“engage with their classmates in explaining, clarifying,
and justifying what they have learned.” Clay animation
is perfect for supporting this learning environment!
Make Science Processes Tangible
First of all, clay animation helps make many science
processes and concepts tangible. In What Works in
Classroom Instruction, Marzano explains that humans
store knowledge in linguistic and visual form. For
concepts that are hard to explain in writing, creating
non-linguistic representations with clay animations can
help students explore and remember information.
Because science topics range from very small things like
atomic particles to very large structures like the solar
system, it is difficult to explore many concepts in a
tangible way. Clay animation allows for hands-on
manipulation and the creation of physical models,
helping students analyze scientific structures and
processes like cell division and plate tectonics.
Improve Thinking Skills While students are motivated by creating their final
animation products, it is the process of making clay
animation, including writing, brainstorming, planning,
sequencing, team work, and management, where the
real learning takes place. As they plan their clay
animation to demonstrate a science process, such as
plant growth, students must use logical thinking skills to

Integrating Technology into Elementary Science tech4learning.com 6
sequence the steps. Critical thinking skills are required
to analyze the process and determine what factors are
necessary for each step in the process and movement
from one step to the next. As students create the clay
animation, they must evaluate the information and
work together to determine the most effective way to
demonstrate the concept or process they are animating.
Collaboration is a necessary component of successful
classroom clay animation. Consider, for example a
project on cell division. If each team attempts to
animate the entire process of cell division, due to time
constraints, the resulting animations might not include
all of the essential information and details. On the other
hand, if each team were to animate one phase in the
process, the entire class could combine their animations
into one presentation. The whole class will still need to
look at the entire process to determine what colors and
shapes to use. This ensures that models display cell
structures like the nucleus and cell walls consistently
throughout the animation. Each team would also have
to work with the team before it and after it to ensure
that no part of the cell division process was missed.
Students at Bauer Elementary in Hudsonville, Michigan
create a clay animation as the
culminating assessment of a unit on
plant and animal life cycles .The
students choose which life cycle
they want to work on, and form
groups to make clay animations to
demonstrate their understanding.
Teacher Julie Myrmel shares, “Not
only do they delve deeper into the
progression of the life cycles, they
get to showcase their artistic side,
learn how to compromise as a member of a group, and
work on a project they really care about. The element of
fun, and the strong sense of ownership of the project,
brings out the best in them.”
Engaging ALL Learners
Engaging the intelligences of all students in a classroom
is part of what makes clay animation so motivating.
Students have seen clay animations on television, and
even though they are using animations to represent
concepts in science, this makes the project more
relevant to their lives. Creating an animation that will be
viewed by other students in their class, students in
other classes if they are shown at a school assembly, or
students around the world if they are shared online,
reinforces that the work our students are doing in the
classroom is valuable and important.
Anne Truger, of Lake County, Illinois, works with
students who have behavioral and learning issues. She
can’t reach her students without projects that are
motivating. When using clay animation, she found that
her students were “more engaged...than I had seen all
year. Students gave up study halls, lunch, and even
came in early to work on the projects!”
This visual approach to learning also
supports the multiple intelligences
students use to learn in the classroom.
Clay animation provides an opportunity
to reach the variety of learners in your
class. The parts of a clay animation
production help all learners strengthen
the different intelligences as they
complete their project. Making a clay
character engages the bodily-
kinesthetic intelligence; writing the story or script
engages the linguistic intelligence. Working in a team
engages the interpersonal intelligence. Creating an
animated production engages the spatial intelligence,
and organizing and sequencing the frames and tasks
engages the logical-mathematical intelligence.
Assessing for Understanding
The process of creating a clay animation also provides
multiple opportunities for assessing understanding.
Watch video on YouTube
“One of my favorite parts of working with these projects
is that the kids who are often the leaders are the same
ones that struggle with more traditional class work. So,
instead of being the one who has to HAVE help, they are
the experts the other kids go to, and they’re the ones
GIVING the help. The look on their faces as they’re sought
out as pros by their peers is priceless.”
Julie Myrmel

Integrating Technology into Elementary Science tech4learning.com 7
With many traditional forms of assessment, students
can recall enough rote information to guess a multiple
choice question correctly or parrot back an exact
definition without understanding what
it means. Creating a clay animation
provides many opportunities for you to
assess for understanding. Lania Ho, of
Barrington, Illinois, asked her students
to create clay animations that
demonstrated a real-life situation to
explain physics concepts they were
learning. When students used a martial arts fight to
demonstrate Newton’s Third Law of Motion – every
action has an equal and opposite reaction - the
questioning and planning during the process provided
an opportunity to ask questions and identify
misconceptions. In this instance, making sure that the
students understood that while the action, one
character hitting another, was obvious, the reaction was
not the other character falling down.
Jean Trusedell, of Decatur, Indiana, used
clay animation for a germ unit. Her
students created animations that
showed how viruses and bacteria attack
our cells, how medicine might affect the
germ and kill it, and how the cells could
be protected. While building the
animation, they had to discuss their
ideas with their teammates as well as explain their ideas
to her. “The greatest part of using clay animation is that
the kids are always having to explain the process as they
go, and I can constantly assess their progress. Asking
them to visualize the cellular level is always difficult; the
clay animation process helped make that possible,” she
shares.
Making the Investment Worthwhile
The process of clay animation involves a significant time
investment. Although there are ways to simplify
projects and the process, you would not want to use
clay animation to teach every topic in your science
curriculum. You can ensure that the time investment is
worthwhile by choosing your topics carefully and
structuring the process to meet your
classroom needs. Using clay animation to
explore a difficult topic helps provide multiple
opportunities to catch misconceptions, while
providing students many opportunities to
analyze content. If student teams create
animations on many different topics at the
end of the unit, sharing the finished
animations is a great way to revisit concepts at the end
of a unit and review for an upcoming assessment.
Remember, the learning during a clay animation project
occurs during the process. Sandra Smits, of Hudsonville,
Michigan, explains, “When they were done with the
project, they really had a strong understanding of the
life cycle because they spent so much time planning it
out and talking about the steps involved to make it all
work.” The visual format and popular medium appeal to
students who might not otherwise engage in
the content or be willing to struggle through
difficult concepts. Clay animation projects
require students to think, not simply recall
facts and information. Jean Trusedell sums
this up nicely: “Clay animation requires my
students to delve deeper into their higher
level thinking skills. Rather than learning that
is rote, clay animation requires my students to
synthesize the facts and turn that knowledge into a new
understanding and THEN demonstrate their new
understandings to others.”
References Marzano, R.J., Pickering, D.J. & Pollock, J.E. (2001). Classroom
Instruction that Works: Research-based Strategies for
Increasing Student Achievement.
National Committee on Science Education Standards and
Assessment, National Research Council. (1995) National
Science Education Standards.

Integrating Technology into Elementary Science tech4learning.com 8
The following lesson plans provide specific, detailed examples of the ways creative technology tools can be applied in
the elementary science curriculum to engage students and improve content knowledge and retention.
Each lesson includes:
the task students will perform,
ideas to engage students in the content,
a description of what students will create with a technology tool,
ways to share student work beyond the classroom walls, and
tips for assessing student work.

Integrating Technology into Elementary Science tech4learning.com 9
Using Diary of a Worm as inspiration, students will create a media campaign to educate
others about the layers, components, and inhabitants of soil and explain why soil is beneficial.
Apps: Pixie® or Wixie®
Task In a move to reduce landscaping budgets and keep their
yards and businesses cleaner, many people are paving
over areas of dirt around their homes and stores.
Fortunately, you know that dirt is more than just dirt -
it’s soil, home to creatures and plants that are
important to the Earth’s health.
Create a campaign to stop the paving and preserve the
soil. Design media products, including pamphlets,
comics, and videos, to educate students, parents,
teachers, administrators, and the community about the
benefits of soil and alternative solutions to paving, such
as greenways and gardens. Use your media products to
share a media campaign to stop the paving!
Engage There are many types of soil, each with its own unique
characteristics and benefits for the ecosystem in which
it is found. Bring different types of soil into your
classroom as well as investigate different types of soil
found around your school and community. Discuss the
characteristics of each type of soil and document with
pictures, descriptive words and research of uses,
including the pros and cons of using specific soils for
different purposes.
Students should be able to answer:
1. What is soil?
2. What are the layers of soil?

Integrating Technology into Elementary Science tech4learning.com 10
3. What plants and animals depend on soil?
4. How do we depend on those plants and
animals?
5. What are the benefits of soil?
Read Doreen Cronin’s Diary of a Worm. Ask students to
explain the benefits of soil and what role a worm plays
in the ecosystem. Discuss the practice of paving over
“dirt” to save money.
1. What is the result of the paving over the dirt?
2. What alternatives used will make the “dirt”
more valuable for everyone?
Discuss ways students could educate others about the
benefits of soil, such as stories, brochures, public
service announcements, or comics.
Create
Let students know they will be responsible for
educating others about the benefits of soil. Form small
teams of students and have them list the stories, facts,
and ideas they think will be helpful in making a
successful argument. Teams
should review their notes,
complete additional research,
and develop a plan for the
product they will create to
educate others.
Have teams share their
proposals with the rest of the
class. This allows all teams to
benefit from all students’
thorough research, powerful
facts, and creative ideas. Ask
each team to choose one or
two core arguments and begin determine how their
team might best make the case to support their
position, developing products such as presentations,
bumper stickers, posters, public service
announcements, children’s stories, brochures, or
comics.
Students use Pixie or Wixie to develop their materials.
Student work should be saved, exported, printed, and
published so that it can be shared with others.
Share
Have students present their information to other
students at school during an assembly or at a booth on
the playground or in the cafeteria.
You might choose to share PSAs on your school web site
or present them during morning announcements. You
may also be to share the PSAs on your local access
television station to help educate the community. Post
student videos and web sites to your school web server
or to a video sharing community for wider distribution.
Brochures can be printed and distributed at local coffee
shops and garden stores.
You can turn this project into a parent night or
community event by hosting a “Don’t Pave It!” trade
show. Have teams make presentations and share their
resources at booths and make-and-take events.
Assessment
You can begin to evaluate students’ content knowledge
during the initial investigations of soil and from
discussions about Diary of a
Worm and the paving problem.
Ask questions about their
research and arguments to
evaluate comprehension and
understanding. Engaging
students in discussion about the
information they have found
will help you identify
misconceptions and better
assess understanding before
project work begins.
The final presentations will help
you evaluate how well students
are able to apply knowledge to communicate an idea
and craft written and visual arguments.
Resources Cronin, Doreen. Diary of a Worm. ISBN: 043969745X
Rosinsky, Natalie. Dirt: The Scoop on Soil. ISBN: 1404803319
Dirt! The Movie
Fact Monster: Soil
View a student sample project

Integrating Technology into Elementary Science tech4learning.com 11
Students will research an animal and create a riddle to show case their knowledge and engage
other students in the natural world.
Apps: Pixie® or Wixie®
Task Kids love jokes and riddles! Your class will create a
series of riddles that other students can use to learn
about animals.
Engage
In this lesson, students will complete research about an
animal and demonstrate their knowledge about the
animal by creating riddles in Pixie or Wixie.
Introduce your students to animal riddles by reading
ABC Animal Riddles (rhyming verse) by Susan Joyce or If
Not for the Cat (haiku) by Jack Prelutsky. These books
will engage your students in the process and
demonstrate various ways that riddles can be written.
Discuss the riddles you have read with your students.
You might ask:
What was your favorite riddle? Why?
What clues helped you figure out the answer?
What types of words did the author use?
What makes a good riddle?
As a class, explore the steps at the Read, Write, Think
website for Riddle Writing which includes great ideas
for finding descriptive words, using a thesaurus, and
writing in perspective.
Let your students know that they will be creating their
own animal riddles. Each student will choose an animal
and create two pages for the riddle.
Page 1 will be the riddle. For example:

Integrating Technology into Elementary Science tech4learning.com 12
I have beautiful black spots. I am a carnivore. I live on
the savanna. I am the fastest
land animal on the planet.
Page 2 will be an illustration of
the animal.
Brainstorm a list of different
animals with the entire class.
Depending on your current
science focus, you may want to
narrow your brainstorm to
types of animals, such as
mammals, or animals that live
in a particular habitat like the desert.
Students should choose one animal from the list and
write down what they already know about the animal
using a cluster map or other graphic organizer.
In order to formulate the riddle, students will write
clues based on the following questions:
What does this animal look like?
Where does it live?
What does it eat?
What makes it unique?
Give students time in the library or online to research
the answers to these questions. Students should add
their research notes to their existing cluster organizer.
Create
When their research is complete, students should write
a draft of the riddle. The riddle should contain four
sentences:
Sentence 1: how the animal looks
Sentence 2: what the animal eats
Sentence 3: where the animal can be found
Sentence 4: a unique fact or distinguishing
characteristic
Use the Text tool to add the text of the riddle to page 1
and use the Options panel to adjust the size and font.
Use the paint tools to illustrate the animal.
If they have time, students can record their voice
reading the riddle on page 1 and add
illustrations or images that support
the words in the riddle.
Students can print their two-page
project as a table tent or greeting
card. You can also collect all
students’ files into one folder,
combine them into one file in Pixie
with each riddle followed by its
illustrated answer, and export the
project as HTML or a movie.
Share
Celebrate and present the student riddles! If students
print table tents or greeting cards, have them place the
printed projects on their desks and encourage students
move around the room to read and guess at other
students’ riddles. If you choose to create a whole-class
HTML file, project the exported riddles in front of the
class and have each student read their riddle and
facilitate class discussion and guesses. You might even
want your class to share this with another class.
Assessment
In the beginning stages, the cluster map organizer can
be used to assess each student’s prior knowledge. You
can continue to monitor progress as students complete
and add their research notes and write their riddles. As
students begin illustrating, prompt them with questions
about their animals to encourage them to add more
details and create more complete and specific
illustrations.
Resources Joyce, Susan. ABC Animal Riddles. ISBN: 0939217511
Yolen, Jane. Least Things: Poems About Small Creatures.
ISBN: 1590780981
Prelutsky, Jack. If Not for the Cat. ISBN: 0060596775
Animal Planet
Fact Monster
Riddle Writing
Watch video on Vimeo

Integrating Technology into Elementary Science tech4learning.com 13
Students apply what they have learned about animal characteristics and adaptation to create
a new creature and introduce it to the scientific community.
Apps: Pixie® or Wixie®
Task Scientists are finding new species every year. While
some of them live in remote environments, others have
been found in large urban cities! While you can’t travel
to faraway lands in the hopes of finding a new species,
you can use what you know about plant and animal
adaptation to create a new species of your own!
Create an electronic book to introduce your species to
the world, sharing its physical adaptations, daily habits
(behavioral adaptations), predators, and prey.
Engage There are lots of right ways to explore this topic. You
might focus on a specific habitat and brainstorm
animals and adaptations for that habitat. You might
instead have students individually or collaboratively
research a favorite animal and explore its habitat and
adaptations. This “create a creature” project is a good
culminating assessment of student understanding of
animals, habitats, and adaptations and assumes they
have already explored these topics.
Begin project work by reading about one of the amazing
creatures in Extreme Animals: The Toughest Creatures
on Earth by Nicola Davies. This book is filled with
remarkable information about many animals kids are
familiar with. Share additional photos of the animal
with your students from education-friendly sites like
Pics4Learning. Penguins are a perennial favorite with
elementary students and images, leveled literature, and
information texts abound.
Ask your students to share what they know about other
amazing creatures. Help lead students to the realization
that a unique physical or behavioral adaptation is what
makes the animal interesting. To get them talking, ask
students to share:
What the animal looks like.

Integrating Technology into Elementary Science tech4learning.com 14
Where the animal lives in the wild.
What makes it interesting.
Explain that new plants and animals are still being
discovered by scientists and researchers. Share
examples of some of newly-discovered species with
your students. Live Science
has a collection of some great
examples for 2013; a search
on the Web will turn up many
others.
Let students know that they
will become animal explorers
tasked with a mission to “find”
a new species. They will use
what they have learned about
plant and animal
characteristics and
adaptations to create a new species and introduce it to
the world by creating an electronic book.
Create Depending on the culture and students in your
classroom, students may work individually or in small
groups. If you have highly independent learners, let
them show off their individuality through personal
work. If you have students who must collaborate to
come up with ideas, small teams provide many more
opportunities to discuss and process learning. Group
work also provides additional opportunities for you to
identify misconceptions and help the group to focus on
key understandings.
If your students have a strong grasp of characteristics,
adaptations, and habitats, have students or teams begin
by describing the habitat in which their new animal will
live. They should include information about weather,
temperature, rainfall, plants, and other animals.
Next, have students think about where their animal will
live in this habitat – on the ground, in the air, water, or
tree tops, etc. Share graphic organizers like t-charts, 4-
squares, clusters, and storyboards to help students
organize their ideas.
Ask students to create a creature with adaptations that
help it survive in this environment. Encourage them to
look to other creatures in similar habitats to identify
features and characteristics that would help this
creature thrive in its habitat. If they are creative
thinkers, they can simply start
designing.
If your students are just beginning
to understand the idea of
adaptations, have them create a
creature first by combining body
parts from one or more categories
of animal types, including birds,
reptiles, amphibians, fish, insects,
and invertebrates.
Tell your students they will be
creating ePubs/iBooks to introduce
their amazing creatures to the world.
Books should include the features of informational text,
including images, labels, photos, captions, and
headings. The information students provide should
answer questions like:
What are the physical features of this creature?
Why are these features needed in this habitat?
What does this creature eat?
What does this creature do during the day? Or is it
nocturnal?
Does this creature have any natural predators?
If your students are ready, give them flexibility to
choose the information they will include in their project.
If you want to provide direction and structure to the
project, you could ask students to create a project that
includes pages for:
1. Title page with name of animal and scientist(s)
who discovered it
2. Image of create in habitat
3. Description of habitat and images to support
description
4. Description of creature’s characteristics and
image with labels
View a sample student project

Integrating Technology into Elementary Science tech4learning.com 15
5. Description of creature’s predators and prey
(diet)
6. Story of how the creature was discovered
(narrative writing)
Have students record their voices as they read the
information on each page. (Note that audio for ePub
may not work on all Android devices.)
Share
Have students present their creatures to the rest of the
class or to a different team. To give the project an
additional air of authenticity, bring in local experts to
ask questions and evaluate student work. If you do not
have a local zoo, veterinarians, park rangers, and even
pet enthusiast parents may be willing to help.
Students can publish their books as ePub files and share
them using a service like iTunes or Dropbox. Share the
ePubs in the school library database, on computers in
the library, or in a publically accessible network location
where other students can access and download the
publications.
If you don’t have ready access to eReaders, you can
export the finished work as PDF files for easy sharing.
You can also print their work and share it in classroom
and school media centers or post the digital files to your
classroom web site.
Assessment
The final ePub and the work during the process will help
you evaluate student understanding of animals,
habitats, and adaptations.
As individual students or teams begin working on the
descriptions of their habitats and animal features,
monitor their progress and ask questions. You can also
use graphic organizers as tangible check in points.
As students begin illustrating, prompt them with
questions about their animals to encourage them to
add more details and create accurate illustrations.
The resulting ePub or PDF can serve as an artifact for
summative assessment of content and expository, or
informative, writing. If their work includes a story
detailing the discovery of the creature, you can also
evaluate their narrative writing skills.
Be sure to evaluate oral presentations for content
accuracy. Students’ ability to answer questions from the
audience will help you assess how well they have
internalized the concepts of behavioral and physical
adaptations.
Resources Nicola Davies. Extreme Animals: The Toughest Creatures on
Earth. ISBN: 0763641278
Pamela Hickman. Animals in Motion: How Animals Swim,
Jump, Slither and Glide. ISBN: 1550745751
LiveScience: Newfound Species
National Park Service: Our Wild Neighbors
National Geographic: Creature Feature

Integrating Technology into Elementary Science tech4learning.com 16
Students will write persuasively on a conservation issue and create a public service
announcement to promote their cause.
App: Frames™
Task
Earth needs your help! While pollution has decreased in
many places, we are still releasing tons of toxins into
the air and water every day. Access to clean drinking
water is decreasing, and landfills are filling up quickly.
One and one-half acres of rainforest are lost every
second.
Balancing the demands of a growing population, a high
standard of living, and a healthy environment is a
delicate and difficult process. Using their incredible
powers of persuasion, and the techniques of persuasive
writing, have students craft a public service
announcement that educates citizens on environmental
issues. They should make their announcement powerful
enough to persuade people to change their behavior to
lessen a negative impact or increase a positive impact
on the environment.
Engage
As a class, brainstorm a list of things worth conserving.
You may want to focus on a threatened area, like the
rainforest, or look for problems your students can solve
in their own communities, like waste reduction or clean
water.
Have individual students choose an issue that is
important to them and formulate a thesis or debatable
statement about the issue. Have them research
information about the issue and then review and
organize their materials. Since facts are a great way to
support a compelling argument, students may want to
organize their facts using a fact vs. opinion graphic
organizer. Students also need to determine which
research information supports their argument and
which information contradicts it. Once they have
identified arguments against their thesis, have them

Integrating Technology into Elementary Science tech4learning.com 17
develop counter arguments they can incorporate into
their essays.
Students should now write a first draft of the essay,
trying to get all their ideas down in logical order. When
the first draft is finished, have them print and edit their
work, making changes to improve the essay. This would
be a great time to have students review one another’s
work.
Share examples of public service announcements you
find on television or online.
Which ones do the students like? Why?
Which ones make the most compelling
arguments? Why?
Most public service announcements are between 10
and 60 seconds long. Ask students how much of their
essay they can they read in ten seconds. How are they
going to need to think differently to make their
argument in a PSA? Work as a class to brainstorm
nonverbal strategies for making a
compelling PSA.
Create Let students know they will be
working on a team with other
students exploring their issue to
create a 30–second public
service announcement. Group
the students together and have
them begin their work by reading
their arguments to the rest of
their team members.
Working as a team, ask students to identify the best
arguments in each essay and brainstorm how they
could share those ideas in a short PSA. Have them list
the stories, facts, and ideas they think will be helpful in
making an argument in their public service
announcement.
Have each team complete a vision for their project to
define their argument, identify their audience, refine
their goal, and choose an idea to pursue. Each team
should then refine their vision and begin developing a
storyboard to serve as the map for the PSA design.
Teams should begin by gathering the media resources
needed for their PSA. Teams may choose to work on
each stage of the development process together or
assign roles, such as researcher, editor, graphic artist,
and director, to divide up the tasks. Have students use
the tools in Frames to develop their PSA.
Share Have teams share their PSAs with the class while talking
about the collaborative process it took to create the
PSA. You might choose to share the PSAs on your school
web site, or present them during morning
announcements. You may also be to share the PSAs
with your local access television station to help educate
the community.
Assessment
The fact vs. opinion organizer, vision, and storyboard
will give insight to the direction teams are heading with
their project. Assessing these items
and observing the collaborative
process before students begin
working in Frames may help ensure
the successful completion of the
PSA. You may want to have
students keep a project journal or
write daily reflections, as it will be
impossible to hear every student’s
comments during the process. The
final PSA will help you assess their
understanding of the issue as well
as their ability to persuade viewers using multimedia.
Resources Chiras, Daniel D., John P. Reganold, and Oliver S. Owen.
Natural Resource Conservation: Management for a
Sustainable Future ISBN: 0130333980
Botkin, Daniel B. and Edward A. Keller. Environmental
Science: Earth as a Living Planet ISBN: 0471389145
Daily, Gretchen C. Nature’s Services: Societal Dependence on
Natural Ecosystems. ISBN: 1559634766
Watch video on YouTube

Integrating Technology into Elementary Science tech4learning.com 18
Students explore the life cycle of a butterfly as they write and illustrate stories that show the
stages of a butterfly’s metamorphosis.
Apps: Pixie®, Wixie®
Task Most young children are familiar with butterflies and
caterpillars and love to listen to stories about them,
whether they are printed and found in the library or
listened to online or using an iPad or tablet.
As budding scientists and authors, tell the students in
your class that they are going to write and illustrate
their own butterfly stories to teach younger students
about the life cycle of a butterfly and get them excited
about reading.
Engage
Ask students to indicate if they have all seen a butterfly
and prompt them to describe what that butterfly looked
like. Most will describe a butterfly in its adult stage.
Ask students if they have ever seen a caterpillar. Is that
a butterfly? What about a chrysalis? Ask them to share
what they think based on prior knowledge. While they
may KNOW that a caterpillar will eventually turn into a
butterfly, you may also want to challenge them to share
how they could prove this information through scientific
observation or experimentation.
Read a story that includes the various stages of a
butterfly’s life cycle, such as the perennial favorite, The
Very Hungry Caterpillar by Eric Carle. After reading,
work as a class to identify the four stages of butterfly’s
life cycle - eggs, caterpillar/larva, chrysalis/pupa, and
adult.
As a group, brainstorm other ways a caterpillar might
feel, such as sad, happy, scared, angry, jealous, or
brave. You might want to use an idea cluster or

Integrating Technology into Elementary Science tech4learning.com 19
character traits organizer. Might a butterfly’s or
caterpillar’s feelings change at different stages of their
life cycle?
If you want to evaluate student understanding before
they begin writing, have them complete a butterfly life
cycle organizer.
Create
Tell your young scientists and authors that they are
going to write and illustrate their own butterfly life
cycle stories! Go back and reread the list of feelings the
class thought a butterfly or caterpillar could have. Have
students choose one feeling to describe the main
character in their story.
Share a character/setting/events organizer with each
student. Have them write the
feeling in the top of the
character box. Students can
then brainstorm ideas for
setting and events. Remind
students that events in their
story need to make sense with
the changes (events) in the
butterfly’s life cycle.
Give the students a blank 4-
stage cycle diagram to organizer
their writing. Students can refer
to the cycle diagram you created as a class or on their
own to make sure they write about the stages correctly.
As students think about what might happen in their
story, have them write words and simple ideas next to
the boxes on the cycle diagram to describe what
happens to their character during each stage of
metamorphosis.
Let students know that their book will need to have at
least one page for each stage in the life cycle. Have
students develop a first draft of their story.
Ask students to read their rough draft three times and
answer the following questions:
1. Did I make each stage of life cycle of the
butterfly clear?
2. Will a reader like my story? Why?
3. What pictures can I add to help tell the story?
Give students time to make edits to their rough draft.
Students should also indicate which sentences will be
on each page.
Next, have students use Pixie or Wixie to design the
final book. You can use the booklet template, create
your own template, or simply show students how to
add pages and text objects.
When sentences have been added to each page, have
the students use the Paint tools to create illustrations
for each page. You can show them how to use the
Stickers as well if you want to save time during the
illustration process.
If you are sharing the books in
digital format, have students
narrate the text on each page of
the story. If you have lots of
students working in a lab, you
may want to use headset
microphones to cut down on
extra noise. You could also have
students work on their narration
at a center in your classroom set
up for this purpose.
As they record, listen, and rerecord they gain valuable
practice with reading fluency. The final product can also
serve as an example of their fluency.
If you are publishing hard copies, have students click
the Print button and choose how they want to share the
story. If you are going to bind the pages into a book,
then full size will work great. If you want to save paper
or colored ink, you can also print at postcard size (4 to a
page) and have students cut before binding.
If you are going share the books in digital form, have
students use the Projects button to export the project
to HTML, PDF, or video.
Share
Collect the final printer versions into a classroom or
media center display or collect the digital versions into a

Integrating Technology into Elementary Science tech4learning.com 20
collection on a page on your school or classroom
website or even on iTunesU!
Celebrate with an author signing or reading event. Have
younger students at the school stop by to read and
enjoy the books as well as invite parents, grandparents,
and community members to join you.
Assessment
At the beginning, you will have an easy opportunity to
assess prior knowledge as you ask about butterfly
sightings and discuss caterpillars. You can also evaluate
analytical and creative thinking as they explain how
they would investigate and prove that a caterpillar was
also a butterfly. Assess comprehension about the
process of metamorphosis and the various stages of a
butterfly’s life cycle as your class, or individual
student’s, develop a 4-cycle diagram.
Use the character/setting/events organizer and the 4-
cycle diagram the students are using to organize their
story to help you catch misconceptions. As students are
writing the story, ask 5 W’s questions and 5 senses
questions to help them write more than the basic facts.
As students begin illustrating their projects in Pixie or
Wixie, prompt them with questions about their story to
encourage them to add more details and create more
complete and specific illustrations. Each student’s voice
narration will provide you with insight into oral
proficiency and reading fluency.
Resources Carle, Eric. The Very Hungry Caterpillar. ISBN: 0399213015
Deluise, Dom. Charlie the Caterpillar. ISBN: 0671796070
Krulik, Nancy. The Magic School Bus: Butterfly and the Bog
Beast. ISBN: 0590508342
Children’s Butterfly
NeoK12 Metamorphosis Videos

Integrating Technology into Elementary Science tech4learning.com 21
Students design enclosures for animals that live in the Arctic or Antarctic regions, reflecting
the animal’s natural habitat, as well as its air, water, food, shelter, and activity needs.
Apps: Pixie® or Wixie®
Task When zoos and aquariums design animal enclosures,
they make sure they are both safe and interactive for
the animals. They also work hard to ensure the
enclosure reflects the animal’s natural habitat.
In this project, your class will work together to design a
Polar Park with a variety of exhibits that showcase the
animals in the Arctic or Antarctic region. It is your task
to design an enclosure for a specific animal that
considers the survival needs of the animal, accurately
reflects their natural habitat, and helps visitors learn
more about this unique species.
Engage Begin by engaging your students in discussions about
weather, climate, and animal adaptions.
Ask your students what type of weather they prefer. Do
they prefer summer where the weather is warm, or
winter where they bundle up to play in the snow? Ask
students to explain how they do different things in
different seasons and how their behavior (food,
clothing, activities) changes when the temperature
changes.
Ask your students which season, or weather (climate),
they think animals prefer. It may take a little prompting,
but students should soon see that different animals may
have different preferences. Ask them to explain and
elaborate using specific animals, and their
characteristics, as examples.
Read a book such as Polar Bears or Penguins by Gail
Gibbons. Discuss the unique adaptations and
characteristics of polar animals. Discuss how the
environment in which these animals live compares to
the environment in which your students live.
Next, ask students if they have ever visited a zoo or an
aquarium. What was their favorite exhibit? Why? What
specific features made it memorable? What do they

Integrating Technology into Elementary Science tech4learning.com 22
think the animals in the enclosure felt about the
exhibits?
Show students a picture of a penguin in their natural
habitat.
Ask the students to describe what they see in the
habitat. Which of those features could be replicated in a
zoo exhibit?
Let the students know that your class will be designing a
Polar Park. As a class, decide if you will focus on Arctic
or Antarctic animals or if you will mix animals (but label
or group them) from both regions.
Form small teams of students to design an enclosure for
a specific animal. Since the focus of this project is on
habitat and requirements for life, let students choose to
make their exhibit any size and using any
budget/materials.
Have teams begin by
researching their animal.
They should be encouraged
to become an expert on this
animal, its unique
characteristics, and needs.
Provide them with graphic
organizers, such as clusters,
to keep notes on plants and
physical features that are
found in this animal’s
natural habitat.
Create
Let the students know that they will be responsible for
sharing their design through informational text and
pictures, as well as formal presentation.
You may want to help provide structure to their
presentation and design portfolio by establishing
requirements like:
A map of the entire enclosure.
Textual information about what the enclosure
includes.
A detailed visual example of one part of the
enclosure.
Important things to know about the species in
enclosure.
Ways the enclosure meets these needs.
Details about the daily routine of the animals in
the enclosure.
Students can use a tool like Wixie to organize their
presentation. Have them use the Paint tools to create a
map, marketing important features in the animal
enclosure, as well a locations where visitors can view
the animal. They should also clearly mark areas that will
be hidden from the guests for the caretakers to prep
food, care for sick animals, and store equipment.
Students should also include a more detailed example
visualizing what one area of the enclosure will look like,
haring special features of that space, as well as how the
animal (or animals) appear in that space.
The presentation should demonstrate their expertise
about the animal itself. They should share facts about
the animal as well as showcase
their knowledge of its unique
characteristics and adaptations
that help it survive in their
natural environment.
Students should also include
text and pictures that describe
how the enclosure reflects the
animals original habitat and is
uniquely suited to helping the
specific animal thrive.
What is available for
the animals to stay active?
How will they obtain their food?
Will they have enough space to build nests or
swim?
How will visitors learn about the animal from
the enclosure?
Share
Have student teams present their designs to “critical
friends” in your classroom. After sharing feedback,
teams should make tweaks to the design and edits to
their presentation.

Integrating Technology into Elementary Science tech4learning.com 23
Invite a local zoologist, park ranger, or even veterinarian
to evaluate student designs and the presentations of
those designs. Student teams can each make an oral
presentation of their design, or have them showcase
their work more in the style of science fair, where
evaluators visit each booth to learn more about their
enclosure.
As a class, work together to develop a map, or design,
for the entire park, showing the location of each
enclosure, and discussing and describing the visitor
experience.
Have your entire class showcase their work at a Polar
Park Faire. Invite parents, as well as community
members, interested in polar animals to talk with your
student experts and tour the proposed design.
Assessment Initial discussions with your students will help you
assess their prior knowledge about arctic animals, as
well as how much they have thought about animal
enclosures at zoos and aquariums they have visited.
As you work together to explore and research one
species together, their ability to glean facts and
information from the story will provide you with a sense
of their research ability. This work as a whole group will
provide information that will help you group students
for maximum success in the project. It will also help you
determine if you need to develop additional research
resources and supports to help students meet the goals
of the project.
Check in with students as they complete their initial
animal research and organizers to clarify
misconceptions before they begin the design process.
Ask students to talk about their maps, visualizations,
before they present so that they have practice
articulating their work. Have teams submit descriptions
and other textual information to you, so you can
provide comments and feedback before they add it to
their design portfolio/presentation.
Support student presentation of their materials as they
share their work with one other team. Use this
opportunity to ask clarifying questions. You may even
want to have the teams present their work to you,
when they think they are finished, so you can provide
feedback before final whole group presentations.
Resources Jackie Glassman & Lisa Bonforte. Amazing Arctic Animals
ISBN: 044842844X
Molly Aloian & Bobbie Kalman. The Arctic Habitat
(Introducing Habitats). ISBN: 0778729818
Barbara Taylor. DK Eyewitness Books: Arctic and Antarctic.
ISBN: 0756690714
Switch Zoo: Build an Online Habitat
Penguin Coast: Maryland Zoo
BrainPOP: Arctic Habitats
Integrating Technology into Elementary Science tech4learning.com 24
Students will learn about the value of scientific thinking as they st udy inventions and practice
research and writing skills to create a Web site about an inventor.
App: Share™
Task Technology is all around us, and not only in cell phones,
computers, and MP3 players. Technology is the
application of science to solve practical problems. The
result is usually an invention, a new product or a
process that makes life better. In this project, your class
will create a Web site to showcase advancements in
everyday life made by famous, and some not-so-
famous, inventors.
Engage
What would life be like without inventions? Because
students are surrounded by technology, begin by
focusing on inventions they use every day. Then,
encourage students to think of inventions that are not
related to computers. After brainstorming several
inventions, ask students to describe how their lives
might be different without them.
Share with your students some common tools like
pencils, scissors, and paper clips. The modern pencil
was invented in 1564 with the discovery of graphite. We
do not know who invented scissors! Ancient Egyptians
probably came up with the idea, which was modified by
the Romans into the form we have today. The paper clip
was not invented until 1899, only a year before the 20th
century!
This process is designed to generate curiosity in your
students about the origin and inventors of products
they use every day. You may want to read E. L.
Konigsburg’s Samuel Todd’s Book of Inventions.
Depending on the age of your students, you may want
to share this unique video about life without basic
inventions. Let your students know that they will create
Web sites that celebrate common inventions and some
not-so-common inventors.

Integrating Technology into Elementary Science tech4learning.com 25
Assign an inventor to each student, or let the students
choose an inventor they wish to research. For example:
American Inventors
Jonas Salk
Isaac Merritt Singer
Thomas Edison
Alexander Graham Bell
Samuel Morse
Jerome Lemelson
African American Inventors
George Washington Carver
Elijah Mc Coy
Lewis Latimer
George Crum
Charles Drew
Philip Dowing
Garrett Augustus Morgan
Women Inventors
Ruth Walkfield
Mary Andersen
Virginia Apgar
Josephine Gares
Bessie Nesmith
Have students research basic who, what, when, where,
and how information about their inventors. Their
research should also help them describe the historical,
social, economic, and scientific impacts of the
inventions. To help students better understand events
that help shaped each inventor’s perspective, have each
student create a timeline of significant events in their
inventor’s life.
Create
Let students know that they will transform their
research into a Web site about the inventor. You may
want to give students guidance on what information
they should include on each page of their project, such
as:
Page 1: Title
Page 2: About the Inventor
Page 3: About the Invention
Page 4: A Description of Life Without the
Invention
Page 5: A Description of How This Invention
Impacted History
Share Upload all of the sites to the same location and create a
menu page that links to each inventor site. You may
also want to place this resource in a school media
center or advertise some fun facts students learned on
your school’s news program or audio announcements.
Ask each student to share the highlights from their
research with the rest of the class. Ask students to
share both basic information and how they think the
inventions changed society and impacted history.
Assessment
As you brainstorm life without inventions, you can
assess students’ prior knowledge. You will be able to
evaluate their note-taking, summarizing, and
information literacy skills as they research information
for their sites
Their site and oral presentation will also help you assess
their understanding of the impact of each inventor’s
invention.
Resources Bender, Lionel. Eyewitness Books: Invention. ISBN:
0756610753.
Konigsburg, E. L. Samuel Todd’s Book of Inventions. ISBN:
0689832028.
Lambert, David. Great Discoveries and Inventions. ISBN:
0816010625.
Invent Now
Zoom Inventors and Inventions
About.com: Famous Inventors
Integrating Technology into Elementary Science tech4learning.com 26
Students will learn about the planets as they create a sample travel journal that explains what
it would be like to visit one of the planets.
Apps: Frames™, Pixie®, Wixie®, or Share™
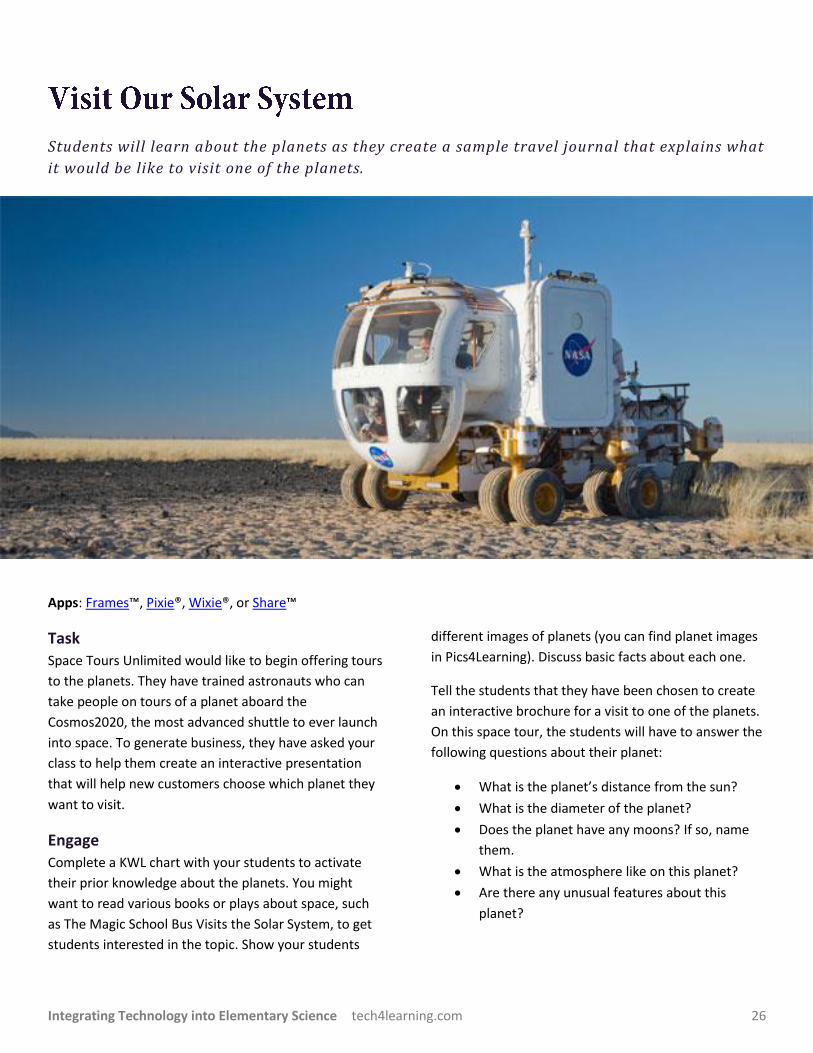
Task
Space Tours Unlimited would like to begin offering tours
to the planets. They have trained astronauts who can
take people on tours of a planet aboard the
Cosmos2020, the most advanced shuttle to ever launch
into space. To generate business, they have asked your
class to help them create an interactive presentation
that will help new customers choose which planet they
want to visit.
Engage
Complete a KWL chart with your students to activate
their prior knowledge about the planets. You might
want to read various books or plays about space, such
as The Magic School Bus Visits the Solar System, to get
students interested in the topic. Show your students
different images of planets (you can find planet images
in Pics4Learning). Discuss basic facts about each one.
Tell the students that they have been chosen to create
an interactive brochure for a visit to one of the planets.
On this space tour, the students will have to answer the
following questions about their planet:
What is the planet’s distance from the sun?
What is the diameter of the planet?
Does the planet have any moons? If so, name
them.
What is the atmosphere like on this planet?
Are there any unusual features about this
planet?
Integrating Technology into Elementary Science tech4learning.com 27
Have students use library books and online resources to
find answers to these questions. There are several
online resources listed in the Resources area.
Create
Once the students have completed the Planet
Worksheet, they are ready to begin creating their
Planetary Tour as seen through the eyes of the first
tourists in space. Students will
present their tour and describe
the things that tourists would
see during a visit to this planet.
Students can use their research
to help them choose
information for their project
and a storyboard to help them
organize their ideas.
Share Have students present their
planetary tour to the rest of
the class or at a school
assembly. This will help
everyone learn more about the planets. You may even
want to have students vote for their favorite tour.
You could also turn this into a community event by
making it a travel trade show. Have each student share
their tour at a planet station. Audience members can
watch each tour to get an idea of which planet they
would like to visit. You could also issue tickets for each
tour so students and community members can choose
which planet they would like to visit.
Assessment
Assess your students’ prior knowledge about the solar
system as you work together to complete a KWL chart.
You could ask them what they know about each planet,
the sun, and the moon individually to elicit more detail.
Their answers will give you insight into their current
comprehension. For example, a student might share
that Mercury is very hot. You might respond with a
question asking what they know about the temperature
on Neptune. This will help lead into understanding that
the distance from the sun is a factor influencing the
environment on each planet.
Student answers to research questions about the
planets can give you insight into
comprehension, but may also
simply be an indication of a
student’s ability to conduct
online and print research.
Engaging students in discussion
about the information they
have found will help you catch
misconceptions and better
assess understanding before
project work begins.
Engage students by asking lots
of questions as they are working
on their itinerary and tour. You
can assess their Frames, Pixie, Wixie, or Share projects
for accuracy of facts and their comprehension of what
impact distance from the sun, atmosphere, and other
planetary features would have on the humans visiting
the planet.
Resources Cole, Joanne and Degan, Bruce. (1992) Magic School Bus:
Lost in the Solar System. ISBN: 0590414291
Mitton, Jacqueline. (1991) Discovering the Planets. ISBN:
0816721319
Simon, Seymour. (2002) Destination Space. ISBN:
0688162908
Nasa-Welcome to the Planets
Watch video on YouTube
Integrating Technology into Elementary Science tech4learning.com 28
Students design a functional and beautiful garden for a particular audience, developing a
scale model, determining costs and materials, and creating a guide explaining how to care for
the garden.
Apps: Pixie® or Wixie®
Task
Your local garden center wants to encourage people to
plant their own gardens. They have asked for your help
in creating a variety of small garden designs that they
can show to customers who are interested in saving
water, cooking with foods they have grown, or just
“greening up” their home environment.
Student teams will design a small garden that is
uniquely suited to a specific environment. They will
work together to create a scale drawing, a list of needed
non-plant materials and estimated costs, a list of
suggested plants and estimated costs, as well as an
instruction manual with the basics of care for the
garden. Teams will present their garden designs and
implementation materials at a community garden fair.
Engage
From conserving water to organic gardening,
environmental issues have most students talking these
days. Use this interest to help engage them in the study
of plants and their role in small ecosystems.
If students’ families have a home or community garden
plot, ask them what crops are grown. Depending on
where you live, students may also have fruit or nut
trees in their yards.

Integrating Technology into Elementary Science tech4learning.com 29
If students live in apartments, prompt them to think of
unique “gardens” they have seen in small spaces. For
example: a cherry tomato plant on the porch, a small
pot of cilantro by the sink, or a bonsai tree in the living
room.
Encourage students to brainstorm other unique gardens
they have seen. Botanical gardens usually have all types
of plants, but students may have also heard of or visited
a xeriscape garden, an aquatic garden, or even a park
with a restored prairie. Engage students with an excerpt
of National Geographic’s Pond Stars!
You can also connect what your students are learning
about American Colonial History and ecosystems in
science by exploring the colonists’ utilization of the
“Three Sisters” style of companion planting. The Three
Sisters name was coined by the Iroquois and used
widely by many Native Americans groups.
In this “companion planting” style of gardening, corns,
beans, and squash are grown together. Beans use the
corn stalk as natural place to climb, help to stabilize the
corn stalk in the wind, and boost nitrogen content in the
soil, which benefits the other plants. Squash grows
around the base, shading the soil and preventing both
the growth of weeds and the loss of moisture. The
sharp hairs on the squash also help to keep pests like
mice and raccoons from eating the crops.
Once you have piqued student interest in plants and
gardening, let them know that they will create a garden
design and develop materials to help people interested
in this type of garden implement on successfully.
Create
Form small teams of students with a science “expert” in
each group to serve as the visionary who can evaluate
the accuracy and quality of design.
Instead of starting with a specific garden type in mind,
have the team focus on the type of person they are
creating the garden for. For example, does the person
want to:
Landscape while saving water.
Grow their own food or herbs.
Add a water feature to their yard.
Create a garden inside.
Create a garden habitat native to the region in
which they live.
Designing with a specific user in mind generally makes it
easier to define the problem and narrow the scope of
the project. It also supports a design thinking mentality
of Frame-Imagine-Create.
Have them complete a cluster organizer or character
trait sheet to practice descriptive writing as they
identify and define who they are designing for.
Give students parameters and requirements for their
work such as:
1. A scale design for a garden.
2. Suggested plants for the garden and an
explanation of why these represent a healthy
ecosystem or habitat.
3. A description of the design that includes
information about it, as well as which type of
person would benefit most from this type of
garden.
4. Care and maintenance instructions for the
plants in the garden.
Once you determine parameters for their work, let
students choose how they will meet them. For example,
their design description could take the form of a poster,
brochure, slide show presentation, or even a video
advertisement. You might want to brainstorm as a
group different ways students can share information as
well as the resources available to them.
Depending on your available resources and student
experience, you may want to provide specific
suggestions. For example, you may suggest the grid
paper in Wixie to help with scale drawing, but also have
sheets of grid paper available for those who aren’t as
comfortable with technology.
You may also want to choose roles for each team
member, such as lead designer, architect, researcher,
writer, editor, and speaker. Depending on your goals for
their learning, you might also have every team member

Integrating Technology into Elementary Science tech4learning.com 30
take the role of research and writer for a day or specific
component of the project.
Once student teams have chosen their audience and
the type of garden they think will be most attractive to
this audience, have them begin researching. They need
to learn about the plants, soil, nutrients, care, and pests
for a successful design.
As they explore the plants that would work in their
garden, encourage them to collect research in a three-
column organizer that includes the plant name,
description, and pros and cons about its use. Students
could also create a larger table with additional columns
for size, water needs, sunlight needs, and feeding. They
should not choose the first plants they find; rather, their
research should help them
choose the best plants from
the many they learn about.
Once they have chosen plants
to include, the team should
work together to organize the
plants into the allotted space.
Encourage them to consider
how the customer will access
each plant for care, how it will
appear (color and beauty), as well as how companion
plants may be mutually beneficial.
Once they have a design created, team members need
to think about how they will present a general
description of their garden as well as care and
maintenance instructions. They should be thinking
about all of the materials they want to have available to
share with potential customers at a garden fair.
Share
Have student teams present their designs to “critical
friends” in your classroom. After sharing feedback,
teams should make tweaks to the design and edits to
their presentation.
Have students showcase their garden designs to
interested community members. Host a Gardening Fair
at your school or partner with a local nursery or garden
center to have students present their ideas to
customers at a special event. Explore additional options
for distributing and displaying materials created by your
students.
Assessment
Once you begin discussing the Three Sisters planting
method, you will get a sense of student engagement in
the topic, as well as begin evaluating prior knowledge
and experience.
If you have students write about their target customers,
you can evaluate their ability to empathize and write
descriptively. If you implement this project more than
one time, you can skip also this part and
distribute/assign the first year’s examples!
The research students do to
develop their list of suggested
plants will give you both a window
into their grasp of plant needs and
ecosystems as well as help you see
where they need additional
support in organizing research
information and note taking.
The scale drawing or design of the
garden is their first chance to
apply the knowledge gained in their research. Evaluate
their drawings’ accuracy for size, complementary
grouping, and maintenance. You might need to prompt
the teams with questions about reaching plants to
weed, prune, or pick.
Be sure to evaluate each team’s overall presentation.
Confirm the content accuracy and rate the effectiveness
of their presentations. Did they share their ideas
creatively? Were they easy to read, find, hear?
Enlist the help of gardening center staff (or parent
experts) to help you evaluate the designs and the
presentation of the design to potential customers.
Resources Celebrate the Three Sisters: Corn, Beans and Squash
Companion Planting
Plant care for edible gardens
Xeriscape Plant Requirements

Integrating Technology into Elementary Science tech4learning.com 31
Click the project to see the sample .
Illustrated Cycles and Diagrams
Students choose a scientific cycle, such as the water cycle,
and illustrate it.
Science Reports
Students create a scientific report on a conservation issue
and apply their knowledge by creating a real world product.
Science Topics News Broadcast
Students apply their knowledge of scientific concepts to
create a news report to illustrate what they have learned.
Non-fiction Science Texts
Students created their own nonfiction science books for
plants, animals, or biomes.

Integrating Technology into Elementary Science tech4learning.com 32