enhancement request - e2singapore.gov.sg uat test... · web viewpassword must be between 8-20...
TRANSCRIPT

NEA_Functionality Test
User Acceptance Test Cases
E2Singapore Website for National Environ-ment Agency (NEA)
Version 1.0
© INFO LAB PTE LTD 2023. All rights reserved. Page 1 of 58

NEA_Functionality Test
PRIVATE AND CONFIDENTIAL DOCUMENT
1 General Test Cases.........................................................................................................................41.1 Login and Security Test Cases...........................................................................................................5
2.2.1. Login............................................................................................................................................................52.2.2. Forgot Password.........................................................................................................................................62.2.3. Change Password.......................................................................................................................................8
2 NEA Test Cases............................................................................................................................142.1 Content Management.......................................................................................................................14
2.2.1. Create Content.........................................................................................................................................142.2.2. Manage Content Editor...........................................................................................................................162.2.3. Update Content.........................................................................................................................................202.2.4. Publish Content........................................................................................................................................212.2.5. Delete Content..........................................................................................................................................23
2.2 Administrator Dashboard................................................................................................................252.3.1. Add Page...................................................................................................................................................252.3.2. Edit Page...................................................................................................................................................282.3.3. Preview Page.............................................................................................................................................292.3.4. Delete Page................................................................................................................................................292.3.5. Move Page.................................................................................................................................................292.3.6. Add CMS...................................................................................................................................................312.3.7. Edit CMS...................................................................................................................................................342.3.8. Delete CMS...............................................................................................................................................342.3.9. Search User...............................................................................................................................................362.3.10. Create User...............................................................................................................................................392.3.11. Edit User...................................................................................................................................................402.3.12. De-activate User.......................................................................................................................................402.3.13. Activate User.............................................................................................................................................402.3.14. Create Role Group...................................................................................................................................422.3.15. Edit Role Group.......................................................................................................................................452.3.16. Delete Role Group....................................................................................................................................452.3.17. Search Role...............................................................................................................................................472.3.18. Include Role..............................................................................................................................................502.3.19. Exclude Role.............................................................................................................................................502.3.20. Upload Images..........................................................................................................................................522.3.21. Delete Images............................................................................................................................................552.3.22. Upload Image............................................................................................................................................562.3.23. Preview Highlight.....................................................................................................................................592.3.24. Update Number of Highlights.................................................................................................................60
2.4 News Management............................................................................................................................622.5.1. Manage News............................................................................................................................................622.5.2. Add News..................................................................................................................................................652.5.3. Edit News via Edit Content button.........................................................................................................692.5.4. Edit News via Edit icon............................................................................................................................722.5.5. Delete News...............................................................................................................................................732.5.6. Search News..............................................................................................................................................742.5.7. Read More Facility...................................................................................................................................752.5.8. News Listing..............................................................................................................................................76
2.5 Approval............................................................................................................................................792.5.1. Approval Console for Reviewer - Search Content................................................................................802.5.2. Approval Console for Reviewer - Publish Content...............................................................................84
© INFO LAB PTE LTD 2023. All rights reserved. Page 2 of 58
NEA_Functionality Test
2.5.3. Approval Console for Reviewer - Reject Content.................................................................................842.5.4. Approval Console for Reviewer - Route................................................................................................852.5.5. Approval Console for Final Reviewer - Search Content......................................................................852.5.6. Approval Console for Final Reviewer - Publish Content.....................................................................902.5.7. Approval Console for Final Reviewer - Reject Content.......................................................................90
2.6 Feedback Management.....................................................................................................................912.7.1. Create Feedback.......................................................................................................................................912.7.2. Reset Feedback.........................................................................................................................................94
2.7 News Subscription.............................................................................................................................952.7.1. Subscribe News.........................................................................................................................................962.7.2. Edit Subscription......................................................................................................................................982.7.3. Unsubscribe..............................................................................................................................................982.7.4. Search News Subscription via Report New Subscription By Category page.....................................982.7.5. Search News Subscription via Report New Subscription By Email page.........................................1022.7.6. Export Subscription...............................................................................................................................106
Appendix......................................................................................................................................................107
© INFO LAB PTE LTD 2023. All rights reserved. Page 3 of 58

NEA_E2S_Functionality Test
1 General Test CasesFor all test cases in this document, you are required to login with the information below.
Website Address / URL: http://e2s.infolab-uat.com
© INFO LAB PTE LTD 2023. All rights reserved. Page 4 of 58

NEA_E2S_Functionality Test
1.1 Login and Security Test Cases
Test Scenario: 1.1.1. Login 1.1.2. Forgot Password1.1.3. Change Password
Test Case No.
Programs/ Module Description of Test Input Data Expected Result Actual Result
2.2.1. Login (http://e2s.infolab-uat.com/adminlogin.aspx)
1. Login Enter valid Email and valid alphanumeric Password. Click ‘Login’ button.
The System displays the E2Singapore page (HTTPS)
2. Login In E2Singapore page, click ‘Logout’ hyperlink at the upper right portion of the screen
The System displays the E2Singapore Login screen.
3. Login Login into the System by giving valid Email and Password. Then logout from
The System stays on the Login screen.
© INFO LAB PTE LTD 2023. All rights reserved. Page 5 of 58
Test Conducted By:
Test Date:
UAT Cycle:

NEA_E2S_Functionality Test
the application and click on the Back button of the browser.
4. Login Login to the System successfully and click <page>
Copy the URL of <page> then click Logout.
Type the URL of <page> in the address bar ofthe browser and try to access the application bypassing the Login page.
Example: The System does not display <title of page> page. It displays Login screen to prompt the user to input Email and Password.
2.2.2. Forgot Password
5. Forgot Password In E2Singapore landing page, navigate on login panel
Login panel has the following fields:
- Email (textbox)- Password (textbox)- Login (button)- Forgot Password?
(hyperlink)
6. Forgot Password Click ‘Forgot Password?’ hyperlink.
The System displays the Forgot Password page with the following fields:
© INFO LAB PTE LTD 2023. All rights reserved. Page 6 of 58

NEA_E2S_Functionality Test
-Email (textbox)-Submit (button)-Cancel (button)
7. Forgot Password Enter valid Email and click ‘Submit’ button.
The System sends the following login password information email to member.
Email Subject:E2Singapore Internet Website Password Retrieval
Email Body:Dear <First Name><Last Name>,
You have requested for the retrieval of password. Please use below password to login in E2Singapore Website:
<Password>
This is a system generated email.
8. Forgot Password Click hyperlink in email E2 Login screen is displayed in the new browser window.
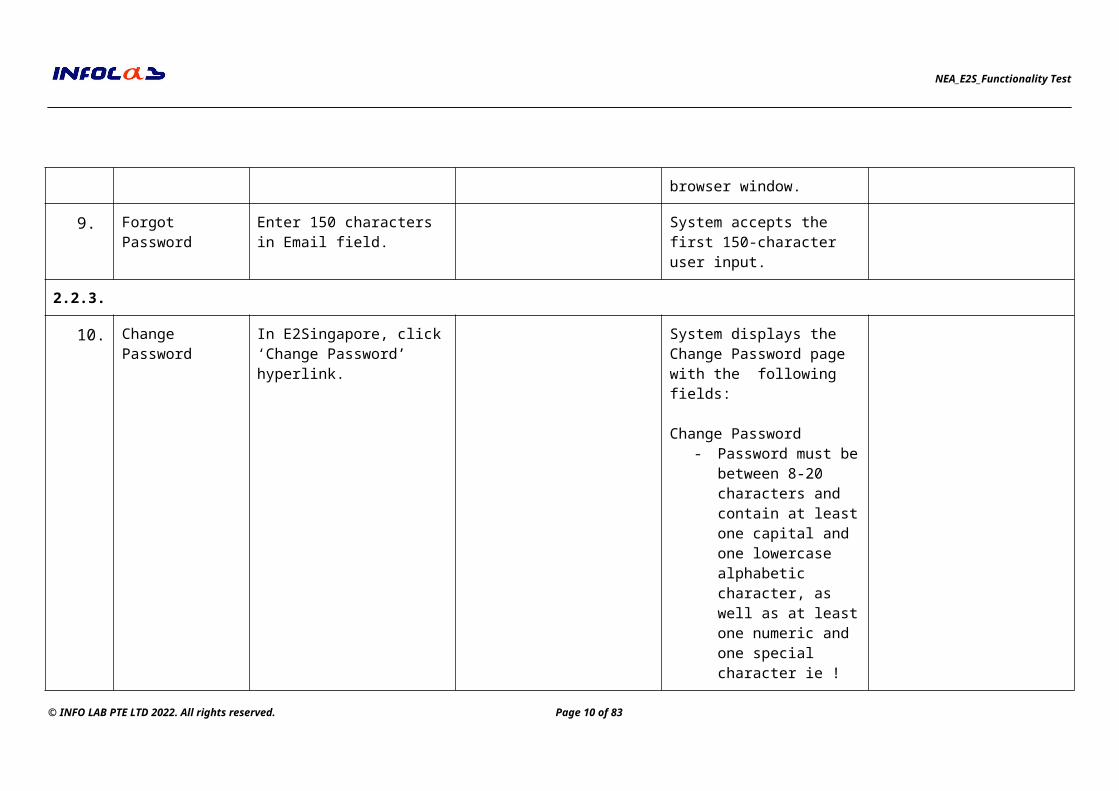
9. Forgot Password Enter 150 characters in System accepts the first 150-
© INFO LAB PTE LTD 2023. All rights reserved. Page 7 of 58

NEA_E2S_Functionality Test
Email field. character user input.
2.2.3.
10. Change Password In E2Singapore, click ‘Change Password’ hyperlink.
System displays the Change Password page with the following fields:
Change Password - Password must be
between 8-20 charac-ters and contain at least one capital and one lowercase alpha-betic character, as well as at least one numeric and one spe-cial character ie !@#$%^&*()<>? (text)
- Old Password (textbox)
- New Password (textbox)
- Verify Password (textbox)
- Change Password (button)
- Cancel (button)
11. Change Password Enter valid password on Old Password field, and matched
Example: Valid Password= 8
The System displays Confirmation box with
© INFO LAB PTE LTD 2023. All rights reserved. Page 8 of 58

NEA_E2S_Functionality Test
valid passwords in both New Password and Verify Password fields.
Click ‘Change Password’ button.
characters with mix of upper and lower case, number and special characters
message, “Your password has been successfully changed.”
12. Change Password Click ‘OK’ button on Confirmation message box, then logout
13. Change Password Logon to E2Singapore website using new password
User successfully logs on E2Singapore Homepage.
14. Change Password Enter similar password in New Password and Verify Password fields.
Old Password: <Password>New Password: Asdf123!Confirm Password: Asdf123!
Click ‘Change Password’ button
Example: Old Password is the password used upon logon to NCC Login screen prior to clicking Change Password button in E2Singapore Homepage.
The System displays Confirmation box with message, “Your password has been successfully changed.”
Error Testing
15. Login Enter invalid Email and correct Password. Click ‘Login’ button.
System prompts error message, “Invalid user email or password.”
© INFO LAB PTE LTD 2023. All rights reserved. Page 9 of 58
NEA_E2S_Functionality Test
16. Login Enter correct Email or invalid Password. Click ‘Login’ button.
System prompts error message, “Invalid user email or password.”
17. Login Enter invalid email format. Example:yahoo.comtest@gmail
System prompts error message, “Invalid user email or password.”
18. Login Enter invalid password 5 times for the same email.
The System prompts Alert box with message, “Your ac-count has been locked out! Please use the 'Forgot Pass-word' function”
19. Forgot Password Leave Email field blank and click ‘Submit’.
System prompts error message,“Email is a mandatory field.”
20. Change Password Leave Old Password, New Password, and Verify Password fields blank.
System displays Alert box with message, “Old Password is a mandatory field. New Password is a mandatory field. Verify Password is a mandatory field.”
21. Change Password Click Change Password button
System prompts Alert box with message,
“Password not changed.
© INFO LAB PTE LTD 2023. All rights reserved. Page 10 of 58

NEA_E2S_Functionality Test
Wrong password format.”
22. Change Password Enter incorrect Old Password, and then enter similar passwords for “New Password” and “Verify Password” fields.
Click ‘Change Password’ button
System displays error message,
“Password not changed. Old Password is wrong.”
23. Change Password Enter correct Old Password, and then enter mismatched passwords in New Password and Verify Password fields.
Click ‘Change Password’ button
System displays error message,
“New Password does not match with Verify Password.”
24. Change Password In Change Password page, click Cancel button
System displays E2Singapore Homepage.
25. Change Password Enter old password in Old Password, New Password, and Confirm Password fields.
System displays Alert box with message, “Password not changed. New password must be different from previous 3 passwords.”
© INFO LAB PTE LTD 2023. All rights reserved. Page 11 of 58

NEA_E2S_Functionality Test
© INFO LAB PTE LTD 2023. All rights reserved. Page 12 of 58

NEA_E2S_Functionality Test
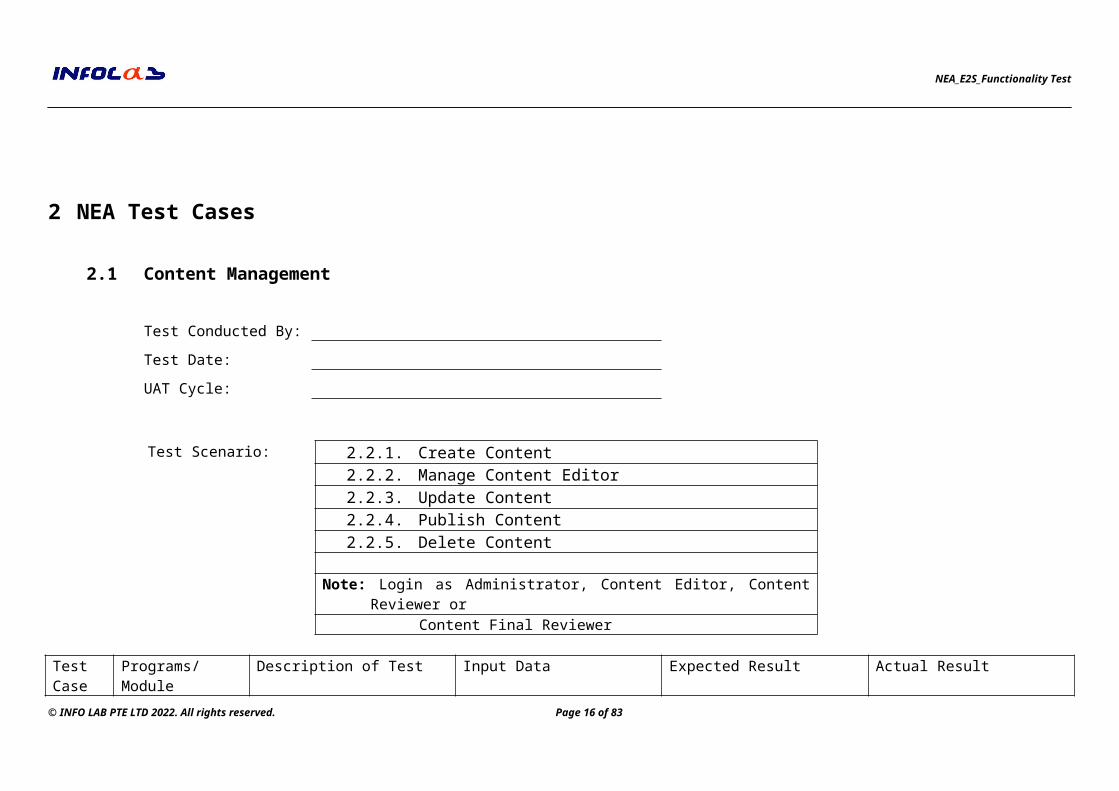
2 NEA Test Cases
2.1 Content Management
Test Scenario: 2.2.1. Create Content2.2.2. Manage Content Editor2.2.3. Update Content2.2.4. Publish Content2.2.5. Delete Content
Note: Login as Administrator, Content Editor, Content Reviewer or Content Final Reviewer
Test Case No.
Programs/ Module Description of Test Input Data Expected Result Actual Result
2.2.1. Create Content1. Content Open a page and click ‘Edit
Content’ hyperlink. Content Editor page is
displayed with the following details:
© INFO LAB PTE LTD 2023. All rights reserved. Page 13 of 58
Test Conducted By:
Test Date:
UAT Cycle:

NEA_E2S_Functionality Test
- Actions (hyperlinks) View To Publish Delete
- Version (text)- User (text)- Creation Date (text)- Active Version< >
(text)- Content editor- Save (hyperlink)- Save and Publish (hy-
perlink)- Save and Send to Re-
viewer (hyperlink)- Cancel (hyperlink)- Preview (hyperlink)
2. Content In Content editor, enter the page content and click on ‘Preview’ hyperlink on the bottom of the page.
The preview of the content version saved is displayed.
3. Content In Content editor, enter the page content and click on ‘Cancel’ hyperlink on the bottom of the page.
Content is not saved.
4. Content In Content editor, enter the page content and click on ‘Save’ hyperlink on the bottom of the page.
Success message, “New version added successfully” is displayed.
Table on the top portion of
© INFO LAB PTE LTD 2023. All rights reserved. Page 14 of 58

NEA_E2S_Functionality Test
the screen will refresh reflecting the newly added version:
- Version- User- Creation Date
5. Content In Content editor, enter the page content and click on ‘Save and Send to Reviewer’ hyperlink on the bottom of the page.
Success message is displayed, “New version added successfully and sent for review successfully”
Table on the top portion of the screen will refresh reflecting the newly added version:
- Version- User- Creation Date
2.2.2. Manage Content Editor6. Content Open a page and click ‘Edit
Content’ hyperlink.Content Editor page is displayed with the following details:
- Actions (hyperlinks) View To Publish Delete
- Version (text)- User (text)- Creation Date (text)- Active Version< >
© INFO LAB PTE LTD 2023. All rights reserved. Page 15 of 58
NEA_E2S_Functionality Test
(text)- Content editor- Save (hyperlink)- Save and Publish (hy-
perlink)- Save and Send to Re-
viewer (hyperlink)- Cancel (hyperlink)- Preview (hyperlink)
7. Content In Content editor screen, type the page content and click on ‘Preview’ hyperlink on the bottom of the page.
The preview of the content version saved is displayed.
8. Content At the bottom of content editor screen, click ‘HTML’ tab.
The content is displayed in html view (equivalent html code of content)
9. Content Copy embedded URL from other website and paste to content editor.
Click ‘Design’ tab at the bottom of the content editor.
Example:Valid URL from YouTube Video:http://youtube.com/123456
The YouTube video is displayed in the rich text editor.
10. Content Copy a paragraph from Word document file and then click
on ( Paste from word, strip font) icon.
Example: Web browser: Internet Explorer 7 and above.
The paragraph is copied on the rich text editor.
11. Content Copy a paragraph from Word document file and then click
on ( Paste from word, strip font) icon.
Example: Web browser: Firefox, Chrome or Safari
‘Paste from Word, strip font’ screen is displayed.
© INFO LAB PTE LTD 2023. All rights reserved. Page 16 of 58

NEA_E2S_Functionality Test
12. Content Click ‘Paste’ button. The paragraph is copied on the rich text editor.
13. Content Click (image manager) icon.
Image Manager dialog box is displayed.
14. Content Click ‘Upload’ button Upload screen is displayed.15. Content Select 2MB JPG image and
click ‘Upload’ button.Selected image is inserted inside the rich text editor.
16. Content In Upload screen, click ‘Add’ button.
One (1) File upload dialog box is added
17. Content In Upload screen, click ‘Remove (X)’ button.
The file upload dialog box is removed.
18. Content Click (document manager) icon.
Document Manager dialog box is displayed.
19. Content Click ‘Upload’ button Upload screen is displayed.20. Content Click ‘Select’ button and
select desired document to upload.
Click ‘Upload’
Document is uploaded.
21. Content In Upload screen, click ‘Add’ button.
One (1) File upload dialog box is added
22. Content In Upload screen, click ‘Remove (X)’ button.
The file upload dialog box is removed.
23. Content In Document Manager dialog box, select desired document.
Click ‘Insert’ button.
The selected document is inserted in the rich text editor.
24. ContentClick (hyperlink manager) icon.
Hyperlink Manager dialog box is displayed.
© INFO LAB PTE LTD 2023. All rights reserved. Page 17 of 58

NEA_E2S_Functionality Test
25. Content Enter necessary details and click ‘OK’ button.
Hyperlink is inserted in the rich text editor.
26. Content Highlight entire hyperlink and
click (remove link) icon.
Hyperlink is removed and link is not clickable.
27. Content Highlight the text and click
(numbered list) icon.
Number list is automatically displayed in the rich text editor.
28. Content Highlight the text and click
(bullet list) icon.
Bullet list is automatically displayed in the rich text editor.
2.2.3. Publish Content 29. Content Open a page and click ‘Edit
Content’ hyperlink.Content Editor page is displayed with the following details:
- Actions (hyperlinks) View To Publish Delete
- Version (text)- User (text)- Creation Date (text)- Active Version< >
(text)- Content editor- Add Version (hyper-
link)- Back to Content Page
(hyperlink)30. Content In the upper portion of the Success message is
© INFO LAB PTE LTD 2023. All rights reserved. Page 18 of 58

NEA_E2S_Functionality Test
Content page, select corresponding ‘To Publish’ hyperlink for desired content version to publish.
displayed, “Selected version set to publish successfully.”
31. Content Verify content in public page. The published version is displayed.
2.2.4. Delete Content 32. Content In the upper portion of the
Content page, select corresponding ‘Delete’ hyperlink for desired content version to be deleted.
Content version selected is deleted.
© INFO LAB PTE LTD 2023. All rights reserved. Page 19 of 58

NEA_E2S_Functionality Test
2.2 Administrator Dashboard
Test Scenario: 2.3.1. Add Page2.3.2. Edit Page2.3.3. Preview Page2.3.4. Delete Page2.3.5. Move Page
Note: Login as Administrator
Test Case No.
Programs/ Module Description of Test Input Data Expected Result Actual Result
2.3.1. Add Page1. Manage Pages In E2Singapore website,
navigate on Admin dashboard.
Admin Dashboard is displayed.
2. Manage Pages Click ‘Manage Pages’ hyperlink
Manage Pages is displayed.
3. Manage Pages Click (add page) icon. Page Details is displayed with the following fields:
- Page Name (textbox)© INFO LAB PTE LTD 2023. All rights reserved. Page 20 of 58
Test Conducted By:
Test Date:
UAT Cycle:

NEA_E2S_Functionality Test
- Page Title (textbox)- Page Description (text
area)- Keywords (text area)- URL Type (drop-
down)- Type (dropdown)- System Page (check-
box)- Included in Menu
(checkbox)- Page Parent (drop-
down)- Base Page (drop-
down)- Effective Date (drop-
down calendar)- Expiry Date (drop-
down calendar)- Permission (check-
boxes)4. Manage Pages Verify values in ‘URL Type’
radio button list.The following values are displayed:
- Page- Internal Link- External Link
5. Manage Pages Verify values in ‘Type’ dropdown list.
The following values are displayed:
- Portal Page- Module Page
© INFO LAB PTE LTD 2023. All rights reserved. Page 21 of 58

NEA_E2S_Functionality Test
- Content Page6. Manage Pages Enter and select necessary
details.
Click ‘Cancel’
Manage Pages is displayed.
7. Manage Pages Enter and select necessary details.
Click ‘Save’
New page is created and is displayed in the Pages list box.
2.3.2. Edit Page8. Manage Pages Select desired page in the
Pages list box and click (edit page) icon.
Page details of selected page are displayed.
9. Manage Pages Make necessary changes and click ‘Cancel’
The changes made are not saved.
10. Manage Pages Make necessary changes and click ‘Save’
The changes made are saved.
11. Manage Pages Select page in the menu. Changes in the page content are displayed.
2.3.3. Preview Page12. Manage Pages Select desired page in the
Pages list box and click (view page) icon
Preview of selected page is displayed.
2.3.4. Delete Page13. Manage Pages Select desired page in the
Pages list box and click (delete page) icon
Confirmation message is displayed. “You are about to delete one Page. After this, you will not be able to recover it. Are you sure you want to proceed?”
14. Manage Pages Click ‘Cancel’ Confirmation is closed and
© INFO LAB PTE LTD 2023. All rights reserved. Page 22 of 58

NEA_E2S_Functionality Test
Manage Pages is displayed. The selected page is not deleted.
15. Manage Pages Click ‘OK’ The selected page is deleted.2.3.5. Move Page
16. Manage Pages Select desired page in the Pages list box and click (move up) icon.
The selected page moves one line up the menu displayed in Pages list box.
17. Manage Pages In homepage, verify menu where the page belongs to.
The page moves one line up the menu.
18. Manage Pages Select desired page in the Pages list box and click (move first) icon.
The selected page moves on the first line of the menu displayed in Pages list box.
19. Manage Pages In homepage, verify menu where the page belongs to.
The page moves one the first line of the menu.
20. Manage Pages Select desired page in the Pages list box and click (move down) icon.
The selected page moves one line down the menu displayed in Pages list box.
21. Manage Pages In homepage, verify menu where the page belongs to.
The page moves one line up the menu.
22. Manage Pages Select desired page in the Pages list box and click (move last) icon.
The selected page moves on the last line of the menu displayed in Pages list box.
23. Manage Pages In homepage, verify menu where the page belongs to.
The page moves one the last line of the menu.
© INFO LAB PTE LTD 2023. All rights reserved. Page 23 of 58

NEA_E2S_Functionality Test
Test Scenario: 2.3.6. Add Setting2.3.7. Edit Setting2.3.8. Delete Setting
Note: Login as Administrator
Test Case No.
Programs/ Module Description of Test Input Data Expected Result Actual Result
2.3.6. Add Setting1. Setting In E2Singapore website,
navigate on Admin dashboard.
Admin Dashboard is displayed.
2. Setting Click ‘Manage Setting’ hyperlink
Manage Setting is displayed with the following details:
- List Name (drop-down)
- Table Name Value
© INFO LAB PTE LTD 2023. All rights reserved. Page 24 of 58
Test Conducted By:
Test Date:
UAT Cycle:

NEA_E2S_Functionality Test
SortOrder ListName
3. Setting Click ‘Add New Record’ button.
The following fields are displayed:
- Name (textbox)- Value (textbox)- SortOrder (textbox)- ListName (textbox)- Update (button)- Cancel (button)
4. Setting Enter valid data on the following fields:
- Name- Value- SortOrder- ListName
Click ‘Cancel’
Manage Settings page is displayed.
5. Setting Enter valid data on the following fields:
- Name- Value- SortOrder- ListName
Click ‘Update’
New setting is created.
2.3.7. Edit Setting6. Setting Select desired setting in the
table listing and click corresponding icon.
Setting details are displayed.
7. Setting Make necessary changes The changes made are not
© INFO LAB PTE LTD 2023. All rights reserved. Page 25 of 58

NEA_E2S_Functionality Test
and click ‘Cancel’ saved.8. Setting Make necessary changes
and click ‘Update’The changes made are saved.
2.3.8. Delete Setting9. Setting Select desired setting in the
table listing and click corresponding icon.
Confirmation message is displayed. “Are you sure to delete this setting?”
10. Setting Click ‘Cancel’ Confirmation is closed and Manage Setting is displayed. The selected setting is not deleted.
11. Setting Click ‘OK’ The selected setting is deleted.
Error Testing12. Setting Click ‘Add new record’ button
then click Update.The following error messages are displayed:“Name is a mandatory field.Value is a mandatory field.SortOrder is a mandatory field.ListName is a mandatory field.”
Test Scenario: 2.3.9. Search User© INFO LAB PTE LTD 2023. All rights reserved. Page 26 of 58
Test Conducted By:
Test Date:
UAT Cycle:

NEA_E2S_Functionality Test
2.3.10. Create User2.3.11. Edit User2.3.12. Activate User2.3.13. De-activate User
Note: Login as Administrator
Test Case No.
Programs/ Module Description of Test Input Data Expected Result Actual Result
2.3.9. Search User1. Manage User In E2Singapore website,
navigate on Admin dashboard.
Admin Dashboard is displayed.
2. Manage User Click ‘Manage User’ hyperlink
Manage User page is displayed with the following details:
Search- Email (textbox)- Name (textbox)- Status (option but-
tons) Active Not Active
- Search (button)- Create User (button)
3. Manage User Enter email and name, set status to ‘Active’ and then click ‘Search’
Example:Search criteria do not match the records in database
System displays message, “No record found.”
© INFO LAB PTE LTD 2023. All rights reserved. Page 27 of 58

NEA_E2S_Functionality Test
4. Manage User Enter valid email and name, set status to ‘Active’ and then click ‘Search’
Example:Search criteria matched the records in database
Search results are displayed in the table with the following details:
- First Name- Last Name- Email- Role Name
5. Manage User Enter email and name, set status to ‘Not Active’ and then click ‘Search’
Example:Search criteria do not match the records in database
System displays message, “No record found.”
6. Manage User Enter valid email and name, set status to ‘Not Active’ and then click ‘Search’
Example:Search criteria matched the records in database
Search results are displayed in the table with the following details:
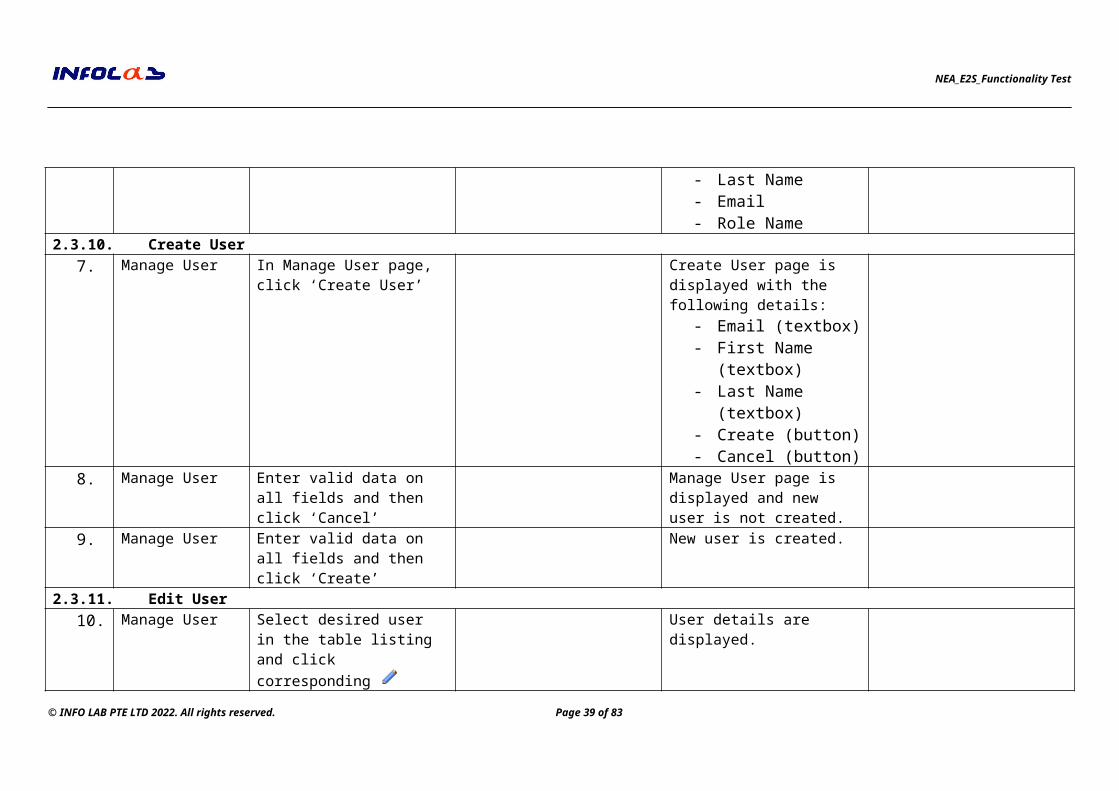
- First Name- Last Name- Email- Role Name
2.3.10. Create User7. Manage User In Manage User page, click
‘Create User’Create User page is displayed with the following details:
- Email (textbox)- First Name (textbox)- Last Name (textbox)- Create (button)- Cancel (button)
8. Manage User Enter valid data on all fields and then click ‘Cancel’
Manage User page is displayed and new user is not created.
9. Manage User Enter valid data on all fields and then click ‘Create’
New user is created.
© INFO LAB PTE LTD 2023. All rights reserved. Page 28 of 58

NEA_E2S_Functionality Test
2.3.11. Edit User10. Manage User Select desired user in the
table listing and click corresponding icon.
User details are displayed.
11. Manage User Make necessary changes and click ‘Cancel’
The changes made are not saved.
12. Manage User Make necessary changes and click ‘Update’
The changes made are saved.
2.3.12. De-activate User13. Manage User Select desired user in the
table listing and click corresponding De-Activate icon.
Success message is displayed. “User account is de-activated.”
2.3.13. Activate User14. Manage User Select desired user in the
table listing and click corresponding Activate icon.
Success message is displayed. “User account is activated.”
Error Testing15. Manage User Click ‘Create User’ button
then click Create button.The following error messages are displayed:“Email is a mandatory field.First Name is a mandatory field.”
© INFO LAB PTE LTD 2023. All rights reserved. Page 29 of 58Test Conducted By:
Test Date:
UAT Cycle:

NEA_E2S_Functionality Test
Test Scenario: 2.3.14. Create Role Group2.3.15. Edit Role Group2.3.16. Delete Role Group
Note: Login as Administrator
Test Case No.
Programs/ Module Description of Test Input Data Expected Result Actual Result
2.3.14. Create Role Group1. Manage Role
GroupIn E2Singapore website, navigate on Admin dashboard.
Admin Dashboard is displayed.
2. Manage Role Group
Click ‘Manage Role Group’ hyperlink
Manage Role Group page is displayed with the following details:
- Add New Role Group (button)
- List of Role Groups
3. Manage Role Group
Click ‘Add New Role Group’ button.
Role Group Details page is displayed with the following details:
- Role Group Name© INFO LAB PTE LTD 2023. All rights reserved. Page 30 of 58

NEA_E2S_Functionality Test
- Description- Active Roles- Save (button)- Cancel (button)
4. Manage Role Group
Enter valid data on all fields. Click ‘Cancel’ button.
Manage Role Group page is displayed and role group is not created.
5. Manage Role Group
Enter valid data on all fields. Click ‘Save’ button.
Role Group is created.
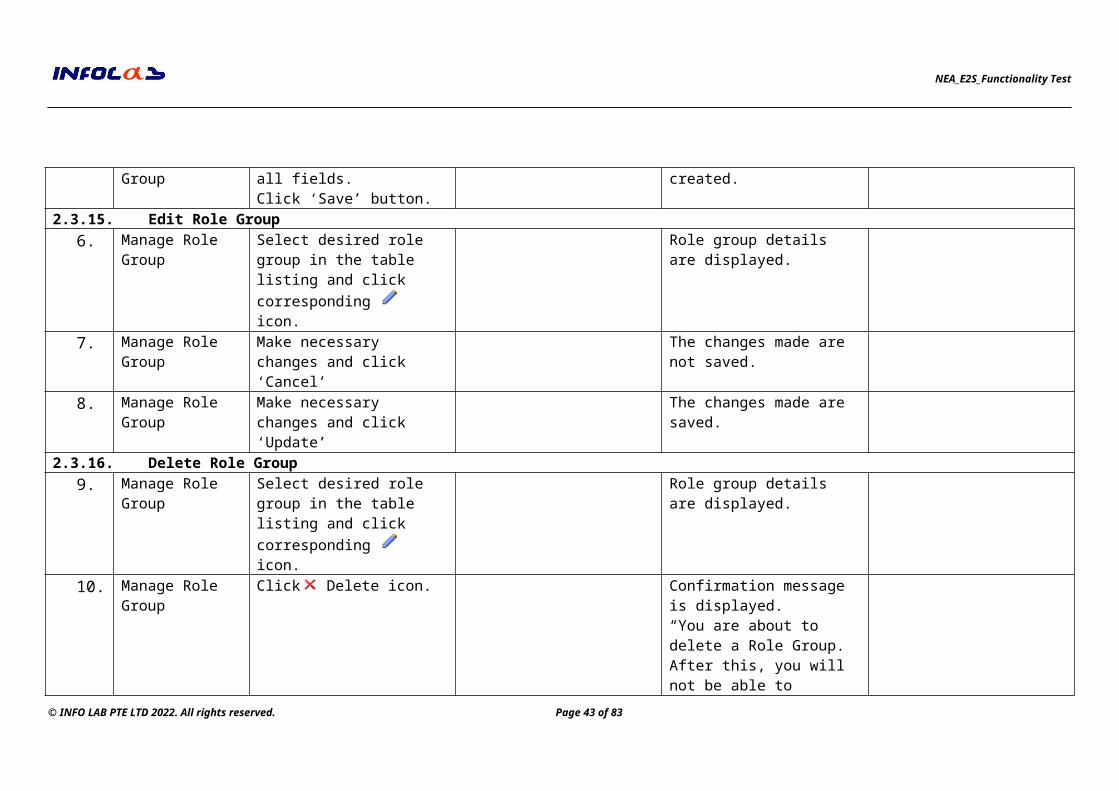
2.3.15. Edit Role Group6. Manage Role
GroupSelect desired role group in the table listing and click corresponding icon.
Role group details are displayed.
7. Manage Role Group
Make necessary changes and click ‘Cancel’
The changes made are not saved.
8. Manage Role Group
Make necessary changes and click ‘Update’
The changes made are saved.
2.3.16. Delete Role Group9. Manage Role
GroupSelect desired role group in the table listing and click corresponding icon.
Role group details are displayed.
10. Manage Role Group
Click Delete icon. Confirmation message is displayed. “You are about to delete a Role Group. After this, you will not be able to recover it. Are you sure you want to proceed?”
11. Manage Role Group
Click ‘Cancel’ button. Manage Role Group page is displayed and Group Role is not deleted.
© INFO LAB PTE LTD 2023. All rights reserved. Page 31 of 58

NEA_E2S_Functionality Test
12. Manage Role Group
Click ‘OK’ button. Group Role is deleted.
Error Testing13. Manage Role
GroupClick ‘Add New Role Group’ button and then click ‘Save’ button.
Error message is displayed:“Role Group Name cannot be empty.”
Test Scenario: 2.3.17. Search Role2.3.18. Include Role2.3.19. Exclude Role
Note: Login as Administrator
Test Case No.
Programs/ Module Description of Test Input Data Expected Result Actual Result
2.3.17. Search Role1. Manage Role
AssignmentIn E2Singapore website, navigate on Admin
Admin Dashboard is displayed.
© INFO LAB PTE LTD 2023. All rights reserved. Page 32 of 58
Test Conducted By:
Test Date:
UAT Cycle:

NEA_E2S_Functionality Test
dashboard.2. Manage Role
AssignmentClick ‘Manage Role Assignment’ hyperlink
Manage Role Assignment page is displayed with the following details:
Search- Role (dropdown)- Email (textbox)- Name (textbox)- Search (button)
Available List - First Name (column)- Last Name (column)- Email (column)
Assigned List- First Name (column)- Last Name (column)- Email (column)
3. Manage Role Assignment
Select role, enter email and name, and then click ‘Search’
Example:Search criteria do not match the records in database
Error message is displayed: “No record found.”
4. Manage Role Assignment
Select role, valid enter email and name, and then click ‘Search’
Example:Search criteria matched the records in database
Search results are displayed in the Available List table with the following details:
- First Name- Last Name- Email
© INFO LAB PTE LTD 2023. All rights reserved. Page 33 of 58

NEA_E2S_Functionality Test
2.3.18. Include Role5. Manage Role
AssignmentSelect role, valid enter email and name, and then click ‘Search’
Example:Search criteria matched the records in database
Search results are displayed in the Available List table with the following details:
- First Name- Last Name- Email
6. Manage Role Assignment
In Available List table, tick checkbox that corresponds to desired user to be included in selected role.
Click Include button
The selected user is moved from Available List table to the Assigned List table.
2.3.19. Exclude Role7. Manage Role
AssignmentIn Assigned List table, tick checkbox that corresponds to desired user to be excluded from role
Click Exclude button
The selected user is moved from Assigned List table to Available List table. User is excluded from role.
Error Testing8. Manage Role
AssignmentSelect role, valid enter email and name, and then click ‘Search’
Example:Search criteria matched the records in database
Search results are displayed in the Available List table with the following details:
- First Name- Last Name- Email
9. Manage Role Do not tick any User Error message is displayed:
© INFO LAB PTE LTD 2023. All rights reserved. Page 34 of 58

NEA_E2S_Functionality Test
Assignment checkbox.
Click Include button
“No user is selected.”
10. Manage Role Assignment
Do not tick any User checkbox.
Click Exclude button
Error message is displayed:“No user is selected.”
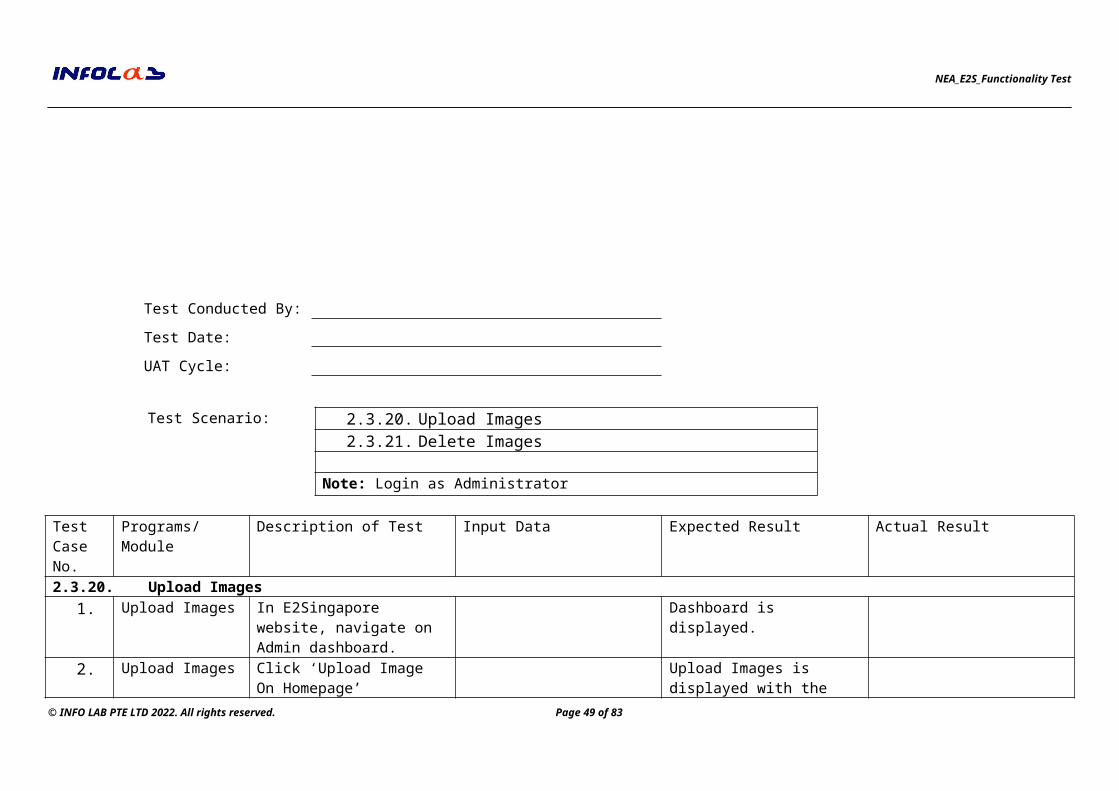
Test Scenario: 2.3.20. Upload Images2.3.21. Delete Images
Note: Login as Administrator
Test Case No.
Programs/ Module Description of Test Input Data Expected Result Actual Result
© INFO LAB PTE LTD 2023. All rights reserved. Page 35 of 58
Test Conducted By:
Test Date:
UAT Cycle:

NEA_E2S_Functionality Test
2.3.20. Upload Images1. Upload Images In E2Singapore website,
navigate on Admin dashboard.
Dashboard is displayed.
2. Upload Images Click ‘Upload Image On Homepage’ hyperlink
Upload Images is displayed with the following details:
- Image Name (textbox)
- Image Type (textbox)- Image (file upload di-
alog box)- ‘If image file exists,
overwrite the existing file’ (checkbox)
3. Upload Images Enter and select valid image name, image type, and .JPG image.
Click ‘Upload’
The image is successfully uploaded.
2.3.21. Delete Images4. Upload Images Tick checkbox of the desired
image to be deleted then click ‘Delete selected images’
The image is successfully deleted.
Error Testing5. Upload Images Upon loading ‘Upload Image’
page, click ‘Upload’ button.The following error messages are displayed:“Image Name is a mandatory field.Image is a mandatory field.”
6. Upload Images Enter and select valid image name, image type, and .Doc
Error message is displayed,“File type must be gif, jpg,
© INFO LAB PTE LTD 2023. All rights reserved. Page 36 of 58

NEA_E2S_Functionality Test
file.
Click ‘Upload’
png or bmp”
Test Scenario: 2.3.22. Upload Image2.3.23. Preview Highlight2.3.24. Update Number of Highlights
Note: Login as Administrator
Test Case No.
Programs/ Module Description of Test Input Data Expected Result Actual Result
2.3.22. Upload Image1. Highlights In E2Singapore website,
navigate on Admin dashboard.
Admin Dashboard is displayed.
2. Highlights Click ‘Manage Highlights’ hyperlink.
Manage Highlights page is displayed.
3. Highlights For Highlight 1, click ‘Upload Image’ hyperlink
Upload Images is displayed with the following details:
- Image Name
© INFO LAB PTE LTD 2023. All rights reserved. Page 37 of 58
Test Conducted By:
Test Date:
UAT Cycle:

NEA_E2S_Functionality Test
(textbox)- Image Type (textbox)- Image (file upload di-
alog box)- ‘If image file exists,
overwrite the existing file’ (checkbox)
4. Highlights Enter and select valid image name, image type, and .JPG image.
Click ‘Upload’
The image is successfully uploaded.
2.3.23. Preview Highlight5. Highlights In Highlight 1 panel, select
photo and selected item. click ‘Preview’
Preview of selected photo is displayed.
6. Highlights Click ‘Refresh’ button The photo is refreshed.2.3.24. Update Number of Highlights
7. Highlights In Show highlights dropdown, select value in ‘Show Highlights’ dropdown.
Click ‘Update’
Example:Previous value is 2, then user set it to 3.
Highlight 3 panel is added at the bottom of the page.
8. Highlights Enter valid data on all fields and click ‘Update’ at the bottom of the page.
The changes are saved.
9. Highlights In E2Singapore homepage, verify the banner displayed.
Three (3) highlights are displayed in Homepage banner.
Error Testing10. Highlights Upon loading Manage Error message is displayed,
© INFO LAB PTE LTD 2023. All rights reserved. Page 38 of 58
NEA_E2S_Functionality Test
Highlights page, leave all fields blank then click ‘Update’ button.
“Photo is a mandatory field.”
2.4 News Management
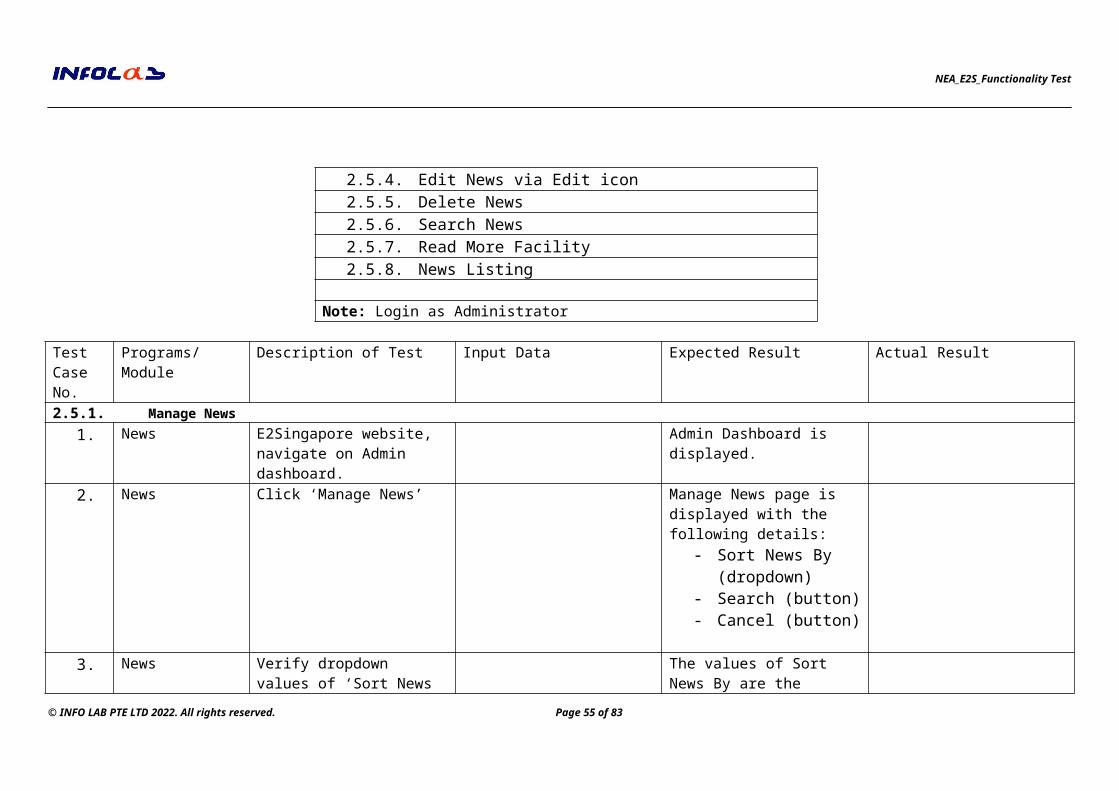
Test Scenario: 2.5.1. Manage News2.5.2. Add News2.5.3. Edit News via Edit Content button2.5.4. Edit News via Edit icon2.5.5. Delete News2.5.6. Search News2.5.7. Read More Facility2.5.8. News Listing
Note: Login as Administrator
Test Case No.
Programs/ Module Description of Test Input Data Expected Result Actual Result
2.5.1. Manage News1. News E2Singapore website, Admin Dashboard is
© INFO LAB PTE LTD 2023. All rights reserved. Page 39 of 58
Test Conducted By:
Test Date:
UAT Cycle:

NEA_E2S_Functionality Test
navigate on Admin dashboard.
displayed.
2. News Click ‘Manage News’ Manage News page is displayed with the following details:
- Sort News By (drop-down)
- Search (button)- Cancel (button)
3. News Verify dropdown values of ‘Sort News By’.
The values of Sort News By are the following:
- Active Status- Inactive Status
4. News Verify default value for ‘Sort News By’ dropdown list.
Default value displayed for ‘Sort News By’ is “Active Status”
5. News Navigate icons per News in the News listing
The following icons are displayed per News:
- Read More- Edit- Delete
2.5.2. Add News6. News In Manage News page, click
‘Add News’ button.News Detail page is displayed with the following details:
- Published Date/Time (date and time con-trol)
- Effective Date/Time
© INFO LAB PTE LTD 2023. All rights reserved. Page 40 of 58

NEA_E2S_Functionality Test
(date and time con-trol)
- Expiry Date/Time (date and time con-trol)
- Active version [ ] (text)
- Title (text area)- Summary (text area)- File/Link/Content (ra-
dio buttons)- Content (rich textbox)- Browse (button)- Use as
Highlights(checkbox)- Category (dropdown)- Keywords for Meta
Tag (text area)- Remark (Only for Ad-
min) (text area)- Save (button)- Save and Send to Re-
viewer (button)- Cancel (button)- Preview (button)
7. News Enter Published Date/Time similar to Effective Date/Time.
Enter valid data on remaining
News is successfully saved and is displayed in Homepage.
© INFO LAB PTE LTD 2023. All rights reserved. Page 41 of 58

NEA_E2S_Functionality Test
fields and click ‘Save’ button.8. News Verify default value for
File/Link/Content. ‘File’ radio button is displayed as default.
9. News In ‘Thumbnail Image’ click ‘Browse’ button, select .jpg file format and click ‘Open’.
The file path is displayed.
10. News Click ‘Upload’ button. The filename of the selected image is displayed.
11. News Upload another thumbnail image by clicking ‘Browse’ button, select .png file format and click ‘Open’.
The file path for second image is displayed.
12. News Click ‘Upload’ button. The filename of the selected image is displayed.
13. News Select ‘Link’ radio button. ‘Content’ textbox is displayed and one thumbnail image file dialog box is removed.
14. News Select ‘Content’ radio button. Rick textbox is displayed.15. News Enter maximum characters
for the following fields:- Title- Summary- Link- Keywords (for Meta
Tag)- Remark (for Admin
only)
System accepts only the following maximum-character input for the following fields:
- Title = 500 chars- Summary = 2000
chars- Link = 2000 chars- Keywords (for Meta
Tag) = 4000 chars- Remark (for Admin
only) = 4000 chars16. News Enter and select valid data
on all fields and click The News preview is displayed at the bottom of
© INFO LAB PTE LTD 2023. All rights reserved. Page 42 of 58
NEA_E2S_Functionality Test
‘Preview’ button. the page.
At the bottom of the content the following text is displayed.
Click here to view the uploaded file
17. News Click <here> hyperlink News Detail is displayed.18. News Enter and select valid data
on all fields and click ‘Cancel’ button.
News is not created and redirects user to Manage News page.
19. News Enter and select valid data on all fields and click ‘Save’ button.
News is successfully saved.
20. News Enter and select valid data on all fields and click ‘Save and Send to Reviewer’ button.
The reviewer is notified that content needs to be reviewed.
2.5.3. Edit News via Edit icon21. News In Admin Dashboard, click
‘Manage News’Manage News page is displayed
22. News Click corresponding Edit (pencil) icon for desired News to edit.
News Detail of selected news is displayed.
23. News Enter changes in ‘Remark: (Only for Admin)’ field and click ‘Save’ button.
The changes are saved.
2.5.4. Delete News24. News In Admin Dashboard, click
‘Manage News’Manage News page is displayed
© INFO LAB PTE LTD 2023. All rights reserved. Page 43 of 58

NEA_E2S_Functionality Test
25. News Click corresponding Delete (X) icon for desired News to delete.
Confirmation message, “You are about to delete a News. After this, you will not be able to recover it. Are you sure you want to proceed?” is displayed.
26. News Click ‘OK’ in Confirmation message.
News is removed in the news listing.
27. News Click ‘Cancel’ in Confirmation message.
News is not removed in the news listing.
2.5.5. Search News28. News In Admin Dashboard, click
‘Manage News’Manage News page is displayed
29. News Enter keyword on the following fields:
- Search Text- Category- Date From- Date To
Click ‘Search’ button.
The first 10 search results are displayed with the following details.
- News Title (hyper-link)
- Published Date (text)- Category (text)- Status (text)- Read More (button)- Edit (button)- Delete (button)
2.5.6. Read More 30. News In Admin Dashboard, click
‘Manage News’Manage News page is displayed
31. News Click corresponding Read More (>) icon for desired News to edit.
News Detail of selected news is displayed with ‘Edit Content’ and ‘Back to News’ buttons.
© INFO LAB PTE LTD 2023. All rights reserved. Page 44 of 58

NEA_E2S_Functionality Test
32. News Click ‘Back to News’ button. Manage News page is displayed.
33. News In E2Singapore Homepage, click ‘Read more news’ at the bottom of news listing.
News page is displayed.
2.5.7. News Listing34. News In E2Singapore website,
hover mouse on NEWS & EVENTS menu and click desired News.
News page is displayed with the following details:
- List of News - Selected News
© INFO LAB PTE LTD 2023. All rights reserved. Page 45 of 58

NEA_E2S_Functionality Test
2.5 Approval
Test Scenario: 2.5.1. Approval Console for Reviewer - Search Content 2.5.2. Approval Console for Reviewer - Publish Content2.5.3. Approval Console for Reviewer - Reject Content2.5.4. Approval Console for Reviewer - Route 2.5.5. Approval Console for Final Reviewer - Search Content 2.5.6. Approval Console for Final Reviewer - Publish Content2.5.7. Approval Console for Final Reviewer - Reject Content
Note: Login as News Editor, Reviewer or Final Reviewer
Test Case No.
Programs/ Module Description of Test Input Data Expected Result Actual Result
2.5.1. Approval Console for Reviewer - Search Content1. Approval E2Singapore website,
navigate on Admin dashboard.
Admin Dashboard is displayed.
2. Approval Click ‘Approval Console’ Approval Console page is displayed with the following details:
- Created Between-And © INFO LAB PTE LTD 2023. All rights reserved. Page 46 of 58
Test Conducted By:
Test Date:
UAT Cycle:

NEA_E2S_Functionality Test
(calendar dropdown)- Content Type (calen-
dar dropdown)- Publish Status (drop-
down)- Search (button)
3. Approval Enter and select search criteria.
Click ‘Search’ button.
System displays the list of content and details
- Title (column)- Type (column)- Created Version (col-
umn)- Published Version
(column- Date Created (col-
umn)- Created By (column)- Status (column)- Actioned By (column)
2.5.2. Approval Console for Reviewer - Publish Content4. Approval Upon retrieving search
results for ‘Pending’ content, click desired Title of content hyperlink to review.
The Content page is displayed.
5. Approval In the Approval Console table listing, click ‘Publish’ icon
The Content page is published.
6. Approval Navigate on the content/page in E2Singapore Homepage.
The changes are reflected on the content page.
2.5.3. Approval Console for Reviewer - Reject Content7. Approval Upon retrieving search The Content page is
© INFO LAB PTE LTD 2023. All rights reserved. Page 47 of 58

NEA_E2S_Functionality Test
results for ‘Pending’ content, click desired Title of content hyperlink to review.
displayed.
8. Approval In the Approval Console table listing, click ‘Reject’ icon
The Content page is rejected.
2.5.4. Approval Console for Reviewer - Route9. Approval Upon retrieving search
results for ‘Pending’ content, click desired Title of content hyperlink to review.
The Content page is displayed.
10. Approval In the Approval Console table listing, click ‘Route’ icon
The Content page is routed.
2.5.5. Approval Console for Final Reviewer - Search Content11. Approval E2Singapore website,
navigate on Admin dashboard.
Dashboard is displayed.
12. Approval Click ‘Approval Console’ Approval Console page is displayed with the following details:
- Created Between-And (calendar dropdown)
- Content Type (calen-dar dropdown)
- Publish Status (drop-down)
- Search (button)13. Approval Enter and select search
criteria.
Click ‘Search’ button.
System displays the list of content and details
- Title (column)- Type (column)
© INFO LAB PTE LTD 2023. All rights reserved. Page 48 of 58
NEA_E2S_Functionality Test
- Created Version (col-umn)
- Published Version (column
- Date Created (col-umn)
- Created By (column)- Status (column)- Actioned By (column)
14. Approval Verify icons under ‘Action’ column
Example:User 1 is both Reviewer and Final Reviewer of Content 1 Page
The following icons are displayed:
- Publish- Reject
Note: If the user has both Reviewer and Final Reviewer role for the same section/page, user will automatically be set as the highest role, which is the Final reviewer
15. Approval Verify dropdown values of ‘Publish Status’ field.
The values of ‘Publish Status’ field are:
- Pending - Routed- Published- Rejected
2.5.6. Approval Console for Final Reviewer - Publish Content16. Approval Upon retrieving search
results for ‘Pending’ content, click desired Title of content
The Content page is displayed.
© INFO LAB PTE LTD 2023. All rights reserved. Page 49 of 58

NEA_E2S_Functionality Test
hyperlink to review.17. Approval In the Approval Console
table listing, click ‘Publish’ icon
The Content page is published.
18. Approval Navigate on the content/page in E2Singapore Homepage.
The changes are reflected on the content page.
2.5.7. Approval Console for Final Reviewer - Reject Content19. Approval Upon retrieving search
results for ‘Pending’ content, click desired Title of content hyperlink to review.
The Content page is displayed.
20. Approval In the Approval Console table listing, click ‘Reject’ icon
The Content page is rejected.
© INFO LAB PTE LTD 2023. All rights reserved. Page 50 of 58

NEA_E2S_Functionality Test
2.6 Feedback Management
Test Scenario: 2.6.1. Create Feedback2.6.2. Reset Feedback
Test Case No.
Programs/ Module Description of Test Input Data Expected Result Actual Result
2.7.1. Create Feedback1. Feedback In E2Singapore website, click
‘Feedback’ at the upper right portion of the screen.
Feedback page is displayed with the following details:
- Feedback Category (dropdown list)
- Name (textbox)- Email (textbox)- Subject (textbox) - Message (text area)- Submit (button)- Reset (button)
2. Feedback Verify mandatory fields. The following mandatory fields are displayed with asterisk:
© INFO LAB PTE LTD 2023. All rights reserved. Page 51 of 58
Test Conducted By:
Test Date:
UAT Cycle:

NEA_E2S_Functionality Test
- Name - Email - Subject - Message
3. Feedback Verify values under ‘Choose your Feedback Category’ field.
The following values are displayed in the ‘Feedback Category’ dropdown list:
- Please Select- Household -Success
Stories- Household – Tips- Building – Incentives- Building – Training- Industry – Incentives- Industry - Training- Incentive- Transport- Test-Bedding and
R&D- Articles- Other
4. Feedback Enter valid data on all fields.
Click ‘Submit’ button.
Feedback email will be sent to administrator email. (note: for testing purpose this will be Info Lab email)
2.7.2. Reset Feedback5. Feedback Select Feedback Category
and enter Name, Email, Subject.
All data entered are cleared.
© INFO LAB PTE LTD 2023. All rights reserved. Page 52 of 58

NEA_E2S_Functionality Test
Click ‘Reset’ button.6. Feedback Upon loading Feedback
page, click ‘Reset’ button.Feedback page is reloaded/refreshed.
Error Testing7. Feedback Leave mandatory field blank. The following error message
is displayed:“<field name> is a mandatory field.”
8. Feedback Upon loading Feedback page, click ‘Submit’ button.
The following error message is displayed:“Name is a mandatory field.Email is a mandatory field.Subject is a mandatory field.Message is a mandatory field. “
9. Feedback Enter incorrect format on ‘Email’ field. Enter valid data on remaining fields and click ‘Submit’ button.
Error message is displayed.
2.7 News Subscription
Test Scenario: 2.7.1. Subscribe News
© INFO LAB PTE LTD 2023. All rights reserved. Page 53 of 58
Test Conducted By:
Test Date:
UAT Cycle:

NEA_E2S_Functionality Test
2.7.2. Edit Subscription2.7.3. Unsubscribe 2.7.4. Search News Subscription via Report New Subscription By Category page2.7.5. Search News Subscription via Report New Subscription By Email page2.7.6. Export News Subscription
Test Case No.
Programs/ Module Description of Test Input Data Expected Result Actual Result
2.7.1. Subscribe News1. News
SubscriptionNavigate on News Subscription panel on Homepage
The following details are displayed:
- Email (textbox)- Subscribe (button)
2. News Subscription
Enter a valid email format and click ‘Subscribe’ button.
Example:[email protected]
Newsletter page is displayed with the following details:
- Email (textbox)- Category (checkbox)
Household Industry Building Transport Others
- Subscribe (button)3. News
SubscriptionVerify mandatory fields. Email and Category fields
has asterisks. 4. News
SubscriptionEnter valid data on the following fields and click ‘Submit’ button.
User with specified email is successfully subscribed to newsletter. Newsletter will be
© INFO LAB PTE LTD 2023. All rights reserved. Page 54 of 58
NEA_E2S_Functionality Test
sent to specified email.
5. News Subscription
Enter valid data on the following fields and click ‘Cancel’ button.
E2Singapore Homepage is displayed.
2.7.2. Edit Subscription6. News
SubscriptionClick hyperlink inside Email Subscription.
User will be directed to News Subscription page.
7. News Subscription
Choose another News Category and click ‘Update’
Changes in News Subscription are saved.
2.7.3.8. News
SubscriptionClick hyperlink inside Email Subscription.
User will be directed to News Subscription page.
9. News Subscription
Click ‘Unsubscribe News’ Unsubscribe News page is displayed.
10. News Subscription
Enter email and click ‘Unsubscribe’ button.
News Subscription is terminated.
2.7.4. Search News Subscription via Report New Subscription By Category page11. News
SubscriptionLogin as Administrator and navigate on Admin Dashboard.
Admin Dashboard is displayed.
12. News Subscription
Under News Room Administration, click ‘News Subscription Report by Category’ hyperlink.
News Subscription Report by Category page is displayed with the following fields:
- Created Between-And (calendar dropdown)
- Subscribe/Unsub-scribe(option buttons)
- Search (button)
© INFO LAB PTE LTD 2023. All rights reserved. Page 55 of 58

NEA_E2S_Functionality Test
13. News Subscription
Enter and select search criteria.
Click ‘Search’ button.
System displays the list of email address and details of users who subscribed the newsletter.
- Email (column)- Subscribed Date (col-
umn)- List of News Category
2.7.5. Search News Subscription via Report New Subscription By Email page14. News
SubscriptionLogin as Administrator and navigate on Admin Dashboard.
Admin Dashboard is displayed.
15. News Subscription
Under News Room Administration, click ‘News Subscription Report By Email’ hyperlink.
News Subscription Report By Email page is displayed with the following fields:
- Created Between-And (calendar dropdown)
- Subscribe/Unsub-scribe(option buttons)
- Search (button)
16. News Subscription
Click ‘Search’ button. System displays the list of email address and details of users who subscribed the newsletter.
- Email (column)- News Category- Total Email Sent
© INFO LAB PTE LTD 2023. All rights reserved. Page 56 of 58

NEA_E2S_Functionality Test
2.7.6. Export Subscription17. News
SubscriptionUpon displaying search results in table listing of Report New Subscription by Category/Email, click ‘Export’ hyperlink.
File download screen is displayed. Subscription Sign Up is exported to Excel.
18. News Subscription
Click ‘Open’ button. Excel file is opened
19. News Subscription
In file download screen, click ‘Save’
Excel file is saved in desired file destination.
© INFO LAB PTE LTD 2023. All rights reserved. Page 57 of 58

NEA_E2S_Functionality Test
Appendix
Classifications of Errors
Fatal Errors are of 3 types; Crash, in which the program terminates abnormally Logic, in which the program does not perform a function properly; for instance, executing a wrong branch or opening a wrong file. Hang, in which the program or portion of it appears to loop indefinitely
1. Serious Errors produce incorrect output.2. Minor Errors cause user dissatisfaction about program’s result, such as misalignment of column.
© INFO LAB PTE LTD 2023. All rights reserved. Page 58 of 58