est. 1965 safe - tractor supply company · 2020-03-12 · important: the factory preset code is...
TRANSCRIPT

A SAFE FAMILY IS A CANNON FAMILY.TM
EST. 1965
SAFE OWNER’S MANUAL
SERIAL NO. .

P a g e | 1
Attach Receipt Here
Included Hardware
Handles – three (3) to five (5) handles depending on model.
Shelf Clips – sixteen (16) to twenty (20) clips depending on
model.
Floor Plugs – two (2) to four (4) plugs depend on model.
Electrical Power Cord – Models with Power Supply and Media
Outlet only.
Owners Manual
P a g e | 2
DO NOT LOCK THE MANUAL IN YOUR SAFE
IMPORTANT: FILL OUT THE INFORMATION BELOW AND RETAIN FOR YOUR RECORDS.
IT WILL BE REQUIRED WHEN CALLING TECHNICAL SERVICE AT:
Hours: Monday – Saturday 6am to 8pm PST
(800) 242-1055
SERIAL NUMBER
Key Code
(Mechanical Lock Only)
Purchased at
(Dealer Name)
Date of Purchase
Cannon Safe, Inc.
CannonSafe.com
21st Edition

P a g e | 3
INDEX
Serial Number Information……………………………………………………………………………………………………… Pg. 2
Index………………………………………………………………………………………………………………………………………. Pg. 3
President’s Letter……………………………………………………………………………………………………………………. Pg. 4
ID My Electronic Lock…………………………..…………………………………………………………………………………. Pg. 5
Mechanical Lock……………………………………………………………………………………………………………………… Pg. 6
EMP Lock………………………………………………………………………………………………………………………………… Pg. 7 How to Open the Safe Using the Electronic Lock
Programming Instructions for the Electronic Lock
Lock Out (Wrong try Penalty) for Electronic Lock
Maintenance for the Electronic Lock
How to Open the Safe Using the Mechanical Lock
Maintenance for the Mechanical Lock
SecuRam Electronic Lock…………………………………………………………………………………………………………. Pg. 9 How to Open the Safe
Programming Instructions
Lock Out (Wrong try Penalty)
Using the Night Light
Maintenance
NL Electronic Lock…………………………………………………………………………………………………………………….Pg. 10
How to Open the Safe
Programming Instructions
Lock Out (Wrong try Penalty)
Using the Night Light
Maintenance
Safe Set-Up……………………………………………………………………………………………………………………………… Pg. 11 Removing Safe from the Pallet
Placement of the Safe
Anchoring of the Safe
Interior Set-Up
Loading the Safe
Electrical Outlet (Select Models)
Door Adjustment
Certificate of Compliance………………………………………………………………………………………………………… Pg. 13
Warranty………………………………………………………………………………………………………………………………… Pg. 14
Safe Accessories……………………………………………………………………………………………………………………… Pg. 15
Registration Card……………………………………………………………………………………………………………………. Pg. 16

P a g e | 4
Congratulations of your purchase of a Cannon Safe!
We want to thank you for purchasing one of our safes. These units are made in our
factories by craftsmen who have years even decades, building beautiful pieces for your
home. We know that it will be a wonderful addition to your home and bring security to
your valued possessions.
Cannon Safe strives to build the best quality and functional safe on the market. We
believe a home security safe is a very permanent investment, and those who choose to
secure personal items, family heirlooms, collectables, money, or firearms should have
peace of mind, knowing that these items are in a secure environment.
Our Safes are backed by a lifetime warranty at no additional cost to you. We build each
safe to strict standards so if the time comes for it to withstand a burglary attack or fire it
will be prepared to do its duty. We are proud to have one of our silent sentinels
protecting your valuables. You can be assured that “A Safe Family is a Cannon Family™”
The Cannon Safe Family

P a g e | 5
ID My Electronic Lock
Use the information below to ID the electronic lock on your safe:
If the keypad can be opened by using either an electronic keypad or mechanical dial you have an EMP Lock (pictured
below). See Pg. 7
If the top row numbers on the lock is 1,2,3,4 and has a ‘SecuRam’ logo on the faceplate you have a SecuRam Lock
(pictured below). See Pg. 9
If the top row numbers on the lock is 1,2,3,4 with the letter ‘A’ on the number ‘1’ you have a NL Lock (pictured
below). See Pg. 10

P a g e | 6
MECHANICAL LOCK
(dial that spins left and right)
How to open/operate a mechanical lock
Important: Turn dial slowly and evenly. Do not turn back to regain alignment if you rotate past number. If an error is made,
re-dial entire combination. Do not count turns. Count how many times each number is aligned with the opening index (at the
12 o'clock position). Always view dial and ring straight on, not at an angle. It is the owners’ responsibility to maintain the
code; Cannon will try to maintain records for up to 6 months.
Step 1: Turn dial left, Step 2: Turn dial right, Step 3: Turn dial left, Step 4: Turn dial right aligning first number aligning second number aligning third number until dial comes to a with opening index with the opening index with the opening index complete stop the fourth time it the third time it comes the second time it comes to the index to the index comes to the index
Step 5: Turn handle to the left or counter-clockwise to open safe Step 6: To relock and secure the combination lock, turn the dial to the left at least four revolutions
How to Use the Key Locking Dial (Not for EMP Lock)
The dial has a key feature. This will allow the dial to be locked either in the open mode or locked mode. Locking the dial at 90 after combination has opened the safe will prevent anyone from shutting the door and locking it. Once you close the door and turn the combination, you can then lock the dial in the "0" position to prevent anyone from tampering with the lock.
Never use the key as the sole means of locking the safe. It is not meant as the primary locking feature.
Maintenance
Important: All maintenance work should be performed by a qualified locksmith in your area. Cannon assumes no
responsibility for the cost of maintenance or the work performed.
Per the manufacturer mechanical locks should be lubricated and cleaned annually by a qualified locksmith.
Never attempt to lubricate or clean the dial or lock on your own.
P a g e | 7
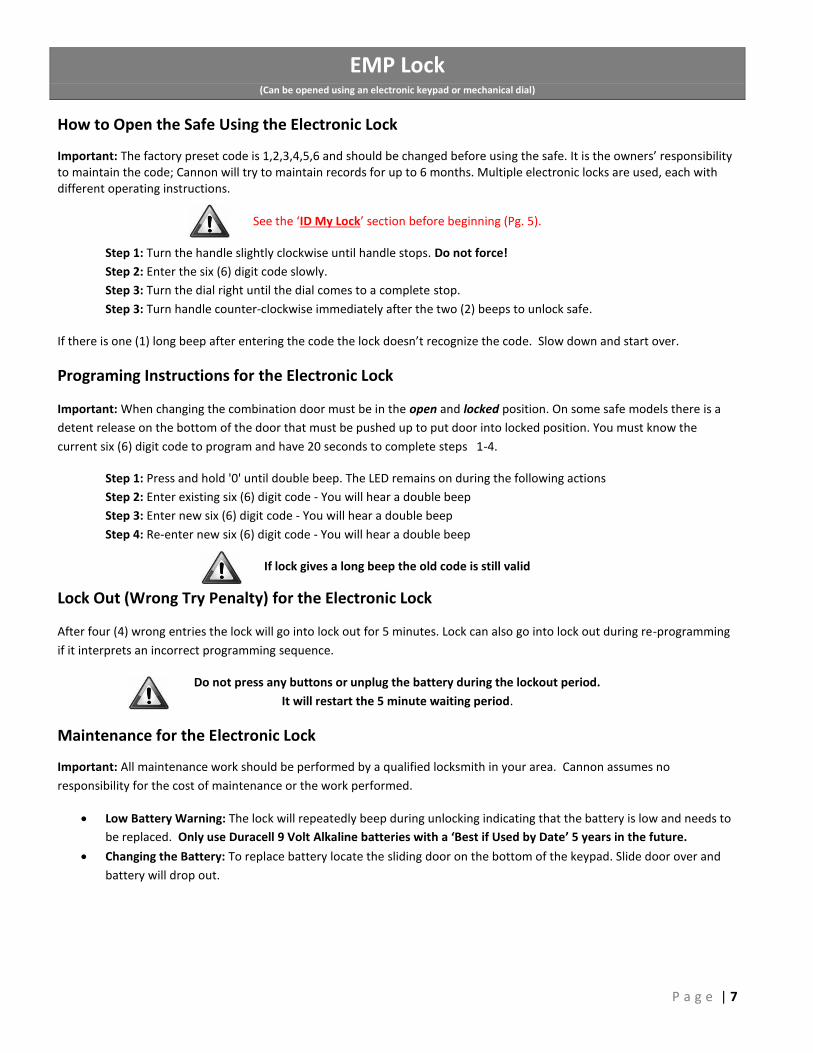
EMP Lock
(Can be opened using an electronic keypad or mechanical dial)
How to Open the Safe Using the Electronic Lock
Important: The factory preset code is 1,2,3,4,5,6 and should be changed before using the safe. It is the owners’ responsibility to maintain the code; Cannon will try to maintain records for up to 6 months. Multiple electronic locks are used, each with different operating instructions.
See the ‘ID My Lock’ section before beginning (Pg. 5).
Step 1: Turn the handle slightly clockwise until handle stops. Do not force!
Step 2: Enter the six (6) digit code slowly.
Step 3: Turn the dial right until the dial comes to a complete stop.
Step 3: Turn handle counter-clockwise immediately after the two (2) beeps to unlock safe.
If there is one (1) long beep after entering the code the lock doesn’t recognize the code. Slow down and start over.
Programing Instructions for the Electronic Lock
Important: When changing the combination door must be in the open and locked position. On some safe models there is a
detent release on the bottom of the door that must be pushed up to put door into locked position. You must know the
current six (6) digit code to program and have 20 seconds to complete steps 1-4.
Step 1: Press and hold '0' until double beep. The LED remains on during the following actions
Step 2: Enter existing six (6) digit code - You will hear a double beep
Step 3: Enter new six (6) digit code - You will hear a double beep
Step 4: Re-enter new six (6) digit code - You will hear a double beep
If lock gives a long beep the old code is still valid
Lock Out (Wrong Try Penalty) for the Electronic Lock
After four (4) wrong entries the lock will go into lock out for 5 minutes. Lock can also go into lock out during re-programming
if it interprets an incorrect programming sequence.
Do not press any buttons or unplug the battery during the lockout period.
It will restart the 5 minute waiting period.
Maintenance for the Electronic Lock
Important: All maintenance work should be performed by a qualified locksmith in your area. Cannon assumes no
responsibility for the cost of maintenance or the work performed.
Low Battery Warning: The lock will repeatedly beep during unlocking indicating that the battery is low and needs to
be replaced. Only use Duracell 9 Volt Alkaline batteries with a ‘Best if Used by Date’ 5 years in the future.
Changing the Battery: To replace battery locate the sliding door on the bottom of the keypad. Slide door over and
battery will drop out.
P a g e | 8
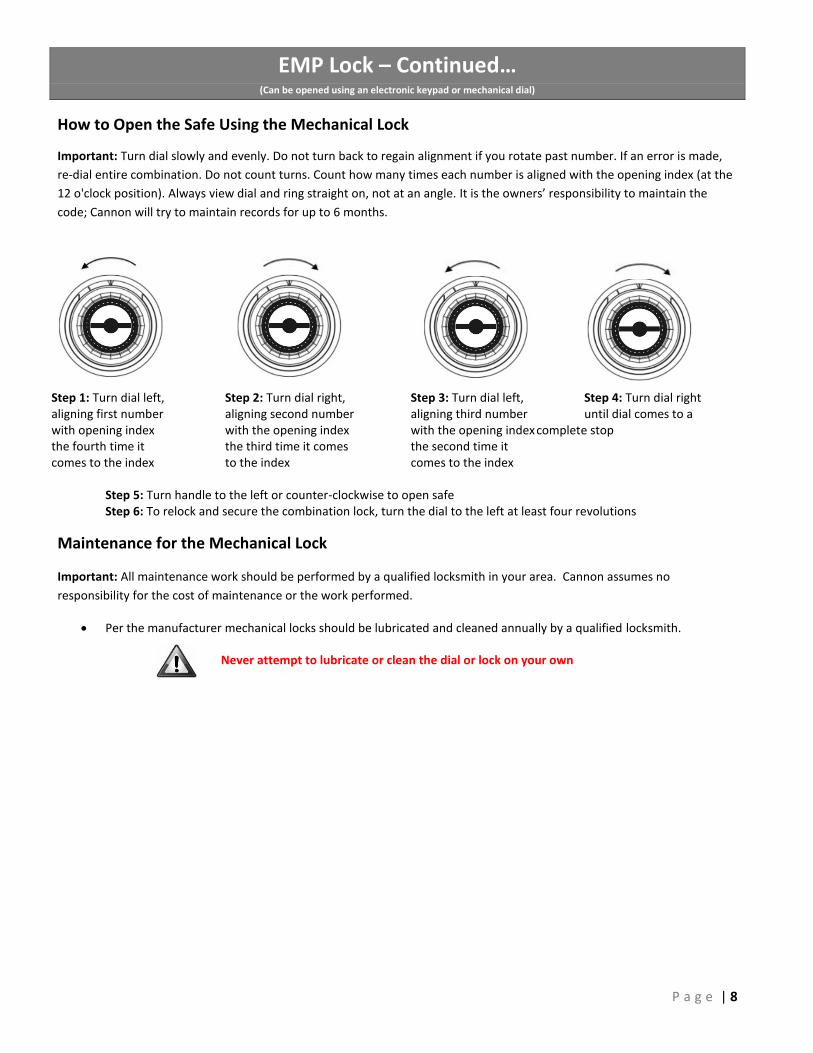
EMP Lock – Continued…
(Can be opened using an electronic keypad or mechanical dial)
How to Open the Safe Using the Mechanical Lock
Important: Turn dial slowly and evenly. Do not turn back to regain alignment if you rotate past number. If an error is made,
re-dial entire combination. Do not count turns. Count how many times each number is aligned with the opening index (at the
12 o'clock position). Always view dial and ring straight on, not at an angle. It is the owners’ responsibility to maintain the
code; Cannon will try to maintain records for up to 6 months.
Step 1: Turn dial left, Step 2: Turn dial right, Step 3: Turn dial left, Step 4: Turn dial right aligning first number aligning second number aligning third number until dial comes to a with opening index with the opening index with the opening index complete stop the fourth time it the third time it comes the second time it comes to the index to the index comes to the index
Step 5: Turn handle to the left or counter-clockwise to open safe Step 6: To relock and secure the combination lock, turn the dial to the left at least four revolutions
Maintenance for the Mechanical Lock
Important: All maintenance work should be performed by a qualified locksmith in your area. Cannon assumes no
responsibility for the cost of maintenance or the work performed.
Per the manufacturer mechanical locks should be lubricated and cleaned annually by a qualified locksmith.
Never attempt to lubricate or clean the dial or lock on your own

P a g e | 9
SecuRam Lock
(top row of number are 1,2,3,4 and a ‘SecuRam’ logo on the faceplate)
How to Open the Safe
Important: The factory preset code is 1,2,3,4,5,6 and should be changed before using the safe. It is the owners’ responsibility
to maintain the code; Cannon will try to maintain records for up to 6 months. Multiple electronic locks are used, each with
different operating instructions.
See the ‘ID My Lock’ section before beginning (Pg. 5).
Step 1: Turn the handle slightly clockwise until handle stops. Do not force!
Step 2: Enter the six (6) digit code slowly.
Step 3: Turn handle counter-clockwise to unlock safe.
If there are three (3) beeps after entering the code the lock doesn’t recognize the code. Slow down and start over.
Programming Instructions
Important: When changing the combination door must be in the open and locked position. On some safe models there is a
detent release on the bottom of the door that must be pushed up to put door into locked position. You must know the
current six (6) digit code to program and have 20 seconds to complete steps 1-4.
Step 1: Enter '0' six (6) times
Step 2: Enter existing six (6) digit code
Step 3: Enter new six (6) digit code
Step 4: Re-enter new six (6) digit code
If lock signals three (3) times old code is still valid
Lock Out (Wrong Try Penalty)
After four (4) wrong entries the lock will go into lock out for 5 minutes. Lock can also go into lock out during re-programming if it interprets an incorrect programming sequence.
Do not press any buttons or unplug the battery during the lockout period.
It will restart the 5 minute waiting period.
Using the Night Light
To activate the light, press the ‘ ‘ button on the keypad before entering the code.
Maintenance
Important: All maintenance work should be performed by a qualified locksmith in your area. Cannon assumes no responsibility for the cost of maintenance or the work performed.
Low Battery Warning: The lock will repeatedly beep during unlocking indicating that the battery is low and needs to be replaced. Only use Duracell 9 Volt Alkaline batteries with a ‘Best if Used by Date’ 5 years in the future.
Changing the Battery: Turn the brass/chrome housing ring counterclockwise and pull off. Install new battery and
reinstall brass/chrome housing ring. Hint: Align the three groves on the housing ring with the three groves on the
keypad and turn clockwise.
P a g e | 10
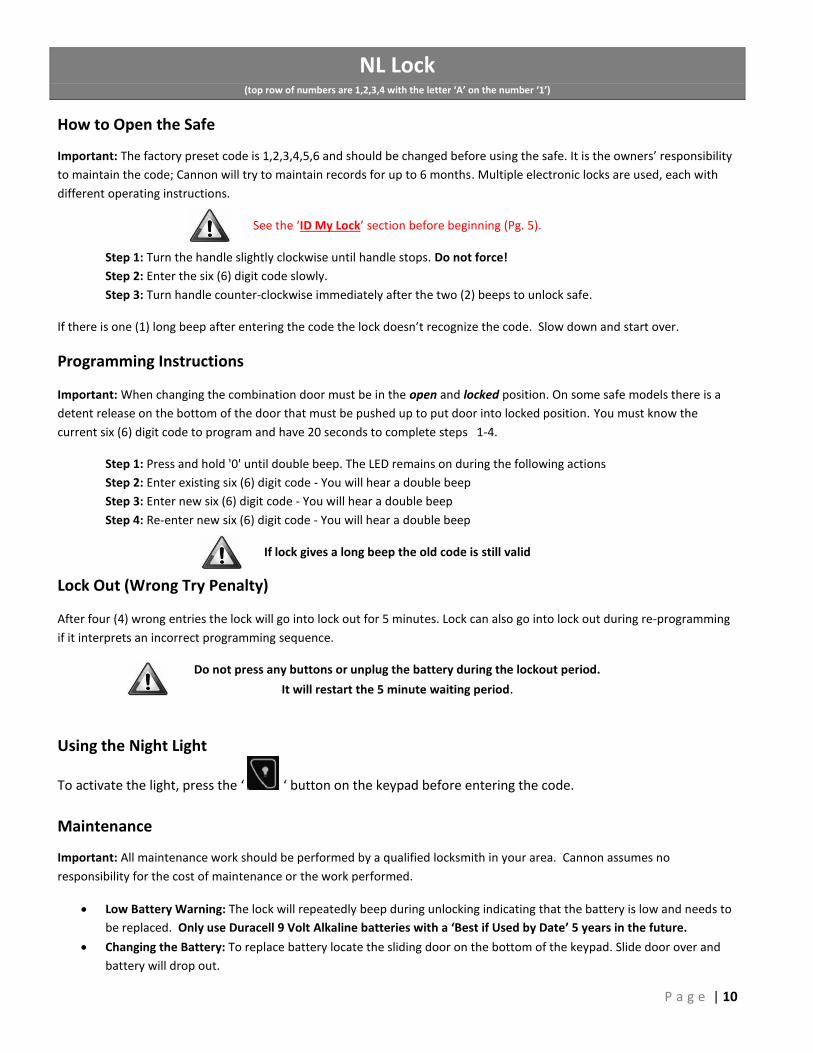
NL Lock
(top row of numbers are 1,2,3,4 with the letter ‘A’ on the number ‘1’)
How to Open the Safe
Important: The factory preset code is 1,2,3,4,5,6 and should be changed before using the safe. It is the owners’ responsibility
to maintain the code; Cannon will try to maintain records for up to 6 months. Multiple electronic locks are used, each with
different operating instructions.
See the ‘ID My Lock’ section before beginning (Pg. 5).
Step 1: Turn the handle slightly clockwise until handle stops. Do not force!
Step 2: Enter the six (6) digit code slowly.
Step 3: Turn handle counter-clockwise immediately after the two (2) beeps to unlock safe.
If there is one (1) long beep after entering the code the lock doesn’t recognize the code. Slow down and start over.
Programming Instructions
Important: When changing the combination door must be in the open and locked position. On some safe models there is a
detent release on the bottom of the door that must be pushed up to put door into locked position. You must know the
current six (6) digit code to program and have 20 seconds to complete steps 1-4.
Step 1: Press and hold '0' until double beep. The LED remains on during the following actions
Step 2: Enter existing six (6) digit code - You will hear a double beep
Step 3: Enter new six (6) digit code - You will hear a double beep
Step 4: Re-enter new six (6) digit code - You will hear a double beep
If lock gives a long beep the old code is still valid
Lock Out (Wrong Try Penalty)
After four (4) wrong entries the lock will go into lock out for 5 minutes. Lock can also go into lock out during re-programming
if it interprets an incorrect programming sequence.
Do not press any buttons or unplug the battery during the lockout period.
It will restart the 5 minute waiting period.
Using the Night Light
To activate the light, press the ‘ ‘ button on the keypad before entering the code.
Maintenance
Important: All maintenance work should be performed by a qualified locksmith in your area. Cannon assumes no
responsibility for the cost of maintenance or the work performed.
Low Battery Warning: The lock will repeatedly beep during unlocking indicating that the battery is low and needs to
be replaced. Only use Duracell 9 Volt Alkaline batteries with a ‘Best if Used by Date’ 5 years in the future.
Changing the Battery: To replace battery locate the sliding door on the bottom of the keypad. Slide door over and
battery will drop out.

P a g e | 11
Safe Setup
Removing Safe from Pallet
Cannon safe recommends contacting professional movers to install your safe. By choosing to install the safe on your own you agree to hold Cannon Safe blameless
of any damage, injury, or death caused by your negligence. Proceed with caution.
Use Caution. Safe is top heavy. While having someone(s) securely holding the safe:
Open door, remove the 2 lag screws from the floor area (opposite corners).
Close door. If equipped with a mechanical lock turn dial back to zero and lock with key.
With at least two (2) people, carefully slide the safe from pallet.
Placement of the Safe
Before placing your safe, verify the load bearing weight of the floor or stairs the safe will be moved over (tile, wood, and other types of floors could be damaged by the weight of the safe). To help determine if the safe will make it through doorways, stairs, or corners use the empty safe box to see if it will fit all the way to the final location. When choosing a location consider the following:
Install the safe near a load-bearing wall as a precaution to support the weight.
To protect the exterior finish consider installing the safe inside your home where there’s climate control.
Where the safe is placed will have a big impact on how it will perform during a fire. Consider lower levels (1st
floor or basement) where temperatures tend to be cooler and try to stay away from potential hot spots (areas where flammable materials are stored).
Anchoring of the Safe Anchoring the safe to the floor is highly recommended. To help eliminate rust issues there should be a gap between the safe and floor to allow air flow (treated wood shims are recommended). Before leveling the safe, make sure the safe is square/level. Use the appropriate hardware for the wood or cement surface the safe is anchored too; anchoring hardware can be purchased from a local hardware store (not included). After the safe is anchored use the four or two black floor plugs (depending on safe) to cover the anchoring holes inside the safe.
Interior Set-Up
Interior is subject to change and may differ depending on size and model. For shipping purposes shelf clips are used below and above certain shelfs. The shelf clips above the shelf are the additional clips needed for the Top/Side shelfs installation.
Install top shelf, or shelves at desired height using the provided shelf clips.
The gun rack is already installed.
Install side shelves.
The cover plate fits directly over half the gun rack. This allows you to use the rack as a shelf.
Shelf clips can be adjusted as needed. Side shelves may be installed on the right or left. For an all-rifle interior remove the side shelves and cover plate.

P a g e | 12
Safe Setup – Continued…
Loading the Safe
Do not put anything in your safe that will put pressure against the door when it’s closed. Overloading shelves (50 + lbs.) can cause them to sag or break. Maximum weights vary by model.
Store heavy contents away from the middle of the shelf and try to distribute weight evenly across shelf.
When inserting guns into your safe, make sure they rest securely into the cutouts to prevent accidental tipping when the door is closed.
When inserting items into the pockets of the door organizer watch the weight of the items (ammo or other like items should be stored on shelfs).
A dehumidifier or desiccant is recommended in humid environment to protect against rust and mildew. Dehumidifiers and other moisture reducing products are available from your dealer or www.cannonsafe.com.
Electrical Outlet (Select Models)
Electric outlets are pre-installed on select model safes. Some assembly required:
Locate the power cord inside the safe.
Insert the plug into the electrical access hole in the back of the safe.
Electrical outlet only powers items plugged into the outlet inside the safe.
Electronic locks are only powered by the 9 Volt battery outside the safe.
Door Adjustment (Select Models)
If your safe door has excessive in and out play that exceeds 1/8 inch, the door can be adjusted by using a Phillips screwdriver.
Use caution when adjusting.
Over adjustment can cause a lock out.
Example to the right. With the door open locate the U-Shaped cutout on the rear of the left door jam that’s in
alignment with the second locking bolt from the top. Using a Philips screwdriver insert the
end into the hole in the middle of the U-Shaped cutout. Gently pull away from the safe in
small increments to tighten.

P a g e | 13
Certificate of Compliance
The following Cannon Safe, Inc. security products exceed California Department of Justice
“Gun Safe Standards” as per Title11, Division 1, Chapter 12.6, § 977.50;
• Traditional Series, all models.
• Cannon Series, all models.
• American Eagle Series, all models.
• Patriots Series, all models.
• Home & Office Series, all models.
DO NOT DISCARD THIS CERTIFICATE.
ATTACH TO YOUR RECEIPT OF PURCHASE.
ALL CANNON SAFES ARE
UL BURGLARY RATED
TO THE RESIDENTIAL SECURITY
CONTAINER STANDARD
P a g e | 14
Warranty
This Cannon Safe carries a lifetime warranty in Residential Use. It is warranted against
defects in workmanship and materials, also against damage by attempted break-in or actual break-
in, natural flood and fire. Commercial or Industrial applications carry a 1 year warranty against
defects in workmanship and materials.
In order to obtain service under this Warranty, Purchaser must provide Cannon Safe Inc.
with following items 1) proof of purchase 2) police or fire department report 3) Photographs of
damaged safe 4) written testimonial. Cannon Safe Inc. may, at its discretion, repair or replace any
defective or damaged part or replace the defective or damaged safe. Whenever possible the safe will
be repaired locally. If Cannon Safe Inc. is replacing a safe, we will require the old safe to be returned
to the factory. This being the case Cannon Safe Inc. will at its expense have the safe opened and will
pay for the freight to the factory and returned. The purchaser must have the safe packaged and
palletized and available for a curb side pickup at their expense. The Warranty does not cover labor
costs for removal or installation of the safe and contents. Personal property in the safe is not
covered.
The obligation Cannon Safe Inc. has under this Warranty is contingent upon proper
installation and use of the safe, and shall not apply to parts or safes which have been misused,
neglected, or put in unusual or extreme environments. Modifying or tampering with the safe, which
might affect the product’s use, voids the Warranty.
Without limit, this Warranty specifically excludes any liability for defects or damage caused
by, or aggravated by, the use of unauthorized parts. Upon delivery, Purchaser must promptly notify
Cannon Safe Inc. of any defect. Purchaser’s remedies are limited solely to repair or replacing parts
and are at the discretion of Cannon Safe Inc.
Electronic and mechanical locks carry a one year warranty for labor; a lifetime warranty for
parts. The warranty does not cover lost or forgotten combinations, improper opening procedure,
weak or dead batteries. Paint is warranted for one year based on proper care and environment.
This Warranty only applies to safes located in the continental United States, for residential use, and
purchased at an authorized Cannon Safe Dealer. (Commercial or business use carries only a 1
year warranty.)
This Warranty is given in place of all other warranties and assurances, whether expressed or
implied, including but not limited to matters of quality, fitness for purpose, or merchantability and
Cannon Safe Inc. accepts no liability, under any circumstances whatsoever, for any incidental or
consequential damage or loss suffered by anyone as a result of using or being unable to use the safe.

P a g e | 15
Safe Accessories
Keypad WallVault - $249.99
Electronic Lock
Two Override Keys
Uphostered Interior Walls
Drop Down Door Opens Instantly
Low Profile Design
Steel Contruction
Easy Installation
False Buttom – Secrect
Compartment
Vertical Drop Door
CA DOJ Approved
Door Panel Pistol Kit - $59.99
This custom item is designed for storage of unloaded weapons only
Accommodates multiple handguns with six configurable holsters
Velcro design for easy placement
Cannon Easy Hook – Universal mount on most safe door panels
No drilling required – installs in minutes without the use of any specialized tools
Security Safe Light - $19.99
Push-Button Operation
Red LED Light Source
Two-Minute Lighting Cycle
Simple Magnetic Attachment
3v Lithium Battery (Included)
Silica Gel Dehumidifier - $24.99
Dries approx.. 57 cubic feet
Non-toxic, safe to use with sensitive material
Blue-to-Pink Indicator Cap
Reactivates Easily in Oven
Electric Dehumidifier - $47.00
12” in length
Dries approx.. 100 cubic feet
Eliminates Dampness, Mildew, Condensation and Humidity
UL-listed
Screw on for convenience
Orders can be placed by visiting CannonSafe.com Product or pricing subject to change without notice.

P a g e | 16
Submit online at http://www.cannonsafe.com/contact/register.html
OR
Remove and mail to:
19949 Kendall Dr
San Bernardino CA 92407

P a g e | 17

P a g e | 18

P a g e | 19
Cannon Safe, Inc.
CannonSafe.com