exercise manual: developer training for apache spark and hadoop … · 2 environment hosts connect...
TRANSCRIPT
201709c
Developer Training for Apache Sparkand Hadoop: Hands-On Exercises
Table of ContentsGeneral Notes ............................................................................................................. 1
Hands-On Exercise: Starting the Exercise Environment (Local VM) ..................... 5
Hands-On Exercise: Starting the Exercise Environment (Web-Based VM,
cmhost on AWS) ...................................................................................................... 13
Hands-On Exercise: Starting the Exercise Environment (Web-Based VM,
cmhost on Skytap) ................................................................................................... 21
Hands-On Exercise: Querying Hadoop Data with Apache Impala ....................... 26
Hands-On Exercise: Accessing HDFS with the Command Line and Hue ............. 29
Hands-On Exercise: Running and Monitoring a YARN Job .................................. 35
Hands-On Exercise: Exploring DataFrames Using the Apache Spark Shell ......... 41
Hands-On Exercise: Working with DataFrames and Schemas ............................ 46
Hands-On Exercise: Analyzing Data with DataFrame Queries ............................ 50

Hands-On Exercise: Working With RDDs .............................................................. 56
Hands-On Exercise: Transforming Data Using RDDs ........................................... 60
Hands-On Exercise: Joining Data Using Pair RDDs ............................................... 67
Hands-On Exercise: Querying Tables and Views with SQL .................................. 71
Hands-On Exercise: Using Datasets in Scala ......................................................... 74
Hands-On Exercise: Writing, Configuring, and Running a Spark
Application ................................................................................................................ 76
Hands-On Exercise: Exploring Query Execution ................................................... 83
Hands-On Exercise: Persisting Data ...................................................................... 88
Hands-On Exercise: Implement an Iterative Algorithm with Apache Spark ....... 92
Hands-On Exercise: Writing a Streaming Application ......................................... 95
Hands-On Exercise: Processing Multiple Batches of Streaming Data ................. 99
Hands-On Exercise: Processing Streaming Apache Kafka Messages ................ 103
Appendix Hands-On Exercise: Producing and Consuming Apache Kafka
Messages ................................................................................................................. 108
Appendix Hands-On Exercise: Collecting Web Server Logs with Apache
Flume ...................................................................................................................... 111
Appendix Hands-On Exercise: Sending Messages from Flume to Kafka ........... 114
Appendix Hands-On Exercise: Import Data from MySQL Using Apache
Sqoop ...................................................................................................................... 117
Appendix: Enabling Jupyter Notebook for PySpark ........................................... 120
Appendix: Troubleshooting Tips .......................................................................... 123
© Copyright 2010–2017 Cloudera. All Rights Reserved. Not to be reproduced or shared without prior written consent from Cloudera. ii

1
General NotesThis course’s exercise environment provides a small cluster that allows you to practicethe concepts taught in the course in a realistic environment. This section will familiarizeyou with the environment and provide tips on using it.
Exercise Cluster OverviewYour exercise environment includes several machines. All are running CentOS Linuxand use the login name training with password training.
Depending on which version of the course, your setup may be running all or partiallyin the cloud. If there are multiple choices for Starting the Exercise Environment,check with your instructor to make sure you run the correct Starting the ExerciseEnvironment exercise.
Environment Hosts
Get2ClusterVirtual Machine
Virtual machine (VM) that runs in the cloud or as a VMwarevirtual machine on your local host machine.
This provides the Gnome desktop environment and is your entrypoint to the exercise environment.
gateway This cluster node provides you with access to the Hadoopcluster. You will log in to gateway to do most of your exercisesteps.
© Copyright 2010–2017 Cloudera. All Rights Reserved. Not to be reproduced or shared without prior written consent from Cloudera. 1

2
Environment HostsConnect using the menu item Applications > Training >Connect to Gateway from the Get2Cluster virtual machinedesktop.
cmhost This cluster node hosts Cloudera Manager, which installs,configures, and monitors the services on the Hadoop cluster. Youwill only need to log in to this host to launch your cluster.
Connect using the menu item Applications > Training >Connect to CM Host from the Get2Cluster virtual machinedesktop.
master-1master-2
The master nodes run the services that manage the Hadoopcluster. You may visit the UIs for services running on these hostsusing the web browser on your VM, but you should not need tolog in to them directly.
worker-1worker-2worker-3
The worker nodes execute the distributed tasks for applicationsthat run on the Hadoop cluster. You will not need to access thesehosts directly.
Course Exercise DirectoriesThe main directory for this course is on the gateway machine in the~/training_materials/devsh/exercises directory. Within that directory youwill find the following subdirectories:
• exercises—contains subdirectories corresponding to each exercise, which arereferred to in the instructions as the “exercise directory.” The exercises directoriescontain starter code (stubs), solutions, Maven project directories for Scala and Javaapplications, and other files needed to completed the exercise.
• data—contains the data files used in all the exercises. Usually you will upload thefiles to Hadoop’s distributed file system (HDFS) before working with them.
• examples—contains example code and data presented in the chapter slides in thecourse.
• scripts—contains the course setup scripts and other scripts required to completethe exercises.
© Copyright 2010–2017 Cloudera. All Rights Reserved. Not to be reproduced or shared without prior written consent from Cloudera. 2
3
Working with the Linux Command Line
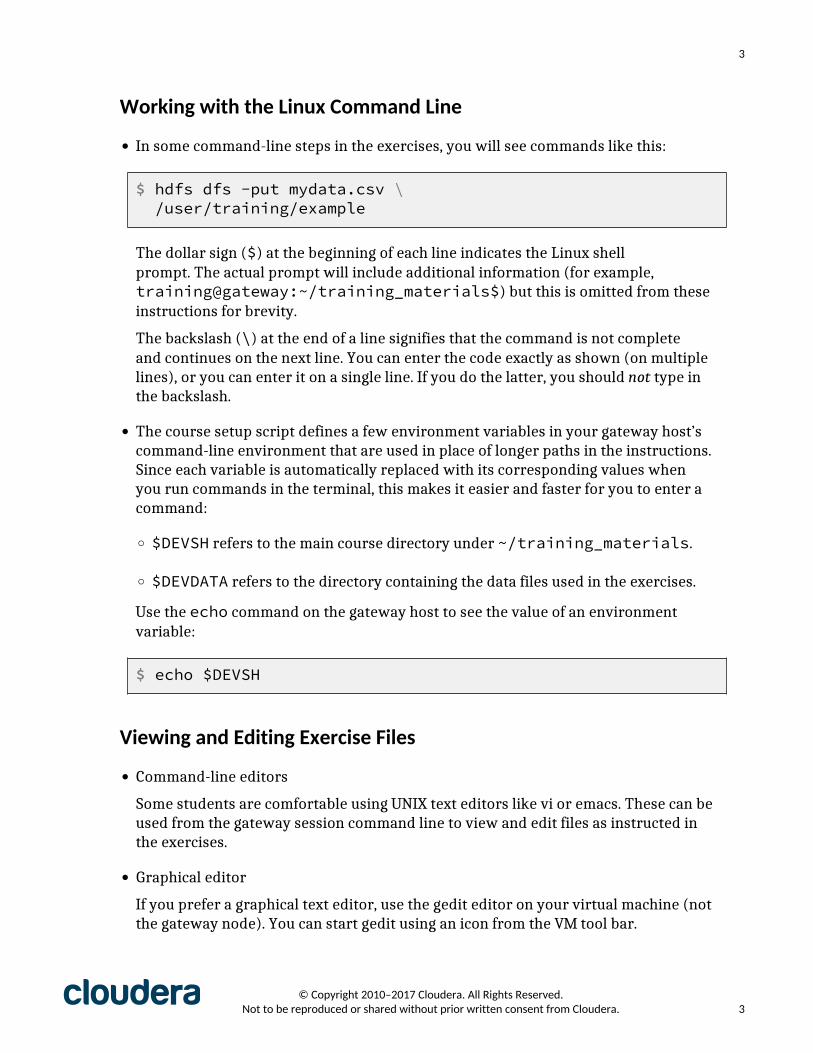
• In some command-line steps in the exercises, you will see commands like this:
$ hdfs dfs -put mydata.csv \ /user/training/example
The dollar sign ($) at the beginning of each line indicates the Linux shellprompt. The actual prompt will include additional information (for example,training@gateway:~/training_materials$) but this is omitted from theseinstructions for brevity.
The backslash (\) at the end of a line signifies that the command is not completeand continues on the next line. You can enter the code exactly as shown (on multiplelines), or you can enter it on a single line. If you do the latter, you should not type inthe backslash.
• The course setup script defines a few environment variables in your gateway host’scommand-line environment that are used in place of longer paths in the instructions.Since each variable is automatically replaced with its corresponding values whenyou run commands in the terminal, this makes it easier and faster for you to enter acommand:
◦ $DEVSH refers to the main course directory under ~/training_materials.
◦ $DEVDATA refers to the directory containing the data files used in the exercises.
Use the echo command on the gateway host to see the value of an environmentvariable:
$ echo $DEVSH
Viewing and Editing Exercise Files
• Command-line editors
Some students are comfortable using UNIX text editors like vi or emacs. These can beused from the gateway session command line to view and edit files as instructed inthe exercises.
• Graphical editor
If you prefer a graphical text editor, use the gedit editor on your virtual machine (notthe gateway node). You can start gedit using an icon from the VM tool bar.
© Copyright 2010–2017 Cloudera. All Rights Reserved. Not to be reproduced or shared without prior written consent from Cloudera. 3

4
Note:
Graphical editors like gedit run on your local VM, but typically the files you need towork with are located in the file system on the gateway host. For your convenience,the exercise environment setup remotely mounts the gateway file system on thelocal VM. The training user’s home directory on the VM (/home/training)contains a training_materials directory that links to /home/training/training_materials on the gateway host. So when you view or edit a filein training_materials, you can access the same file on the local VM or in agateway terminal session.
Points to Note during the Exercises
Step-by-Step InstructionsAs the exercises progress and you gain more familiarity with the tools andenvironment, we provide fewer step-by-step instructions; as in the real world, wemerely give you a requirement and it is up to you to solve the problem! You should feelfree to refer to the hints or solutions provided, ask your instructor for assistance, orconsult with your fellow students.
Bonus ExercisesThere are additional challenges for some of the hands-on exercises. If you finish themain exercise, please attempt the additional steps.
Catch-Up ScriptIf you are unable to complete an exercise, there is a script to catch you up automatically.Each exercise has instructions for running the catch-up script if the exercise depends oncompletion of prior exercises.
$ $DEVSH/scripts/catchup.sh
The script will prompt you for the exercise that you are starting; it will then set up allthe required data as if you had completed all of the previous exercises.
Note: If you run the catch-up script, you may lose your work. For example, all exercisedata will be deleted from HDFS before uploading the required files.
TroubleshootingIf you have trouble or unexpected behavior in the exercise environment, refer to theTroubleshooting Tips section at the end of the exercise manual.
© Copyright 2010–2017 Cloudera. All Rights Reserved. Not to be reproduced or shared without prior written consent from Cloudera. 4

5
Hands-On Exercise: Starting the Exercise Environment(Local VM)In this exercise, you will start the cluster on which you will do the courseexercises.
This course provides a small cluster as an exercise environment that allows you topractice the concepts taught in the course in a realistic environment. This section willwalk you through starting the cluster.
Local VM and AWS: Provides instructions for when Get2Cluster runs as a local VM onyour laptop or desktop machine. In this setup, the cmhost and cluster VMs run on AWS.
Exercise Instructions
Before You StartBefore you start, verify the following:
• You have VMware player installed on your local host machine.
• You have the CM host IP address your instructor has provided.
• If you are taking a custom course, be sure you have the custom course code providedby your instructor.
Start Your Get2Cluster Virtual MachineYour entry point to your exercise environment is the Get2Cluster virtual machine (VM).
1. Make sure you have a VMware player installed on your computer.
2. If the VM .zip file is not yet downloaded to your local host, do so now using thelink provided by your instructor.
3. Unzip the VM file into a directory of your choice. On most systems, you can do thisby simply double-clicking the file.
4. Start the VM. On most systems, you can do this by double-clicking on the .vmx file(such as Cloudera-Training-NGEE-Get2Cluster-VM.vmx) in the unzippedVM directory. You can also launch the VMware reader and load the same file inusing the File menu.
When the VM has started, you will automatically be logged in as the usertraining, and you will see the VM’s desktop.
© Copyright 2010–2017 Cloudera. All Rights Reserved. Not to be reproduced or shared without prior written consent from Cloudera. 5
6
5. Copy the Hands-On Exercise Manual (the document you are currently viewing) ontoyour Get2Cluster VM desktop and use the VM’s PDF viewer to view it. Some PDFviewers do not allow you to cut and paste multi-line commands properly. To dothis, drag the PDF file from your local host’s file browser to the VM window. Double-click the PDF file on the desktop to open it in a viewer running on the VM. This willallow you to cut and paste commands directly from the PDF into your VM window.
Configure Network Access to the Cloudera Manager Host
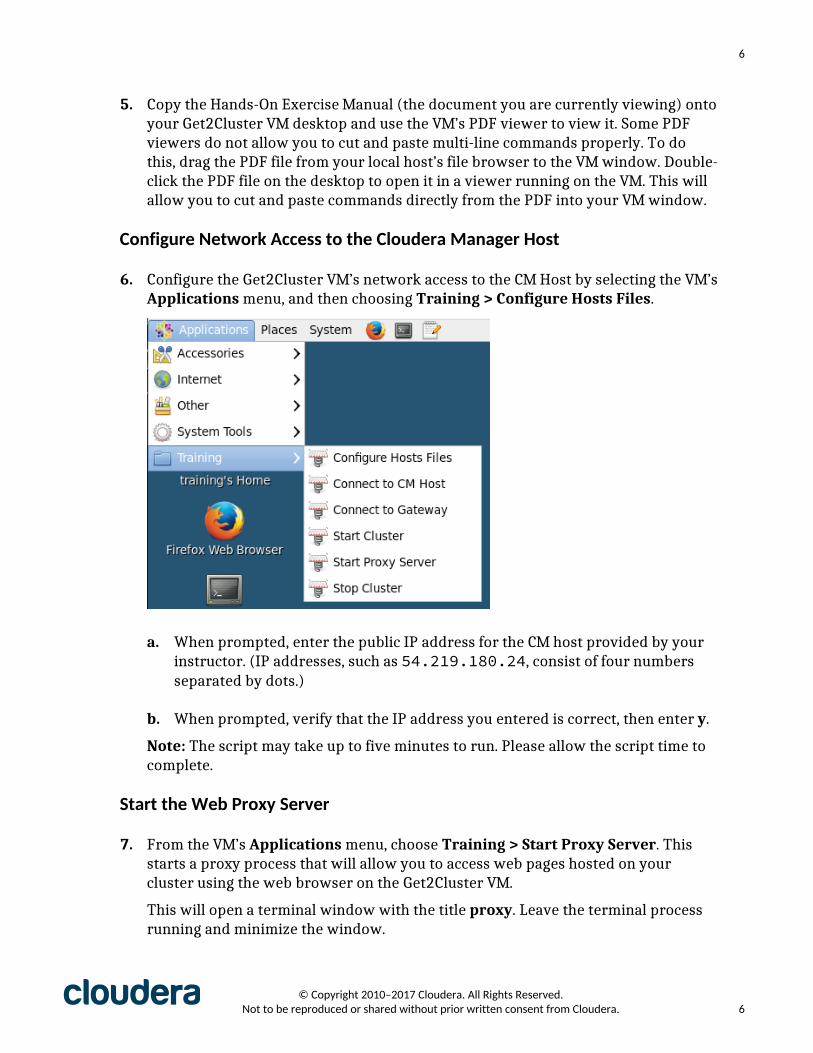
6. Configure the Get2Cluster VM’s network access to the CM Host by selecting the VM’sApplications menu, and then choosing Training > Configure Hosts Files.
a. When prompted, enter the public IP address for the CM host provided by yourinstructor. (IP addresses, such as 54.219.180.24, consist of four numbersseparated by dots.)
b. When prompted, verify that the IP address you entered is correct, then enter y.
Note: The script may take up to five minutes to run. Please allow the script time tocomplete.
Start the Web Proxy Server
7. From the VM’s Applications menu, choose Training > Start Proxy Server. Thisstarts a proxy process that will allow you to access web pages hosted on yourcluster using the web browser on the Get2Cluster VM.
This will open a terminal window with the title proxy. Leave the terminal processrunning and minimize the window.
© Copyright 2010–2017 Cloudera. All Rights Reserved. Not to be reproduced or shared without prior written consent from Cloudera. 6

7
Note: The proxy process must remain running throughout the day. Do not close theterminal window or exit the process until the end of the day. If you do exit theprocess, you will not be able to access web UI pages hosted on the cluster from theGet2Cluster web browser.
If you accidentally stop the proxy server, restart it following the step above. You willalso need to restart the proxy server if you lose your connection to the internet at anypoint during the class. (A possible indication that the proxy has stopped working is ifthe terminal no longer displays the "proxy" title in the desktop menu bar.)
Verify that Cloudera Manager is Running Correctly
8. Open the Firefox browser on the Get2Cluster VM and click on the ClouderaManager bookmark. Log in as user admin with password admin.
You may see any of the following indications that the cluster is is still starting up:
• There is an icon next to Cloudera Management Service indicating that theservice is restarting.
• Warning messages Request to the Service Monitor failed or Request to HostMonitor failed.
• The Running Commands icon (a paper scroll) in the upper right corner of theCloudera Manager web UI has a number 1.
• One or more cluster services appears with a red dot indicating an unhealthystatus.
© Copyright 2010–2017 Cloudera. All Rights Reserved. Not to be reproduced or shared without prior written consent from Cloudera. 7

8
If the Cloudera Manager web UI displays any of these indicators, it means that thecluster is still starting. Wait a few minutes and reload the page.
9. When Cloudera Manager is fully started and running correctly, the start-upindicators above will be cleared and the Cloudera Management Service will show ahealthy status, indicated by a green dot next to it.
a. If all the start-up indicators are cleared, but the Cloudera Manager Servicestill does not have a healthy status, restart the service manually in a CM Hostterminal session.
i. Start a new terminal session connected to the CM host: from the VM’sApplications menu, select Training > Connect to CM Host. This will opena new terminal window titled training@cmhost with a session running onthe CM host.
ii. In the CM host terminal window, restart the Cloudera Manager Service.
$ ~/config/reset-cm.sh
The service should show a healthy status (green dot icon) after a few moments.
Create and Launch the Exercise ClusterThe exercise environment depends on Cloudera Manager, which runs on the CM host, todeploy the exercise cluster.
© Copyright 2010–2017 Cloudera. All Rights Reserved. Not to be reproduced or shared without prior written consent from Cloudera. 8

9
10. Start a new terminal session connected to the CM host: from the VM’s Applicationsmenu, select Training > Connect to CM Host. This will open a new terminalwindow titled training@cmhost with a session running on the CM host.
11. In the CM host terminal session, run the command below to create and launch anew cluster.
$ ~/create-cluster.sh
a. When prompted for a name for your new cluster, enter your last name. Thename of the cluster can be up to 20 characters, and should include only lettersand/or numbers. Do not include any spaces, punctuation, or special characters.
Note: If you need to rebuild a cluster for any reason, choose a different clustername than the one you used the first time by adding 2 to your original clustername.
b. When prompted, choose the number corresponding to the course you aretaking.
• If you are taking a regular course (not a custom course) choose the numberfor DevSH.
• If you are taking a custom course, select Custom, enter the custom coursecode (three numbers separated by dots, such as 32.9.27) provided by yourinstructor.
Note: It is important to choose the correct course, so that the correct files willbe downloaded and the correct configurations will be applied to the cluster.
After you choose your course, the script will continue and will take 15 to 30 minutescomplete. It is important to leave the script running uninterrupted.
Because the script takes a while to complete, your instructor may proceed with thecourse while it runs. Before proceeding with the next exercise, be sure to return to theVerify Your Cluster section below to make sure that your cluster is running correctly. Ifthe cluster is not running correctly, refer to the Troubleshooting Tips section at the endof the Exercise Manual, or ask your instructor for help.
Verify Your ClusterConfirm that your exercise environment is set up correctly.
12. Review the status of services running on the cluster in the Get2Cluster VM’s webbrowser using the Cloudera Manager bookmark.
© Copyright 2010–2017 Cloudera. All Rights Reserved. Not to be reproduced or shared without prior written consent from Cloudera. 9
10
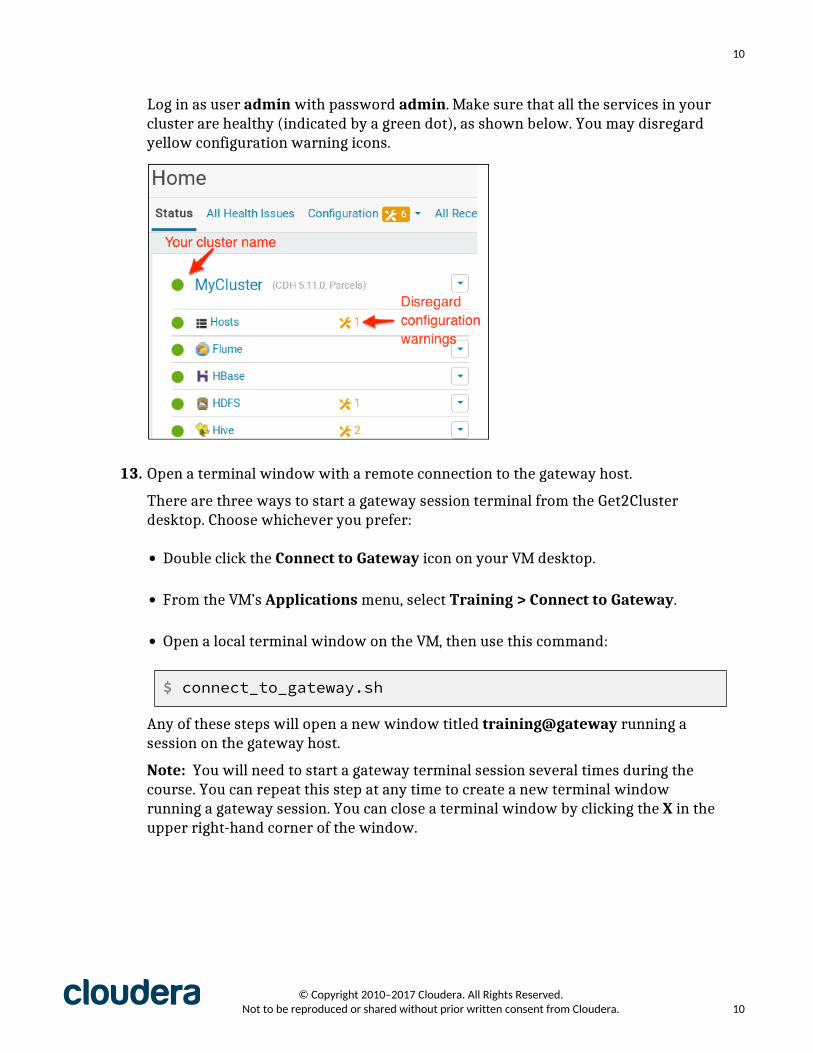
Log in as user admin with password admin. Make sure that all the services in yourcluster are healthy (indicated by a green dot), as shown below. You may disregardyellow configuration warning icons.
13. Open a terminal window with a remote connection to the gateway host.
There are three ways to start a gateway session terminal from the Get2Clusterdesktop. Choose whichever you prefer:
• Double click the Connect to Gateway icon on your VM desktop.
• From the VM’s Applications menu, select Training > Connect to Gateway.
• Open a local terminal window on the VM, then use this command:
$ connect_to_gateway.sh
Any of these steps will open a new window titled training@gateway running asession on the gateway host.
Note: You will need to start a gateway terminal session several times during thecourse. You can repeat this step at any time to create a new terminal windowrunning a gateway session. You can close a terminal window by clicking the X in theupper right-hand corner of the window.
© Copyright 2010–2017 Cloudera. All Rights Reserved. Not to be reproduced or shared without prior written consent from Cloudera. 10
11
14. Confirm that your course exercise directory is present in thetraining_materials directory by running this command in your gatewaysession:
$ ls ~/training_materials/devsh
The directory should exist and contain several subdirectories including data andexercises.
Your exercise environment is now ready.
Manage Your Cluster
Stop Your Cluster at the End of Each Day
At the end of each day, stop your cluster.
15. From the Get2Cluster VM desktop, select the Applications menu, then selectTraining > Stop Cluster to stop your cluster. When prompted if you are sure youwant to stop the cluster, confirm by entering Y.
This will stop all the VMs except for CM host and Get2Cluster.
16. After the cluster stops, perform the following additional steps on the Get2ClusterVM:
• Exit all open terminal windows including the proxy terminal window.
• Exit all open browser sessions.
• Suspend or stop the Get2Cluster VM.
Restart Your Cluster and Verify Cluster Health
At the start of the second day of class, and each day of class thereafter, restart yourcluster.
17. Restart your Get2Cluster virtual machine if necessary. Exit any terminal windowsor browser sessions still open on the VM, including the proxy terminal window.
18. On the Get2Cluster VM desktop menu bar, select the Applications menu andchoose Training > Start Cluster to restart your cluster.
19. After the cluster restarts, restart the web proxy server on the VM desktop menuby selecting Applications > Training > Start Proxy Server. Minimize the proxyterminal window and leave it running for the rest of the day.
© Copyright 2010–2017 Cloudera. All Rights Reserved. Not to be reproduced or shared without prior written consent from Cloudera. 11
12
20. Launch Firefox on your VM and click on the Cloudera Manager bookmark. Log into Cloudera Manager with the username admin and password admin.
21. Some health warnings may appear as the cluster is starting. They will typicallyresolve within a few minutes. If you see any remaining health issues after fiveminutes, they may be due to clock offset issues. Try resolving the issues followingthese steps.
a. Click All Health Issues and then click on Organize by Health Test.
b. Check if there are Clock Offset issues. If there are, open a new CM terminalwindow on your VM (Applications > Training > Connect to CM Host) and runthe following command on CM host:
$ ~/config/reset-clocks.sh
Additional troubleshooting tips, if needed, are documented in the appendix. The tipentitled "Cloudera Manager displays unhealthy status of services" offers solutionsto any other health issues your cluster you may experience.
This is the end of the exercise.
© Copyright 2010–2017 Cloudera. All Rights Reserved. Not to be reproduced or shared without prior written consent from Cloudera. 12

13
Hands-On Exercise: Starting the Exercise Environment(Web-Based VM, cmhost on AWS)In this exercise, you will start the cluster on which you will do the courseexercises.
This course provides a small cluster as an exercise environment that allows you topractice the concepts taught in the course in a realistic environment. This section willwalk you through starting the cluster.
Skytap and AWS: Provides instructions for when Get2Cluster runs on Skytap and theGet2Cluster desktop is accessed via web browser. In this setup, the cmhost and all thecluster VMs run on AWS.
Exercise Instructions
Before You StartBefore you start, verify the following:
• You have a URL from the instructor that provides access to a Get2Cluster virtualmachine running in the cloud.
• You have the CM host IP address your instructor has provided.
• If you are taking a custom course, be sure you have the custom course code providedby your instructor.
Setup B: Start Your Get2Cluster Virtual MachineYour entry point to your exercise environment is the Get2Cluster virtual machine (VM).
1. Open the URL provided by your instructor in your browser.
2. You should see a page that shows the Get2Cluster VM. If it is not already running,click the play button (triangle icon) to start it.
3. After the Get2Cluster VM has started, click on the desktop thumbnail view to accessthe desktop.
The Get2Cluster desktop will open in a new browser tab. You will automatically belogged in as the user training.
4. In order for cut-and-paste to work correctly, you should view the course ExerciseManual (the document you are currently viewing) on your Get2Cluster VM ratherthan on your local host machine.
© Copyright 2010–2017 Cloudera. All Rights Reserved. Not to be reproduced or shared without prior written consent from Cloudera. 13

14
a. On your Get2Cluster VM, start the Firefox browser. The default page will displaythe Cloudera University home page. (You can return to this page at any time byclicking the home icon in Firefox.)
b. Log in to your Cloudera University account and from the Dashboard find thiscourse under Current.
c. Select the course title, then click to download the Exercise Manual underMaterials.
d. Start the Evince PDF viewer on your VM:
$ evince &
e. Select menu item File > Open and open the Exercise Manual PDF file in theDownloads directory.
Configure Network Access to the Cloudera Manager Host
5. Configure the Get2Cluster VM’s network access to the CM Host by selecting the VM’sApplications menu, and then choosing Training > Configure Hosts Files.
a. When prompted, enter the public IP address for the CM host provided by yourinstructor. (IP addresses consist of four numbers separated by dots, such as54.219.180.24.)
b. When prompted, verify that the IP address you entered is correct, then enter y.
© Copyright 2010–2017 Cloudera. All Rights Reserved. Not to be reproduced or shared without prior written consent from Cloudera. 14
15
Note: The script may take up to five minutes to run. Please allow the script time tocomplete.
Start the Web Proxy Server
6. From the VM’s Applications menu, choose Training > Start Proxy Server. Thisstarts a proxy process that will allow you to access web pages hosted on yourcluster using the web browser on the Get2Cluster VM.
This will open a terminal window with the title proxy. Leave the terminal processrunning and minimize the window.
Note: The proxy process must remain running throughout the day. Do not close theterminal window or exit the process until the end of the day. If you do exit theprocess, you will not be able to access web UI pages hosted on the cluster from theGet2Cluster web browser.
If you accidentally stop the proxy server, restart it following the step above. Youwill also need to restart the proxy server if you lose your connection to the internet atany point during the class. (A possible indication that the proxy has stopped workingis if the terminal no longer displays the "proxy" title in the desktop menu bar.)
Verify that Cloudera Manager is Running Correctly
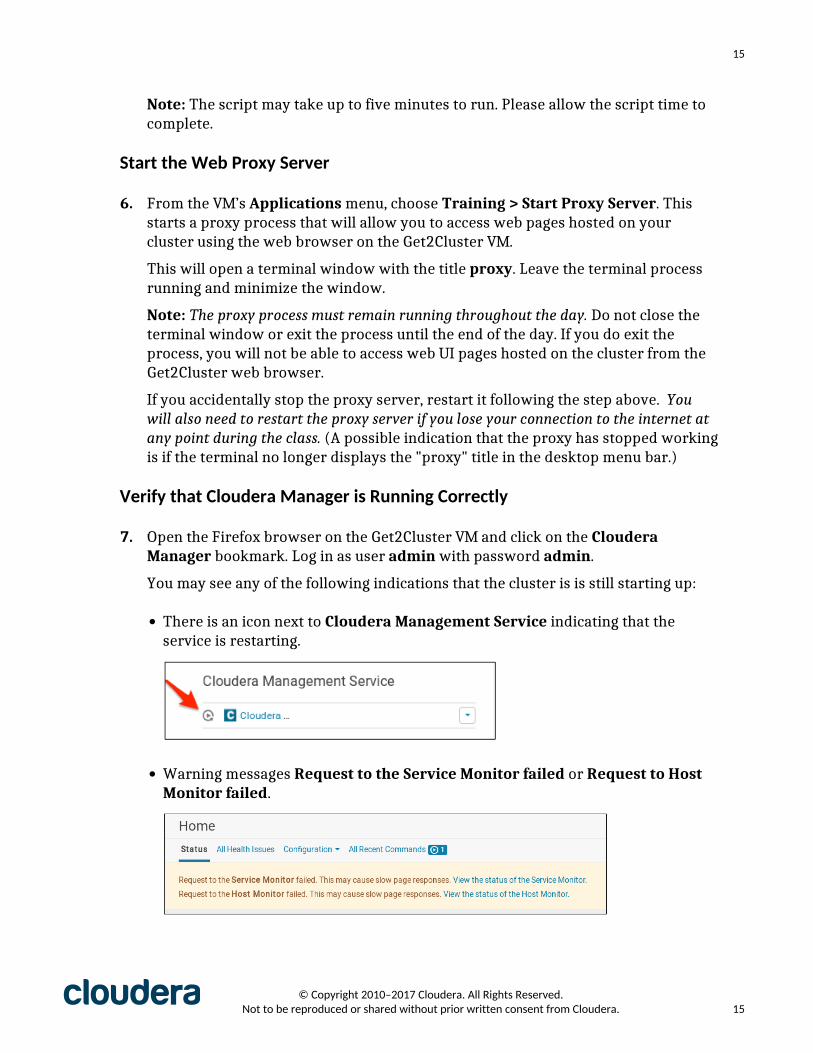
7. Open the Firefox browser on the Get2Cluster VM and click on the ClouderaManager bookmark. Log in as user admin with password admin.
You may see any of the following indications that the cluster is is still starting up:
• There is an icon next to Cloudera Management Service indicating that theservice is restarting.
• Warning messages Request to the Service Monitor failed or Request to HostMonitor failed.
© Copyright 2010–2017 Cloudera. All Rights Reserved. Not to be reproduced or shared without prior written consent from Cloudera. 15

16
• The Running Commands icon (a paper scroll) in the upper right corner of theCloudera Manager web UI has a number 1.
• One or more cluster services appears with a red dot indicating an unhealthystatus.
If the Cloudera Manager web UI displays any of these indicators, it means that thecluster is still starting. Wait a few minutes and reload the page.
8. When Cloudera Manager is fully started and running correctly, the start-upindicators above will be cleared and the Cloudera Management Service will show ahealthy status, indicated by a green dot next to it.
a. If all the start-up indicators are cleared, but the Cloudera Manager Servicestill does not have a healthy status, restart the service manually in a CM Hostterminal session.
i. Start a new terminal session connected to the CM host: from the VM’sApplications menu, select Training > Connect to CM Host. This will opena new terminal window titled training@cmhost with a session running onthe CM host.
ii. In the CM host terminal window, restart the Cloudera Manager Service.
$ ~/config/reset-cm.sh
© Copyright 2010–2017 Cloudera. All Rights Reserved. Not to be reproduced or shared without prior written consent from Cloudera. 16

17
The service should show a healthy status (green dot icon) after a few moments.
Create and Launch the Exercise ClusterThe exercise environment depends on Cloudera Manager, which runs on the CM host, todeploy the exercise cluster.
9. Start a new terminal session connected to the CM host: from the VM’s Applicationsmenu, select Training > Connect to CM Host. This will open a new terminalwindow titled training@cmhost with a session running on the CM host.
10. In the CM host terminal session, run the command below to create and start a newcluster.
$ ~/create-cluster.sh
a. When prompted for a name for your new cluster, enter your last name. Thename of the cluster can be up to 20 characters, and should include only lettersand/or numbers. Do not include any spaces, punctuation, or special characters.
Note: If you need to rebuild a cluster for any reason, choose a different clustername than the one you used the first time by adding 2 to your original clustername.
b. When prompted, choose the number corresponding to the course you aretaking.
• If you are taking a regular course (not a custom course) choose the numberfor DevSH.
• If you are taking a custom course, select Custom, enter the custom coursecode (three numbers separated by dots, such as 32.9.27) provided by yourinstructor.
Note: It is important to choose the correct course, so that the correct files willbe downloaded and the correct configurations will be applied to the cluster.
After you choose your course, the script will continue and will take 15 to 30 minutescomplete. It is important to leave the script running uninterrupted.
Because the script takes a while to complete, your instructor may proceed with thecourse while it runs. Before proceeding with the next exercise, be sure to return to theVerify Your Cluster section below to make sure that your cluster is running correctly. Ifthe cluster is not running correctly, refer to the Troubleshooting Tips section at the endof the Exercise Manual, or ask your instructor for help.
© Copyright 2010–2017 Cloudera. All Rights Reserved. Not to be reproduced or shared without prior written consent from Cloudera. 17
18
Verify Your ClusterConfirm that your exercise environment is set up correctly.
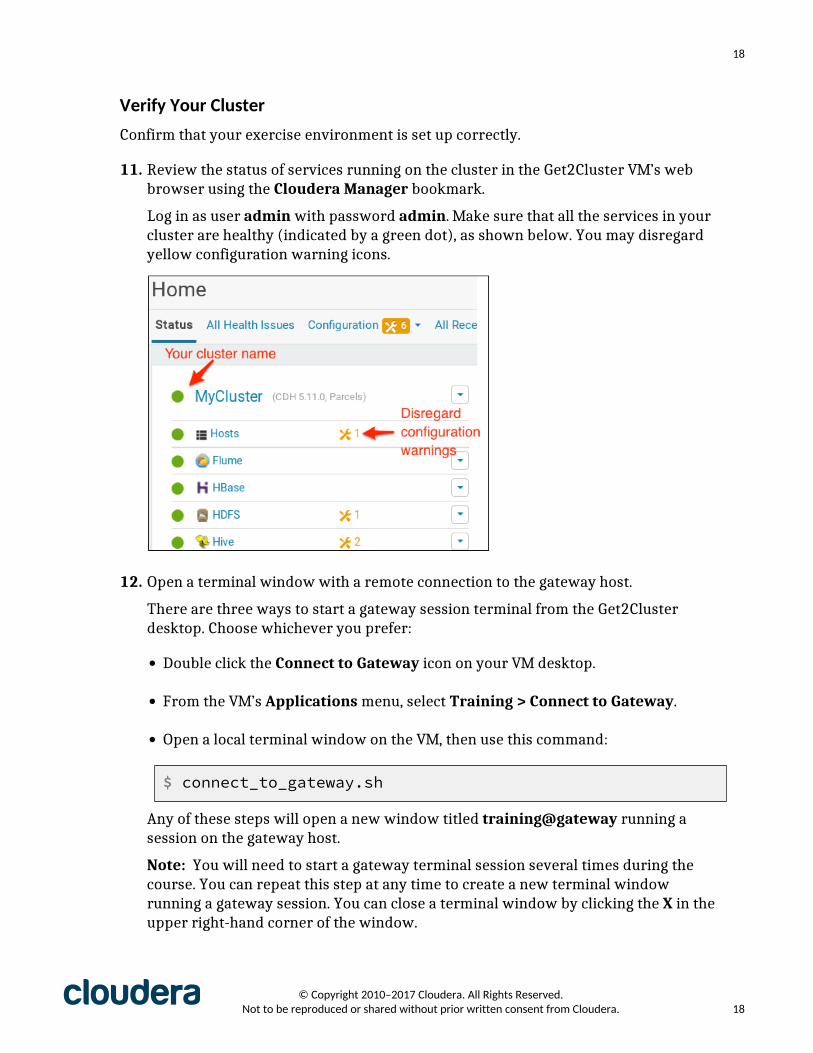
11. Review the status of services running on the cluster in the Get2Cluster VM’s webbrowser using the Cloudera Manager bookmark.
Log in as user admin with password admin. Make sure that all the services in yourcluster are healthy (indicated by a green dot), as shown below. You may disregardyellow configuration warning icons.
12. Open a terminal window with a remote connection to the gateway host.
There are three ways to start a gateway session terminal from the Get2Clusterdesktop. Choose whichever you prefer:
• Double click the Connect to Gateway icon on your VM desktop.
• From the VM’s Applications menu, select Training > Connect to Gateway.
• Open a local terminal window on the VM, then use this command:
$ connect_to_gateway.sh
Any of these steps will open a new window titled training@gateway running asession on the gateway host.
Note: You will need to start a gateway terminal session several times during thecourse. You can repeat this step at any time to create a new terminal windowrunning a gateway session. You can close a terminal window by clicking the X in theupper right-hand corner of the window.
© Copyright 2010–2017 Cloudera. All Rights Reserved. Not to be reproduced or shared without prior written consent from Cloudera. 18

19
13. Confirm that your course exercise directory is present in thetraining_materials directory by running this command in your gatewaysession:
$ ls ~/training_materials/devsh
The directory should exist and contain several subdirectories including data andexercises.
Your exercise environment is now ready.
Manage Your Cluster
Stop Your Cluster at the End of Each Day
At the end of each day, stop your cluster.
14. From the Get2Cluster VM desktop, select the Applications menu, then selectTraining > Stop Cluster to stop your cluster. When prompted if you are sure youwant to stop the cluster, confirm by entering Y.
This will stop all the VMs except for CM host and Get2Cluster.
15. After the cluster stops, perform the following additional steps on the Get2ClusterVM:
• Exit all open terminal windows including the proxy terminal window.
• Exit all open browser sessions.
• Suspend or stop the Get2Cluster VM.
Restart Your Cluster and Verify Cluster Health
At the start of the second day of class, and each day of class thereafter, restart yourcluster.
16. Return to the URL provided at the start of class by your instructor and restart yourGet2Cluster virtual machine if necessary. Exit any terminal windows or browsersessions still open on the VM, including the proxy terminal window.
17. On the Get2Cluster VM desktop menu bar, select the Applications menu andchoose Training > Start Cluster to restart your cluster.
18. After the cluster restarts, restart the web proxy server on the VM desktop menuby selecting Applications > Training > Start Proxy Server. Minimize the proxyterminal window and leave it running for the rest of the day.
© Copyright 2010–2017 Cloudera. All Rights Reserved. Not to be reproduced or shared without prior written consent from Cloudera. 19

20
19. Launch Firefox on your VM and click on the Cloudera Manager bookmark. Log into Cloudera Manager with the username admin and password admin.
20. Some health warnings may appear as the cluster is starting. They will typicallyresolve within a few minutes. If you see any remaining health issues after fiveminutes, they may be due to clock offset issues. Try resolving the issues followingthese steps.
a. Click All Health Issues and then click on Organize by Health Test.
b. Check if there are Clock Offset issues. If there are, open a new CM terminalwindow on your VM (Applications > Training > Connect to CM Host) and runthe following command on CM host:
$ ~/config/reset-clocks.sh
Additional troubleshooting tips, if needed, are documented in the appendix. The tipentitled "Cloudera Manager displays unhealthy status of services" offers solutionsto any other health issues your cluster you may experience.
This is the end of the exercise.
© Copyright 2010–2017 Cloudera. All Rights Reserved. Not to be reproduced or shared without prior written consent from Cloudera. 20
21
Hands-On Exercise: Starting the Exercise Environment(Web-Based VM, cmhost on Skytap)In this exercise, you will start the cluster on which you will do the courseexercises.
This course provides a small cluster as an exercise environment that allows you topractice the concepts taught in the course in a realistic environment. This section willwalk you through starting the cluster.
Skytap-only: Provides instructions for when Get2Cluster, the cmhost, and all thecluster VMs run on Skytap and you access the Get2Cluster desktop via web browser.
Exercise Instructions
Start the Virtual Machines
1. Open the URL provided by your instructor in your browser. If you are anOnDemand student, simply click the Open button at the top of any exercise unit inthe course.
2. You should see a web page that shows eight virtual machines (VMs). They are theGet2Cluster VM, as well as cmhost and all the other cluster VMs.
You will need to have all eight of the VMs running. If any of them are not alreadyrunning, click the play button (triangle icon) in the top left corner of the VMs tab tostart all the VMs at once.
3. Your entry point to your exercise environment is the Get2Cluster VM. After theGet2Cluster VM is started, click on the desktop thumbnail view to access thedesktop.
The Get2Cluster desktop will open in a new browser tab. You will automatically belogged in as the user training.
4. In order for cut-and-paste to work correctly, you should view the course ExerciseManual (the document you are currently viewing) on your Get2Cluster VM ratherthan on your local host machine. If you are an OnDemand student, skip this step.
a. On your Get2Cluster VM, start the Firefox browser. The default page will displaythe Cloudera University home page. (You can return to this page at any time byclicking the home icon in Firefox.)
b. Log in to your Cloudera University account and from the Dashboard find thiscourse under Current.
© Copyright 2010–2017 Cloudera. All Rights Reserved. Not to be reproduced or shared without prior written consent from Cloudera. 21

22
c. Select the course title, then click to download the Exercise Manual underMaterials.
d. Start the Evince PDF viewer on your VM:
$ evince &
e. Select menu item File > Open and open the Exercise Manual PDF file in theDownloads directory.
Start the Cluster
5. From the Get2Cluster desktop’s Applications menu, choose Training > StartCluster. A terminal window will open and a script will run in it.
6. Wait for the process running in the terminal window to complete.
Verify the ClusterConfirm that your exercise environment is set up correctly.
7. Review the status of services running on the cluster in the Get2Cluster VM’s webbrowser using the Cloudera Manager bookmark.
Log in as user admin with password admin.
Some health warnings may appear as the cluster is starting. They will typically resolvethemselves once at least five minutes have passed since the Start Cluster terminalwindow process finished. Please be patient.
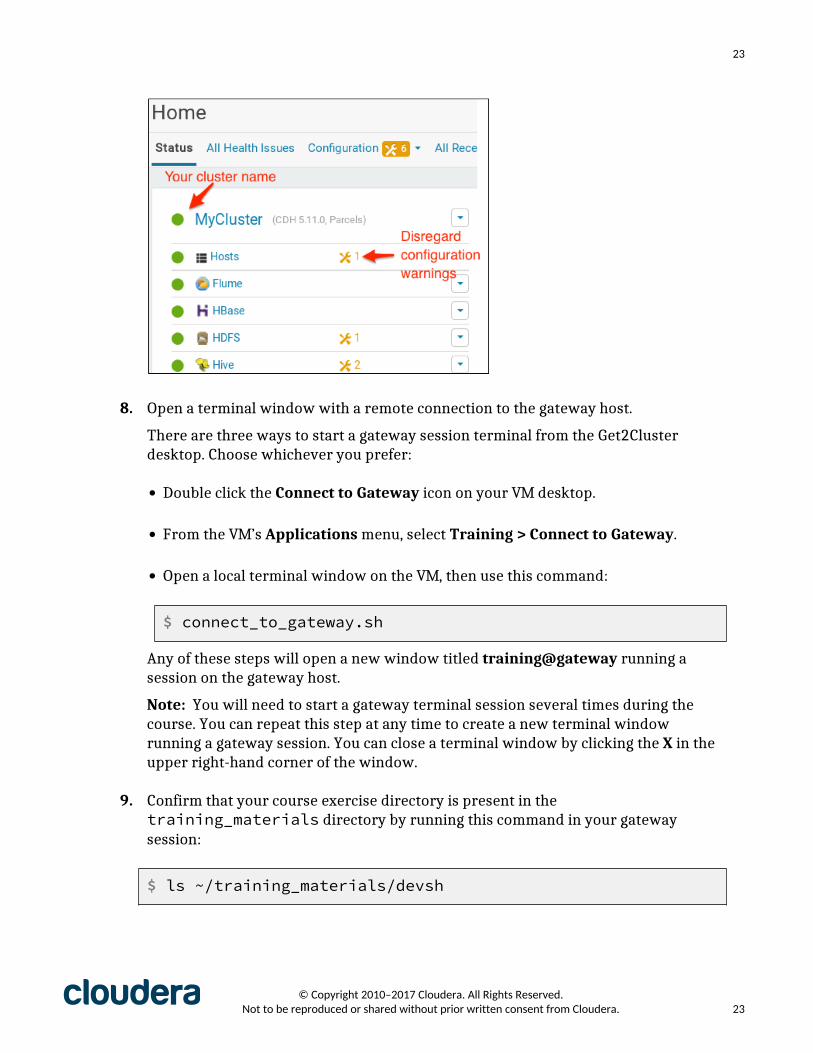
Verify that all the services in your cluster are healthy (indicated by a green dot), asshown below. You may disregard yellow configuration warning icons.
© Copyright 2010–2017 Cloudera. All Rights Reserved. Not to be reproduced or shared without prior written consent from Cloudera. 22
23
8. Open a terminal window with a remote connection to the gateway host.
There are three ways to start a gateway session terminal from the Get2Clusterdesktop. Choose whichever you prefer:
• Double click the Connect to Gateway icon on your VM desktop.
• From the VM’s Applications menu, select Training > Connect to Gateway.
• Open a local terminal window on the VM, then use this command:
$ connect_to_gateway.sh
Any of these steps will open a new window titled training@gateway running asession on the gateway host.
Note: You will need to start a gateway terminal session several times during thecourse. You can repeat this step at any time to create a new terminal windowrunning a gateway session. You can close a terminal window by clicking the X in theupper right-hand corner of the window.
9. Confirm that your course exercise directory is present in thetraining_materials directory by running this command in your gatewaysession:
$ ls ~/training_materials/devsh
© Copyright 2010–2017 Cloudera. All Rights Reserved. Not to be reproduced or shared without prior written consent from Cloudera. 23
24
The directory should exist and contain several subdirectories including data andexercises.
Your exercise environment is now ready.
Manage Your Cluster
Stop Your Cluster at the End of Each Day
At the end of each day, stop or suspend your cluster.
TIP: If you are an OnDemand student, you don’t need to manually stop or suspend thecluster, however doing so will preserve exercise time on your subscription. If you donot manually stop the VMs, they will auto-suspend within an hour or so.
10. In the Get2Cluster VM desktop, exit all open terminal windows. Also exit all openbrowser sessions. If you happen to have used any of the other desktop interfaces(such as cmhost or gateway), exit all terminal and browser windows in thosedesktops as well.
11. Return to the URL provided to you by the instructor at the start of class.
12. Click on the stop icon or the pause icon at the top of the VMs tab to stop or suspendall eight VMs.
Note: If you happen to leave the VMs running, the VMs may be suspended after a fewhours in which no keyboard or mouse interaction with the cluster is detected.
Restart Your Cluster and Verify Cluster Health
At the start of the second day of class, and each day of class thereafter, restart yourcluster.
13. Return to the URL provided by your instructor at the beginning of class. If you arean OnDemand student, simply click the Open button at the top of any exercise unitin the course.
14. Start all eight VMs if they are not currently running.
15. Open the Get2Cluster VM desktop and exit any terminal windows or browsersessions still open in the Get2Cluster desktop.
16. From the Get2Cluster VM desktop, select the Applications menu and chooseTraining > Start Cluster to restart your cluster daemons and services.
17. Give the start cluster action time to complete.
© Copyright 2010–2017 Cloudera. All Rights Reserved. Not to be reproduced or shared without prior written consent from Cloudera. 24

25
18. Launch Firefox inside your Get2Cluster desktop and click on the ClouderaManager bookmark. Log in to Cloudera Manager with the username admin andpassword admin.
19. Some health warnings may appear as the cluster is starting. They will typicallyresolve themselves once at least five minutes have passed since the Start Clusterterminal window process finished. Please be patient.
If you see any remaining health issues after five minutes, they may be due to clockoffset issues. Try resolving the issues following these steps.
a. Click All Health Issues and then click on Organize by Health Test.
b. Check if there are Clock Offset issues. If there are, open a new CM terminalwindow on your VM (Applications > Training > Connect to CM Host) and runthe following command on CM host:
$ ~/config/reset-clocks.sh
Additional troubleshooting tips, if needed, are documented in the appendix. The tipentitled "Cloudera Manager displays unhealthy status of services" offers solutionsto any other health issues your cluster you may experience.
This is the end of the exercise.
© Copyright 2010–2017 Cloudera. All Rights Reserved. Not to be reproduced or shared without prior written consent from Cloudera. 25

26
Hands-On Exercise: Querying Hadoop Data withApache Impala
Files and Data Used in This Exercise:
Impala/Hive table accounts
In this exercise, you will use the Hue Impala Query Editor to explore data in aHadoop cluster.
This exercise is intended to let you begin to familiarize yourself with the courseexercise environment as well as Hue. You will also briefly explore the Impala QueryEditor.
Before starting this exercise, return to the instructions for the Starting the ExerciseEnvironment exercise. Make sure that your exercise environment cluster is runningcorrectly following the steps in the Verify Your Cluster section.
View and Query a Table Using Hue
1. Start Firefox on the VM using the shortcut provided on the main menu panel at thetop of the screen.
2. View the Hue UI. Your Hue user name should be training, with password training(which is the same login information as on your cluster hosts.)
Note: Make sure to use this exact username and password. Your exercise environmentis configured with a system user called training and your Hue username mustmatch. If you accidentally use the wrong username, refer to the instructions in theTroubleshooting Tips section at the end of the exercise.
a. Click the Hue bookmark, or visit http://master-1:8888/.
b. Because this is the first time anyone has logged into Hue on this server, youwill be prompted to create a new user account. Enter username training andpassword training, and then click Create account. (If prompted you may clickRemember.)
Hue WarningsYou may see warnings on the Hue home screen about disabledor misconfigured services. You can disregard these; the notedservices are not required for these exercises.
3. From the Query Editors menu, select Impala.
© Copyright 2010–2017 Cloudera. All Rights Reserved. Not to be reproduced or shared without prior written consent from Cloudera. 26

27
4. In the left panel under the default database, select the accounts table. This willdisplay the table’s column definitions.
• Note: There are several columns defined. If you do not see them all, try resizingthe Firefox window.
5. Hover your pointer over the accounts table to reveal the associated Show detailsicon (labeled i), as shown below.
Click the icon to bring up the details popup, and select the Sample tab. The tab willdisplay the first several rows of data in the table. When you are done viewing thedata, click the X in the upper right corner of the popup to close it.
6. In the main panel in the query text box, enter a SQL query like the one below:
SELECT * FROM accounts WHERE first_name LIKE 'An%';
7. Click the Execute button (labeled as a blue “play” symbol: ) to execute thecommand.
© Copyright 2010–2017 Cloudera. All Rights Reserved. Not to be reproduced or shared without prior written consent from Cloudera. 27

28
8. To see results, view the Results tab below the query area.
9. Optional: If you have extra time, continue exploring the Impala Query Editor onyour own. For instance, try selecting other tabs after viewing the results.
This is the end of the exercise.
© Copyright 2010–2017 Cloudera. All Rights Reserved. Not to be reproduced or shared without prior written consent from Cloudera. 28

29
Hands-On Exercise: Accessing HDFS with theCommand Line and Hue
Files and Data Used in This Exercise:
Data files (local) $DEVDATA/kb/$DEVDATA/calllogs/$DEVDATA/base_stations.parquet
Data files (HDFS) /user/hive/warehouse/accounts
In this exercise, you will practice working with HDFS, the Hadoop Distributed FileSystem.
You will use the HDFS command line tool and the Hue File Browser web-based interfaceto manipulate files in HDFS.
Explore HDFS Using the Command Line InterfaceThe simplest way to interact with HDFS is by using the hdfs command. To executeHDFS filesystem commands, use hdfs dfs.
Note on System CommandsYou will do almost all your work in these exercises on the clustergateway node. For some exercises you might need to have multipleterminal windows connected to the gateway.
1. Open a terminal window with a SSH session to the cluster gateway node by double-clicking the Connect to Gateway icon on your Virtual Machine desktop or selectingthe Applications > Connect to Gateway item from the VM menu bar.
2. In the gateway terminal session, use the HDFS command line to list the content ofthe HDFS root directory using the following command:
$ hdfs dfs -ls /
There will be multiple entries, one of which is /user. Each user has a “home”directory under this directory, named after their username; your username in thiscourse is training, therefore your home directory is /user/training.
© Copyright 2010–2017 Cloudera. All Rights Reserved. Not to be reproduced or shared without prior written consent from Cloudera. 29
30
3. Try viewing the contents of the /user directory by running:
$ hdfs dfs -ls /user
You will see your home directory in the directory listing.
Relative PathsIn HDFS, relative (non-absolute) paths are considered relativeto your home directory. There is no concept of a “current” or“working” directory as there is in Linux and similar filesystems.
4. List the contents of your home directory by running:
$ hdfs dfs -ls /user/training
There are no files yet, so the command silently exits. Compare this to the behaviorif you tried to view a nonexistent directory, such as hdfs dfs -ls /foo, whichwould display an error message.
Note that the directory structure in HDFS has nothing to do with the directorystructure of the local filesystem; they are completely separate namespaces.
Upload Files to HDFSBesides browsing the existing filesystem, another important thing you can do with theHDFS command line interface is to upload new data into HDFS.
5. Start by creating a new top-level directory for exercises. You will use this directorythroughout the rest of the course.
$ hdfs dfs -mkdir /loudacre
6. Change directories to the Linux local filesystem directory containing the sampledata we will be using in the course.
$ cd $DEVDATA
If you perform a regular Linux ls command in this directory, you will see severalfiles and directories that will be used in this course. One of the data directoriesis kb. This directory holds Knowledge Base articles that are part of Loudacre’scustomer service website.
© Copyright 2010–2017 Cloudera. All Rights Reserved. Not to be reproduced or shared without prior written consent from Cloudera. 30
31
7. Insert this directory into HDFS:
$ hdfs dfs -put kb /loudacre/
This copies the local kb directory and its contents into a remote HDFS directorynamed /loudacre/kb.
8. List the contents of the new HDFS directory now:
$ hdfs dfs -ls /loudacre/kb
You should see the KB articles that were in the local directory.
9. Practice uploading a directory, confirm the upload, and then remove it, as it is notactually needed for the exercises.
$ hdfs dfs -put activations /loudacre/$ hdfs dfs -ls /loudacre/activations$ hdfs dfs -rm -r /loudacre/activations
View an HDFS File
10. Now view some of the data you just copied into HDFS.
$ hdfs dfs -cat /loudacre/kb/KBDOC-00289.html | head \ -n 20
This prints the first 20 lines of the article to your terminal. This command is handyfor viewing text data in HDFS. An individual file is often very large, making itinconvenient to view the entire file in the terminal. For this reason, it is often a goodidea to pipe the output of the dfs -cat command into head, more, or less. Youcan also use hdfs dfs -tail to more efficiently view the end of the file, ratherthan piping the whole content.
Download an HDFS FileIn an earlier exercise, you used Impala to explore data in HDFS in the accounts table.You can view and work with that data directly by downloading it from HDFS to theLinux local filesystem.
11. To download a file to work with on the local filesystem use the
© Copyright 2010–2017 Cloudera. All Rights Reserved. Not to be reproduced or shared without prior written consent from Cloudera. 31
32
hdfs dfs -get command. This command takes two arguments: an HDFS pathand a local Linux path. It copies the HDFS contents into the local filesystem:
$ hdfs dfs -get \ /user/hive/warehouse/accounts /tmp/accounts$ less /tmp/accounts/part-m-00000
Enter the letter q to quit the less command after reviewing the downloaded file.
View HDFS Command Line Help
12. There are several other operations available with the hdfs dfs command toperform most common filesystem manipulations such as mv, cp, and mkdir. In theterminal window, enter:
$ hdfs dfs
You see a help message describing all the filesystem commands provided by HDFS.
Try playing around with a few of these commands if you like.
Use the Hue File Browser to Browse, View, and Manage Files
13. In Firefox, visit Hue by clicking the Hue bookmark, or going to URL http://master-1:8888/.
14. If your prior session has expired, re-log in using the login credentials you createdearlier: username training and password training.
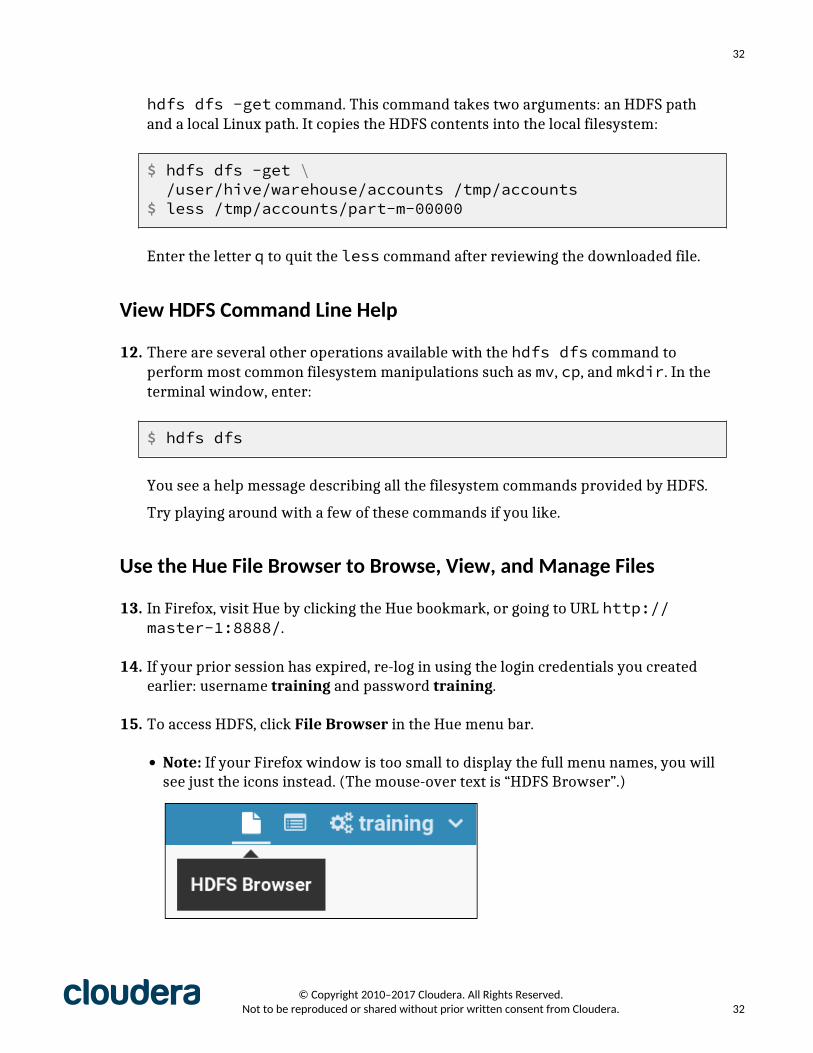
15. To access HDFS, click File Browser in the Hue menu bar.
• Note: If your Firefox window is too small to display the full menu names, you willsee just the icons instead. (The mouse-over text is “HDFS Browser”.)
© Copyright 2010–2017 Cloudera. All Rights Reserved. Not to be reproduced or shared without prior written consent from Cloudera. 32

33
16. By default, the contents of your HDFS home directory (/user/training) aredisplayed. In the directory path name, click the leading slash (/) to view the HDFSroot directory.
17. The contents of the root directory are displayed, including the loudacre directoryyou created earlier. Click that directory to see the contents.
18. Click the name of the kb directory to see the Knowledge Base articles you uploaded.
19. Click the checkbox next to any of the files, and then click the Actions button to see alist of actions that can be performed on the selected file(s).
20. View the contents of one of the files by clicking on the name of the file.
• Note: In the file viewer, the contents of the file are displayed on the right. Inthis case, the file is fairly small, but typical files in HDFS are very large, so ratherthan displaying the entire contents on one screen, Hue provides buttons to movebetween pages.
21. Return to the directory view by clicking View file location in the Actions panel onthe left.
22. Click the up arrow to return to the /loudacre base directory.
23. Upload the /home/training/training_materials/devsh/data/base_stations.parquet file to the /loudacre HDFS directory.
Note: You are using the Hue UI from a browser running on your local VM, butthe files you need to upload are located in the file system on the gateway host.
© Copyright 2010–2017 Cloudera. All Rights Reserved. Not to be reproduced or shared without prior written consent from Cloudera. 33

34
For your convenience, the exercise environment setup remotely mounts thegateway file system on the local VM. The training user’s home directory on the VM(/home/training) contains a training_materials link that links to /home/training/training_materials on the gateway host. This allows you to useHue to upload a file in the training_materials directory on the gateway host,by browsing to the training_materials link on the local VM.
a. Click the Upload button on the right. You can choose to upload aplain file, or to upload a zipped file (which will automatically beunzipped after upload). In this case, select Files, then click Select Files.
b. A Linux file browser will appear. Browse to /home/training/training_materials/devsh/data, choose base_stations.parquet,and click the Open button.
c. Confirm that the file was correctly uploaded into the current directory.
24. Optional: Explore the various file actions available. When you have finished, selectany additional files you have uploaded and click the Move to trash button todelete. (Do not delete base_stations.parquet; that file will be used in laterexercises.)
This is the end of the exercise.
© Copyright 2010–2017 Cloudera. All Rights Reserved. Not to be reproduced or shared without prior written consent from Cloudera. 34
35
Hands-On Exercise: Running and Monitoring a YARNJob
Files and Data Used in This Exercise
Exercise directory $DEVSH/exercises/yarnData files (HDFS) /loudacre/kb
In this exercise, you will submit an application to the YARN cluster, and monitorthe application using both the Hue Job Browser and the YARN Web UI.
The application you will run is provided for you. It is a simple Spark applicationwritten in Python that counts the occurrence of words in Loudacre’s customer serviceKnowledge Base (which you uploaded in a previous exercise). The focus of this exerciseis not on what the application does, but on how YARN distributes tasks in a job across acluster, and how to monitor an application and view its log files.
Important: This exercise depends on a previous exercise: “Access HDFS with theCommand Line and Hue.” If you did not complete that exercise, run the course catch-upscript and advance to the current exercise:
$ $DEVSH/scripts/catchup.sh
Explore the YARN Cluster
1. Visit the YARN Resource Manager (RM) UI in Firefox using the provided bookmark(labeled RM), or by going to URL http://master-1:8088/.
No jobs are currently running so the current view shows the cluster “at rest.”
Who Is Dr. Who?You may notice that YARN says you are logged in as dr.who. Thisis what is displayed when user authentication is disabled for thecluster, as it is in the exercise environment. If user authenticationwas enabled, you would have to log in as a valid user to view theYARN UI, and your actual username would be displayed, togetherwith user metrics such as how many applications you had run,how much of system resources your applications used and so on.
2. Take note of the values in the Cluster Metrics section, which displays informationsuch as the number of applications running currently, previously run, or waiting to
© Copyright 2010–2017 Cloudera. All Rights Reserved. Not to be reproduced or shared without prior written consent from Cloudera. 35

36
run; the amount of memory used and available; and how many worker nodes are inthe cluster.
3. Click the Nodes link in the Cluster menu on the left. The bottom section will displaya list of worker nodes in the cluster.
4. Click the worker-1.example.com:8042 link under Node HTTP Address toopen the Node Manager UI on worker-1. This displays statistics about the selectednode, including amount of available memory, currently running applications (thereare none), and so on.
5. To return to the Resource Manager, click ResourceManager > RM Home on theleft.
© Copyright 2010–2017 Cloudera. All Rights Reserved. Not to be reproduced or shared without prior written consent from Cloudera. 36

37
Submit an Application to the YARN Cluster
6. If you don’t have a terminal window connected to the gateway node, start one now,using the desktop Gateway icon on your VM or the Applications > Connect toGateway item from the VM menu bar.
7. In your gateway session, run the example wordcount.py program on the YARNcluster to count the frequency of words in the Knowledge Base file set:
$ spark2-submit --master yarn \ $DEVSH/exercises/yarn/wordcount.py /loudacre/kb/*
The spark2-submit command is used to submit a Spark program for executionon the cluster. Since Spark is managed by YARN on the course VM, this gives us theopportunity to see how the YARN UI displays information about a running job. Fornow, focus on learning about the YARN UI.
While the application is running, continue with the next steps. If it completes beforeyou finish the exercise, go to the terminal, press the up arrow until you get to thespark2-submit command again, and rerun the application.
View the Application in the Hue Job Browser
8. Go to Hue in Firefox, and select the Job Browser. (Depending on the width of yourbrowser, you may see the whole label, or just the icon.)
9. The Job Browser displays a list of currently running and recently completedapplications. (If you don’t see the application you just started, wait a few seconds,the page will automatically reload; it can take some time for the application to beaccepted and start running.) Review the entry for the current job.
© Copyright 2010–2017 Cloudera. All Rights Reserved. Not to be reproduced or shared without prior written consent from Cloudera. 37

38
This page allows you to click the application ID to see details of the runningapplication, or to kill a running job. (Do not do that now though!)
View the Application in the YARN UITo get a more detailed view of the cluster, use the YARN UI.
10. Reload the YARN RM page in Firefox. Notice that the application you just started isdisplayed in the list of applications in the bottom section of the RM home page.
11. As you did in the first exercise section, select Nodes.
12. Select the node HTTP address link for worker-1 to open the Node Manager UI onthat node.
13. Now that an application is running, you can click List of Applications to see theapplication you submitted.
14. If your application is still running, try clicking on List of Containers.
This will display the containers the Resource Manager has allocated on the selectednode for the current application. (No containers will show if no applications arerunning; if you missed it because the application completed, you can run theapplication again. In the terminal window, use the up arrow key to recall previouscommands.)
© Copyright 2010–2017 Cloudera. All Rights Reserved. Not to be reproduced or shared without prior written consent from Cloudera. 38

39
View the Application Using the yarn Command
15. Open a second gateway session terminal window.
Tip: Resize the terminal window to be as wide as possible to make it easier to readthe command output.
16. View the list of currently running applications.
$ yarn application -list
If your application is still running, you should see it listed, including the applicationID (such as application_1469799128160_0001), the application name(PythonWordCount), the type (SPARK), and so on.
If there are no applications on the list, your application has probably finishedrunning. By default, only current applications are included. Use the -appStatesALL option to include all applications in the list:
$ yarn application -list -appStates ALL
17. Take note of your application’s ID (such asapplication_1469799128160_0001), and use it in place of app-id in thecommand below to get a detailed status report on the application.
$ yarn application -status app-id
Bonus Exercise: View the Application in Cloudera ManagerIf you have more time, attempt this extra bonus exercise.
1. In the web browser on your VM, go to the Cloudera Manager UI using the providedbookmark.
2. Log into Cloudera Manager with the username admin and password admin.
© Copyright 2010–2017 Cloudera. All Rights Reserved. Not to be reproduced or shared without prior written consent from Cloudera. 39

40
3. On the Cloudera Manager home page, open the Clusters menu and select YARNApplications.
4. On the YARN-1 management page, select the Applications tab.
Applications that are currently running or have recently run are shown. Confirmthat the application you ran above is displayed in the list. (If your application hascompleted, you can restart it to explore the CM Applications manager working witha running application.)
5. Optional: Continue exploring the CM YARN applications manager. For example, trythe Collect Diagnostics button, or other action items available in the drop-downmenu shown to the right of each application.
This is the end of the exercise.
© Copyright 2010–2017 Cloudera. All Rights Reserved. Not to be reproduced or shared without prior written consent from Cloudera. 40

41
Hands-On Exercise: Exploring DataFrames Using theApache Spark Shell
Files and Data Used in This Exercise
Exercise directory $DEVSH/exercises/spark-shellData files (local) $DEVDATA/devices.json
In this exercise, you will use the Spark shell to work with DataFrames.
You will start by viewing and bookmarking the Spark documentation in your browser.Then you will start the Spark shell and read a simple JSON file into a DataFrame.
Important: This exercise depends on a previous exercise: “Access HDFS with CommandLine and Hue.” If you did not complete that exercise, run the course catch-up script andadvance to the current exercise:
$ $DEVSH/scripts/catchup.sh
View the Spark Documentation
1. Start Firefox in your Virtual Machine and view the Spark documentation by visitingthe URI http://spark.apache.org/docs/2.1.0/.
2. From the Programming Guides menu, select the DataFrames, Datasets and SQL.Briefly review the guide and bookmark the page for later review.
3. From the API Docs menu, select either Scala or Python, depending on yourlanguage preference. Bookmark the API page for use during class. Later exerciseswill refer you to this documentation.
4. If you are viewing the Scala API, notice that the package names are displayed onthe left. Use the search box or scroll down to find the org.apache.spark.sqlpackage. This package contains most of the classes and objects you will be workingwith in this course. In particular, note the Dataset class. Although this exercisefocuses on DataFrames, remember that DataFrames are simply an alias for Datasetsof Row objects. So all the DataFrame operations you will practice using in thisexercise are documented on the Dataset class.
5. If you are viewing the Python API, locate the pyspark.sql module. This modulecontains most of the classes you will be working with in this course. At the top aresome of the key classes in the module. View the API for the DataFrame class; theseare the operations you will practice using in this exercise.
© Copyright 2010–2017 Cloudera. All Rights Reserved. Not to be reproduced or shared without prior written consent from Cloudera. 41
42
Start the Spark ShellYou may choose to do the remaining steps in this exercise using either Scala or Python.
Note on Spark Shell PromptTo help you keep track of whether a Spark command is Pythonor Scala, the prompt will be shown here as either pyspark>or scala>. Some commands are the same for both Scala andPython. These will be shown with a > undesignated prompt. Theactual prompt displayed in the shell will vary depending on whichversion of Python or Scala you are using and which commandnumber you are on.
6. If you don’t already have a terminal window connected to the gateway node,start one now, using the desktop Connect to Gateway icon on your VM or theApplications > Connect to Gateway item from the VM menu bar.
7. In the terminal window, start the Spark 2 shell. Start either the Python shell or theScala shell, not both.
To start the Python shell, use the pyspark2 command.
$ pyspark2
To start the Scala shell, use the spark2-shell command.
$ spark2-shell
You may get several WARN messages, which you can disregard.
8. Spark creates a SparkSession object for you called spark. Make sure the objectexists. Use the first command below if you are using Python, and the second one ifyou are using Scala. (You only need to complete the exercises in Python or Scala.)
pyspark> spark
scala> spark
Python will display information about the spark object such as:
<pyspark.sql.session.SparkSession at address>
© Copyright 2010–2017 Cloudera. All Rights Reserved. Not to be reproduced or shared without prior written consent from Cloudera. 42
43
Scala will display similar information in a different format:
org.apache.spark.sql.SparkSession =org.apache.spark.sql.SparkSession@address
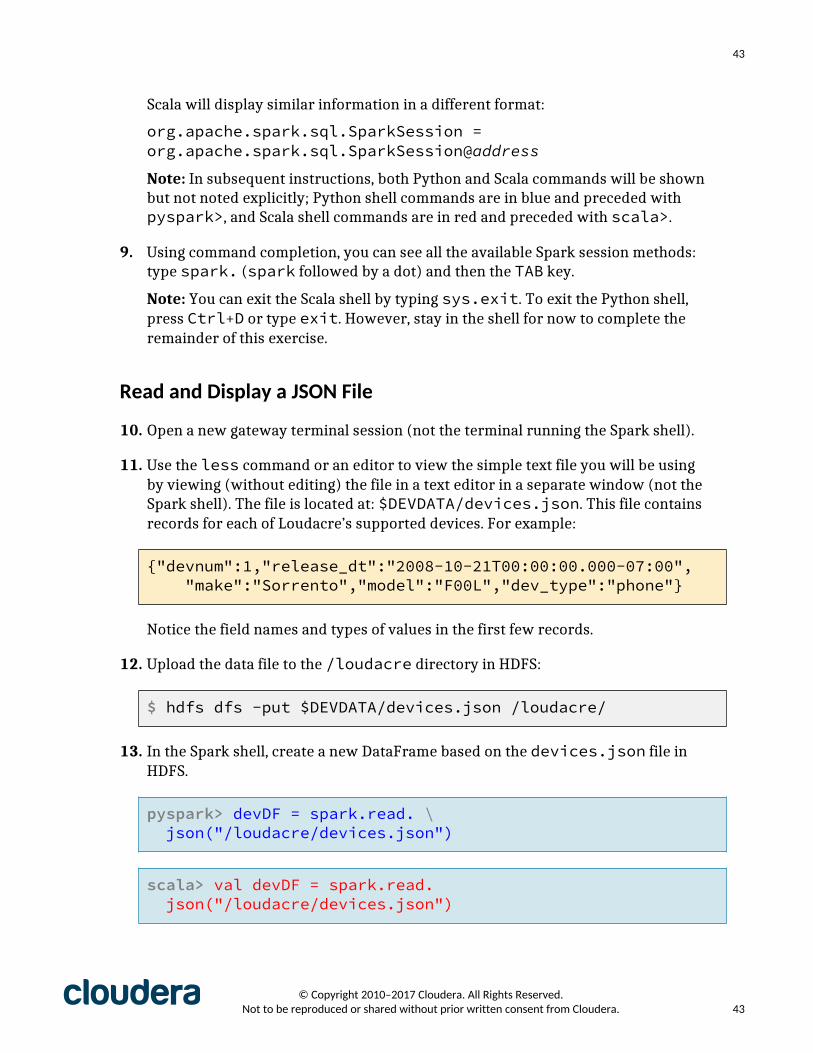
Note: In subsequent instructions, both Python and Scala commands will be shownbut not noted explicitly; Python shell commands are in blue and preceded withpyspark>, and Scala shell commands are in red and preceded with scala>.
9. Using command completion, you can see all the available Spark session methods:type spark. (spark followed by a dot) and then the TAB key.
Note: You can exit the Scala shell by typing sys.exit. To exit the Python shell,press Ctrl+D or type exit. However, stay in the shell for now to complete theremainder of this exercise.
Read and Display a JSON File
10. Open a new gateway terminal session (not the terminal running the Spark shell).
11. Use the less command or an editor to view the simple text file you will be usingby viewing (without editing) the file in a text editor in a separate window (not theSpark shell). The file is located at: $DEVDATA/devices.json. This file containsrecords for each of Loudacre’s supported devices. For example:
{"devnum":1,"release_dt":"2008-10-21T00:00:00.000-07:00", "make":"Sorrento","model":"F00L","dev_type":"phone"}
Notice the field names and types of values in the first few records.
12. Upload the data file to the /loudacre directory in HDFS:
$ hdfs dfs -put $DEVDATA/devices.json /loudacre/
13. In the Spark shell, create a new DataFrame based on the devices.json file inHDFS.
pyspark> devDF = spark.read. \ json("/loudacre/devices.json")
scala> val devDF = spark.read. json("/loudacre/devices.json")
© Copyright 2010–2017 Cloudera. All Rights Reserved. Not to be reproduced or shared without prior written consent from Cloudera. 43
44
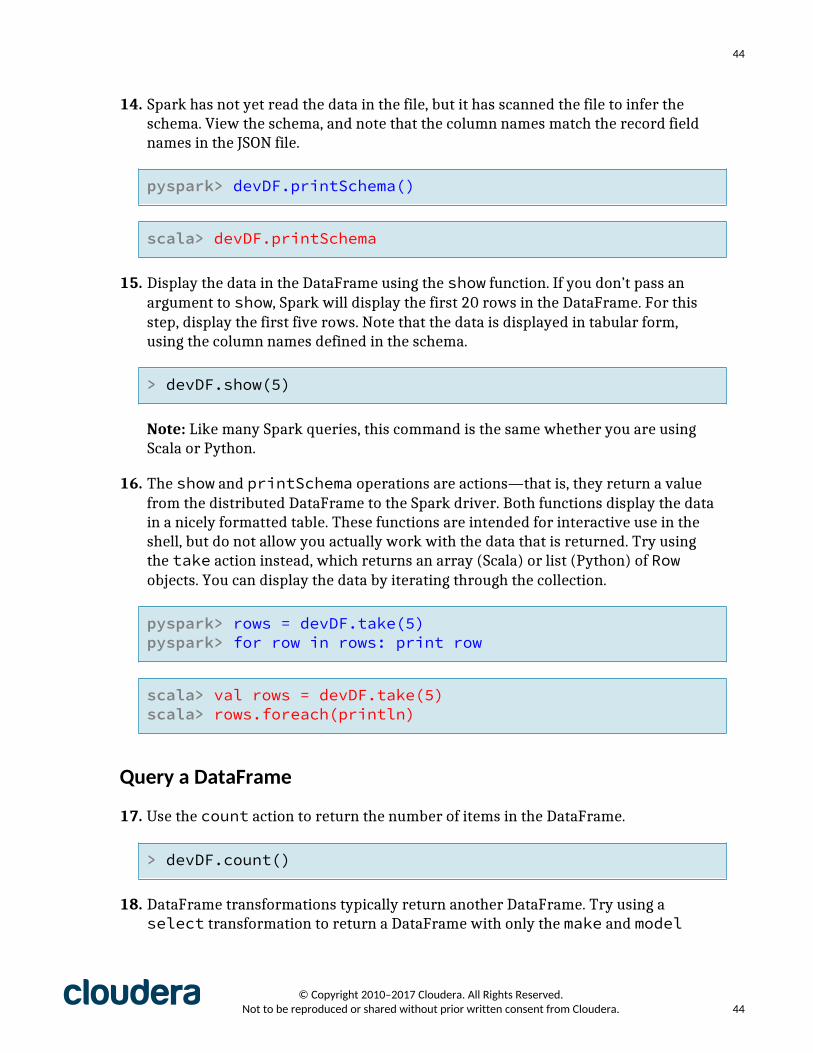
14. Spark has not yet read the data in the file, but it has scanned the file to infer theschema. View the schema, and note that the column names match the record fieldnames in the JSON file.
pyspark> devDF.printSchema()
scala> devDF.printSchema
15. Display the data in the DataFrame using the show function. If you don’t pass anargument to show, Spark will display the first 20 rows in the DataFrame. For thisstep, display the first five rows. Note that the data is displayed in tabular form,using the column names defined in the schema.
> devDF.show(5)
Note: Like many Spark queries, this command is the same whether you are usingScala or Python.
16. The show and printSchema operations are actions—that is, they return a valuefrom the distributed DataFrame to the Spark driver. Both functions display the datain a nicely formatted table. These functions are intended for interactive use in theshell, but do not allow you actually work with the data that is returned. Try usingthe take action instead, which returns an array (Scala) or list (Python) of Rowobjects. You can display the data by iterating through the collection.
pyspark> rows = devDF.take(5)pyspark> for row in rows: print row
scala> val rows = devDF.take(5)scala> rows.foreach(println)
Query a DataFrame
17. Use the count action to return the number of items in the DataFrame.
> devDF.count()
18. DataFrame transformations typically return another DataFrame. Try using aselect transformation to return a DataFrame with only the make and model
© Copyright 2010–2017 Cloudera. All Rights Reserved. Not to be reproduced or shared without prior written consent from Cloudera. 44

45
columns, then display its schema. Note that only the selected columns are in theschema.
pyspark> makeModelDF = devDF.select("make","model")pyspark> makeModelDF.printSchema()
scala> val makeModelDF = devDF.select("make","model")scala> makeModelDF.printSchema
19. A query is a series of one or more transformations followed by an action. Sparkdoes not execute the query until you call the action operation. Display the first 20lines of the final DataFrame in the series using the show action.
pyspark> makeModelDF.show()
scala> makeModelDF.show
20. Transformations in a query can be chained together. Execute a single command toshow the results of a query using select and where. The resulting DataFrame willcontain only the columns devnum, make, and model, and only the rows where themake is Ronin.
pyspark> devDF.select("devnum","make","model"). \ where("make = 'Ronin'"). \ show()
scala> devDF.select("devnum","make","model"). where("make = 'Ronin'"). show
This is the end of the exercise.
© Copyright 2010–2017 Cloudera. All Rights Reserved. Not to be reproduced or shared without prior written consent from Cloudera. 45

46
Hands-On Exercise: Working with DataFrames andSchemas
Files and Data Used in This Exercise:
Exercise directory $DEVSH/exercises/dataframesData files (HDFS) /loudacre/devices.jsonHive Tables accounts
In this exercise, you will work with structured account and mobile device datausing DataFrames.
You will practice creating and saving DataFrames using different types of data sources,and inferring and defining schemas.
Important: This exercise depends on a previous exercise: “Exploring DataFrames Usingthe Spark Shell.” If you did not complete that exercise, run the course catch-up scriptand advance to the current exercise:
$ $DEVSH/scripts/catchup.sh
Create a DataFrame Based on a Hive Table
1. This exercise uses a DataFrame based on the accounts Hive table. Before youstart working in Spark, visit Hue in your browser, and use the Impala Query Editorto review the schema and data of the accounts table in the default database.
2. If you don’t have one already, open a terminal session to the gateway node, andstart the Spark 2 shell (either Scala or Python, as you prefer).
3. Create a new DataFrame using the Hive accounts table.
pyspark> accountsDF = spark.read.table("accounts")
scala> val accountsDF = spark.read.table("accounts")
4. Print the schema and the first few rows of the DataFrame, and note that the schemaand data are the same as the Hive table.
5. Create a new DataFrame with rows from the accounts data where the zip code is94913, and save the result to CSV files in the /loudacre/accounts_zip94913
© Copyright 2010–2017 Cloudera. All Rights Reserved. Not to be reproduced or shared without prior written consent from Cloudera. 46

47
HDFS directory. You can do this in a single command, as shown below, or withmultiple commands.
python> accountsDF.where("zipcode = 94913"). \ write.option("header","true"). \ csv("/loudacre/accounts_zip94913")
scala> accountsDF.where("zipcode = '94913'"). write.option("header","true"). csv("/loudacre/accounts_zip94913")
6. Use Hue or the command line (in a separate gateway session) to view the/loudacre/accounts_zip94913 directory in HDFS and the data in one of thesaved files. Confirm that the CSV file includes a header line, and that only recordsfor the selected zip code are included.
7. Optional: Try creating a new DataFrame based on the CSV files you created above.Compare the schema of the original accountsDF and the new DataFrame. What’sdifferent? Try again, this time setting the inferSchema option to true andcompare again.
Define a Schema for a DataFrame
8. If you have not done so yet, review the data in the HDFS file/loudacre/devices.json.
9. Create a new DataFrame based on the devices.json file. (This command couldtake several seconds while it infers the schema.)
pyspark> devDF = spark.read. \ json("/loudacre/devices.json")
scala> val devDF = spark.read. json("/loudacre/devices.json")
10. View the schema of the devDF DataFrame. Note the column names and types thatSpark inferred from the JSON file. In particular, note that the release_dt columnis of type string, whereas the data in the column actually represents a timestamp.
© Copyright 2010–2017 Cloudera. All Rights Reserved. Not to be reproduced or shared without prior written consent from Cloudera. 47
48
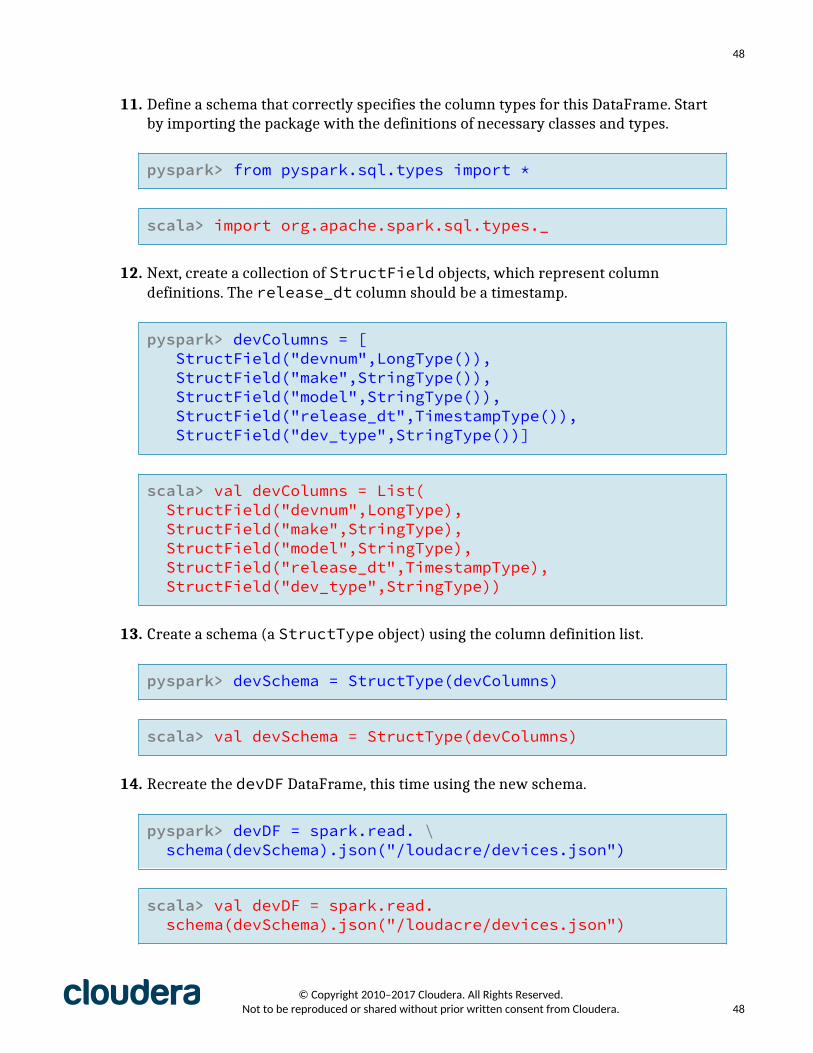
11. Define a schema that correctly specifies the column types for this DataFrame. Startby importing the package with the definitions of necessary classes and types.
pyspark> from pyspark.sql.types import *
scala> import org.apache.spark.sql.types._
12. Next, create a collection of StructField objects, which represent columndefinitions. The release_dt column should be a timestamp.
pyspark> devColumns = [ StructField("devnum",LongType()), StructField("make",StringType()), StructField("model",StringType()), StructField("release_dt",TimestampType()), StructField("dev_type",StringType())]
scala> val devColumns = List( StructField("devnum",LongType), StructField("make",StringType), StructField("model",StringType), StructField("release_dt",TimestampType), StructField("dev_type",StringType))
13. Create a schema (a StructType object) using the column definition list.
pyspark> devSchema = StructType(devColumns)
scala> val devSchema = StructType(devColumns)
14. Recreate the devDF DataFrame, this time using the new schema.
pyspark> devDF = spark.read. \ schema(devSchema).json("/loudacre/devices.json")
scala> val devDF = spark.read. schema(devSchema).json("/loudacre/devices.json")
© Copyright 2010–2017 Cloudera. All Rights Reserved. Not to be reproduced or shared without prior written consent from Cloudera. 48

49
15. View the schema and data of the new DataFrame, and confirm that therelease_dt column type is now timestamp.
16. Now that the device data uses the correct schema, write the data in Parquet format,which automatically embeds the schema. Save the Parquet data files into an HDFSdirectory called /loudacre/devices_parquet.
17. Optional: In a separate gateway terminal session, use parquet-tools to view theschema of the saved files.
$ parquet-tools schema \ hdfs://master-1/loudacre/devices_parquet/
Note that the type of the release_dt column is noted as int96; this is how Sparkdenotes a timestamp type in Parquet.
18. Create a new DataFrame using the Parquet files you saved in devices_parquetand view its schema. Note that Spark is able to correctly infer the timestamp typeof the release_dt column from Parquet’s embedded schema.
This is the end of the exercise.
© Copyright 2010–2017 Cloudera. All Rights Reserved. Not to be reproduced or shared without prior written consent from Cloudera. 49

50
Hands-On Exercise: Analyzing Data with DataFrameQueries
Files and Data Used in This Exercise:
Exercise directory $DEVSH/exercises/analyzeData files (local) $DEVDATA/accountdeviceData files (HDFS) /loudacre/devices.json
/loudacre/base_stations.parquetHive Tables accounts
In this exercise, you will analyze account and mobile device data using DataFramequeries.
First, you will practice using column expressions in queries. You will analyze data inDataFrames by grouping and aggregating data, and by joining two DataFrames. Thenyou will query multiple sets of data to find out how many of each mobile device modelis used in active accounts.
Important: This exercise depends on a previous exercise: “Working with DataFramesand Schemas.” If you did not complete that exercise, run the course catch-up script andadvance to the current exercise:
$ $DEVSH/scripts/catchup.sh
Query DataFrames Using Column Expressions
1. Optional: Review the API docs for the Column class (which is in the Python modulepyspark.sql, and the Scala package org.apache.spark.sql). Take note ofthe various options available.
2. Create a new DataFrame called accountsDF based on the Hive accounts table.
3. Try a simple query with select, using both column reference syntaxes.
pyspark> accountsDF. \ select(accountsDF["first_name"]).show() pyspark> accountsDF.select(accountsDF.first_name).show()
scala> accountsDF. select(accountsDF("first_name")).showscala> accountsDF.select($"first_name").show
© Copyright 2010–2017 Cloudera. All Rights Reserved. Not to be reproduced or shared without prior written consent from Cloudera. 50

51
4. To explore column expressions, create a column object to work with, based on thefirst_name column in the accountsDF DataFrame.
pyspark> fnCol = accountsDF.first_name
scala> val fnCol = accountsDF("first_name")
5. Note that the object type is Column. To see available methods and attributes, usetab completion—that is, enter fnCol. followed by TAB.
6. New Column objects are created when you perform operations on existingcolumns. Create a new Column object based on a column expression that identifiesusers whose first name is Lucy using the equality operator on the fnCol object youcreated above.
pyspark> lucyCol = (fnCol == "Lucy")
scala> val lucyCol = (fnCol === "Lucy")
7. Use the lucyCol column expression in a select statement. Because lucyColis based on a boolean expression, the column values will be true or falsedepending on the value of the first_name column. Confirm that users namedLucy are identified with the value true.
pyspark> accountsDF. \ select(accountsDF.first_name,accountsDF.last_name,lucyCol).show()
scala> accountsDF. select($"first_name",$"last_name",lucyCol).show
8. The where operation requires a boolean-based column expression. Use thelucyCol column expression in a where transformation and view the data in theresulting DataFrame. Confirm that only users named Lucy are in the data.
> accountsDF.where(lucyCol).show(5)
© Copyright 2010–2017 Cloudera. All Rights Reserved. Not to be reproduced or shared without prior written consent from Cloudera. 51
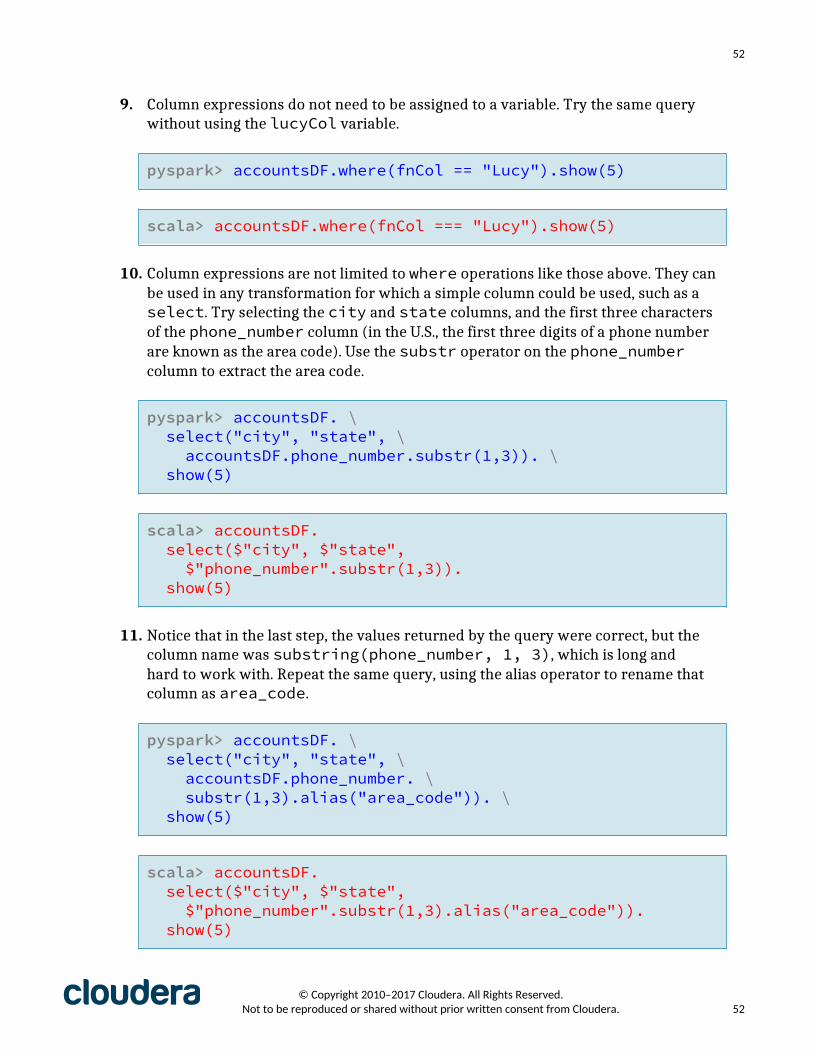
52
9. Column expressions do not need to be assigned to a variable. Try the same querywithout using the lucyCol variable.
pyspark> accountsDF.where(fnCol == "Lucy").show(5)
scala> accountsDF.where(fnCol === "Lucy").show(5)
10. Column expressions are not limited to where operations like those above. They canbe used in any transformation for which a simple column could be used, such as aselect. Try selecting the city and state columns, and the first three charactersof the phone_number column (in the U.S., the first three digits of a phone numberare known as the area code). Use the substr operator on the phone_numbercolumn to extract the area code.
pyspark> accountsDF. \ select("city", "state", \ accountsDF.phone_number.substr(1,3)). \ show(5)
scala> accountsDF. select($"city", $"state", $"phone_number".substr(1,3)). show(5)
11. Notice that in the last step, the values returned by the query were correct, but thecolumn name was substring(phone_number, 1, 3), which is long andhard to work with. Repeat the same query, using the alias operator to rename thatcolumn as area_code.
pyspark> accountsDF. \ select("city", "state", \ accountsDF.phone_number. \ substr(1,3).alias("area_code")). \ show(5)
scala> accountsDF. select($"city", $"state", $"phone_number".substr(1,3).alias("area_code")). show(5)
© Copyright 2010–2017 Cloudera. All Rights Reserved. Not to be reproduced or shared without prior written consent from Cloudera. 52
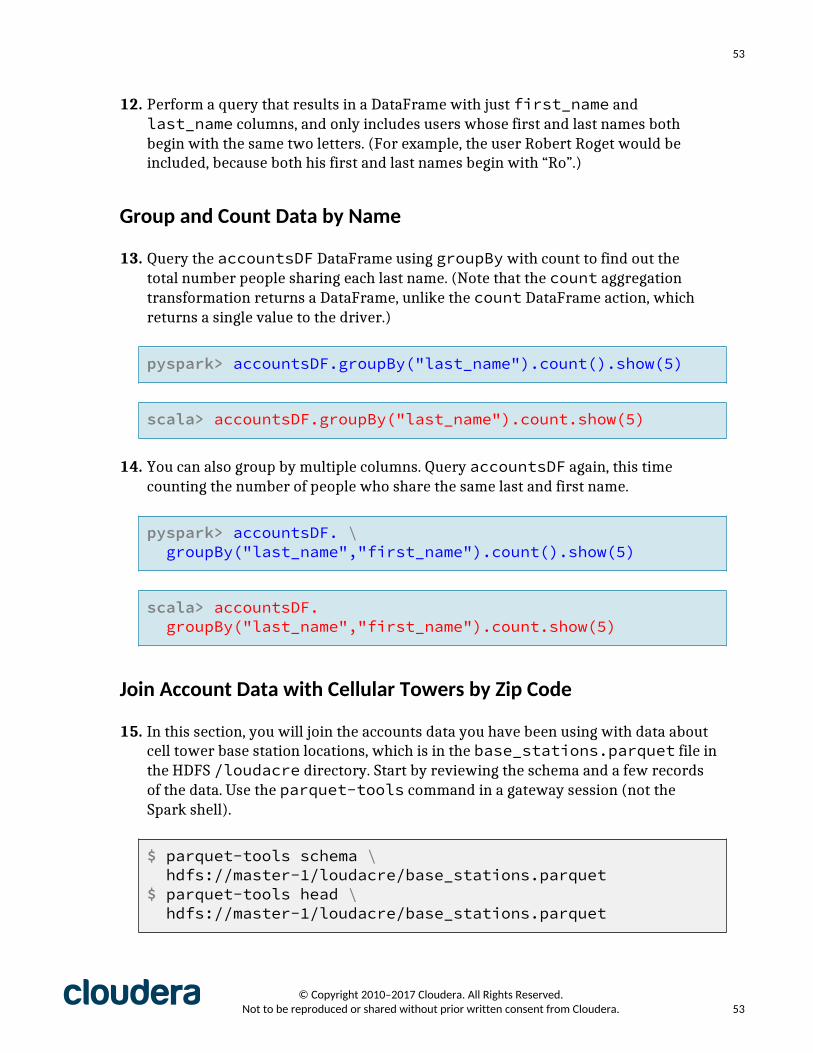
53
12. Perform a query that results in a DataFrame with just first_name andlast_name columns, and only includes users whose first and last names bothbegin with the same two letters. (For example, the user Robert Roget would beincluded, because both his first and last names begin with “Ro”.)
Group and Count Data by Name
13. Query the accountsDF DataFrame using groupBy with count to find out thetotal number people sharing each last name. (Note that the count aggregationtransformation returns a DataFrame, unlike the count DataFrame action, whichreturns a single value to the driver.)
pyspark> accountsDF.groupBy("last_name").count().show(5)
scala> accountsDF.groupBy("last_name").count.show(5)
14. You can also group by multiple columns. Query accountsDF again, this timecounting the number of people who share the same last and first name.
pyspark> accountsDF. \ groupBy("last_name","first_name").count().show(5)
scala> accountsDF. groupBy("last_name","first_name").count.show(5)
Join Account Data with Cellular Towers by Zip Code
15. In this section, you will join the accounts data you have been using with data aboutcell tower base station locations, which is in the base_stations.parquet file inthe HDFS /loudacre directory. Start by reviewing the schema and a few recordsof the data. Use the parquet-tools command in a gateway session (not theSpark shell).
$ parquet-tools schema \ hdfs://master-1/loudacre/base_stations.parquet$ parquet-tools head \ hdfs://master-1/loudacre/base_stations.parquet
© Copyright 2010–2017 Cloudera. All Rights Reserved. Not to be reproduced or shared without prior written consent from Cloudera. 53

54
16. In your Spark shell, create a new DataFrame called baseDF using the base stationsdata. Review the baseDF schema and data to ensure it matches the data in theParquet file.
17. Some account holders live in zip codes that have a base station. Join baseDF andaccountsDF to find those users, and for each, include their account ID, first name,last name, and the ID and location data for the base station in their zip code.
pyspark> accountsDF. \ select("acct_num","first_name","last_name","zipcode"). \ join(baseDF, baseDF.zip == accountsDF.zipcode). \ show()
scala> accountsDF. select("acct_num","first_name","last_name","zipcode"). join(baseDF,$"zip" === $"zipcode").show()
Count Active Devices
18. The accountdevice CSV data files contain data lists all the devices used by all theaccounts. Each row in the data set includes a row ID, an account ID, a device ID forthe type of device, the date the device was activated for the account, and the specificdevice’s ID for that account.
The CSV data files are in the $DEVDATA/accountdevice directory on thegateway node local file system. Review the data in the data set, then upload thedirectory and its contents to the HDFS directory /loudacre/accountdevice.
19. Create a DataFrame based on the accountdevice data files.
20. Use the account device data and the DataFrames you created previously in thisexercise to find the total number of each device models across all active accounts(that is, accounts that have not been closed). The new DataFrame should be sortedfrom most to least common model. Save the data as Parquet files in a directorycalled /loudacre/top_devices with the following columns:
ColumnName
Description Example Value
device_id The ID number of each known device(including those that might not be inuse by any account)
18
make The manufacturer name for the device Ronin
© Copyright 2010–2017 Cloudera. All Rights Reserved. Not to be reproduced or shared without prior written consent from Cloudera. 54

55
ColumnName
Description Example Value
model The model name for the device Novelty Note 2active_num The total number of the model used
by active accounts2092
Hints:
• Active accounts are those with a null value for acct_close_dt (account closedate) in the accounts table.
• The account_id column in the device accounts data corresponds to theacct_num column in accountsDF.
• The device_id column in the device accounts data corresponds to the devnumcolumn in the list of known devices in the /loudacre/devices.json file.
• When you count devices, use withColumnRenamed to rename the countcolumn to active_num. (The count column name is ambiguous because it isboth a function and a column.)
This is the end of the exercise.
© Copyright 2010–2017 Cloudera. All Rights Reserved. Not to be reproduced or shared without prior written consent from Cloudera. 55
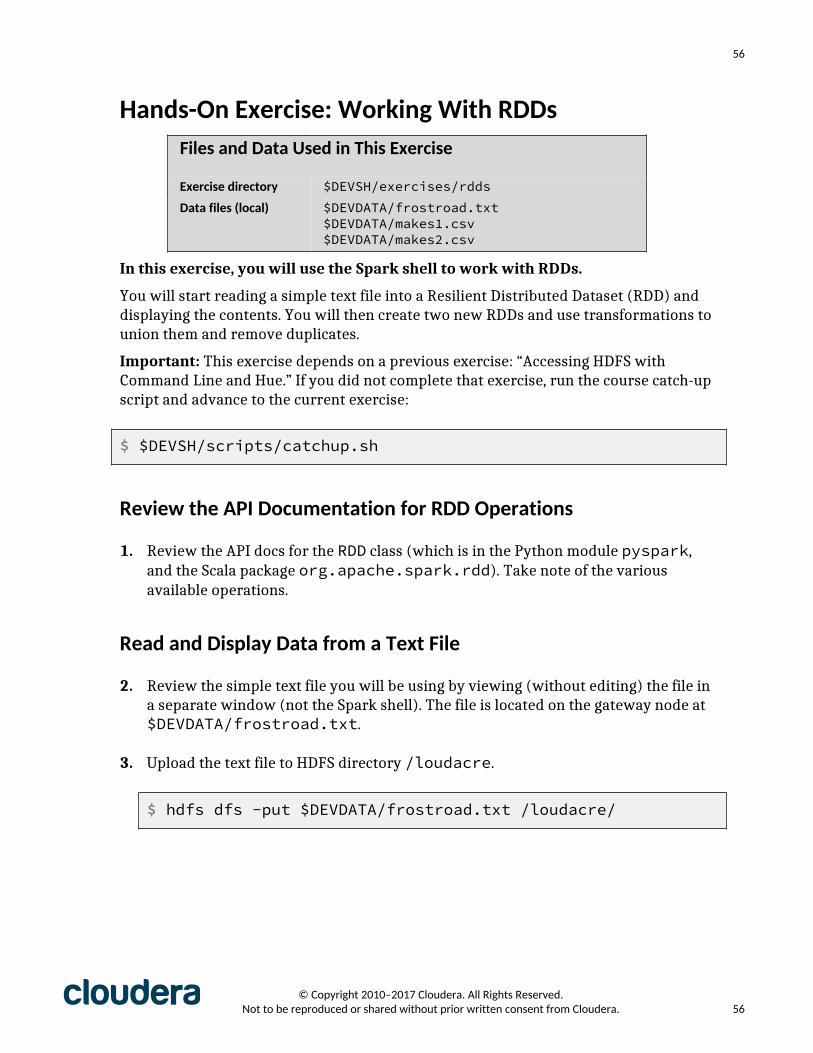
56
Hands-On Exercise: Working With RDDsFiles and Data Used in This Exercise
Exercise directory $DEVSH/exercises/rddsData files (local) $DEVDATA/frostroad.txt
$DEVDATA/makes1.csv$DEVDATA/makes2.csv
In this exercise, you will use the Spark shell to work with RDDs.
You will start reading a simple text file into a Resilient Distributed Dataset (RDD) anddisplaying the contents. You will then create two new RDDs and use transformations tounion them and remove duplicates.
Important: This exercise depends on a previous exercise: “Accessing HDFS withCommand Line and Hue.” If you did not complete that exercise, run the course catch-upscript and advance to the current exercise:
$ $DEVSH/scripts/catchup.sh
Review the API Documentation for RDD Operations
1. Review the API docs for the RDD class (which is in the Python module pyspark,and the Scala package org.apache.spark.rdd). Take note of the variousavailable operations.
Read and Display Data from a Text File
2. Review the simple text file you will be using by viewing (without editing) the file ina separate window (not the Spark shell). The file is located on the gateway node at$DEVDATA/frostroad.txt.
3. Upload the text file to HDFS directory /loudacre.
$ hdfs dfs -put $DEVDATA/frostroad.txt /loudacre/
© Copyright 2010–2017 Cloudera. All Rights Reserved. Not to be reproduced or shared without prior written consent from Cloudera. 56

57
4. In the Spark shell, define an RDD based on the frostroad.txt text file.
pyspark> myRDD = sc. \ textFile("/loudacre/frostroad.txt")
scala> val myRDD = sc. textFile("/loudacre/frostroad.txt")
5. Using command completion, you can see all the available transformations andoperations you can perform on an RDD. Type myRDD. and then the TAB key.
6. Spark has not yet read the file. It will not do so until you perform an action on theRDD. Try counting the number of elements in the RDD using the count action:
pyspark> myRDD.count()
scala> myRDD.count
The count operation causes the RDD to be materialized (created and populated).The number of lines (23) should be displayed, for example:
Out[2]: 23 (Python) orres1: Long = 23 (Scala)
7. Call the collect operation to return all data in the RDD to the Spark driver. Takenote of the type of the return value; in Python will be a list of strings, and in Scala itwill be an array of strings.
Note: collect returns the entire set of data. This is convenient for very smallRDDs like this one, but be careful using collect for more typical large sets of data.
pyspark> lines = myRDD.collect()
scala> val lines = myRDD.collect
8. Display the contents of the collected data by looping through the collection.
pyspark> for line in lines: print line
scala> for (line <- lines) println(line)
© Copyright 2010–2017 Cloudera. All Rights Reserved. Not to be reproduced or shared without prior written consent from Cloudera. 57

58
Transform Data in an RDD
9. In this exercise, you will load two text files containing the names of various cellphone makes, and append one to the other. Review the two text files you will beusing by viewing (without editing) the file in a separate window. The files aremakes1.txt and makes2.txt in the $DEVDATA directory on the gateway node.
10. Upload the two text file to HDFS directory /loudacre.
$ hdfs dfs -put $DEVDATA/makes*.txt /loudacre/
11. In Spark, create an RDD called makes1RDD based on the /loudacre/makes1.txt file.
pyspark> makes1RDD = sc.textFile("/loudacre/makes1.txt")
scala> val makes1RDD = sc.textFile("/loudacre/makes1.txt")
12. Display the contents of the makes1RDD data using collect and then loopingthrough returned collection.
pyspark> for make in makes1RDD.collect(): print make
scala> for (make <- makes1RDD.collect()) println(make)
13. Repeat the previous steps to create and display an RDD called makes2RDD basedon the second file, /loudacre/makes2.txt.
14. Create a new RDD by appending the second RDD to the first using the uniontransformation.
pyspark> allMakesRDD = makes1RDD.union(makes2RDD)
scala> val allMakesRDD = makes1RDD.union(makes2RDD)
15. Collect and display the contents of the new allMakesRDD RDD.
16. Use the distinct transformation to remove duplicates from allMakesRDD.Collect and display the contents to confirm that duplicate elements were removed.
© Copyright 2010–2017 Cloudera. All Rights Reserved. Not to be reproduced or shared without prior written consent from Cloudera. 58
59
17. Optional: Try performing different transformations on the RDDs you created above,such as intersection, subtract, or zip. See the RDD API documentation fordetails.
This is the end of the exercise.
© Copyright 2010–2017 Cloudera. All Rights Reserved. Not to be reproduced or shared without prior written consent from Cloudera. 59

60
Hands-On Exercise: Transforming Data Using RDDsFiles and Data Used in This Exercise
Exercise directory $DEVSH/exercises/transform-rddsData files (local) $DEVDATA/weblogs/
$DEVDATA/devicestatus.txt
In this exercise, transform data in RDDs .
You will start reading a simple text file into a Resilient Distributed Dataset (RDD). Thenyou create an RDD based on Loudacre’s website log data and practice transforming thedata.
Important: This exercise depends on a previous exercise: “Accessing HDFS withCommand Line and Hue.” If you did not complete that exercise, run the course catch-upscript and advance to the current exercise:
$ $DEVSH/scripts/catchup.sh
Explore the Loudacre Web Log Files
1. In this section you will be using data in $DEVDATA/weblogs. Review one of the.log files in the directory. Note the format of the lines:
2. Copy the weblogs directory from the gateway filesystem to the /loudacre HDFSdirectory.
© Copyright 2010–2017 Cloudera. All Rights Reserved. Not to be reproduced or shared without prior written consent from Cloudera. 60

61
3. Create an RDD from the uploaded web logs data files in the /loudacre/weblogs/ directory in HDFS.
pyspark> logsRDD = sc.textFile("/loudacre/weblogs/")
scala> val logsRDD = sc.textFile("/loudacre/weblogs/")
4. Create an RDD containing only those lines that are requests for JPG files. Use thefilter operation with a transformation function that takes a string RDD elementand returns a boolean value.
pyspark> jpglogsRDD = \ logsRDD.filter(lambda line: ".jpg" in line)
scala> val jpglogsRDD = logsRDD.filter(line => line.contains(".jpg"))
5. Use take to return the first five lines of the data in jpglogsRDD. The return valueis a list of strings (in Python) or array of strings (in Scala).
pyspark> jpgLines = jpglogsRDD.take(5)
scala> val jpgLines = jpglogsRDD.take(5)
6. Loop through and display the strings returned by take.
pyspark> for line in jpgLines: print line
scala> jpgLines.foreach(println)
© Copyright 2010–2017 Cloudera. All Rights Reserved. Not to be reproduced or shared without prior written consent from Cloudera. 61

62
7. Now try using the map transformation to define a new RDD. Start with a simple mapfunction that returns the length of each line in the log file. This results in an RDD ofintegers.
pyspark> lineLengthsRDD = \ logsRDD.map(lambda line: len(line))
scala> val lineLengthsRDD = logsRDD.map(line => line.length)
8. Loop through and display the first five elements (integers) in the RDD.
9. Calculating line lengths is not very useful. Instead, try mapping each string inlogsRDD by splitting the strings based on spaces. The result will be an RDD inwhich each element is a list of strings (in Python) or an array of strings (in Scala).Each string represents a “field” in the web log line.
pyspark> lineFieldsRDD = \ logsRDD.map(lambda line: line.split(' '))
scala> val lineFieldsRDD = logsRDD.map(line => line.split(' '))
10. Return the first five elements of lineFieldsRDD. The result will be a list of lists ofstrings (in Python) or an array of arrays of strings (in Scala).
pyspark> lineFields = lineFieldsRDD.take(5)
scala> val lineFields = lineFieldsRDD.take(5)
11. Display the contents of the return from take. Unlike in examples above, whichreturned collections of simple values (strings and ints), this time you have a set ofcompound values (arrays or lists containing strings). Therefore, to display themproperly, you will need to loop through the arrays/lists in lineFields, and then
© Copyright 2010–2017 Cloudera. All Rights Reserved. Not to be reproduced or shared without prior written consent from Cloudera. 62

63
loop through each string in the array/list. (To make it easier to read the output, use------- to separate each set of field values.)
pyspark> for fields in lineFields: print "-------" for field in fields: print field
scala> for (fields <- lineFields) { println("-------") fields.foreach(println)}
12. Now that you know how map works, create a new RDD containing just the IPaddresses from each line in the log file. (The IP address is the first space-delimitedfield in each line.)
pyspark> ipsRDD = \ logsRDD.map(lambda line: line.split(' ')[0])pyspark> for ip in ipsRDD.take(10): print ip
scala> val ipsRDD = logsRDD.map(line => line.split(' ')(0))scala> ipsRDD.take(5).foreach(println)
13. Finally, save the list of IP addresses as a text file:
pyspark> ipsRDD.saveAsTextFile("/loudacre/iplist")
scala> ipsRDD.saveAsTextFile("/loudacre/iplist")
• Note: If you re-run this command, you will not be able to save to the samedirectory because it already exists. Be sure to first delete the directory usingeither the hdfs command (in a separate terminal window) or the Hue filebrowser.
14. In a gateway terminal window or the Hue file browser, list the contents of the/loudacre/iplist folder. Review the contents of one of the files to confirm thatthey were created correctly.
© Copyright 2010–2017 Cloudera. All Rights Reserved. Not to be reproduced or shared without prior written consent from Cloudera. 63

64
Map weblog entries to IP address/user ID pairs
15. Use RDD transformations to create a dataset consisting of the IP address andcorresponding user ID for each request for an HTML file. (Filter for files with the.html extension; disregard requests for other file types.) The user ID is the thirdfield in each log file line. Save the data into a comma-separated text file in thedirectory /loudacre/userips_csv. Make sure the data is saved in the form ofcomma-separated strings:
165.32.101.206,8100.219.90.44,102182.4.148.56,173246.241.6.175,45395175.223.172.207,4115…
16. Now that the data is in CSV format, it can easily be used by Spark SQL. Load the newCSV files in /loudacre/userips_csv created above into a DataFrame, thenview the data and schema.
Bonus Exercise 1: Clean device status dataIf you have more time, attempt this extra bonus exercise.
One common use of core Spark RDDs is data scrubbing—converting the data into aformat that can be used in Spark SQL. In this bonus exercise, you will process data inorder to get it into a standardized format for later processing.
Review the contents of the file $DEVDATA/devicestatus.txt. This file containsdata collected from mobile devices on Loudacre’s network, including device ID,current status, location, and so on. Because Loudacre previously acquired other mobileproviders’ networks, the data from different subnetworks has a different format. Notethat the records in this file have different field delimiters: some use commas, some usepipes (|), and so on. Your task is the following:
17. Upload the devicestatus.txt file to HDFS.
18. Determine which delimiter to use (the 20th character—position 19—is the first useof the delimiter).
19. Filter out any records which do not parse correctly (hint: each record should haveexactly 14 values).
20. Extract the date (first field), model (second field), device ID (third field), andlatitude and longitude (13th and 14th fields respectively).
© Copyright 2010–2017 Cloudera. All Rights Reserved. Not to be reproduced or shared without prior written consent from Cloudera. 64

65
21. The second field contains the device manufacturer and model name (such as RoninS2). Split this field by spaces to separate the manufacturer from the model (forexample, manufacturer Ronin, model S2). Keep just the manufacturer name.
22. Save the extracted data to comma-delimited text files in the/loudacre/devicestatus_etl directory on HDFS.
23. Confirm that the data in the file(s) was saved correctly. The lines in the file shouldall look similar to this, with all fields delimited by commas.
2014-03-15:10:10:20,Sorrento,8cc3b47e-bd01-4482-b500-28f2342679af,33.6894754264,-117.543308253
The solutions to the bonus exercise are in $DEVSH/exercises/rdds/bonus-dataclean/solution.
Bonus Exercise 2: Convert Multi-line XML files to CSV filesOne of the common uses for RDDs in core Spark is to transform data from unstructuredor semi-structured sources or formats that aren’t supported by Spark SQL to structuredformats you can use with Spark SQL. In this bonus exercise, you will convert a whole-file XML record to a CSV file that can be read into a DataFrame.
24. Review the data on the local Linux filesystem in the directory $DEVDATA/activations. Each XML file contains data for all the devices activated bycustomers during a specific month.
Sample input data:
<activations> <activation timestamp="1225499258" type="phone"> <account-number>316</account-number> <device-id> d61b6971-33e1-42f0-bb15-aa2ae3cd8680 </device-id> <phone-number>5108307062</phone-number> <model>iFruit 1</model> </activation> …</activations>
© Copyright 2010–2017 Cloudera. All Rights Reserved. Not to be reproduced or shared without prior written consent from Cloudera. 65
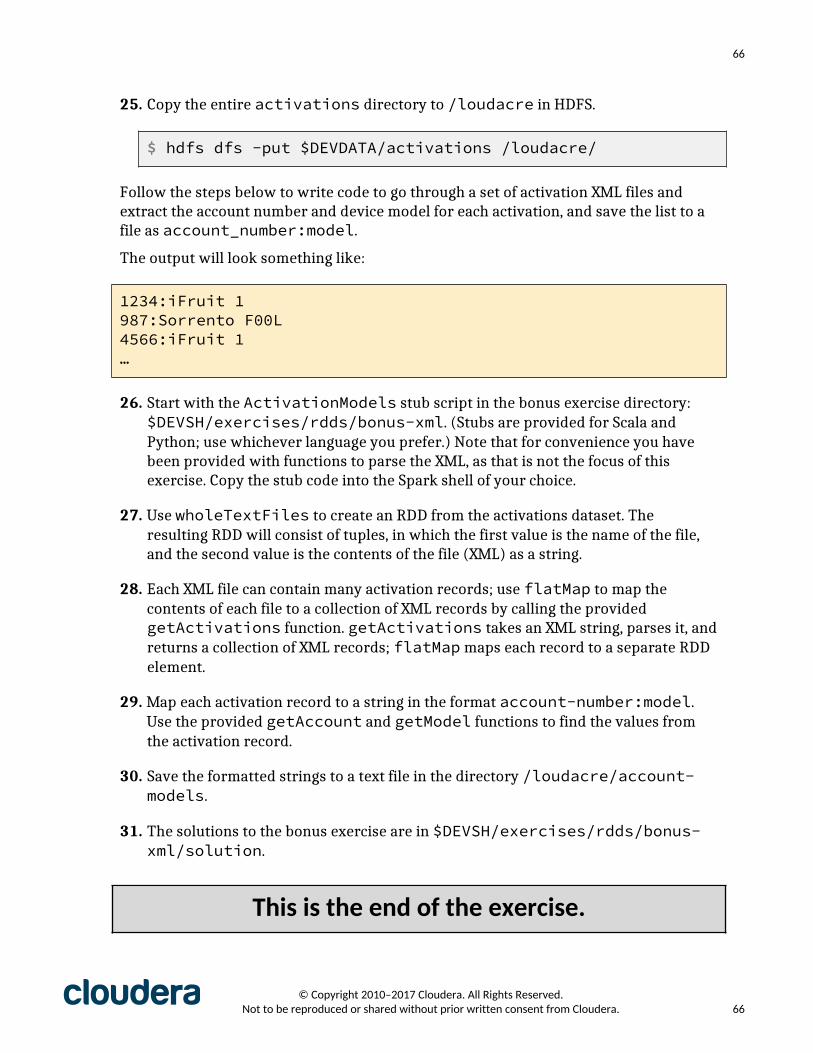
66
25. Copy the entire activations directory to /loudacre in HDFS.
$ hdfs dfs -put $DEVDATA/activations /loudacre/
Follow the steps below to write code to go through a set of activation XML files andextract the account number and device model for each activation, and save the list to afile as account_number:model.
The output will look something like:
1234:iFruit 1987:Sorrento F00L4566:iFruit 1…
26. Start with the ActivationModels stub script in the bonus exercise directory:$DEVSH/exercises/rdds/bonus-xml. (Stubs are provided for Scala andPython; use whichever language you prefer.) Note that for convenience you havebeen provided with functions to parse the XML, as that is not the focus of thisexercise. Copy the stub code into the Spark shell of your choice.
27. Use wholeTextFiles to create an RDD from the activations dataset. Theresulting RDD will consist of tuples, in which the first value is the name of the file,and the second value is the contents of the file (XML) as a string.
28. Each XML file can contain many activation records; use flatMap to map thecontents of each file to a collection of XML records by calling the providedgetActivations function. getActivations takes an XML string, parses it, andreturns a collection of XML records; flatMap maps each record to a separate RDDelement.
29. Map each activation record to a string in the format account-number:model.Use the provided getAccount and getModel functions to find the values fromthe activation record.
30. Save the formatted strings to a text file in the directory /loudacre/account-models.
31. The solutions to the bonus exercise are in $DEVSH/exercises/rdds/bonus-xml/solution.
This is the end of the exercise.
© Copyright 2010–2017 Cloudera. All Rights Reserved. Not to be reproduced or shared without prior written consent from Cloudera. 66
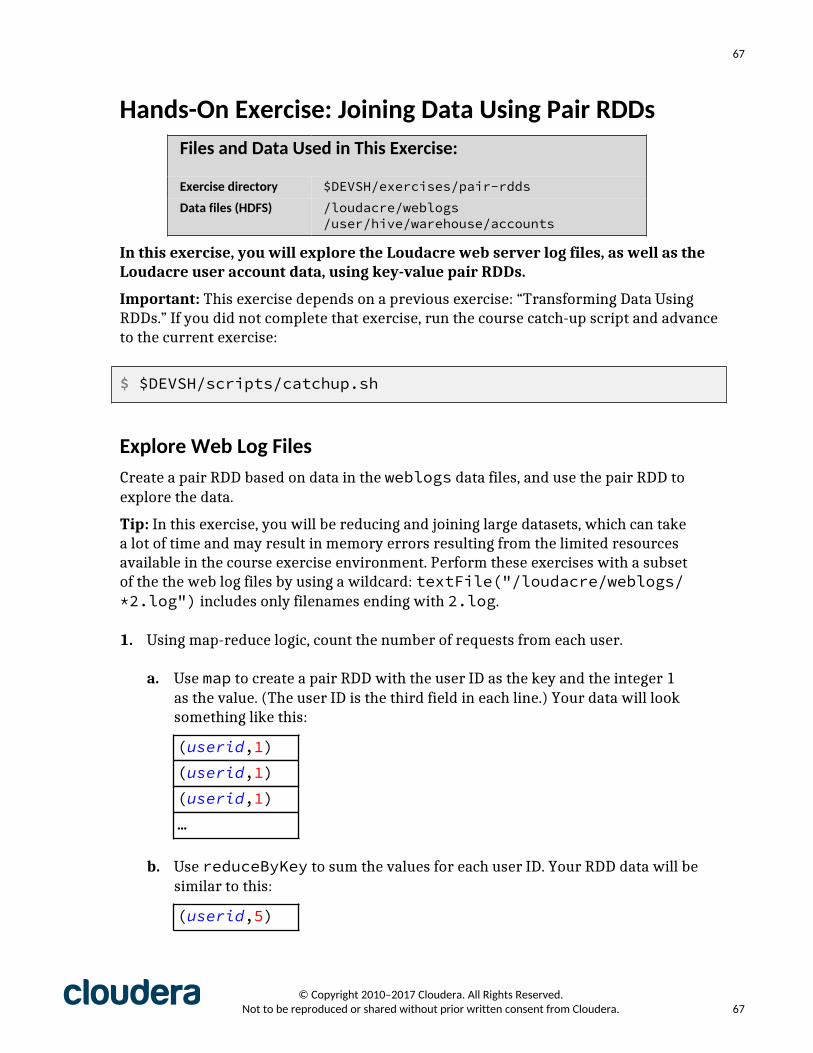
67
Hands-On Exercise: Joining Data Using Pair RDDsFiles and Data Used in This Exercise:
Exercise directory $DEVSH/exercises/pair-rddsData files (HDFS) /loudacre/weblogs
/user/hive/warehouse/accounts
In this exercise, you will explore the Loudacre web server log files, as well as theLoudacre user account data, using key-value pair RDDs.
Important: This exercise depends on a previous exercise: “Transforming Data UsingRDDs.” If you did not complete that exercise, run the course catch-up script and advanceto the current exercise:
$ $DEVSH/scripts/catchup.sh
Explore Web Log FilesCreate a pair RDD based on data in the weblogs data files, and use the pair RDD toexplore the data.
Tip: In this exercise, you will be reducing and joining large datasets, which can takea lot of time and may result in memory errors resulting from the limited resourcesavailable in the course exercise environment. Perform these exercises with a subsetof the the web log files by using a wildcard: textFile("/loudacre/weblogs/*2.log") includes only filenames ending with 2.log.
1. Using map-reduce logic, count the number of requests from each user.
a. Use map to create a pair RDD with the user ID as the key and the integer 1as the value. (The user ID is the third field in each line.) Your data will looksomething like this:
(userid,1)(userid,1)(userid,1)…
b. Use reduceByKey to sum the values for each user ID. Your RDD data will besimilar to this:
(userid,5)
© Copyright 2010–2017 Cloudera. All Rights Reserved. Not to be reproduced or shared without prior written consent from Cloudera. 67

68
(userid,7)(userid,2)…
2. Use countByKey to determine how many users visited the site for each frequency.That is, how many users visited once, twice, three times, and so on.
a. Use map to reverse the key and value, like this:
(5,userid)(7,userid)(2,userid)…
b. Use the countByKey action to return a map of frequency: user-count pairs.
3. Create an RDD where the user ID is the key, and the value is the list of all the IPaddresses that user has connected from. (IP address is the first field in each requestline.)
• Hint: Map to (userid,ipaddress) and then use groupByKey.
(userid,20.1.34.55)(userid,245.33.1.1)(userid,65.50.196.141)…
(userid,[20.1.34.55, 74.125.239.98])(userid,[75.175.32.10, 245.33.1.1, 66.79.233.99])(userid,[65.50.196.141])…
Join Web Log Data with Account DataReview the accounts data located in /user/hive/warehouse/accounts, whichcontains the data in the Hive accounts table. The first field in each line is the user
© Copyright 2010–2017 Cloudera. All Rights Reserved. Not to be reproduced or shared without prior written consent from Cloudera. 68

69
ID, which corresponds to the user ID in the web server logs. The other fields includeaccount details such as creation date, first and last name, and so on.
4. Join the accounts data with the weblog data to produce a dataset keyed by user IDwhich contains the user account information and the number of website hits forthat user.
a. Create an RDD, based on the accounts data, consisting of key/value-array pairs:(userid,[values…])
(9012,[9012,2008-11-24 10:04:08,\N,Cheryl,West, 4905 OliveStreet,…])(2312,[2312,2008-11-23 14:05:07,\N,Elizabeth,Kerns, 4703Eva Pearl Street,Richmond,CA,…])(1195,[1195,2008-11-02 17:12:12,2013-07-1816:42:36,Melissa, Roman,3539 James MartinCircle,Oakland,CA,…])…
b. Join the pair RDD with the set of user-id/hit-count pairs calculated in the firststep.
(9012,([9012,2008-11-24 10:04:08,\N,Cheryl,West, 4905 OliveStreet,San Francisco,CA,…],4))(2312,([2312,2008-11-23 14:05:07,\N,Elizabeth,Kerns, 4703Eva Pearl Street,Richmond,CA,…],8))(1195,([1195,2008-11-02 17:12:12,2013-07-1816:42:36,Melissa, Roman,3539 James MartinCircle,Oakland,CA,…],1))…
c. Display the user ID, hit count, and first name (4th value) and last name (5th
value) for the first five elements. The output should look similar to this:
9012 6 Rick Hopper1123 8 Lucio Arnold1093 2 Brittany Parrott…
© Copyright 2010–2017 Cloudera. All Rights Reserved. Not to be reproduced or shared without prior written consent from Cloudera. 69

70
Bonus ExercisesIf you have more time, attempt the following extra bonus exercises:
1. Use keyBy to create an RDD of account data with the postal code (9th field in theCSV file) as the key.
Tip: Assign this new RDD to a variable for use in the next bonus exercise.
2. Create a pair RDD with postal code as the key and a list of names (Last Name,FirstName) in that postal code as the value.
• Hint: First name and last name are the 4th and 5th fields respectively.
• Optional: Try using the mapValues operation.
3. Sort the data by postal code, then for the first five postal codes, display the code andlist the names in that postal zone. For example:
--- 85003Jenkins,ThadRick,EdwardLindsay,Ivy…--- 85004Morris,EricReiser,HazelGregg,AliciaPreston,Elizabeth…
This is the end of the exercise.
© Copyright 2010–2017 Cloudera. All Rights Reserved. Not to be reproduced or shared without prior written consent from Cloudera. 70

71
Hands-On Exercise: Querying Tables and Views withSQL
Files and Data Used in This Exercise:
Exercise directory $DEVSH/exercises/spark-sqlData files (local) $DEVDATA/accountdeviceHive Tables accounts
In this exercise, you will use the Catalog API to explore Hive tables, and createDataFrames by executing SQL queries.
Use the Catalog API to list the tables in the default Hive database, and view the schemaof the accounts table. Perform queries on the accounts table, and review the resultingDataFrames. Create a temporary view based on the accountdevice CSV files, and useSQL to join that table with the accounts table.
Important: This exercise depends on a previous exercise: “Analyzing Data withDataFrame Queries.” If you did not complete that exercise, run the course catch-upscript and advance to the current exercise:
$ $DEVSH/scripts/catchup.sh
Show tables and columns using the Catalog API
1. View the list of current Hive tables and temporary views in the default database.
pyspark> for table in spark.catalog.listTables(): print table
scala> spark.catalog.listTables.show
The list should include the accounts table.
© Copyright 2010–2017 Cloudera. All Rights Reserved. Not to be reproduced or shared without prior written consent from Cloudera. 71
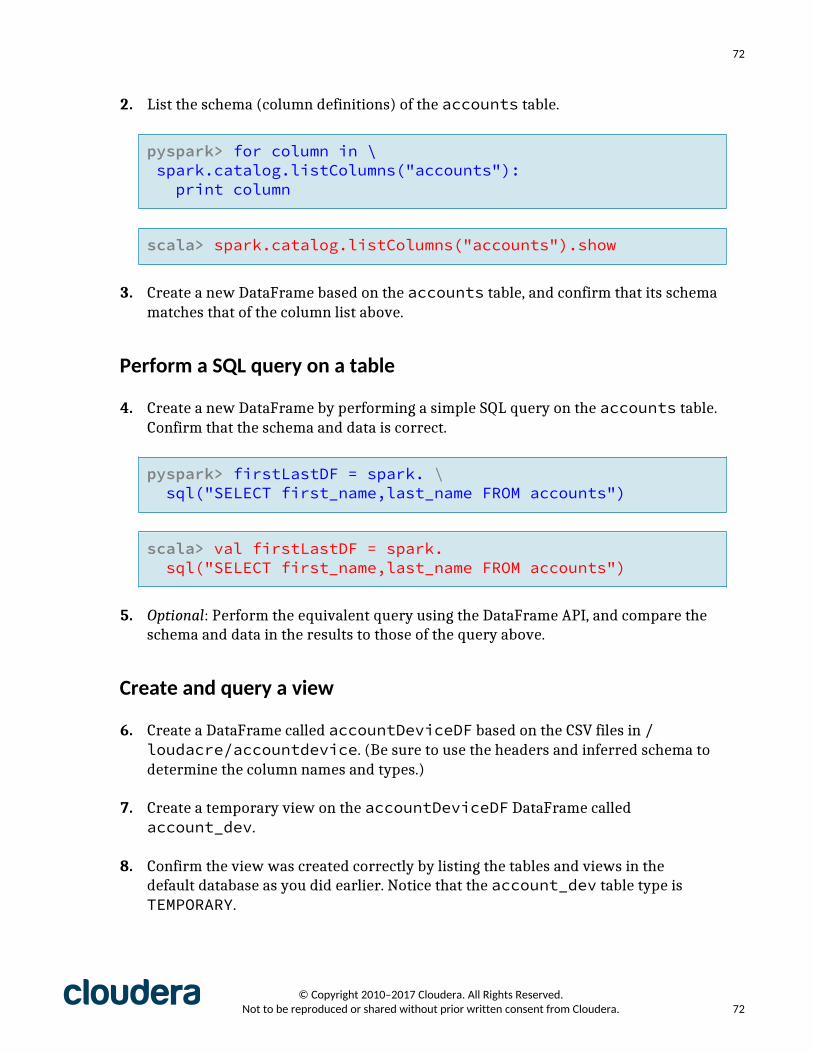
72
2. List the schema (column definitions) of the accounts table.
pyspark> for column in \ spark.catalog.listColumns("accounts"): print column
scala> spark.catalog.listColumns("accounts").show
3. Create a new DataFrame based on the accounts table, and confirm that its schemamatches that of the column list above.
Perform a SQL query on a table
4. Create a new DataFrame by performing a simple SQL query on the accounts table.Confirm that the schema and data is correct.
pyspark> firstLastDF = spark. \ sql("SELECT first_name,last_name FROM accounts")
scala> val firstLastDF = spark. sql("SELECT first_name,last_name FROM accounts")
5. Optional: Perform the equivalent query using the DataFrame API, and compare theschema and data in the results to those of the query above.
Create and query a view
6. Create a DataFrame called accountDeviceDF based on the CSV files in /loudacre/accountdevice. (Be sure to use the headers and inferred schema todetermine the column names and types.)
7. Create a temporary view on the accountDeviceDF DataFrame calledaccount_dev.
8. Confirm the view was created correctly by listing the tables and views in thedefault database as you did earlier. Notice that the account_dev table type isTEMPORARY.
© Copyright 2010–2017 Cloudera. All Rights Reserved. Not to be reproduced or shared without prior written consent from Cloudera. 72
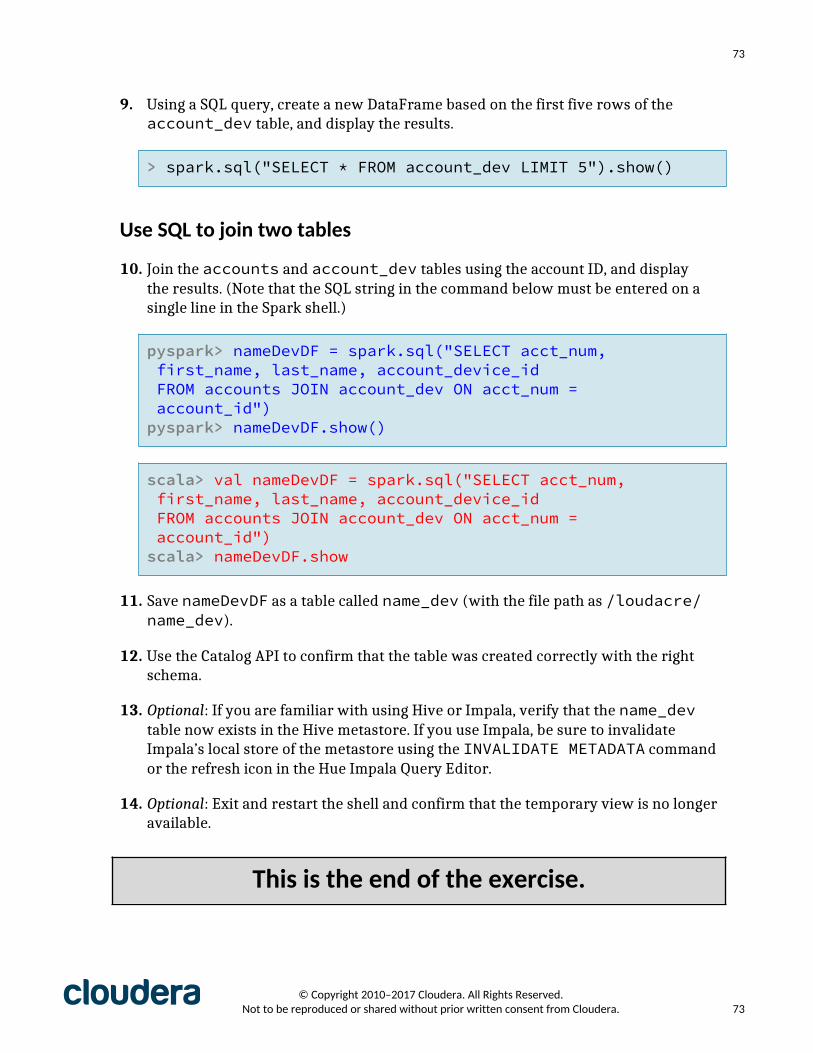
73
9. Using a SQL query, create a new DataFrame based on the first five rows of theaccount_dev table, and display the results.
> spark.sql("SELECT * FROM account_dev LIMIT 5").show()
Use SQL to join two tables
10. Join the accounts and account_dev tables using the account ID, and displaythe results. (Note that the SQL string in the command below must be entered on asingle line in the Spark shell.)
pyspark> nameDevDF = spark.sql("SELECT acct_num, first_name, last_name, account_device_id FROM accounts JOIN account_dev ON acct_num = account_id")pyspark> nameDevDF.show()
scala> val nameDevDF = spark.sql("SELECT acct_num, first_name, last_name, account_device_id FROM accounts JOIN account_dev ON acct_num = account_id")scala> nameDevDF.show
11. Save nameDevDF as a table called name_dev (with the file path as /loudacre/name_dev).
12. Use the Catalog API to confirm that the table was created correctly with the rightschema.
13. Optional: If you are familiar with using Hive or Impala, verify that the name_devtable now exists in the Hive metastore. If you use Impala, be sure to invalidateImpala’s local store of the metastore using the INVALIDATE METADATA commandor the refresh icon in the Hue Impala Query Editor.
14. Optional: Exit and restart the shell and confirm that the temporary view is no longeravailable.
This is the end of the exercise.
© Copyright 2010–2017 Cloudera. All Rights Reserved. Not to be reproduced or shared without prior written consent from Cloudera. 73

74
Hands-On Exercise: Using Datasets in ScalaFiles and Data Used in This Exercise:
Exercise directory $DEVSH/exercises/datasetsData files (HDFS) /loudacre/weblogs
In this exercise, you will explore Datasets using web log data.
Create an RDD of account ID/IP address pairs, and then create a new Dataset ofproducts (case class objects) based on that RDD. Compare the results of typed anduntyped transformations to better understand the relationship between DataFramesand Datasets.
Note: These exercises are in Scala only, because Datasets are not defined in Python.
Important: This exercise depends on a previous exercise: “Transforming Data UsingRDDs.” If you did not complete that exercise, run the course catch-up script and advanceto the current exercise:
$ $DEVSH/scripts/catchup.sh
Explore Datasets using web log dataFind all the account IDs and the IP addresses from which those accounts logged in to theweb site from Loudacre’s web log data.
1. Create a case class for account ID/IP address pairs.
scala> case class AccountIP (id: Int, ip: String)
2. Create an RDD of AccountIP objects by using the web log data in /loudacre/weblogs. Split the data by spaces as use the first field as IP address and the thirdas account ID.
scala> val accountIPRDD = sc. textFile("/loudacre/weblogs"). map(line => line.split(' ')). map(fields => new AccountIP(fields(2).toInt,fields(0)))
© Copyright 2010–2017 Cloudera. All Rights Reserved. Not to be reproduced or shared without prior written consent from Cloudera. 74

75
3. Create a Dataset of AccountIP objects using the new RDD.
scala> val accountIPDS = spark.createDataset(accountIPRDD)
4. View the schema and data in the new Dataset.
5. Compare the result types of a typed transformation—distinct—and an untypedtransformation—groupBy/count.
scala> val distinctIPDS = accountIPDS.distinctscala> val accountIPCountDS = distinctIPDS. groupBy("id","ip").count
6. Save the accountIPDS Dataset as a Parquet file, then read the file back intoa DataFrame. Note that the type of the original Dataset (AccountIP) is notpreserved, but the types of the columns are.
Bonus Exercises
1. Try creating a new Dataset of AccountIP objects based on the DataFrame youcreated above.
2. Create a view on the AccountIPDS Dataset, and perform a SQL query on the view.What is the return type of the SQL query? Were column types preserved?
This is the end of the exercise.
© Copyright 2010–2017 Cloudera. All Rights Reserved. Not to be reproduced or shared without prior written consent from Cloudera. 75
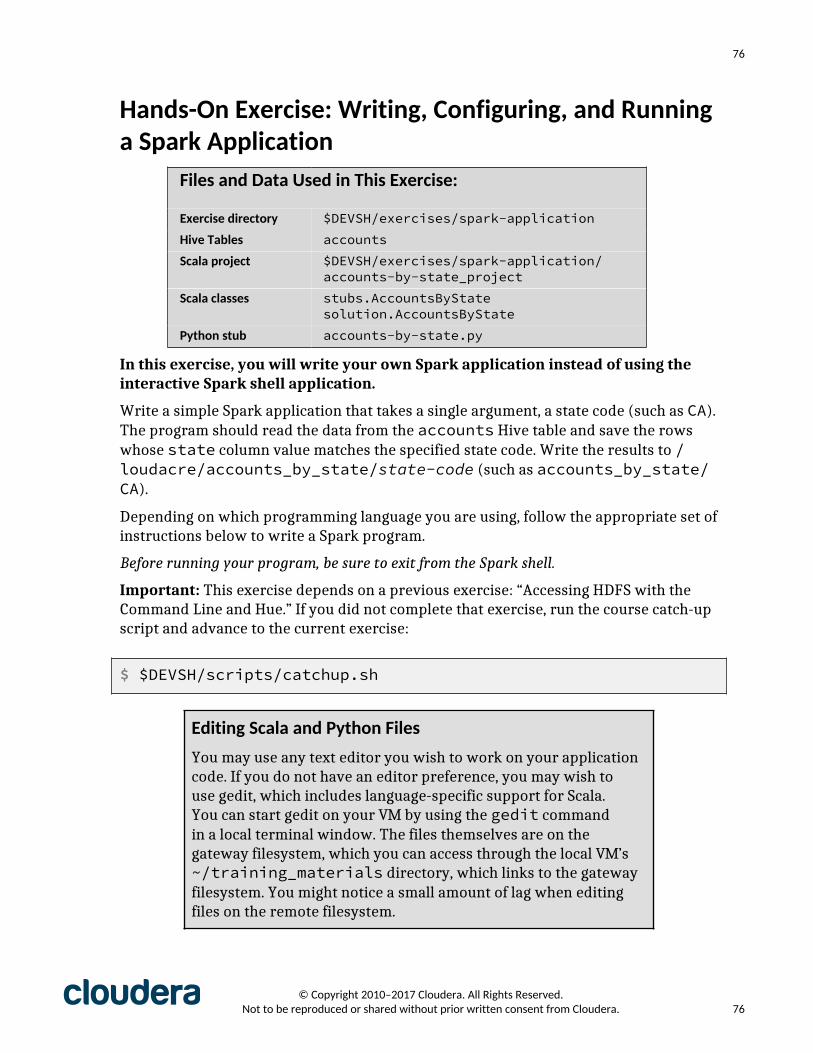
76
Hands-On Exercise: Writing, Configuring, and Runninga Spark Application
Files and Data Used in This Exercise:
Exercise directory $DEVSH/exercises/spark-applicationHive Tables accountsScala project $DEVSH/exercises/spark-application/
accounts-by-state_projectScala classes stubs.AccountsByState
solution.AccountsByStatePython stub accounts-by-state.py
In this exercise, you will write your own Spark application instead of using theinteractive Spark shell application.
Write a simple Spark application that takes a single argument, a state code (such as CA).The program should read the data from the accounts Hive table and save the rowswhose state column value matches the specified state code. Write the results to /loudacre/accounts_by_state/state-code (such as accounts_by_state/CA).
Depending on which programming language you are using, follow the appropriate set ofinstructions below to write a Spark program.
Before running your program, be sure to exit from the Spark shell.
Important: This exercise depends on a previous exercise: “Accessing HDFS with theCommand Line and Hue.” If you did not complete that exercise, run the course catch-upscript and advance to the current exercise:
$ $DEVSH/scripts/catchup.sh
Editing Scala and Python FilesYou may use any text editor you wish to work on your applicationcode. If you do not have an editor preference, you may wish touse gedit, which includes language-specific support for Scala.You can start gedit on your VM by using the gedit commandin a local terminal window. The files themselves are on thegateway filesystem, which you can access through the local VM’s~/training_materials directory, which links to the gatewayfilesystem. You might notice a small amount of lag when editingfiles on the remote filesystem.
© Copyright 2010–2017 Cloudera. All Rights Reserved. Not to be reproduced or shared without prior written consent from Cloudera. 76

77
Write and Run a Spark Application in Python
1. If you are using Python, follow these instructions; otherwise, skip this section andcontinue to Writing and Running a Spark Application in Scala below.
2. A simple stub file to get started has been provided in the exercise directory on thegateway node: $DEVSH/exercises/spark-application/python-stubs/accounts-by-state.py. This stub imports the required Spark classes and setsup your main code block. Open the stub file in an editor.
3. Create a SparkSession object using the following code:
spark = SparkSession.builder.getOrCreate()
4. In the body of the program, load the accounts Hive table into a DataFrame. Selectaccounts where the state column value matches the string provided as the firstargument to the application. Save the results to a directory called /loudacre/accounts_by_state/state-code (where state-code is a string suchas CA.) Use overwrite mode when saving the file so that you can re-run theapplication without needing to delete the directory.
5. At the end of the application, be sure to stop the Spark session:
spark.stop()
6. Run your application. In a gateway terminal session, change to the exercise workingdirectory, then run the program, passing the state code to select. For example, toselect accounts in California, use the following command:
$ cd $DEVSH/exercises/spark-application/$ spark2-submit python-stubs/accounts-by-state.py CA
Note: To run the solution application, use python-solution/accounts-by-state.py.
7. Once the program completes, use parquet-tools to verify that the file contentsare correct. For example, if you used the state code CA, you would use the commandbelow:
$ parquet-tools head \ hdfs://master-1/loudacre/accounts_by_state/CA
© Copyright 2010–2017 Cloudera. All Rights Reserved. Not to be reproduced or shared without prior written consent from Cloudera. 77
78
8. Skip the section below on writing and running a Spark application in Scala andcontinue with Viewing the Spark Application UI.
Write and Run a Spark Application in ScalaA Maven project to get started has been provided in the exercise directory on thegateway node: $DEVSH/exercises/spark-application/accounts-by-state_project.
9. Edit the Scala class defined in stubs package in src/main/scala/stubs/AccountsByState.scala.
10. Create a SparkSession object using the following code:
val spark = SparkSession.builder.getOrCreate()
11. In the body of the program, load the accounts Hive table into a DataFrame. Selectaccounts where the state column value matches the string provided as the firstargument to the application. Save the results to a Parquet file called /loudacre/accounts_by_state/state-code (where state-code is a string suchas CA). Use overwrite mode when saving the file so that you can re-run theapplication without needing to delete the save directory.
12. At the end of the application, be sure to stop the Spark session:
spark.stop
13. In a gateway terminal session, change to the project directory, then build yourproject. Note that the first time you compile a Spark application using Maven, itmay take several minutes for Maven to download the necessary libraries. When youbuild using the same libraries in the future, they will not be downloaded a secondtime, and building will be must faster. (The line below must be entered on a singleline in your gateway session.)
$ cd $DEVSH/exercises/spark-application/accounts-by-state_project$ mvn package
14. If the build is successful, Maven will generate a JAR file called accounts-by-state-1.0.jar in the target directory. Run the program, passing the state
© Copyright 2010–2017 Cloudera. All Rights Reserved. Not to be reproduced or shared without prior written consent from Cloudera. 78

79
code to select. For example, to select accounts in California, use the followingcommand:
$ spark2-submit \ --class stubs.AccountsByState \ target/accounts-by-state-1.0.jar CA
Note: To run the solution application, use --classsolution.AccountsByState.
15. Once the program completes, use parquet-tools to verify that the file contentsare correct. For example, if you used the state code CA, you would use the commandbelow:
$ parquet-tools head \ hdfs://master-1/loudacre/accounts_by_state/CA/
View the Spark Application UIIn the previous section, you ran a Python or Scala Spark application using spark2-submit. Now view that application’s Spark UI (or history server UI if the application iscomplete).
16. Open Firefox on your VM and visit the YARN Resource Manager UI using theprovided RM bookmark (or go to URI http://master-1:8088/). While theapplication is running, it appears in the list of applications something like this:
After the application has completed, it will appear in the list like this:
© Copyright 2010–2017 Cloudera. All Rights Reserved. Not to be reproduced or shared without prior written consent from Cloudera. 79

80
17. Follow the ApplicationMaster link to view the Spark Application UI, or the Historylink to view the application in the History Server UI.
Set Configuration Options Using Submit Script Flags
18. Change to the correct directory (if necessary) and re-run the Python or Scalaprogram you wrote in the previous section, this time specifying an applicationname. For example:
$ spark2-submit --name "Accounts by State 1" \ python-stubs/accounts-by-state.py CA
$ spark2-submit --name "Accounts by State 1" \ --class stubs.AccountsByState \ target/accounts-by-state-1.0.jar CA
19. Go back to the YARN RM UI in your browser, and confirm that the application namewas set correctly in the list of applications.
20. Follow the ApplicationMaster or History link. View the Environment tab. Takenote of the spark.* properties such as master and app.name.
21. You can set most of the common application properties using submit scriptflags such as name, but for others you need to use conf. Use conf to set thespark.default.parallelism property, which controls how many partitionsresult after a "wide" RDD operation like reduceByKey.
$ spark2-submit --name "Accounts by State 2" \ --conf spark.default.parallelism=4 \ python-stubs/accounts-by-state.py CA
$ spark2-submit --name "Accounts by State 2" \ --conf spark.default.parallelism=4 \ --class stubs.AccountsByState \ target/accounts-by-state-1.0.jar CA
© Copyright 2010–2017 Cloudera. All Rights Reserved. Not to be reproduced or shared without prior written consent from Cloudera. 80
81
22. View the application history for this application to confirm that thespark.default.parallelism property was set correctly. (You will need toview the YARN RM UI again to view the correct application’s history.)
Optional Review Property Setting Overrides
23. Rerun the previous submit command with the verbose option. This will displayyour application property default and override values.
$ spark2-submit --verbose --name "Accounts by State 3" \ --conf spark.default.parallelism=4 \ python-stubs/accounts-by-state.py CA
$ spark2-submit --verbose --name "Accounts by State 3" \ --conf spark.default.parallelism=4 \ --class stubs.AccountsByState \ target/accounts-by-state-1.0.jar CA
24. Examine the extra output displayed when the application starts up.
a. The first section starts with Using properties file, and shows thefile name and the default property settings the application loaded from thatproperties file.
• What is the system properties file?
• What properties are being set in the file?
b. The second section starts with Parsed arguments. This lists the arguments—that is, the flags and settings—you set when running the submit script(except for conf). Submit script flags that you didn’t pass use their defaultvalues, if defined by the script, or are shown as null.
• Does the list correctly include the value you set with --name?
• Which arguments (flags) have defaults set in the script and which do not?
c. Scroll down to the section that starts with System properties. This listshows all the properties set—those loaded from the system properties file,those you set using submit script arguments, and those you set using the confflag.
© Copyright 2010–2017 Cloudera. All Rights Reserved. Not to be reproduced or shared without prior written consent from Cloudera. 81

82
• Is spark.default.parallelism included and set correctly?
Bonus Exercise: Set Configuration Properties ProgrammaticallyIf you have more time, attempt the following extra bonus steps:
1. Edit the Python or Scala application your wrote above, and use the builder functionappName to set the application name.
2. Re-run the application without using script options to set properties.
3. View the YARN UI to confirm that the application name was correctly set.
You can find the Python bonus solution in $DEVSH/exercises/spark-application/python-bonus. The Scala solution is in the bonus package in theexercise project.
This is the end of the exercise.
© Copyright 2010–2017 Cloudera. All Rights Reserved. Not to be reproduced or shared without prior written consent from Cloudera. 82

83
Hands-On Exercise: Exploring Query ExecutionFiles and Data Used in This Exercise:
Exercise directory $DEVSH/exercises/query-executionData files (HDFS) /user/hive/warehouse/accounts
/loudacre/weblogs/loudacre/devices.json/loudacre/accountdevice
Hive tables accounts
In this exercise, you will explore how Spark executes RDD and DataFrame/Dataset queries.
First, you will explore RDD partitioning and lineage-based execution plans using theSpark shell and the Spark Application UI. Then you will explore how Catalyst executesDataFrame and Dataset queries.
Important: This exercise depends on a previous exercise: “Transforming Data UsingRDDs”. If you did not complete those exercises, run the course catch-up script andadvance to the current exercise:
$ $DEVSH/scripts/catchup.sh
Explore Partitioning of File-Based RDDs
1. Review the accounts data files (/user/hive/warehouse/accounts/) usingHue or a gateway command line. Take note of the number of files.
2. In the Spark shell, create an RDD called accountsRDD by reading the accountsdata, splitting it by commas, and keying it by account ID, which is the first field ofeach line.
pyspark> accountsRDD = sc. \ textFile("/user/hive/warehouse/accounts"). \ map(lambda line: line.split(',')). \ map(lambda account: (account[0],account))
scala> val accountsRDD = sc. textFile("/user/hive/warehouse/accounts"). map(line => line.split(',')). map(account => (account(0),account))
© Copyright 2010–2017 Cloudera. All Rights Reserved. Not to be reproduced or shared without prior written consent from Cloudera. 83
84
3. Find the number of partitions in the new RDD.
pyspark> accountsRDD.getNumPartitions()
scala> accountsRDD.getNumPartitions
4. Use toDebugString to view the lineage and execution plan of accountsRDD.How many partitions are in the resulting RDD? How may stages does the queryhave?
pyspark> print accountsRDD.toDebugString()
scala> accountsRDD.toDebugString
Explore Execution of RDD Queries
5. Call count on accountsRDD to count the number of accounts. This will triggerexecution of a job.
6. In the browser, view the application in the YARN RM UI using the providedbookmark (or http://master-1:8088) and click through to view the SparkApplication UI.
7. Make sure the Jobs tab is selected, and review the list of completed jobs. The mostrecent job, which you triggered by calling count, should be at the top of the list.(Note that the job description is usually based on the action that triggered the jobexecution.) Confirm that the number of stages is correct, and the number of taskscompleted for the job matches the number of RDD partitions you noted when youused toDebugString.
8. Click on the job description to view details of the job. This will list all the stages inthe job, which in this case is one.
9. Click on DAG Visualization to see a diagram of the execution plan based on theRDD’s lineage. The main diagram displays on the stages, but if you click on a stage, itwill show you the tasks within that stage.
10. Optional: Explore the partitioning and DAG of a more complex query like the onebelow. Before you view the execution plan or job details, try to figure out how manystages the job will have.
© Copyright 2010–2017 Cloudera. All Rights Reserved. Not to be reproduced or shared without prior written consent from Cloudera. 84

85
This query loads Loudacre’s web log data, and calculates how many times each uservisited. Then it joins that user count data with account data for each user.
pyspark> logsRDD = sc.textFile("/loudacre/weblogs")pyspark> userReqsRDD = logsRDD. \ map(lambda line: line.split(' ')). \ map(lambda words: (words[2],1)). \ reduceByKey(lambda v1,v2: v1 + v2)pyspark> accountHitsRDD = accountsRDD.join(userReqsRDD)
scala> val logs = sc.textFile("/loudacre/weblogs")scala> val userReqsRDD = logs.map(line => line.split(' ')). map(words => (words(2),1)). reduceByKey((v1,v2) => v1 + v2)scala> val accountHitsRDD = accountsRDD.join(userReqsRDD)
Note: If you execute the query multiple times, you may note that some tasks withina stage are marked as “skipped.” This is because whenever a shuffle operationis executed, Spark temporarily caches the data that was shuffled. Subsequentexecutions of the same query re-use that data if it’s available to save some steps andincrease performance.
Explore Execution of DataFrame Queries
11. Create a DataFrame of active accounts from the accounts table.
pyspark> accountsDF = spark.read.table("accounts")pyspark> activeAccountsDF = accountsDF. \ select("acct_num"). \ where(accountsDF.acct_close_dt.isNull())
scala> val accountsDF = spark.read.table("accounts")scala> val activeAccountsDF = accountsDF. select("acct_num"). where($"acct_close_dt".isNull)
© Copyright 2010–2017 Cloudera. All Rights Reserved. Not to be reproduced or shared without prior written consent from Cloudera. 85

86
12. View the full execution plan for the new DataFrame.
pyspark> activeAccountsDF.explain(True)
scala> activeAccountsDF.explain(true)
Can you locate the line in the physical plan corresponding to the command to loadthe accounts table into a DataFrame?
How many stages do you think this query has?
13. Call the DataFrame’s show function to execute the query.
14. View the Spark Application UI and choose the SQL tab. This displays a list ofDataFrame and Dataset queries you have executed, with the most recent query atthe top.
15. Click the description for the top query to see the visualization of the query’sexecution. You can also see the query’s full execution plan by opening the Detailspanel below the visualization graph.
16. The first step in the execution is a HiveTableScan, which loaded the account datainto the DataFrame. Hover your mouse over the step to show the step’s executionplan. Compare that to the physical plan for the query. Note that it is the same as thelast line in the physical execution plan, because it is the first step to execute. Didyou correctly identify this line in the execution plan as the one corresponding to theDataFrame.read.table operation?
17. The Succeeded Jobs label provides links to the jobs that executed as part of thisquery execution. In this case, there is just a single job. Click its ID to view the jobdetails. This will display a list of stages that were completed for the query.
How many stages executed? Is that the number of stages you predicted it would be?
18. Optional: Click the description of the stage to view metrics on the execution of thestage and its tasks.
19. The previous query was very simple, involving just a single data source with awhere to return only active accounts. Try executing a more complex query thatjoins data from two different data sources.
This query reads in the accountdevice data file, which maps that maps accountIDs to associated device IDs. Then it joins that data with the DataFrame of active
© Copyright 2010–2017 Cloudera. All Rights Reserved. Not to be reproduced or shared without prior written consent from Cloudera. 86
87
accounts you created above. The result is DataFrame consisting of all device IDs inuse by currently active accounts.
pyspark> accountDeviceDF = spark.read. \ option("header","true"). \ option("inferSchema","true"). \ csv("/loudacre/accountdevice")pyspark> activeAcctDevsDF = activeAccountsDF. \ join(accountDeviceDF, accountsDF.acct_num == accountDeviceDF.account_id). \ select("device_id")
scala> val accountDeviceDF = spark.read. option("header","true"). option("inferSchema","true"). csv("/loudacre/accountdevice")scala> val activeAcctDevsDF = activeAccountsDF. join(accountDeviceDF,$"acct_num" === $"account_id"). select($"device_id")
20. Review the full execution plan using explain, as you did with the previousDataFrame.
Can you identify which lines in the execution plan load the two different datasources?
How many stages do you think this query will execute?
21. Execute the query and review the execution visualization in the Spark UI.
What differences do you see between the execution of the earlier query and thisone?
How many stages executed? Is this what you expected?
22. Optional: Explore an even more complex query that involves multiple joins withthree data sources. You can use the last query in the solutions file for this exercise(in the $DEVSH/exercises/query-execution/solution/ directory). Thatquery creates a list of device IDs, makes, and models, and the number of activeaccounts that use that type of device, sorted in order from most popular device typeto least.
This is the end of the exercise.
© Copyright 2010–2017 Cloudera. All Rights Reserved. Not to be reproduced or shared without prior written consent from Cloudera. 87

88
Hands-On Exercise: Persisting DataFiles and Data Used in This Exercise:
Exercise directory $DEVSH/exercises/persistData files (HDFS) /loudacre/accountdeviceHive tables accounts
In this exercise, you will explore DataFrame persistence.
Important: This exercise depends a on previous exercise: “Analyzing Data withDataFrame Queries.” If you did not complete that exercise, run the course catch-upscript and advance to the current exercise:
$ $DEVSH/scripts/catchup.sh
Compare the Execution Plans of Persisted and Unpersisted Queries
1. Create a DataFrame that joins account data for active accounts with their associateddevices. To save time and effort, copy the query code from the persist.pysparkor .scalaspark file from the $DEVSH/exercises/persist/stubs directoryinto the Spark shell.
2. The query code you pasted above defines a new DataFrame calledaccountsDevsDF, which joins account data and device data for all activeaccounts. Try executing a query starting with the accountsDevsDF DataFramethat displays the account number, first name, last name and device ID for each row.
pyspark> accountsDevsDF. \ select("acct_num","first_name","last_name","device_id"). \ show(5)
scala> accountsDevsDF. select("acct_num","first_name","last_name","device_id"). show(5)
3. In your browser, go to the SQL tab of your application’s Spark UI, and view theexecution visualization of the query you just executed. Take note of the complexityso that you can compare it to later executions when using persistence.
Remember that queries are listed in the SQL tab in the order they were executed,starting with the most recent. The descriptions of multiple executions of the same
© Copyright 2010–2017 Cloudera. All Rights Reserved. Not to be reproduced or shared without prior written consent from Cloudera. 88
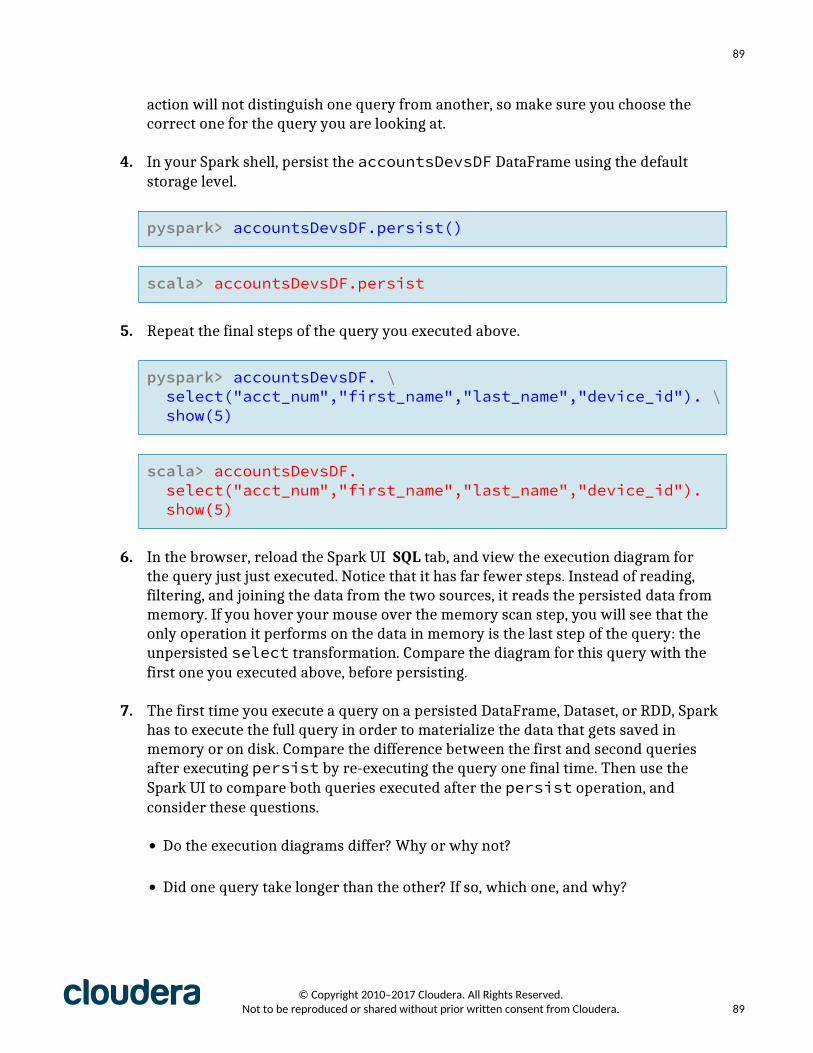
89
action will not distinguish one query from another, so make sure you choose thecorrect one for the query you are looking at.
4. In your Spark shell, persist the accountsDevsDF DataFrame using the defaultstorage level.
pyspark> accountsDevsDF.persist()
scala> accountsDevsDF.persist
5. Repeat the final steps of the query you executed above.
pyspark> accountsDevsDF. \ select("acct_num","first_name","last_name","device_id"). \ show(5)
scala> accountsDevsDF. select("acct_num","first_name","last_name","device_id"). show(5)
6. In the browser, reload the Spark UI SQL tab, and view the execution diagram forthe query just just executed. Notice that it has far fewer steps. Instead of reading,filtering, and joining the data from the two sources, it reads the persisted data frommemory. If you hover your mouse over the memory scan step, you will see that theonly operation it performs on the data in memory is the last step of the query: theunpersisted select transformation. Compare the diagram for this query with thefirst one you executed above, before persisting.
7. The first time you execute a query on a persisted DataFrame, Dataset, or RDD, Sparkhas to execute the full query in order to materialize the data that gets saved inmemory or on disk. Compare the difference between the first and second queriesafter executing persist by re-executing the query one final time. Then use theSpark UI to compare both queries executed after the persist operation, andconsider these questions.
• Do the execution diagrams differ? Why or why not?
• Did one query take longer than the other? If so, which one, and why?
© Copyright 2010–2017 Cloudera. All Rights Reserved. Not to be reproduced or shared without prior written consent from Cloudera. 89
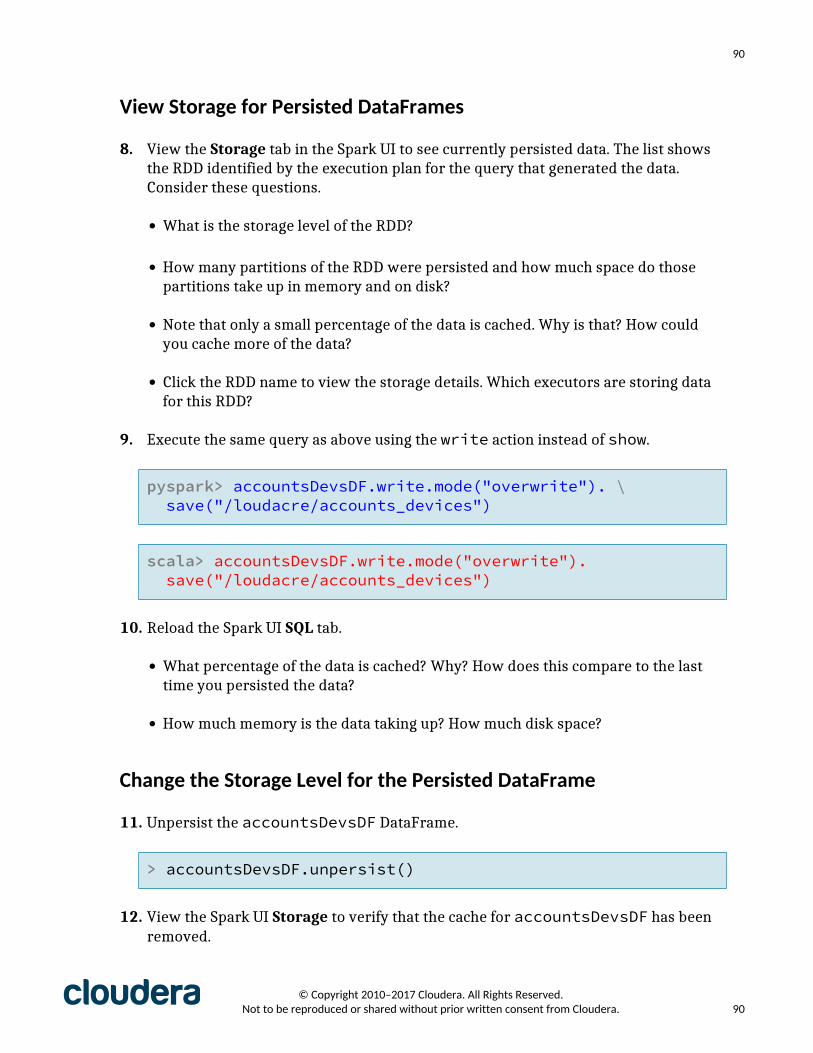
90
View Storage for Persisted DataFrames
8. View the Storage tab in the Spark UI to see currently persisted data. The list showsthe RDD identified by the execution plan for the query that generated the data.Consider these questions.
• What is the storage level of the RDD?
• How many partitions of the RDD were persisted and how much space do thosepartitions take up in memory and on disk?
• Note that only a small percentage of the data is cached. Why is that? How couldyou cache more of the data?
• Click the RDD name to view the storage details. Which executors are storing datafor this RDD?
9. Execute the same query as above using the write action instead of show.
pyspark> accountsDevsDF.write.mode("overwrite"). \ save("/loudacre/accounts_devices")
scala> accountsDevsDF.write.mode("overwrite"). save("/loudacre/accounts_devices")
10. Reload the Spark UI SQL tab.
• What percentage of the data is cached? Why? How does this compare to the lasttime you persisted the data?
• How much memory is the data taking up? How much disk space?
Change the Storage Level for the Persisted DataFrame
11. Unpersist the accountsDevsDF DataFrame.
> accountsDevsDF.unpersist()
12. View the Spark UI Storage to verify that the cache for accountsDevsDF has beenremoved.
© Copyright 2010–2017 Cloudera. All Rights Reserved. Not to be reproduced or shared without prior written consent from Cloudera. 90
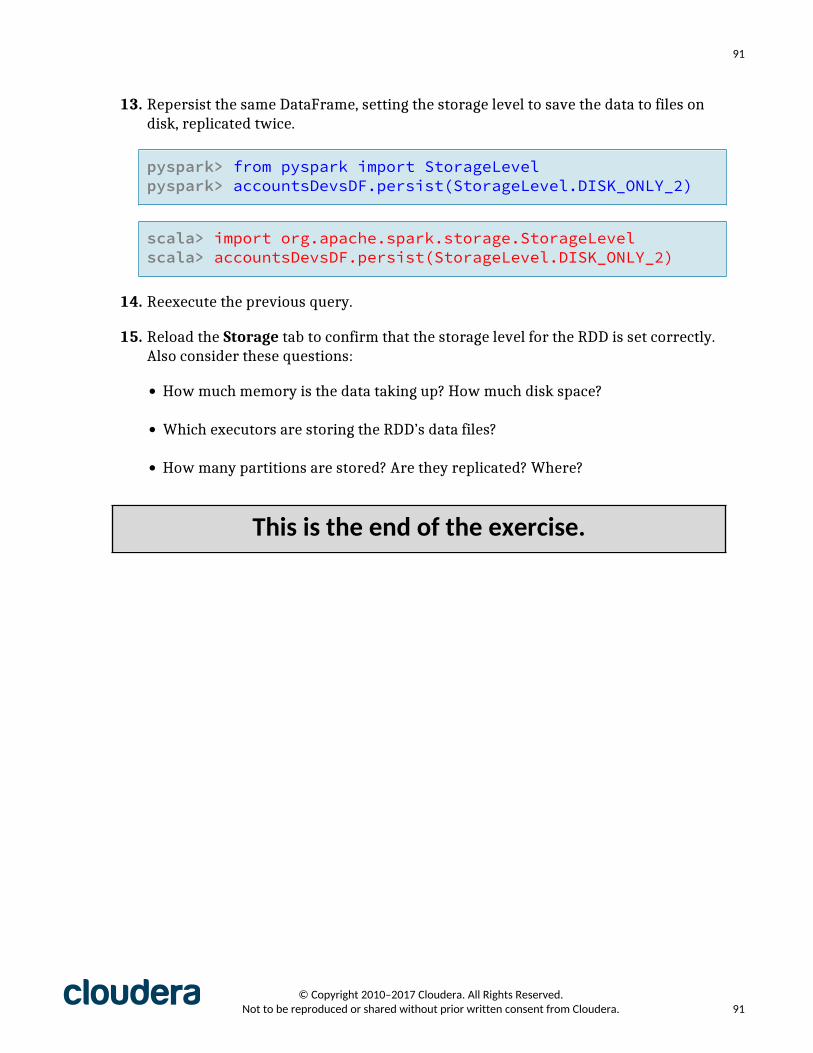
91
13. Repersist the same DataFrame, setting the storage level to save the data to files ondisk, replicated twice.
pyspark> from pyspark import StorageLevelpyspark> accountsDevsDF.persist(StorageLevel.DISK_ONLY_2)
scala> import org.apache.spark.storage.StorageLevelscala> accountsDevsDF.persist(StorageLevel.DISK_ONLY_2)
14. Reexecute the previous query.
15. Reload the Storage tab to confirm that the storage level for the RDD is set correctly.Also consider these questions:
• How much memory is the data taking up? How much disk space?
• Which executors are storing the RDD’s data files?
• How many partitions are stored? Are they replicated? Where?
This is the end of the exercise.
© Copyright 2010–2017 Cloudera. All Rights Reserved. Not to be reproduced or shared without prior written consent from Cloudera. 91

92
Hands-On Exercise: Implement an Iterative Algorithmwith Apache Spark
Files and Data Used in This Exercise:
Exercise directory $DEVSH/exercises/iterativeData files (HDFS) /loudacre/devicestatus_etl/*Stubs KMeansCoords.pyspark
KMeansCoords.scalaspark
In this exercise, you will practice implementing iterative algorithms in Spark bycalculating k-means for a set of points.
Reviewing the Data
1. If you completed the bonus section of the “Process Data Files with Apache Spark”exercise, you used Spark to extract the date, maker, device ID, latitude andlongitude from the devicestatus.txt data file, and store the results in theHDFS directory /loudacre/devicestatus_etl .
If you did not complete that bonus exercise, upload the solution file from the localfilesystem to HDFS now. (If you have run the course catch-up script, this is alreadydone for you.)
$ hdfs dfs -put $DEVDATA/static_data/devicestatus_etl \ /loudacre/
2. Examine the data in the dataset. Note that the latitude and longitude are the 4th and5th fields, respectively, as shown in the sample data below:
2014-03-15:10:10:20,Sorrento,8cc3b47e-bd01-4482-b500- 28f2342679af,33.6894754264,-117.5433082532014-03-15:10:10:20,MeeToo,ef8c7564-0a1a-4650-a655- c8bbd5f8f943,37.4321088904,-121.485029632
Calculating k-means for Device Location
3. Start by copying the code provided in the KMeansCoords stub file, into your Sparkshell. The starter code defines convenience functions used in calculating k-means:
© Copyright 2010–2017 Cloudera. All Rights Reserved. Not to be reproduced or shared without prior written consent from Cloudera. 92

93
• closestPoint: given a (latitude/longitude) point and an array of currentcenter points, returns the index in the array of the center closest to the givenpoint
• addPoints: given two points, return a point which is the sum of the two points—that is, (x1+x2, y1+y2)
• distanceSquared: given two points, returns the squared distance of the two—this is a common calculation required in graph analysis
Note that the stub code sets the variable K equal to 5—this is the number ofmeans to calculate.
4. The stub code also sets the variable convergeDist. This will be used to decidewhen the k-means calculation is done—when the amount the locations of themeans changes between iterations is less than convergeDist. A “perfect”solution would be 0; this number represents a “good enough” solution. For thisexercise, use a value of 0.1.
5. Parse the input file—which is delimited by commas—into(latitude,longitude) pairs (the 4th and 5th fields in each line). Only includeknown locations—that is, filter out (0,0) locations. Be sure to persist the resultingRDD because you will access it each time through the iteration.
6. Create a K-length array called kPoints by taking a random sample of K locationpoints from the RDD as starting means (center points).
For example, in Python:
kPoints = data.takeSample(False, K, 42)
Or in Scala:
val kPoints = data.takeSample(false, K, 42)
7. Iteratively calculate a new set of K means until the total distance between themeans calculated for this iteration and the last is smaller than convergeDist. Foreach iteration:
a. For each coordinate point, use the provided closestPoint function to mapthat point to the index in the kPoints array of the location closest to thatpoint. The resulting RDD should be keyed by the index, and the value should bethe pair: (point, 1). (The value 1 will later be used to count the number ofpoints closest to a given mean.) For example:
© Copyright 2010–2017 Cloudera. All Rights Reserved. Not to be reproduced or shared without prior written consent from Cloudera. 93

94
(1, ((37.43210, -121.48502), 1))(4, ((33.11310, -111.33201), 1))(0, ((39.36351, -119.40003), 1))(1, ((40.00019, -116.44829), 1))…
b. Reduce the result: for each center in the kPoints array, sum the latitudes andlongitudes, respectively, of all the points closest to that center, and also find thenumber of closest points. For example:
(0, ((2638919.87653,-8895032.182481), 74693)))(1, ((3654635.24961,-12197518.55688), 101268)))(2, ((1863384.99784,-5839621.052003), 48620)))(3, ((4887181.82600,-14674125.94873), 126114)))(4, ((2866039.85637,-9608816.13682), 81162)))
c. The reduced RDD should have (at most) K members. Map each to a new centerpoint by calculating the average latitude and longitude for each set of closestpoints: that is, map (index,(totalX,totalY),n) to (index,(totalX/n, totalY/n)).
d. Collect these new points into a local map or array keyed by index.
e. Use the provided distanceSquared method to calculate how much thecenters “moved” between the current iteration and the last. That is, foreach center in kPoints, calculate the distance between that point and thecorresponding new point, and sum those distances. That is the delta betweeniterations; when the delta is less than convergeDist, stop iterating.
f. Copy the new center points to the kPoints array in preparation for the nextiteration.
8. When all iterations are complete, display the final K center points.
This is the end of the exercise.
© Copyright 2010–2017 Cloudera. All Rights Reserved. Not to be reproduced or shared without prior written consent from Cloudera. 94
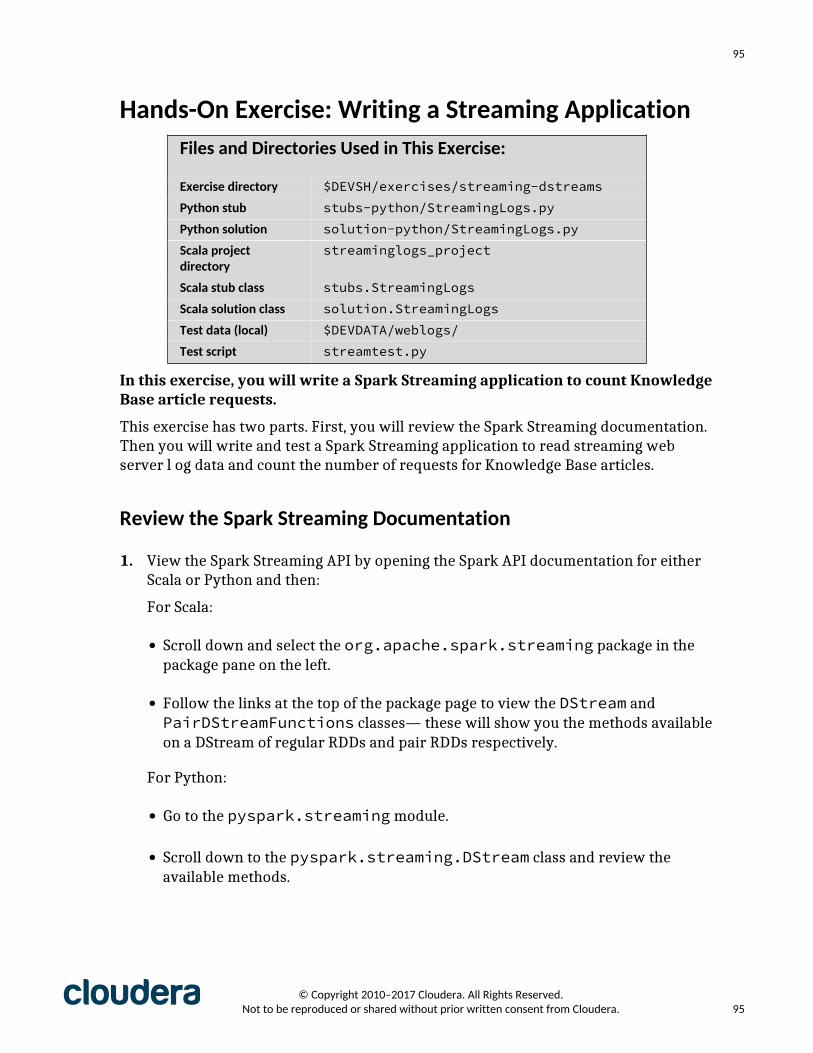
95
Hands-On Exercise: Writing a Streaming ApplicationFiles and Directories Used in This Exercise:
Exercise directory $DEVSH/exercises/streaming-dstreamsPython stub stubs-python/StreamingLogs.pyPython solution solution-python/StreamingLogs.pyScala projectdirectory
streaminglogs_project
Scala stub class stubs.StreamingLogsScala solution class solution.StreamingLogsTest data (local) $DEVDATA/weblogs/Test script streamtest.py
In this exercise, you will write a Spark Streaming application to count KnowledgeBase article requests.
This exercise has two parts. First, you will review the Spark Streaming documentation.Then you will write and test a Spark Streaming application to read streaming webserver l og data and count the number of requests for Knowledge Base articles.
Review the Spark Streaming Documentation
1. View the Spark Streaming API by opening the Spark API documentation for eitherScala or Python and then:
For Scala:
• Scroll down and select the org.apache.spark.streaming package in thepackage pane on the left.
• Follow the links at the top of the package page to view the DStream andPairDStreamFunctions classes— these will show you the methods availableon a DStream of regular RDDs and pair RDDs respectively.
For Python:
• Go to the pyspark.streaming module.
• Scroll down to the pyspark.streaming.DStream class and review theavailable methods.
© Copyright 2010–2017 Cloudera. All Rights Reserved. Not to be reproduced or shared without prior written consent from Cloudera. 95

96
2. You may also wish to view the Spark Streaming Programming Guide (selectProgramming Guides > Spark Streaming on the Spark documentation mainpage).
Simulate Streaming Web LogsTo simulate a streaming data source, you will use the provided streamtest.pyPython script, which waits for a connection on the host and port specified and, once itreceives a connection, sends the contents of the file(s) specified to the client (which willbe your Spark Streaming application). You can specify the speed (in lines per second) atwhich the data should be sent.
3. Stream the Loudacre web log files at a rate of 20 lines per second using theprovided test script.
$ python $DEVSH/scripts/streamtest.py gateway 1234 20 \ $DEVDATA/weblogs/*
This script will exit after the client disconnects, so you will need to restart the scriptwhen you restart your Spark application.
Tip: This exercise involves using multiple terminal windows. To avoid confusion,set a different title for each one by selecting Set Title… on the Terminal menu:
Set the title for this window to “Test Streaming.”
Write a Spark Streaming Application
4. To help you get started writing a Spark Streaming application, stub files have beenprovided for you.
For Python, start with the stub file StreamingLogs.py in the $DEVSH/exercises/streaming-dstreams/stubs-python directory, which importsthe necessary classes for the application.
For Scala, a Maven project directory called streaminglogs_project hasbeen provided in the exercise directory ($DEVSH/exercises/streaming-dstreams). To complete the exercise, start with the stub code in src/main/
© Copyright 2010–2017 Cloudera. All Rights Reserved. Not to be reproduced or shared without prior written consent from Cloudera. 96

97
scala/stubs/StreamingLogs.scala, which imports the necessary classesfor the application.
5. Define a Streaming context with a one-second batch duration.
6. Create a DStream by reading the data from the host and port provided as inputparameters.
7. Filter the DStream to only include lines containing the string KBDOC.
8. To confirm that your application is correctly receiving the streaming web log data,display the first five records in the filtered DStream for each one-second batch. (InScala, use the DStream print function; in Python, use pprint.)
9. For each RDD in the filtered DStream, display the number of items—that is, thenumber of requests for KB articles.
Tip: Python does not allow calling print within a lambda function, so create anamed defined function to print.
10. Save the filtered logs to text files in HDFS. Use the base directory name/loudacre/streamlog/kblogs.
11. Finally, start the Streaming context, and then call awaitTermination().
Test the ApplicationAfter a few batches of data have been processed and displayed, you can end the test.
12. In a new terminal window, change to the correct directory for the language you areusing for your application.
For Python, change to the exercise directory:
$ cd $DEVSH/exercises/streaming-dstreams
For Scala, change to the project directory for the exercise:
$ cd \ $DEVSH/exercises/streaming-dstreams/streaminglogs_project
13. If you are using Scala, build your application JAR file using the mvn packagecommand.
© Copyright 2010–2017 Cloudera. All Rights Reserved. Not to be reproduced or shared without prior written consent from Cloudera. 97

98
Note: If this is your first time compiling a Spark Scala application, it may takeseveral minutes for Maven to download the required libraries to package theapplication.
14. Use spark2-submit to run your application. The StreamingLogs applicationtakes two parameters: the host name and the port number to which to connect theDStream. Specify the same host and port at which the test script you started earlieris listening.
For Python:
$ spark2-submit \ stubs-python/StreamingLogs.py gateway 1234
Note: Use solution-python/StreamingLogs.py to run the solutionapplication instead.
For Scala:
$ spark2-submit --class stubs.StreamingLogs \ target/streamlog-1.0.jar gateway 1234
Note: Use --class solution.StreamingLogs to run the solution classinstead.
15. After a few moments, the application will connect to the test script’s simulatedstream of web server log output. Confirm that for every batch of data received(every second), the application displays the first few Knowledge Base requests andthe count of requests in the batch. Review the HDFS files the application saved in /loudacre/streamlog.
16. Return to the terminal window in which you started the streamtest.py testscript earlier. Stop the test script by typing Ctrl+C.
17. Return to the terminal window in which your application is running. Stop yourapplication by typing Ctrl+C. (You may see several error messages resulting fromthe interruption of the job in Spark; you may disregard these.)
This is the end of the exercise.
© Copyright 2010–2017 Cloudera. All Rights Reserved. Not to be reproduced or shared without prior written consent from Cloudera. 98
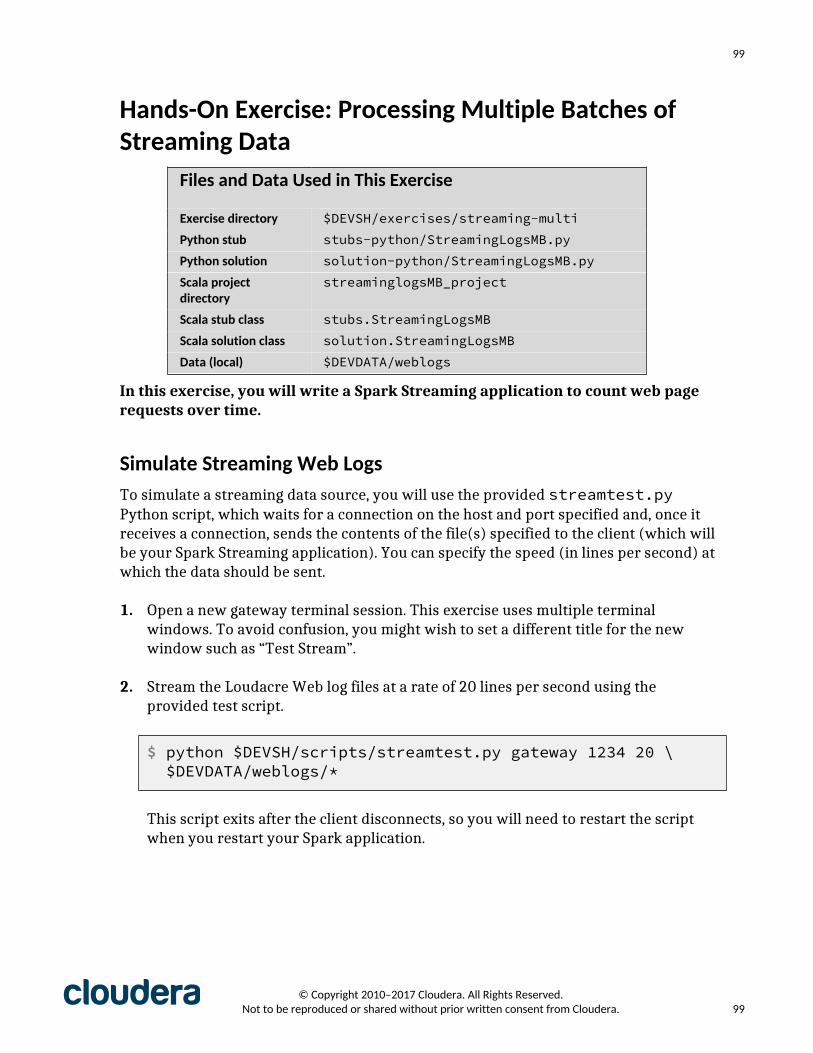
99
Hands-On Exercise: Processing Multiple Batches ofStreaming Data
Files and Data Used in This Exercise
Exercise directory $DEVSH/exercises/streaming-multiPython stub stubs-python/StreamingLogsMB.pyPython solution solution-python/StreamingLogsMB.pyScala projectdirectory
streaminglogsMB_project
Scala stub class stubs.StreamingLogsMBScala solution class solution.StreamingLogsMBData (local) $DEVDATA/weblogs
In this exercise, you will write a Spark Streaming application to count web pagerequests over time.
Simulate Streaming Web LogsTo simulate a streaming data source, you will use the provided streamtest.pyPython script, which waits for a connection on the host and port specified and, once itreceives a connection, sends the contents of the file(s) specified to the client (which willbe your Spark Streaming application). You can specify the speed (in lines per second) atwhich the data should be sent.
1. Open a new gateway terminal session. This exercise uses multiple terminalwindows. To avoid confusion, you might wish to set a different title for the newwindow such as “Test Stream”.
2. Stream the Loudacre Web log files at a rate of 20 lines per second using theprovided test script.
$ python $DEVSH/scripts/streamtest.py gateway 1234 20 \ $DEVDATA/weblogs/*
This script exits after the client disconnects, so you will need to restart the scriptwhen you restart your Spark application.
© Copyright 2010–2017 Cloudera. All Rights Reserved. Not to be reproduced or shared without prior written consent from Cloudera. 99
100
Display the Total Request Count
3. A stub file for this exercise has been provided for you in the exercise directory. Thestub code creates a Streaming context for you, and creates a DStream called logsbased on web log request messages received on a network socket.
For Python, start with the stub file StreamingLogsMB.py in the stubs-pythondirectory.
For Scala, a Maven project directory called streaminglogsMB_project hasbeen provided in the exercise directory. To complete the exercise, start with thestub code in src/main/scala/stubs/StreamingLogsMB.scala.
4. Enable checkpointing to a directory called logcheckpt.
5. Count the number of page requests over a window of five seconds. Print out theupdated five-second total every two seconds.
• Hint: Use the countByWindow function.
Build and Run Your ApplicationAfter a few batches of data have been processed and displayed, you can end the test.
6. In a different gateway terminal window than the one in which you started thestreamtest.py script, change to the correct directory for the language you areusing for your application. To avoid confusion, you might wish to set a different titlefor the new window such as “Application”.
For Python, change to the exercise directory:
$ cd $DEVSH/exercises/streaming-multi
For Scala, change to the project directory for the exercise:
$ cd \ $DEVSH/exercises/streaming-multi/streaminglogsMB_project
7. If you are using Scala, build your application JAR file using the mvn packagecommand.
8. Use spark2-submit to run your application. Your application takes twoparameters: the host name and the port number to connect the DStream to. Specifythe same host and port at which the test script you started earlier is listening.
© Copyright 2010–2017 Cloudera. All Rights Reserved. Not to be reproduced or shared without prior written consent from Cloudera. 100

101
For Python:
$ spark2-submit \ stubs-python/StreamingLogsMB.py gateway 1234
Note: Use solution-python/StreamingLogsMB.py to run the solutionapplication instead.
For Scala:
$ spark2-submit --class stubs.StreamingLogsMB \ target/streamlogmb-1.0.jar gateway 1234
Note: Use --class solution.StreamingLogsMB to run the solution classinstead.
9. After a few moments, the application should connect to the test script’s simulatedstream of web server log output. Confirm that for every batch of data received(every second), the application displays the first few Knowledge Base requests andthe count of requests in the batch. Review the files.
10. Return to the terminal window in which you started the streamtest.py testscript earlier. Stop the test script by typing Ctrl+C.
11. Return to the terminal window in which your application is running. Stop yourapplication by typing Ctrl+C. (You may see several error messages resulting fromthe interruption of the job in Spark; you may disregard these.)
Bonus ExerciseExtend the application you wrote above to also count the total number of page requestsby user from the start of the application, and then display the top ten users with thehighest number of requests.
Follow the steps below to implement a solution for this bonus exercise:
1. Use map-reduce to count the number of times each user made a page request ineach batch (a hit-count).
• Hint: Remember that the User ID is the 3rd field in each line.
2. Define a function called updateCount that takes an array (in Python) or sequence(in Scala) of hit-counts and an existing hit-count for a user. The function shouldreturn the sum of the new hit-counts plus the existing count.
© Copyright 2010–2017 Cloudera. All Rights Reserved. Not to be reproduced or shared without prior written consent from Cloudera. 101

102
• Hint: An example of an updateCount function is in the course material and thecode can be found in $DEVSH/examples/spark/spark-streaming.
3. Use updateStateByKey with your updateCount function to create a newDStream of users and their hit-counts over time.
4. Use transform to call the sortByKey transformation to sort by hit-count.
• Hint: You will have to swap the key (user ID) with the value (hit-count) to sort.
Note: The solution files for this bonus exercise are in the bonus package in the exerciseMaven project directory (Scala) and in solution-python/bonus in the exercisedirectory (Python).
This is the end of the exercise.
© Copyright 2010–2017 Cloudera. All Rights Reserved. Not to be reproduced or shared without prior written consent from Cloudera. 102

103
Hands-On Exercise: Processing Streaming ApacheKafka Messages
Files and Data Used in This Exercise
Exercise directory $DEVSH/exercises/streaming-kafkaPython stub stubs-python/StreamingLogsKafka.pyPython solution stubs-solution/StreamingLogsKafka.pyScala projectdirectory
streaminglogskafka_project
Scala stub class stubs.StreamingLogsKafkaScala solution class solution.StreamingLogsKafkaData (local) $DEVDATA/weblogs/*
In this exercise, you will write an Apache Spark Streaming application to handleweb logs received as messages on a Kafka topic.
Write a Spark Streaming Application Using a Direct Kafka DStreamWrite an application to consume Kafka messages in the weblogs topic using directKafka DStream.
In this exercise you will work in the exercise directory: $DEVSH/exercises/streaming-kafka. Within that directory are separate language-specific directoriescontaining stub files that import the necessary libraries for your application.
• For Python, start with the stub file StreamingLogsKafka.py in the stubs-python directory.
• For Scala, a Maven project directory called streaminglogskafka_project hasbeen provided. To complete the exercise, start with the stub code in src/main/scala/stubs/StreamingLogsKafka.scala.
1. Your application should accept two input arguments that the user will set whenstarting the application:
• First argument: the Kafka topic from which to retrieve messages
• Second argument: a comma-separated list of Kafka brokers and ports, such asbroker1:port,broker2:port,broker3:port. (This could be any numberof brokers, depending on the environment.)
© Copyright 2010–2017 Cloudera. All Rights Reserved. Not to be reproduced or shared without prior written consent from Cloudera. 103
104
2. Create a DStream using KafkaUtils.createDirectStream. The topic listand broker list should use the arguments passed by the user when submitting theapplication.
Refer to the course materials for the details of creating a Kafka stream.
3. Kafka messages are in (key, value) form, but for this application, the key is nulland only the value is needed. (The value is the web log line.) Map the DStream toremove the key and use only the value.
4. To verify that the DStream is correctly receiving messages, display the first 10elements in each batch.
5. For each RDD in the DStream, display the number of items—that is, the number ofrequests.
Tip: Python does not allow calling print within a lambda function, so define anamed function to print.
6. Save the filtered logs to text files in HDFS. Use the base directory name/loudacre/streamlog/kafkalogs.
Build Your Scala ApplicationIf you are using Scala, you need to build your application before running it. If you areusing Python, you can skip these steps.
7. Change to the project directory for the exercise.
$ cd \$DEVSH/exercises/streaming-kafka/streaminglogskafka_project
8. Build your application JAR file using the mvn package command.
Create a Kafka Topic
9. Open a new gateway terminal session. This exercise uses multiple terminalwindows. To avoid confusion, you might wish to set a different title for the newwindow such as “Kafka”.
© Copyright 2010–2017 Cloudera. All Rights Reserved. Not to be reproduced or shared without prior written consent from Cloudera. 104
105
10. Use the kafka-topics script to create a Kafka topic called weblogs from whichyour application will consume messages.
$ kafka-topics --create --zookeeper master-1:2181 \ --replication-factor 1 --partitions 2 --topic weblogs
11. Confirm your topic was created correctly by listing topics. Make sure weblogs isdisplayed.
$ kafka-topics --list --zookeeper master-1:2181
Produce Kafka Messages to Test Your Application
12. Run the test script to generate Kafka messages to the weblogs topic using the datafiles in $DEVDATA/weblogs at a rate of 20 messages per second.
$ $DEVSH/scripts/streamtest-kafka.sh \ weblogs worker-1:9092 20 $DEVDATA/weblogs/*
The script will begin displaying the messages it is sending to the weblogs Kafkatopic. (You may disregard any SLF4J messages.)
13. Return to the terminal window where your Spark application is running to verifythe count output. Also review the contents of the saved files in HDFS directories/loudacre/streamlog/kafkalogs-<time-stamp>. These directories holdpart files containing the page requests.
Run Your Application
14. Open a new gateway terminal session. To avoid confusion, you might wish to set adifferent title for the new window such as “Application”.
15. Change to the correct directory for the language you are using for your application.
• For Python, change to the main exercise directory:
$ cd $DEVSH/exercises/streaming-kafka
© Copyright 2010–2017 Cloudera. All Rights Reserved. Not to be reproduced or shared without prior written consent from Cloudera. 105

106
• For Scala, change to the project directory for the exercise:
$ cd \$DEVSH/exercises/streaming-kafka/streaminglogskafka_project
16. Use spark2-submit to run your application. Your application takes twoparameters: the name of the Kafka topic from which the DStream will readmessages, weblogs, and a comma-separated list of broker hosts and ports.
• For Python:
$ spark2-submit \ stubs-python/StreamingLogsKafka.py weblogs \ worker-1:9092
Note: Use solution-python/StreamingLogsKafka.py to run the solutionapplication instead.
• For Scala:
$ spark2-submit --class stubs.StreamingLogsKafka \ target/streamlogkafka-1.0.jar weblogs \ worker-1:9092
Note: Use --class solution.StreamingLogsKafka to run the solutionclass instead.
17. Confirm that your application is correctly displaying the Kafka messages it receives,as well as displaying the number of received messages, every second.
Note: It may take a few moments for your application to start receiving messages.Occasionally you might find that after 30 seconds or so, it is still not receiving anymessages. If that happens, press Ctrl+C to stop the application, then restart it.
Clean Up
18. Stop the Spark application in the first terminal window by pressing Ctrl+C. (Youmight see several error messages resulting from the interruption of the job inSpark; you may disregard these.)
© Copyright 2010–2017 Cloudera. All Rights Reserved. Not to be reproduced or shared without prior written consent from Cloudera. 106
107
19. Stop the streamtest-kafka.sh script in the second terminal window bypressing Ctrl+C.
This is the end of the exercise.
© Copyright 2010–2017 Cloudera. All Rights Reserved. Not to be reproduced or shared without prior written consent from Cloudera. 107
108
Appendix Hands-On Exercise: Producing andConsuming Apache Kafka Messages
Files and Data Used in This Exercise
Exercise directory $DEVSH/exercises/kafka
In this exercise, you will use Kafka’s command line tool to create a Kafka topic.You will also use the command line producer and consumer clients to publish andread messages.
Creating a Kafka Topic
1. Open a new gateway terminal window and create a Kafka topic named weblogsthat will contain messages representing lines in Loudacre’s web server logs.
$ kafka-topics --create \ --zookeeper master-1:2181,master-2:2181,worker-2:2181 \ --replication-factor 3 \ --partitions 2 \ --topic weblogs
You will see the message: Created topic "weblogs".
Note: If you previously worked on an exercise that used Kafka, you may get anerror here indicating that this topic already exists. You may disregard the error.
2. Display all Kafka topics to confirm that the new topic you just created is listed:
$ kafka-topics --list \ --zookeeper master-1:2181,master-2:2181,worker-2:2181
3. Review the details of the weblogs topic.
$ kafka-topics --describe weblogs \ --zookeeper master-1:2181,master-2:2181,worker-2:2181
Producing and Consuming MessagesYou will now use Kafka command line utilities to start producers and consumers for thetopic created earlier.
© Copyright 2010–2017 Cloudera. All Rights Reserved. Not to be reproduced or shared without prior written consent from Cloudera. 108

109
4. Start a Kafka producer for the weblogs topic:
$ kafka-console-producer \ --broker-list worker-1:9092,worker-2:9092,worker-3:9092 \ --topic weblogs
You will see a few SLF4J messages, at which point the producer is ready to acceptmessages on the command line.
Tip: This exercise involves using multiple terminal windows. To avoid confusion,set a different title for each one by selecting Set Title… on the Terminal menu:
Set the title for this window to “Kafka Producer.”
5. Publish a test message to the weblogs topic by typing the message text and thenpressing Enter. For example:
test weblog entry 1
6. Open a new terminal window and adjust it to fit on the window beneath theproducer window. Set the title for this window to “Kafka Consumer.”
7. In the new gateway terminal window, start a Kafka consumer that will read fromthe beginning of the weblogs topic:
$ kafka-console-consumer \ --zookeeper master-1:2181,master-2:2181,worker-2:2181 \ --topic weblogs \ --from-beginning
After a few SLF4J messages, you should see the status message you sent using theproducer displayed on the consumer’s console, such as:
test weblog entry 1
8. Press Ctrl+C to stop the weblogs consumer, and restart it, but this time omit the--from-beginning option to this command. You should see that no messagesare displayed.
© Copyright 2010–2017 Cloudera. All Rights Reserved. Not to be reproduced or shared without prior written consent from Cloudera. 109
110
9. Switch back to the producer window and type another test message into theterminal, followed by the Enter key:
test weblog entry 2
10. Return to the consumer window and verify that it now displays the alert messageyou published from the producer in the previous step.
Cleaning Up
11. Press Ctrl+C in the consumer terminal window to end its process.
12. Press Ctrl+C in the producer terminal window to end its process.
This is the end of the exercise.
© Copyright 2010–2017 Cloudera. All Rights Reserved. Not to be reproduced or shared without prior written consent from Cloudera. 110

111
Appendix Hands-On Exercise: Collecting Web ServerLogs with Apache Flume
Files and Data Used in This Exercise
Exercise directory $DEVSH/exercises/flumeData files (local) $DEVDATA/weblogs
In this exercise, you will run a Flume agent to ingest web log data from a localdirectory to HDFS.
Apache web server logs are generally stored in files on the local machines running theserver. In this exercise, you will simulate an Apache server by placing provided web logfiles into a local spool directory, and then use Flume to collect the data.
Both the local and HDFS directories must exist before using the spooling directorysource.
Create an HDFS Directory for Flume-Ingested Data
1. Create a directory in HDFS called /loudacre/weblogs_flume to hold the datafiles that Flume ingests:
$ hdfs dfs -mkdir -p /loudacre/weblogs_flume
Create a Local Directory for Web Server Log Output
2. Create the spool directory into which the web log simulator will store data filesfor Flume to ingest. On the local Linux filesystem on the gateway node, create thedirectory /flume/weblogs_spooldir:
$ sudo mkdir -p /flume/weblogs_spooldir
3. Give all users the permissions to write to the /flume/weblogs_spooldirdirectory:
$ sudo chmod a+w -R /flume
© Copyright 2010–2017 Cloudera. All Rights Reserved. Not to be reproduced or shared without prior written consent from Cloudera. 111

112
Configure FlumeA Flume agent configuration file has been provided for you:$DEVSH/exercises/flume/spooldir.conf.
Review the configuration file. You do not need to edit this file. Take note in particular ofthe following:
• The source is a spooling directory source that pulls from the local/flume/weblogs_spooldir directory.
• The sink is an HDFS sink that writes files to the HDFS/loudacre/weblogs_flume directory.
• The channel is a memory channel.
Run the Flume AgentNext, start the Flume agent on the gateway node and copy the files to the spoolingdirectory.
4. Start the Flume agent using the configuration you just reviewed:
$ flume-ng agent \ --conf /etc/flume-ng/conf \ --conf-file $DEVSH/exercises/flume/spooldir.conf \ --name agent1 -Dflume.root.logger=INFO,console
5. Wait a few moments for the Flume agent to start up. You will see a message like:Component type: SOURCE, name: webserver-log-source started
Simulate Apache Web Server Output
6. Open a separate gateway terminal window. Run the script to place the web log filesin the /flume/weblogs_spooldir directory:
$ $DEVSH/scripts/copy-move-weblogs.sh \ /flume/weblogs_spooldir
This script will create a temporary copy of the web log files and move them to thespooldir directory.
© Copyright 2010–2017 Cloudera. All Rights Reserved. Not to be reproduced or shared without prior written consent from Cloudera. 112
113
7. Return to the terminal that is running the Flume agent and watch the loggingoutput. The output will give information about the files Flume is putting into HDFS.
8. Once the Flume agent has finished, enter Ctrl+C to terminate the process.
9. Using the command line or Hue File Browser, list the files that were added by theFlume agent in the HDFS directory /loudacre/weblogs_flume.
Note that the files that were imported are tagged with a Unixtimestamp corresponding to the time the file was imported, such asFlumeData.1427214989392.
This is the end of the exercise.
© Copyright 2010–2017 Cloudera. All Rights Reserved. Not to be reproduced or shared without prior written consent from Cloudera. 113

114
Appendix Hands-On Exercise: Sending Messages fromFlume to Kafka
Files and Data Used in This Exercise
Exercise directory $DEVSH/exercises/flafkaData files (local) $DEVDATA/weblogs
In this exercise, you will run a Flume agent on the gateway node that ingests weblogs from a local spool directory and sends each line as a message to a Kafkatopic.
The Flume agent is configured to send messages to the weblogs topic you createdearlier.
Important: This exercise depends on two prior exercises: “Collect Web Server Logswith Flume” and “Produce and Consume Kafka Messages.” If you did not complete bothof these exercises, run the catch-up script and advance to the current exercise:
$ $DEVSH/scripts/catchup.sh
Configure a Flume Agent with a Kafka SinkA Flume agent configuration file has been provided for you:$DEVSH/exercises/flafka/spooldir_kafka.conf
1. Review the configuration file. You do not need to edit this file. Take note in particularof the following points:
• The source and channel configurations are identical to the ones in the “CollectWeb Server Logs with Flume” exercise: a spooling directory source that pullsfrom the local /flume/weblogs_spooldir directory, and a memory channel.
• Instead of an HDFS sink, this configuration uses a Kafka sink that publishesmessages to the weblogs topic.
© Copyright 2010–2017 Cloudera. All Rights Reserved. Not to be reproduced or shared without prior written consent from Cloudera. 114
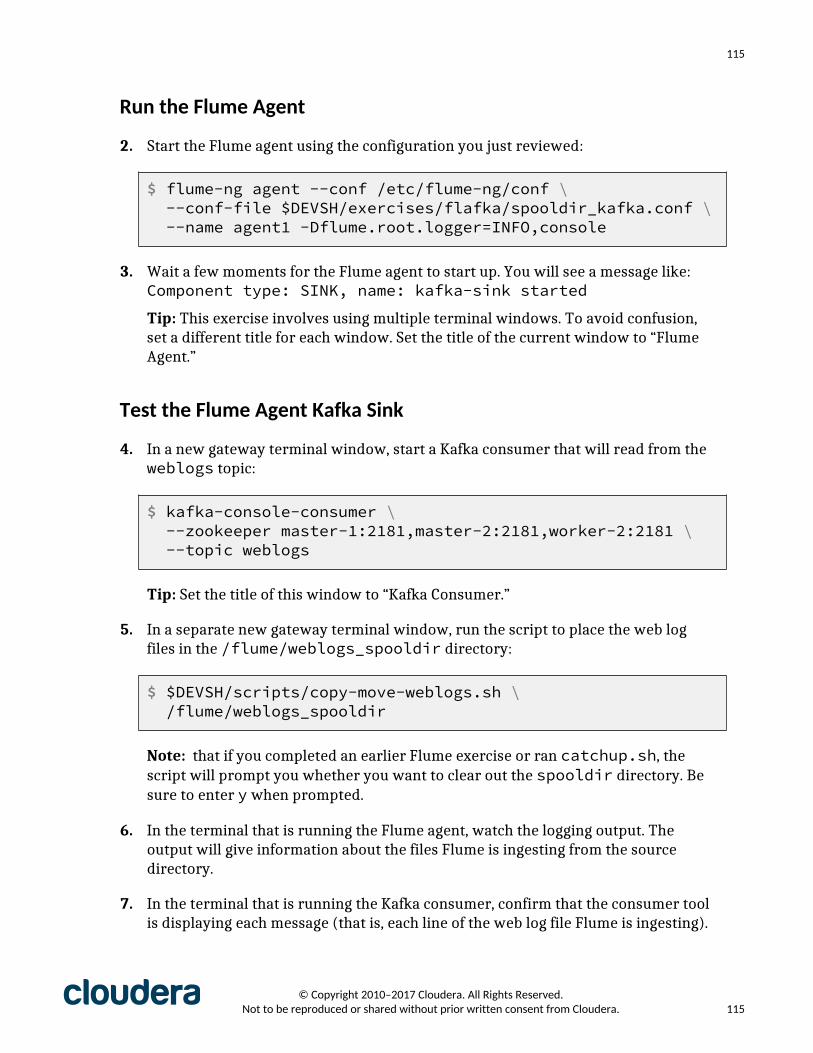
115
Run the Flume Agent
2. Start the Flume agent using the configuration you just reviewed:
$ flume-ng agent --conf /etc/flume-ng/conf \ --conf-file $DEVSH/exercises/flafka/spooldir_kafka.conf \ --name agent1 -Dflume.root.logger=INFO,console
3. Wait a few moments for the Flume agent to start up. You will see a message like:Component type: SINK, name: kafka-sink started
Tip: This exercise involves using multiple terminal windows. To avoid confusion,set a different title for each window. Set the title of the current window to “FlumeAgent.”
Test the Flume Agent Kafka Sink
4. In a new gateway terminal window, start a Kafka consumer that will read from theweblogs topic:
$ kafka-console-consumer \ --zookeeper master-1:2181,master-2:2181,worker-2:2181 \ --topic weblogs
Tip: Set the title of this window to “Kafka Consumer.”
5. In a separate new gateway terminal window, run the script to place the web logfiles in the /flume/weblogs_spooldir directory:
$ $DEVSH/scripts/copy-move-weblogs.sh \ /flume/weblogs_spooldir
Note: that if you completed an earlier Flume exercise or ran catchup.sh, thescript will prompt you whether you want to clear out the spooldir directory. Besure to enter y when prompted.
6. In the terminal that is running the Flume agent, watch the logging output. Theoutput will give information about the files Flume is ingesting from the sourcedirectory.
7. In the terminal that is running the Kafka consumer, confirm that the consumer toolis displaying each message (that is, each line of the web log file Flume is ingesting).
© Copyright 2010–2017 Cloudera. All Rights Reserved. Not to be reproduced or shared without prior written consent from Cloudera. 115

116
8. Once the Flume agent has finished, enter Ctrl+C in both the Flume agent terminaland the Kafka consumer terminal to end their respective processes.
This is the end of the exercise.
© Copyright 2010–2017 Cloudera. All Rights Reserved. Not to be reproduced or shared without prior written consent from Cloudera. 116

117
Appendix Hands-On Exercise: Import Data fromMySQL Using Apache Sqoop
Files and Data Used in This Exercise
Exercise directory $DEVSH/exercises/sqoopMySQL database loudacreMySQL table basestationsHDFS paths /loudacre/basestations_import
/loudacre/basestations_import_parquet
In this exercise, you will import tables from MySQL into HDFS using Sqoop.
Important: This exercise depends on a previous exercise: “Accessing HDFS withCommand Line and Hue.” If you did not complete that exercise, run the course catch-upscript and advance to the current exercise:
$ $DEVSH/scripts/catchup.sh
Import a Table from MySQL to HDFSYou can use Sqoop to look at the table layout in MySQL. With Sqoop, you can alsoimport the table from MySQL to HDFS.
1. If you don’t already have one started, open a gateway terminal window.
2. Run the sqoop help command to familiarize yourself with the options in Sqoop:
$ sqoop help
3. List the tables in the loudacre database:
$ sqoop list-tables \ --connect jdbc:mysql://gateway/loudacre \ --username training --password training
4. Run the sqoop help import command to see its options:
$ sqoop help import
© Copyright 2010–2017 Cloudera. All Rights Reserved. Not to be reproduced or shared without prior written consent from Cloudera. 117
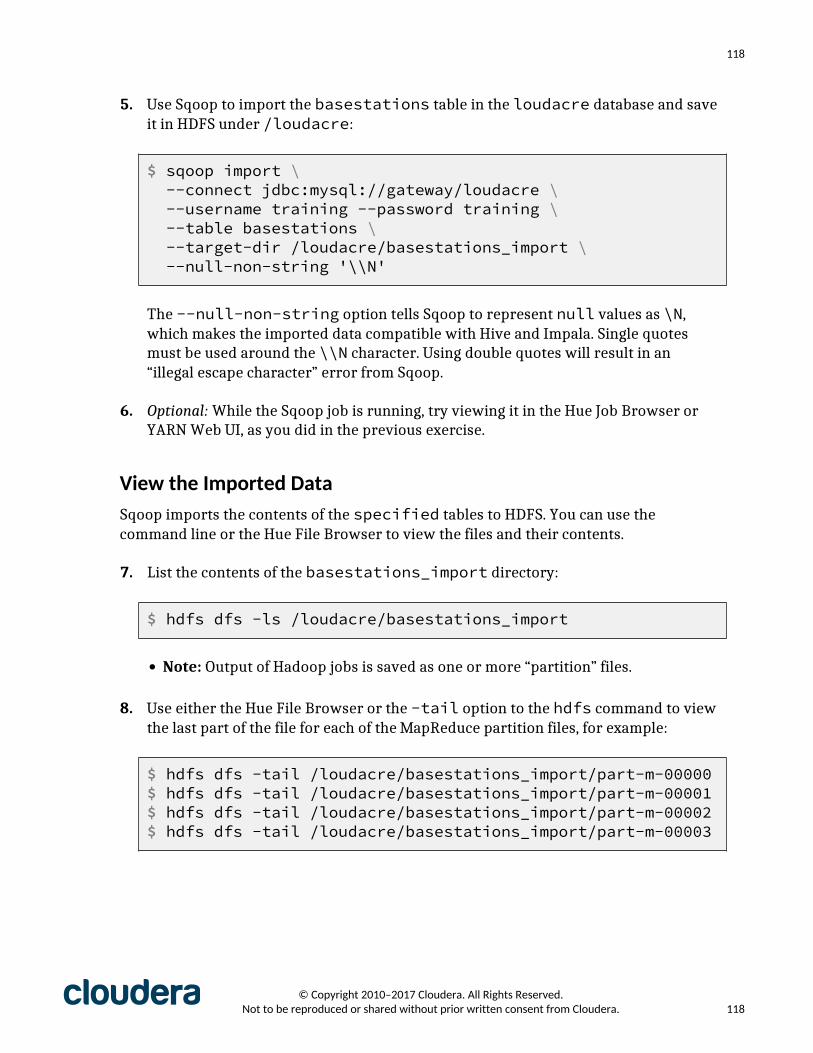
118
5. Use Sqoop to import the basestations table in the loudacre database and saveit in HDFS under /loudacre:
$ sqoop import \ --connect jdbc:mysql://gateway/loudacre \ --username training --password training \ --table basestations \ --target-dir /loudacre/basestations_import \ --null-non-string '\\N'
The --null-non-string option tells Sqoop to represent null values as \N,which makes the imported data compatible with Hive and Impala. Single quotesmust be used around the \\N character. Using double quotes will result in an“illegal escape character” error from Sqoop.
6. Optional: While the Sqoop job is running, try viewing it in the Hue Job Browser orYARN Web UI, as you did in the previous exercise.
View the Imported DataSqoop imports the contents of the specified tables to HDFS. You can use thecommand line or the Hue File Browser to view the files and their contents.
7. List the contents of the basestations_import directory:
$ hdfs dfs -ls /loudacre/basestations_import
• Note: Output of Hadoop jobs is saved as one or more “partition” files.
8. Use either the Hue File Browser or the -tail option to the hdfs command to viewthe last part of the file for each of the MapReduce partition files, for example:
$ hdfs dfs -tail /loudacre/basestations_import/part-m-00000$ hdfs dfs -tail /loudacre/basestations_import/part-m-00001$ hdfs dfs -tail /loudacre/basestations_import/part-m-00002$ hdfs dfs -tail /loudacre/basestations_import/part-m-00003
© Copyright 2010–2017 Cloudera. All Rights Reserved. Not to be reproduced or shared without prior written consent from Cloudera. 118

119
Import a Table Using an Alternate File Format
9. Import the basestations table to a Parquet data format rather than the defaultfile form (text file).
$ sqoop import \ --connect jdbc:mysql://gateway/loudacre \ --username training --password training \ --table basestations \ --target-dir /loudacre/basestations_import_parquet \ --as-parquetfile
10. View the results of the import command by listing the contents of thebasestations_import_parquet directory in HDFS, using either Hue or thehdfs command. Note that the Parquet files are each given unique names, such ase8f3424e-230d-4101-abba-66b521bae8ef.parquet.
• Note: You can’t directly view the contents of the Parquet files because they arebinary files rather than text.
11. Use the parquet-tools head command to view the first few records in the setof data files imported by Sqoop.
$ parquet-tools head \ hdfs://master-1/loudacre/basestations_import_parquet/
This is the end of the exercise.
© Copyright 2010–2017 Cloudera. All Rights Reserved. Not to be reproduced or shared without prior written consent from Cloudera. 119
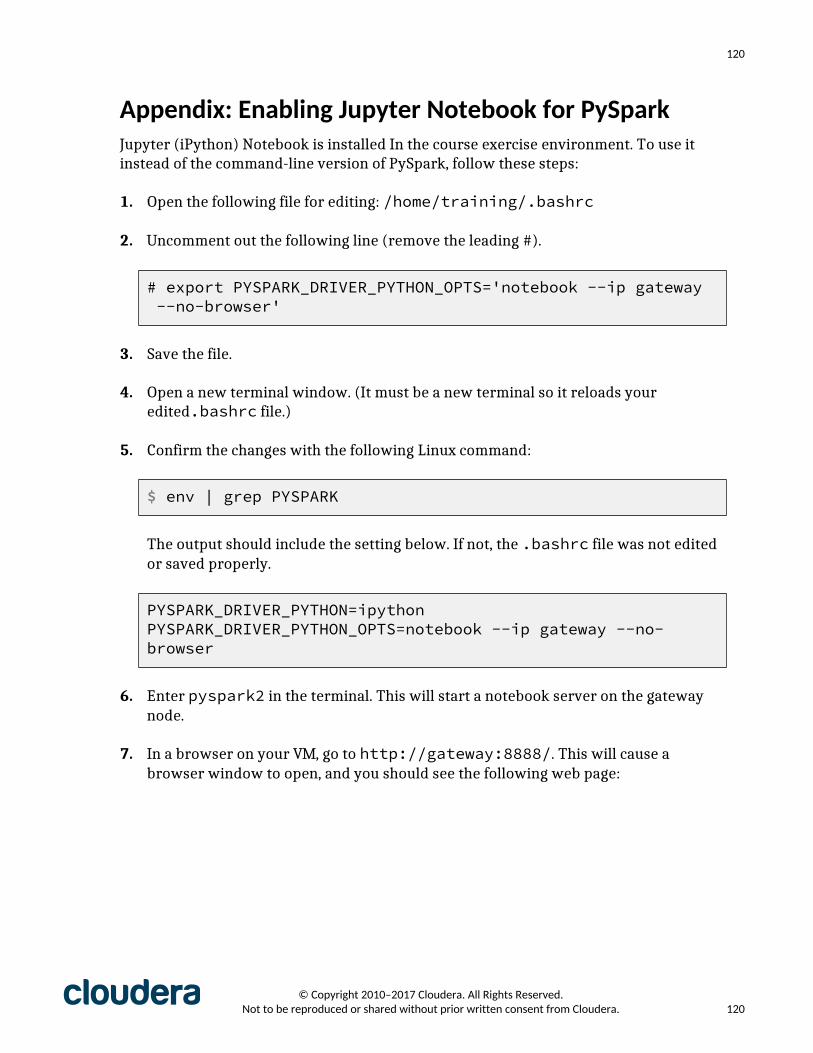
120
Appendix: Enabling Jupyter Notebook for PySparkJupyter (iPython) Notebook is installed In the course exercise environment. To use itinstead of the command-line version of PySpark, follow these steps:
1. Open the following file for editing: /home/training/.bashrc
2. Uncomment out the following line (remove the leading #).
# export PYSPARK_DRIVER_PYTHON_OPTS='notebook --ip gateway --no-browser'
3. Save the file.
4. Open a new terminal window. (It must be a new terminal so it reloads youredited.bashrc file.)
5. Confirm the changes with the following Linux command:
$ env | grep PYSPARK
The output should include the setting below. If not, the .bashrc file was not editedor saved properly.
PYSPARK_DRIVER_PYTHON=ipythonPYSPARK_DRIVER_PYTHON_OPTS=notebook --ip gateway --no-browser
6. Enter pyspark2 in the terminal. This will start a notebook server on the gatewaynode.
7. In a browser on your VM, go to http://gateway:8888/. This will cause abrowser window to open, and you should see the following web page:
© Copyright 2010–2017 Cloudera. All Rights Reserved. Not to be reproduced or shared without prior written consent from Cloudera. 120

121
8. On the right hand side of the page select Python 2 from the New menu.
9. Enter some Spark code such as the following and use the play button to executeyour Spark code.
10. Notice the output displayed.
© Copyright 2010–2017 Cloudera. All Rights Reserved. Not to be reproduced or shared without prior written consent from Cloudera. 121
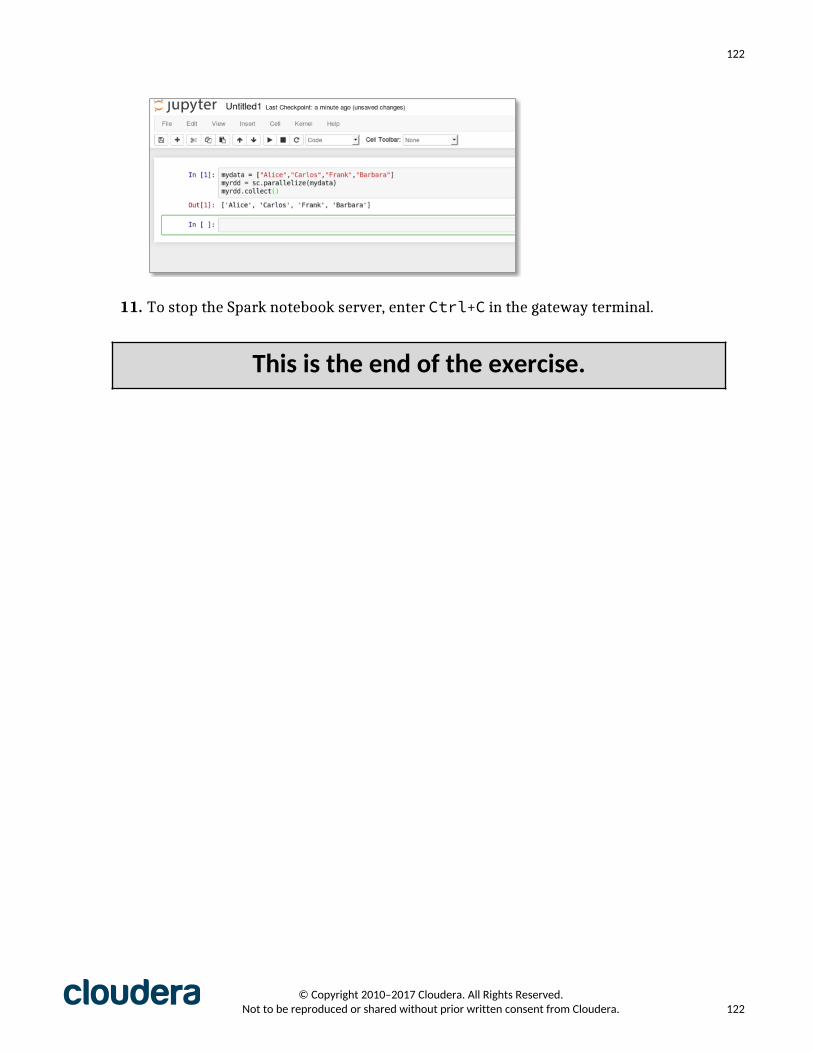
122
11. To stop the Spark notebook server, enter Ctrl+C in the gateway terminal.
This is the end of the exercise.
© Copyright 2010–2017 Cloudera. All Rights Reserved. Not to be reproduced or shared without prior written consent from Cloudera. 122
123
Appendix: Troubleshooting TipsThis appendix offers some tips to handle problems you may encounter whilecompleting exercises.
Messages stopped displaying in the terminal window when running create-cluster.shThis usually indicates that there was a temporary network disconnect between theGet2Cluster VM and cmhost while the script was running. However it is still likely thatthe cluster was successfully created.
Steps to take:
• Continue with the steps documented in the "Verify Your Cluster" section of theStarting the Exercise Environment exercise.
• Login to Cloudera Manager (if the browser cannot connect, verify your web proxyis still running). Do you see that a full cluster with the name you specified nowexists and is healthy (as indicated by green status icons)? If not, it may be that thecluster is still being created. In Cloudera Manager, click on the Running Commands(paper scroll) icon to see if any commands are still running. You can view All RecentCommands as well. Verify that the Import Cluster Template command succeeded (itshould have a green checkmark next to it).
• If you want to see the messages that would have displayed in the original terminalwindow where you ran create-cluster, had the network interruption not occured,run this command from a cmhost terminal: $ cat /home/training/config/cluster.log
If the cluster did not get created and there are no more running commands, you canalways reuse your cmhost to create a new cluster. This will take approximately 25additional minutes to complete. If you want to go this option, run this command fromthe /home/training directory of a cmhost terminal (then repeat the Create and Launchthe Exercise Cluster section of the Starting the Exercise Environment exercise):
$ ./create-cluster.sh
The Cloudera Manager Management services display unknown or unhealthystatusThe Cloudera Manager Management services monitor the health of your cluster. If thisservice is not running properly, then the health of other cluster services will not display(frequently indicated by a question mark status icon). You may also see a yellow bar
© Copyright 2010–2017 Cloudera. All Rights Reserved. Not to be reproduced or shared without prior written consent from Cloudera. 123
124
display across the top of the Cloudera Manager web UI with messages such as, "Requestto the Service Monitor failed…".
To resolve the issue, try running this command from the /home/training directory of acmhost terminal:
$ ./config/reset-cm.sh
Cloudera Manager displays unhealthy status of servicesIf the cluster is still being created, or if you just restarted the cluster from a stoppedstate, then it can take a few minutes for bad health status indicators to resolvethemselves. However, if neither of these situations apply, here are some ways todetermine what might be causing the health issues to appear, and how to resolve them.
Click on All Health Issues, then click on Organize by Health Test.
• If you have "Process Status" issues where the Cloudera Manager agent is notresponding (as indicated by Hosts with unhealthy status), run this command from thecmhost terminal:
◦ $ ./config/restart-agents.sh
◦ Allow two to three minutes after running the script for the health issues todisappear from the CM web UI.
◦ If the restart-agent script throws errors, ensure that your cluster instances arerunning. You can run Applications > Training > Start Cluster to ensure they arerunning.
• If you have "Clock Offset" issues, run this command from the cmhost terminal:
◦ $ ./config/reset-clocks.sh
◦ Note: it can take two or three minutes after running the above command for thehealth issues to clear from the Cloudera Manager web UI
• If you have any type of "Canary" issues, these typically clear up on their own, giventime.
• If any other issues still exist after solving any Process Status and Clock Offset issues:
◦ In Cloudera Manager, note the name of one of the services reporting the issue (e.g.HDFS).
◦ From the Clusters menu, choose that service (e.g. HDFS).
© Copyright 2010–2017 Cloudera. All Rights Reserved. Not to be reproduced or shared without prior written consent from Cloudera. 124

125
◦ From the Actions menu, choose Restart.
• If you still have issues, you can always re-run create-cluster.sh.
Unable to view files on the Get2Cluster VM in /home/training/training_materials or /mnt/gatewaySometimes, if you have a brief network outage between the Get2Cluster VM and thegateway host, the gateway folder remotely mounted on VM will be unmounted. To re-mount the folder, execute the following command in a terminal window on the VM:
$ ~/bin/mount_gateway_drive.sh
You may need to restart applications such as the File Browser or gedit in order toaccess the re-mounted folder.
Unable to load any cluster web pages in the browser on the Get2Cluster VMIf you are unable to load the YARN Resource Manager UI, Hue, Cloudera Manager orother cluster pages, your proxy service may have stopped running due to networkissues. Try restarting it following the instructions in the Starting the ExerciseEnvironment exercise, then reload the page in your VM browser.
Unable to connect to gateway host or other cluster hosts from theGet2Cluster VMIf you are unable to start a terminal session connected to the gateway host, CM host,or other hosts in your cluster, you may be having trouble with your local networkconnection. If you have confirmed that’s not the case, your Get2Cluster VM may haveout-of-date IP address references for the cluster nodes. This can occur, for example, ifthe cluster was stopped and restarted. Request the correct public IP address for yourCM host from your instructor, then run the Configure Hosts Files step as explained inthe Starting the Exercise Environment exercise.
Your terminal session to the gateway host is not workingYour terminal may appear to be "frozen", or you may get a "broken pipe" error. Thisusually happens if you have lost your network connection to the cluster. Try closing thesession using CTRL+C. If that does not work, close the terminal window by clicking theX in the upper right corner of the window.
When your network connection is reestablished, start a new gateway session. Youwill have to restore your exercise context, such as changing to the correct directory,and restarting the Spark shell or other processes that had been running in your
© Copyright 2010–2017 Cloudera. All Rights Reserved. Not to be reproduced or shared without prior written consent from Cloudera. 125
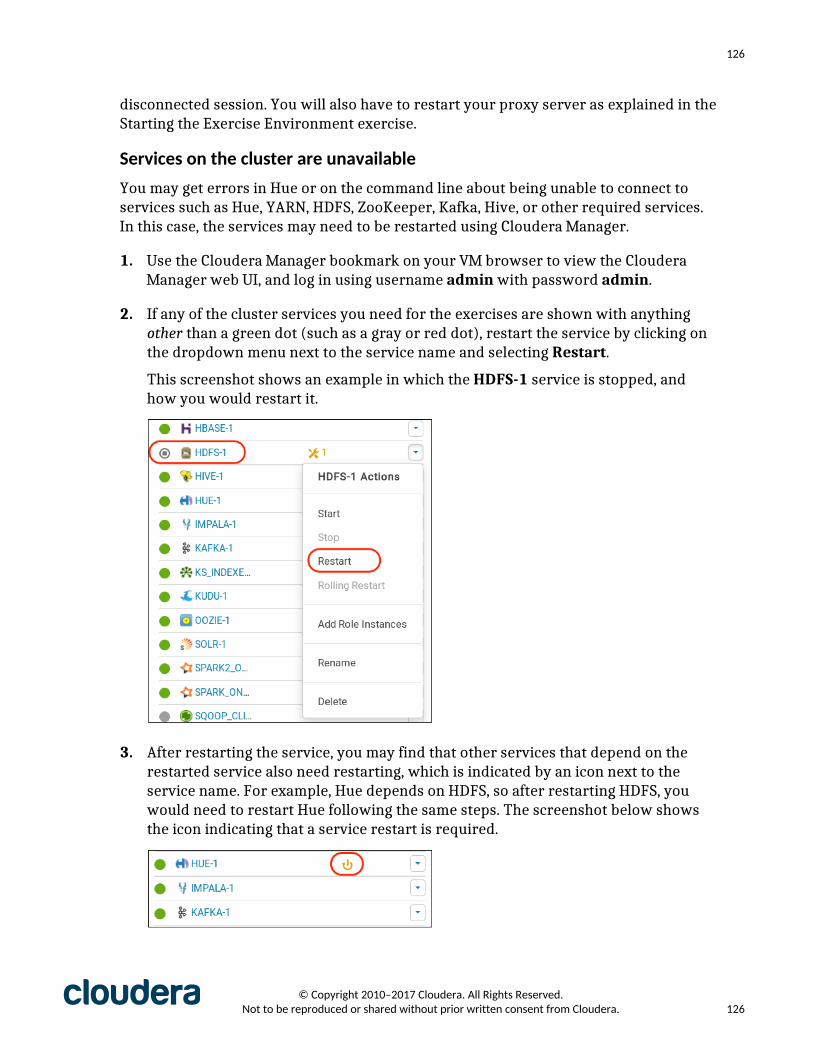
126
disconnected session. You will also have to restart your proxy server as explained in theStarting the Exercise Environment exercise.
Services on the cluster are unavailableYou may get errors in Hue or on the command line about being unable to connect toservices such as Hue, YARN, HDFS, ZooKeeper, Kafka, Hive, or other required services.In this case, the services may need to be restarted using Cloudera Manager.
1. Use the Cloudera Manager bookmark on your VM browser to view the ClouderaManager web UI, and log in using username admin with password admin.
2. If any of the cluster services you need for the exercises are shown with anythingother than a green dot (such as a gray or red dot), restart the service by clicking onthe dropdown menu next to the service name and selecting Restart.
This screenshot shows an example in which the HDFS-1 service is stopped, andhow you would restart it.
3. After restarting the service, you may find that other services that depend on therestarted service also need restarting, which is indicated by an icon next to theservice name. For example, Hue depends on HDFS, so after restarting HDFS, youwould need to restart Hue following the same steps. The screenshot below showsthe icon indicating that a service restart is required.
© Copyright 2010–2017 Cloudera. All Rights Reserved. Not to be reproduced or shared without prior written consent from Cloudera. 126
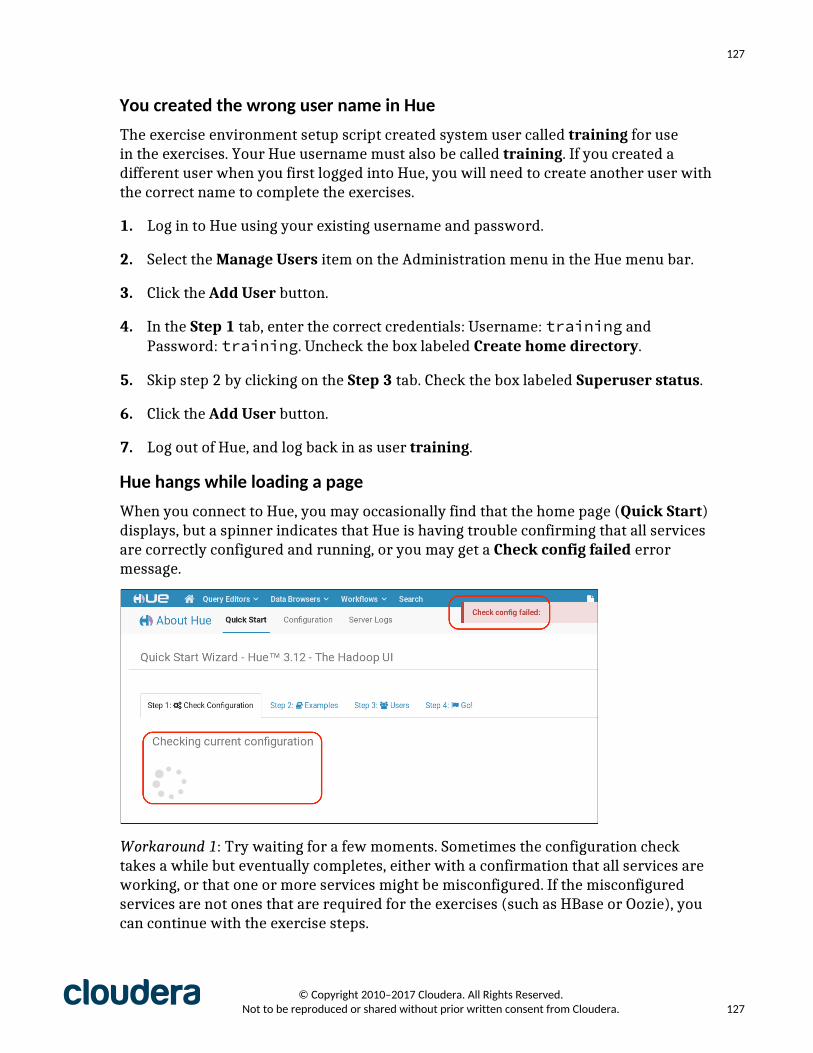
127
You created the wrong user name in HueThe exercise environment setup script created system user called training for usein the exercises. Your Hue username must also be called training. If you created adifferent user when you first logged into Hue, you will need to create another user withthe correct name to complete the exercises.
1. Log in to Hue using your existing username and password.
2. Select the Manage Users item on the Administration menu in the Hue menu bar.
3. Click the Add User button.
4. In the Step 1 tab, enter the correct credentials: Username: training andPassword: training. Uncheck the box labeled Create home directory.
5. Skip step 2 by clicking on the Step 3 tab. Check the box labeled Superuser status.
6. Click the Add User button.
7. Log out of Hue, and log back in as user training.
Hue hangs while loading a pageWhen you connect to Hue, you may occasionally find that the home page (Quick Start)displays, but a spinner indicates that Hue is having trouble confirming that all servicesare correctly configured and running, or you may get a Check config failed errormessage.
Workaround 1: Try waiting for a few moments. Sometimes the configuration checktakes a while but eventually completes, either with a confirmation that all services areworking, or that one or more services might be misconfigured. If the misconfiguredservices are not ones that are required for the exercises (such as HBase or Oozie), youcan continue with the exercise steps.
© Copyright 2010–2017 Cloudera. All Rights Reserved. Not to be reproduced or shared without prior written consent from Cloudera. 127
128
Workaround 2: Usually when the configuration check has not completed or warns ofa misconfigured service, the rest of Hue will still work correctly. Try completing theexercise by going to the Hue page you want to use, such as the Query Editor or FileBrowser. If those functions work, you can continue with the exercise steps.
Solution: If the workarounds above are not helpful, you may need to restart the Hueservice using Cloudera Manager. Refer to the section above called "Services on thecluster are unavailable". Follow those steps to restart the HUE-1 service, even if theservice is displayed with a healthy (green dot) indicator in Cloudera Manager. When theservice is restarted, reload the Hue page in your browser.
HDFS error running catchup scriptWARN hdfs.DFSClient: Caught exceptionjava.lang.InterruptedException
You may get this warning from the catchup script. This is just a warning, and you candisregard it.
BindException When Starting the Spark ShellYou may see a Spark warning like this when starting either the Python or Scala Sparkshell:
FAILED org.spark-project.jetty.server.Server@69419d59: java.net.BindException: Address already in use
This is usually because you are attempting to run two instances of the Spark shell at thesame time.
To fix this issue, exit one of your two running Spark shells.
If you do not have a terminal window running a second Spark shell, you may have onerunning in the background. View the applications running on the YARN cluster usingthe Hue Job Browser. Check the start times to determine which application is the oneyou want to keep running. Select the other one and click kill.
bind: Address already in use when running proxy serverThis error occurs when a proxy session has terminated, but the actual process is stillrunning.
In some cases, simply waiting a few moments and restarting the proxy server will work.If not, try restarting the network in a terminal window on the local VM.
$ sudo service network restart
© Copyright 2010–2017 Cloudera. All Rights Reserved. Not to be reproduced or shared without prior written consent from Cloudera. 128
129
Spark job is accepted but never runsWhen you execute a Spark application on YARN, you may see several messages showingthat the job is ACCEPTED:
INFO yarn.Client: Application report for application_xxxx (state: ACCEPTED)
After a few seconds, you should be notified that the job status is now RUNNING. If theACCEPTED message keeps displaying and the application or query never executes, thismeans that YARN has scheduled the job to run when cluster resources are availble, butnone (or too few) resources are available.
Cause: This usually happens if you are running multiple Spark applications (such astwo Spark shells, or a shell and an application) at the same time. It can also mean that aSpark application has crashed or exited without releasing its cluster resources.
Fix: Stop running one of the Spark applications. If you cannot finding a runningapplication, use the Hue job browser to see what applications are running on the YARNcluster, and kill the one you do not need.
© Copyright 2010–2017 Cloudera. All Rights Reserved. Not to be reproduced or shared without prior written consent from Cloudera. 129