experiments without explosions
DESCRIPTION
Experiments Without ExplosionsTRANSCRIPT

MIR PUBLISHERS MOSCOW

0 . OjitrHH
OnblTbl 5E3 B3PblBOB
M3RaTejIbCTB0 «XHMHH» MoCKBa

O. M. OLGIN
Experiments Without Explosions
Mir Publishers Moscow

Translated from the Russian by G.I . Grishuk
First published 1988 Revised from the 1986 Russian edition
Ha aHSAuucxoM aauKe
Printed in the Union of Soviet Socialist Republics
© H3RaTeJibcTBo «XHMHH», 1986
© English translation, Mir Publishers,
ISBN 5-03-000561-7 1988

PREFACE
Chemical experiments are one of the most ex-citing things to do, probably, because they are like miracles: you mix two substances and get a third one that is different from the initial components. And, in addition, each miracle is still more exciting because it has a precise scientific explanation. It is true, however, that a beginner is not always able to understand it. There are many experiments that seem rather simple and easy, but they are difficult to explain on the level of chemical knowledge one acquires at school. Therefore, you will have to take our word for some of the things written in this book.
We will tell you about the miraculous trans-formations of substances, in other words, about chemical experiments. Quite often they open the way to science. The biographies of many great scientists reveal that at a tender age many of them derived great pleasure from chemical ex-periments. With time these experiments became more and more complex and instructive, and soon-er or later the hobby led to serious scientific re-search. And the research was not necessarily in the field of chemistry. Biology, physics, medi-cine, geology, and many other branches of science also require a thorough knowledge of
5

Preface
chemistry and skills to conduct experiments correctly.
Some students believe that a good chemical experiment must always be accompanied by ex-plosions, thunder, crashes and puffs of caustic smoke. But this is a grave mistake: the opposite is true. I assure not only you, but your parents, too. If your parents have doubts about whether or not to allow you to conduct chemical exper-iments, show them the following sentence: If you follow the instructions carefully, the ex-periments described in this book will produce no explosions, thunder or caustic smells. There is no danger at all!
But complete safety can be guaranteed only on one indispensible condition, which we re-peat once again: You must do everything exactly as stated in this book. Do not rush and put the cart before the horse. Excessive self-confidence is of no benefit to the beginner.
In this book you will find many chemical ex-periments appealing to different tastes and of varying complexity. We will start with the sim-plest experiments devised for those who will probably conduct them for the first time in their lives. Gradually, the experiments will become more and more complicated, but by that time you will have acquired some experience, and, as the saying goes, have become a skilled hand at chemistry. Do not be confused by the simplicity of some chapters and the complexity of others. After all, when there is a wide enough range of choices you can easily find exactly what you like and are able to do. If an experiment seems too
6

Preface
difficult or even impossible, put it aside for the time being.
In fact, we would like to advise you not to read this book the first time from cover to co-ver. This is completely unnecessary. It is much bet-ter to leaf through it, find an experiment that interests you and that you are really able to con-duct, and only then read the whole chapter at-tentively, from beginning to end, making notes to remind yourself about what substances, uten-sils, and equipment you will need. If you do not have some of the required things, skip the ex-periment and proceed to the next one. Later, you can make up for what you had to omit.
Some of the experiments, described in this book, should not be conducted at home, but rather at school, where your chemistry teacher can advise and even help you. Please do not hesitate to ask your teacher for assistance, which he will surely be glad to offer. And if you cannot obtain certain chemicals, you will probably find them in the chemistry laboratory at school. Besides, experienced chemists recommend that experi-ments be conducted not alone, but in a group, and preferably under the supervision of an experi-enced person. Therefore, if you have the chance to use the chemistry laboratory after classes, and have your teacher or some other experienced per-son act as an instructor, do not neglect it. In the author's opinion, this is the best way to study chemistry for students of school age.
But, we repeat, even the experiments that you conduct at home will not be a source of worry for either you or your parents, if you are ac-
7

Preface
curate and follow the instructions precisely. If you want to understand what happens during a chemical reaction, or you want to devise differ-ent versions of some experiments, you can al-ways turn to the chemical literature, to your school textbook or to popular science books.
Setting up a home laboratory is not as dif-ficult as it may seem. Right after the introduc-tion instructions are given about how to do this, what you will need at the beginning, and where to buy equipment and reagents.
It is requested that all the readers, without ex-ception, read this section, particularly the begin-ning of it, very attentively. Perhaps you have already conducted experiments and acquired some skills. Still, do not overlook the advice given in the following chapter. First of all, you will prob-ably find something new and useful there; second-ly, what is much more important, the basic pre-cautions to make your work safe are given there. Safety and orderliness are things that are worth reading about, even if the material seems fami-liar to you. Something useful may still turn up.
If you are just a beginner, the safety precau-tions given are twice as valuable for you. They are indispensable. You must not conduct even the first, most simple experiments without read-ing them. So do be attentive!
If an experiment cannot be done at home, you will be told so. But for the experiments that can be conducted in a modest home laboratory, we have selected substances that can easily be bought in a pharmacy or a hardware store. Some of'the things you can also find at home, and some of
8

Preface
the experiments are so simple that they can be conducted by any beginner, even by someone who has not yet started to study chemistry at school.
The book consists of six parts. The first part contains advice on how to set up a home labo-ratory, and preliminary instructions that are essential for any beginning chemist on how to work, and the dos and don'ts of chemistry. The other five parts of this book describe the exper-iments, experiments without explosions. In or-der to separate the groups of experiments, and make it easier for the reader to select an experi-ment, each part is divided into chapters. Some-times, in order to avoid repetition, you will be referred to chapters where specific substances, devices and procedures have already been men-tioned. You can easily find the information you need in the Table of Contents.
The equations for chemical reactions have de-liberately been omitted, although they are usual-ly given in textbooks and more serious mono-graphs. Of course, chemical equations explain the basis of reactions, but not all readers can understand them, and this book is intended for as many readers as possible. Thus, only the initial reactants and the products of a reaction are men-tioned. This makes the reading easier for those who want to conduct experiments, but for whom complicated chemical equations are still shroud-ed in mystery. Those who wish to understand the basis of experiments can find the necessary equations in textbooks. To make things easier, the formulas of substances, that is, of the reac-
9

Preface
tants and products of a reaction, are given in the book.
With this let us conclude the introduction. There is little left to say. The experiments that are described in this book were suggested and conducted by many people, including chemists, engineers, and teachers. The author wishes to express his deep gratitude to them and at the very least, mention their names here: G. A. Balueva, N. V. Bovin, Yu. A. Bulavin, Yu. V. Vlasenko, N. F. Grineva. M. A. Gure-vich, V. E. Zhvirblis, V. I. Zubritsky, Yu. A. Koidan, N. N. Krasikov, I. A. Leenson, G. V. Lisichkin, Yu. G. Orlik, N. A. Paravyan, V. A. Pchelin, V. I. Safonov, K. I. Sevast'yano-va, V. F. Skobelev, and A. M. Skundin.
Special thanks go to those who helped to pre-pare the second edition of this book: first of all, to Doctors M. G. Goldfeld, P. V. Kozlov, G. V. Lisichkin, and also to I. A. Leenson and E. S. Rotina.
Let us now stop talking and get down to busi-ness.

CONTENTS
Preface 5
1
The Home Laboratory 14
2 The First Experiments 31
Drawing with Iodine 31 Home-Made Indicators 32
Extraction 36 Experiments with Gases 38
Oxidation-Reduction 42 Adsorption 46
Dry Cleaning 50 Washing Clothes 53 A Soap Candle 58
Chalk, Marble, Eggshell 61 Electrolysis in a Glass 63
Tin and Lead 69 Aluminium, Chromium, and Nickel 74
Experiments with Copper Wire 77 Smoke Without Fire 80
3 Let's Look into the Cupboard 87
Experiments with Protein 88 Experiments with Carbohydrates 91
11

Contents
Sugar from Sawdust 98 A Cup of Tea 104
Let's Make Use of Bones! 108 Why Berries Release Juice 113 Summertime Experiments 118
How Much Vitamin C Does an Apple Contain? 121 Almonds—Bitter and Sweet 127
4 Business with Pleasure 131
Oil Paints 131 Pigments 135
Watercolours 142 How to Fight Corrosion 148
How to Paint Without Paints 151 Electroplating 156
Galvanoplastics 161 Noble Patina 165
Glass and Enamel 168 Home-Made Plasticine and Sealing Wax 174
Let Us Silver a Mirror! 178
5 Sleight of Hand 185
Spoon-Rectifier 185 Light a Lamp with a Match! 189
The Long Service Life of a Battery 195 Sources of Current from Stuff at Hand 198
All Crystals, Big and Small 203 Crystal Patterns 209
A Plate Bearing Riches 212 How to Make the Invisible Visible 214
Simple Tricks 218 A Chemical Clock 223
A Rainbow Without the Sun 226 Luminous Solutions 228
The Luminescence of Solid Bodies 221 A Fantastic Bouquet of Flowers 232
12

Contents
6 With Your Own Eyes 235 Experiments with Enzymes: Oxidases and Peroxidases 236 Experiments with Enzymes:
Dehydrogenases 243 Experiments with Enzymes:
Amylases 247 And Not Only Amylase 251
Chromatography at Home 253 The Ray of Light Fell on the Crystal... 258
An Unusual Photograph 262 Cautionl High Speed! 266
Artificial Fibres 277 A Chemical Watchman 280

I THE HOME LABORATORY
We would like you to read this part, even if you are going to conduct experiments in your chem-istry class at school. First of all, you will prob-ably benefit from the simple suggestions about things at hand that can be used in the experi-ments. Second, and this is more important, this part of the book begins with some precautions and suggestions that are indispensible for all young chemists, no matter where they conduct experiments or how experienced they are.
Below are our seven indispensible conditions. The first and most important condition: You
must strictly follow all the recommendations. You probably know that the same chemical
reaction can take a different course if you change the conditions of the experiment, for example, by raising the temperature, adding some extra substance to the test tube, or mixing the sub-stances in a different order. This is precisely what we are warning you about: there is no guarantee that the reaction will go in the way you expect. The following is a simple example of this.
You may know that in order to dilute sul-phuric acid you should slowly add the acid to water in small portions, carefully mixing the solution. (Please, memorize this rule once and
14

1. The Home Laboratory
for all and on no account mix these substances in the reverse order.) One may wonder, what difference does it make whether you add acid to water or water to acid? But all rules in chem-istry have a profound meaning. So what is the reason for this particular order in mixing sul-phuric acid and water?
A considerable amount of heat is produced when sulphuric acid is mixed with water. Acid is much heavier than water, therefore, when acid is grad-ually added to a vessel containing water, it sinks immediately, and heat is generated well beneath the surface of the water. The mixture warms up gradually and evenly, as if it were heated on a stove. But if you add water, which is lighter than acid, to the acid, it will spread in a thin layer over the surface of the acid: the water immediately heats up and turns into steam, just like when water is poured into a hot frying pan. The steam will lift drops of acid, which may fall on clothes and skin, causing burns and damaging the eyes. This is what can happen when simple rules are ignored.
Therefore, in this case, as well as in all other cases, please, follow strictly our advice!
The second condition: Never mix two chemi-cals just to see the result: it may not always be a good one. It is quite another matter if you are sure about what will happen during the reaction and what will be produced. For example, you may have studied this reaction at school, and, thus, know that the experiment is safe. But even then you should use minimal quantities of reactants. Not glassfuls, or tablespoonfuls, but grams and
15
Experiments Without Explosions
even fractions of a gram, are quite sufficient for watching the course of a reaction. And even if you need to obtain a considerable amount of some substance, you should first conduct a trial ex-periment to learn all the details of the specific reaction.
The third condition: Do not use the tableware from which you eat for your experiments; use special vessels. And on no account should you taste the substances (except when it is explicitly mentioned that you can).
The fourth condition: Store your reagents in separate jars and boxes. To avoid confusion, label them. If a reagent is no longer needed (or if the experiment is finished and you do not need the products of the reaction) immediately throw away what you do not need: it is safer this way, and you will avoid confusion.
The fifth condition: Do not leave used dishes around. Wash them immediately because later it will be more difficult to wash them clean; you may even have to throw some of them away. Second, some substances are oxidized in the air, and their reactions continue well after the experiment is over. This can bring about a re-sult that neither you nor, for that matter, the author expected. In short, wash vessels thorough-ly after each experiment.
It is also more pleasant to work when the sur-roundings are clean, and besides, in this case the grown-ups will have a more favourable attitude to your studies. In general, the experi-menter is successful only when he works accu-rately.
16

1. The Home Laboratory
The sixth condition: Never touch the reagents with your hands, do not bend over the vessels in which reactions are proceeding, and do not deliberately sniff reagents with a strong smell. Protect your clothes, your skin, and, most im-portant, your eyes, from splashes or grains of reagents. The general rule is to always be careful.
And the last, seventh condition, which you must observe strictly if you want to become a real experimenter, is as follows: Begin working only when you are quite clear about the order in which you will do things. Before you start, read the description of the experiment from beginning to end. Make a list of everything you will need: vessels, reagents, test tube racks, stands, and even a rag. Put it all on your laboratory bench, so that everything is within easy reach. You can start working only after all these prepara-tions have been made.
Perhaps you do not even realize how impor-tant this last piece of advice is. If you follow it, you will avoid confusion and rushing around. Imagine that you started an experiment without proper preparation without having read the first sentence of the instructions. It is written: "Pour dilute acetic acid into a bottle and add a piece of sodium sulphite, wrapped in filter paper". Let us assume that you can do this easily, unless, in a hurried search for filter paper, you tip over the bottle with the acetic acid solution. The reac-tion begins and gas starts to form. And mean-while you are reading: "Close the bottle with a cork fitted with a draining tube, and pass the gas through a potassium permanganate solution."
17
Experiments Without Explosions
While you are looking for a cork, adjusting the tube, and fetching potassium permanganate from the medicine chest, the reaction in the bottle will cease, and you will have to start everything from the beginning. And it wouldn't have cost you anything to read the instructions before-hand, and to prepare everything in advance...
If you are already sufficiently acquainted with chemistry in order to fulfil this condition ac-curately it is very useful to write down the equa-tions of the reactions that will take place during the experiment, by consulting appropriate books or a competent person, for example, your chem-istry teacher. This will make clearer what you have to do, and perhaps you will be able to change the experiment slightly, making some addi-tions to it. But we must stress once again that you can do this only when you are quite sure that the experiment will proceed exactly as you expect.
We advise all young chemists, whatever their training and experience may be, to start a labo-ratory logbook. A real chemist always records the plan for his work, a list of reagents, and the experimental procedure; he makes a sketch of the required equipment and lists the details of it. He describes the conditions of the experi-ment and the equations of the reactions, and calculates the quantities of reactants necessary for the experiment. After finishing the experi-ment, he records his observations and conclu-sions.
To make it clearer how to keep a laboratory logbook (an ordinary notebook can be used)
18

1. The Home Laboratory
we show here, as an example, a page from a log-book. It goes without saying that it is not neces-sary to follow this exactly, make your notes in a way that is customary and convenient for you. But it may help to look at the following example:
February 27, 1986 Experiment No. 13
Objective of the experiment: To investigate the reaction of the neutralization of sodium bi-carbonate solution by acetic acid (in the pres-ence of an indicator).
Reference: "Experiments Without Explosions", Mir Publishers, Moscow, 1988.
Equation of the reaction:
NaHC03 + CH3COOH —CH3COONa +
+ H20 + C02
Reagents: 1. Sodium bicarbonate NaHC03
(baking soda). 2. Acetic acid solution CHsCOOH
(vinegar). 3. Indicator—pharmaceutical phe-
nolphthalein. Equipment: A glass and a medicine drop-
per. Experimental procedure and observations:
solve half a teaspoon of sodium bicarbonate in 100 ml of water, and approximately one quarter
a pulverized phenolphthalein pill... Conclusions: If your observations were exact, your notes
2« 19

Experiments Without Explosions
accurate and your conclusions correct, it means that you succeeded not only in conducting the experiment (which is interesting in itself), but also that you understood its meaning and bene-fitted from it (and this is much more important). Please, make the effort to look into textbooks and popular books on chemistry; the experimenter must understand the meaning of an experiment and its characteristic features. It is on purpose that we have left this work for you to do on your own.
Now, after reading these preliminary remarks, which, we are sure, you took very seriously, it is time to set up your own laboratory, however modest for a start.
You will have to do things that are not as fascinating as experiments, but they are nec-essary. And setting up your own laboratory, if you apply yourself seriously to it, is also an in-structive experience.
If you normally associate the word "laboratory" with a spacious room equipped with an exhaust hood, glassware, hot plates, pumps and tall cab-inets, well packed with utensils and reagents, which almost scrape the ceiling, then for once you are mistaken. What we are talking about is a corner of the room, where you can place a small table and hang a shelf over it. But please, do two things before you start arranging this labo-ratory. First of all, decide for yourself whether you seriously want to conduct experiments, have enough patience to conduct them accurately, and can cope with all the preparations and dull tasks such as cleaning up and washing the dish-
20

1. The Home Laboratory
ware. Once you have made a decision, it remains only to fulfil the second request: Obtain the consent of the adults. Let us hope that they will be impressed by your determination. We start with the arrangement of your working place.
It is preferable to place your table close to a window, where the light is better and where it is easier to ventilate the area. If there is no place near a window, be sure that there is enough electric lighting. In any case, do not conduct experiments in a semi-dark room!
No matter how accurately you work, solutions may splash and powder may spill on your table. In order to protect the table, cover it with a piece of linoleum, a sheet of thick plywood, or pressed cardboard. You can also do with an ordinary oilcloth or polyethylene film. If the table is not entirely at your disposal, you absolutely must do this. In addition, it is not a bad idea to put a tray on the table, for example, a large photo-graphic cuvette that can easily be washed after experiments. When you finish your work, the table should also be wiped with a wet cloth, and then wiped dry.
You will be more comfortable if you hang a shelf or a cabinet over the table, and keep all your equipment there. If this is impossible, at least keep all the dishware and reagents in one place close to the working table. Never leave, them strewn around the room!
Acquire a thick apron, preferably made of oil-cloth. Sometimes we will have to deal with caustic substances, and the apron will protect your clothes. Buy a pair of rubber gloves in a
21

Experiments Without Explosions
pharmacy or in a hardware store; you will need them for some experiments.
Now let us discuss the dishware. Of course, it is better to have real test tubes, retorts, beakers, and crucibles. But it is not an indispensible con-dition; you can conduct many experiments using only the things at hand.
The best substitutes for test tubes are the glass tubes with thin walls in which pills are sold. It is not possible to heat such tubes in an open flame because of their flat bottom, but they can withstand a water bath. For the experiments and storage of substances you can also use the vials that drugs are sold in. At the beginning you will not need more than ten such home-made test tubes.
Sometimes it is necessary to heat the test tubes, and, certainly, you cannot hold them with your fingers. Perhaps the best holder for test tubes is a wooden clothespin, i.e. a spring clamp
22

1. The Home Laboratory
used for hanging washed clothes on a line. For your convenience you can lengthen a clothes-pin by attaching to one side of it a stick or a piece of thick wire. It is not difficult to make a holder from thick soft wire, but do not forget to put a piece of rubber tube on the end of the holder that you will touch, or to wrap it with an insulating band.
For most of the experiments you will not need a special test tube stand, but a test tube rack may come in handy so as not to have to hold the test tubes for a long time. The simplest test tube rack is a bar of wood with drilled holes of a diameter slightly larger than the diameter of the test tubes (these holes should not penetrate the whole body of the wooden bar).
Various vials and jars that drugs are sold in, which usually have polyethylene caps, can also be used as chemical utensils. The polyethylene caps are very convenient because they are a stan-
23

Experiments Without Explosions
dard size and fit many jars. But the most im-portant thing is that polyethylene is chemically stable; it is not destroyed even by concentrated solutions of acids and many organic solvents, and, therefore, even reagents that gradually de-stroy rubber corks can be stored in vials with polyethylene caps. By the way, using small quan-tities of reactants, experiments can even be conducted in lids and caps.
Glass jars that contained food, for example, from salad dressings, jams, and marinated foods, are suitable for storing reagents and for some experiments. Do remember that glass vessels with thick walls should not be heated because they can break. In the instructions to experiments it is noted which vessels are most suitable. If the vessels for a given experiment are not specified, it means that you can use any glass container at hand.
No matter what sort of containers you choose for storing reagents, they must be tightly closed, and should be labelled. Labels can be made from adhesive tape. Such labels easily adhere to dry glass surfaces, and you can write on them with a ball-point pen. You can also glue on a paper la-bel, and cover it with a transparent Scotch tape to make it last.
All vessels should be washed before and after experiments; if vessels are dirty, they should be washed with a detergent and a wire brush, and then rinsed several times with clean water.
Vessels must always be kept clean. They should be washed immediately after an experiment; and it is easier to follow this rule than to break it be-
24

1. The Home Laboratory
cause in an hour or two dirt may stick to the walls so strongly that you will hardly be able to wash them. It is better to dry the washed vessels in a position that allows water to trickle out of them. For this purpose you can make a simple dryer. Ham-mer long nails through a wooden plank or a sheet of thick plywood up to the heads; then bend the nails at a 45° angle. In order not to injure your hands, wrap the sharp ends with adhesive tape, or put pieces of a rubber tube on them. Just to be on the safe side, you can blunt them with a file. Hang the dryer on the wall, and put a tray under it so that water from the test tubes and vessels will not drip onto the table or floor.
It is sometimes necessary to calcine a substance during an experiment. Normally this is done in special porcelain vessels, but you can manage without them by using small, thoroughly washed tins. If you have a small quantity of a sub-stance, a stainless steel tablespoon or even a teaspoon can be used. Of course, after this you should no longer use these spoons for eating. The same goes for the bottles, jars, glasses, and other vessels used in experiments.
Perhaps it would be better to buy one or two stainless steel spoons for your laboratory. You
25

Experiments Without Explosions
can use them not only for calcination, but also as spatulas for scooping substances. If an ex-periment is conducted in a test tube, you can manage without a spatula: powders are usually scooped directly into a dry test tube.
Now, a few words about filters. In the instruc-tions for the experiments you will very often encounter the following: filter the liquid; sepa-rate the precipitate from the solution. Of course, sometimes you can do this without filtration. If the precipitate is heavy enough, you can just let it settle to the bottom of the vessel, and then pour the liquid into a clean vessel with the help of a glass rod. This method is called "decant-ing". But more often it is necessary to filter liq-uids, and to do this you must learn to make pa-per filters. Use only special paper called "filter paper", which is not impregnated with glue. Sometimes it is called "blotting paper", because it blots ink very well.
26

1. The Home Laboratory
To make a filter, take a square piece of filter paper, fold it in the middle, and then fold it in the middle-once again. Next, cut the edges with scissors; the unfolded piece of paper should form a circle. Then open up the paper, which was fold-ed four times, and make a cone. One section of this cone will be formed by one layer of filter pa-per, the other section by three layers.
Another type of filter, which is a bit more com-plicated, is a fluted filter. Cut a circle out of a sheet of filter paper, and fold it many times to make a harmonica. Liquids filter through such a filter quicker, but a heavy filter cake can break this filter; therefore, it can be used only for light, flocculent precipitates, and for large crystals.
No matter which filter you use, you should put it into a funnel, glass (chemical) or plastic, which you can buy in a hardware store. The filter must fit the funnel snugly and reach a few millimetres short of its rim. The filter is usually first wetted with a solvent (as a rule, with water because we will most often deal with water so-lutions), then the liquid with a precipitate is carefully poured into the filter. Filtration requires patience, because solutions pass through filter paper slowly. Never tear the tip of the filter be-cause all your work will be wasted.
Sometimes you can filter through a piece of fabric or several layers of cheesecloth: this is quicker, but less effective. In the instructions for each experiment it will be stated which kind of filter can be used that will not be detrimental to the results. If no specific mention is made, use a paper filter.
27
Experiments Without Explosions
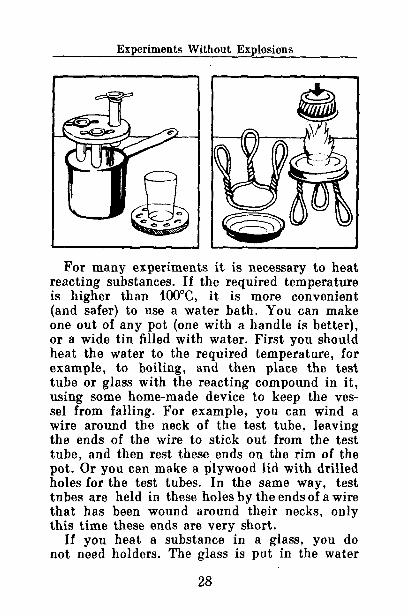
For many experiments it is necessary to heat reacting substances. If the required temperature is higher than 100°C, it is more convenient (and safer) to use a water bath. You can make one out of any pot (one with a handle is better), or a wide tin filled with water. First you should heat the water to the required temperature, for example, to boiling, and then place the test tube or glass with the reacting compound in it, using some home-made device to keep the ves-sel from falling. For example, you can wind a wire around the neck of the test tube, leaving the ends of the wire to stick out from the test tube, and then rest these ends on the rim of the pot. Or you can make a plywood lid with drilled holes for the test tubes. In the same way, test tubes are held in these holes by the ends of a wire that has been wound around their necks, only this time these ends are very short.
If you heat a substance in a glass, you do not need holders. The glass is put in the water
28

1. The Home Laboratory
bath, not directly on the bottom of it where it can get overheated, but on a plywood or wood-en stand, preferably with holes cut in it to allow the water to circulate. The stand should tightly fit the walls of the pot, otherwise it may float to the surface.
You do not need to pour a lot of water in the pot; it is sufficient if a glass or a test tube is half-immersed. Water should be gradually added to the pot to make up for the water that boils away.
The water bath can be heated on a gas or elec-tric stove (be careful!). If you need to heat sub-stances to high temperatures over an open flame, it is better to use a burner with tablets of solid alcohol of the type used by tourists. These tablets (they usually consist of urotropine, a substance that is also used in medicine) produce an even, hot flame. They must be burned on a trivet burner, specially made for this purpose. You can make a tripod with thick steel wire, place a tin lid with turned-up edges (for example, from a glass jar) on top and burn tablets on this tin lid. You should also prepare in advance a tin cap (for example, from a small food tin) to ex-tinguish the flame. When you no longer need the flame cover it with this cap, and, by cutting off the supply of air, the flame dies out.
There is one more way of heating substances to high temperatures, viz., a sand bath. Fill a small frying pan with an even, 2 cm thick layer of calcinated sand. Place a porcelain or metal vessel containing the reacting substances on the sand, and heat the sand bath on an electric
29

Experiments Without Explosions
plate. This is an old, reliable and safe, if slow, method of heating.
In conclusion, a few words about the measur-ing of masses and volumes follow.
For a home laboratory you can use a pharma-ceutical balance: they are accurate enough and inexpensive. A similar balance is used for weigh-ing photoreagents. You can also use beam scales with a 100 g weight limit; in most of our exper-iments, high-precision weighing will not be necessary. For weights you can use small coins whose exact weight has been determined in advance.
For measuring volumes you can use a pharma-ceutical measuring glass or a graduated beaker. As a last resort you can use a graduated baby bottle.
Sometimes we will need more complicated instruments, many of which you can make your-self, using the things at hand. Exact instructions for this are given with each experiment. And now, after all the preliminaries, let us commence.

2
THE FIRST EXPERIMENTS
It is the custom to start with the simplest things. The experiments that are described in this
part of the book are very simple. They are suita-ble for those who have only begun to study chem-istry, and for those who have not even begun. Senior pupils may also find something useful in this part. By the way, have you ever come ac-ross the simple, but very spectacular, experi-ment of drawing on metal with iodine? We may as well begin with this.
Drawing with Iodine
The great advantage of this experiment is that you are most likely to have all the things that are necessary for it at home: a candle, pharma-ceutical iodine (an alcoholic solution of iodine), and some worthless piece of iron, e.g. an old door hinge, a useless key or lock. Polish the metal surface, on which you are going to draw, with abrasive paper until it shines, then light a candle and tilt it over the shining surface so that the wax (paraffin) drips on it. If you heat the metal piece slightly, the paraffin will cover it in a thin layer. When the paraffin cools, take a needle and scratch grooves in it making sure
31

Experiments Without Explosions
that they reach the metal. Drip some iodine with a medicine dropper into the grooves. When, in a few minutes, the iodine solution loses its colour, drip more into the grooves. In approxi-mately an hour remove the layer of paraffin, and you will see distinct lines on the metal, which exactly trace the lines on the paraffin.
If the experiment was successful, you can do something more complicated, i.e. instead of just doodling on paraffin you can write a word or draw a picture on it, or you can mark your knife or bicycle wrench.
Let us discuss what happens when iodine con-tacts metal. Iron reacts with iodine forming a salt, i.e. ferrous iodide. This salt is a powder that easily comes off the surface, leaving grooves in the metal under the paraffin. This process is called chemical etching. It is used widely, ex-cept that iodine is usually replaced with other, more active, substances.
By the way, iodine reacts not only with iron, but also with copper. This means that with it you can etch various articles made of copper and copper alloys, such as brass. You can try doing this.
Home-Made Indicators
Indicators are frequently used in laboratories, oc-casionally to identify various substances, but more often to determine the acidity of the me-dium, because this factor influences the behav-iour of substances and the character of a reaction. We will also need indicators, and since it is not
32

2. The First Experiments
always possible to buy them, we will try to make them ourselves. We will use plants as raw ma-terials because many flowers, fruits, berries, leaves, and roots contain coloured substances that change their colour under the influence of certain substances. Thus, when indicators are ex-posed to an acidic (or basic) medium, they vividly signal us about this.
It is not difficult to gather "raw plant ma-terial" in forests, fields, orchards or gardens. Pick brightly coloured flowers, such as irises, dark tulips, roses, pansies, and peonies; pick fruits, such as raspberries, blackberries, cherries, black grapes, and bog whortleberries; or collect a few leaves of red cabbage or young beetroot. So-lutions of indicators are made by decocting, i.e. by boiling the plant in water to extract the active principles. This liquid preparation is called a decoction. Decoctions spoil very quickly by turn-ing sour and mouldy, therefore, they must be made just before the experiment. Place some of the raw plant material (the exact amount does not matter) in test tubes, pour some water into the test tubes, put them in a water bath, and heat until the solutions in the test tubes become coloured. When cool, filter each solution and pour them into clean labelled jars, prepared beforehand.
To provide yourself with indicators, dry some flower petals and berries, put them in separate boxes, and prepare decoctions from them as described above, but do not mix diSerent dried substances in one decoction.
By conducting tests you can find out which
33
Experiments Without Explosions
decoction can be used as an indicator for which medium, and exactly how it changes its colour in this medium. Take up several drops of your home-made indicator with a medicine dropper and add the indicator first to an acidic and then to a basic solution. Table vinegar can be used to make the acidic solution, and washing soda (so-dium carbonate) to make the basic solution. For example, a bright blue decoction made from irises turns red if mixed with vinegar, and green-ish-blue if mixed with soda solution.
Carefully record the results of all these tests: best of all, make a table of the results (see p. 35).
Not only leaves and berries can be used for mak-ing indicators. The juices of some vegetables and fruits (red cabbage, cherries, black grapes, black currants), and from some stewed fruits markedly change their colour if the acidity of the medium changes. Even beetroot soup can be used as an indicator. Housewives noticed this long ago, and they make use of this property, although they do not conduct chemical analyses. To make the beetroot soup bright red in colour, they add, just before the end of cooking, a little bit of acetic or citric acid, and the colour of the soup changes before their eyes.
Phenolphthalein is widely used as an indica-tor in laboratories. It is also used in medical practice as a laxative. Therefore, we will use the pharmaceutic pills to make this indicator. Grind one or two pills and dissolve them in 10 ml of dilute alcohol; as a last resort dissolve them in warm water. No matter which liquid is used as a solvent, the pills will not dissolve
34

2. The First Experiments
completely, because, in addition to the active component phenolphthalein, they also contain a filler, i.e. talc, chalk or some similar substance. Now filter the solution through blotting paper and pour it into a clean jar labelled "Phenolphtha-lein—Indicator". This colourless solution does not spoil with time. You can use it many times to identify a basic medium: it immediately turns red. To verify this, add a drop or two of phenol-phthalein to a solution of washing soda.
Below is an example of a table that you can use as a reference when choosing an indicator:
Colour of solution
Indicator initial
in acidic medium
in basic medium
Grape juice Blue iris
Dark red Bright blue
Red Red
Green Greenish blue
We suggest that you continue this table on your own.
A final thing that you can do with plant indi-cators is the following. In the olden days it was fashionable to write invitations on flower petals. A fine pen or a sharp stick was used to write with an acid or basic solution, depending on the colour of the petal and desired colour of the in-scription. You can try to write on petals in this way, but we would like you to select the petals and solutions for writing yourself. Note, though, that the solution should not be too concentrated, otherwise the delicate petal will be damaged.
3* 35

Experiments Without Explosions
Extraction
Now we will introduce you to a very widely used industrial process today which is called extrac-tion.
Grind several kernels of different shelled nuts and some shelled sunflower seeds, put the mash into a test tube, and add some patrol to the mash. Be sure that there is no open fire around: petrol is highly flammable. Shake the test tube and set it aside for two hours, but, from time to time, shake it again. Pour the solution into a saucer, and put the saucer into a well-ventilated place. When the petrol evaporates, some oil will re-main on the bottom of the saucer. You have extracted oil from the nuts and seeds and you were able to do this because oil easily dissolves in petrol.
You can try to extract oil from other seeds, but, by all means, do not taste it!
We will conduct the next experiment with leaves. For this we need a water bath and a glass with thin walls (as you remember, a glass with thick walls can crack). Put a fresh plant leaf in a glass, and pour a small amount of dilute alcohol over it. Heat the water bath, then take it off the burner and place the glass with the leaf in it. After a while, remove the leaf from the glass with tweezers: you will see that the leaf has become colourless, and the alcohol solution is emerald in colour. Thus, you have extracted chlorophyll, the green colouring material (pig-ment) of plants.
By the way, if you use an edible plant, for
36

2. The First Experiments
example, salad or spinach, you can extract a food dye from it to add colour to creams or sauces. This is precisely what is done at food facto-ries. To speed up the process we suggest that you mash the leaves and shake the vessel from time to time.
Another experiment is the following. Fill half of a test tube with water, and add approximately 1 ml of a pharmaceutical tincture of iodine: a brownish solution results. Then add an equal amount of petrol, shake the test tube several times, and set it aside. When the mixture sep-arates into layers, you will see that the upper, petrol layer, is dark brown, and the lower, water layer, is almost colourless. Iodine does not dis-solve well in water, but it dissolves well in petrol, and that is why it passed from water into the petrol solution.
Our last extraction experiment is based on differences in solubility. How can you quickly distinguish grinded coffee from grinded chicory? By the smell, of course; but what if the smell is weak, or you do not remember what it should smell like? Then add a pinch of each powder into a transparent vessel with hot water. The coloured chicory components are extracted with water with difficulty, therefore the water remains practically colourless. But components of coffee are easily dissolved in water, and the coffee powder will slowly sink to the bottom of the vessel, leaving a brown "tail".
37

Experiments Without Explosions
Experiments with Gases
Since we have already experimented a little with liquids, let us now turn to gases. This is somewhat more difficult, and first of all we will need corks with holes in them and gas-discharge tubes.
The tubes can be made of glass, metal or even plastic. Avoid rubber corks, since it is difficult to drill holes in them. Use natural corks or polyethylene corks: you can make holes in them with a heated awl. Fix a tube in a hole. You can use, for example, a tube from a medicine drop-per. The tube must fit the hole tightly, without any gaps; therefore, at first you should make a hole that is smaller than the tube, and then enlarge the hole, adjusting it to the diameter of the tube. Put a flexible rubber or polyethylene tube (30 cm long) on the glass tube, and insert another, short glass tube into the other end of this flexible tube.
You can now conduct the first experiment with gases. Prepare limewater by pouring half a glass of hot water over half a teaspoon of pulverized slacked lime. Stir the solution and let it settle. The transparent layer over the settled solution is limewater. Carefully pour the liquid that is over the sediment into another vessel: as you re-member, this laboratory technique is called de-canting.
If you have no slacked lime Ca(OH)2, you can prepare limewater from two solutions that are sold at pharmacies: calcium chloride CaCl2 and am-monium hydroxide NH4OH (aqua ammonia). By mixing them one obtains transparent limewater.
38

2. The First Experiments
Take a cooled bottle of mineral water or soda. Open the bottle, quickly insert a cork with a gas-discharge tube into the neck and put the free end of the tube into a glass with limewater. Place the bottle in warm water. Bubbles of gas will start evolving from the liquid in the bottle. This gas, carbon dioxide C02, is added to bottled drinks to make them taste better.
Gas reaches the limewater through the gas-discharge tube, and passes through the lime-water. The limewater immediately becomes opaque, because the calcium hydroxide in it turns into calcium carbonate CaC03, and this substance dissolves poorly in water, forming a white suspension.
It is not necessary to buy soda or mineral water to conduct an experiment with limewater. When we breathe, we inhale oxygen and exhale carbon dioxide, the same gas that made the limewater opaque. Put one end of any clean tube into a fresh portion of limewater, and exhale into the tube several times. You will not have to wait long for a result.
Open one more bottle of soda or mineral water, insert a cork with a gas-discharge tube, and con-tinue to pass carbon dioxide through the lime-water. In a while the solution will again be-come transparent, because the carbon dioxide reacts with calcium carbonate, turning it into another salt, i.e. calcium hydrocarbonate Ca(HC03)2. This salt, contrary to calcium car-bonate, dissolves well in water.
The next gas that is of interest to us was already mentioned in this chapter: it is ammonia. It
39

Experiments Without Explosions
can easily be recognized by a characteristic pun-gent smell of pharmaceutical ammonium hy-droxide.
Pour some of a boiled saturated solution of washing soda into a bottle. Add some ammonium hydroxide, insert a cork with a flexible gas-dis-charge tube into the bottle, and put a test tube turned upside-down on the free end of the tube. Heat the bottle in warm water. Ammonia vapour is lighter than the air, therefore it will soon fill the upside-down test tube. Carefully keeping the test tube in this position, put it into a glass of water. Almost immediately the water will start to rise into the test tube: the ammonia dis-solves in the water and, therefore, it passes from the test tube into the water, leaving an empty place in the test tube for the water to fill.
At the same time you can learn how to recog-nize ammonia not only by its smell. First of all, using phenolphthalein or home-made indicators, make sure that ammonia solution has a basic re-action. Second, do a qualitative reaction for am-monia. A qualitative reaction is a reaction that allows the correct determination of a substance or a group of substances.
Prepare an unsaturated solution of blue vitriol (the colour of it should be light blue), and place the free end of the gas-discharge tube into it. When ammonia NH3 starts to evolve from the tube, the solution around the tube will become bright blue. The reaction between ammonia and the copper salt yields a brightly coloured com-plex compound of rather complicated compo-sition [Cu(NH3)4]S04.
40

2. The First Experiments
Now, obtain a very small piece of calcium car-bide; we will make acetylene. Set up the same ap-paratus as was used in the previous experiment, but pour water into the bottle instead of ammo-nium hydroxide. Put a small, pea-sized piece of calcium carbide carefully wrapped in blotting paper in the bottle, and insert a cork with a gas-discharge tube into the bottle. When the blot-ting paper gets sodden, gas will start to evolve from the free end of the gas-discharge tube. As in the previous experiment, collect this gas in the upside-down test tube. After one minute, put the test tube right side up and hold a burning match to it. The gas will blaze up and burn out with a smoky flame. This gas is acetylene, the same gas that is used in welding.
By the way, acetylene is not the only substance that is formed during this experiment. The solution that is left in the bottle is an aqueous solution of calcium hydroxide, i.e. limewater. It can be used in experiments with carbon diox-ide.
The next experiment with gases must be con-ducted only in a well-ventilated room, or lack-ing it, outside the house in the fresh air. We will produce a gas with a strong smell, viz. sul-phur dioxide S02.
Pour some dilute acetic acid into a bottle, and add some sodium sulphite Na2S03 that has been wrapped in blotting paper (sodium sulphite can be bought in photographic retail shops). Insert a cork with a gas-discharge tube into the bottle and put the free end of the tube into a glass with a dilute solution of potassium permanganate
41

Experiments Without Explosions
KMn04 that has been prepared beforehand (KMn04 is a well-known household disinfectant). The solution should be light pink in colour. When the blotting paper gets sodden, sulphur dioxide will evolve from the bottle. It reacts with the potassium permanganate solution, making it colourless.
If you have no sodium sulphite, you can use the contents of the big cartridge of the common Metol photographic developer. However, in this case the sulphur dioxide will be mixed with car-bon dioxide, but it will not spoil the experiment.
Oxidation-Reduction
The experiment with sulphur dioxide demon-strated one of the numerous oxidation-reduction reactions. In such reactions atoms of some sub-stances take up electrons and atoms of other substances donate electrons. The former sub-stances are called oxidizing agents (for exam-ple, potassium permanganate); the latter are reducing agents (sulphur dioxide).
We now conduct some more experiments on oxidation reduction.
Apply a drop of dilute iodine tincture on a fresh-ly cut potato. A blue spot will appear, because potato starch turns blue in the presence of free iodine. This reaction is often used to detect starch, therefore, it is also a qualitative reaction.
Apply some sodium sulphite solution to the same spot where you applied the iodine tincture. The blue colour will quickly disappear. The following thing happened: the sulphite donated
42

2. The First Experiments
an electron to free iodine, the iodine became elec-trically charged and turned into an ion, and the iodide ion no longer reacts with starch.
This property of sodium sulphite and sulphur dioxide demonstrates that these substances are good reducing agents. Another interesting ex-periment with sodium sulphite, in which we will again use potassium permanganate as a co-oxidizer for sodium sulphite, is the following.
Into four test tubes, pour a solution of potas-sium permanganate diluted so that in the first test tube it is light pink; in the second, pink; in the third, light purple; and in the fourth, dark purple. Add some of the sodium sulphite solu-tion to each test tube. The solution in the first test tube will become almost colourless; in the second, brownish; in the third test tube brownish flakes will appear; and the same will happen in the fourth test tube, but here the precipitate will be much more substantial. In all four test tubes sol-id manganese oxide Mn02 is formed. But in the first and second test tubes, it exists as a colloidal solution (the solid particles are so small that the solution seems transparent). And in the other two test tubes, the concentration of Mn02 is so high that the particles stick together and pre-cipitate.
Potassium permanganate is like a chemical chameleon: it changes its colour spectacularly. For example, in a basic medium, the solution of potassium permanganate changes its colour from reddish-violet to green because the perman-ganate is reduced to green manganate. To verify this drop a crystal of potassium permanganate
43

Experiments Without Explosions
into a basic solution, for example, into a con-centrated boiled solution of washing soda. In-stead of the expected pink colour, the solution will be green.
This experiment is even more spectacular if caustic soda is used, but you must not experi-ment with such dangerous alkalies at home. You do not yet have the necessary skills. But at school, in your chemistry class, you can con-duct the following experiment: Pour some po-tassium permanganate solution (which should be red in colour and transparent) into a thin-walled glass. Now add a rather concentrated solution of caustic soda in very small portions, so as not to increase the temperature of the reacting mixture. Watch the colour of the liquid: at first it will turn more and more violet, then, as the solution becomes more and more basic, it turns blue and, in the end, green.
The change in colour is particularly vivid if viewed against the light. In any case, there should be good lighting, otherwise you may fail to notice the colour transitions.
The next experiment will help you to distin-guish dirty water from clean water. Fill one test tube with clean water, and the other with stale water from a puddle, or a bog. Add some of a solution of an oxidizing agent (in this case, potassium permanganate) to each test tube. In the test tube containing the tap water, the so-lution of potassium permanganate will preserve its pink colour, and in the test tube containing the stale water, the solution will become colour-less. In warm weather, organic substances ac-
44

2. The First Experiments
cumulate in stale water. They, like sodium sul-phite, reduce potassium permanganate, chang-ing its colour.
In the first experiment with sodium sulphite we recommended that you use the contents of the big cartridge of the photodeveloper. If you followed our advice at that time, you still have the small cartridge of the photodeveloper left. It contains a mixture of Metol and hydroquinone. Dissolve this mixture in water, and you will get a slightly coloured solution. Add some cal-cium hypochlorite (it is a widely used disinfec-tant, which should be carefully handled), and the solution in the test tube will turn yellow. Cal-cium hypochlorite is a good oxidizing agent: it oxidizes hydroquinone to quinone, which is yellow in colour. If you now add the mixture of sodium sulphite and soda from the big cartridge of the photodeveloper to the test tube, the yellow colour will disappear because sodium sulphite will again reduce quinone to hydroquinone.
We will conduct the last experiment on oxida-tion-reduction with chromium compounds. Exper-iments with chromium compounds are often very colourful, which is not surprising: in Greek, "chromos" means "colour".
Obtain a yellow potassium dichromate solu-tion K2Cr207. This substance is widely used in engineering as an oxidizing agent, for example, for cleaning very soiled details. It should be carefully handled. If you add a little sulphuric acid to the solution of potassium dichromate (be careful: the acid should be added in small portions!), the yellow solution will turn red.
45

Experiments Without Explosions
Add a few pieces of zinc to this acidified solution. If you have no granulated zinc, which is com-monly used in experiments, you can obtain zinc from a used battery (the metal cartridges of cells are made of it).
Now that you have added some zinc to the solution in the glass, the potassium dichromate is reduced, and becomes dark green, since Cr® +
were formed. Concurrently, the reaction between zinc and acid produces hydrogen. If the products of this reaction are not oxidized by the oxygen in air, the reaction will continue, and a blue col-our will appear: it is the colour of a solution of chromous sulphate CrS04. Pour the solution into another glass; while you are doing this, oxidation takes place, and the solution again becomes green.
Adsorption
Everyone is probably familiar with the physi-cochemical phenomenon we are now going to discuss, but not all of you know that this phe-nomenon is called adsorption. Perhaps you have not yet studied adsorption at school, but you have observed it many times. In fact, you see this phenomenon every time you stain some pa-per, or, which is considerably worse, your clothes, with ink. The taking up of particles of some sub-stance (ink, etc.) by the surface of another sub-stance (paper, cloth, etc.) is called adsorption.
Coal is a very good adsorbent: not common hard coal, but active charcoal (activated carbon). This activated carbon is sold in pharmacies,
46

2. The First Experiments
usually in the form of tablets. We will use this carbon in our experiment on adsorption.
Prepare a dilute solution of ink (the colour of the ink does not matter), and pour it into a test tube, but not to the brim. Add a tablet of activated carbon, preferably a pulverized tablet, cover the test tube with your finger and shake it vigorously. Before your very eyes the solution will become lighter in colour. Repeat this pro-cedure with some other coloured solution, for example a solution of gouache or water-colours. The effect will be the same. And if you use just common charcoal, it will not adsorb the dye as well.
This is not at all surprising, since activated carbon has a much larger surface area than char-coal. Its particles are literally covered with pores (carbon is treated in such a way as to remove the impurities). Since adsorption is the taking up of a substance by a surface, it is clear that the larger the surface area, the better the adsorption.
Adsorbents can adsorb substances not only from solutions. Apply a drop of eau-de-cologne or some other fragrant substance to the bottom of a half-a-litre (pint) glass jar. Hold the jar in your palms for half a minute to heat the fragrant liquid slightly in order to make it evaporate more quick-ly and have a stronger smell. According to ex-perimental practice in chemistry, do not directly inhale the contents of the jar, but, waving your hand lightly, direct the vapours of the volatile fragrant substance to your nose (chemists take this precaution because one does not necessarily
47
Experiments Without Explosions
know whether the contents of a jar have a good or bad smell).
No matter which fragrant liquid you used, you will certainly detect its smell clearly. And now put some activated carbon into the jar, close it tightly with the lid and set it for several minutes. Remove the lid and again direct the air to your nose by waving your hand. The smell has dis-appeared. It was adsorbed by the adsorbent, or rather, the molecules of the fragrant substance, which you had put into the jar, were adsorbed by it.
These experiments can be conducted not only with activated carbon. Many other substances can act as adsorbents, for example, tuff, dry pulverized clay, chalk, or blotting paper. The substances are various and diverse, but in order to act as an adsorbent a necessary condition is a large area of surface. Some food products are also good adsorbents. You certainly know how easily bread adsorbs the surrounding odours. That's why it is not recommended to keep different kinds of bread in one container: their smells mix, and each of them loses its characteristic aroma.
Popped corn, which many of us like so much, is a very good adsorbent. Certainly, there is no point in wasting a whole package of it or even a quarter of a package, but several kernels could perhaps be sacrificed for chemistry. Repeat the previous experiment with a fragrant liquid, using popped corn as an adsorbent. The smell will disappear completely. It goes without saying, though, that you cannot eat the popped corn that you used for the experiment.
48

2. The First Experiments
Let us return to the experiment in which we obtained carbon dioxide. Fill two test tubes with this gas, then add some popped corn tp one of them, and shake it several times. Now repeat the experiment using limewater, exactly as you did it before. (You can just "pour out" the gas from the test tubes into the limewater, as you would pour out water, since carbon dioxide is heavier than air.) Will the limewater behave differently? Yes, there is a marked difference. The liquid turns opaque only in the glass into which the gas that was not treated with the adsorbent was "poured out". There was no carbon dioxide in the test tube to which popped corn had been added: all the gas had been adsorbed by the corn.
If you conduct experiments in your chemistry class at school and already know how to obtain and collect such coloured gases as chlorine and nitrogen dioxide, you can test the effect of ac-tivated carbon and popped corn on them (you should not experiment with these gases at home because you need good ventilation). Add an ad-sorbent to a vessel containing coloured gas and shake it several times: the colour will disappear completely or fade considerably.
Many kitchens are now equipped with various devices for cleaning the air above gas stoves from fumes and smoke. All such devices have one feature in common: a cartridge with an adsor-bent, through which the smokey air is pumped. Now you know how this works. When the whole surface of the adsorbent is covered with particles adsorbed from the air, the used cartridge is replaced with a fresh one.
49

Experiments Without Explosions
Dry Cleaning
Experiments in this chapter are actually a re-petition of what we have already done because it is the same processes, which we used to con-duct experiments, that are most often used for dry cleaning and removal of stains, namely, ex-traction, oxidation-reduction, and adsorption.
Certainly, it is not worth soiling clothes special-ly for these experiments. We will do the following: Let us stain several pieces of light-coloured fabric with different substances, and then try to remove the stains. If the experiments are suc-cessful, you can risk cleaning your own or some-body else's clothes (if they trust you with them).
Most common are the stains from fatty sub-stances. We usually remove grease stains by ex-traction, therefore, it is necessary to select a suitable solvent. Fresh grease stains can be re-moved with petrol, turpentine or medicinal ether. Rub the spot several times with a piece of cotton-wool that has been dipped in the solvent and the grease will pass into the solvent. The fabric should be wiped with soapy water or a solution of washing powder, otherwise a ring may remain around the place from which the spot was re-moved.
It is more difficult to remove old grease stains: solvent alone is not sufficient, complex mixtures must be used. For example, a mixture of petrol, medicinal ether, and turpentine (in the propor-tion 7 : 1 : 2 ) , or a mixture of ethyl alcohol, turpentine, and medicinal ether (in the proportion 10 : 2 : 1).
50

2. The First Experiments
If the fabric is coloured, be careful not to dam-age the colours with the solvent. Before treat-ing the stain, check whether the solvent you are going to use changes the colour of the fabric.
Oil varnish stains come out quite well, if treated with a paste made of petrol and kaolin. The doughlike mixture is applied to the spot, and left on the fabric until the petrol evaporates completely. In this case extraction works together with adsorption: the kaolin adsorbs the sub-stances extracted by the petrol.
Fresh oil paint stains should first be rubbed with turpentine (to soften them), and then re-moved with petrol. If such treatment can dam-age the colour of the fabric, rub the stain with a hot glycerin solution, or with a mixture of glycerin and an equal amount of ethyl alco-hol.
Extraction can also be used to remove grass stains. Do you remember the experiment in which we extracted chlorophyl with alcohol? Thus, if you rub the stained place with alcohol (or medicinal ether), the chlorophyl will be gradually extracted from the stain, and the stain will disappear.
Sometimes ink stains can also be removed from clothes. Cover the stain with some pulverized chalk or tooth powder, and add two or three drops of alcohol. The alcohol will dissolve the ink pigment, and the chalk will absorb the coloured solution. Remove the stained chalk with the blunt end of a knife. Again apply a fresh portion of chalk and alcohol to the stain, and repeat this procedure until the chalk remains
4* 51

Experiments Without Explosions
white. Let the chalk dry, and then remove what remains with a brush.
In the last experiment we again combined extraction with adsorption. In general, a com-bination of these two processes is often the most effective way to remove stains. Kaolin, chalk, and similar powders do not allow the coloured solution to spread in the fabric and leave a ring around the removed spot.
Now let us say a few words about oxidation-reduction (redox) reactions, which can also help to remove stains.
Fresh berry and juice stains can quite often be removed with plain hot water. If this is not enough, these stains on white fabrics can be de-colourized by a hydrogen peroxide solution, made, for example, by dissolving a hydroperoxide tablet in half a glass of water. Soak the stain in this solution, then apply a few drops of am-monium hydroxide, rub it with clean cotton wool swab, and rinse with water. Hydrogen peroxide is a powerful oxidizing agent, it oxidizes many colouring agents, thereby decolourizing them.
Scorch stains on white cotton and linen fabrics can also be removed by a redox reaction. A water solution of calcium hypochlorite (caution!), 1 : 50 by mass, can be used as an oxidizing agent. If the fabric is overheated, brown products of thermal oxidation are formed, which calcium hypochlorite destroys and makes colourless. But remember that this reaction produces hydro-chloric acid, which by itself can destroy the fabric. Therefore, immediately after cleaning,
52

2. The First Experiments
rinse the fabric, first with a weak solution of soda to neutralize the acid, and then with clean water.
And to end this chapter, if the fabric is stained with iodine, you can remove the stain completely by rubbing it with a solution of sodium thiosul-phate (hyposulphite). You already know which substance is an oxidizing agent and which sub-stance is a reducing agent in this reaction.
Washing Clothes
After dry cleaning it is perfectly natural to dis-cuss washing clothes, which is exactly what we will do.
Washing is a physicochemical process and its main participants are surface-active agents (sur-factants). Molecules of such substances consist of two parts, namely, a hydrophilic part, i.e. it has a strong affinity for water, and a hydropho-bic part, which does not react with water, but readily makes contact with contaminating sub-stances, for example, with fats and oils that are difficult to wash off. These two groups, hydro-philic and hydrophobic, are situated on the opposite ends of a long molecule. Such mole-cules adhere to a fatty surface with their hydro-phobic ends; meanwhile, their hydrophilic ends stick out like the spines of a hedgehog. Water thoroughly wets these "spines", it surrounds this "hedgehog", tears it off the surface and carries it away. Roughly speaking, this is the principle action of soap and washing powder. In order to speed up the removal of dirt from fabrics
53

Experiments Without Explosions
or our hands, we rub them with a sponge, or a brush, or just against each other.
Since soap is the oldest surfactant, we will start with it.
Dissolve some soap in a small quantity of water and add phenolphthalein to this solution. The solution will turn raspberry red, which indicates that the medium is basic. Indeed, common soap is a sodium salt of fatty acids, for example, oleic acid and stearic acid C17H35COONa; and liquid soap is the potassium salt of the same acids. When dissolved in water, such salts undergo hydrolysis to yield an acid and an alkali. But fatty acids are weak, and alkalies in this case are strong, therefore the solution has an alkaline reaction.
In the past people thought that soap washes well because it forms an alkali. This turned out to be a wrong idea. On the contrary, an alkali, for example, washing soda, washes because it com-bines with fats, and forms soap-like surface-active substances in solution.
By the way, it is not so difficult to make soap. There are several ways to do this; one of them is as follows. Prepare a hot concentrated solution of washing soda, pour it in a test tube and gradually, drop by drop, add vegetable oil until it no longer dissolves. You can add bees-wax instead of vegetable oil. Add a pinch of table salt to this solution. The same is done at soap manufacturing plants: this process is called "salting out". After the salt is added, solid soap floats up, and can easily be separated from the solution.
54

2. The First Experiments
Nowadays soap is less and less frequent y used for washing, and washing powders are more and more often used. These powders include synthesized surface-active agents; therefore, they are called synthetic washing powders.
Let us conduct the following experiment. Cut a piece of dirty fabric into three parts and put each part into a separate glass. Now pour plain warm water into the first glass, a solution of soap into the second glass, and a solution of any washing powder you happen to have at home into the third glass. Rub the rags lightly and rinse them with warm water. Dry them and examine them carefully. The rag that came out of the glass with water is hardly any cleaner. The rag from the glass with a solution of soap is definitely less dirty. But the cleanest of the three is the rag from the glass with the washing powder solution. Therefore, synthetic washing powders are more effective than common soap.
Many washing powders have one more valuable property, i.e. they wash in any water: in soft, in hard, even in seawater. And what about soap?
Dissolve in plain water any calcium or magne-sium salt. (You can buy Epsom salts, dry sea salt, or a solution of calcium chloride in a drug store.) Now you have made the water hard; indeed, the difference between hard and soft wa-ter is that hard water contains a lot of calcium and magnesium salts.
Take again a dirty rag, and try to wash it with soap in hard water. It doesn't work—there are even no soapsuds. The salts react with soap to form calcium and magnesium soaps, which are
55

Experiments Without Explosions
not water-soluble. Therefore the soap loses all its useful properties.
But if you dissolve a washing powder in hard water, it will wash out dirt almost as well as before: the hard water does not spoil its ability to wash. Surfactants in washing powder do not react with the salts, therefore they do not lose their properties.
Solutions of washing powders can be basic, like solutions of laundry soap: in this case they are recommended only for washing cotton and linen, on no account wool or silk. But there are neutral detergents, which are often in a liquid, rather than a powdered, form: such detergents are good for washing wool, silk, and synthetic fabrics. When in doubt whether you should wash a woollen sweater with a given powder, do the pfrenolphthalein test. If the solution turns red, then it contains a free alkali, which is bad for wool, since it can destroy its fibres. But if the washing powder solution remains colourless, or became only very slightly col-oured, do not hesitate to immerse your woollen garments in it.
In olden times, when soap was a luxury, less expensive things that could also remove dirt, though not as well as soap, were used for laun-dering. You can test such substances youself. For this experiment you can use mustard powder or a decoction of beans, but even better is to use the roots of some plants, for example, primula, paris, cyclamen, or saponaria. These roots con-tain saponins, i.e. substances that can be used for washing (perhaps, in old books you have run
56

2. The First Experiments
across the word "soaproot"). Certainly, all these organic substances wash less effectively than soap, but you will easily discover that they do in fact wash.
We will conclude this chapter on washing agents with an experiment in which the surface tension of water will be changed by adding surface-active agents to make the object move on the surface of the water.
Make a flat spiral with several turns of fine copper wire, smear it slightly with oil or petro-leum jelly, and lower it very carefully onto the surface of water. The surface tension of water will prevent the spiral from sinking, but water cannot wet it. Now accurately apply a drop of soapy solution from a medicine dropper to the middle point of the spiral. The spiral will imme-diately start spinning. The soapy solution spreads over the water surface, reaches the end of the spiral, and exits from the spiral, developing a weak jet power. When the spiral stops spinning, apply one more drop of soapy solution, and it will start rotating again.
This spiral can serve as a device for the deter-mination of the surface activity of different liq-uids. Replace the soapy solution with another substance, and the spiral will spin with a differ-ent speed. If you apply a sodium chloride solution, the spiral will not rotate at all. And if you put the spiral on the surface of a washing powder solu-tion, it will sink very quickly because the wash-ing powder removes the layer of oil that keeps the spiral afloat.
57

Experiments Without Explosions
A Soap Candle
When we were trying to understand why soap washes, we discussed the specific structure of its molecule. It has a "head" and a long "tail", which interact differently with water: the "head" strives for water, and the "tail", on the contrary, avoids it.
Let us examine closely a hydrophobic "tail" which is a long hydrocarbon chain. Such com-pounds are very widespread; they are very im-portant for industry. Many fats, oils, lubricants, and other very useful substances are made of them. We will now produce one of these sub-stances, the so-called stearin, from laundry soap.
With a knife cut it into shavings approximate-ly half of a bar of laundry soap into a clean tin, or a pot that is no longer being used. Add enough water to cover the soap shavings completely, and place the mixture in a water bath. Stir the contents of the pot with a wooden stick from time to time to make the soap dissolve more quickly. Then remove the vessel from the fire (not with your bare hands, it goes without saying) and add some vinegar to it. The reaction with the acetic acid produces a thick white mass that floats to the surface. This mass is stearin: a semi-opaque mixture of several substaiices, mainly stearic acid C,7H35COOH and palmitic acid C18HnCOOH. The composition cannot be predicted precisely since it depends on the substances that were used for the production of soap.
In literature one discovers that stearin was used for making candles. Or rather it was used
58
2. The First Experiments
for making candles in the past; nowadays can-dles are mainly made of paraffin rather than stearin because paraffiin, which is produced from petroleum, is cheaper and more readily avail-able than stearin. But since we have stearin at our disposal, let us make a candle from it. Candle-making is, in itself, a very fascinating thing.
When the pot is completely cool, remove the stearin from the surface with a spoon into a clean vessel. Rinse the stearin with water two or three times, and wrap it into a clean white rag or blotting paper to absorb the excessive moisture from it. When the stearin dries com-pletely, we can start making a candle.
Perhaps, one of the simplest methods of mak-ing candles is to dip a thick twined thread re-peatedly into stearin that has been slightly heated and has melted, each time waiting until the stearin solidifies on the wick. Do this until the candle is sufficiently thick. This is a good, if a little tiresome, method of making candles. In any case, this is the method that was often used in the old days.
There is also another, even more simple method. You can form a candle around the wick with your hands from stearin that has been heated to a soft consistency, or simply use the stearin that was just made and has not yet cooled. But with this method the wick will not be so well impregnated with the melted stearin, and the candle will not be all that good, although it will burn somehow.
The methods for making fancy, decorative candles are much more complicated. First of all it
59

Experiments Without Explosions
is necessary to make a mould from either wood-en, plaster or metal materials. It is also desira-ble to start by impregnating the wick with one or two layers of stearin. Then fix the wick in such a way that it can pass through the central axis of the mould. It is better if the wick is stretched slightly. And only after this prelimi-nary preparation can the hot stearin be poured into the mould.
You can also use this method to make fancy candles from paraffin, i.e. from shop candles, melting them and then shaping as you desire. But we warn you that this is a lot of fuss.
Having made a candle from soap, we now con-duct an experiment in the reverse direction, i.e. we will produce soap from a candle. But a par-affin candle is not appropriate for this ex-periment because paraffin molecules have no "heads". But if you are sure that the candle is a stearin one, do not hesitate; you can produce laundry soap from it. Natural beeswax can also be used.
Heat several chips of a stearin candle in a water bath, with hot but not yet boiling water. When the stearin melts completely, add a concen-trated solution of washing (calcinated) soda. A sticky white mass will form, which is soap. Keep it for several more minutes in the water bath, and then, protecting your hand with a glove or a towel to prevent it from burning, pour the hot mass into any mould (it can even be a match-box). When the soap solidifies, take it out of the mould.
It is not at all difficult to prove that what
60
2. The First Experiments
you have is real soap that can wash. But do not use it lor washing your hands, since we do not know whether the substances from which the candle was made were pure.
Chalk, Marble, Eggshell
Wet a piece of natural chalk CaC03 (you can use a pharmaceutical hydrochloric acid) with a drop of hydrochloric acid HC1. Vigorous boiling will occur where the drop has fallen. Put the piece of chalk with the "boiling" drop into the flame of a candle, or a tablet of solid alcohol. The flame will turn a beautiful red.
This is a well-known phenomenon: calcium, which is a component of chalk, makes the flame red. But why did we add acid? The acid reacts with the chalk to form soluble calcium chloride CaCl2, and the drops of calcium chloride are carried away by the gases directly into the flame: this makes the experiment more spectacular.
Unfortunately, it is impossible to conduct this experiment with the pressed chalk used in schools. It contains soda (sodium salt) as an impurity and, therefore, the flame turns orange. The experiment works best with a piece of white marble wetted with the same acid. And to verify whether sodium salts turn the flame bright yellow, introduce into it a grain of table salt NaCl, or simply "salt" the flame a little.
We will need a candle for the next experiment with chalk. Fix it to a nonflammable stand, and put a piece of chalk (marble, shell, or eggshell) into the flame. If the chalk becomes blackened
61

Experiments Without Explosions
by the smoke, this indicates that the tempera-ture of the flame is not high enough. We are going to calcine chalk, and for this the tempera-ture must be 700-800°C. What should be done? The temperature can be increased by blowing air through the flame.
Remove the rubber cap from the medicine dropper, and replace it with a rubber or a plastic tube. Blow air into the tube, directing it through the pointed end of the dropper into the middle of the flame over the wick. The flame will deflect aside, and its temperature will rise. Now di-rect the tongue of the flame to the pointed part of the chalk. This part will become white-hot, the chalk there will turn into calcium oxide CaO, and carbon dioxide will form.
Repeat this operation several times with pieces of chalk, marble, or eggshell. Put the calci-nated pieces into a clean tin. While they are cooling, place the largest of them on a saucer and apply several drops of water to the part that was heated. You will hear a hissing sound, all the water will be absorbed by the chalk, and the heated part will disintegrate into powder. This powder is slaked lime Ca(OH)2.
Add more water, and apply a little phenol-phthalein. The water in the saucer will turn red, which indicates that the slaked lime so-lution is basic.
When the calcinated pieces cool, put them in a glass jar or bottle, cover them with water, close the container with a stopper and then shake it: the water will become opaque. You already know that we have made limewater.
62

2. The First Experiments
Let it settle, and then decant the transparent solution into a clean glass vessel. Pour some limewater into a test tube; you can use it for the experiments with gases described above. Or you can use it for magic tricks, like turning "water" into "milk", or "water" into "blood". These tricks are described in the part entitled "Sleight of Hand".
Electrolysis in a Glass
This book contains many experiments with elec-tricity. In this chapter we will describe the eas-iest of them. They can be performed using only three or four pocket flashlight batteries.
Enthusiasts often try to conduct electrochem-ical experiments at home, but they do not nec-essarily succeed. Some small detail is overlooked, and the whole experiment fails. But if you follow all the recommendations in this book, you can be assured that the experiment will be successful.
We will start with a very simple, but very instructive, experiment. You will need only one reagent, namely, some ink of any colour. Of course, you will have to take some pains to construct apparatus for it.
Take two rectangular metal plates, 8 to 10 cm long and 1 to 2 cm wide. It does not make any difference which metal they are made of—iron, copper or aluminium—the only thing that mat-ters is that they should easily fit into a trans-parent vessel, i.e. a tall graduated cylinder or a large test tube* Drill holes in one end of both
63

Experiments Without Explosions
plates to connect them to conductors. Find two identical plastic or wooden spacers no more than a few mil-limetres thick, and attach them with any water-resistant glue to the metal plates so that they stand paral-lel to each other.
Pour water into the graduated cylinder or test tube, and add
enough ink to make a solution that is not too dark in colour, but also not transparent. Place the two plates with the holes up into the solution, and connect the plates by wires to two batteries connected in series, "plus" to "minus". After several minutes the ink so-lution between the two plates will become light-er, and dark particles will gather at the bottom of the vessel and on the surface of the solution.
Ink is composed of very small coloured par-ticles that are suspended in water. When current passes through the solution, they stick together and cannot float in water any more, sinking to the bottom under the influence of gravity. Sub-sequently the solution becomes lighter and lighter.
But why did the particles gather on the sur-face of the solution? When current passes through solutions, gases are often formed. In this case the bubbles of gas picked up the solid particles and carried them to the surface.
64
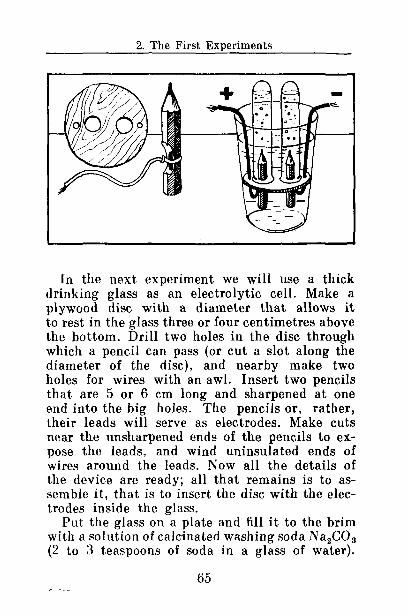
2. The First Experiments
In the next experiment we will use a thick drinking glass as an electrolytic cell. Make a plywood disc with a diameter that allows it to rest in the glass three or four centimetres above the bottom. Drill two holes in the disc through which a pencil can pass (or cut a slot along the diameter of the disc), and nearby make two holes for wires with an awl. Insert two pencils that are 5 or 6 cm long and sharpened at one end into the big holes. The pencils or, rather, their leads will serve as electrodes. Make cuts near the unsharpened ends of the pencils to ex-pose the leads, and wind uninsulated ends of wires around the leads. Now all the details of the device are ready; all that remains is to as-semble it, that is to insert the disc with the elec-trodes inside the glass.
Put the glass on a plate and fill it to the brim with a solution of calcinated washing soda Na2C03
(2 to 3 teaspoons of soda in a glass of water).
65

Experiments Without Explosions
Fill two test tubes with the same solution. Cover one of them with your thumb, turn it upside down, and immerse it into the glass, so that not a single air bubble gets inside. Under the water put the test tube on the pencil-electrode. Do the same with the other test tube.
Connect no less than three batteries in series, "plus" to "minus", and attach the wires from the pencils to the first and last batteries. Electrolysis of the solution will start immediately. Positively charged hydrogen ions H+ will migrate to the negatively charged electrode, the cathode. There they will take up an electron and transform into gas, i.e. hydrogen. When the test tube around the pencil connected to the "minus" end becomes filled with hydrogen, you can remove it from the vessel and, without turning it right side up, set fire to the gas. It will ignite with a characteristic sound. Oxygen is evolved at the other, positive, electrode, which is called the anode. Cover the test tube containing oxygen with your thumb under the water, remove it from the vessel, turn it right side up, and insert a smouldering wooden stick: it will catch fire.
Thus, we have produced hydrogen H2 and oxygen 02 from water H20; the only question remaining is why we needed soda. The answer is, to speed up the process. Pure water very poorly conducts an electric current, and an electrochemical reaction proceeds very slowly in it.
Using the same device, you can conduct one more experiment, i.e. electrolysis of a saturated solution of table salt NaCl. In this experiment
66

2. The First Experiments
one test tube will be filled with colourless hy-drogen gas; and the other test tube with a yellow-ish green gas. This gas is chlorine, which is gen-erated from the table salt. Chlorine easily donates its charge, and is the first to appear at the anode.
Cover the test tube containing chlorine and some of the table salt solution with your thumb under water, remove it from the vessel, and turn it right side up, holding your thumb over the top all the time. A chlorine solution, the so-called chlorine water, will be generated. It is a strong bleaching agent; for example, if you add the chlorine water to a light blue solution of ink, it becomes decolorized.
The electrolysis of table salt results in the formation of one more substance, i.e. caustic soda. This alkali remains in solution. You can verify this by adding some phenolphthalein solution or a home-made indicator near the nega-tive electrode.
Thus, during this experiment we obtained, at one stroke, three valuable substances: hydrogen, chlorine, and caustic soda. This explains why the electrolysis of table salt is so widely used in industry.
You can do one more interesting experiment using an electric current and a saturated solution of table salt: now we will drill the metal with a common pencil.
Mix a saturated solution of table salt in a sau-cer. Connect a razor to the positive pole of a pocket flashlight battery with a wire: the razor will serve as the anode. Break the pencil lead at the sharpened end of the pencil, and, with a needle,
5 67

Experiments Without Explosions
pick out approximately half a millimetre of the lead from the pencil. Cut the pencil, exposing the lead 2 to 3 cm away from the sharpened end, wind an uninsulated end of a wire around the cut. Then insulate this place with insulating tape. Connect the other end of the wire to the nega-tive pole of the battery: the pencil will serve as the cathode.
Put the razor into the saucer containing the solution, and touch it with the pencil-cathode. Bubbles of hydrogen will immediately appear around the pencil, and the razor-anode will be-gin dissolving because the iron atoms will acquire a charge, turn into ions, and enter the solu-tion. In 10 or 15 minutes a hole will appear in the razor. If the battery is new and the razor is thin (0.08 mm) the hole will appear very quick-ly. A hole in aluminium foil is drilled literally in seconds.
If you decide to drill a hole with a pencil in a specific spot of a thin metal plate, it is better to coat the plate beforehand with varnish, and then remove the varnish from the spot where you wish to make a hole.
We picked the pencil lead out of the sharpened end of the pencil in order to prevent it from touch-ing the metal. Otherwise the circuit would be-come closed at once, the current would not pass through the solution, and electrolysis would not take place.
It is possible to drill holes with a pencil with-out an electrolytic cell (which in this experiment was the saucer). Put the plate-anode on a board or eating plate, apply a drop of water to it, dip
68

2. The First Experiments
the sharpened end of a pencil that is connected to a battery into table salt, and then immerse it into the drop. From time to time wipe off the products of electrolysis with a rag, and add a new drop. By repeating this operation you can, with no effort at all, drill holes in metal foil or in a piece of a tin. By the way, you can use this meth-od for drilling a hole in a broken stainless steel knife, if you want to make a new handle for it.
Of course, one battery is not enough for drill-ing metal of a thickness of more than one milli-metre. It is necessary to connect several batteries in parallel, or use a step-down transformer with a rectifier, for example, from a toy model of a rail-road, or from a kit for poker-work. And no mat-ter which source of electric current and method of electrolysis you use, you will have to change the electrolytic solution several times, and re-move the products of electrolysis from the hole with a nail or an awl.
Tin and Lead
Metals are not very convenient to experiment with, since normally for such experiments com-plicated equipment is required. Still, some ex-periments can be done in the home laboratory.
Let us begin with tin. You can buy sticks of metallic tin used for soldering and conduct an experiment with it. Take the stick by both ends and bend it: you will clearly hear a crunch.
The crystalline structure of metallic tin is such that when it is bent, small crystals of metal seem to rub together, making a crunching sound.
69

Experiments Without Explosions
By this property you can distinguish pure tin from tin alloys: a tin alloy stick will not make any sounds when bent.
And now let us produce tin from empty pre-served food cans. Most of the cans are tin-plated in-side, i.e. have a protective coating of tin which protects the iron from oxidation and food prod-ucts from spoiling. This tin can be extracted and reused.
First of all, an empty can must be thoroughly cleaned. Washing is not enough, therefore, fill the can with a concentrated solution of washing soda, put it on a stove for half an hour, and let the solution boil thoroughly. Then pour away the solution and rinse the can with water two or three times. Now you can consider it clean.
We will need two or three batteries from a pocket flashlight, connected in series, or, as was mentioned above, you can use a rectifier with a transformer, or a 9-12 V accumulator. No matter which source of electric current you use, connect the tin to its positive pole, and make sure that the contact is good: you can pierce a small hole near the rim and pass the wire through it. Now connect the negative pole to a piece of iron, for example, a large nail that has been thoroughly scraped. Put the iron electrode into the can so that it does not touch the bottom and the walls of the can. Work out yourself how to do this; it is not a very complicated problem. Fill the can with an alkali solution, i.e. caustic soda (be very careful with it!) or washing soda. Caustic soda is better for this experiment but you must be ex-tremely accurate if you work with it.
70

2. The First Experiments
We will need an alkali solution more than once for the experiments, so let us learn how to make it correctly. Add washing soda Na2C03 to a so-lution of slaked lime Ca (OH)2, and boil the mix-ture. The reaction yields caustic soda and calcium carbonate, that is, chalk, which is practically insoluble in water. The solution, which you should filter after cooling, will contain only the alkali.
Now let us return to the experiment with the can.
Soon bubbles of gas will appear on the iron elec-trode, and tin from the inner coating of the can will pass gradually into the solution. But what if you need the metal itself rather than a tin-con-taining solution? Well, this can also be arranged. Replace the iron electrode with a carbon one. Here again you can use an old battery: there is a carbon rod in its zinc cylinder. Pick it out and connect it to the negative pole of your electric current source with a wire. In the process of elec-trolysis, sponge tin will be deposited on the rod, and if the voltage was chosen correctly, this will happen rather quickly. Of course, it could happen that there will not be enough tin in one can. In this case, take another can, accurately cut it into small pieces with special scissors for cutting iron, and place the pieces inside the can containing electrolyte. Be careful, the pieces of the can should also not touch the carbon rod!
You can remelt the tin collected from the elec-trode. Switch off the current, remove the car-bon rod with the sponge tin, put it into a porce-lain bowl or a clean metal vessel, and heat it on
71

Experiments Without Explosions
fire. Soon the tin will turn into a hard ingot. Do not touch it, or the metal vessel, until they cool!
You can set aside some of the sponge tin for future experiments. If you dissolve it in hydro-chloric acid (which should be done by adding small pieces to the moderately heated acid), you will get a solution of tin chloride. Prepare such a solution with a concentration of 7%, and add a slightly more concentrated (approximately 10%) alkali solution, stirring the mixture in the process. At first a white sediment will form, but soon it will dissolve in the excessive alkali. You have obtained a solution of sodium stannite— the same solution you obtained in the experiment where you extracted tin from a can. If you were successful then you can skip the first part of the experiment—the migration of the metal from the inside coating of the can to the solution—and proceed immediately to the second part of the experiment, where the metal is deposited on the rod. If you need to extract a large amount of tin from cans this will save you a lot of time.
It is much more difficult to melt lead than tin. Put some lead into a small porcelain crucible or a small metal pot. You can use several small shots that are used in hunting rifles, but then you must conduct the experiment in the open air, and do not bend over the vessel where the lead is melted. Small shots for hunting rifles are made out of a special alloy that contains arsenic, and arsenic, when heated, may form volatile com-pounds that are dangerous to one's health.
For this reason we recommend that for this experiment you use a plate from an old, discard-
72

2. The First Experiments
ed car accumulator rather than small shots. Car accumulators are literally stuffed with lead, that's why they are so heavy. Cut a small piece from the plate with cutting pliers, or, if you have no cutting pliers at hand, just bend the plate in all directions until it breaks.
Heat the vessel containing the lead on a gas or electric stove. Lead melts at a temperature slight-ly higher than 300°C. Lift the crucible or metal pot with strong reliable tweezers or flat-nosed pliers, and very carefully, so as not to spill the molten metal, pour it out into a mould. The mould can be made of gypsum or metal. To simplify the experiment, you can just make a cavity in moist sand; a round, oval, square, or any other shape will do. The ingot that is hardening in the mould is a home-made lead cast. Try to make several casted items of different shape, and notice their high density and heavy weight.
You can continue to further calcine lead, but do this only in the open air, not in a closed room. If you do this in the chemical laboratory at school, use an exhaust hood. These precautions are necessary because in the process of long cal-cinating some lead can evaporate, and its vapours are harmful to one's health. We need to heat the lead for several hours. A red film will form on the surface of the metal which is plumbo—plumbic oxide. It is known as "red lead", and in former times it was widely used in the preparation of paints.
Lead, like many other metals, reacts with acids, forcing the hydrogen out of them. But if you place lead in concentrated hydrochloric
73

Experiments Without Explosions
acid, it will not dissolve. In another, obviously weaker, acid such as acetic acid, lead will though slowly dissolve!
This paradox can be explained by the fact that the reaction of lead with hydrochloric acid pro-duces lead chloride PbCl2, which is a sparingly soluble substance. It covers the surface of the metal to prevent the further reaction of metal with the acid. Lead acetate Pb(CH3COO)2, which is produced in the reaction with acetic acid, is very soluble and does not interfere with the reaction between the acid and the metal.
Aluminium, Chromium, and Nickel
To begin with, we will conduct two simple ex-periments with aluminium, for which you can use a broken aluminium spoon. Place a piece of metal in a test tube containing any acid, for example, hydrochloric acid. The aluminium will immediately start to dissolve, actively forcing hydrogen from the acid and forming aluminium salt A1C13. Put another piece of aluminium into a concentrated alkaline solution, for example, a solution of caustic soda (be very careful!). In this case also the metal will start dissolving, lib-erating hydrogen. This time a different salt will be formed, namely, a salt of aluminic acid, sodium aluminate NaA102.
Aluminium oxide and hydroxide exhibit the properties of a base as well as an acid, i.e. they react with acids as well as with bases. They are called amphoteric substances. By the way, tin compounds are also amphoteric; you can check
74

2. The First Experiments
this yourself, of course, only if you have already extracted tin from a can.
There is a rule that the more active the metal, the quicker it is oxidized, i.e. corrodes. For ex-ample, sodium cannot be left exposed to air; it must be kept under kerosene. But, on the other hand, it is known that aluminium is mush more active than, say, iron, but iron rusts quickly, and aluminium, no matter how long it is exposed to air or water, practically does not change at all. Is this an exception to the rule?
Let us do an experiment. Fix a piece of alumin-ium wire over the flame of a gas stove or an al-cohol burner so that only the lower portion of the wire is heated. Aluminium melts at 660°G, there-fore, it seems reasonable to expect the metal to drip onto the burner. But, instead of melting, the heated end of the wire will suddenly sag mark-edly. Examine it carefully. You will notice a thin coating around the molten metal. It is com-posed of aluminium oxide A1203, which is very stable and heat-resistant.
Aluminium oxide covers the surface of alumin-ium with a thin and dense layer, thus prevent-ing it from oxidizing further. This property of aluminium oxide has wide practical application, for example, it is used in metal plating: The met-al surface is covered with a thin layer of alumin-ium, which is immediately covered with alumin-ium oxide, and the oxide reliably protects the metal from corrosion.
Now let us discuss two other metals, which we will also use in an experiment: chromium and nickel. They are located far from each other in
75

Experiments Without Explosions
the periodic table of elements, but there is a spe-cial reason for considering them jointly: they are both used for coating metal objects like tools, buttons, buckles, and car bumpers with a shiny layer that prevents them from rusting. Now the question is, Is it possible to find out for sure from which one of these two metals a coating was made?
Let us try to do an analysis. Chip a piece of the coating of an old object and leave it in the air for several days to allow it to become cov-ered with a film of oxide. Then place it in a test tube containing concentrated hydrochloric acid (be very careful! Acid must not be spilled on your hands or clothes). If the coating was made of nickel, it will immediately start to dissolve in acid, forming a salt NiCla, and the reaction will be accompanied by the emission of hydrogen. If the coating was made of chromium, at first there will be no changes, but after some time the met-al will start dissolving in the acid, forming chromium chloride CrCl3. Remove the piece of coating from the acid with tweezers, rinse it with water and dry it in air. Then, in two or three days, immerse it again in acid, and you will ob-serve the same effect.
The explanation for this is as follows: A very thin film of oxide forms oft the surface of the chro-mium and hinders the reaction between the acid and the metal. But the film itself slowly dissolves in acid. In the air chromium again becomes covered with a protective coating; however, un-like chromium, nickel does not have a protec-tive coating.
76
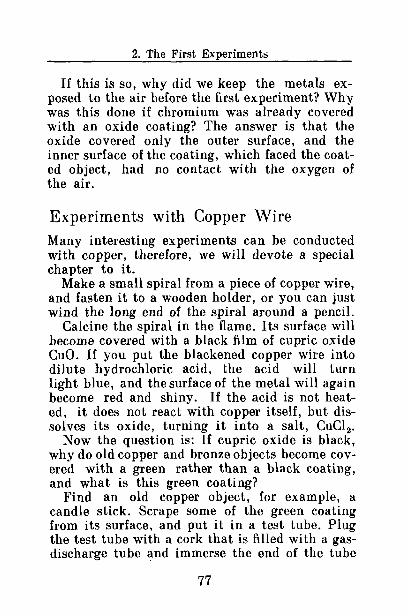
2. The First Experiments
If this is so, why did we keep the metals ex-posed to the air before the first experiment? Why was this done if chromium was already covered with an oxide coating? The answer is that the oxide covered only the outer surface, and the inner surface of the coating, which faced the coat-ed object, had no contact with the oxygen of the air.
Experiments with Copper Wire
Many interesting experiments can be conducted with copper, therefore, we will devote a special chapter to it.
Make a small spiral from a piece of copper wire, and fasten it to a wooden holder, or you can just wind the long end of the spiral around a pencil.
Calcine the spiral in the flame. Its surface will become covered with a black film of cupric oxide CuO. If you put the blackened copper wire into dilute hydrochloric acid, the acid will turn light blue, and the surface of the metal will again become red and shiny. If the acid is not heat-ed, it does not react with copper itself, but dis-solves its oxide, turning it into a salt, CuCl2.
Now the question is: If cupric oxide is black, why do old copper and bronze objects become cov-ered with a green rather than a black coating, and what is this green coating?
Find an old copper object, for example, a candle stick. Scrape some of the green coating from its surface, and put it in a test tube. Plug the test tube with a cork that is filled with a gas-discharge tube and immerse the end of the tube
77

Experiments Without Explosions
in limewater (you already know how to prepare it). Heat the bottle. Drops of water will condense on the wall of the test tube, and a gas will start to evolve from the tube, turning the lime-water opaque. Therefore, this gas isxparbon di-oxide. The black powder, that remains ih the test tube, dissolves in the acid, colouring the solu-tion blue. Perhaps you guessed that this black powder is cupric oxide.
Thus, we have learned into which components the green coating decomposes. Its formula is CuC03-Cu (OH)2 (basic copper carbonate). It forms on copper objects because there is always carbon dioxide and water vapour in the air. It is called patina. The salt also occurs in nature? the famous mineral malachite consists of it.
We will resume the experiments with patina and malachite in the part entitled "Business with Pleasure". But now let us again examine the tar-nished copper wire. Is it possible to make it shiny again without using acid?
Place ammonium hydroxide in a test tube, heat the copper wire until it is red-hot, and put it in the test tube. The spiral will make a hissing sound and again become red and shiny. The re-action lasted no more than a minute producing copper, water, and nitrogen. If you repeat this experiment several times; the ammonium hy-droxide in the test tube will turn dark blue. An-other reaction occurs simultaneously with this reaction, that of complex formation. It results in formation of the complex compound of copper that earlier enabled us to correctly detect ammonia by the dark blue colour of the reacting mixture.
78
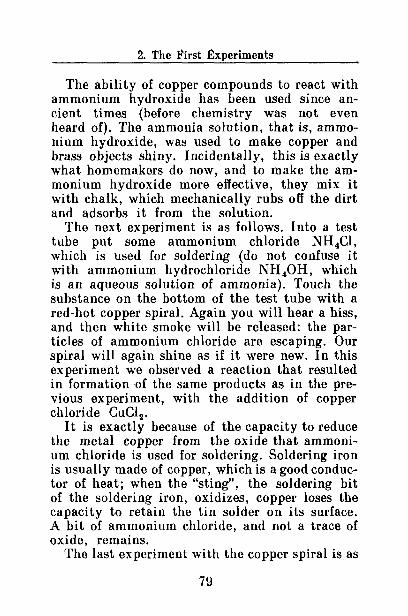
2. The First Experiments
The ability of copper compounds to react with ammonium hydroxide has been used since an-cient times (before chemistry was not even heard of). The ammonia solution, that is, ammo-nium hydroxide, was used to make copper and brass objects shiny. Incidentally, this is exactly what homemakers do now, and to make the am-monium hydroxide more effective, they mix it with chalk, which mechanically rubs off the dirt and adsorbs it from the solution.
The next experiment is as follows. Into a test tube put some ammonium chloride NH4C1, which is used for soldering (do not confuse it with ammonium hydrochloride NH4OH, which is an aqueous solution of ammonia). Touch the substance on the bottom of the test tube with a red-hot copper spiral. Again you will hear a hiss, and then white smoke will be released: the par-ticles of ammonium chloride are escaping. Our spiral will again shine as if it were new. In this experiment we observed a reaction that resulted in formation of the same products as in the pre-vious experiment, with the addition of copper chloride CuCl2.
It is exactly because of the capacity to reduce the metal copper from the oxide that ammoni-um chloride is used for soldering. Soldering iron is usually made of copper, which is a good conduc-tor of heat; when the "sting", the soldering bit of the soldering iron, oxidizes, copper loses the capacity to retain the tin solder on its surface. A bit of ammonium chloride, and not a trace of oxide, remains.
The last experiment with the copper spiral is as
79

Experiments Without Explosions
follows. Pour a little eau-de-cologne into a test tube or, better still, pure alcohol, and again im-merse a red-hot copper spiral in it. Perhaps you can already predict the result of the experiment: the oxide coating is again removed from the wire. This time a complicated organic reaction took place. The copper was reduced, and the ethyl alcohol, which is a component of the eau-de-cologne, was oxidized to acetaldehyde. This reaction is not used for household purposes, but sometimes it is used in laboratories, to make aldehyde from alcohol.
Smoke Without Fire
Some substances pass from a solid state directly to a vapour state, omitting the liquid state in between. In other words, they do not melt. This conversion from a solid to a vapour state is called sublimation.
Crystalline iodine is one of these somewhat unusual substances. But it is better not experi-ment with it in a home laboratory: it is a very caustic substance and is used only in chemical laboratories. Perhaps we can find something eas-ier to deal with and to obtain for the experi-ments?
Solid carbon dioxide C02 will be used. Its household name is dry ice. This substance is called dry ice because, when heated, it does not melt, but turns into light smoke. The temperature of dry ice is very low (minus 78°C); it is lower than the temperature of the coldest day at the North Pole. Moreover, dry ice is so cold that if
80

2. The First Experiments
you hold a piece of it in your unprotected palm for more than a second, your skin may become frost bitten and covered with blisters, as if you had burned it.
Therefore, do not ignore our recommendation: wear gloves when working with dry ice, and pick up pieces of it with tweezers.
But where can you obtain dry ice? The most promising source is ice cream vendors. There is no better way to preserve ice cream products on a hot day than to keep them on dry ice. Dry ice does not melt, like regular ice, producing pud-dles; it simply evaporates without leaving a trace.
The first experiment with dry ice is easy enough, if a little noisy. Fill a pot with cold water, and set it on a hard flat surface, for example, on tiled floor, or on any other flat foundation, no matter what material it is made of. Raise one side of the pot slightly, and put a very small piece of dry ice under it. Once you lower the pot on the dry ice, you will hear an awful screeching sound. The question is, where is the screeching coming from? And who is screeching?
It is the pot that is screeching, and we would like to explain why. A small piece of dry ice is trapped between its bottom and the hard sur-face. The dry ice evaporates and very slightly raises the pot. Immediately after this the vapour pressure drops again, and the pot returns to its original position. Once the bottom of the pot again touches the piece of dry ice, its weight pres-es on the ice, the pressure increases, the pot rises up, then down, repeating this movement.
81

Experiments Without Explosions
In short, it jumps many times a second, only you cannot register its movement with your eye. The oscillations that occur have a specific sound frequency. Perhaps you did not know that the human ear can detect sound signals in the fre-quency range between 20 and 20 000 oscillations per second. It is exactly in this range that our pot jumps.
But why is the sound so loud? Our pot is acting as a resonator, amplifying the oscillations exact-ly as the wooden parts of musical instruments (for example, violins, guitars, and pianos) act as resonators for their strings.
The next experiment with dry ice can justly be described as "obtaining smoke without fire". Actually, there are many experiments of this kind: the most well known is the reaction of hy-drochloric acid with ammonium hydroxide. Since we mentioned it, we will tell you how to per-form this experiment. Rinse the inside of one glass with hydrochloric acid, and another glass with ammonium hydroxide. Put one glass upside down on top of the other glass, so that there are no gaps between the rims of the glasses. Very quickly, the inner space will be filled with thick white smoke. This happens because very tiny particles of ammonium chloride form. They are solid, and very small, and float in air like fog.
But we will produce smoke without acid using dry ice. Fill a glass with water and add a piece of dry ice (remember to do this with tweezers). Instantly the water will "boil up", and thick white smoke will belch from the glass. It is perhaps more correct to call this fog rather than
82

2. The First Experiments
smoke. It appears because the dry ice cools water vapours, and it aggregates into tiny drops, making the air over the glass cloudy.
At the same time you can check whether carbon dioxide forms acid when it dissolves in water. Test the water in the glass with one of your indi-cators. It will no doubt give an acid reaction.
For the next experiment we need a pot, but this time we will put dry ice inside the pot. This experiment is easier to conduct if the pot is tall.
When several pieces of dry ice evaporate com-pletely, the air in the pot will be replaced with carbon dioxide gas. It is much heavier than air, although it is no less transparent: at a glance you cannot tell them apart. How then can you distin-guish between these gases?
Blow a soap bubble directly over the pot, and shake it off the straw or thin tube, so as to di-rect it into the pot. An incredible thing happens: the bubble will soar near the rim of the pot, supported by the invisible layer of the heavier gas. If the gas has partly escaped from the pot, the bubble will drop lower and stay somewhere around the middle of the pot, but never reach the bottom.
Do not pour away the soapy solution which you used for blowing the bubbles. We will conduct one more experiment, or, rather, a variation of the previous experiment.
Usually a soap bubble slowly descends, but we will make it do exactly the opposite, i.e. fly upwards. To do this we will need the same pot with the evaporated dry ice, and a rather long straw that reaches to the bottom of the pot. Take
6* 83

Experiments Without Explosions
up some soapy solution with this straw, and blow a bubble near the very bottom of the pot. Contrary to all expectations, it will instantly fly upwards because you filled it with air, which is much lighter than the gas in the pot.
Now let us try to put the dry ice in some liquid that does not freeze, even at a very low tempera-ture. Thus we will create an excellent low-tem-perature refrigerator. It will quickly and strongly chill objects that are immersed in it.
But what liquids do not freeze at —78°C? Perhaps the most easily available is acetone, a very well-known solvent, which is often used in the household for stain removal, or for dissolving nail polish. Only we urge you not to forget that acetone is very volatile, it evaporates easily, and no less easily flares up; therefore, be sure that there is no open fire around when you work with acetone.
Pour a little acetone into a small metal can, and gradually, in small portions, drop the dry ice into the transparent liquid. The liquid will "boil" after each piece of dry ice is added, there-fore, the pieces of ice must be small. Do not on any account put the dry ice into the metal can first and then pour the acetone on the dry ice: the dry ice will immediately be thrown out of the pot, by the vigorous boiling of the acetone. This can be quite dangerous.
Thus, be patient, and add the dry ice to the metal can in small portions. The "boiling" will be less and less intense, because the liquid is suf-ficiently chilled as manifested by the frost that covers the outside surface of the metal can. But
84

2. The First Experiments
inside the can there is polar frost, to put it mildly.
Do you want to verify this? Cut a piece from a flexible rubber hose several centimetres long, and drop it in the can. In a minute, remove it, natu-rally with tweezers rather than with your hand. You will feel that something happened to the rub-ber: it seems hard now. Hit it with a hammer, and the rubber, which is usually so elastic, will break into pieces like glass. Thus you can see how frost changes the properties of many mate-rials. And now you can imagine how difficult it is to work at polar research stations!
The last experiment with dry ice is also a rather noisy one. But it is completely safe, other-wise it would not be in this book.
Do you still have the rubber hose? Cut a piece 10 cm long. Bend and clamp one end of it. If you do not have a suitable clamp, just close this end of the hose as tightly as possible by winding a wire around it.
Through the other, open end of the hose add a little bit of dry ice, crushing it first into small pieces. Then bend and quickly clamp this end of the hose. Step aside and watch the hose from a distance.
The following will happen: carbon dioxide will sublimate, but there is no way it can escape from the hose. Therefore, in approximately a minute the hose will swell and burst with a loud clap because it can no longer contain the highly pres-surized carbon dioxide.
With this, our first, introductory experiments have come to an end. Now that you have learned
85

Experiments Without Explosions
certain procedures, acquired a stock of vessels and reagents, and realized the importance of safety measures, it is time to get down to more serious things.
The question is, where do we start? Perhaps we should look into the kitchen cupboard?

3 LET'S LOOK INTO
THE CUPBOARD
Ever since man started cooking his food, without knowing it, he became a chemist. The most com-plicated chemical and biochemical reactions took place on frying pans and braziers, in barrels and earthenware pots. By the way, not all of them are fully explained even today, which by no means prevents people from boiling, baking, pickling, and marinating. Still, a lot is already well un-derstood. And some reactions, though, of course, not the most complicated ones, can be reproduced even in a home laboratory.
The experiments listed in this part have at least one unquestionable advantage: all the neces-sary substances, or, to be more precise, products, can be found in your cupboard or refrigerator, or they can be bought in a foodstore. You will need only small quantities of products, but if you buy more than you need for the experiment, the rest will not go to waste, we hope.
The most important part of food is protein, it constitutes the building material for all organ-isms. Thousands of scientists all over the world work with protein and study its properties. Cer-tainly, we shall not discover anything new, con-ducting our experiments. But they say the first step is the hardest...
87
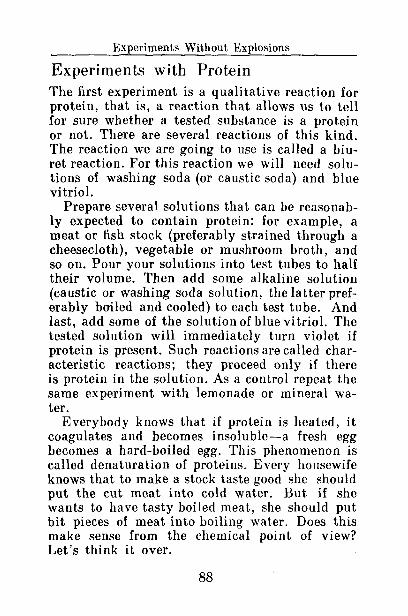
Experiments Without Explosions
Experiments with Protein
The first experiment is a qualitative reaction for protein, that is, a reaction that allows us to tell for sure whether a tested substance is a protein or not. There are several reactions of this kind. The reaction we are going to use is called a biu-ret reaction. For this reaction we will need solu-tions of washing soda (or caustic soda) and blue vitriol.
Prepare several solutions that can be reasonab-ly expected to contain protein: for example, a meat or fish stock (preferably strained through a cheesecloth), vegetable or mushroom broth, and so on. Pour your solutions into test tubes to half their volume. Then add some alkaline solution (caustic or washing soda solution, the latter pref-erably boiled and cooled) to each test tube. And last, add some of the solution of blue vitriol. The tested solution will immediately turn violet if protein is present. Such reactions are called char-acteristic reactions; they proceed only if there is protein in the solution. As a control repeat the same experiment with lemonade or mineral wa-ter.
Everybody knows that if protein is heated, it coagulates and becomes insoluble—a fresh egg becomes a hard-boiled egg. This phenomenon is called denaturation of proteins. Every housewife knows that to make a stock taste good she should put the cut meat into cold water. But if she wants to have tasty boiled meat, she should put bit pieces of meat into boiling water. Does this make sense from the chemical point of view? Let's think it over.
88

3. Let's Look into the Cupboard
Fill a test tube with cold water, add to it some raw minced meat, and heat it. During the process of heating a large quantity of grey flakes will form in the test tube. These flakes consist of coagulated protein and they are usually skimmed off the top because they spoil the look and taste of the stock. When the stock is heated further, water-soluble substances gradually pass from meat into the stock. These substances are called extractive, because they are obtained by the ex-traction of meat with boiling water or, to put it more simply, by boiling meat. It is these sub-stances that, for the most part, give the stock its specific taste, and the meat, deprived of them, becomes less tasty.
Boil water in the other test tube and add the raw meat to the boiling water. Once the meat comes in contact with water, it immediately turns grey, but now, in this test tube very few flakes form. Under the influence of the high tempera-ture, the protein, which was on the surface of the meat, instantly coagulated and sealed the count-less pores which penetrate the meat. In this case, extractive substances, including proteins, can-not pass into the stock. Therefore, they stay in the meat, and give it a good flavour and aroma. Needless to say, the stock will not be so tasty.
Protein becomes denatured, that is, it coagu-lates not only when heated. Pour some fresh milk into the test tube, and add one or two drops of vinegar or citric acid. The milk will immediate-ly curdle, forming white flakes. These flakes are the coagulated milk protein. By the way, cot-tage cheese is made using this reaction, and this
89

Experiments Without Explosions
is why cottage cheese is so healthy: the milk pro-tein passes into it almost completely.
When milk is left in a warm place, its protein also curdles, but for a different reason: lactic acid bacteria are at work. Many varieties of such bacteria are known, and they all produce lactic acid, even when they are nourished on, say, cab-bage juice rather than milk. Strain some sour milk and add to the whey several drops of some home-made indicator. The colour of the indicator will reveal the presence of acid in the solution. The acid is lactic acid, the same acid found in cabbage or cucumber brine.
Some protein molecules are composed of sul-phur in addition to carbon, hydrogen, oxygen, and nitrogen. You can check this by experiment. Put some egg white into a test tube containing a solution of caustic or washing soda, heat the test tube, and add to it a little bit of a solution of ba-sic lead acetate, Pb(CH3C00)2-3H20 (Gou-lard's extract), which is sold in pharmacies. If the contents of the test tube turns black, sulphur is present: the sulphur forms lead sulphide, which is black in colour.
To conclude this chapter, let us make a real protein glue—casein glue—which is still used, despite the abundance of synthetic glues. Since casein constitutes the ba^ic part of cottage cheese, we shall make this glue from milk, or rather, from milk protein.
Strain the sour milk. Rinse what was deposit-ed on the filter with water several times to get rid of the water-soluble substances, and dry what remains. Then rinse the dried mass with pet-
90

3. Let's Look into the Cupboard
rol in order to remove the milk fat, which dis-solves in petrol, and dry again. Be careful! When you work with petrol, make sure that there is no open fire around! Pour the used petrol down the toilet, and flush it several times. When the mass dries completely, pound it in a mortar, and you will obtain protein powder. It is very easy to make glue from this: mix one part of it with an equal portion of ammonium hydroxide and three times volume of water. Certainly you will want to test the glue. Try to glue some wooden or ce-ramic objects with it; casein glue is particularly good for these materials.
Experiments with Carbohydrates
Carbohydrates constitute one of the apexes of the triangle on which our nutrition is based (the other two are proteins and fats). Glucose and fruc-tose, starch and cellulose, and dozens of other carbohydrates are continuously formed and "burned" (oxidized) in vegetable and animal cells, being an indispensable energy-producing material for the organism.
Despite all the differences between the individ-ual representatives of carbohydrates, it is ob-vious that all of them have common properties, characteristic for the whole group. These proper-ties enable us to detect even very small quanti-ties of carbohydrates. TheMolisch test is a relia-ble and, what's more, spectacular way to detect them.
Pour approximately 1 ml of water into a test tube, and add several grains of granulated sugar
91

Experiments Without Explosions
(saccharose), and part of a glucose tablet or a piece of blotting paper (cellulose). Now add two or three drops of an alcoholic solution of resor-cinol or thymol (these substances are sold in phar-macies). Tilt the test tube, and pour in 1 or 2 ml of the concentrated sulphuric acid, very carefully letting it drip slowly along the wall of the test tube. Be careful not to let the drops of acid touch your skin! Fix the test tube vertically. The heavy acid will sink to the bottom, and at the boundary between the acid and water a beau-tiful bright ring—red, pink or violet—will appear.
If a substance of unknown composition forms such a ring in response to the Molisch test, you can be quite sure that there are carbohydrates in it. Only remember that this test is so sensitive that even a particle of dust or a small fibre on the walls of the test tube can account for a positive result. Therefore it is necessary to wash careful-ly the vessel in which you are going to run the test, and rinse it, if possible, with distilled wa-ter.
Now, having learned how to detect carbohy-drates, let us proceed to one of the most well-known carbohydrates—starch. For a start let us learn to correctly make starch paste, which is a colloi-dal solution of starch in' water. Pour some cold water into the pan, and add approximately two teaspoons of starch per each glass of water (in-cluding the water you are going to add later). Stir the mixture well: the so-called starch milk forms. Add boiling water to it, stirring it with-out interruption, and continue to stir while heat-
92

3. Let's Look into the Cupboard
ing on the stove until it becomes transparent; then cool it. The resulting mass is starch paste, which is good for glueing paper. In the past it was very widely used by bookbinders.
You already know that starch turns blue in the presence of free iodine. We shall often make good use of this phenomenon, only take care that the iodine solution should be very weak. By the way, you can use such a weak solution (to make it, just dilute a pharmaceutical tincture of iodine with water) to detect starch in different food products.
Having prepared a weak solution of iodine in a test tube, let us examine the transformations of starch. We shall now try to make glucose from starch paste.
Under the influence of water, giant molecules of starch undergo hydrolysis, and split to smaller molecules. First soluble starch is formed, then smaller "lumps"—dextrines, then disaccha-rides, not the well-known saccharide but a differ-ent disaccharide—maltose, or malt sugar. And lastly, the decomposition of maltose results in the formation of glucose, or grape sugar. The end product of hydrolysis often contains all the in-termediate substances: in this form, it is known as molasses.
Add 1 or 2 teaspoons of dilute sulphuric acid (approximately a 10% solution) to half a glass of starch paste (when diluting the acid, do not forget that acid should be added to water, and not vice versa!).
Pour the mixture of the starch paste and acid into a pot, and bring it to boil, gradually adding
93

Experiments Without Explosions
water to compensate for evaporation. From time to time take samples of the liquid with a spoon and, after cooling them slightly, test them with drops of dilute iodine solution. As you remember, the starch gives a blue colour; dextrines, a red-dish brown; and maltose and saccharose do not change their colour at all. During hydrolysis, the colour of samples will change, and if iodine does not change the colour of the mixture any more, you might as well stop boiling. However, for a more complete decomposition of maltose, it makes sense to boil the mixture for several more minutes.
Cool the liquid a little after boiling, and grad-ually add to it, stirring it all the time, approxi-mately 10 g of powdered chalk to neutralize the sulphuric acid completely. This will cause the mixture to froth because acid and chalk react to form carbon dioxide. When the frothing stops, heat the yellowish mixture in the pot slowly un-til the volume is reduced by two-thirds. Then fil-ter it, while still hot, through several layers of cheesecloth, and boil it down again, but this time it should be heated more carefully and in a water bath, because this mixture easily burns. You will obtain thick sweet molasses, composed mainly of glucose. Approximately the same pro-cess is used for making large amounts of molasses at industrial plants.
Glucose is necessary for human beings, it is one of the main sources of energy. But bread, potatoes or spaghetti contain mainly starch, which is transformed to glucose in the organism by the action of enzymes.
94
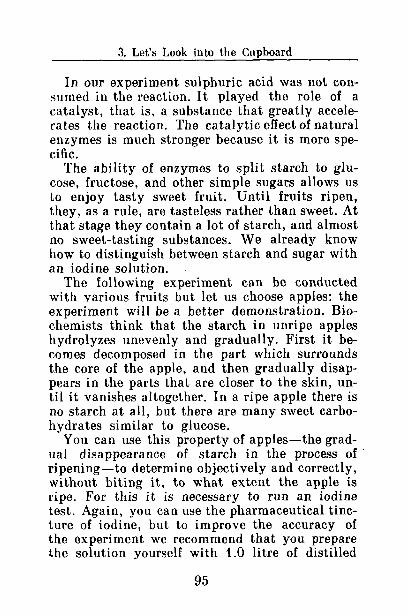
3. Let's Look into the Cupboard
In our experiment sulphuric acid was not con-sumed in the reaction. It played the role of a catalyst, that is, a substance that greatly accele-rates the reaction. The catalytic effect of natural enzymes is much stronger because it is more spe-cific.
The ability of enzymes to split starch to glu-cose, fructose, and other simple sugars allows us to enjoy tasty sweet fruit. Until fruits ripen, they, as a rule, are tasteless rather than sweet. At that stage they contain a lot of starch, and almost no sweet-tasting substances. We already know how to distinguish between starch and sugar with an iodine solution.
The following experiment can be conducted with various fruits but let us choose apples: the experiment will be a better demonstration. Bio-chemists think that the starch in unripe apples hydrolyzes unevenly and gradually. First it be-comes decomposed in the part which surrounds the core of the apple, and then gradually disap-pears in the parts that are closer to the skin, un-til it vanishes altogether. In a ripe apple there is no starch at all, but there are many sweet carbo-hydrates similar to glucose.
You can use this property of apples—the grad-ual disappearance of starch in the process of ripening—to determine objectively and correctly, without biting it, to what extent the apple is ripe. For this it is necessary to run an iodine test. Again, you can use the pharmaceutical tinc-ture of iodine, but to improve the accuracy of the experiment we recommend that you prepare the solution yourself with 1.0 litre of distilled
95

Experiments Without Explosions
water, 1.0 g of iodine, and 4.0 g of potassium io-dide.
Gut the apple that you want to test for ripe-ness in half with a sharp knife, take one of the halves, and immerse the cut surface into the so-lution of iodine. Keep it in the solution for a couple of minutes, then remove and examine it. If the apple is as ripe as it will ever be, the col-our of the cut surface will not change. This is un-derstandable: a ripe apple has no starch to turn blue. On the other hand, if the apple is absolute-ly unripe, the whole cut surface will be coloured with different shades of blue. If the apple is half ripe, only part of the cut surface will turn blue, namely the part which is closer to the skin or fur-ther from the core.
When this test is used by food experts, they grade apples for ripeness, from zero to five. If apples should be eaten very soon, their grade is closer to zero. But such completely ripe apples endure storage worse than slightly underripe apples. Thus, if apples are to be stored, their grade should preferably be from 2 to 4; in other, words, the apple should be partly coloured by io-dine. A completely coloured surface indicates that the apple should have hung on the tree longer in order to ripen.
Now that you have learnt this simple way of grading apples, you can conduct experiments on your own, picking an apple from the tree every few days to check the hydrolysis of starch and its transformation into simple saccharides. Compare, for example, the ripening of apples on the south-ern and northern sides of the tree, on the branches
96
3. Let's Look into the Cupboard
which are closer to the top of the tree and on those closer to the ground, and on different varieties of apple trees.
Perhaps you would like to try this test with different fruits? We cannot guarantee that this test is applicable in all cases, but it is easy to try, particularly if the solution of iodine is already prepared, and the result can be interesting.
Let us return to the question about the direct action of enzymes on starch, and conduct two more experiments. The source of enzymes will be your own saliva. It contains, for example, the enzyme amylase, which transforms starch, a polysaccharide, into maltose, a disaccharide. But first of all you need to prepare the reagent—a solution of saliva.
Rinse your mouth for a minute with distilled water, or, if you cannot obtain it, with boiled water: this is the saliva solution you will use. Filter this solution, and mix it with an equal amount of starch paste. Put a test tube filled with this mixture in a glass with warm, approxi-mately -f- 40°C, water. From time to time run an iodine test. The change in colour will be similar to what we observed during hydrolysis with sul-phuric acid, but the reaction will proceed more quickly. In no more than a quarter of an hour the starch hydrolyzes to maltose, and the coloured reaction with iodine will stop.
Here is an extremely simple experiment. Chew a piece of bread for a long time. You will notice that the taste will become sweet. This is due to the enzyme amylase, which transformed the starch in bread into maltose.
97

Experiments Without Explosions
Sugar from Sawdust
In the middle of the last century the carbohydrates got their name by mistake. At that time it was thought that the molecule of any sugary sub-stance had the formula Cm(H20)n. This standard was applied to all the carbohydrates that were known and the formula of glucose (C6H12Q6) at that time looked like the following: C6(H20)6.
Later, the other sugars were discovered, and they turned out to be exceptions to the rule. For example, a typical representative of the carbo-hydrates, rhamnose (it gives a positive reaction to the Molisch test) has the formula C6H1208. And although the inaccuracy of the name for the whole class of compounds was evident, the term "carbohydrates" had become so customary that it was not changed. Today, however, many chemists prefer a different name—"sugars".
We shall try to obtain one of the sugars from sawdust by hydrolysis, that is, by decomposition with water. This is a very widespread chemical process. Sawdust and other timber waste mate-rials contain the carbohydrate cellulose. At hy-drolytic plants, cellulose is transformed into glu-cose, which can be used for many purposes: most often it is fermented and turned into alcohol, which is an initial product for many chemical syntheses. A large and separate branch of the chemical industry is called the hydrolytic in-dustry.
Before reproducing the process of hydrolysis of timber, let us try to understand it. This is ea-sier to do if we start experimenting with cucum-
98

3. Let's Look into the Cupboard
bers and wooden sticks rather than sawdust. Wash a fresh cucumber, grate it, and squeeze
out the juice. If you wish, you may filter it, but it is not strictly necessary.
Prepare cupric hydroxide Cu(OH)2 in a test tube by adding 2 or 3 drops of blue vitriol solu-tion to 0.5-1.0 ml of caustic soda solution. Add to the resulting precipitate an equal amount of cucumber juice, and shake the test tube. The pre-cipitate will dissolve, and a blue solution will result. This reaction is characteristic of polyhy-dric alcohols, that is, for alcohols that have sev-eral hydroxyl groups.
Now heat the test tube with the blue solution until it boils. The solution will at first turn yel-low, then orange; after cooling, a red sediment of cuprous oxide Cu20 will settle to the bottom of the test tube. This reaction is characteristic for another class of organic compounds—alde-hydes—which suggests that cucumbers contain some substance which is an alcohol and at the same time an aldehyde. This substance is glucose, which is an alcohol and at the same time an aldehyde from the point of view of its structure. It gives cucumbers their sweetish taste.
You can probably guess that this experiment can be conducted not only with cucumber juice. It gives good results with other sweet juices such as grape, carrot, apple, and pear. Plain glucose tablets can also be used for this experiment.
Now let us conduct the second preliminary ex-periment—the saccharification of a wooden stick.
Prepare a solution of sulphuric acid by adding to one volume of water one volume of concentrat-
7* 99

Experiments Without Explosions
ed sulphuric acid (do not on any account pour water into the acid!). Immerse a wooden stick into the test tube with this solution, and heat it until the solution boils. The wooden stick will become charred, but this will not spoil the ex-periment.
After the solution boils, remove the wooden stick, put it into the other test tube with 1-2 ml of water, and boil the water. Now there is glucose in both test tubes. You can verify this by adding to the solutions 2 or 3 drops of blue vitriol, and thfin some caustic soda—you will see the familiar blue colour. If this solution is boiled, as expect-ed, a red precipitate of cuprous oxide Cu20 will fall out. Thus, the glucose was detected.
The saccharification of our wooden stick is the result of the hydrolysis of cellulose (cellulose constitutes approximately 50 per cent of the com-position of timber). As in the hydrolysis of starch, sulphuric acid is not consumed in the process, it only plays the role of a catalyst.
And now, after completing all the prelimina-ries, we can conduct the experiment promised by the title of this chapter: obtain sugar from saw-dust.
Pour into a porcelain bowl 2-3 tablespoons of sawdust and wet it with water. Then add some more water and an equal amount of the sulphuric acid solution (1:1) prepared beforehand. Mix the paste well in the bowl. Cover it with a lid, and put it into an oven for an hour or slightly less.
Next, take the bowl out of the oven, fill it with water up to the brim, and stir the contents. Filter the solution, and neutralize the filtrate by
100

3. Let's Look into the Cupboard
adding powdered chalk or limewater to it until bubbles of carbon dioxide stop forming. You can determine the end of neutralization by testing the liquid with litmus paper, or with one of your home-made indicators. But do not pour the drops of an indicator directly into the reacting solution. You should take a sample, no more than 2-3 drops, and transfer it to a glass plate, or to a small test tube.
Pour the contents of the bowl into a milk bot-tle, shake it, and set it aside for several hours. Calcium sulphate, which was formed during the neutralization of the acid, will sink to the bot-tom of the bottle, and a glucose solution will re-main above it. Carefully pour the glucose solu-tion out into a clean bowl (this is best done by pouring along a glass stick), and filter it.
The last step is to evaporate the solution in a water bath. After this you will see light yellow crystals of glucose on the bottom of the bowl. You can taste them, but do not eat them; they have not been purified enough for eating.
Thus we have completed four operations: saw-dust has been boiled with a sulphuric acid solu-tion, the acid has been neutralized, and the solu-tion has been- filtered and evaporated. This is exactly how glucose is produced at hydrolysis plants, only it is not produced in porcelain bowls...
We can also quite easily reproduce one more industrial process: the transformation of one sugar into two other different sugars.
Home-made jam often crystallizes if stored for too long. This happens because the sugar in the
101

Experiments Without Explosions
syrup crystallizes. But this happens far less of-ten to store-bought jam. The reason is that at the cannery not only beetroot or cane sugar (sac-charose C 1 2 H 2 2 O u) is used but also other sugary substances, for example, invert sugar. The next experiment will demonstrate what the inversion of sugar means, and what it can be used for.
Pour 10-20 g of a weak sugar solution into a test tube or into a glass and add several drops of dilute hydrochloric acid. Heat this solution in a boiling water bath for 10-15 minutes, and then neutralize the acid, preferably with magnesium carbonate MgC03. The so-called white magnesi-um is sold in pharmacies, but this substance with a slightly more complex composition can also be used in this experiment. As a last resort you can use sodium bicarbonate NaHC03, but in this case table salt will be left in the solution, and it is not very compatible with sugar...
When the bubbles of carbon dioxide cease to form, let the liquid settle. To be sure check with an indicator whether the acid was completely neu-tralized. Pour the liquid into another vessel and taste it; it is less sweet than the initial solution (for comparison set aside some initial sugar solu-tion).
There is practically no longer any saccharose in the solution, but there are two new substances present: glucose and fructose. This process is called the inversion of sugar, and the resulting mixture is called inverted sugar.
Oddly enough, there are no outward signs of this reaction. The colour, volume and reaction of the medium remain the same. No gases or preci-
102

3. Let's Look into the Cupboard
pitates are formed. And still the reaction pro-ceeds, only one needs optical devices to detect it. Sugars are optically active substances: a beam of polarized light changes the direction of polariza-tion after passing through a sugar solution. Dif-ferent sugars rotate the plane of polarization in different directions, and by a specific angle. Sac-charose turns the plane of polarization to the right, and the products of its hydrolysis—glucose and fructose—turn the plane to the left. Hence, the term "inversion" which means "turning" in Latin.
Since you do not have optical devices at your disposal, let us prove by chemical methods that the initial sugar really underwent changes. Add several drops of a blue methylene solution (you can use the blue ink for fountain pens), and a small amount of a weak solution of any alkali to the initial and resultant sugar solutions. Heat the solutions in a water bath. There will be no changes in the test tube with the common sugar, but the contents of the test tube with the in-verted sugar will become almost colourless.
Inverted sugar is far less prone to crystalliza-tion than common sugar. If you carefully evapo-rate its solution in the water bath, you will ob-tain thick syrup, resembling honey in appearance. This syrup does not crystallize after cooling.
By the way, glucose and fructose—the same carbohydrates that are formed in inverted sugar— make up three-quarters of the composition of hon-ey, a substance that we all like so much. Ar-tificial honey is also produced using an inverted sugar base. Certainly, our syrup differs conside-
103

Experiments Without Explosions
rably from honey, mainly by the absence of aro-ma. But this shortcoming can be partially over-come by the addition of a small quantity of natural honey.
Why don't we make a lot of non-crystallizing syrup for jam-making at home? Unfortunately, it is difficult to remove the impurities, and there is no guarantee that you will be able to succeed. In any case, it is not worth the risk.
A Cup of Tea
It is natural to think about tea after sugar syr-up, jam and honey, which we dealt with in the previous chapters. Let us extract from tea the substance that improves vitality and stimulates our activity. We are talking about caffeine, which is so called because it was first discovered in coffee beans, where there is much more of it than in tea leaves.
Strictly speaking, there are several tonics in tea leaves: vitamins, essential oils, and so on. But the most important role is played by caffeine, which belongs to the class of alkaloids—a large class of nitrogen-containing organic substances, to which nicotine found in tobacco, papaverine from poppies, and othei; substances also be-long.
For this experiment we will need a porcelain or metal crucible: you can use any suitable met-al vessel that is preferably tall like a glass, rath-er than flat. Put approximately one teaspoon of black tea leaves, which has been pounded in a mortar, and about 2 g of magnesium oxide into
104

3. Let's Look into the Cupboard
the vessel. Magnesium oxide is available in pharmacies, and is usually called "magnesia". Mix the tea leaves with this substance and put the vessel on a stove on moderate heat. Cover the vessel with a porcelain bowl, or any similar object (for example, a jam dish) that has been filled with cold water. In the presence of magne-sium oxide, caffeine will sublimate, that is, it will transform directly into vapour, skipping the liquid phase. Upon reaching the cold surface, caffeine will enter the solid phase again and settle on the bottom of the bowl or jam dish as colourless crystals. When this happens, stop heat-ing, carefully remove the bowl or dish from the crucible, and scrape off the crystals into a clean glass vessel.
How can we make sure that these crystals are really caffeine? There is a spectacular qualitative reaction which we can use. Put several crystals on a porcelain or ceramic plate (for example, you can use a piece of a bathroom tile) and put 1 or 2 drops of concentrated nitric acid on the crys-tals. (Be extremely careful when you work with concentrated acids!). Heat the plate until the mixture on it becomes dry. Meanwhile caffeine will oxidize and turn into noticeable orange-coloured amalinic acid.
But this is not yet the end of the experiment. Let us try to neutralize the acid, adding to it about 10 drops of the concentrated ammonia so-lution (not the pharmaceutical solution, but the one which is sold in hardware stores).Neutraliza-tion results in the formation of the salt that has a very beautiful red colour with a purple tinge.
105

Experiments Without Explosions
This salt is called murexide, and the reaction is also called the murexide reaction.
The other experiments with tea described in this chapter should not be conducted in the home laboratory: they require skill and substances that people usually do not have at home. We will ex-tract tanning agents from tea called tannides, and from them we will obtain tannin, a substance that is used for tanning hides (hence the name tannin), ^or treating textile fabrics with a mordant before dyeing, and as an astringent agent in me-dicine (think of the astringent taste of strong tea). For industrial purposes, though, tannin is extract-ed from inedible sources, such as gallnuts, or galls, sumac and so on.
We will try to extract tannin from green tea. If you have no green tea, you can use black tea, but it contains far less tannides in it.
Put 50 g of green tea into a pan, pour half a glass of boiling water on top, and boil the mixture over low heat for approximately an hour, so as to extract the soluble substances as completely as possible. Filter the solution through several layers of cheesecloth, or through two layers of cotton fabric; in addition, wash the deposit on the filter with half a glass of hot water through the cheesecloth. The yield will be approximately one glass of greenish yellow solution.
Add 15-20 g of lead acetate to this solution, or the same amount of Goulard's extract. Mind you, lead acetate must not be ingested: it is poison-ous! Now pour off the liquid carefully, add to the precipitate a glass of hot water, stir the mixture, let it settle, and again ponr off the liquid. Repeat
106

3. Let's Look into the Cupboard
this operation 3 or 4 times to remove the lead ions. To check whether you have removed them completely, transfer a sample of the liquid into a test tube and add several drops of dilute sulphu-ric acid. If there is still lead in the solution, it will become turbid: in this case it is necessary to repeat the washing. When this test becomes nega-tive, filter the solution through glass wool, and wash the precipitate (it is lead tannate) on the filter with 50 ml of a 1.0% solution of sulphuric acid. Collect the resulting solution, neutralize the acid by adding a 0.5% solution of barium hy-droxide drop by drop, and then filter off the pre-cipitate (barium sulphate).
The transparent fluid that has passed through the filter contains tea tannin. Evaporate it until it is dry in the water bath. Scrape the dry tannin from the bottom of the vessel and pulverize it.
The following are several spectacular reactions that use tannin. Since we have very little tannin (no more than three grams) we should be very economical with it.
Dissolve approximately 0.5 g of tannin in 40.0 ml of water. As soon as you add a solution of ferric chloride or some other salt of trivalent iron, the liquid will blacken. You have made old-fash-ioned ink; however, in former times the tan-nin to make it was obtained from oak apples (gall-nuts), galls on the leaves and young shoots of oak trees.
Another spectacular experiment is the follow-ing: put approximately 0.3 g of tannin into a small test tube, and add 3 drops of concentrated hydrochloric acid. This will result in the forma-
107

Experiments Without Explosions
tion of phlobaphen, a red-coloured substance. Now add a little bit of tannin to a solution of
silver nitrate AgNOa (lunar caustic). You can make this from a lunar caustic stick, which is available in pharmacies. This time a brownish precipitate of silver tannate will be produced.
The last experiment with tannin is as follows. Dissolve approximately 0.3 g of vanillin (or the corresponding amount of vanilla sugar) in a 2% solution of hydrochloric acid. Add three times less the amount of tannin. You will not have to wait long for a crimson colour to appear. This is a characteristic reaction not only of tannin, but in general of substances from the class of cate-chins, to which many tanning substances belong.
Let's Make Use of Bones!
A good housewife does not throw away bones: soup stock can be made from them, and a very rich one at that. If bones are boiled for a long time, and then the stock is cooled, it will turn into jelly. By the way, jelly is not only the name of a good product, it is also a chemical term. A large group of colloidal systems is called jellies after the best known representative of this group, meat jelly.
Jelly forms by boiling bones because bones con-tain a special protein substance called gelatin. This substance, in a very purified form, is sold in food stores. Technical gelatin, that is, gela-tin that has not been purified, is also sold in shops, but in hardware stores instead of food stores. It is called carpenter glue, or animal glue.
108

3. Let's Look into the Cupboard
We will make this glue from bones. Unfortu-nately, we can't make food gelatin: its purifica-tion is too complicated.
For this experiment we will need raw bones, in principle, any bones will do, but the experiment will be more successful if we use the so-called marrow bones rather than tubular bones. Scraped ribs and different joints are also good. Very few bones are needed, 100 to 200 g at the most.
First of all the bones should be roughly broken. Wrap them in sturdy material, for example, can-vas, and pound them well with a hammer. Un-wrap the cloth, remove the pieces of marrow (if there are any), wrap the broken bones in an-other piece of cloth and again pound the bones with a hammer until they are fragmented into tiny pieces.
We are not yet ready to make glue. First we must get rid of the fat that is in the bone frag-ments. Fat dissolves well in many solvents and the most available one is probably petrol. Please, do not forget that it is flammable! It can also be toxic if its vapours are inhaled for too long. For these reasons you should work with it either under an exhaust hood, or in the open air, for example, on the balcony. If you must conduct the experiment indoors, by all means open the win-dows. And also make sure that there is no open fire anywhere near.
Pour the petrol on the bone fragments, and wait for 20-30 minutes, stirring the mixture sev-eral times. Pour the petrol (along with the fat that has dissolved in it) in the toilet bowl rather than down the sink, and flush it several times to
109

Experiments Without Explosions
get rid of the smell. When the bones are dry, and this will happen rather quickly, rinse them with hot water two or three times.
Now let us make a broth with the degreased bones. It is not really necessary to use a pan for this, an empty, well-washed can will also do. The bones should be boiled in water for a long time, and then the broth should be boiled down over low heat until it becomes thick and viscous.
From here on all you need is patience. Put the broth in a dry and warm place, and check it from time to time. In a few days the broth will dry out and turn into brown carpenter glue. Al-though it appears to be a dry substance, it con-tains a lot of bound water that has been absorbed by gelatin during boiling. Later on, when you will need to use your glue, heat it in a water bath: some bound water will separate, and the glue will swell.
Using this glue you can successfully stick var-ious wooden objects together. But the glue is not sufficiently purified to be used in our next experiments. Instead we will use ready-made gelatin available in food stores.
To make a solution of gelatin, put 10.0 g of gelatin powder in a quarter of a glass of cold wa-ter, and let it soak for a sufficient amount of time, no less than one houf. Next, warm the mix-ture up to approximately 50°C, and wait, con-stantly stirring, until the mixture dissolves com-pletely. Pour some of the solution on a polyethyl-ene film (plastic wrap) so that it covers the film in a thin layer, and let it dry well. (Do not use a piece of glass instead of the film because la-
110

3. Let's Look into the Cupboard
ter on you will not be able to separate the gela-tin from it). You will obtain a thin sheet of gelatin, and to make the result more spectac-ular, cut out an outline of a fish from it. Put this gelatin fish on blotting paper, and careful-ly breathe over it. The fish will start twisting and rolling up because your breath moistens the gelatin sheet on one side, so that it swells and tries to coil up.
Swollen gelatin has one more interesting fea-ture: it can make a beautiful snowflake-like pat-tern on glass, and this can be preserved for a long time. Prepare the same solution as you did in the previous experiment, only use two or three times less gelatin, or simply dilute the re-maining solution from the previous experiment with warm water. Pour the still warm solution on a glass plate, and immediately put this plate in a very cold place, either outside in winter, if the winters are cold enough in your country, or in the coldest place of the freezing compart-ment in your refrigerator. The water will crys-tallize, forming a pattern similar to the snow-flake pattern which appears on the windows in cold countries in winter. If the gelatin jelly is left in the freezer for several days, the ice will eventually evaporate. It should then be allowed to thaw out slowly, and the snowflake pattern will be preserved.
Now let us do something different such as make mineral fertilizers. The majority of bones mainly consist of phosphorite but one of the exceptions is teeth bones, which consist mainly of apatite. Phosphate fertilizers are
111

Experiments Without Explosions
synthesized at special fertilizer plants from the minerals phosphorite and apatite. We will turn bones into simple superphosphate.
First, calcine the bones well to burn out all the organic compounds (they interfere with the experiment). Calcination will transform the bones into calcium phosphate Ca3(P04)2—phos-phorite. Pick out clean white pieces of calcina-ted bone and pulverize them by first pounding them with a hammer, and then grinding them in a mortar. Mix 50.0 g of this powder with 3.0-5.0 g of chalk, put the mixture into a clean glass vessel, and add 20.0 g of 70.0% sulphuric acid. (Again remember that when you dilute sul-phuric acid with water, you must pour the acid into the water, and never vice versa.) Add acid to the mixture of bones and chalk gradually, in small portions, stirring the mixture continu-ously with a glass rod. The mixture will quick-ly warm up and turn into paste, and then into a dry white substance, superphosphate Ca(H2P04)2. It takes approximately an hour to form this product.
Now let us ask, why isn't phosphorite used as a fertilizer, and superphosphate is clearly preferred? To answer this question we will per-form one more experiment.
Take two glass vessels, filled with water. To one of them add some powdered bones (phos-phorite), and to the other, the superphosphate that you have obtained. The phosphorite powder will quickly sink to the bottom without chang-ing its initial volume, but superphosphate will
112

3. Let's Look into the Cupboard
undergo hydrolysis, increase considerably in vol-ume, and then sink to the bottom of the vessel very slowly, over several hours. This property of superphosphate helps it to distribute well in soil, and stay there for a long time.
Since you have produced some home-made fertilizer, why not use it for feeding your house-plants? Observe the growth of your plants fer-tilized with superphosphate and compare it with the growth of control plants, which were not fertilized. Or you can fertilize the plants in the control group with standard, factory-made fer-tilizers. It will be interesting to discover wheth-er they prove to be more beneficial for the plants than the home-made fertilizer.
Why Berries Release Juice
If a plant wilts, if its leaves turn yellow, it means that its cells are not getting enough water. But each cell is bound externally by a mem-brane, so the question is, How does the moisture, absorbed by the roots, permeate the membrane to enter the cell? And what makes water move contrary to the force of gravity, upwards, from roots to leaves?
To answer these questions we will conduct preliminary experiments with a membrane, which is similar to a cell membrane.
If two solutions are divided by a solid par-tition, they do not mix. But if there is no par-tition, the solutions will mix by themselves, even without stirring them. And what happens if the partition is semipermeable?
113

Experiments Without Explosions
Let us investigate this in our next exper-iment. We will use a sheet of parchment or cellophane (but not polyethylene) for a semipermeable mem-brane. It will acquire the properties needed for this experiment if it is soaked in water until it softens.
Prepare a sugar syr-up, that is, a saturat-
ed sugar solution that is so thick that the sugar cannot dissolve in it any more. You can do this more quickly and easily if you use hot water for the solution. Fill a glass with this syrup to the brim, then cover it with the soaked parch-ment or cellophane sheet, and tie the sheet tightly around the rim of the glass. Make sure that there are no air bubbles under the sheet. Place this glass into a big glass jar or pot filled with water (the water level should be well above the glass), and let it sit for several hours. When you check the glass later, you will immediately see that the film which covers the glass is bulg-ing, as if some kind of bubble has formed above the glass.
In order to explain what has happened, it is necessary to first understand what a semiper-meable membrane is: it is a film which bars the passage of some molecules, but is permeable to other molecules. Both parchment and cello-
114

3. Let's Look into the Cupboard
phane paper are porous, but their pores are so small that they are not permeable to sugar mol-ecules. There is water on both sides of our par-tition, but on the side of the sugar solution, there are less water molecules per each unit of the partition surface; therefore, more molecules per-meate the membrane from the water side than in the opposite direction. As a result, the vol-ume of liquid in the glass increases, and the semipermeable film bulges. Everything in na-ture strives to attain equilibrium, in this case equilibrium between the concentrations of so-lutions. And soon equilibrium is attained: the amount of water molecules entering the glass with syrup is equal to that leaving to enter the big vessel. Thus, the bulge over the glass does not become too big.
The physicochemical phenomenon that we have just, observed is called osmosis, and the pressure that makes the film bulge is called os-motic pressure. To observe osmosis it is neces-sary to have a partition and two liquids: a so-lution of some substance and a pure solvent (in our case it was water), or at least a weaker solution of the same substance.
The membranes of living cells are always semi-permeable. They bar the passage of many water-soluble substances, but let water through. Each animal and plant cell is, therefore, a microscop-ic osmotic system, and the osmotic pressure plays a very important role in the vital activity of organisms.
You can observe osmosis by performing very simple experiments. Cut a thin slice of lemon
8 * 115

Experiments Without Explosions
with a sharp knife, and put it on a saucer. Notice that there is practically no juice on the surface of the slice. Sprinkle the slice with granulated sugar, or, better still, with confectioner's sugar, and soon the lemon will release juice.
You can conduct the same experiment with strawberries or other berries. Put them into dry jars, sprinkle with sugar, and you will see that they soon release juice.
In all these cases you have observed osmosis in action. A concentrated solution is formed on the surface of lemon or berries, and their juice, which is far less concentrated, tries to dilute this solution: it permeates the cell membranes and leaves the cells just as water, in the previous ex-periment, moved from the big vessel into the glass of syrup.
The next object of study is cabbage. Naturally, we will sprinkle it with salt rather than sugar. Shred a cabbage with a knife, sprinkle with salt and rub well: the cabbage will also release juice. This is the way to make sauerkraut. It is also strongly recommended to rub well cabbage, that has been shredded for salads. It will release juice and become more tender. The same phenomenon— osmosis—is responsible.
Now let us experiment with the potato. Cut a potato into three cubes, preferably of the same size. Prepare three glass jars: fill one of them with a salted water; the other, with a concentrated table salt solution; and the third, with plain tap water. Put a potato cube into each jar, and ex-amine them carefully in two or three hours. You will find no changes in the cube that was soaking
116

3. Let's Look into the Cupboard
in salted water, but the two other cubes will have changed markedly. The cube that was in the concentrated table salt solution became much smaller, and the cube that was in water, on the contrary, became much larger.
First, let us try to understand why the first cube did not change. It was in a dilute table salt solution, where the salt concentration was approx-imately equal to that in the potato juice. The cube that was in the concentrated table salt so-lution started to release water, decreasing the concentration of the corresponding solution, and causing the cube to shrink. And the last cube, which was in water, started to absorb water, and, thus, increased in size.
From a potato we will proceed to a carrot and make it act like a pump.
Gut the top of a carrot, and insert a glass tube into the carrot. Put the carrot in a glass of water; find a way to keep it in a vertical position.
Fill half of the glass tube with the salt solution, and observe what happens. Soon the level of water in the tube will rise and, if the experiment is conducted correctly, water will even flow out from the tube, as if the carrot is pumping the wa-ter from the ^lass, making it rise.
When you are watering carrots in your vege-table garden, they pump water from the soil to the top in a similar manner. The concentration of salts in the carrot juice is higher than the con-centration of salts in the water that you use for watering; therefore, due to osmosis the life-giv-ing moisture is available not only to the roots, but to all the tissues of the plant.
117

Experiments Without Explosions
Summertime Experiments
You can observe the osmotic transfer of water or, as it is sometimes also called, the root pressure, in a field or a vegetable garden. Find some fast-growing plant, preferably with a strong and thick stem (sunflower, tulip, etc.), and cut the stem at a height of approximately ten centimetres above the ground. Attach a short rubber tube to the stem protruding from the ground and insert a thin and long glass tube (no shorter than half a me-tre) into the rubber tube. Such a long tube must obviously be fixed somehow in the vertical posi-tion: tie it to a wooden stick that has been ham-mered into the ground nearby. Wind a thread around the rubber tube where it attaches to the stem in order to create a better seal, and it is also help-ful to plaster the connection with plasticine to make the seal reliable and hermetic.
Now, start watering the stem. Soon the water in the tube will rise. If the diameter of the tube is no more than 5 mm, the water column will be high.
The osmotic pressure, however, is not the only reason for the upward movement of water. One of the other reasons is transpiration, that is, the evaporation of water from the surfaces of leaves. Having delivered the nutritive substances to the plant, some of the water evaporates through the stomata of the leaves, and is then replaced with more water from the roots. It is easy to conduct an experiment demonstrating transpiration. Put a cut twig of some plant into a test tube filled with water, and mark the level of water in the
118

3. Let's Look into the Cupboard
test tube, forexample, by winding a coloured thread around the test tube at this level. You will not have to wait long for the water level to de-crease. But perhaps the reason for this is the evaporation of water directly from the test tube?
To eliminate the direct evaporation, pour a bit of vaseline or vegetable oil on the surface of the water in the test tube. It will spread over the whole surface and stop evaporation. But the lev-el of the water in the test tube will continue de-creasing; therefore, one can conclude that the water evaporates through the leaves. If you have a balance, this experiment can be even more graphic: counterweigh the test tube with the twig (don't forget to get some oil to the water) on the balance. Soon the equilibrium will be upset, and the tray with the test tube will rise.
You can conduct similar experiments with var-ious wild plants or house plants; they will all have different rates of transpiration. But let us modify the experiment a little, and cover the twig with a glass jar. It is not even necessary to cut a twig for such an experiment; you can just cover any small house plant with a glass jar. If the plant was adequately watered, the air in the en-closed volume will very soon become saturated with water vapour, and the water will no longer be able to evaporate from the leaves. Evidently, no transpiration is occurring in this case, but some time later drops of water will appear on the leaves. Why? Again, this is due to osmotic pres-sure.
There is another way for water to rise in the stem: every plant has minute thin-walled vessels
119
Experiments Without Explosions
called capillaries, and the smaller the inner diameter of the capillary, the faster the liquid rises in it. It is a pity that you don't have a capillary glass tube with a diameter of 0.02 mm. Water can rise up to three metres in it! And plants have even thinner capillaries with even smaller diameters.
Fill several glass jars with water and add a few drops of ink to colour it. Cut the stems or twigs of various plants (preferably under water) with a sharp knife and put them into the jars. Gradu-ally, the coloured water will fill all the veins of the plant and will rise in the capillaries. It is easy to trace the movement of water by the chang-ing colour of the veins in the leaves. With the help of a strong magnifying glass you can examine the arrangement of capillaries in the stems by making several transverse cuts across them.
The last experiment with plants is the follow-ing. Fill some wide vessel, for example, a bowl, with water coloured with ink. Put a twig in the water and cut the end of the stem under the wa-ter. In a few minutes remove the twig, and make several cuts with a sharp knife. It only took a few minutes (Did you notice how many?) for water to rise rather high up in the stem.
Take another twig of thp same plant and cut it in the air; then put it into the same bowl of wa-ter, and keep there for the same amount of time. The cuts will show you that, in this case, the water has risen to a considerably lower level!
The reason for this is that the capillaries of the plants are very thin, and they easily become occluded with air "corks"—tiny bubbles of air
120

3. Let's Look into the Cupboard
that prevent water from reaching the leaves. If the stem is cut under water, air bubbles cannot occlude the capillaries.
Now you certainly understand why experienced flower growers recommend cutting the stems of flowers under water, rather than in air, to make the cut flowers last much longer.
How Much Vitamin C Does an Apple Contain?
The answer to this question can be found in a reference book. But the data given there applies to apples in general; what about the vitamin C content of a specific apple, the one you are going to eat?
Actually it is quite complicated to determine vitamin content. But the content of vitamin C— ascorbic acid—can be determined even in the home laboratory.
Perhaps you think that since vitamin C is an acid, its content should be determined using an alkali. It sounds fine, but in our case such an anal-ysis is out of the question. In addition to ascor-bic acid, apples contain many other organic acids, such as citric, malic, and tartaric, to name but a few, and they all participate in the neutral-ization reaction with alkali; therefore, an alka-li will not be of any help in this case.
We will make use of a specific property of ascorbic acid, namely, that it is oxidized very easily. You probably know that a considerable amount of vitamin' C is lost during transpor-tation and cooking. This happens because an
121
Experiments Without Explosions
ascorbic acid molecule is unstable, and easily oxidized, even by the oxygen, in the air trans-forming into a different acid, dehydroascorbic, which does not have vitamin-like properties. For the analysis of vitamin C content we use a much stronger oxidizing agent, iodine.
We will need an iodine solution of known con-centration, for example, a pharmaceutical al-coholic solution of iodine (iodine tincture) with a 5% iodine concentration, that is, a solution that contains 5.0 g of iodine per 100.0 ml of so-lution. We now need to prepare a starch solution: Add 1.0 g of starch to a small quantity of cold water, stir the solution well, and pour it into a pan containing a glass of boiling water. Let the mixture boil for approximately one minute. This starch solution can be used in experiments for up to a week.
Everything is now ready for the determination of vitamin C content. But before we perform the analysis let us test this method on pure ascorbic acid.
Take 0.5 g of pharmaceutical ascorbic acid (without glucose) dissolve it in 500.0 ml of water and sample 25.0 ml of this solution. Add ap-proximately half a glass of water (the exact quantity does not matter), and an additional 2 or 3 ml of starch solution. Next, add the iodine solution gradually, drop by drop, witVi a medicine dropper, continuously shaking the mixture (one of the most convenient vessels for this operation is a conical flask). Carefully count the drops, observing at the same time the colour of the solution. Once the iodine has oxidized all the
122

3. Let's Look into the Cupboard
ascorbic acid, the next drop added will react with the starch, changing the colour of the solution to blue. This means that our operation— titration—is finished.
But how can we determine the amount of the iodine tincture we used? We know the number of drops, but a drop is not a unit of measurement. In chemical laboratories special burets that are graduated in millilitres are used. We will use another method, which is quite accurate, if a little time-consuming. With the same medicine dropper we will count how many drops are contained in the pharmaceutical bottle of iodine tincture. Don't be dismayed, this will take no more than several minutes (the volume of tinc-ture, usually it is 10.0 ml, is indicated on the label). Once you know the volume of one drop, you can count the volume of iodine solution consumed during the titration of ascorbic acid. We suggest that on your own you write the equation of the titration reaction, and from this equation check how much ascorbic acid is con-tained in a tablet. Or you can reverse the problem; since you know the amount of ascorbic acid, check the concentration of the iodine tincture. Is it really a 5% tincture as indicated on the label?
This simple method of analysis is often used by chemists analysing iodine and other oxidizing agents.
Now it is time to tackle our main task, the determination of vitamin C content. We know the concentration of the iodine solution, and we also know that 1.0 ml of a 5% iodine solution
123

Experiments Without Explosions
corresponds to 35 mg of ascorbic acid (by the way, one multivitamin tablet contains 35 mg of ascor-bic acid).
Let us start with orange or lemon juice, fresh-ly made or canned. Measure 20.0 ml of juice, and dilute it with water to about 100 ml. Add some starch solution to it (not too much) and then add, drop by drop, as in the previous exper-iment, the iodine solution until the mixture turns blue and stays this way for 10 or 15 seconds. The amount of ascorbic acid in the solution is far less than in the previous experiment with ascorbic acid tablets; therefore, the titration will require far less iodine. If the content of vitamin C is very small, it may not be necessary to use more than one or two drops of the iodine tincture. In this case our analysis will obviously be very approximate or rough. To obtain more accurate results, we will have to use a lot of juice, or dilute the iodine tincture. We are sure that not only professional chemists, but all those who love tasty juice, will prefer to dilute the tincture! To analyse the vitamin C content of fruit juices, it is convenient to dilute the iodine tincture with water (1 part tincture: 40 parts water) in order to obtain a 0.125% iodine solution (1.0 ml of this corresponds to 0.875 mg of ascorbic acid). Do not forget, though, that the surface tension of water is greater than that of alcohol; therefore, drops of water are bigger than drops of alcohol, and we must calcu-late anew the volume of one drop.
If you work in a school laboratory it is pos-sible to make the iodine solution more accurately.
124

3. Let's Look into the Cupboard
There you can make a solution that contains 1.27 g of iodine in 1.0 litre of water. Since the solubility of iodine at room temperature is very small (only 0.3 g per litre) a bit of potassium iodide or sodium iodide, which greatly increases the water solubility of iodine, must be added to the solution. One of these salts is always added to the pharmaceutical iodine tincture.
Now let us analyse apples. This analysis presents some difficulties because apples contain the enzyme ascorbineoxidase, in the presence of which ascorbic acid is quickly oxidized in air. To prevent this it is necessary to carry out the analysis very quickly in an acid medium.
Weigh an apple, and with a thin stainless steel knife cut a sample from this apple (a slice from the skin to the core). Vitamin C is not distrib-uted in the apple evenly, and since we want to determine the total content of vitamin C, rather than the content of some specific zone, it is necessary to thoroughly mash this apple slice in a porcelain mortar that contains some dilute hydrochloric acid. Add some starch solution to the mixture and titrate the mixture with a dilute iodine solution. The mass of the sample can be determined by subtracting the weight of the apple after the sample was removed from the initial weight of the apple. Do not waste precious time weighing the cut piece, it will oxidize.
Just how accurate is our method? After all, fruit juices contain not only vitamin C, but other organic substances that also react with iodine, although not as quickly as ascorbic acid.
125
Experiments Without Explosions
Nevertheless, this method proves to be sufficient-ly accurate, judging by the results obtained in the following analysis.
A decoction of dried rose hips was made, using 25.0 g of rose hips for every 0.5 litre of water. According to the iodine test, the content of vitamin C in dried rose hips is 3.8%, and accord-ing to the reference materials the content is 4.5%. The iodine test indicates that there is 0.05% of vitamin C in freshly squeezed orange juice, and 0.075% in canned orange juice (0.04%, according to reference data). If one takes into account that the vitamin content differs even in different fruits of the same species, it is obvious that this method gives an accurate enough idea of the vitamin C content in different fruits.
Thus, you have learned how to calculate quick-ly and rather accurately the content of ascorbic acid, and, now, a broad field of activities is opened for you. You can analyse the vitamin C content in many fruits and berries (whose juice may not be naturally red), or you can find out whether the vitamin C content depends on the variety of the fruit. Only do not forget that dis-solved ascorbic acid oxidizes in air, and for this reason all the experiments must be carried out with freshly squeezed juice.
The following are several suggestions of sub-jects for investigation. Determine the content of vitamin C in fruit that was just picked from the tree, and in the same fruit after a week, a month, or half a year. It is sometimes said that one should not cut fruit with an iron knife, since it destroys vitamin C. Check whether this is
126

3. Let's Look into the Cupboard
true by keeping the juice in an iron vessel. Incidentally, when you compare the vitamin C content of freshly squeezed and of canned orange juice, do not forget that some canned juices contain specially added ascorbic acid. And last of all, you can investigate how the vitamin C content is affected by heating, and make your own conclusions from this experiment.
Almonds—Bitter and Sweet
The almonds that we eat or use for cooking are usually sweet. But there are also bitter almonds, which are closely related to sweet almonds, and it is practically impossible to tell them apart by sight. One cannot eat bitter almonds, but they do not go to waste. First of all, they are utilized for the production of oil that is used in medicine, and for the production of a flavour-ing agent used in the food industry and even for home cooking, since bitter almonds have a much stronger flavour than sweet almonds. It is actual-ly their flavour that is called almond flavour.
You can distinguish a sweet almond from a bitter one the, very second you bite the kernel, but we will try to do this from a chemical point of visw. This is not for the purpose of analysis though, the experiment is too complicated to be used every time you want to distinguish sweet almonds from bitter almonds, but to learn about some interesting features of the family Rosaceae, to which almonds belong.
Let us conduct the experiment. Shell several almonds, blanch the kernels to remove their
127

Experiments Without Explosions
tough skins, and grind them thoroughly, adding 5-10 ml of water to the paste. Filter the mixture, take 10 drops of the filtrate and mix with several drops of a dilute (approximately 10%) solution of caustic soda. The resulting mixture should have a basic reaction, so add the basic solution until you get a stable colour with phenolphthalein or some home-made indicator.
Next, add one drop of a solution of green vitriol FeS04-7H20, heat the mixture to boiling, filter it, and add several drops of hydrochloric acid to the filtrate. Now the mixture must give an acid reaction, so repeat the test with the indicator. The last step is to add one drop of a solution of ferric chloride FeCl3, and you will find out for sure whether you had sweet or bitter almonds. If they were sweet, nothing will happen, but if the almonds are bitter, a beautiful blue precipi-tate will fall out immediately. This precipitate is Prussian blue, Fe4[Fe(CN)6]3.
Bitter almonds, which gave a spectacular col-our reaction, contain a complex substance that is called amygdalin, and the enzyme glycosidase, which can, in the presence of water, decompose amygdalin to more simple substances. A chain of complicated transformations, which we omit here for the sake of simplicity, results in the formation of sodium ferrOcyanide Na4[Fe(CN)6l. It was this substance that gave the bright colour after the last drop of ferric chloride was added.
But why don't sweet almonds give such a reaction? The reason is that they do not contain amygdalin. But they do contain glycosidase, and
128

3. Let's Look into the Cupboard
because of it we will be able to conduct one more experiment.
This time we will use plum, peach or cherry stones instead of bitter almond: these fruits also belong to the Rosaceae family, and they have a lot in common with almonds, including the presence of amygdalin in kernels.
Remove the kernels from stones that have not been subjected to heating; in other words, the stones of fresh or frozen fruits can be used, but not of canned or preserved fruit. Mix their kernels with an equal amount of sweet almonds, add water and then filter the solution. Continue the experiment as with the bitter almonds. At the end when you add the last drop of ferric chloride, the beautiful Prussian blue will again appear.
In this experiment, amygdalin was taken from cherry, peach or plum stones, and the enzyme that destroys it, from sweet almond. We have observed the same effect as in the case of bitter almond.
An important thing to note at this point is that physicians do not recommend storing home-made preserves of cherries and plums for a long time, if they have not been boiled, since their stones are potentially dangerous. The transfor-mation of amygdalin, which they contain, can result in the formation of substances that are harmful to one's health, although this admit-tedly takes a long time. The stones of fresh fruits are not dangerous.
Now that you have learned many things, you can give advice. The first advice, although it is bothersome, is that, to be on the safe side, it is
129

Experiments Without Explosions
better not to use fruit with stones for preserves that are not boiled. And the second advice is that it is completely safe to use fruit with stones for preserves that are boiled, because heating de-stroys the enzymes which decompose amygdalin. If you want, you can conduct the same experiment using kernels of boiled stones: the blue colour will not appear at the end.

4
BUSINESS WITH PLEASURE
There are many different reasons for conducting chemical experiments: to satisfy one's curiosity, to do something interesting and clever in one's spare time, to test what is described in books. There is one more reason, though, and that is to obtain, by chemical transformations, substances, or their compounds, which are useful for you, for the home or school. Best of all you make these things with your own hands: home-made paints, or a wonderful gift, or a badge that nobody else has.
It is better to conduct the majority of the experiments described in this part at school or in a chemistry club with your friends. It is more interesting to work in good company, and together you can make something useful for your school or your Club. Last of all, if problems arise with equipment, glassware, or reagents, they can be solved much easier there than at home.
Let us start with making oil paints and water-colours.
Oil Paints
Oil paints are a mixture of a drying oil and pig-ments, that is, colouring substances. In the next
9* 131

Experiments Without Explosions
chapter we will tell you how to make them your-self, but now let us discuss the base of an oil paint—a drying oil.
Certainly, drying oils, as well as many pigments, are available in stores. But such an obvious solution is of no interest to a young chemist. If we are going to perform experiments with oil paints, let us make drying oil ourselves. First of all, we must learn what a drying oil is.
Natural drying oil is made from vegetable oil. There is a great variety of such oils. Some of them dry completely when exposed to air, for example, linseed or hempseed oil. Others dry imperfectly, such as sunflower oil, and are thus called semidrying oils. And some oils are non-drying oils: they do not solidify readily when exposed to air, such as olive oil obtained from olives, or castor oil obtained from the beans of the castor-oil plant.
Why is the word "drying" used in connection with oils? They do not contain a solvent, so what is there to dry? The question is appropriate; although the term "drying" is an accepted one, it is not altogether precise. Actually, oils poly-merize, that is, their small molecules combine to form larger molecules that are solid, insoluble, and non-melting polymers. But for polymeri-zation to occur it is necessary to have a substance that can combine relatively small molecules of oil into structural units. This substance is oxygen of the air. Now you understand why a fresh layer of oil paint on some object dries quickly. And the oil paint which was left in a jar solidifies
132

4. Business with Pleasure
only on the surface, because only this is the part exposed to the air.
However, even drying oils in their pure form react with oxygen very slowly, and we would have to wait a long time for the paint to dry completely. But it is possible to accelerate this reaction considerably by adding a bit of a cata-lyst to the oil. Catalysts that accelerate the drying of layers of paint are called siccatives. Common drying oil is a mixture of an oil (now-adays this oil is of increasingly synthetic origin) and a siccative.
Thus, in order to prepare drying oil for paints, you should mix some pure drying oil with a sic-cative. It is possible to buy a siccative in a store, but it will be more interesting to make it your-self, and then to experiment with it.
Many siccatives are salts of organic acids. You can produce such a salt, for example, a rather commonly used resinate; a resinate is a salt of resin acids, which are principal components of rosin, or colophony, as it is also called.
Heat approximately 50 g of rosin in a porce-lain dish or, if this is not available, in a metal vessel to 220-250°C. At this temperature rosin will melt. Gruadually, in small portions, add 5.0 g of calcium oxide CaO (be careful not to touch it with your fingers). This reaction will result in the formation of calcium resinate.
If, instead of calcium oxide, you add 15.0 g of litharge (lead monoxide PbO), ground to paste with linseed oil, you will obtain a different siccative, i.e. lead resinate. To obtain litharge, mix lead powder with sodium nitrate or potassium
133

Experiments Without Explosions
nitrate, which are widely used fertilizers. When this mixture is heated, yellow lead oxide PbO forms, and thus you can judge the progress of the reaction by the changing colour. When the yellow colour becomes intense, stop heating, cool the mixture, and add water to it. Soluble products of the reaction will pass into the so-lution, and when you shake the mixture, light litharge will separate from heavy lead, which will sink to the bottom of the vessel. For this reason, you should remove the turbid, cloudy liquid, formed over the precipitate, filter it, and then dry the filter cake—this is litharge.
The mixture of rosin with CaO or PbO should be heated until it becomes a uniform mass. From time to time sample drops of the mixture on a clean glass, and when you obtain a transparent drop, stop heating.
Another very commonly used siccative is manganic oxide Mn02, which can be obtained quite easily. Prepare a solution of sodium sul-phite Na2S03 and a solution of potassium per-manganate KMn04. When you mix these so-lutions, a black powder will precipitate. This black powder is manganic oxide. Filter it out, and dry in air without heating.
No matter which siccative you have prepared, the next step will be the same. Add a siccative to a natural drying oil, linseed or kempseed, that was heated to 150-200°C. The results will be better if you use refined oil. Mix 3-5 parts of the siccative with 100 parts of oil, and stir the mixture until the siccative dissolves completely. Now you have obtained the drying oil. Let it
134

4. Business with Pleasure
cool, and then test the action of the siccative. Apply a thin coat of your drying oil on a glass
or metal surface, and nearby apply a similar coat of pure oil without catalyst. You will easily discover how the siccative considerably accelerates the drying of oil. If you have pre-pared several siccatives, compare their activity.
To make an oil paint it is necessary to mix drying oil with a pigment, store-bought or home-made. Be informed that the pigment should be thoroughly dried, ground, and sifted through a sieve with the finest mesh you can find, or through a double layer of cheesecloth.
Now add drying oil, drop by drop, to this fine powder, continuously mixing and grinding the paste until you obtain a uniform mass re-sembling porridge. Grind it again thoroughly, and dilute with the same drying oil until it achieves the thickness of common oil paint. Perhaps your paint will turn out to be transparent, which is not always acceptable. To make the paint non-transparent (or, as professionals say, to give it covering power), add a white pigment to the oil. This will not influence the colour of the paint, it will just make it nontransparent.
It is possible that no matter how accurately you follow all the steps, your paint will still not be quite as good as store-bought paint. But you managed to make it with your own hands!
Pigments
Thirty or forty years ago pigments were still called mineral paints. At that time this name
135

Experiments Without Explosions
was self-explanatory: many natural pigments were obtained by grinding coloured minerals. The same is sometimes done even today, especial-ly if bright, rich, stable paints are needed for painting pictures. But it is much more common to use synthetic pigments, the various oxides and salts of metals. If pigments are of organic origin, they are now commonly called dyes and are used mainly for dyeing fabrics.
Let us make mineral pigments of different colours, starting with white.
White pigments are usually lead, zinc or titanium compounds, the latter being least accessible for home production of pigments. The best source of lead for the home laboratory is Goulard's extract, which is a 20% solution of basic lead acetate that you have already worked with. And since white lead is a basic lead carbo-nate Pb(0H)2C03, it can be made bypassing car-bon dioxide through the acetate solution, that is, through Goulard's extract, and it will precipi-tate in the process. Filter out the precipitate, wash it with water, and allow it to dry. The solution of lead acetate will remain in the filtrate. Do your best to work carefully: compounds of lead must not contaminate your hands and face, or in particular, enter your njouth. It is not allowed to use paints containing any compounds of lead, inclading lead siccative for coating food vessels, or any objects that come in contact with food.
Zinc-based paints, which we will now deal with, also cannot be used for painting food ves-sels, and all the above-mentioned precautions apply to them as well.
136

4. Business with Pleasure
The basic material for zinc pigments is zinc chloride ZnCl2. To make a solution of zinc chloride add some zinc, not necessary granu-lated, to hydrochloric acid. You can use, for example, a cartridge from an old battery: it is made of almost pure zinc. Carefully, drop by drop, add a solution of washing soda to the solution of zinc chloride. The solution of washing soda will neutralize the excess acid (you will recognize this by the frothing), and then react with zinc chloride, producing the carbonate compound ZnC03. Filter out the zinc carbonate, wash it with water, and calcine it at a temper-ature no less than 280°C. Above this temperature zinc carbonate decomposes to white zinc oxide ZnO and C02.
There is one more white zinc pigment, zinc sulphide ZnS. To obtain it, it is necessary to first produce sodium sulphide Na2S. The easiest way to do this is to heat sodium sulphite Na2S03
(as mentioned before it is available in photo-graphic retail shops) to a high temperature, which will cause it to decompose into two substances, sodium sulphate Na2S04 and sodium sulphide Na2S. We need only the latter substance, there-fore, after cooling, dissolve the mixture in water, and gradually add the solution of zinc chloride (its synthesis was described in the previous experiment). Avoid an excess of acid because sulphide, resulting from the reaction, dissolves in it. After filtering and drying, you will get a white insoluble sulphide, powdered ZnS.
Now let us make coloured pigments. We will
137

Experiments Without Explosions
start with bluish-green verdigris, which is a mixture of the basic copper acetates.
Add a solution of washing soda to a solution of blue vitriol: basic copper carbonate Cu2(0H)2C03
will precipitate. Filter it out, and carefully add acetic acid drop by drop, until the precipitate dissolves completely. Boil down the solution on a small fire until almost dry (do not overheat or allow the solution to splash), and cool it. Filter out the bluish-green crystals that fell out of the solution, and dry them between sheets of blotting paper.
It is better to conduct this experiment under the exhaust hood in the chemical laboratory at school, but if you have conducted it at home, do not forget to air out the room well, until the smell of vinegar disappears.
We now proceed to pigments based on ferric oxide Fe203. The far from complete list of such pigments includes minium, Prussian red, ocher, umber, colcothar, Venetian red, and English red. The paints have different hues, from reds to browns, depending on the method of produc-tion; if heated strongly, ferric oxide turns black.
Ferric oxide can easily be obtained by calcining green vitriol FeS04-7H20 (ferrous sulphate). The calcination will proceed quicker if you take small portions of vitriol. Calcine the vitriol until it changes from green to black, then cool it, and you will get red Fe203.
If you fail to obtain green vitriol, you can make ferrous sulphate without difficulty from the more common blue vitriol: add to it iron filings that you have made using a file (washed
138

4. Business with Pleasure
with petrol). Once the blue solution turns green, pour it out, leaving the precipitate in the vessel, filter it and boil it down until dry. The green vitriol you have produced will not be pure, be-cause iron was partially oxidized by the oxygen in air, but it will not impair the results of the experiment.
You can obtain brown ferric hydroxide Fe(OH)3, if you mix a solution of green vitriol with a solution of caustic soda, which is made from washing soda and slaked lime as described earlier (see p. 69). (Be very careful when you work with any alkali!) The reaction will result in the pre-cipitation of ferrous hydroxide Fe(OH)2. It can easily be oxidized with hydrogen peroxide to ferric hydroxide Fe(OH)3 we need or even, if you are willing to wait, just with the oxygen in air: simply leave it in an open vessel. When a brown precipitate forms, separate it and dry at room temperature.
A very well known blue iron-based pigment is Prussian blue. It can be made from the salt of trivalent iron, which can be obtained by dissolv-ing the freshly formed iron hydroxide from the previous experiment in hydrochloric acid (you can use the dilute hydrochloric acid that is sold in pharmacies), or in acetic acid although it is somewhat less effective than hydrochloric acid. Add to this a solution of potassium ferrocyanide (it can be bought in photographic retail shops), and immediately a blue precipitate of Prussian blue Fe4[Fe(CN)6]3 will form. This reaction is extremely sensitive, it is often used for the detection of ions of trivalent iron in solutions.
139

Experiments Without Explosions
Yellow lead oxide, or litharge, which you used to make a siccative, can also be added to a paint as a pigment. And to obtain bright red lead minium Pb304 simply heat the litharge you have already made in an open vessel. The correct temperature for this procedure presents a problem. The oxidation reaction is reversible, and at a temperature above 500°C, minium again transforms into litharge; therefore, we need a temperature lower than 500°C, but not much lower, or the reaction will not take place at all. You probably do not have a suitable thermo-meter, so put pieces of lead and zinc near the calcinated litharge. The melting point of lead is 327°C; of zinc, 420°C. The temperature interval between these two temperatures is perfectly suitable for obtaining minium. Thus during the experiment lead should melt, but zinc should remain solid.
Black pigment is common soot. Here is one of the ways to make useful soot, which can be used as a pigment for paints: Direct the flame of a paraffin candle on a massive cold nonflam-mable object. Scrub off from time to time the black coating that forms on the surface of the cold object. Under such conditions paraffin does not burn completely; therefore, along with carbon dioxide C02, elementary carbon, or soot, is also formed.
To conclude this topic we will make green pigments. Let us start with dark green chromium oxide Cr203. As you probably remember from our oxidation-reduction experiments, many chromium compounds are brightly coloured, and
140

4. Business with Pleasure
are therefore often used as pigments, though only for paints that do not get into contact with food.
As the initial material we will again use potas-sium dichromate K2Cr207, which is the most easily obtainable of all the chromium compounds. Mix it with active carbon or sulphur, and thor-oughly pound the mixture in a mortar. Then take no more than 2 g of the mixture, and heat it to a high temperature in a porcelain or metal dish (when too much mixture is used, the reac-tion is too vigorous). Cool the mixture, wash it several times with water, filter, and dry the dark green chromium oxide that was deposited on the filter.
There are other ways to obtain this pigment. For example, one could heat ammonium dichro-mate or a mixture of potassium dichromate and ammonium chloride. By the way, the chromium oxide that is obtained in such reactions can be used not only as a green pigment: it is a fine (one of the best actually) abrasive material. It enters into the composition of many extrafine polishing pastes, for example, pastes that are used for finishing lenses and mirrors of optical devices.
Finally, there is the bright green pigment "emerald green", chromium hydroxide. It only differs from the common grey hydroxide of the same composition in that it consists of larger particles.
Fuse potassium dichromate with pharmaceuti-cal boric acid in a stainless steel spoon. Heating should be carried out at the temperature where iron turns red-hot, so hold the spoon with the
141

Experiments Without Explosions
tongs. After cooling, wash the melt with water and filter it. You will indeed obtain a substance of emerald green colour.
When you make enough pigments, test them in paints, as was described in the previous sec-tion. Or you can test them in combination with store-bought paints, adding your pigments to white paint or synthetic enamel paint.
Watercolours
In old books you can often find the names of exotic dyes, such as red sandal, quercitron, carmine, sepia, and logwood. Some of these dyes are still used, but only in very small quan-tities, and mainly for making paints used in artwork. Natural dyes with such exotic names are made from plants and animals, and, as you probably know, to produce them is an expensive and complicated process. But natural dyes are very bright, stable, and light-resistant.
It would be interesting to try using natural dyes, but how can one get them? Logwood grows in South America; sandal tree, in Southern Asia; sepia is prepared from the ink of various cuttlefishes; carmine is made from cochineal derived from small insects.
Still, it is perfectly possible to make natural dyes even in a home laboratory. In the most common plants which surround us there are natural dyes, bright and stable. Our ancestors used them quite often. So let us try to derive dyes from plants, and then, with these dyes, make the water-soluble colours that are known
142

4. Business with Pleasure
as watercolours. Certainly, all the dyes we are going to derive for this purpose must be water-soluble.
We will make all dyes using the same method. We will shred plants, or their parts, and then boil them in water for a long time to produce a concentrated decoction. It should be thick enough. We do not need to extract a dry dye, since we are going to make a water-soluble dye.
And now here is a very important rule to remember: pick only the minimal quantity of plants, so as to do as little damage as possible to the natural environment.
Let us start with red dye. It can be produced from the stem of St. John's wort (it will be necessary to acidify the decoction a little), or from the root of Galium. Perhaps you do not know what these plants look like. In that case consult your teacher of biology, or check out a reference book or plant guide from the library. Such books usually contain the descriptions of plants and sketches of them.
Soak the skin of alder in water for several days, and then make a decoction. Again you will obtain a red dye. One more source of red dye is the roots of horse sorrel, but in this case it is necessary to add some potash alum to the decoction, when it is ready, otherwise the colour will be dull.
Blue dye can be derived from the roots of elecampane, which is, like St. John's wort, a medicinal plant. To derive the dye it is necessary to first soak the roots in ammonium hydroxide, which is the aqueous solution of ammonia. Blue
143

Experiments Without Explosions
dye can also be obtained from the flowers of delphinium and roots of knotweed.
Green dye is obtained from the leaves of clover, which is also a medicinal plant. A dye that is not as bright, but is still a nice greyish green colour can be obtained from the leaves and stems of lady's mantle. They must be shred very finely before making the decoction.
Yellow dye can be derived from many plants: dyer's broom, the skin of nut trees, the skin, leaves and berries of alder buckthorn, and the flowers of Galium. A yellow dye of lemon colour can be derived from the berries of barberry.
If you boil onion skins in water, you will ob-tain brown dyes of different shades, from almost yellow to dark brown. Another source of brown dye is the dry skin of Rhamnus cathartica.
One can easily guess that bilberries and black-berries contain a voilet dye. It is not a very stable dye, but it certainly can be used for watercolours. And an orange dye can be derived from the stems and leaves of celandine.
How can we get a black pigment? First of all, it can be derived from a decoction of the berries and roots of baneberry. But there is another, more simple way: add green vitriol to any of the decoctions you have made. Almost all our de-coctions contain tanning agents like tannin (remember the experiments with tea), and there-fore they turn black in the presence of salts of divalent iron.
By now you have made plenty of thick de-coctions of different colours, and we can proceed to the most important stepmaking watercolours.
144

4. Business with Pleasure
They are mainly composed of dye and water, but there are other necessary components as well. These are substances that bind dye to paper, for example, gum arabic, or the gum of other trees (such substances have high adhesive prop-erties). Viscous substances that prevent dyes from spreading all over the paper and make them stick in a uniform layer need to be added. Honey can be used for this purpose, or molasses, or glycerin. And the last additive is an anti-septic and a disinfectant. After all, we are deal-ing with substances of plant origin, and they must be protected from microorganisms such as mold and fungus, which will certainly want to feed on our dyes.
If you do not have gum arabic, the best bind-ing substance to use is the gum that is secreted by cherry or plum trees. This is the sticky leak-ing material found on their trunks, which you can collect without causing the tree any harm. This gum does not dissolve easily in water, but if you add a little acid, the process will consider-ably accelerate.
Prepare 5-7 ml of a 50% glue solution for the dye of every colour you are going to make. Mix this solution with an equal amount of glycerin, or a three times less amount of honey. As an antiseptic we will use a 5% solution of phenol, which is called "carbolic acid". It is available in pharmacies. We need very little of this solution, no more than several drops.
Mix all the components. The base of the water-colour is ready, but it lacks the main component, the dye, which should always be added last. The
145

Experiments Without Explosions
dye is added as a thick solution, in an amount approximately equal to the amount of the base of the dye.
The dye is now made. Perhaps you are sur-prised that it is not solid. In stores the water-colours are sold in the form of solid dry cakes. Professional artists, however, also use semifluid watercolours packed in tubes. Their consistency very closely resembles the consistency of the dyes you have made.
If you are going to preserve your watercolours for future use, it is necessary to keep them in glass containers with tightly fitted polyethylene caps, otherwise they will dry out soon. Your home-made watercolours should be used in the same way as store-bought watercolours. Take a sheet of thick paper and a soft brush and... We are sure you know what to do next. Certainly some of you young chemists are also young artists.
Before we embark on a new topic, let us per-form one more experiment with the dyes. Let us try to dye some cloth. In the past plant dyes were mainly used for this very purpose. But let us set one condition: do not put into the dye bath (the bowl or basin with dye) any items you value and are going to use in future. For a start experiment with pieces of clean white fabric or yarn. Only when you are quite sure that your experiment is successful, you can try to dye some good item, providing that it is made from the same fibres you have already experimented with.
Usually before dying the fabric, it is necessary to treat it with a mordant, that is, to soak it in a hot solution of some salt; quite often a solu-
146

4. Business with Pleasure
tion of potash alum is used for this purpose. Soak the fabric or the yarn in the mordanting solution for several minutes, then submerge it into the dyeing solution that was previously strained through the cheesecloth. Boil the item in the dyeing solution. Unfortunately, it is not possible to give exact recommendations on the concen-tration of the dyeing solution because two plants, which look exactly the same, can contain differ-ent amounts of the pigments; therefore, the con-centration of the dyeing solution and the amount of time required for dyeing will have to be determined by experimentation.
There are several plants from which it is possible to obtain rather good dyes for fabric. One of them is onion (we already mentioned onion skins). A decoction of onion skins dyes fabric reddish yellow, if it was mordanted in a solution of alum, and green, if the fabric was mordanted in green vitriol. Onion skins have been used since ancient times for dyeing wool and linen.
A dye can also be made from the leaves and stems of potato. It will dye the fabric lemon yellow, if it was mordanted in a solution of some salt of tin. The decoction of rhubarb root will dye fabric "swampy" green, if it was mor-danted in green vitriol.
Wool can be dyed in decoctions of bark from different trees. For example, the bark of alder dyes wool dark red, and the bark of ash, blue. The wood of wild pear trees contains brown dye (wool should be mordanted in an aqueous solution of some salt of bismuth).
10* 147
Experiments Without Explosions
In the past a decoction of raw coSee beans was used, although admittedly rarely, for dyeing wool green. You can try making this dye, since you need a very small amount of raw beans to do it. The beans should be ground and boiled in water, to which some washing soda has been added. Before dyeing the wool in this solution, mordant it in a hot solution of alum.
If you have developed a taste for dyeing, you can test the dyeing properties of other plants in combination with different mordants. In this way you may discover some unknown or long-forgotten combination that yields a very beauti-ful colour.
How to Fight Corrosion
Stems, bark, fruits, and leaves contain not only dyes, but dozens of other useful substances. It is quite surprising, though, that plants also contain organic substances that can protect metal from corrosion.
Imagine that you need to clean the rust from a large steel object. One cannot possibly rub it all over with abrasive paper; therefore, only chemical methods remain, such as, treatment with acid. But the acid that dissolves rust is bound to dissolve some metal as well because there are no ways to protect the metal from con-tact with the acid.
The only answer is to find a solution that re-moves the rust, but does not dissolve the metal itself. Such etching solutions have been used for a long time already. Along with acid they con-
148

4. Business with Pleasure
tain an important additive, an inhibitor of cor-rosion. This substance considerably slows down the dissolution of metal, but practically does not at all prevent metal oxides and hydroxides (that is, the products of corrosion) from dissolving.
The inhibitors that are used in industry are usually obtained synthetically. One of them is hexamethylenetetramine, which is sold in phar-macies under the name of "Urotropin". You can make a comparative test: put two identical iron objects into two test tubes containing a weak solution of hydrochloric acid, to one of which some crushed Urotropin was added. The differ-ence will soon be visible to the naked eye. In the test tube with the inhibitor the metal will dissolve much more slowly.
But we wanted to obtain the inhibitors of corrosion from plants, so let us get down to business.
For our experiments we will use the leaves and the stems of such wild plants as celandine, Corydalis, and fumitory of the family Papaver-aceae, althaea medicinal of the family Malvaceae, and yarrow of the family Compositae. Almost all of them can be purchased in pharmacies in dried form. For our experiments we will need just a few specimens of the plants. We once again want to remind you that we must treat our natural environment with care, and we rec-ommend that you consult your biology teacher, or a plant guide, if you are not sure what these plants look like.
Inhibitors can also be produced from some agricultural plants, which may be easier to ob-
149

Experiments Without Explosions
tain. The leaves and stems of potatoes and toma-toes can be used in these experiments. It stands to reason to pick the plant after the crop has been collected, when it will be of no further use.
With a knife shred the leaves or stems of the wild or domestic plants that you have collected and pour a weak (no stronger than 5%) solution of hydrochloric acid over them. If you use the pharmaceutical hydrochloric acid, dilute it with an approximately equal amount of water. Leave the green mass, covered with dilute acid, for several days in a closed vessel to promote extrac-tion; in a week this process is likely to be finished. When the extract is ready, an etching solution for rusted objects can be made from it. If the rust is considerable, the mixture should be made in the following proportion: 5 parts (by volume) of the extract, 40 parts of concentrated hydrochloric acid, and 75 parts of water. If there is relatively little rust, use 10 parts of the extract and approximately 20 parts of acid, and increase the amount of water a bit.
Now you can immerse rusted objects into these solutions. Soon they will shine as new, but metal will not dissolve in the etching solution.
What are these substances in plants that proved to so well protect the metal from corrosion? They consist of complex compounds: alkaloids, poly-saccharides, proteins, mucins, and tannins. They all, though to a different degree, can be adsorbed by the metal surface and thereby prevent direct contact between the metal and the acid. But they refuse to adhere to the rust, so nothing prevents it from being dissolved in acid.
150

4. Business with Pleasure
How to Paint Without Paints
It is possible to paint many metallic surfaces without paints, if you cover them chemically or electrochemically with a thin layer of coloured oxides or salts that closely bind to the surface. The last condition is not so easy to fulfill. For example, iron in humid air very quickly (and through no fault of ours) becomes covered with a reddish-brown film of oxides, or, in plain words, rust, but you cannot possibly consider this painting: rust adheres to the surface very badly, and soils things that touch it.
We will give you some recommendations on how to paint non-ferrous metals, but not all of them can be used in a home laboratory. You probably do not have the necessary reagents at home, but hopefully by now you have become a member of a chemistry club.
Copper and brass tarnish in air rather quickly, but they will remain shiny if you paint them chemically. It is rather time-consuming to pre-pare the objects because their surface must be absolutely clean, without any traces of dirt or grease. Polish the surface, and first thoroughly rub it with a cloth dipped in petrol, and then polish it again with moist chalk or tooth powder. Rinse the object under tap water, and from now on keep it hanging on a thick thread or fishing-line. Do not touch it with your fingers, so as not to make greasy spots on it. Even if your fingers look completely dry, there is always some grease on them. Immerse the object in a dilute solution of nitric acid (no more than 5-10 ml
151
Experiments Without Explosions
of acid per 100 ml of water), and then rinse it again, preferably in hot water. The preparation is now complete.
Further operations depend on the colour that you have decided to paint the copper. If you have chosen black, keep the object for about five minutes in a solution that contains 0.9 g of caustic soda and 0.3 g of ammonium persulphate (NH4) 2s208 (this substance is used in photog-raphy) in 100.0 ml of water. The temperature of the solution should be 90-100°C.
Copper and brass will acquire a nice chocolate colour in a solution that contains 4.5 g of potas-sium chloride, 2.0 g of nickel sulphate NiS04, and 10.5 g of copper sulphate CuS04 per 100.0 ml of water at a temperature of 90-100°C. Brass will turn sky blue if you keep it for a short time in a solution that contains 3.0 g of lead acetate (you can use Goulard's extract), 6.0 g of sodium thio-sulphite (hyposulphite), and 5.0 g of acetic acid per 100.0 ml of water. The temperature of this solution should be about 80°C.
It is also possible to make copper green. For this it should be immersed in a solution that contains 20.0 g of copper nitrate CuNOa, 30.0 g of ammonium hydroxide, 40.0 g of ammonium chloride, and 40.0 g of podium acetate (easily obtained by mixing soda and vinegar) per 100.0 ml of water. Please handle copper nitrate with care: protect your face and, in particular, do not ingest it.
The reaction time has not been indicated except for the experiment for colouring metal black. Determine it for the other colours experimen-
152
4, Business with Pleasure
tally, but remember that the longer the treatment, the more intense the colour you will get.
Another metal that can be chemically painted is zinc. Zinc is not used very often, but we are all familiar with zinc-coated objects like buckets and basins. For this experiment you can take any old zinc-coated object that is not being used any more. Wash its surface with a solution of soda, or rub it with a cloth dipped in petrol. Then wash it with soap in hot water and rinse several times. Finally cover the zinc-coated sur-face with a mixture of substances that react with zinc to form coloured compounds. The following are several recipes for chemical paint-ing.
Black: 2 parts copper nitrate, 3 parts cupric oxide, 8 parts hydrochloric acid, and 64 parts water; when the surface turns black, rinse it with water and dry.
Green: 10 parts copper sulphate, 10 parts tartaric acid, 12 parts water, and 24 parts an aqueous solution of caustic soda (1:15); once the colour appears immediately rinse the surface with water, or else it will acquire a brownish hue.
Blue: Mix 6.0 g of any nickel salt and 6.0 g of ammonium chloride in 100.0 ml of water.
Gold: Mix a solution of 1 part tartaric acid, 2 parts soda, and 1 part water with pure clay; rub the surface with the mixture, and, when it dries, rinse it with water.
Brownish-bronze: 1 part verdigris and 5 parts acetic acid; rub the surface with it; wash with water and dry.
153

Experiments Without Explosions
Copper: Since zinc is more active than copper, it is sufficient to wet it with a solution of a copper salt, for example, blue vitriol.
By the way, with these paints you can draw pictures on the zinc-coated surface.
From zinc we now proceed to aluminium. It is more difficult to paint aluminium. It is a more complex procedure, and cannot be done without an electric current. Aluminium oxide and alu-minium salts do not have attractive colours, there-fore, another method of painting should be used. This method is well known and is called anodiz-ing: the aluminium object is immersed in an electrolyte and an electric current is passed through the solution; as a result on the surface of the object a thin, less than 0.1 mm film of oxide forms. This process is called anodizing because the aluminium detail acts as the anode of the galvanic cell. The film of oxide is per-meated with microscopically branched pores, to which the colouring agent easily adheres. It is even possible to paint the anodized surface with organic paints, including natural dyes, although inorganic substances work better. Usually the objects are treated by turns in two dyeing solutions, and the brightly coloured reaction products remain in the pores.
Polish the aluminium object, degrease it with petrol or acetone, rinse in hot water, and hang on a wire. Then immerse it for 2-3 minutes in a 5% solution of caustic soda, rinse again, and dip in a weak solution of nitric acid (20-30 ml of acid in 100.0 ml of water). Obviously you should not touch the detail with your fingers;
154

4, Business with Pleasure
therefore if the hanging arrangement is incon-venient for work, tweezers can be of help.
Again rinse the objects with hot and cold water, and hang them on a wire in a glass. The wire can be wound around a wooden stick or a pencil several times to make the object hang a few centimetres above the bottom of the glass. Con-nect the detail to the positive pole of a current source. Now hang cathodes (steel plates) in a similar manner. Batteries can be used as a source of current, but they will go flat very quick-ly. For this reason, it is preferable to use an accumulator, or a transformer with a rectifier.
Fill the glass over which the object is hanging with a sulphuric acid solution (20.0 ml of acid per 100.0 ml of water). Be careful while doing this. Now connect a switch to the electric cir-cuit, or a cutout and rheostat, to regulate the current. To measure the current we will need an ammeter, or a tester, which many radio amateurs have. Close the circuit, and adjust the
155

Experiments Without Explosions
current to 20-25 mA for each 1 cm2 of surface. The object will immediately become covered with gas bubbles. Oxygen is being produced, and it is this oxygen that oxidizes the aluminium. At room temperature the process will take approxi-mately an hour.
Rinse the anodized detail with running water, and proceed to painting. Immerse the object by turns into both dyeing solutions. Keep it 5-10 minutes in each solution, and rinse it with running water after each immersion. When the object is painted, rinse it for the last time and dry.
The following are the compositions and con-centrations of dyeing solutions in grams per 100.0 ml of water:
Blue or dark blue colour, potassium ferro-cyanide (1.0-5.0) and ferric chloride (1.0-10.0); brown, potassium ferrocyanide (1.0-5.0) and cop-per vitriol (1.0-10.0); black, cobalt acetate (5.0-10.0) and potassium permanganate (1.5-2.5); yellow, potassium dichromate (5.0-10.0) and lead acetate (10.0-20.0); golden yellow, sodium hyposulphite (1.0-5.0) and potassium perman-ganate (1.0-5.0); whitehead acetate (1.0-5.0) and sodium sulphate (1.0-5.0); orange, potassium bichromate (0.5-1.0) and silver nitrate (5.0-10.0).
Electroplating
Now that you have successfully anodized alu-minium, it is natural to proceed to other electro-chemical experiments. You already have an electrolytic bath, a source of electric current,
156

4, Business with Pleasure
and a switch with a rheostat. In the following experiments the metal contained in the solution in an electrolytic bath will be deposited on the surface of objects. This process is called electro-plating, and the coating covering the surface is called an electroplate. By the way, the anodic coating of aluminium is also electroplating.
First we will learn how to coat a steel surface with copper. Copper plating is very widely used in industry, and not necessarily as an independ-ent process; frequently it is a preparatory treat-ment before coating with other, more lasting and decorative metals such as chromium, nickel, and silver. The reason for this is that if the copper is electroplated correctly, it adheres to steel very strongly, and smooths out all the surface irregu-larities and defects. Other metals then adhere to the copper coating. It seems that this is an easy thing to do: one treats a steel object with a so-lution of blue vitriol, waits until the more active iron forces copper out of the solution and it deposits on the object's surface. What happens is exactly as described (you can check by immers-ing a clean nail in a solution of blue vitriol CuS04). In this case, however, the copper coat-ing on the steel surface is very loose and can be easily wiped oS with a cloth. The electrochemical treatment gives an even and durable coating.
A very simple method of copper plating is as follows. Remove the insulation from one end of a flexible multiple-strand wire, and separate the thin copper strands to make them look like a brush. To facilitate your work attach the wire to a wooden stick or a pencil and connect the
157

Experiments Without Explosions
other end to the positive pole of a pocket flash-light battery. Find a broad glass vessel, into which your "brush" can be dipped, and fill it with electrolyte (a concentrated solution of blue vitriol, preferably slightly acidified).
Prepare a steel plate, or some other small object that preferably has flat surfaces. Rub it with fine abrasive paper and degrease it by boiling in a solution of washing soda. Put the plate into a "bath" or cuvette and connect it with a wire to the negative pole of the battery. The circuit is now ready; the only thing that remains is to add electrolyte.
Dip the "brush" into the solution of blue vitriol and run it along the plate not touching its sur-face; there should always be a layer of electrolyte between the plate and the brush. The wires of the "brush" should always be covered with the electro-lyte. Before your eyes the plate will become cov-ered with a red layer of metallic copper. It will take only a few minutes to electroplate a small object. But if the surface is larger you will need not only extra time, but also an extra battery to electroplate it. Connect the second battery in parallel with the first. When the coating is finished, dry the object in air and polish the dull layer of copper with a woolen or felt cloth until it shines.
The same experiment can be conducted with an aluminium or zinc-coated plate. The method of electroplating, when the object is not immersed but is treated outside the bath, in small sections, with a constantly supplied electrolyte, is some-times used in industry, especially when the
158

4, Business with Pleasure
object is so large that it is not possible to iind a suitable bath for it. For example, when repair-ing the plating of a huge ocean ship.
If the objects are not too large, however, they are usually immersed in a bath containing electro-lyte; it is quicker and easier to electroplate this way. The following describes how a bath with electrolyte is used for nickel-plating steel, or rather the preparatory step—obligatory copper-plating.
Find a metal object that you want to plate with nickel, for example, a faucet or a door-plate, and, as usual, rub it with abrasive paper to remove the film of oxide, wipe it with a brush, thoroughly rinse with water, degrease in a hot soda solution, and then once again rinse it with water. Put a pencil on a glass jar or a glass, prepare two copper plates (anodes) and hang them 011 copper wires that are then wound around the stick or pencil. Put the copper plates hanging on wires from the wooden "crossbeam" into the glass vessel (a similar device was made for the experiments described in the previous chapter). On the wire between the anodes hang the object you want to treat. Connect together the copper wires on which the anodes hang, then connect them to the positive pole of the source of current, and connect the detail to the negative pole. Now connect to the electric circuit a rheostat or resistor for 200-300 ohms to control the current, and a milliammeter (tester). For a source of direct current connect in parallel two or three pocket flashlight batteries, or use an accumulator for no more than 6 V.
159

Experiments Without Explosions
Prepare a solution of electrolyte by mixing 20.0 g of blue vitriol and 2.0-3.0 ml of sulphuric acid in 100.0 ml of water, and pour it in the glass so that it completely covers the electrodes. With the help of the rheostat or resistor, set the electric current to 10-15 mA for each square centimetre of the surface of the object. In approximately 20 minutes switch off the current and take the object out of the electrolyte. It will be covered with a thin copper coating. Do not pour away the electrolyte, you will need it for future exper-iments.
Now we are ready to try nickel-plating. Prepare a new electrolyte: 30.0 g of nickel sulphate, 3.5 g of nickel chloride, and 3.0 g of boric acid per 100.0 ml of water. Pour it into another glass vessel. For nickel-plating we need nickel elec-trodes. Immerse them in electrolyte, assemble the circuit the same way you did in the previous experiment, and switch on the current, again for approximately 20 minutes. Take the detail out of the electrolyte, rinse it with water, and dry. It will be covered with a dull greyish coat-ing of nickel. It should be polished in order to give it the customary shiny appearance.
The electrolyte for chrome-plating usually contains chromic acid. You probably do not have this acid; therefore, we need to find another way to obtain it.
Earlier you obtained chrome green pigment. If you skipped that experiment, you can buy chrome green pigment in a store. Fuse chrome oxide with soda by heating the mixture in a clean open metal vessel. You will obtain sodium
160

4, Business with Pleasure
chromate Na2Cr04. Dissolve it in water, filter, and acidify with sulphuric acid: this is the solution you need for chrome-plating. If you happen to have sodium chromate, there is cer-tainly no need to prepare it yourself.
Select a small object that you want to chrome-plate. Rub it, as usual, with abrasive paper, degrease it, etch in a weak solution of acid, and rinse. This will be the cathode, therefore, connect it to the negative pole of the source of current. The anode must be of some inert material, for example, graphite.- Disassemble an old battery and remove the graphite rod.
An accumulator or several pocket flashlight batteries can be used as the source of electric current for chrome-plating. Determine on your own the duration of the process and the electric current required. When the electrolysis is over, take the object out of the electrolyte, rinse it thoroughly, and polish with a cloth dipped in tooth-powder until it shines.
Galvanoplastics
Another very widespread electrochemical process is galvanoplastics, that is, a thick, massive metal layer is deposited on the surface of some object in order to copy its form. Galvanoplastics is used when a metal detail is of a complex shape, and thus the usual methods, such as moulding or machining, cannot be applied. Sometimes gal-vanoplastics is used to reproduce sculptures from models; it is also uspd for making the metal forms for the mass production of records that precisely
161

Experiments Without Explosions
copy the intricate variations in the grooves of the primary standard recording.
If you have used up all your solution for copper-plating, make it anew. Take a piece of wax or paraffin, and level its surface carefully to make it as flat as possible. Draw a picture or pattern on the flat surface, or perhaps your initials (you will have your own monogram). It is most con-venient to do this with a needle, but try not to make the grooves too deep.
With a soft brush apply electroconducting powder to the surface with the drawing. Such a powder can be made by pulverizing the lead of a common pencil or a graphite rod from a battery in a mortar. On both sides of the drawing press thin bare copper wires for conducting the electricity to the graphite-covered surface, and connect them together. Hang the piece of wax in the glass vessel as we did before, fill the vessel with electrolyte, immerse a copper electrode, and assemble the same circuit as was used in the experiments with copper-plating. In this case, however, we need a far weaker current, approxi-mately 5-10 mA; therefore, you will have to readjust the rheostat or select a different resistor.
Switch on the current and be patient. With this intensity of the current it will take at least five hours for copper to deposit on the graphitized surface; however, do not increase the current, because the quality will suffer. When the process is finished, switch off the current, and carefully transfer the wax to a hot water bath. It will melt down, and you will have a thin copper plate with a pattern. Accurately remove the copper
162

4. Business with Pleasure
wires from it. As you see, you have made an exact copy of your drawing.
We now proceed to something quite useful: we will apply galvanoplastics for making unique badges. You will be the only person who has them! Or yau can make 20 or 30 identical badges, and give them as souvenirs to your friends who have participated in a hiking expedition or a sport contest, etc.
We won't give you artistic recommendations; design the badge yourself. But do not make it too complicated because such badges are more difficult to make, and they do not turn out partic-ularly attractive. According to your design cut a pattern from thin cardboard with the exact outline of the badge. Put your pattern on thin copper or brass foil, and accurately cut as many blanks as you are going to have badges.
Your blank is soft, so to make it stiff, cover it with a layer of copper in a galvanic bath. You already know the essense of this operation; recommendations are given specifically for making the badges.
Pierce each blank near the edge with a needle, and put a thin copper wire in the holes. Wash the blanks, rub them with a cloth dipped in petrol, and then polish them with tooth powder and rinse again with water. Now immerse them for half a minute into a 5% solution of nitric acid, holding them either by wires, or with tweezers. After this wash them in running water, and then wind the wires around a metal rod. Put the metal rod with blanks into a glass vessel with two copper plates (anodes); our blanks will
li* 163

Experiments Without Explosions
be the cathodes. The blanks should hang at different levels for the even distribution of electro-lyte among them. Fill the vessel with an electro-lyte of the following composition: 25.0 g of blue vitriol and 1.5 ml of sulphuric acid per 100.0 ml of water (preferably distilled). The source of electric current is an accumulator, or transformer with rectifier. The current should equal 10 mA per 1 cm2 of surface. The resulting copper layer should be 0.5-0.8 mm thick.
When the copper-plating is finished, rinse the details. If you decided to have an embossed picture or inscription on your badge, outline it with a needle; you will cover them with copper, and they will stand out from the surface. Cover the remaining parts of the surface with a thin layer of glue, varnish or paraffin, immerse the blanks in the electrolyte, and again switch on the current until the open parts of the badges become covered with a layer of copper. After this remove the glue or paraffin.
If you can, engrave a picture or an inscription on the badge, and by all means solder a safety pin on the reverse side.
Now let us make our badge more presentable. You can do this by chemical painting or nickel-plating, but badges with an "old silver" look the best.
Prepare a 2-3% solution of silver nitrate: you can do this by dissolving a pharmaceutical silver nitrate stick in water. In small portions add hydrochloric acid (3-4 volumes per 1 volume of solution). When the silver chloride precipi-tates, pour off the solution, and rinse the precipi-
164

4, Business with Pleasure
tate several times in distilled water. When rins-ing, decant the water very carefully, over a glass rod, so as not to lose any silver chloride. After rinsing add in small portions a 30% solution of potassium iodide to the precipitate until it dissolves completely. Then add water until the volume of the solution (which is the electrolyte for silver-plating) is the same as the volume of electrolyte that was used for copper-plating.
Immerse the badges in this electrolyte (again they will be cathodes). For anodes you can use graphite rods, preferably from batteries rather than pencils, because their area must be much larger than the surface of the badges. The density of the electric current should be rather small, about 1 mA/cm8.
The badges will become covered with a layer of silver, but it will look like very new rather than old silver! It is not too tricky to "antique" the badges by blackening them a little. To do this, prepare an 0.5-1.0% aqueous solution of potassium sulphide and heat it up to 50°C. The badges will change their colour in this solution-first they will turn grey, then bluish, and finally black. Rinse the badges and rub them with a felt cloth. The relief parts will lighten, but the rest
>of the surface will remain black. Thus, the badges will acquire the look of old silver.
Noble Patina
You have learned how to give silver that noble old look by an express method. Now let us le^rn how to make a noble patina almost as quickly.
165

Experiments Without Explosions
In damp air copper and bronze objects gradually become covered with a greenish coating. Old candlesticks, door handles, clocks, and bronze sculptures in squares turn green and black. The coating that covers them—the so-called noble, or antique, patina—is quite appreciated by art lovers.
Patina forms if for a long time, for several years at least, an object is exposed to air con-taining moisture and carbon dioxide. The presence of these two substances results in the formation of a coating consisting of basic copper carbonate, with a composition similar to that of the well-known mineral malachite. We will not be able to make artificial malachite: its solid crystalline structure cannot be reproduced. Antique patina is another matter. We will make it not in several years but- in several minutes, or, at worst, in a few hours.
Connect a copper wire with scraped ends to a small copper object, or, better still, for a preliminary test, to a copper plate or a piece of copper foil. Rub the surface, as you have done enough times before, with fine abrasive paper, put the object in a hot solution of washing soda, rinse with water, and immerse into a dilute vinegar solution (this will help to prevent oxi-dation).
Prepare the electrolyte: dissolve two teaspoons of ammonium chloride in a glass of water. Remove the copper object from the vinegar so-lution with tweezers or by the wire (do not touch it with your fingers), rinse it in running water, and immerse in the solution of ammonium chlo-
166

4, Business with Pleasure
ride. Connect the wire to the positive pole of the battery, and connect the negative pole of the battery to a copper electrode, to any copper plate (it is not necessary to clean it so thorough-ly). Soon the cathode, that is, the object that we want to cover with patina, will be covered with a dull red film. You are probably going to say that we promised you a green patina, didn't we?
But do not jump to conclusions. After approx-imately ten minutes take the object out of the electrolyte without touching it with your fingers, and place it so as to allow the water to drip from it and to prevent the surface from being scratched—perhaps the best arrangement is to allow it to hang by the wire. In no more than an hour the red film will turn green, and you will have a green patina, resembling malachite.
This experiment can be quite spectacular, if you use a 25% ammonia 'solution for the electro-lyte, but in this case the work must be carried out under an exhaust hood or in open air, because a concentrated solution of ammonia has a very strong odour. Hang the object in such a way that only part of it is immersed in the electrolyte. The part of the object that is immersed in the electrolyte will become red, and in a little more than an hour the part of it that is above the sur-face will become covered with a greenish blue coating, very similar to the real noble patina.
When you conduct this experiment, do not increase the electric current to accelerate the process: the more slowly it proceeds, the more durable will be the layer of the basic copper
167

Experiments Without Explosions
carbonate. Yet hours are not years, and the durability of our film is still a far cry from the durability of natural patina, although our patina is no less beautiful. To preserve it, cover the green coating with some transparent varnish.
Glass and Enamel
Badges, brooches, various ornaments, and many household objects are covered with enamel, that is, glass deposited on metal. We will also try to make glass. But for this it is necessary to have a special furnace, a home laboratory is not appropriate. Moreover, to make glass one must be skilled in working with hot melts, therefore, these experiments must be conducted under the supervision of an instructor.
At industrial factories and in laboratories glass is produced from a mixture consisting of thor-oughly blended powdered salts, oxides, and other compounds. When heated in furnaces up to very high temperatures, sometimes more than 1500°C, the salts decompose to oxides, and the oxides interact to form silicates, borates, phos-phates, and other compounds stable at high tem-peratures. Glass is a mixture of all these com-pounds.
We will make the so-called easily fusible glass, which can be produced in a laboratory electric furnace that is heated up to 1000°C. We will need crucibles, tongs for holding the glass, and a small even plate of steel or cast iron. First we will make the glass, and then find a use for it.
168

4, Business with Pleasure
Using a spatula, sieve and then mix on a sheet of paper 10.0 g of sodium tetraborate (borax), 20.0 g of lead oxide, and 1.5 g of cobalt oxide. This is our mixture. Pour it into a small crucible and tamp it with the spatula to make a cone with a vertex in the centre. The tamped batch should not fill more than three quarters of the crucible, otherwise the glass may spill over. Transfer the crucible with the tongs to a furnace (crucible or muffle), heated to 800-900°C, and let it stay there until the mixture fuses together. You can judge when this has occurred by observ-ing the production of bubbles: when no more bubbles are formed, the glass is ready. Remove the crucible from the furnace with the tongs, and immediately pour the liquid glass on the cleaned surface of the steel or cast iron plate. The glass will cool on the plate, forming a bluish-violet solid mass.
To produce glass of other colours, replace the cobalt oxide with other oxides. Iron(III) oxide (1.0-1.5 g) colours glass brown; copper(II) oxide (0.5-1.0 g), green; and mixture of 0.3 g of cupric oxide, 1.0 g of cobalt oxide, and 1.0 gram of ferric oxide colours glass black. And if you use only boric acid and lead oxide, the glass will be colourless and transparent. You can experiment on your own with oxides of other metals, for example, chromium, manganese, nickel, and tin.
Pound the glass with a pestle in a porcelain mortar. So as not to cut your hands with the splinters of glass wrap your hand with a thick cloth, and cover the mortar and pestle with a clean cloth.
169
Experiments Without Explosions
Pour the fine glass powder on a thick glass plate, add a little water, and grind it to a rather liquid paste with a grinder (a glass or porcelain disc with a handle). You can also do this with a small flat-bottom crucible, or a polished granite plate; this is how the artists whom we call "old masters" prepared paints. The paste you have obtained is called slip. We will apply it to an aluminium surface using almost the same method whereby ornaments are made.
Clean the surface of the aluminium plate with abrasive paper, and degrease it by boiling in a soda solution. On the clean surface make a drawing with a lancet or a needle. Apply the slip to the surface within the outline of the drawing with a brush that is used for water-colours. Dry it over the flame and then heat it in the flame until the glass fuses on the metal. If you want to decorate a rather large surface, for example, a door sign, divide it into sections, and cover each section with glass by turns. To get a brighter colour of enamel apply the glass layer twice. This method can be used not only for making ornaments, but also for making durable enamel coatings to protect the aluminium parts of various devices and models. Since in such cases the enamel must withstand additional stresses, it is better to cover the degreased and washed surface of the metal with a thick oxide film. For this it is sufficient to put the detail in a furnace heated up to a little less than 600°C for 5-10 minutes.
Certainly, it is more convenient to apply the slip to a large detail by spraying or simply pour-
170

4, Business with Pleasure
ing it over the surface rather than with a brush, but the layer of slip must be thin. Dry the detail in a drying chamber at 50-60°C, and then put it in an oven that is heated to 700-800°C.
Low-melting glass can also be used for making coloured pieces for mosaics. Take the fragments of broken china (you can ask for them in a store that sells china), and pour a thin layer of slip over them, dry them at room temperature or in the drying chamber, and fuse the glass on the pieces of china by heating them in an electric furnace at no less than 700°C.
When you master working with glass, you can help your schoolmates from the biology club; perhaps they make stuffed animals there, and for this they need glass eyes of various colours.
Take a steel plate 1.5 cm thick, and drill several cavities of different sizes with a copical or spherical bottom. Fuse coloured glass as we did before. You already know how to obtain the colours that eyes can have, and to change the intensity of colour, simply decrease or increase a bit the amount of colouring agent.
Pour a small drop of brightly coloured melted glass into the cavity in the steel plate, then pour over it glass that has the colour you want for the iris. The first drop will enter the mass of the "eye", but will not mix with it, so both the pupil and the iris will be reproduced. Cool the eyes slowly, and, to avoid sharp differences in tem-perature, take the already solid but still hot eyes from the mould with heated tongs, put them in fine sand, and cool them to room tem-perature.
171

Experiments Without Explosions
Certainly, there are other applications. for coloured glass, but we suggest you find them yourself.
To conclude the experiments with glass, let us with the help of the same electric furnace turn common transparent glass into coloured glass. You may ask whether it is possible to make sunglasses by this method? In principle yes, but we doubt that the first attempt will be suc-cessful, because this process is rather tricky and demands certain skill. Therefore, try your hand at making sunglasses only after you have mastered this process on pieces of glass and are satisfied with the results.
The basic dye we will use for the glass will be colophony. Earlier you made the siccatives for oil paints from resinates, salts of acids that are components of colophony. Again we will use resinates because they form a thin even film on glass, and are good vehicles for dyeing agents.
Prepare a 20% solution of caustic soda, and dissolve pieces of colophony in it, stirring con-tinuously, until the solution is dark yellow. Remember that you must be very careful when you work with caustic soda! Filter the solution, and add to it a little bit of a ferric chloride FeCl3 solution, or some other salt of trivalent iron. The solution should be dilute; therefore, do not use too much salt, or a ferric hydroxide pre-cipitate will form, which will spoil the results. If the concentration of salt is not too high, the red precipitate of ferric resinate will form, and we wish to obtain exactly this substance in order to proceed further.
172

4, Business with Pleasure
Filter out the red precipitate, dry it in air and dissolve it in benzine to obtain a saturated solution, or better still, in hexane or petroleum ether. Cover the surface of the glass with a thin layer of the solution using a brush or by spraying, let it dry, and put it in a furnace heated to 600°C for 5-10 minutes. You may say that col-ophony is an organic substance, and therefore cannot withstand such temperatures. You are quite right, and it is exactly because of this that we put it in the furnace: to let the organic base burn out. What remains on the glass is an extremely thin film of ferric oxide that adheres very strongly to the surface. Although the oxide is generally nontransparent, such a thin layer lets through some of the light rays, and for this reason it can be used as a light filter.
Perhaps the light-filtering layer is too dark or, on the contrary, too light for you. In this case try to vary the conditions of the experiment: slightly increase or decrease the concentration of the colophony solution, change the time or the temperature of baking in the furnace. If you are not satisfied with the colour of the glass, replace ferric chloride with the chloride of some other metal that has a bright colour, for example, cupric chloride or cobalt chloride.
When you master this technology on the pieces of glass, you can try to turn ordinary eyeglasses with transparent lenses into tinted glasses. Do not forget to take the lenses out of the frame: a plastic frame is no more capable of withstanding the temperature in the furnace than colophony is.
173

Experiments Without Explosions
Home-Made Plasticine and Sealing Wax
Certainly it is possible to buy plasticine in a store, but stores are full of radios as well, yet still so many amateurs rack their brains over radio circuitry!
The only raw material for making plasticine that is hard to obtain is oleic acid C17HS3COOH. But you can probably find it in the chemical laboratory at your school. It is a very well-known acid, a component of almost all the fats. From oleic acid we will obtain a salt of zinc, zinc oleate. Take 35 parts (by weight) of heated oleic acid, and add in small portions 5 parts of dried zinc white (you can use your home-made white pigment). Add each new portion of zinc white only after the froth has disappeared from the previous portion. If you have no zinc white or home-made white pigment, you can use common chalk: you will obtain calcium oleate, and it is true, the quality of plasticine will be worse.
Add to the syrup-like oleate you have obtained 18 parts of a mixture of equal amounts of oil and wax, stirring continuously. The mixture of oil and wax is made by melting the wax and adding, by stirring vigorously, a liquid oil, for example, vaseline oil. We would like to emphas-ize once again that it is necessary to very thor-oughly mix all the components; to a large degree the quality of plasticine depends on this. As regards the wax, a natural wax such as beeswax is preferred but as a last resort you can use stearin (but not paraffin!). You can obtain stearin with-
174

4, Business with Pleasure
out much trouble from laundry soap: the proce-dure was described in the chapter entitled "First Experiments".
When the mixture of oleate, oil, and wax (or stearin) is ready, add 23 parts of finely powdered sulphur (you can use pharmaceutical sulphur), 15 parts of sieved clay powder, and 4 parts of a mineral dye. You can, for example, use col-cothar (ferric oxide Fe203); you already know how to make it (but do not forget to vigorously stir the mixture all the time). Once again thor-oughly stir the ready mixture, and roll it out on a piece of plywood or a tin sheet with a rolling-pin. Our plasticine is ready.
It is possible that there will be one thing that you will not like about it, namely, the odour; zinc oleate is not exactly French perfume. But it is possible to cover it with a perfume additive. When you are mixing the components, add several drops of some pleasant-smelling substance, for example, rose or lavender oil, or eau-de-cologne.
Sealing wax, if heated, somewhat resembles plasticine. When it cools, it becomes solid and brittle. But perhaps you are not quite sure what sealing wax is?
It is a substance that people used already 6000 years ago for exchanging messages. Ancient Sumerians enclosed their clay tablets in casings made from the so-called sealing earth. And ancient Egyptians tied a strong thread around their scrolls, and in order to prevent anybody from unrolling them to learn the contents, they Nsealed the threads with a viscous substance that
175

Experiments Without Explosions
solidified. If anyone broke the seal, it was im-mediately known.
Later, sealing wax went out of use for a long time, but in the Middle Ages it again was widely used for sealing letters. Very few people knew at that time how to make sealing wax, and it was kept a professional secret. Today we know that they mixed dammar (white resin), red pigment vermelion, and shellac. Not all of these substances are easy to obtain nowadays, and, in addition, red vermelion is poisonous, there-fore, we will use a simpler and safer recipe for making sealing wax. According to this recipe, the ingredients are common beeswax, colophony, pulverized chalk, and some easily available pigment. We recommend that you use one of the home-made pigments, mentioned in the section entitled "Pigments". However, you can also use a commercial dye, for example, the bluing, which is used in laundering, or pulver-ized leads from black or coloured pencils. Last of all, it is also possible to make a white sealing wax; in this case there is no need to use any pigment, just double the amount of chalk.
Let us now make our own sealing wax. Take a pan that is not very large, with a capacity of approximately one litre, or a carefully washed wide tin of the same volume, and melt 25 g of wax on low heat. Stir the wax constantly, and regulate the flame to prevent the wax from scorching. Weigh 200 g of colophony and add it to the wax in small portions, not forgetting to stir the mixture thoroughly. The mixture will froth quite a bit, but do not let this disturb you;
176

4, Business with Pleasure
this is exactly what should happen. Just check that the froth does not overflow because it can catch fire. However, this will not happen if the vessel is large enough.
The froth will gradually disappear by itself. This indicates that it is time to add the pulverized chalk: 20 g should be added if you want to make a coloured sealing wax; and, as you remember, twice the amount should be added if you want it to be white. Add the chalk in small portions, and after that add from 20 to 40 g of pigment, depending on the intensity of colour you wish to have.
All the components of this mixture have differ-ent densities, therefore the mixture should be stirred continuously including while it is cooling almost until it solidifies. When the mixture becomes very thick and viscous, pour it into several small glass bottles, where it will solidify completely. When this happens, wrap your hand with a thick cloth, and very carefully break the bottles having also wrapped them in pieces of cloth. Hopefully, you will not cut your hands after all these precautions. The home-made seal-ing wax will be in the shape of sticks. It was exactly in this form that it was used for many centuries for sealing letters.
Now, to seal a letter, heat the end of the stick slightly and press it hard on paper, for example, on an envelope tied with a brightly coloured thread. Some sealing wax will remain on the paper. Before it solidifies, press on it some object with an embossed surface to make a seal. In olden times members of the nobility had family
177

Experiments Without Explosions
seals: it was considered that they could not be forged, just as it was not possible to forge a coin. Such seals are of great interest to historians today because they reveal a lot about their owners and the time they lived in. Historians who study seals call themselves sphragists, and this branch of history is called sphragistics.
You probably don't have a real seal, so let us try to make one either by one of the methods described here in the section on galvanoplastics, or by etching, as described in the section entitled "Painting with Iodine". The easiest way to im-print an image on sealing wax is to press a coin on it while it is still warm. When the sealing wax solidifies the image of the coin will remain. But, naturally, it will be a reversed copy: the parts of the coin that were elevated will be hol-lowed out, and vice versa. Also, it will be a mirror image! If you decide to make your own seal, re-member that your mould should be a mirror image, otherwise it will not be possible to read the inscription of your seal on the home-made sealing wax.
Let Us Silver a Mirror!
Is it possible? Mirrors .are silvered at special factories, in mirror workshops. This craft has existed since ancient times, it has its own tra-ditions and professional secrets: a good mirror is hard to make. But nevertheless let us try!
It is not all that difficult to make a surface that acts as a mirror. The "silver mirror" reaction is successfully accomplished in chemistry classes
178

4. Business with Pleasure
at school, but the resulting mirror is not a good mirror: the surface will shine for a short while, and that's all. This is not what we have in mind. We would like to make a real mirror and are quite sure that you will be able to do it, if you work accurately and do not neglect the details.
It is important that you use only distilled water. Take powdered "rouge" (this is a specially prepared ferric iron(III) oxide), put it through a fine sieve, and dissolve the sieved powder in distilled water. If you have no rouge, you can use some polishing liquid bought in a hardware store. Put the flat glass from which you want to make a mirror on a table. With a level check whether the surface of the table is horizontal, and if not, make it absolutely horizontal by putting folded sheets of paper under the legs of the table. Do not use a large glass for your first experiment, start modestly with a small glass. Put some old thick rags under the glass, so as not to accidently break it.
Rub the glass carefully with the polishing liquid, using a felt cloth (a piece of an old hat) or a piece of soft leather making circular move-ments. Then grind a pumice stone into a fine powder, sieve it, dissolve in distilled water, and rub the glass with a piece of cheesecloth dipped in this suspension. Rinse the surface with dis-tilled water, wipe it first with a damp sponge and then with a piece of cheesecloth that has been dipped in a 0.15% solution of tin(IV) chlo-ride. After this, rinse it again, and wipe with a wrung-out piece of cheesecloth. The preparation of the glass is now finished. This was a very
12 179

Experiments Without Explosions
important step: the quality of mirror depends on the accurate preparation of the glass.
Immediately after completing the preparation, the surface must be silvered. If for some reason you have not yet prepared the solution for sil-vering, immerse the glass in warm distilled water and do not remove it until everything is ready. This procedure is quite useful even if everything is ready: it is better if the glass is between 8 and 10°C warmer than the solution for silvering.
The solution for silvering must be prepared wearing rubber gloves. Two solutions, which are made separately, are mixed. The amount of ingredients you need to make one litre of solution are given below, and you can estimate yourself how much solution you need.
The recipe for the first solution is the following: 4.0 g of silver nitrate, 10.0 ml of a 25% ammonia solution, and 4.0 g of caustic soda. This solution should be prepared by a special method: dissolve all the silver nitrate in 300.0 ml of water, then pour 9/10 of the solution into a clean glass vessel and add, drop by drop, a solution of ammo-nia, stirring the liquid continuously with a glass rod. The cloudy liquid will become more and more transparent, and eventually it will become clear. Add a bit of silver nitrate solution; the solution will again become cloudy. Add the solution of caustic soda and the liquid will turn light brown. Again add the solution of ammonia dropwise, and the liquid will become lighter; it will seem slightly bluish. Add the remaining silver nitrate solution (1/10) and ammonia solu-
180

4, Business with Pleasure
tion, stir well, and add distilled water to make one litre of solution.
If you, for some reason, have to store this solution, pour it into a bottle with a tightly fitting cap. It must not be kept in an open vessel!
The second solution: 100.0 g of refined sugar and 10.0 ml of a 10% solution of sulphuric or nitric acid. Dissolve the sugar in distilled water, add the acid, boil the solution for a quarter of an hour, and add distilled water to make one litre of solution.
Mix the two solutions: to approximately 100 ml of the first solution (with silver nitrate) add 1 ml of the second solution (with sugar). The exact proportion has to be determined experimentally. If there is an excess of sugar solution, the flakes will fall out in the process of silvering; and if, on the contrary, there is not enough sugar solu-tion, the silvering will proceed too slowly. Once you mix the solutions, immediately stir the mixture thoroughly; first it will turn an orange-red colour, and then it will blacken. This indicates that the silvering should be started immediately, so do not waste any time!
Quickly pour the mixture on the glass. It will spread all over the surface, and the glass will become dark, but it will lighten quickly, and a layer of metal silver will form: the silver was reduced from silver nitrate. After 5-10 minutes carefully remove the mixture from the glass with a piece of cheesecloth, or, preferably, chamois that has been dipped in distilled water. Then pour the mixture on the glass again and leave it for another quarter of an hour. Then rinse the
181

Experiments Without Explosions
silvered surface with distilled water. If there are black spots on the glass, rub them with a swab, dipped in the pumice suspension, and then with a swab dipped in the tin(IV) chloride solution. After that again pour the silvering solution on these spots, and, when the silvering has complet-ed, rinse them with water.
To check whether enough silver has deposited on the glass, look through it at a 60 W electric bulb; it should be hardly visible through the silvered glass.
At this stage, the silver layer will still not adhere to the glass strongly enough. To reinforce it, heat the mirror in a vertical position for several hours at 100-150°C. This can be done in the drying chamber, or, as a last resort, in a moderately heated oven. When the mirror cools, cover the silver coating with a water-resistant transparent varnish by spraying (a brush can damage the coating). When the varnish dries, apply a thick layer of nontransparent paint or black bitumen varnish, and move the brush or spray in only one direction: either from top to bottom, or from left to right.
The mirror is almost ready. Its front side, which was not silvered, still needs to be finished. If there are silver spots on it, remove them with a swab that has been dipped in a dilute solution of hydrochloric acid. If your hands are stained with the solution, clean them with a slightly warm solution of hyposulphite and then wash well in warm water.
How much silver was required to silver the mirror? And how much silver is in the coating
182

4, Business with Pleasure
of a real mirror? These questions are not tricky, but it is not easy to answer them. The silver coating is so thin that it is not possible to measure it even with a micrometer.
Take a piece of a broken mirror, remove the layer of varnish and paint with a piece of cotton wool dipped in acetone, and put a small crystal of iodine on the silvered surface. The iodine evaporates rather quickly even at room temper-ature, and its vapour spreads over the glass because it is much heavier than air. To protect it from a draught, which can drive them away, cover the crystal with a glass.
The reaction of iodine with silver results in the formation of silver iodide, and a transparent spot will slowly spread around the crystal (silver iodide is transparent in a thin layer). The silver coating around the spot will not disappear, but it will become thinner. As a result, coloured rings will appear on the mirror, which are partic-ularly visible in reflected light.
The rings appear coloured for the same reason that soap bubbles and spots of oil on a water surface are multicoloured. This phenomenon is called the interference of light in thin films, and is explained in your school physics course. The most important thing for us to know is the follow-ing: the greater the amount of rings, the thicker is the silver coating. If there are two rings, the thickness of the coating is 0.03 [xm; three rings indicate that the coating is 0.06 micron thick; four, 0.09 micron; five, 0.12 micron; six, 0.15 mi-cron; seven, 0.21 micron.
Once you know the thickness of the silver
183

Experiments Without Explosions
coating, you can easily calculate the amount of silver it contains: multiply the thickness of the coating by the surface area of the mirror, and multiply the volume of silver once again by the density of silver (10.5 g/cm3).
As a reference to check your result, a mirror with a surface area of approximately 1 m2 con-tains slightly more than one gram of silver.

5
SLEIGHT OF HAND
We are surrounded by a lot of things and sub-stances that appear common and unremarkable. However, quite often they have fascinating properties that are not open to ready observation. For example, it is possible to rectify an alter-nating current with an aluminium spoon, to light up an electric bulb with a match, to strike sparks with a lump of refined sugar, and to polish to a shine a burnt casserole with pharmaceutical potassium permanganate. But to do this it is necessary, first of all, to know the properties of the substances, and, second, to be able to make use of these properties, or, in other words, to have a sleight of hand, which comes with experience. As old-time conjurers used to say, there is no deception about what you will see.
So, let us start doing tricks that are based on chemistry. Some of them are strictly for fun; others will demonstrate interesting phenomena and will allow us to make uncommon things.
Spoon-Rectifier
For this experiment you can use any aluminium spoon, for example, a teaspoon or a tablespoon. First, it is necessary to thoroughly wash and
185

Experiments Without Explosions
degrease the spoon (you already know how to do this if you conducted the experiments on anodiz-ing aluminium). The spoon will be the first component of the rectifier, and an empty can that is of approximately the same height as the spoon will be the second component.
Wash an empty can with soap OT washing powder, rinse it and fill with a solution for anodiz-ing aluminium. This is made by adding 20.0 ml of sulphuric acid (be careful!) to 100.0 ml of water. Instead of acid you can use ammonium carbonate (NH4)2C03 (10.0 g), or, as a last resort, sodium bicarbonate, which is dissolved in water until the solution is saturated. For this experiment it is necessary to use distilled water, or, failing that, fresh rainwater.
Before immersing the spoon in the can, mark on the spoon the level of the anodizing solution. The aluminium will dissolve very quickly at the interface between the solution and the air, and
186

5. Sleight of Hand
the spoon will break into two parts. To prevent this, cover this area of the spoon with a layer of varnish or water-resistant glue.
Now hang the spoon in the can so as to ensure that it does not touch the walls of the can (we are sure you'll think of an appropriate device to accomplish this). Place a tile or some other sup-port that does not conduct electricity under the can. This time, instead of batteries or an accu-mulator, we will use the alternating current from the supply line; therefore, we need to take all the necessary precautions. For the same reason insulate very thoroughly all the bare ends of the wires, and do not touch the spoon or the can during the experiment. Preferably cover them with a plywood box or a plastic bucket before switching on the current.
The connections for electric circuit are simple: connect, in series, a 40 or 60 W bulb, a switch, the can, the spoon and the ammeter (if you hap-pen to have one). Then check the insulation and switch on the current.
As you hopefully have guessed, the bulb lights up because the solution in the can conducts electricity. In approximately half an hour, though, the bulb will emit less and less light, and then it will go out completely. Our spoon has become a rectifier: it allows the current to pass in only one direction, from the can to the spoon.
You can prove this by connecting an oscillo-graph to the circuit: at first a sinusoid will appear on the screen, but later its lower part will disappear, because the so-called impulse current
187

Experiments Without Explosions
will flow in the circuit. The oscillograph can help us to immediately determine the positive and negative poles of the rectifier (this is very important if you want to use the home-made rectifier for electrochemical experiments). But you can also determine the polarity of the rectifier with a strip of filter paper, dipped in a dilute solution of table salt to which a little phenol-phthalein has been added.
Switch off the current and attach one end of the strip of paper to the spoon, and the other end to the can (with clothespins, for example). Switch on the current, and in several minutes the filter paper will turn red near one of the poles. This is the negative pole. During the electrolysis of water (salt is added to water only to increase its conductivity) hydrogen is formed near the negative electrode (cathode), resulting in an excess of OH 7 ions. These ions make the medium basic and turn the indicator paper red.
The same test, using the indicator paper dipped in a table salt solution and phenol-phthalein, comes in handy if you mix up the poles of an accumulator or a battery. In this case, the voltage is not high; therefore, you can simply press the paper with your fingers to both poles of the current source.
But why did the aluriiinium spoon become a rectifier? Once the current is switched on, a layer of aluminium oxide forms on the spoon, just as during the anodizing of aluminium. This coating is a semiconductor: it allows the passage of current only in one direction. This property of semiconductors is often used in engineering.
188

5. Sleight of Hand
You can use this home-made rectifier to conduct some of the experiments described in this book, but you should connect it with a step-down trans-former. On no account should the voltage exceed 40 V. And the electric current that you can tap off the spoon may reach up to 100 A.
Is it really necessary to use a spoon and can to make a rectifier? Certainly not. Instead of a spoon you can use an aluminium electrode of any configuration, and you can replace the can by any iron, lead or graphite electrode; then immerse both electrodes in a glass vessel filled with electrolyte. What's more, we suggest that you do exactly this, if you want to make prac-tical use of your home-made rectifier. But if you want to demonstrate to somebody how alumin-ium oxide rectifies the electric current, a spoon and a can look much more impressive.
Light a Lamp with a Match!
It is preferable to conduct this experiment with a desk lamp. Disconnect one of the wires from the plug and lengthen it, but make sure that the insulation is good.
Take a short narrow glass tube with thin walls and insert electrodes (wires with a diameter of about 1 mm) from both ends. Fix the electrodes in the tube with insulation tape. The ends of the electrodes should not touch each other; the dis-tance between them should be approximately 1-2 mm.
Connect the extended wire of the lamp to one of the electrodes; connect the other electrode by
189

Experiments Without Explosions
wire to the empty receptacle of the plug, and insulate the connection. Now you have a circuit that is open in only one place, between the ends of the electrodes. Fix the glass tube horizontally. This is easy to do, if the wires are stiff enough, by using plastic insulation; simply bend the wire so that the tube can be supported by it. The preparation is now finished, and it is time to insert the plug into the socket. The bulb will, of course, not light up.
Hold a burning match to the tube with the electrodes. If the tube is not made of hard glass, its walls will soften slightly, and sag a bit. Immediately, the electric bulb will light up, although the circuit remains open. This happens because the salts, which are components of the glass, ionize during heating, and the glass be-comes a conductor.
If the experiment is unsuccessful because the tube is too wide, use a candle or an alcohol lamp
190

5. Sleight of Hand
rather than a match. To turn on a lamp with a candle is also a spectacular demonstration.
Melted saltpeter can also turn on a lamp. Fix a test tube vertically, pour in a little saltpeter (potassium nitrate or sodium nitrate), and then put two copper wires in the test tube. To prevent the electrodes from touching one another, insert them in a cork. Connect the electrodes to the bulb as you did in the previous experiment. When you switch on the light, the bulb, natu-rally, will not light up: crystalline saltpeter does not conduct current.
Heat the saltpeter until it melts in the flame of solid alcohol tablets: the bulb will now light up. The ions that form the crystal lattice start moving and the circuit is closed. It will be illuminated even after you remove the flame because the melted saltpeter has a high electrical resistance, and the heat that is generated during the passage of current maintains the saltpeter in the melted state.
You can conduct a similar experiment with a solution, for example, a table salt solution. In this case it is better to use graphite electrodes. First immerse them in a jar of clean water, then add table salt in small portions to the water; the bulb will shine brighter and brighter.
By the way, this is a convenient method for testing the electrical conductivity of solutions. For example, you can test the conductivity of sodium bicarbonate, sugar, and acetic acid solu-tions of different concentrations.
Here is one more interesting experiment using an electric bulb, only this time we will use a
191

Experiments Without Explosions
small bulb from a pocket flashlight. Take a strip of tin, bend it at a right angle, and put it in a small beaker. Insert a bulb from a pocket flashlight in the horizontal plane of the strip of tin, so as to ensure that the glass envelope of the bulb is situated inside the beaker, facing its bottom. Connect the bulb to the battery: the tip of the cap to the negative pole, and the hori-zontal plane of the strip of tin to the positive pole. You should not solder the connections be-cause the solder can melt during the experiment;
192

5. Sleight of Hand
therefore, invent some sort of mechanical contact or use the body of an old pocket flashlight.
The experiment proceeds as follows. Take the bulb out of the beaker and fill the beaker with sodium nitrate (potassium nitrate cannot be used for this experiment; later you will under-stand why). Put the beaker on a wire gauze and heat it in the flame of a gas or alcohol burner—it is preferable not to use solid alcohol tablets since the temperature for melting is not regulated. The melting point for saltpeter is 309°C, and it decomposes at 390°G; therefore, it is necessary to maintain the temperature within this range. This can be done by either adjusting the size of the flame, or the distance between the flame and the beaker. Be sure not to allow the melted substance to solidify, even on the surface.
Carefully lower the bulb into the melted salt-peter. The major portion of the glass envelope of the bulb should be immersed into the melt, but be sure to prevent contact between the salt-peter and the tip of the cap because this will cause a short circuit. Keep the lit lamp in salt-peter for about an hour, then open the circuit, put out the burner and carefully remove the bulb. When it cools, rinse it with water, you will see that the electric bulb will be covered from the inside with a mirrored film!
You already know that charged particles of glass become mobile as a result of heating: it is for this reason that the lamp lit up when you heated the glass tube with a match. The main participants in this "race" are sodium ions. They
193

Experiments Without Explosions
become mobile enough already at a temperature slightly above 300°C. The glass itself, however, remains absolutely solid.
When you immersed the lit bulb in the melted saltpeter, the glass envelope of the bulb got into the electric field between the negative pole (the filament of the bulb) and the positive pole (the saltpeter melt, which is in contact with the strip of tin). The positive sodium ions started to move in the glass towards the cathode, that is, towards the filament of the bulb. In other words, they started to move towards the inside surface of the bulb.
Does this mean that the mirrored film inside the bulb consists of sodium? Yes, it does. But how did the ions transform into metal?
Incandescent metals (they also include the metal of the bulb's filament) release electrons. Thus, the electrons from the filament moved to the inside surface of the glass envelope of the bulb and combined there with the sodium ions, forming metallic sodium.
But why is potassium saltpeter (potassium nitrate) not suitable for this experiment? After all, it seems that it is not involved in chemical transformations. Well, this is incorrect. When a sodium ion became a neutral atom, a negatively charged ion vacancy remained in the glass. Sodium nitrate fills these spots because of the effect of the electric field, sodium ions released from the melted sodium saltpeter penetrate the glass and fill the vacancies. But since potassium ions are one and a half times larger than sodium ions, they cannot penetrate the glass. The electric
194

5. Sleight of Hand
bulb would simply burst if immersed in potas-sium nitrate.
Such far from common electrolysis through glass is sometimes used to obtain a layer of very pure, or, more correctly, spectroscopically pure (specure), sodium.
The Long Service Life of a Battery
Imagine that the following happens: You want to conduct an electrochemical experiment, so you prepare all the necessary things. You connect the circuit, and ... the battery has gone flat! But it could be worse. A pocket flashlight can go out at night, and in the woods, as well. And it is so annoying if the batteries in the transistor radio go flat right in the middle of your favourite song or football game. But it can't be helped, or can it?
Well, actually there is something that you can do. If you have no spare battery, do not throw away a dead one, try to "revive" it.
Many modern batteries consist of a mangani-zinc system. When in operation, the negative pole of such batteries (zinc cartridge) gradually and very slowly disintegrates, and the positive electrode (manganese dioxide Mn02) is reduced to the hydroxide of trivalent manganese (man-ganic hydroxide MnOOH). This element gradu-ally covers the grains of manganese dioxide, penetrates them and blocks the way for the elec-trolyte. The battery usually runs down when less than half of the manganese dioxide has been used, and, as a rule, at that time up to four-
13* 195

Experiments Without Explosions
fifths of the zinc remains unused! An almost good battery is thrown away.
But if the "shell" of MnOOH is removed, the electrolyte will again be able to reach the grains of manganese dioxide, and the battery will be ready for use again. Well, how can this be done? The easiest way is to thoroughly pound the battery with a hammer or a stone. The grains of manganese dioxide will break open, and the electrolyte will be able to penetrate them again. This is not the best way to revive a battery, but you are highly unlikely to find anything better in the woods.
If the battery runs down at home, you can more effectively return the battery to life by reactivating the manganese dioxide. Take a nail and pierce a hole in the zinc cartridge of the battery, then submerge the battery in water. The electrolyte in the battery is rather thick (it is specially thickened), and when the battery is submerged in water, the electrolyte becomes diluted and thus reaches the manganese dioxide grains more easily. This simple method allows one to prolong the service life of the battery almost by one-third. What's more, this method can be further simplified.
It is not really necessary to submerge the bat-tery in water; piercing a hole in the zinc cartridge is quite sufficient. Manganese dioxide is mixed with graphite powder to increase conductivity; therefore, as soon as air penetrates the battery, the graphite will begin to absorb oxygen, and one more positive electrode will appear, in addi-tion to manganese dioxide (the so-called air elec-
196

5. Sleight of Hand
trode near which the oxygen get reduced). In short, a common nail turns a mangani-zinc cell into an air-zinc cell.
In all fairness, though, we must admit that after this procedure the battery will produce less electricity. This is characteristic for a home-made air-zinc cell. But to make up for this, it will have a very long service life.
The last method we want to describe here is also the most efficient: it will make the battery almost as good as new. You need to charge the battery with electric current, just as accumulators are charged. The reaction that proceeds in the battery is a reversible one, and MnOOH can again be transformed into Mn02.
Note that only batteries in which the paste has not dried out, and those with an undamaged outer case can be recharged. And, unlike accu-mulators, you cannot charge a battery with direct current. If a battery is charged with direct current, zinc will deposit on the case of the battery in a branching thread-like design (den-drites), and very soon this will cause a short-circuit, which will destroy the battery completely. Batteries should be charged with the so-called asymmetrical current. This can be obtained by partially rectifying an alternating current, for example, by adding to the electric circuit a rectifier diode and, in parallel to it, a resistor (about 50 ohm). The source of current should have a voltage of about 12 V; therefore, it is not possible to operate on the supply line directly, a step-down transformer is required.
Mangani-zinc batteries can be recharged three
197

Experiments Without Explosions
times. This reduces their capacity only slightly. And small, so-called button batteries, in which a mercury-zinc system is used, can be recharged up to ten times. But do not pound them with a hammer, or pierce them; there are practically no active elements in them after discharging.
Sources of Current from Stuff at Hand
As you see, certain skill is necessary to revive a used battery. But you have to be even more skilled to make, on your own, a source of current, which can be used for various electrochemical experiments, for example, for anodizing alu-minium, or for nickel-plating.
There exist many chemical sources of current; the easiest to make is, perhaps, a Grenet cell. For this you need a glass jar and two plates, a zinc one and a carbon one, of a size tbat can fit in the jar. Take a polyethylene lid that fits the jar, and pierce it with an awl in two places so that wires for the electrodes can be inserted in the holes. Hang the plates (electrodes) by the wires (the electrodes should not touch each other, therefore, space the holes in the lid appropri-ately).
Prepare an aqueous solution containing 16% of sulphuric acid and 12% of potassium bichro-mate to use as an electrolyte. As usual, be very careful while making the electrolyte; add acid to water and not vice versa.
Fill the jar with electrolyte so that it covers approximately three quarters of the plates. Cover
198

5. Sleight of Hand
the jar tightly with the lid from which the elec-trodes hang, thus immersing the electrodes in the electrolyte. Once the electrodes come in contact with the electrolyte, an electric potential appears, and if you close the circuit, it will carry a current. It is easy to check this by a voltmeter, which will indicate a voltage of approximately 2 V. But the current in the circuit will be rather weak: it will not even be able to light up a bulb from a pocket flashlight. But if you make two or three Grenet cells and connect them in series (zinc plate to carbon plate), the bulb will light up. And for nickel-plating even one Grenet cell is enough.
Though the Grenet cell is reliable, it has at least two disadvantages: first of all, it is incon-venient because of the liquid electrolyte, which, in addition, contains sulphuric acid; and second, zinc and carbon plates are not among the things that constitute the part and parcel of everyday life or can be picked up anywhere whenever necessary. Therefore, let us consider other sources of current that can be made at home. Although they are inferior to wet cells, they can be made of things that are easier to find.
Tea and cigarettes are often wrapped in foil, one side of which is "silvery", and the other is paper. Copper foil is available in "do-it-yourself' shops. Cut "silver" and copper foil into 5x5 squares, and put them in a pile, alternating "silver" and copper squares. The first layer should be from wrapping paper, with the paper side down and the "silvery" side up. On top of it place a cop-per foil square. Then again place a square cut
199

Experiments Without Explosions
from wrapping paper in the same orientation, followed by a copper foil square, and so on. Thus, you will make a battery, the first layer of which is paper, and the top layer, copper foil. The higher the battery, that is, the larger the amount of wrapping paper-copper foil cells, the greater is the voltage.
From the copper foil cut strips that will be used as current leads. Put them under the first and over the top layer of the battery. Tape them to the battery with insulating tape, and immerse the battery in the electrolyte (a solution of table salt). To check whether the battery works, bring a strip of filter paper dipped in the phenol-phthalein solution (you already used this test in previous experiments) near its poles. The paper will turn red near the negative pole. Such a battery can carry a voltage of several volts, but, unfortunately, it gives a rather weak current.
The easiest way to make other sources of cur-rent is to use the details of old batteries. Break
200

5. Sleight of Hand
Paraffin
CardSoarol circle
+ " ' ' ittfoil
Graphite leai
Ruitar hose
.Paste
:+ive wuteriaI
Paraffin ^ ^ ^ ^ Cardboard circle
a battery open and take out the active material, the manganese dioxide coating the electrodes, the graphite rods, and the dried out paste (thick-ened electrolyte). Scrape off the latter and cover it with water to allow it to swell. Powder the manganese dioxide, and mix it with several drops of glue or a solution of gelatin. Use it to coat the graphite rod or a lead of a drawing pen-cil, leaving an uncoated section on the top to connect the wire. When the coating dries, wind several layers of "silvery" wrapping paper around the rod, with the "silvery" side outside, and tie it with a thread. Wind one wire round the top of the rod tightly, another around the "silvery" paper, and fix it in place with Scotch tape. Last of all, wrap the insulating tape around the cell. It is now ready for use.
To make a better cell, moisten the active ma-terial and the paste with the following solution: 24.0 g of ammonium chloride per 100.0 ml of
201

Experiments Without Explosions
distilled water, and it is also good to add 1.0 gram of calcium chloride. If you heat this solution with starch milk, you will get a pasty electrolyte.
Take a polyethylene bottle cork, pierce a hole in it, and pass a wire through this hole. Fix a circle cut from galvanized iron into the cork and press it to the wire lead. Cut a circle from filter paper with an inner diameter equal to that of the cork, soak it in electrolyte, smear with paste and put in the cork. On top put soaked active material and manganese dioxide from the old battery, and press it down with the disc that was cut from the graphite rod (this disc will serve as the second current lead). It is possible to make a battery from such cork cells that can carry a voltage of several volts.
You can replace the polyethylene cork with an iron cap with tin coating from a mineral water or lemonade bottle. Obviously, in this case you will not need the zinc circle, and you will not need to pierce a hole in the top of the cap; the cap is a conductor, but the tin cell carries a low voltage.
You can make an even better cell from an alu-minium foil cartridge. To make this cartridge, cut a piece of rubber hose 3-4 cm long, and put a large enough piece of aluminium foil in it. Press the foil to the walls of the hose, make a bottom for the cartridge from the excess foil, and flatten it with some rounded stick, for exam-ple, with the opposite end of a ball-point pen. This type of aluminium cartridge can perfectly replace a zinc one.
Put a cardboard circle on the bottom of your
202

5. Sleight of Hand
aluminium cartridge, and coat the cartridge from inside with thickened electrolyte from an old cartridge, or with your home-made electrolyte; note that the coating should not be more than 1.0 mm thick. Fill a bag made of some light cloth with moistened manganese dioxide Mn02. Compress it by pressing it lightly with the same pen and add some more manganese dioxide until it reaches the rim of the cartridge. Press in a graphite rod or a pencil lead. Once again com-press the manganese dioxide slightly, close the bag as far as possible, and on the rod place the second cardboard circle with a hole in the middle to prevent the electrode from inclining. Light the candle and drip the wax on this circle and on the bottom of the cell for insulation.
This cell can carry a voltage of approximately 1 V, but the current is greater than that of a cell made from the polyethylene cork. Two or three cartridges are sufficient to hear the radio broad-cast with headphones.
All Crystals, Big and Small
Experiments on growing crystals are frequently described, and they are so spectacular and easy to perform, that you have probably already done one and understand the basic principle. It is certainly not complicated to make crystals. Prepare a hot saturated solution of some salt (sodium chloride, copper or iron sulphate, alums, potassium bichromate, and so on—the list is very long), cool it carefully, not allowing the excess of salt to- precipitate from the solution
203

Experiments Without Explosions
(such a solution is called supersaturated), and then seed the reaction with a crystal of the same salt hanging on a thread. After this, all you need to do is to cover the vessel with a sheet of paper, put it in a secluded corner and patiently wait for a large crystal to grow. This can take weeks or even months; just do not forget to add small portions of saturated solution to make up for evaporation.
What has been described is well known. But there are many variants of this experiment, and we will select some less common ones, for exam-ple, using lead nitrate and potassium iodide. Mix equal amounts of 10% solutions of these salts, and lead iodide will fall out. Carefully pour off the liquid. Boil water in some transparent vessel, acidify it a little with vinegar, and, while it is still boiling, stir up and add the wet lead iodide. Let the solution cool slowly, and golden crystals will form in it.
A variation on the same theme is the following: mix lead nitrate and potassium iodide solutions in a test tube, boil the mixture to dissolve the precipitate, and then quickly cool the test tube under cold running water. In this case you will see tiny golden crystals suspended in the liquid.
A general rule is that the size of the crystals strongly depends on the speed of cooling. Pour 25.0 ml of water in a vessel, and add, in small portions, 20.0 g of potassium nitrate, stirring the mixture after each portion is added until the salt dissolves completely. When the salt no longer dissolves, heat the vessel a little, and stir before adding the next portion. When you have added
204

5. Sleight of Hand
all the salt, divide the mixture in half and pour it into two vessels. Let one cool covered with several layers of thick cloth to slow the cooling. In this vessel you will find several large crystals, and, with luck, one fine crystal. Put the other vessel immediately in a pot of cold water; a lot of tiny crystals will form. This is a good illustra-tion of the general rule.
The following two experiments are so spectac-ular that they can be done before an audience, provided that you prepare everything thoroughly. The first of them is called Peligot's experiment. Take a glass cylinder that is 25-30 cm high, wash it inside with hot water, and pour (through a funnel, directing the stream along the wall of the cylinder) a hot, very concentrated solution of hyposulphite, until the cylinder is filled to one-third of its capacity. To prepare the solution of hyposulphite, dissolve 450.0 g of hyposulphite in 45.0 ml of water while heating.
Add the second (hot) solution (sodium acetate: 300.0 g in 45.0 ml of water), also through the same funnel, until another third of the cylinder volume. Pour this solution very carefully and slowly, also along the wall of the cylinder in order to prevent it from mixing with the first solution. And last of all, fill the remaining third of the cylinder volume with hot water, which will prevent the saturated solution from untimely crystallization.
Now there are three layers in the cylinder: the top layer is water, in the middle is supersaturat-ed solution of sodium acetate, and the bottom layer consists of a supersaturated solution of
205

Experiments Without Explosions
hyposulphite. Cover the cylinder with glass and let it cool to room temperature before starting the experiment.
Using melted wax attach a small, inconspicu-ous crystal of hyposulphite to a glass rod. Then, in full view of your audience, quickly immerse the rod in the bottom layer. The concentration of salt is so high there that immediately many new crystals will form around your crystal, pro-ducing a flower-like structure. In the middle layer, the "alien" substance will not form crystals around the seed of hyposulphite.
Immerse in the middle of the layer another glass rod (the audience is not supposed to notice the difference) to which a small crystal of sodium acetate has been attached. Again a "flower" will "grow", but this one will look completely different! Handle the cylinder with care, and you will be able to use it for this experiment several times.
For another experiment that can also be per-formed like a magic trick, you need only sodium acetate. Dissolve 100.0-150.0 g of this salt in hot water, preferably in an enameled vessel, and slowly concentrate the solution by evaporation. Carefully watch for the exact moment to take the vessel off the fire: from time to time blow on the surface of the hot solution, and once the film, resembling a film of fat, appears, stop heating, because this indicates that the concentration of salt is exactly right for the formation of crystal hydrate CH3C00Na-3H20. Pour the liquid in a clean glass with thin walls and close it. When the liquid cools, a tiny seed of sodium
206

5. Sleight of Hand
acetate is enough to instantly crystallize the liquid to a solid, ice-like mass. If you took the solution off the fire too soon, and the concentra-tion of salt was not enough, some water will appear over the solid mass; you can just pour it off. If, on the contrary, the concentration of salt was too high, there will be a coat of salt on the surface of the solid mass; it is not necessary to scrape it off, just add a little bit of water.
You can repeat this experiment as many times as you want by melting the crystal hydrate in the water bath and then cooling it. You can invite an audience and surprise them by demon-strating how water turns instantly into ice without any cooling! What's more, the glass gets heated because the heat of crystallization is released. You can also turn the glass over, and not a single drop of water will fall from it.
If you perform this experiment before an audience, make it look like a magic trick by adding the seed of salt to the solution without anybody noticing it, for example, by shaking it off the tip of the glass rod. Be sure to cover the glass tightly between experiments; even a particle of dust can cause an unplanned crystal-lization.
You can obtain the reagent for this experiment (sodium acetate) from acetic acid and soda. If you want to produce it yourself, dissolve 1 part of acetic acid in 2 parts of water, and add soda in small portions gradually, waiting until the frothing stops before adding each new portion, otherwise the reaction will proceed so vigorously that the liquid may be thrown out of the vessel.
207

Experiments Without Explosions
There are unusual crystals such as metal crystals. Let us grow some crystals of copper.
You already produced small crystals of copper when you put a nail in the solution of blue vitriol. These crystals were so small that the coating of copper on the surface of the nail seemed uniform. To grow large crystals it is necessary to slow the reaction down, to allow time for the copper that is released in this reaction to settle on the crystals and increase their size. Slow cooling is one of the methods that can be used when the chemical reaction has come to completion.
To slow the reaction, we will use table salt. Put some crystals of blue vitriol in the bottom of a vessel, such as a glass jar, and cover them with table salt (preferably not coarse). On top put a circle cut from filter paper, which is big enough to touch the walls of the vessel. Take an iron circle of a slightly smaller diameter, rub it with abrasive paper, rinse with water and place on the paper circle.
Fill the jar with a saturated solution of table salt until it completely covers the iron circle. The rest will happen by itself. It is difficult to say how long one must wait for results; a lot depends on different parameters of the experi-ment, but, generally, it is a matter of several days rather than several hours.
Thus, in several days you will find beautiful red crystals of copper in the jar. By varying the size of the vessel, the size of the blue vitriol crystals, the thickness of the table salt layer, and the temperature of the experiment, you can obtain copper crystals of various forms, and,
208

5. Sleight of Hand
with luck, very beautiful and unusual ones. Sometimes, dendrites form. These are skeleton-like crystals, resembling trees.
If you leave the crystals in the same vessel where they formed, they will not last for long. Remove them from the solution, rinse with water and put in a test tube, filled with dilute sulphuric acid. Plug the test tube with a cork, now your crystals are safe.
Crystal Patterns
There are substances that are called isomorphous because they exhibit similarity in crystalline form and. structure despite their different com-position. Crystals of one isomorphous substance can grow in a saturated solution of another iso-morphous substance, forming, so to say, a "crystal in a crystal". If you cut such a structure, you will see a geometric pattern on the surface of the cross section.
The easiest isomorphous substances to obtain are alums, crystal hydrates of double sulphates that have the formula M x M n i (S04)2-12H20. We will need three alums: dark violet chrome potassium sulphate KCr(S04)2-12H20, green ferric ammonium sulphate NH4Fe(S04)2-12HaO, and colourless aluminium potassium sulphate KA1(S04)2 • 12H20.
Fill an enameled or glass vessel with water, add one of the three above-mentioned alums, and heat the mixture slightly (do not allow it to boil), stirring continuously with a glass rod. When the salt dissolves, add another portion of
209

Experiments Without Explosions
the same alum, and heat the solution again. Once the solution becomes saturated, filter it quickly through a glass or enameled funnel containing a piece of cotton. The funnel should first have been rinsed with boiling water to warm it: if the funnel is cold, crystallization may occur immediately and the crystals will clog the funnel.
Cover the vessel containing alum solution with a lid, and let it cool slowly. Small crystals will precipitate. If they start to stick together, add a little water to the solution, heat it and then cool again. Remove the crystals from the solu-tion, dry in air, put them in a test tube and plug it with a cork. Prepare the crystals of two other alums in the same way. Save the saturated solu-tions of alum, and label the jars to avoid mixing them up.
Now take one small crystal of each alum, tie each to a very fine thread (for example, from a nylon stocking), and immerse each crystal into the solution where it grew. Cover the jars with paper lids and protect them from draughts.
Within approximately a week the crystals will have noticeably grown. Now replace each seed crystal with a different one. If, in the beginning, you put two crystals in each jar, more combina-tions of colours will result. To avoid mixing up the crystals and ruining the whole project, attach labels to each thread, and note in your laboratory logbook how long each crystal was kept in each solution.
A perfect crystal of alums is an octahedron, but we do not want a perfect crystal; the more fanciful the geometrical form of the crystal, the
210

5. Sleight of Hand
more interesting is the pattern on the cross sec-tion. In addition to crystals for making patterns you can grow aggregates of crystals—druses-using small accreted crystals as seeds. If they start to branch while growing, do not try to correct this, rather, regulate the growth yourself. If you smear the face with petroleum jelly, it will not grow further; if you remove the jelly with acetone, the face will resume growing.
Cut the fully formed crystal with a thick thread, and do this carefully and patiently. Level the slices with abrasive paper, and polish them by rubbing with circular movements against wet Whatman's paper.
Depending on the angle of the slice, the number of layers in the crystal, and their thickness, the geometric patterns on the surface of the slice can be extremely diverse. A druse causes even more variations in the patterns. Immediately cover the patterned slice with clear varnish, or transparent nail polish; otherwise it will become dull and crumble.
It is much easier to make a pattern with crystals of ammonium chloride. It is colourless, however, its pattern is so interesting. But, let us not jump ahead.
Prepare a saturated solution of ammonium chloride by adding it to warm water and stirring thoroughly. Take a glass plate or a piece of a mirror, wash it and cover it with the saturated solution, using a brush. Then let the plate cool slowly, and put it in a cupboard to protect it from dust. In several hours the water will evap-orate, and a pattern will form on the plate,
14* 211

Experiments Without Explosions
resembling the snowflake patterns that appear on windows. Our artificial pattern is not afraid of heat, but it is better to keep it away from water.
A Plate Bearing Riches
Digging for buried treasures takes a lot of effort and is generally a hopeless undertaking. Yet we suggest that you try your luck, because we guarantee success. We will look for real gold, but not in caves or woods; an ordinary plate with a gold border trim will do, and even a broken one at that.
Perhaps it will come as a surprise to you, but gold borders on tableware really do consist of gold. It is true that there is very little gold there because the layer is very thin. Take a gold-rimmed glass and examine it against light; the layer of gold is practically transparent.
A gold border is painted on tableware using a solution. We will start this experiment with preparing a solution that contains gold.
You can obtain broken tableware with a gold border free of charge in a china shop. For these experiments you will need approximately 10 cm2
of gold border. With this we will make about 5 ml of dilute aurochlorohydric acid HfAuClJ. The gold should be dissolved in the mixture of concentrated acids (3.0 ml of hydrochloric acid and 1.0 ml of nitric acid). This mixture is called aqua regia. Be extremely careful when you work with concentrated acids; by all means wear the rubber gloves, and, most importantly, do this experiment only in the presence of your teacher!
212

5. Sleight of Hand
Thoroughly wash the gold border on the pieces of tableware, and remove all the traces of grease with a cotton-wool swab, dipped in acetone. Take up several drops of aqua regia with a med-icine dropper, and dissolve the gold border with them. Carefully draw up the solution of auro-chlorohydric acid and transfer to a small test tube that has been washed with distilled water. All the solutions for this experiment should be prepared with distilled water and in clean vessels.
To ensure that the gold is completely collected, rinse the place where the border used to be with a small amount of water, using a medicine drop-per, and transfer this water to the test tube with aurochlorohydric acid. Add enough water to the test tube to make 5.0 ml of solution. This is the solution that we will use for the experiment. We will make a very beautiful Cassius' purple: a colloidal solution containing tiny particles of metallic gold. It forms when a solution of stannous chloride SnCl2 is added to a very dilute solution of aurochlorohydric acid.
Dissolve 0.5 g of stannous chloride in 50.0 ml of water. Add several drops of this transparent solution to the test tube with the pale yellow solution of aurochlorohydric acid. At first the mixture will turn yellowish brown, but, in several minutes, a spectacular colour—Cassius' purple— will appear. When this occurs, metallic gold is reduced, and stannic hydroxide Sn(OH)4, which is formed in the process, imparts stability to the colloidal solution. Usually the solution has a rich red colouring, but the colour may have different
213

Experiments Without Explosions
tints, from pink to violet, depending on the size of the particles.
Colloidal gold can be precipitated by a solution of table salt, which makes the particles of gold aggregate and then sink. If you rinse the pre-cipitate, dry it, and then add aqua regia, you will again obtain the solution of aurochlorohydric acid.
If you happen to have access to a hydrogen torch, you can perform a very spectacular exper-iment, the so-called Donau experiment. A flame of hydrogen directed at the surface of the auro-chlorohydric acid solution also reduces gold, and, as a result, coloured stripes appear in the liquid. Or you can do the following: apply a concen-trated solution of aurochlorohydric acid (obtained by adding aqua regia to gold) to a clean porcelain plate. Let the plate dry, and then put it in the flame of the hydrogen torch—a glittering coat of gold will form on the plate.
One warning: Use the hydrogen torch only with the permission and in the presence of your teacher.
How to Make the Invisible Visible
In adventure stories about olden times you have certainly read about letters that were written with colourless ink: wicked villains do not know the secret, and only the noble heroes can make the invisible ink visible.
Actually, there is not much of a secret here, and this trick was explained long ago. Some colourless solutions develop, so to say, when heated, forming coloured compounds. Among
214

5. Sleight of Hand
such substances are the juices of lemon and onion. Dip a pen in one of these juices, and write some-thing on a sheet of paper: nothing will be visible. But if you heat the paper over a hot surface or an open fire (be careful, the paper may catch fire!), the inscription will become clearly vis-ible. It is also possible to successfully perform this experiment with milk and dilute vinegar.
Let us conduct some similar experiments, but this time you will use chemical reagents instead of natural substances. In a small test tube pour a very small amount of ammonium chloride (a quantity that fits on the tip of a knife), and add approximately a teaspoon of water. Dip a pen in this transparent solution, write or draw something on a sheet of paper, and let it dry. After strong heating the inscription or drawing will be clearly visible.
This experiment is more spectacular with a very dilute solution of cobaltous chloride CoCl2. When the paper dries, the inscription is practi-cally imperceptible against the white background because crystal hydrate C O C 1 2 - 6 H 2 0 , which forms after drying, is pale pink. But when the paper is heated, some of the water of crystallization splits off and the salt turns blue. If you moisten the paper (by breathing on it, or better still, by holding it over steam), the inscription will disappear, because crystalline hexahydrate forms again.
Perhaps you already know this experiment; therefore, we would like to suggest a far less common version of it. We will not heat the paper with the inscription, but to demonstrate
215

Experiments Without Explosions
how to split off some water without heating, we will conduct a preliminary experiment.
Pour some concentrated solution of pink cobal-tous chloride in a test tube. Add an equal volume of acetone and mix the two solutions; the mixture will turn blue! Dilute it with water, and it will again turn pink.
What is the reason for these transformations? Acetone easily mixes with water, and it can take up water from other substances. But then can the inscription, which consists of cobaltous chloride, be developed with acetone alone, without any heating? This is exactly so. Rub the inscribed paper with a cotton-wool swab dipped in acetone, and you will obtain the same result as after heating.
There is. one more experiment dealing with inscriptions made without pen and ink. Smooth a piece of foil from a chocolate wrapping, and fasten it to a board with pins. Connect one of the pins to the negative pole of the battery. Connect a nail that has been scraped with abrasive paper to the positive pole. Wet a sheet of writing paper with an almost clear solution of table salt to which potassium ferricyanide K3[Fe(CN)6] has been added, put it on the foil, and touch the paper with the nail: it wrill leave a blue trace. During electrolysis, Fe2+ ions, reacting with potassium ferricyanide, produce Turnbull's blue Fe3[Fe(CN)6]2. This substance penetrates the paper and gets fixed in its fibres. If you replace red potassium ferricyanide with potassium thio-cyanate KSCN or ammonium thiocyanate NH4SCN, the nail will leave a red, rather than
216

5. Sleight of Hand
blue, trace, because red ferric thiocyanate will form.
These experiments can be conducted not only with writing paper, but with the pieces of clean white cloth.
The ability to make the invisible visible fre-quently turns out to be a great help to those whose job is to investigate crimes. It is said that the criminal always leaves traces, but they are not necessarily easily noticeable. Criminol-ogists first of all look for fingerprints, because they are unique, belong to one specific person, and can no more be imitated than a human face. Of course, experts have sensitive methods and all the appropriate reagents that enable them to uncover even very weak fingerprints; we have a rather crude method, but then it is also quite a simple one.
Mix equal amounts of talc and soot (talc is available in pharmacies, and in the chapter on pigments we described how to obtain soot). Breathe on your finger to moisten it a little, and press it to a clean sheet of paper: the finger-print is not visible. Now pour a mixture of talc and soot oh the paper, and carefully spread it over the print- with a soft brush, or shake the paper a bit. Then pour off the excess mixture, and you will see a clear impression of a fingertip. The invisible greasy traces of your fingertip on the paper adsorbed the particles of black mixture and thus become visible.
You can conduct this experiment with different objects and surfaces: take an old newspaper, a cardboard box, a plastic vessel or a glass. If
217

Experiments Without Explosions
you want to conduct the experiment with a glass, increase the amount of talc to help the mixture to stick to the surface; once you remove the excess mixture oS the glass, heat it a little, and the fingerprints will become even more clearly visible on the transparent surface.
Simple Tricks
The experiments where you made the invisible visible, in addition to some other experiments that you conducted, can easily be performed before an audience as magic tricks. But magic tricks are much more impressive if they are performed in rapid succession, one after another, in a mysterious atmosphere accompanied by incanta-tions and slow movements with a magic wand.
We will not give the chemical explanations for the following tricks on purpose. They are not particularly complicated; therefore try to dis-cover them on your own. You will not only entertain your audience, but increase your knowledge as well.
You should adhere to the proportions of sub-stances recommended here, but strict observance is not necessary. To avoid measuring the re-agents each time, make wooden spoons that con-tain approximately 10 mg of dry reagent. Or you can use the plastic spoons that are sometimes attached to pharmaceutical products. Each time we will mention how many spoons you need.
First trick: The transformation of water into milk. Put five measuring spoons of calcium chlo-
218

5. Sleight of Hand
ride in a glass, and the same amount of sodium carbonate (washing soda) to another glass. Fill the glasses to one-third of their volume with water. The solutions will look like ordinary water. Mix the solutions: the resulting liquid will be white like milk. Without wasting a single minute (or the precipitate will settle, and it will be obvious to the audience that the mixture is not milk), add a good amount of a solution of hydrochloric acid to the white liquid, and the "milk" will immediately "boil" and again turn into water.
Now let us perform a slightly more complicated trick: you will turn water not only into milk, but into ink as well. You will need three glasses for this. Put two spoons of barium chloride or strontium chloride in one glass. Put one spoon of tannin in another glass. Add half of a spoon of water to each glass. Stir the contents of the glasses, and, when the reactants dissolve, the glasses will appear empty to the audience because there is so little liquid in them.
Put five spoons of ferrous ammonium sulphate (Mohr' salt) FeS04(NH4)2S04 into a third glass. Fill this glass almost to the top with water. Now everything is ready for the magic trick. In full view of the audience, take the third glass with Mohr' salt and pour its colourless contents into the first two "empty" glasses. In the first glass containing barium chloride the water will instantly turn into "milk"; in the second glass it will turn into "ink".
The next trick is no more difficult. Dissolve two spoons of cobaltous chloride (you made in-
219

Experiments Without Explosions
visible inscriptions with this reagent) in a test tube with water. Soak a white cotton handker-chief in this solution and then dry it: it will turn pale blue.
The trick is as follows: You show the audience a blue handkerchief, then you rumple it and hold it in your fist. If you exhale strongly into your fist several times, the handkerchief will be moistened and turn white. Then open your fist and show the audience a white handkerchief! You can use the same handkerchief several times: it will again turn blue when you let it dry.
For the next trick demonstrating colour trans-formations you will need three salts: potassium ferricyanide, sodium salicylate, and Mohr's salt. You will need a very small amount of each salt, approximately one spoonful. Fill three test tubes to half their volume with water, and dis-solve each salt in a separate test tube. This trick is based on the fact that when Mohr's salt is mixed with potassium cyanide a blue colour results, and when mixed with sodium salicylate, a red colour develops. Draw a design on a sheet of paper with a drawing pencil, then, using a brush apply potassium ferricyanide or sodium salicylate to parts of the drawing and let the paper dry (the audience will not notice that the paper is marked in any way). Hang the "clean" sheet of paper on the wall, and paint over it with a brush dipped in the solution of Mohr's salt; inform the audience that it is plain water. The drawing will immediately, before the very eyes of the audience, turn red and blue.
There is another traditional trick you can
220

5. Sleight of Hand
perform: Light a candle without fire. Perhaps you know the secret of this trick, but a lot de-pends on the presentation.
We recommend that you do the following: Cover a test tube on the outside with melted stearin or paraffin to make it look like a candle. Insert a metal cap with a hole for the wick. Pour some alcohol in the test tube to impregnate the wick. Then cover the cap with stearin or paraffin so that only the wick will show. "The candle" is now ready.
An ordinary glass rod will serve as a magic wand: to one end add a small amount of a dough-like mixture of potassium permanganate and sulphuric acid. Heed this warning: Make only very small amounts of this mixture, enough for one trick only! And do not on any account touch it!
You can probably think of an appropriate stag-ing for this trick (waving the magic wand and using incantations)! Then, all of a sudden, touch the wick with the magic wand: a flame will immediately appear on its tip.
Tricks, or, rather, experiments with colour transformations, appear still more spectacular if thickened, rather than usual watery, solutions are used for them. As a thickening agent, sodium silicate can be used: a water solution of it is called water glass. Or you can use silicate glue, which is used in offices, after diluting it by half with water.
Pour some calcium chloride in a glass and add a few drops of phenolphthalein. Fill another glass with water glass. When you add the con-
221

Experiments Without Explosions
tents of the first glass to the second and shake the mixture, it turns red, and, what's more, viscous as fruit jelly.
Or you can take three spoons of magnesium sulphate (pharmaceutical Epsom salts), add wa-ter, shake the mixture, and add several drops of water glass. You will also get jelly when you stir this mixture, but it will be pale pink rather than red.
Coloured silicate jellies can be used for "paint-ing" magic pictures. Sketch a painting, and apply a transparent solution of phenolphthalein to parts that you want coloured. Cover another sheet of paper with water glass, which is also transparent. Press these two sheets of paper together, and after several minutes (meanwhile you can demonstrate another trick) carefully separate these two sheets of paper. The painting will have turned red "by itself'! There is nothing surprising here for those who know chemistry: solutions of sodium silicate give a basic reaction.
The last trick that we promised to teach you is about how to turn "water" into "blood". Pre-pare a vessel with nontransparent walls; for example, glue coloured paper around a glass jar (you can draw alchemic symbols on it to make it look still more mysterious). Fill the jar with water.
Prepare several clean glasses. Three glasses are sufficient but to give the audience the impres-sion that very complicated transformations are taking place, take five or six glasses. Put four spoons of potassium hyposulphate, or several drops of acetic acid in one glass, and mark it so
222

5. Sleight of Hand
as to be able to distinguish it at once from the others (but the marking should not be noticeable to the audience). Put a spoon of calcinated soda in the second glass, and several drops of phenol-phthalein in the third glass. Pour a little water over the dry reactants, and stir the mixtures until they dissolve. Now you can perform the trick.
First of all, demonstrate to the audience that the jar contains plain water, and since this is really so, you can convince the audience com-pletely by drinking a bit of it. Then fill all the glasses with water from the jar: nothing will happen. Now pour the water from all the glasses except for one, the first glass with calcium hypo-sulphate (or acetic acid) back into the jar. The liquid in the jar will become red as blood. De-monstrate this to the audience by pouring it into the glasses again.
Now, one more time, pour the contents of all the glasses (this time all the glasses, including the first one) into the jar. The liquid will become colourless, the "blood" will turn into "water", which you can again demonstrate by pouring it into the glasses. But certainly this "water" must not be drunk!
This is a simple trick, but it is quite spectacu-lar, particularly if you remember to do some incantations.
A Chemical Clock
In the previous experiments, which were like tricks, colourless solutions changed colours in-stantly, as if by magic. It is true that chemical
223

Experiments Without Explosions
reactions proceed very quickly, and, as a rule, they start immediately, the moment the reac-tants are brought into contact. But ther$ are exceptions to this rule. The reacting mixture can be colourless for some time, and then sud-denly become coloured. And this can happen in five or ten seconds, at your command; there-fore, you can yourself set the chemical alarm clock for the time you want.
Prepare two solutions. For the first one: mix 3.9 g of potassium iodate KIOa in one litre of water. The other solution should consist of 1.0 g of sodium sulphite Na2SOs, 0.94 g of concentrated sulphuric acid (be careful!), and a very small amount (just a few millilitres) of starch paste in one litre of water. Both solutions are colourless and transparent.
While stirring the mixture continuously, quick-ly add 100.0 ml of the second solution to 100.0 ml of the first one. It is preferable to perform this experiment with another person: that way your friend can immediately start to count the time with a stopwatch or by the second hand of an ordinary watch. After six or eight minutes (the exact time depends on the temperature) the liquid will instantly turn dark blue, almost black.
Now again measure 100.0 ml of the second so-lution, and dilute 50.0 ml of the first solution with water so that the concentration is exactly half of the original. You can verify with the help of the stopwatch that the time that passes from when the solutions are mixed to when the colour changes will increase twice.
And last, add 100.0 ml of the second solution
224
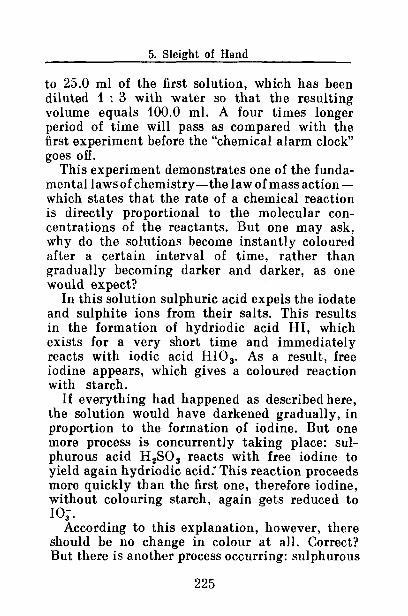
5. Sleight of Hand
to 25.0 ml of the first solution, which has been diluted 1 : 3 with water so that the resulting volume equals 100.0 ml. A four times longer period of time will pass as compared with the first experiment before the "chemical alarm clock" goes off.
This experiment demonstrates one of the funda-mental laws of chemistry—the law of mass action — which states that the rate of a chemical reaction is directly proportional to the molecular con-centrations of the reactants. But one may ask, why do the solutions become instantly coloured after a certain interval of time, rather than gradually becoming darker and darker, as one would expect?
In this solution sulphuric acid expels the iodate and sulphite ions from their salts. This results in the formation of hydriodic acid HI, which exists for a very short time and immediately reacts with iodic acid HI03. As a result, free iodine appears, which gives a coloured reaction with starch.
If everything had happened as described here, the solution would have darkened gradually, in proportion to the formation of iodine. But one more process is concurrently taking place: sul-phurous acid H2S03 reacts with free iodine to yield again hydriodic acid* This reaction proceeds more quickly than the first one, therefore iodine, without colouring starch, again gets reduced to I03".
According to this explanation, however, there should be no change in colour at all. Correct? But there is another process occtirring: sulphurous
225

Experiments Without Explosions
acid is constantly consumed in the reaction, and once all the sulphurous acid turns into sulphuric acid, nothing prevents iodine from reacting with starch. At this point the whole solution becomes instantly coloured.
When you diluted the solution 1 : 1 and 1 : 2, you decreased the concentration of potassium iodate, and the rate of the reaction slowed down proportionately.
As you can see, the explanation required much more time than the experiment itself.
A Rainbow Without the Sun
Optical devices are widely used for chemical studies. The phenomenon you are about to observe is used for the determination of the melting point of substances.
Prepare about fifteen thin glass plates. Old photographic plates are appropriate. Wash them with hot water to remove the emulsion, and cut them in 5 X 5 cm squares. Stack up ten squares, one on top of the other, and tape them with insulating tape to prevent the stack from falling apart. Take one of the remaining plates, sprinkle it with a small amount of sodium thiosulphate (hyposulphite), and carefully heat it until the crystals melt. Heat another plate and imme-diately cover the melted crystals with it. A thin transparent layer of melted salt will be formed between the plates. If the layer is turbid, add a very small amount of water, no more than a few drops. While cooling the melt will begin to crystallize. This phenomenon is interesting
226

5. Sleight of Hand
I Scretnx
I .Sample . L
(Hirror r
I Scretnx
I .Sample . L
(Hirror r
\ oP H'm glass plfttw
and you may wish to observe it through a magni-fying glass.
Put a sheet of black paper on the table, and on top of it, a clean thin glass plate. Turn on a bright lamp and sit at the table so as to be able to see a reflection of the lamp in the thin glass plate that is on top of the black sheet of paper, through the stack of glass squares, which you are holding in your hand. By changing the angle of the stack and the distance from the table, find a position in which the reflection of the lamp will grow dim. It is better to look through the stack at an acute angle. If the light of the lamp bothers you, cover it with a screen or your palm, but make sure that you can still see the light reflected from the table.
With your free hand take two plates with hyposulphite and place them between the stack and the table so that they are in the path of light. Turn and tilt them a little, and you will see a very beautiful rainbow.
15* 227

Experiments Without Explosions
To explain this experiment it is necessary to discuss physical, rather than chemical, phenom-ena. We will just tell you how the melting point is determined with the help of such plates, which are called polarization plates. The rainbow that you saw appears only in crystals. If a solid sub-stance is heated slowly, the rainbow disappears the moment the transition from a solid to a liquid state occurs.
Luminous Solutions
In some chemical reactions the energy is parti-ally released in the form of light. This process is called chemiluminescence. Sometimes the chemiluminescence occurs in living organisms; everyone knows about fireflies and glowworms. A weak luminescence also accompanies the oxidation of some organic compounds. You can observe this in an experiment examining the oxidation of hydroquinone. It is better to conduct the last part of this experiment in a dark room in order to see the luminescence more clearly.
Dissolve 1.0 g of hydroquinone and 5.0 g of potassium carbonate (potash) in 40.0 ml of pharmaceutical Formalin (an aqueous solution of formaldehyde). Pour the reacting mixture in a big flask or a bottle of no less than one litre in volume.
In a small vessel prepare 15.0 ml of a concen-trated solution of hydrogen peroxide. You can use tablets of urea peroxide, which is a crystal-line compound of urea and hydrogen peroxide (the urea will not spoil the experiment). Put
228

5. Sleight of Hand
both vessels in a dark room, in a place where you can easily reach them. When your eyes adapt to the darkness, add the solution of hydrogen peroxide to the large vessel. Immediately the mixture will start to froth (now you see why a large vessel was necessary), and to emit a clearly visible orange glow.
The chemical energy, which is released when hydroquinone is oxidized with peroxide in a basic medium, transforms almost completely to the luminous rather than the usual thermal energy. Still, some heat is released in this reac-tion, therefore formaldehyde partially evaporates. And since it has an unpleasant smell, do not bend over the vessel, and ventilate the room once the experiment is over.
Luminescence occurs not only during oxidation. Sometimes it happens during crystallization. This phenomenon has been known for a long time, and you can observe it yourself.
The most easily accessible reagent for this experiment is table salt. Dissolve enough salt in water to ensure that there are some undis-solved crystals on the bottom of the glass. Pour the saturated solution in another glass and care-fully add, drop by drop, concentrated hydro-chloric acid, using a medicine dropper. The salt will start to crystallize, and it will be accom-panied by luminescence: small sparks will pass through the solution. To see them it is best to conduct this experiment in a dark room, as was done with the previous experiment.
The crystallization of other salts, such as po-tassium chloride and barium chlorate, is also
229

Experiments Without Explosions
accompanied by the same phenomenon. But such sparks appear only if hydrochloric acid is added.
Perhaps the most spectacular experiment can be conducted with a mixture of potassium and sodium sulphates. Mix 200.0 g of potassium sul-phate with 80.0 g of sodium sulphate, and add hot water in small portions. When all the crystals dissolve, let the solution cool. This experiment should also be conducted in a dark room. First, already at 60°C rather weak sparks will appear. Later, more and more sparks will appear. When a large amount of crystals form, you will see a shower of sparks, but you will have to wait, a long time for this to occur, perhaps for an hour. If you put your ear to the wall of the vessel, you will hear sounds like thunder. In this case the luminescence is likely to be caused by the forma-tion of the double salt 2K2S04-Na2S04-10H20.
Do not discard the solution with the crystals when the luminescence is over. Stir up the crystals at the bottom of the vessel with a glass rod, or shake the vessel several times, and sparks will again appear.
The following is one more experiment demon-strating luminescence during crystallization: this phenomenon is called crystalloluminescence. You will need barium bromate' Ba(Br03)2, which you can prepare from the more easily available reagents, potassium bromate KBrOa and barium chloride BaCl2. Since the first substance dissolves rather poorly, we have to use dilute solutions of approximately 3% concentration. If you cool the mixture of these solutions, barium bromate
230

5. Sleight of Hand
will precipitate, because it practically does not dissolve at all in cold water.
Filter the solution, rinse the barium bromate with cold water and allow it to dry. Then weigh out 2.0 g of it, dissolve it in 50.0 ml of boiling water, and again filter the solution. Set the solution aside to cool, but preferably at a tem-perature that is higher than room temperature, for example, at 40-45°C (best of all put it in a drying cabinet). At this temperature blue sparks will appear in the solution, and claps will be heard: again a mini-thunderstorm is taking place in the beaker.
The Luminescence of Solid Bodies
Cool the solution of barium bromate, which was left over from the previous experiment, to room temperature, and white crystals of salt will precipitate. When a sufficient amount of them appear, grind them with a glass rod. While you are doing this, flashes of light will be visible: this may not occur with the first attempt, but with a correct way of grinding it will happen.
What causes these flashes? After all, there are no chemical processes occurring, and crystalliza-tion is also over.
The reason is completely different: the flashes are due to friction, and this phenomenon is called triboluminescence (friction in Greek is "tribein"). There exist substances that are very sensitive to friction, and they begin to glow in the dark not only when one grinds them, but even when one shakes them up. These substances are not widely
231

Experiments Without Explosions
available, but perhaps you can find them in the chemical laboratory at your school. Two of such substances are zinc sulphide ZnS mixed with 0.02% manganous sulphide MnS, and cad-mium sulphide GdS. But among the substances that glow during friction are some very ordinary ones, for example, saccharose.
Put a little bit of refined granulated sugar in a large porcelain mortar. Take the mortar to a dark room. When your eyes adapt to the dark, start pounding the sugar in the mortar with the porcelain pestel using circular movements: pound slowly at first, then quicker and quicker. Soon blue sparks will appear and form a glowing circle. If you keep up the pace of pounding, the sparks will keep appearing under the pestel.
A simplified version of this experiment is as follows: Hold a lump of refined sugar tightly in your hand, and strike some rough porcelain or ceramic surface with it several times. Do this, as before, in the dark. When your eyes adapt to the dark, you will see glowing stripes, which die out almost as soon as they appear.
The triboluminescence is explained by electric discharges accompanying the destruction of crys-tals, and this also explains why the tribolu-minescence stops when all the crystals have been pounded (for example, castor sugar does not glow during friction).
A Fantastic Bouquet of Flow.ers
Next we will make flowers acquire fantastic colours. It is possible to do this because some
232

5. Sleight of Hand
natural colouring agents change their colour under the influence of certain media: because of this property we were able to make indicators from plants.
Once a poet wrote the poem which is about a young girl who refused a bouquet of red roses, and a young man who went to find blue roses, but didn't succeed.
One will also certainly be unable to find green peonies, yellow lilies of the valley, and raspberry narcissus. But still, you can see them with your own eyes.
In a flask or a glass mix 50.0 ml of medicinal ether with the same amount of a concentrated solution of ammonia (this is the reagent for making fantastic flowers). But please remember that the vapours of ether are highly flammable, therefore, make sure that there is no open fire around. Both liquids also have a very pungent smell, and for this reason experiment should be conducted under an exhaust hood, or at least in the open air.
Place the flower whose colour you wish to change over the vessel with reactants. After some time (the exact interval must be experimentally determined for each type of flower) the colour of the flower will change. Both liquids that you are using are volatile. The ether vapours extract colouring agents from the cells of the flower and the ammonia vapours create a basic medium in the petels. As a result, the colouring agents change their colours, exactly like indicators that are used in laboratories.
Treat several different flowers in this way,
233

Experiments Without Explosions
and you will create a bouquet of fantastic flowers. If you are going to surprise your friends, remember that the treated flowers wilt quickly, and for this reason must be prepared just before showing them.
One might expect the colours of the flowers to change back to normal in an acid medium (in the vapours of some acid). Unfortunately, this is not the case: irreversible processes have taken place in the flowers, and it is rarely possible to restore the natural colour.

6
WITH YOUR OWN EYES
At school you first study chemical theories, and then you prove that these theories are correct in the school laboratory. But you cannot obtain evidence for all the chemical theories during labs, can you? There is simply not enough time, and many theories are too complex to verify. Still, some phenomena, though they are quite complicated by nature, can be studied even in the home laboratory. You can learn about them firsthand, not just from books.
Today, biochemistry is developing very rapid-ly, and you too can observe with your own eyes biochemical transformations. Have you heard about the solar cells which convert the energy of sunlight into electrical energy? You can make such cells yourself, and they will produce elec-tricity. To produce artificial silk, to separate a mixture of different substances in a column for chromatographic analysis, to synthesize semi-conductive material and check its properties—all these things are perfectly within the reach of a young chemist.
Of course, many phenomena and processes will remain outside your sphere of action: no one can embrace the boundless. But let us hope that the information that is contained in this
235

Experiments Without Explosions
chapter, though limited in scope, will give you enough to think about. It is very important to see something with your own eyes, but it is still more important to understand what you have seen.
Experiments with Enzymes: Oxidases and Peroxidases
Complicated chemical processes proceed contin-uously in the cells of plants and animals. These processes are regulated by proteinaceous sub-stances—enzymes—which act like catalysts in promoting chemical reactions in cells. To study such biochemical processes one needs complicated instruments and many reagents. But it is pos-sible to observe some biochemical phenomena with the naked eye.
Let us start with the oxidizing enzymes: oxidases and peroxidases. They are present in many living tissues because oxidation is the basis of breathing. These two classes of enzymes act differently: oxidases oxidize organic substances with the oxygen of the air; peroxidases do the same, but "derive" their oxygen from peroxides. Substances do oxidize slowly without the help of enzymes, but enzymes accelerate this reaction by many thousands of times.
The oxidation of some substances, for example, phenol and hydroquinone, results in the forma-tion of coloured products. The appearance of the colour indicates that the enzyme has done its job, and the intensity of colour gives an idea about the amount of oxidized products. The ab-
236

6. With Your Own Eyes
sence of colour indicates that the enzyme is not active. This can happen if the medium is too acid or too basic, in the absence of oxygen, or in the presence of substances that are harmful to enzymes—the so-called inhibitors of en-zymes.
Now, after this short introduction, let us dis-cuss the experiments themselves. You will need the following: a cabbage-stump, an apple, a sprout-ed tuber of potato, and an onion with roots that have sprouted in the dark. For a reagent you will need cold boiled water, or, better yet, distilled water, hydroquinone from a photographic re-tail shop, and pharmaceutical hydrogen per-oxide. You will also need a grater for vegetables, a water bath, test tubes, or vials from drugs, clean medicine droppers, and cheesecloth, or white cotton cloth.
We will begin our investigations with cabbage juice. Shred a piece of a cabbage-stump that weighs approximately 20.0 g, squeeze the pulp through two layers of cheesecloth or one layer of cotton cloth collecting the juice in a glass, and dilute it 1 : 9 with water. When you will experiment with other vegetables, dilute the juice with no more than two or three parts of water.
Attach labels with numbers on six clean dry test tubes or vials. Put 1.0 ml of dilute cabbage juice in test tubes 1 through 4. Put test tubes 1 and 2 in a boiling water bath for approximately five minutes to destroy (inactivate) the enzymes, then cool them to room temperature. Add 1.0 ml of water to test tubes 5 and 6.
237

Experiments Without Explosions
Add a very small quantity (on the tip of a knife) of hydroquinone to each test tube. Th£n add 5 drops of water to test tubes 1, 3 and 5 and 5 drops of hydrogen peroxide to test tubes 2, 4 and 6. Carefully stir the contents of each test tube.
Within 10-15 min the results of the experi-ment are already visible. We suggest that you record the results of the experiment, arranging them in a table. In the first column record the numbers of the test tubes and their contents, in the next column indicate whether the colour of the mixture changed as a result of the exper-iment, and how it changed. In the last column record your conclusion about whether or not oxidation occurred.
When you have filled in the whole table, try to analyse the results. Answer the following questions:
Can hydrogen peroxide oxidize hydroquinone in the absence of cabbage juice?
Can hydroquinone be oxidized by cabbage juice without hydrogen peroxide?
Are enzymes still active in the juice after boiling?
Which oxidizing enzymes does the cabbage juice contain, oxidases or peroxidases?
It is too early to draw final conclusions on the basis of this experiment with only one type of plant; therefore, conduct the same experiment with a sprouted potato tuber, apple pulp, an onion bulb, the bottom of an onion bulb, and onion leaves. Remember that in these cases the juice should be diluted with water only two or three times.
238

6. With Your Own Eyes
When you have completed all the experi-ments, you can determine in which juice the en-zymes are more active. Also answer the follow-ing question: Can plant cells contain both oxi-dases and peroxidases?
Try to answer the questions yourself, without reading our explanations, and then check whether your conclusions were correct.
The answer to the first question is that hydro-gen peroxide gradually oxidizes hydroquinone even without juice: a pink colour slowly appeared in test tubes 5 and 6. This means that an enzyme is not absolutely required in the reaction. As all catalysts, enzymes only accelerate by many times a reaction that has already started. You probably noticed how quickly the colour appeared in test tube 4. But peroxidases cannot accelerate the reaction of hydroquinone with the oxygen in air: in test tube 3, the colour was either absent or appeared very slowly.
The answer to the second question is that an enzyme can be inactivated even by brief boiling. There is practically no colour in test tube 2. Enzymes are proteins, and they curdle when boiled: protein flakes appeared in test tubes 1 and 2 after heating.
Third, there is no colour in test tube 3. This means that cabbage juice contains only peroxi-dases, which accelerate the oxidation of hydroqui-none only in the presence of hydrogen peroxide. But in the experiments with potato and apple the colour appeared, and it appeared much more quickly when the test tubes were shaken, which enriched the solutions with oxygen of the air.
239

Experiments Without Explosions
This demonstrates that potatoes and apples con-tain oxidases, or, to be more precise, phenoloxi-dases, which promote the oxidation of hydroqui-none with oxygen. This explains why cut pota-toes and apples darken in the air: they contain substances cognate to hydroquinone. Oxidase also loses its activity when heated: do you recall ever seeing boiled potatoes that have darkened?
The fourth answer is that potatoes and apples contain oxidases: the contents of test tube 4 be-came coloured more quickly when hydrogen per-oxide was added. But onions do not contain oxi-dases, they do not darken in the air even after hydroquinone is added.
Did you notice that oxidizing enzymes are par-ticularly active in those parts of plants that are either preparing for growth or growing: in the bottom part of the onion and its roots, in the sprouts of potato tuber? There is more active metabolic activity in these parts.
Thus, we have discovered that not every me-dium is favourable for enzymes. If high heat inac-tivates enzymes, perhaps they are more active at low temperatures? Let us check this. For the experiment you will need some additional things: four glass or metal vessels of approximately one litre in volume each, and one kilogram of ice or snow. We will use a cabbage-stump for the ex-periment.
Grate the stump, and, as you did in the pre-vious experiment, squeeze the juice through a cheesecloth or cotton cloth, and dilute it with water 20 times. Check that the test tubes are still numbered. Pour 1.0 ml of dilute cabbage juice
240

6. With Your Own Eyes
in test tubes 1 through 4 and add hydroquinone (on the tip of a knife) to each test tube. Pour 1.0 ml of water in test tubes 5 and 6, and also add hydroquinone (on the tip of a knife). Then arrange the test tubes in the following way: put test tube 1 in a vessel containing snow or ice; test tube 2, in a vessel containing warm water (40°C); test tube 3, in hot water (60°C); leave test tube 4 on the table at room temperature; put test tube 5 in a vessel with boiling water; and leave test tube 6 on the table at room tem-perature.
Five minutes after the beginning of the exper-iment, add to each test tube, starting with the colder ones, 5 drops of hydrogen peroxide. Care-fully shake each test tube, and mark the time— the beginning of the reaction. Five minutes later (after the beginning of the reaction) remove the test tubes from the vessels and write down the results of the experiment in a table, similar to one you used in the previous experiment. When you complete the whole table, proceed to the analysis of the experiment.
Try to draw the conclusions on your own, using the following questions as guidelines:
Does the oxidation reaction accelerate with an increase in temperature, even if no enzyme is added?
Are enzymes more active at lower temperatures? What temperature is most favourable for the
activity of peroxidases? Why do food products last longer in the ref-
rigerator? What is the reason for boiling milk?
241

Experiments Without Explosions
Why are warm-blooded animals—mammals and birds—the most highly developed and viable organisms on the Earth?
Have you answered, on your own, all these questions? Then now you may read our explana-tions.
You probably noticed that the rate of oxida-tion of hydroquinone with the oxygen in air is different at low and high temperatures. Natu-rally, it is higher at higher temperatures. The peroxidases promote the reaction of hydroqui-none with hydrogen peroxide. The reaction pro-ceeds even at low temperatures in the presence of an enzyme, but the higher the temperature, the easier it is for an enzyme to activate the molecules of the reactants.
But it should be remembered that proteins coagulate at high temperatures, and the rate of reaction decreases. There is an optimal temper-ature for enzymatic activity: this is the temper-ature at which the enzymes are most active. This temperature is different for different en-zymes, but many enzymes, including peroxidases, have optimal temperatures between 40 and 50°C.
Food products spoil because of the action of enzymes, which are either contained in these products or produced by microorganisms. Enzymes become less active at low temperatures, there-fore food products last longer in refrigerators.
Warm-blooded animals reached the highest degree of evolution because they are able to main-tain a body temperature that is optimal for the activity of enzymes.
242

6. With Your Own Eyes
Experiments with Enzymes: Dehydrogenases
So far you have conducted experiments with plant cells. Now let us try to experiment with the enzymes in animal tissues. We will investi-gate dehydrogenases, which participate in tissue respiration in animals. It is clear from the name of these enzymes that they remove hydrogen from substances. You will see later how this happens; now prepare all the necessary things for the ex-periment.
You will need the following substances: 5.0 ml of a 0.5% aqueous solution of formaldehyde (di-lute pharmaceutical Formalin ten times); 5.0 ml of a 0.02% aqueous solution of methylene blue (you can use dilute blue ink); 5.0 ml of an aqueous solution of succinic acid, carefully neutralized with baking soda until the bubbles stop forming; 10.0 ml of Vaseline or vegetable oil. You will also need a thermometer and the substances to be investigated: fresh cow's milk, and chicken or rabbit meat.
First of all, let us study how formaldehyde oxi-dizes the dehydrogenase in fresh milk. To make the process visible we need methylene blue solu-tion: dehydrogenase will remove an atom of hy-drogen from formaldehyde and transfer it to the easily reduced colouring agent, which will be-come decolourized. Concurrently formaldehyde will be oxidized to formic acid. The colouring agent, decolourized as a result of reduction, can easily be oxidized by the oxygen in air and again turn blue; therefore, the reaction mixture must
16* 243

Experiments Without Explosions
be insulated from the air by a layer of oil. Number six test tubes. Pour 5.0 ml of fresh
unboiled milk in test tubes 1 and 2, and 5.0 ml of cold boiled milk in test tube 3.
Heat water in a water bath to 37°C. Add 0.5 ml (approximately 50 drops) of formaldehyde solu-tion and 5 drops of methylene blue solution to each test tube. The mixture will become pale blue. Pour a little oil in each test tube to create a thin insulating layer on the surface, and put test tubes 1 and 3 in the water bath. Leave test tube 2 at room temperature. Note the time of the be-ginning of the reaction, and observe the changes in colour of the solutions. Make sure that you write down all the results.
As before, we will ask questions that will help you to reach conclusions.
At what temperature does the solution de-colourize more quickly?
Does the enzyme remain active in boiled milk? What will happen if air is passed through the
decolourized solution? Before checking your answers, conduct one
more experiment with dehydrogenase, and then we will discuss the results of both experiments.
The muscles of animals contain a special en-zyme: dehydrogenase of succinic acid. It cata-lyzes the transformation of succinic acid into fu-maric acid, transferring the removed hydrogen to an appropriate substance, for example, to methyl-ene blue. This reaction proceeds without oxygen, or, as it is called, under anaerobic conditions.
Cut 10.0 g of chicken or rabbit meat into very small pieces and mash it in a saucer. Put the
244

6. With Your Own Eyes
pulp in a cheesecloth, and rinse the pulp with water to remove soluble substances. Mix the rinsed pulp with a three times larger volume of wa-ter, to which approximately one-third of a tea-spoon of table salt has been added. Transfer 5.0 ml of the dilute pulp into test tubes 4, 5, and 6. Put test tube 4 in a boiling water bath for 5 min-utes, then cool it to room temperature. Add 0.5 ml of succinic acid solution and 10 drops of methylene blue solution to test tubes 4 and 5. Add 0.5 ml of water and 10 drops of methylene blue solution to test tube 6. Add a little oil to each test tube to isolate the mixture from air. Ob-serve the changes in colour and try to answer the following questions:
Was the colouring agent reduced in the presence of boiled meat pulp?
Is succinic acid necessary for this reaction? Do tissue enzymes behave in a similar way at
high temperature? And now we will explain these experiments.
The dehydrogenases in fresh milk accelerate the oxidation of formaldehyde. (You can judge this by the decolourization of methylene blue.) It is possible to return the blue colour to the reduced colouring agent, oxidizing it with oxygen in air. The milk dehydrogenase "works" slowly at low temperatures, and after boiling, loses its activity completely. This means that this enzyme also has an optimal temperature of reaction.
Experiments with meat pulp showed that suc-cinic acid dehydrogenase, similar to other en-zymes, loses its activity after boiling. The reaction does not proceed in the absence of succinic acid
245

Experiments Without Explosions
(to check this, you rinsed the meat pulp with water, thus, removing the succinic acid of meat). The enzyme rather quickly oxidizes succinic acid to fumaric acid, transferring the hydrogen atoms to the colouring agent.
The following is another experiment investi-gating this enzyme, but using microorganisms. So far you have studied animal and plant tissues, but microorganisms are even better armed with enzymes: they have only biochemical weapons to be used in their struggle for survival. We will conduct the following experiment with one of the microorganisms, more specifically, with, a fun-gus, viz., ordinary yeast. Among the many active enzymes that are produced by yeast there is our old acquaintance, dehydrogenase.
Before beginning the experiment, wash two test tubes with soap, using a piece of cotton wool and a rod, rinse them with water and dry. Take a piece of fresh yeast and crush it in a saucer with two teaspoons of boiled water. It is preferable to use a plastic or aluminium spoon for this. When the mixture acquires uniform consistency, trans-fer it to two test tubes with a clean medicine drop-per. Add a little oil to each test tube with another medicine dropper.
Put test tube 1 in boiling water for 5 min-utes, then cool it to room temperature. Add a pinch of granulated sugar to each test tube, and shake the test tube carefully to help the sugar to dissolve. Add 10-15 drops of methylene blue so-lution to each test tube (using a third-medicine dropper). Now observe the colour of the solu-tions.
246

6. With Your Own Eyes
You can make this experiment more interesting, but for this you need more test tubes. You can try to change the temperature of the solutions, or use different proportions of yeast and granu-lated sugar. This time draw the conclusions entirely on your own, without relying on leading questions. You are already experienced enough to manage this perfectly.
Experiments with Enzymes: Amylases
Enzymes accelerate many chemical reactions, but they do this selectively. Each of them has a spe-cific "skill", and sometimes a process is promoted by several enzymes. Let us obtain some practical evidence of this.
We will study enzymes that split starch and add to its "fragments" water molecules; these are the hydrolytic enzymes. Among them are amyl-ases, which we have already discussed in the sec-tion entitled "Experiments with Carbohydrates". Since you already know the mechanism of action of such enzymes, we can proceed directly to com-parative studies and find out how the human and animal amylases act on starch.
As before, the source of human amylase will be saliva. Animal amylases can be found in honey.
Prepare five solutions that are necessary for the experiment. For the first solution, collect 0.5 ml of saliva into a test tube and dilute 20-fold with cold boiled water. The second solution
247

Experiments Without Explosions
is a very thin starch paste. The third solution is a pharmaceutical iodine tincture diluted with wa-ter 20-fold. The fourth solution consists of 2 or 3 drops of honey diluted with water 10-fold; stir this solution thoroughly. The fifth solution is made by mixing half of a teaspoon of baking soda for every ten spoons of water.
This time we will need nine test tubes. Pour approximately 5.0 ml of starch paste into each test tube. Add 5 drops of vinegar to test tubes 1, 4, and 7, and the same amount of soda solution to test tubes 2, 5, and 8. Add 5 drops of clean wa-ter to test tubes 3, 6, and 9. Stir the contents of every test tube well, and add 10 drops of dilute saliva to each one.
After 10 minutes, add 1 or 2 drops of iodine so-lution to test tubes 1, 2, and 3, and mix their contents. Observe the change in colour. Fifteen minutes after this add the same amount of iodine to test tubes 4, 5, and 6 and then, 10 minutes la-ter, add iodine to the remaining test tubes. As you remember, starch and dextrines produce dif-ferent colours when mixed with iodine, and the colour changes gradually along with the destruc-tion of starch by amylase. By the change in col-our we will be able to judge whether the starch has been destroyed, and which medium—acid, neutral, or basic—is more favourable for this process.
The experiment can be conducted with honey in exactly the same way.
The activity of the amylases varies greatly depending on the sample, therefore, it may be necessary to decrease or increase the hydrolysis
248

6. With Your Own Eyes
time. For example, there is very little amylase in the saliva of chain smokers.
For the next experiment you will need barley malt, derived from germinated barley grains. Steep the grains in water for several hours, and allow them to germinate on a saucer over a pe-riod of 4 or 5 days, adding some water every day. Then separate the germs, rinse them with water and thoroughly mash them with a wooden pestel or spoon. Dilute the pulp with two parts of distilled water, and squeeze the juice through a thick cloth into a glass: This extract contains two enzymes: alpha-amylase and beta-amylase. It is possible to destroy one of them with special treat-ment in order to observe the activity of the other. We will destroy alpha-amylase by heating. Add three parts of water to one part of the germinated barley extract, stir the mixture, and heat it in a water bath for 20 minutes at 70°C, stirring thor-oughly and continuously. The cooled solution contains beta-amylase.
To obtain a solution of alpha-amylase it is necessary to destroy beta-amylase with acid. Cool about 5.0 ml of the extract to 2 or 3°C in the refrigerator or on ice, add a not quite full teaspoon of cooled vinegar, and then fill the test tube almost to the brim with cold water. Stir the mixture and let it stay for 15-20 minutes. Then neutralize the solution, adding pulverized chalk until the bubbles stop forming. Again stir the mixture, dilute it 1 : 1 with water, let it settle, and then pour the liquid that is above the precipitate into a clean test tube. Now you
249

Experiments Without Explosions
have completed the preparation for the experi-ment.
Pour 1.0 ml of starch solution and 9.0 ml of water into each of 10 test tubes. Using a medicine dropper, add 10 drops of alpha-amylase solution to test tubes 1 through 5, and the same amount of beta-amylase solution to the remaining test tubes. Thoroughly stir the contents of each test tube. After 3 minutes add 1 drop of iodine solution to test tubes 1 and 6, and stir. After 5 minutes add the solution to test tubes 2 and 7; after 10 min-utes, to test tubes 3 and 8; after 20 minutes, to test tubes 4 and 9; and after 30 minutes, to test tubes 5 and 10.
You will notice that the colour will change very quickly in the presence of alpha-amylase: from blue to violet to pink to yellow. This is accompa-nied by the formation of dextrines, fragments of starch molecules. Beta-amylase acts differently. It, so to say, "bites off" the fragments of starch molecules, therefore, the blue colour, character-istic for the reaction of iodine with starch, re-mains but the intensity of colour fades as the starch is destroyed.
The results of this experiment vividly demon-strate the variety of properties characteristic of enzymes, even similar ones. Enzymes usually act in concert in living organisms. The transforma-tions that take place in living organisms are much more complicated than the relatively sim-ple reactions that you observed in the test tubes. But learning these simple things is the first step to learning about the more complex processes.
250

6. With Your Own Eyes
And Not Only Amylase
You already know that saliva is an excellent sub-stance for biochemical studies; what's more, con-trary to other substances of animal origin, it is always available.
Besides amylase, there are other enzymes in saliva: they help to digest food by splitting com-plex natural substances to more simple ones. But, compared to amylase, they are much more difficult to separate and study. For this reason we will conduct our last biochemical experiments with substances of different nature.
Rinse your mouth with water, collect 1.0 ml of saliva in a test tube or vial, and dilute it with 3 parts of distilled or boiled water. Pour half of the contents of the test tube into another test tube, and add approximately 10 drops of lunar caustic, i.e. silver nitrate AgN03 (you can dis-solve half of a pharmaceutical lunar caustic stick in 1.0 ml of water, the other ingredients will not ruin the experiment). A white precipitate will form. Filter it out and add some vinegar to it: this will partially dissolve it. The salts of hy-drochloric and phosphoric acids (chlorides and phosphates) react in this manner with silver ni-trate.
Acidify a little the saliva in the other test tube with a weak solution of hydrochloric acid, and add several drops of a 3% solution of ferric chlo-ride FeCl3. The brownish-red colouring indicates the presence of thiocyanates, the salts of thiocy-anic acid. The saliva of smokers contains little amylase, but more than a usual amount of thio-
251

Experiments Without Explosions
cyanates. You can check this experimentally, if you have relatives who smoke.
For the next experiment collect approximately 5.0 ml of saliva in a glass. Add to it several drops of acetic acid (note, not dilute vinegar!), stirring the mixture with a glass rod. A white substance, resembling boiled egg white, will stick to the glass rod. This substance is mucin: it increases the viscosity of saliva, thickens it, and pro-motes the formation of foam.
Let us try to analyse the composition of mu-cin. Put some of it in a small test tube, and add a little nitric acid, no more than 2 or 3 drops. When the mucin turns yellow, add the same amount of a concentrated solution of an alkali (for example, ammonia solution), and the mu-cin will turn orange. This reaction, which is called the xanthoprotein reaction, is character-istic of proteins. Instead of it you can conduct a biuret reaction, which is described in the sec-tion entitled "Experiments with Protein". Both of these reactions will demonstrate the protein nature of mucin.
But our experiment with mucin is not yet over. Test the rest of the mucin, which you have sep-arated from the saliva, for carbohydrates. For this you can use the Molisch test, described in the section entitled "Experiments with Carbohy-drates", or, if you happen to have a little L-naph-thol, the simpler version of this test is as fol-lows: Dissolve mucin in a dilute (approximately 1%) hydrochloric acid solution, add 3 or 4 drops of a 0.1% alcoholic solution of naphthol, stir the mixture, and very carefully pour a drop of
252

6. With Your Own Eyes
it on the surface of a concentrated sulphuric acid. A violet ring will appear, which indicates the presence of a carbohydrate.
Then it means that mucin is a protein and a carbohydrate at the same time? This is exactly so. Mucin belongs to the class of glycoproteins, i.e. compounds that have both protein and car-bohydrate parts. Mucin can be decomposed with strong acids to yield amino acids, which are com-ponents of both proteins and carbohydrates.
Chromatography at Home
Chromatography is very often used in laboratories for the separation of various mixtures, for anal-ysis, and for the separation of individual sub-stances from mixtures. It is one of the best methods for the separation and analysis of mix-tures. Chromatography is also used in industry to purify and separate similar substances, organic and inorganic, from lanthanides to amino acids. This method is based on the selective adsorption of the individual components of a liquid or gaseous mixture by a special sorbent.
Modern gas or liquid chromatographic devices are complicated instruments: they are automat-ically controlled, very often by minicomputers, which plan the course of the analysis and print the final results. Of course, this apparatus is inacces-sible for the home or school laboratory. Neverthe-less, even a beginner can learn the simple methods from which modern high technology chromato-graphy developed.
Let us begin with paper chromatography. Ana-
253

Experiments Without Explosions
lytical chemists use special paper for chroma-tography, but common filter paper, or even blot-ting paper, will be fine for our experiments. Take a square sheet of paper, and in the middle put a drop of the solution to be studied containing a mixture of coloured substances. This could be an alcoholic solution of some drug, for example, valerian or calendula tincture, or the chlorophyll extract that you prepared yourself (see "Extrac-tion"), or a mixture of colouring agents, specially prepared for this experiment. The solution will leave a spot on the paper. In the middle of the spot apply several drops of solvent (for the above-mentioned solutions, the solvent is alcohol). Do not use eau-de-cologne instead of alcohol because it contains substances that can lead to faulty analysis. Instead of ethyl alcohol you can use isopropyl alcohol (it is sometimes used for washing windows).
The several drops of solvent you applied have quickly spread the coloured substances in every direction around the spot, driving them between the paper fibres. The rate of this movement de-pends on the nature of the substances and their molecular weight, but sooner or later there will be several rings of different colour on the paper. The number of the rings depends on the number of substances in the mixture being analysed.
If you use an extract of chlorophyll, there will be two rings, a yellow and a green one.
You can think of many variants of this exper-iment with different mixtures and suitable sol-vents. It is possible to get more precise results if instead of paper you use a thin layer of sorbent,
254

6. With Your Own Eyes
applied to, say, a glass plate. This type of chro-matographic analysis is called thin-layer chroma-tography, and for the simplest application of it starch can be used as a sorbent.
Mix starch in a small amount of alcohol (you can again use isopropyl alcohol), pour the mix-ture on a glass plate, and let the solvent evap-orate. When the plate is dry, in the centre ap-ply a drop of the mixture you want to analyse (it goes without saying that the mixture should be coloured, otherwise it will be difficult to ob-serve the separation). Choose yourself the sample you would like to study. In addition to the mix-tures suggested above, you can use coloured juices, ink, gouache pigments, and so on.
Let the spot dry, and apply 1 or 2 drops of sol-vent on top of it. The spreading spot leaves on the sorbent (starch) not one, but two or more coloured rings; this indicates that you analysed a mixture rather than an individual substance.
The following is a variation of the experiment with thin-layer chromatography: Put the plate with the spot of the analysed mixture aslant in a glass that contains a very small amount of sol-vent (just enough to slightly wet the starch). The solvent (alcohol) will rise up along the starch surface, reach the sample spot, and will continue to rise above it. The mixture will become separat-ed into components because the sorbent (starch) adsorbs them with varying degrees of affinity.
You can employ thin-layer chromatography at home using materials at hand, and no special preparation is necessary. It is important that the material be firm enough, but at the same time
255

Experiments Without Explosions
porous, so as to ensure that the solvent can move along its surface. Among the materials suitable for chromatography is ordinary eggshell.
Do not throw away the eggshells when you fry eggs or cook an omelette. Cut an even piece no longer than 2 cm, and thoroughly remove the membrane covering the inside surface. Draw a horizontal line near the end of the piece of the shell with ink or a fibre tip pen, and put the shell in a small glass with water with the marked end down. We hope that you can figure out on your own how to fix the eggshell in the glass without break-ing it. Make sure that the horizontal line that you have drawn is a little above the surface of water, and parallel to it.
Since the surface of the eggshell is porous, the water will slowly rise along it, reach the line and proceed higher. As in the previous experiments, the ink will separate into its components, most likely there will be two of them. The components
256

6. With Your Own Eyes
will rise with different speed, and, in addition, they will have different colours.
When the line on the shell has clearly divided into two lines, remove the shell from the water and allow it to dry in the air. The chromatograph-ic separation is over. In this experiment the adsorbent you used was calcium carbonate CaC03, which is the main component of such substances as chalk, marble, and eggshell; therefore, the same experiment can be performed with a piece of chalk.
Other substances can also be used in this exper-iment. For example, silica gel cartridges which are used as desiecants and smell absorbents, or the already familiar aluminium oxide, which is pulverized to a fine powder and then applied to a plate, can be used. And even a piece of newspaper will work, only you should use the margins where nothing is printed. Paper consists mainly of cellulose, and chromatography experts con-sider cellulose one of the best adsorbents for the separation of substances.
Column chromatography is no less widely used in laboratories. The mixtures are separated in columns filled with the sorbent. This method is, perhaps, more accurate, but it requires pa-tience because the solution moves slowly in the column.
We will make a chromatographic column out of a glass tube that is approximately 20 cm long with a diameter of about 1.0 cm. Plug the bottom end of it with cotton wool, and fill it to slightly more than half with starch or powdered sugar. Pour in the solution you want to analyse, pref-
257

Experiments Without Explosions
erably not a very concentrated one. When the solution soaks through approximately half of the starch or sugar, add 3-4 ml of pure solvent. The mixture will become distributed along the column, and coloured rings will be clearly vis-ible. The number of rings will correspond to the number of components in the mixture. This ex-periment is quite successful using a chlorophyll extract, if benzine is the solvent.
The Ray of Light Fell on the Crystal. . .
Let us make a semiconductor. Actually, you did this once before, when you made a rectifier out of an aluminium spoon. This experiment will be no less interesting, and we will give all the theoretical explanations. It is better to conduct this experiment in the chemical laboratory at school, not because it is dangerous, but because you are unlikely to have the necessary equip-ment and reagents at home.
First let us conduct a preliminary experiment. Prepare a solution of lead acetate or lead nitrate, and pass hydrogen sulphide through it (make sure you do this under the hood!). Dry the lead sulphide PbS precipitate apd test it for its abil-ity to conduct electricity. It will turn out that it is an ordinary insulator. So what does this have to do with semiconductors?
Let us not jump to conclusions; it is better to conduct the following basic experiment. Prepare equal amounts (for example, 15.0 ml) of a 3% solution of thiocarbamide NH2C(S)NH2, and a
258

6. With Your Own Eyes
6% solution of lead acetate. Pour both solutions in a small glass. Immerse a glass plate with tweez-ers vertically into the solution, and hold it or fix it in this position in some way. Wearing rub-ber gloves, fill the glass with a concentrated alkali solution (be very careful!) almost to the brim, and stir the solution very carefully with a glass rod, without touching the glass plate. Heat the solution slightly until it begins to steam, stirring it continuously. After approximately 10 minutes, carefully lift the glass plate from the vessel, rinse it with running water, and let it dry.
Here you have also obtained lead sulphide PbS. So what is the difference?
In the second experiment the reaction proceed-ed slowly, and the precipitate did not appear im-mediately. You remember that at first the solu-tion became cloudy and almost resembled milk; only after this it darkened because the interme-diate compounds decomposed, forming black lead sulphide. Lead sulphide precipitated on the glass plate, forming a black coating. This coating consists of very small crystals visible only through a microscope. For this reason the coating appears very smooth.
Connect two wires of an electric circuit to the coating, and pass an electric current through. In the previous experiment lead oxide behaved as a dielectric, but now it conducts electricity! Connect an ammeter to the circuit, measure the current and calculate the resistance: it will be higher than the resistance of metals, but not so high as to prevent the electric current from being conducted.
17 259

Experiments Without Explosions
Bring an illuminated electric bulb very close to the glass plate, and close the circuit again. You will immediately see that the resistance of lead oxide has dropped dramatically. If you sim-ply heat the glass plate, the result will be almost the same. But if illumination and heating increase the conductivity, we are dealing with a semi-conductor!
Why does lead sulphide exhibit this property? As was mentioned, its formula is PbS, but the actual composition of the crystals of lead sulphide does not correspond fully to this formula. Some compounds, and lead sulphide is among them, do not obey the law of constant proportions. All such compounds are semiconductors. (By the way, the same goes for aluminium oxide, which rectifies an alternating current.)
One would expect the arrangement of atoms in a PbS crystal to be repeated regularly. But often this is not the case because the concentration of the solutions where the crystals form vary be-cause of variations in temperature and other ex-ternal causes. Thus, in a real (imperfect) crystal the ratio of lead and sulphur atoms is not strictly 1 :1 , although the deviations from this ratio are very small, only about ±0.0005. Even this, however, is enough to change the properties of the substance considerably.
Atoms of lead and sulphur are bound in the crystal by two electrons that lead donates to sulphur. What happens when the 1 : 1 equilib-rium is upset? If there is no atom of sulphur near the lead atom, the electrons will become free, and it is these electrons that carry the current.
260
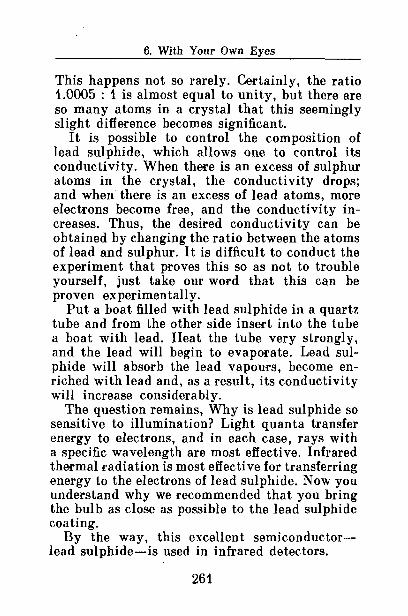
6. With Your Own Eyes
This happens not so rarely. Certainly, the ratio 1.0005 : 1 is almost equal to unity, but there are so many atoms in a crystal that this seemingly slight difference becomes significant.
It is possible to control the composition of lead sulphide, which allows one to control its conductivity. When there is an excess of sulphur atoms in the crystal, the conductivity drops; and when there is an excess of lead atoms, more electrons become free, and the conductivity in-creases. Thus, the desired conductivity can be obtained by changing the ratio between the atoms of lead and sulphur. It is difficult to conduct the experiment that proves this so as not to trouble yourself, just take our word that this can be proven experimentally.
Put a boat filled with lead sulphide in a quartz tube and from the other side insert into the tube a boat with lead. Heat the tube very strongly, and the lead will begin to evaporate. Lead sul-phide will absorb the lead vapours, become en-riched with lead and, as a result, its conductivity will increase considerably.
The question remains, Why is lead sulphide so sensitive to illumination? Light quanta transfer energy to electrons, and in each case, rays with a specific wavelength are most effective. Infrared thermal radiation is most effective for transferring energy to the electrons of lead sulphide. Now you understand why we recommended that you bring the bulb as close as possible to the lead sulphide coating.
By the way, this excellent semiconductor— lead sulphide—is used in infrared detectors.
261

Experiments Without Explosions
An Unusual Photograph
Photography is based on the transformations of photosensitive substances, i.e. silver halides. One of the most widely used silver halides is silver bromide. They are part of the composition of pho-tosensitive emulsions. Light causes the silver halides to decompose, and they form tiny crystal-line nuclei of silver on the exposed sections.
Silver is a precious metal that is required not only for photography; therefore, researches are looking for the photosensitive substances and systems that do not contain silver. There some interesting findings have been made, but so far there is no full-value substitute for silver-con-taining materials. Still, photography without, or almost without, silver can be successfully used for some purposes. You can recreate on your own some of these unusual processes. The fol-lowing are some examples.
Dissolve 15.0 g of glucose and 2.0 g of ammo-nium dichromate in 100.0 ml of distilled water. Soak a clean fine white cloth in this solution, dry it in the dark, because it has become photosen-sitive, and then iron it, also in the dark. Prepare, in advance, a developer: 1.0 g of silver nitrate (it is not possible to manage entirely without sil-ver salts) is mixed with 10.0 ml of acetic acid per 100.0 ml of water.
Take a piece of tracing paper and draw what you wish to depict on the cloth. Put the tracing paper with the drawing on the cloth, and expose it to daylight. Be patient. No less than five min-utes are necessary for a photochemical process,
262
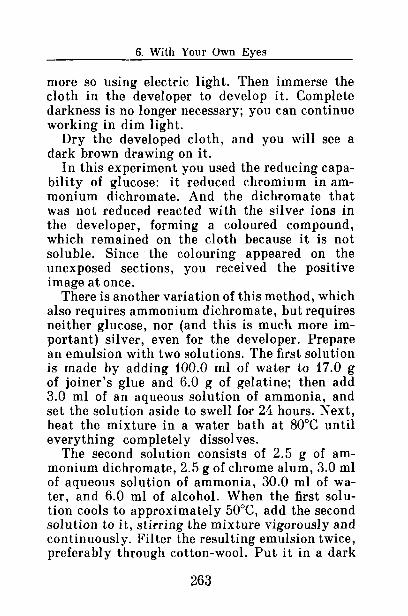
6. With Your Own Eyes
more so using electric light. Then immerse the cloth in the developer to develop it. Complete darkness is no longer necessary; you can continue working in dim light.
Dry the developed cloth, and you will see a dark brown drawing on it.
In this experiment you used the reducing capa-bility of glucose: it reduced chromium in am-monium dichromate. And the dichromate that was not reduced reacted with the silver ions in the developer, forming a coloured compound, which remained on the cloth because it is not soluble. Since the colouring appeared on the unexposed sections, you received the positive image at once.
There is another variation of this method, which also requires ammonium dichromate, but requires neither glucose, nor (and this is much more im-portant) silver, even for the developer. Prepare an emulsion with two solutions. The first solution is made by adding 100.0 ml of water to 17.0 g of joiner's glue and 6.0 g of gelatine; then add 3.0 ml of an aqueous solution of ammonia, and set the solution aside to swell for 24 hours. Next, heat the mixture in a water bath at 80°C until everything completely dissolves.
The second solution consists of 2.5 g of am-monium dichromate, 2.5 g of chrome alum, 3.0 ml of aqueous solution of ammonia, 30.0 ml of wa-ter, and 6.0 ml of alcohol. When the first solu-tion cools to approximately 50°C, add the second solution to it, stirring the mixture vigorously and continuously. Filter the resulting emulsion twice, preferably through cotton-wool. Put it in a dark
263

Experiments Without Explosions
place, and carry out the next operation: the ap-plication of emulsion to a metal, glass or ceramic plate. This must also be done in the dark.
Heat the emulsion to 30-40°C and pour it in a thin stream on the clean plate, rocking it slightly to smooth out the layer of emulsion. Dry the plate for 10-15 minutes, preferably by heating it slightly and, as in the previous experiment, put a piece of tracing paper with a drawing in the photosensitive layer. Press it down with a glass plate to smooth it, and expose it to light. Ex-posure to bright sunlight for several minutes, or to artificial light, for 10 minutes (using several lamps with a total power of 2000 W, preferably with reflectors), is sufficient.
The plate must be developed immediately, other-wise chromium salts will harden the gelatine in the places where it is not supposed to be hardened. We will use a lukewarm water (not above 30°C) as a developer. Unhardened gelatine will dissolve in this water, and the parts where the proteins of gelatine hardened under the influence of light will remain on the surface.
The image will not be very clear. To improve the quality of the image, immerse the plate in a 1% solution of methyl violet indicator (dilute violet ink can be used). Rinse the plate in water, and fix it for 3-4 minutes in a solution consisting of 5.0 g of ammonium bichromate, 2.0 g of chrome alum, and 4.0 ml of alcohol per 100.0 ml of wa-ter. Dry the photograph in the air. To fix the pho-tograph further, you can heat it for several minutes in a desiccator or oven.
We will produce the next photograph without
264

6. With Your Own Eyes
silver 011 a more traditional material, i.e. paper. Filter paper, rather than ordinary paper, will be used but still, the experiment is quite in-teresting.
Immerse a paper circle in a solution containing an equal amount (20.0 ml) of 5% solutions of the following substances: potassium ferricyanide K3[Fe(GN)6], ferric chloride FeCl3, and oxalic acid H2C04 (be careful!). Remove the soaked pa-per from the solution and dry it in the dark. Put on it a piece of tracing paper with a drawing and expose it to sunlight. Ordinary incandescent lamps do not work in this case, but, instead of sunlight, an ultraviolet (quartz) lamp can be used. The illuminated places will become dark blue because of the formation of Turnbull's blue, which you are already familiar with. There is no need to develop this photograph, and to fix it just rinse it with water to wash away the substances that did not participate in the reaction.
And the last photography experiment that does not use silver is conducted as follows: in a glass dissolve 0.4 g of ferric chloride FeCl3 and 0.4 g of oxalic acid in 100.0 ml of water. In another glass dissolve 1.4 g of copper chloride in the same amount of water. Mix 10.0 ml of the first solution with 0.6 ml of the second solution, soak a piece of filter paper in the mixture, and dry it in the dark. Prepare the developer as follows: dissolve 3.5 g of blue vitriol, 17.0 g of Seignette salt (potas-sium sodium tartrate), and 5.0 g of caustic soda (be careful!) in 100.0 ml of water; then add 25.0 ml of a 40% solution of formaldehyde. Put a piece of tracing paper with a drawing on the filter paper
265

Experiments Without Explosions
and expose it to sunlight, or to an ultraviolet lamp, as in the previous experiment. But this time, in contrast to the previous experiment, the image will not appear at once; it will appear only after the paper is developed for 15 minutes, and then rinsed with a large amount of water.
This process somewhat resembles photography based on silver-containing reagents, because again crystalline nuclei form in the photosensitive layer. The difference is that, in this experiment, the crystalline nuclei are copper rather than silver, and the copper precipitated from the developer, rather than from the emulsion as in ordinary pho-tography.
Caution! High Speed!
There is a branch of chemistry called chemical kinetics that is concerned with the mechanisms and rates of chemical reactions.
Although chemical theory can explain a lot, it is not yet possible to theoretically predict the rate of every chemical reaction. The rate of reac-tions is determined experimentally, in the labo-ratory, and scientists also develop methods to change the rate as required. There are many reac-tions that are important for industrial processes, but which proceed too slbwly; it is necessary to accelerate them. Other reactions, which, on the contrary, are harmful, must be inhibited.
In short, chemical kinetics is an experimental science. Its laws can be verified by some simple experiments.
Let us start by checking that the rate of a reac-
266

6. With Your Own Eyes
tion can change rather considerably. In fact, it is not really necessary to conduct experiments to prove this. One knows from experience that food products keep longer in the cold than in a warm place, because the rates of the same biochemical reactions change at different temperatures.
To check this experimentally, again conduct the experiment from the section entitled "Chemical Clock", but this time change the tem-perature of the reaction rather than the concen-tration of the reactants (as you did before). If you pour both of the initial solutions, sodium sul-phite and potassium iodate with sulphuric acid, in ice water rather than warm water, considerably more time will pass before the blue colour ap-pears. But note that in very hot water the blue colour will not appear at all, because the coloured compound, consisting of starch and iodine, is unstable.
Thus, you have found out experimentally that the higher the concentration of the reactants and the temperature of the reaction, the higher is the reaction rate. But some reactions at first appear to be exceptions to this rule. Let us consider one example.
Fill a test tube with acetic acid to a level 1-2 cm from the bottom, and add several pieces of zinc. Clean the surface of the zinc beforehand by im-mersing it in a solution of hydrochloric acid for about 20 seconds and then rinsing it with water.
Acetic acid is a weak acid, and the zinc dis-solves in it very slowly: hydrogen bubbles are hardly formed. How can one to accelerate this reaction? You might guess that the solution should
267

Experiments Without Explosions
be heated, and you are right. But, is there any other way? Let us do the following: Add pure water in small portions to the test tube, stirring the contents well after each addition. Watch the bubbles, a very surprising thing happens. The acid is diluted two-fold, then three-fold, and the reaction proceeds more and more vigorously, rather than slowing down as one would expect!
If you conduct this experiment at school, use a small piece of untreated magnesium ribbon in-stead of zinc. Magnesium reacts with dilute ace-tic acid even more vigorously than zinc.
This "exception" to the rule is perfectly rea-sonable, if you think about it. The experiment with acetic acid can be explained as follows: The rate of the reaction of zinc or magnesium with acid depends on the concentration of hydrogen ions in the solution. These ions are formed by the dilution of any acid with water. If there is little water, weak acetic acid is present in the solution almost exclusively in the form of undis-sociated molecules. As the acid is more and more diluted with water, more molecules of acetic acid dissociate into ions, and the reaction proceeds more quickly. If too much water is added, the reaction will slow down again, and for a differ-ent reason: the concentration of the ions will again decrease because the' acid has been diluted too much. Fifteen percent acetic acid reacts most quickly with zinc.
We suggested that you perform this experi-ment not only because we wanted to show you how unexpected chemical transformations can be, but also to illustrate the following rule: to control
268

6. With Your Own Eyes
HCi «- NHa
the rate of a chemical reaction it is necessary to know its mechanism.
Each reaction starts with the collision of mole-cules. Let us study the very beginning of a reaction.
Take a glass tube that is not very wide and several centimetres long, and find two corks for it. In the bottoms of both corks insert small glass sticks, directed inside the tube, and wrap the ends of the sticks with small pieces of cotton-wool. Wet one piece of cotton-wool with several drops of concentrated hydrochloric acid; wet the other with a concentrated ammonia solution. Simultaneously insert both corks in the tube from both ends. In several minutes (the exact time depends on the length of the tube) a white circle of ammonium chloride NH4C1 will appear close to the cotton-wool that is wetted with hydro-chloric acid.
Usually, if it is necessary to accelerate a chem-ical reaction, the mixture is stirred. We inten-tionally did not do this, and did not even try to
269

Experiments Without Explosions
help the molecules to meet: they moved by them-selves. Such spontaneous movement of molecules in a medium is called diffusion. After evapo-ration from the cotton-wool the molecules of both substances underwent billions of collisions each second with the molecules of air and among themselves. And although the speed of the mol-ecules is very high (hundreds of metres per sec-ond), at zero temperature and normal pressure, the mean free path, that is, the average distance traversed between collisions for these substances, is only about 0.0001 mm. This is why ammonia and hydrogen chloride (from hydrochloric acid) moved so slowly in the tube. An aromatic sub-stance spreads equally slowly in a room with stagnant air.
But why didn't the white circle appear in the middle of the tube? The answer is, ammonia mol-ecules are smaller than hydrogen chloride mole-cules, and they move through the air more quickly. If the air is evacuated from the tube, the molecules of ammonia and hydrogen chloride will meet within fractions of a second and the free path of molecules will increase considerably.
We recommend that you conduct on your own an investigation on the effect of gravity and tem-perature on diffusion. You can do this by posi-tioning the tube vertically and aslant, and heat-ing only certain parts of it (including the part where ammonium chloride precipitates). Try to draw the conclusions yourself.
After studying gases let us examine liquids. In liquids, diffusion occurs even more slowly than in gases. Let us prove this experimentally.
270

6. With Your Own Eyes
On a smooth and clean glass plate pour several drops of three liquids, arranging them in the following way: in the middle, water; and on the sides, soda and hydrochloric acid solutions. Be-fore the beginning of the experiment the liquids should not contact each other. To start the exper-iment connect the liquids very carefully with a glass rod, avoiding, as much as possible, mix-ing them. Carbon dioxide will form, but this will not happen immediately, and when the gas starts evolving, the bubbles will appear along the border between the zones of diffusion of the acid and soda.
Instead of soda and acid you can use any two water-soluble substances, which, when mixed, become coloured or precipitate. In such experi-ments, however, it is difficult to avoid a flood of fluid, which distorts the picture; therefore, it is better to conduct the experiment with thickened solutions. One of the ways to thicken a solution is to use gelatine.
Make a 4% solution of gelatine in hot water (do not boil it!). Pour the hot solution in a test tube and, when it cools, quickly, with a single movement, introduce with tweezers a small crys-tal of potassium permanganate, blue vitriol, or any other brightly coloured, water-soluble sub-stance into the middle of the test tube. Imme-diately remove the tweezers with a careful, but swift movement. Over the next several hours you will be able to observe a very beautiful pic-ture of diffusion. The coloured substance will diffuse in all directions with equal speed, forming a coloured sphere.
271
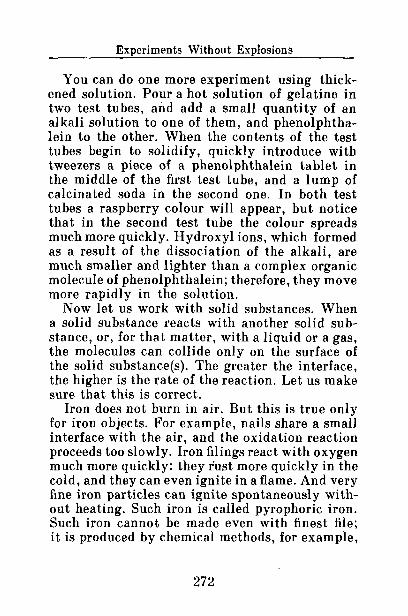
Experiments Without Explosions
You can do one more experiment using thick-ened solution. Pour a hot solution of gelatine in two test tubes, and add a small quantity of an alkali solution to one of them, and phenolphtha-lein to the other. When the contents of the test tubes begin to solidify, quickly introduce with tweezers a piece of a phenolphthalein tablet in the middle of the first test tube, and a lump of calcinated soda in the second one. In both test tubes a raspberry colour will appear, but notice that in the second test tube the colour spreads much more quickly. Hydroxyl ions, which formed as a result of the dissociation of the alkali, are much smaller and lighter than a complex organic molecule of phenolphthalein; therefore, they move more rapidly in the solution.
Now let us work with solid substances. When a solid substance reacts with another solid sub-stance, or, for that matter, with a liquid or a gas, the molecules can collide only on the surface of the solid substance(s). The greater the interface, the higher is the rate of the reaction. Let us make sure that this is correct.
Iron does not burn in air. But this is true only for iron objects. For example, nails share a small interface with the air, and the oxidation reaction proceeds too slowly. Iron filings react with oxygen much more quickly: they rust more quickly in the cold, and they can even ignite in a flame. And very fine iron particles can ignite spontaneously with-out heating. Such iron is called pyrophoric iron. Such iron cannot be made even with finest file; it is produced by chemical methods, for example,
272

6. With Your Own Eyes
by decomposition of ferrous oxalate (a salt of oxalic acid).
Mix aqueous solutions of some salt of iron(II) (for example, green vitriol) and. oxalic acid, or its water-soluble salt. Filter out the yellow fer-rous oxalate precipitate, and transfer it to a test tube, filling no more than one-fifth of the test tube volume. Heat it in the flame of a burner, holding the test tube horizontally or even slightly aslant, with the opening of the test tube facing down and away from you. Remove the drops of water, formed during heating, with twisted filter paper or cotton-wool. When the oxalate decomposes, form-ing a black powder, plug the test tube and let it cool.
Very carefully, in small portions, pour the contents of the test tube onto a metal plate or tile: the powder will emit bright sparks. This experiment looks particularly dramatic in a darkened room.
Heed this important warning: Pyrophoric iron cannot be stored; it may cause fire! When the experiment is finished, calcinate the powder in the air, or treat it with an acid to dispose of the unburned particles (they can ignite spontane-ously).
Now let us examine how the size of the surface of a solid substance influences the rate of its reac-tion with a liquid. Take two identical pieces of chalk, and pulverize one of them to a powder. Put the piece of chalk and the powder in test tubes, and add an equal amount of hydrochloric acid to both. As one would expect, the1 pulve-rized chalk dissolves more quickly. Put a third
273

Experiments Without Explosions
piece of chalk in a test tube with sulphuric acid. The reaction will begin vigorously, then slow down and stop completely. Why is this? Surely sulphuric acid is not weaker than hydrochloric acid?
The reaction of chalk with hydrochloric acid yields calcium chloride CaCl2, which easily dis-solves in water, and does not prevent access of the new portions of acid to chalk. The reaction with sulphuric acid gives calcium sulphate CaS04, which poorly dissolves in water; therefore, it covers the surface of the chalk. To sustain the reaction it is necessary to clean the chalk surface from time to time, or to pulverize the chalk be-forehand. It is of utmost importance in chemical technology to know such details of processes.
Another experiment is as follows: In a mortar mix two solid substances that yield coloured prod-ucts when they react with each other, for exam-ple, lead nitrate and potassium iodide, or blue vitriol and potassium ferricyanide, and pound the mixture with the pestel. In the process of pounding, the mixture will gradually become more and more coloured, because the interface increases. If you pour a little water over the mixture, the colour will immediately become more intense, because the molecules move more quickly in a solution.
To complete the experiments on kinetics, we will conduct a quantitative experiment. The only device you will need is a stop-watch, or a watch with a second hand.
Prepare 0.5 litre of a 3% sulphuric acid solu-tion (add the acid to water and not vice versa!), and the same amount of a 12% solution of so-
274

6. With Your Own Eyes
dium thiosulphate. Add several drops of ammoni-um hydroxide to the water before dissolving the thiosulphate.
Take two 100.0 ml glass cylinders and on the walls mark 08 50.0,25.0,12.5, and 37.5 ml vol-umes, dividing the distances in succession by half. Fill the vessels with the prepared solutions to the 50.0 ml mark.
Put an ordinary thin glass (200 or 250 ml) on a sheet of dark paper, and first pour in the thiosul-phate solution, and then the acid solution. Im-mediately register the time, and stir the mixture for 1 or 2 seconds. Do this with a wooden stick so as not to break the glass. Once the solution begins getting cloudy, write down the time that has passed since the reaction began. It is better to conduct this experiment in pairs: one person can watch the time, and the other can mix the solutions and signal when they turn cloudy.
Wash the glass and conduct this experiment three more times, each time diluting the solution of thiosulphate: take, in sequence, 37.5, 25.0, and 12.5 ml volumes, but each time add water up to the 50.0 ml mark. The amount of acid is the same in all experiments, and the total volume of the reacting mixture is always 100.0 ml.
Now make a graph, plotting the reaction rate versus the thiosulphate concentration. It is con-venient to express the concentration in simple units of 1, 2, 3, and 4 along the abscissa. But-, how do you calculate the reaction rate?
It is not possible to calculate this precisely because we can only estimate the moment when the liquid gets cloudy, giving a subjective result.
18 275

Experiments Without Explosions
What's more, the cloudiness indicates only that the tiny particles of sulphur, which are formed in the reaction, have reached a size that is vis-ible to the eye. But, for want of anything better, we will consider the beginning of cloudiness as the end of the reaction, which is, incidentally, not all that far from the truth. Let us make one more assumption, namely, that the rate of the[reac-tion is inversely proportional to its duration. If the reaction proceeded for 10 seconds, let us con-sider the rate equal to 0.1. Layoff the rate, corre-sponding to each concentration, on the y axis.
From the four experiments we have four points, and the fifth point is the origin. All five points will fall approximately on one straight line. The equa-tion of this line is as follows:
v = k [Na2S203]
where v is the reaction rate, the brackets denote the concentration (as is customary in kinetics), and k is the rate constant, which can easily be determined from the plot.
One would expect that the rate of the reaction also depends on the concentration of sulphuric acid. Investigate exactly how the rate of the reaction changes if you dilute the sulphuric acid, using the same amount of thiosulphate. Strange as it is, the rate stays exactly the same!
Actually, this is not at all unusual. A complex reaction takes place in this experiment, and sul-phur, its product, does not form immediately after the initial collision of thiosulphate and acid molecules. In general, only in relatively few reactions are the final products formed at once.
276

6. With Your Own Eyes
In complex sequential reactions individual steps last different periods of time: a specific reaction can proceed more slowly than the others. In our case the slowest was the final step where sulphur was formed. And actually it was the rate of this step that we determined in this experiment.
Artificial Fibres
In the last few decades artificial fibres have taken the world by storm. And though people still cultivate cotton and flax, and breed sheep and goats, artificial synthetic fibres are added to the traditional natural ones so that the fabrics look good, and are durable, crease resistant, or have other desired qualities. Finally, they make natu-ral fibres more economical.
It will be difficult for you to make, on your own, the most widespread artificial fibres of today, viz., polyamid and polyester; therefore, let us settle for cuprammonium, which was one of the first of the artificial fibres to appear. It is made of cellulose obtained from sawdust and other waste materials of the wood industry. Cuprammonium is still used in carpet weaving and at knitting mills, but it is much less widespread now than it used to be, because more durable and cheap fibres have appeared. But it is perhaps the easiest fibre for you to make experimentally.
Artificial fibres are formed from viscous solu-tions of modified cellulose by extrusion through spinnerets, i.e. metal plates or caps with fine holes. In our case a solution of a cuprammonium compound, which has the general formula
277

Experiments Without Explosions
[Cu(NH 3)„](OH)2, will be used. To prepare this solution you will need first of all basic cupric carbonate Cu(0H)2C03. If you do not have this salt, obtain it by the easiest method: mix aqueous solutions of blue vitriol and calcinated (washing) soda, filter out the precipitate, and dry it.
Pour 20.0 ml of a 25% ammonia solution into a glass vessel that has a rubber cork (it is better to prepare this solution under an exhaust hood or in the open air). Then add 25.0 g of basic cu-pric carbonate. Plug the vessel with the rubber cork, and shake the mixture until uniform dark blue liquid is obtained. This is a cuprammonium solution, which has one very important quality, namely, it can dissolve cellulose.
Fill two small glass vessels (with rubber corks) with the dark blue cuprammonic solution. Add small pieces of pharmaceutical cotton-wool to one of the vessels, plugging it with the cork and shaking it after each addition. In the same way dissolve small pieces of white filter or blotting paper in the other vessel. In both you should obtain viscous solutions as thick as syrup. Cel-lulose, which is the base of our fibre, can be sepa-rated from these solutions. To verify this, fill a glass with dilute vinegar and add, drop by drop, either of the cellulose solutions: flakes of cellulose will precipitate.
But one cannot possibly make fibres from flakes. So how can fibres be made from the solution? In the same way as it is done in factories: by extruding the solution through a fine hole into a solution of sulphuric acid, where the shape of the fibres is fixed.
278

6. With Your Own Eyes
To observe this process, conduct the following experiment. Fill a glass with a 10% sulphuric acid, and add dropwise, using a medicine dropper, a cuprammonium solution of cotton-wool or blot-ting paper. Part of the solution will sink to the bottom, leaving behind a lustrous filament. Try to remove it carefully with tweezers from the glass. This is a real cuprammonic fibre. True, it is not very even, but this can be corrected if you ask a friend to help you with the experiment: one of you will form the filament, and the other will remove it from the solution.
Insert, as tightly as possible, a needle from a medical syringe in a rubber tube with thick walls. Fill the tube with the cellulose solution, plug it with a cork, and immerse the needle in a cuvette containing a solution of sulphuric acid. Your friend should be ready with the tweezers: you will squeeze the tube gradually, and he will pick up the filament and pass it through the solution in the cuvette.
279

Experiments Without Explosions
After a little practice this experiment usually proceeds quite smoothly. It is convenient to wind the filament on a reel. You can also replace the rubber tube with a large syringe or an old bicycle pump.
Viscose and acetate fibres are made more or less the same way, only the solvents for cellulose will be different. In all cases, the cellulose mole-cules form a thread.
Certainly, even a handkerchief cannot be wo-ven from the yarn you have made. But this was not our goal. This part of the book, as you re-member, is entitled "With Your Own Eyes", and indeed you have seen how a beautiful silky thread was obtained by dissolving plain-looking paper in a dark blue liquid.
A Chemical Watchman
Now we have come to the last experiment in this book. It is perhaps more complicated than all the others, because a special device must be made for it. We have given it the title, "Chemical Watch-man", although, strictly speaking, it is a so-lion—an electronic detecting device whose oper-ation depends on the movement of ions in a so-lution. Today a new branch of applied science called chemotronics has appeared. In contrast to electronics, it studies the practical applica-tion in different devices of electrochemical pro-cesses occurring at the boundary between the electrode and electrolyte, under the influence of an electric current, when the ions are moving in the electrolyte. Since the ions are much heavier
280

6. With Your Own Eyes
than electrons, chemotronic processes occur relatively slowly, but, for a detecting device, the speed of response is not necessarily the most im-portant characteristic. Chemotronic devices are very reliable, and they are currently widely ap-plied.
Certainly, chemotronic devices are rather com-plicated. But still, you can make a model of a solion. First of all, it is interesting to see how the chemotronic devices work, and, in addition, the solion will certainly stand you in good stead.
First, make a cylinder case. The best way is to turn it from acrylic plastic on a lathe. But this is not the only way to do it: you can glue plates of acrylic plastic, together, giving the case a rec-tangular form. The diameter of the cylinder case should be about 40 mm; the height, 20 mm. Turn cavities approximately 5 mm deep and with a diameter of 30 mm, on both ends of the cylin-der, and make sure that a thick wall of solid plastic remains between the cavities. Then drill a hole (2-3 mm) between the wall of the cylinder and the lower cavity (closer to the wall separating the cavities) for filling the device with electro-ly te, and find a cork that fits the hole tightly. From the opposite side of the case drill three holes for electrodes, with a diameter slightly more than 1 mm: the upper hole should enter the upper cavity; the middle hole should be in the wall be-tween the cavities; and the lower hole enters the lower cavity.
For electrodes use thick leads from drawing pencils. Seal the places where the leads exit from the case with some glue. When the glue dries,
281

Experiments Without Explosions
0 5 " 0 . 5 m m Upper memBrflne
T
Electrolyte .
^ssss^sssss ^^sS^Sjf Gfaf»K""+e
Lower mewitNine 2-3 mm dia
tends
vertically drill in the wall between the cavities a very thin through hole, no more than 0.5 mm in diameter. Make sure that this hole goes through the middle electrode as well!
The device is almost ready. All that remains is to glue thin membranes (0.3-0.5 mm) made from the same acrylic plastic on the top and bottom. For the time being, glue only the lower mem-brane.
Now it is time to prepare the electrolyte. Dis-solve 20-30 g of potassium iodide in half a glass of water, heat the solution slightly, and add ap-proximately 1 g of iodine. Fill the device with this electrolyte through the hole that you made for this purpose, ensuring that no bubbles of air remain in the lower cavity. The easiest way to do this is to use a medical syringe. When the electrolyte fills the upper cavity as well, glue the upper membrane and seal the case hermeti-cally, insert the cork in the hole through which
282

6. With Your Own Eyes
you poured the electrolyte, and carefully seal the cork with glue.
Our solion will be battery-powered. Connect the upper and the lower electrodes entering the cavities to the positive pole of a pocket flashlight battery. Attach the middle electrode to the nega-tive pole. Connect a rheostat, a voltmeter, and a microammeter (as you already know, both of the latter can be replaced by a tester) to the elec-tric circuit.
Using the rheostat (or the resistors), adjust the voltage to approximately 0.8-0.9 V. The microam-meter, which is connected to the circuit of the middle electrode, will read a current of 200-300 jiA. Let the current run for 10-15 hours. The current will gradually decrease to 10-20 fiA, which is exactly what we need. Now the solion is ready to be used.
The easiest way to test it is to blow on one of the membranes, or to touch it with a needle. Immediately the needle of the ammeter will sharply deflect to the right. The movement of the membrane is not visible, but the solion reacted at once.
We would like to explain why this happened. The magnitude of current depends on the amount of iodine near the negative electrode, i.e. the cathode. At the cathode, iodine becomes reduced, taking up electrons, and at the anode it is formed anew from the ions. In this way, iodine is gradu-ally pumped from the cathode to the anode. When the device is energized, the magnitude of the current drops, because less and less iodine re-mains at the negative electrode. But once the
283

Experiments Without Explosions
membrane has been moved, even very slightly, an additional portion of the molecules of iodine, no matter how small, reach the cathode, and the solion responds to this immediately: the current increases.
Such chemotronic devices are extremely sen-sitive. If they are well made, they sometimes detect only a few molecules. Such sensitivity is of great value when the signal is so small that it is difficult to register it by other means. Such de-vices are used, for example, in medical research, or in industry for monitoring small details, moving on the conveyer belt.
Is it possible to use this solion at home or at school? It certainly is. You can, for example, use it to announce the arrival of a guest. Fix it to the door of your flat, and it will respond imme-diately when your guest touches the door.
Obviously, this solion, in its present state, is not very convenient for this: you have to watch it continually, waiting for the hand of the amme-ter to deflect. But you can connect it to a signal-ling system, i.e. a bell or an electric bulb. Work out how to do this by yourself, or consult your physics teacher.
By the way, such solions are used in the alarm systems of important establishments such as banks. Here, these devices are not "hospitable" at all, on the contrary, they warn about dangerous intruders.
This is it. The last page is finished, the last experiment has been performed.
But does this have to be the last experiment?
284

6. With Your Own Eyes
We did not plan to present an exhaustive guide to chemical experiments for students, and a lot has not been included here. There are so many different chemical experiments that it is hardly possible to include them all in one book, even a much bigger one. And you certainly will be able to find descriptions of experiments in journals, in popular science books, in theoretical and prac-tical chemistry manuals, if you have acquired a taste for chemical experiments; and we do hope that you have.
You can also devise the experiments yourself. In the beginning of the book we discouraged you to do so, but then you had no practical experience and no skills. Now you have mastered many tech-niques, and acquired safety skills. All our warn-ings, though, are still valid: do not aimlessly mix reagents, or use excessive quantities of them, or commit other mistakes of beginners. And the most important thing is to clearly understand how the reaction proceeds, what the result is supposed to be, and what conditions are necessary for this. Theoretical preparation is of utmost im-portance for this. You can learn about the theo-ries in school textbooks, in more serious chem-istry texts, or in journal articles. The best way is to consult an expert, and only then perform the experiment, accurately and without haste.
Let us consider this book the first step to inde-pendent research rather than just a manual for beginners. And if all these experiments convince you, even a little, to make chemistry your pro-fession, then the efforts of the team that prepared this book have not been wasted.
285

MIR PUBLISHERS
MOSCOW
I S B N 5 -03 -000561 -7