express engage evaluate exhibit - boys & girls clubs … · wheeled balloon car, puff mobile,...
TRANSCRIPT
Table of Contents
express
exhibit
engage
evaluate
High School STEM! Modules
MODULE 1: Engineering Ingenuity

Module 1: Engineering Ingenuity
2
2 of 43
engage express evaluate exhibit
ABOUT THIS MODULE 3
ACADEMIC VOCABULARY 4
REQUIRED MATERIALS 5
EVENT PLANNER 8
MONDAY: THE DESIGN PROCESS 9
TUESDAY: COLLABORATION IS KEY 17
WEDNESDAY: BUILT TO SOAR 24
THURSDAY: DESIGNING WITH A PURPOSE 31
FRIDAY: ENGINEERING GALLERY 38

Module 1: Engineering Ingenuity
3
3 of 43
engage express evaluate exhibit
Objective
What is STEM?
Science: The study of the natural world.
Technology: The STEM definition for technology includes any product
made by humans to meet a want or need. Any product created to solve
a problem can be regarded as technology.
Engineering: The design process used to solve problems.
Math: The language of numbers, shapes and quantities that seems
irrelevant to many.
Driving Questions
What are the components of STEM?
How can I incorporate these components into my everyday life?
Products of the Week
Basketball Tower, Object Construction, Marshmallow Bridge, Four- Wheeled Balloon Car, Puff Mobile, Hovercraft
Community Sharing Event
Design Gallery Walk
Introduction
In this module, members will cover the 4 C’s of STEM. The skills of Communication, Collaboration, Critical Thinking and Creativity. These skills are needed for success and individual growth. The 4 C’s will help members explore the mechanisms of working and thriving in today’s work environment.
About This Module

Module 1: Engineering Ingenuity
4
4 of 43
engage express evaluate exhibit
Word Definition
Science The study of the natural world.
Technology
The STEM definition for technology includes any product made by
humans to meet a want or need. Any product created to solve a
problem can be regarded as technology.
Engineering The design process used to solve problems.
Math The language of numbers, shapes and quantities that seems irrelevant
to many.
Design The plan or drawing produced to show the look of something before it is built or made.
Academic Vocabulary
Module 1: Engineering Ingenuity
5
5 of 43
engage express evaluate exhibit
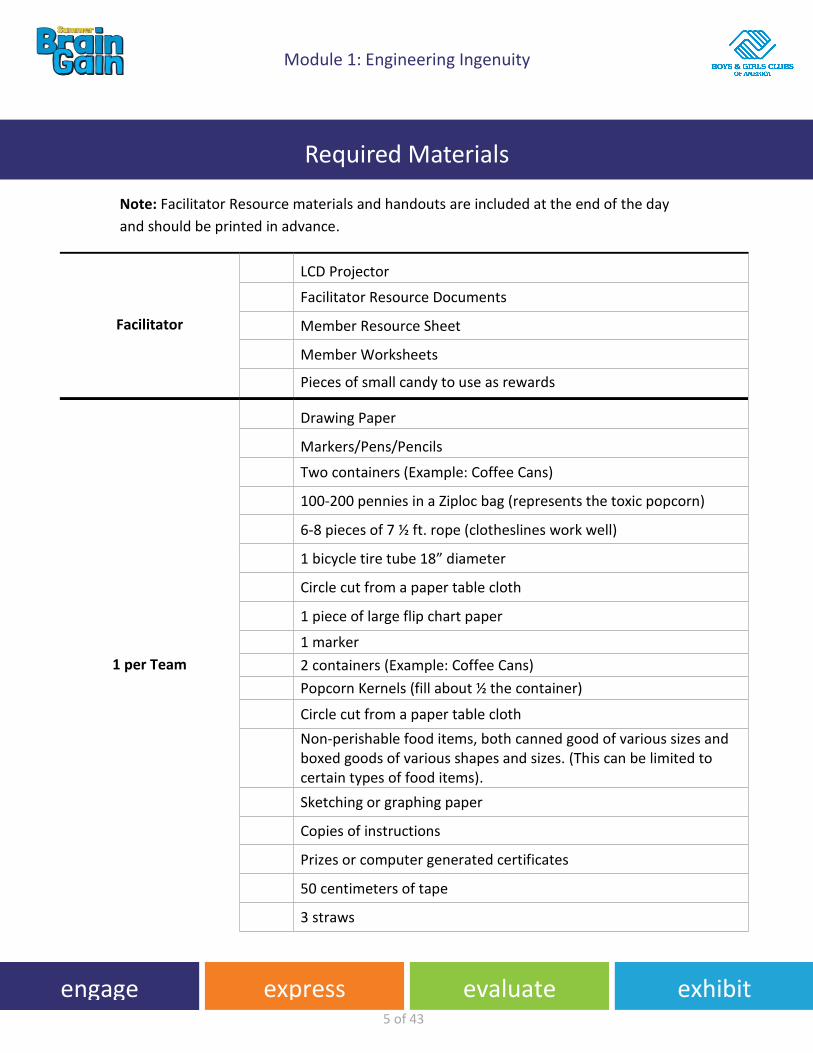
Note: Facilitator Resource materials and handouts are included at the end of the day
and should be printed in advance.
Facilitator
LCD Projector
Facilitator Resource Documents
Member Resource Sheet
Member Worksheets
Pieces of small candy to use as rewards
1 per Team
Drawing Paper
Markers/Pens/Pencils
Two containers (Example: Coffee Cans)
100-200 pennies in a Ziploc bag (represents the toxic popcorn)
6-8 pieces of 7 ½ ft. rope (clotheslines work well)
1 bicycle tire tube 18” diameter
Circle cut from a paper table cloth
1 piece of large flip chart paper
1 marker
2 containers (Example: Coffee Cans)
Popcorn Kernels (fill about ½ the container)
Circle cut from a paper table cloth
Non-perishable food items, both canned good of various sizes and boxed goods of various shapes and sizes. (This can be limited to certain types of food items).
Sketching or graphing paper
Copies of instructions
Prizes or computer generated certificates
50 centimeters of tape
3 straws
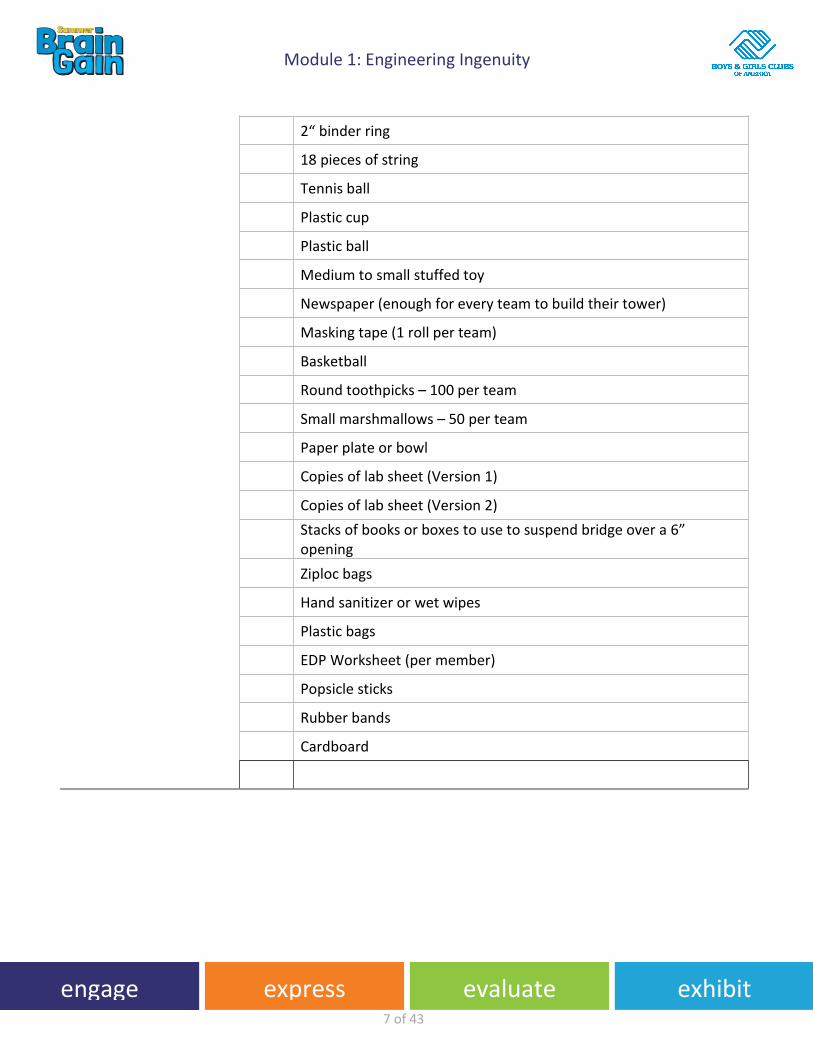
Required Materials

Module 1: Engineering Ingenuity
6
6 of 43
engage express evaluate exhibit
4 lifesavers
1 piece of paper
2 paper clips
Sketch paper
Pens/Markers/Pencils
3-4 3x5 index cards
1 roll of scotch or masking tape
Scissors
Member’s Instruction Sheet
Jet Balloon Flexible straw Rubber band or tape
Choose one of the following for the BODY of the car: Water bottle Toilet-paper tube Juice box Disposable cup (paper or plastic) Milk carton (individual size)
Choose one of the following for the AXLE of the car: Straws Barbeque skewers Chopsticks
Choose one of the following for the WHEELS of the car: Bottle caps Candy mints (with a hole in the middle) CDs Cardboard circles
Choose one of the following for the CONNECTOR for attaching wheels to an axle: Dry sponge Foam Clay Marshmallow (cut in half)
Module 1: Engineering Ingenuity
7
7 of 43
engage express evaluate exhibit
2“ binder ring
18 pieces of string
Tennis ball
Plastic cup
Plastic ball
Medium to small stuffed toy
Newspaper (enough for every team to build their tower)
Masking tape (1 roll per team)
Basketball
Round toothpicks – 100 per team
Small marshmallows – 50 per team
Paper plate or bowl
Copies of lab sheet (Version 1)
Copies of lab sheet (Version 2)
Stacks of books or boxes to use to suspend bridge over a 6” opening
Ziploc bags
Hand sanitizer or wet wipes
Plastic bags
EDP Worksheet (per member)
Popsicle sticks
Rubber bands
Cardboard
Module 1: Engineering Ingenuity
8
8 of 43
engage express evaluate exhibit
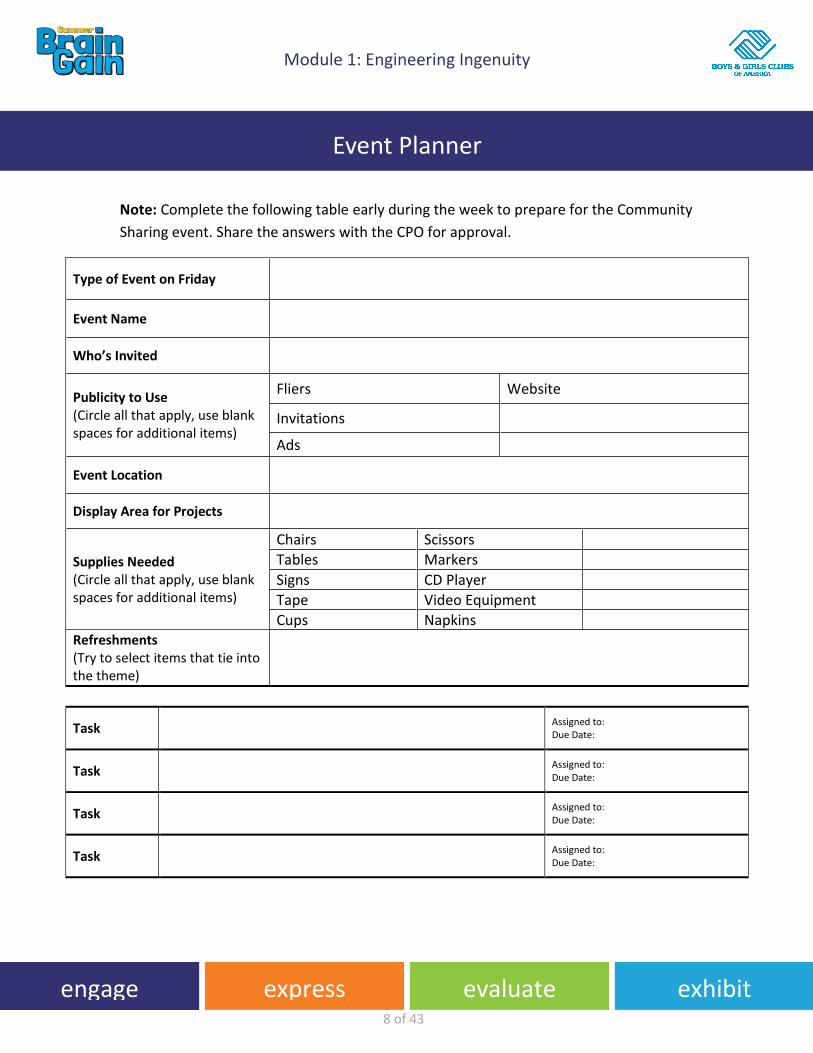
Note: Complete the following table early during the week to prepare for the Community
Sharing event. Share the answers with the CPO for approval.
Type of Event on Friday
Event Name
Who’s Invited
Publicity to Use (Circle all that apply, use blank spaces for additional items)
Fliers Website
Invitations
Ads
Event Location
Display Area for Projects
Supplies Needed (Circle all that apply, use blank spaces for additional items)
Chairs Scissors
Tables Markers
Signs CD Player
Tape Video Equipment
Cups Napkins Refreshments (Try to select items that tie into the theme)
Task Assigned to: Due Date:
Task Assigned to: Due Date:
Task Assigned to: Due Date:
Task Assigned to: Due Date:
Event Planner
Module 1: Engineering Ingenuity
9
9 of 43
engage express evaluate exhibit
Monday Warm-up
Location Multipurpose Room Estimated Time 15 minutes
Steps to Follow
1 Ask: What is engineering?
2 Write responses on chart paper.
3 Watch the video and discuss what engineering means to each member.
4 What is Engineering? https://www.youtube.com/watch?v=FAJGx3zP-Eo (6:20)
Monday: The Design Process

Module 1: Engineering Ingenuity
10
10 of 43
engage express evaluate exhibit
Monday Activity 1 The Design Process
Location Multipurpose Room Estimated Time 45 minutes
Description When an engineer is charged with tackling a problem, do they jump headfirst and ask questions later? Of course not! There is a universal process that is used.
Objective Members will implement the steps of the design process and use the steps in various activities.
What You Need
Kid Engineer: The Design Process
https://www.youtube.com/watch?v=Vcma79mVAYw&list=PLPwoZ
bg0fLjavtmKZ2uW75YNjrsbU4Mff&index=4 (6:30)
Drawing Paper
Markers/Pens/Pencils
LCD Projector
Steps to Follow
1 Show Design Remix video.
2 Members partner up and collaborate on a design idea.
3 Partners add creative spins to original designs.
4 Partners will share their designs and the process they took to get to a completed design with the group.
Module 1: Engineering Ingenuity
11
11 of 43
engage express evaluate exhibit
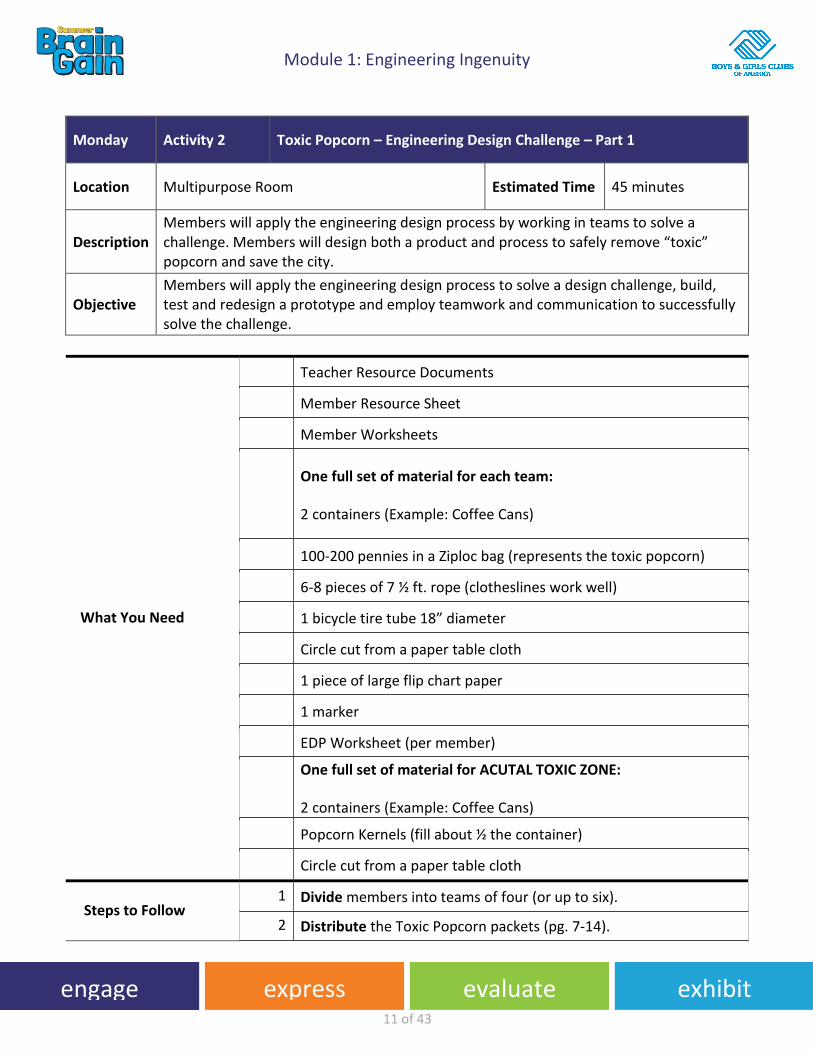
Monday Activity 2 Toxic Popcorn – Engineering Design Challenge – Part 1
Location Multipurpose Room Estimated Time 45 minutes
Description Members will apply the engineering design process by working in teams to solve a challenge. Members will design both a product and process to safely remove “toxic” popcorn and save the city.
Objective Members will apply the engineering design process to solve a design challenge, build, test and redesign a prototype and employ teamwork and communication to successfully solve the challenge.
What You Need
Teacher Resource Documents
Member Resource Sheet
Member Worksheets
One full set of material for each team:
2 containers (Example: Coffee Cans)
100-200 pennies in a Ziploc bag (represents the toxic popcorn)
6-8 pieces of 7 ½ ft. rope (clotheslines work well)
1 bicycle tire tube 18” diameter
Circle cut from a paper table cloth
1 piece of large flip chart paper
1 marker
EDP Worksheet (per member)
One full set of material for ACUTAL TOXIC ZONE:
2 containers (Example: Coffee Cans)
Popcorn Kernels (fill about ½ the container)
Circle cut from a paper table cloth
Steps to Follow 1 Divide members into teams of four (or up to six).
2 Distribute the Toxic Popcorn packets (pg. 7-14).

Module 1: Engineering Ingenuity
12
12 of 43
engage express evaluate exhibit
3 Discuss the Engineering Design Process (p. 7-9), Scenario, Design Challenge, Criteria, Constraint and Materials.
4
Read the scenario: (pg. 10) A can of highly toxic popcorn has contaminated a circle of approximately 4 feet in diameter. The toxic area extends to the ceiling. If the toxic popcorn is not transferred to a safe container for decontamination, then it will contaminate and destroy the entire city. The popcorn is estimated to have a safe life of exactly 60 minutes before it explodes. It’s up to us to save the city!
5
Use the two containers located inside the circle. One (unsafe container) is half full of the toxic popcorn. The other (safe) container is available for decontamination. Find a way to safely transfer the toxic popcorn form the unsafe container to the safe container, using only the materials provided.
6
Provide each team with their testing materials. Discuss why they can’t “test” at the “actual” toxic site and explain that you were able to find some similar items that they can use to test their device and process.
7
Planning Stage Discuss the problem you need to solve as a team. Then develop and agree on a process for solving the challenge. Determine what materials you will want to use.
8 Draw the design on the Member Worksheet (pg. 11).
9 Construction Phase Choose the best product design and our best process design. Build your design (pg. 12).
10 Test the design and process created. Make any adjustments and then list the steps of the process that will be used (pg. 13).
11
Explain that they only have 60 minutes to save the city. They will have 40 minutes to design, build, test and redesign their solution and the group will have 10 minutes to choose the very best group solution and save the city. (The first part of this activity will be for the members to design and test and the second part of the activity will be for them to choose the best design and save the city.)
12
Provide each team with one large flip chart paper to draw their design and write out (as well as sketch) their final process. Each team must be prepared to explain their design and process to the group.
13 Share the final design and process with the group using their flip chart paper as an aid after 40 minutes of designing, building, testing and revising.

Module 1: Engineering Ingenuity
13
13 of 43
engage express evaluate exhibit
14 Vote on the design that they think will save the city. (Remind the members that this is not about them, but about saving the city and choosing the best design possible.)
15 Implement the chosen team’s process. Remind them how important communication is for success and that you want to hear them communicate with each other.
16 Encourage and support the chosen design. Remind the members that THE GROUP needs to save the city so we all need to help by supporting the team implementing their process.
17 Allow each team to implement their process since they worked hard on their design.

Module 1: Engineering Ingenuity
14
14 of 43
engage express evaluate exhibit
Monday Activity 3 Toxic Popcorn – Engineering Design Process – Part 2
Location Multipurpose Room Estimated Time 45 minutes
Description Members will apply the engineering design process by working in teams to solve a challenge. Members will design both a product and process to safely remove “toxic” popcorn and save the city.
Objective Members will apply the engineering design process to solve a design challenge, build, test and redesign a prototype and employ teamwork and communication to successfully solve the challenge.
What You Need
Teacher Resource Documents
Member Resource Sheet
Member Worksheets
One full set of material for each team:
2 containers (Example: Coffee Cans) 100-200 pennies in a Ziploc bag (represents the toxic popcorn)
6-8 pieces of 7 ½ ft. rope (clotheslines work well)
1 bicycle tire tube 18” diameter
Circle cut from a paper table cloth
1 piece of large flip chart paper
1 marker
EDP Worksheet (per member)
One full set of material for ACUTAL TOXIC ZONE:
2 containers (Example: Coffee Cans)
Popcorn Kernels (fill about ½ the container)
Circle cut from a paper table cloth
How to Prepare
Module 1: Engineering Ingenuity
15
15 of 43
engage express evaluate exhibit
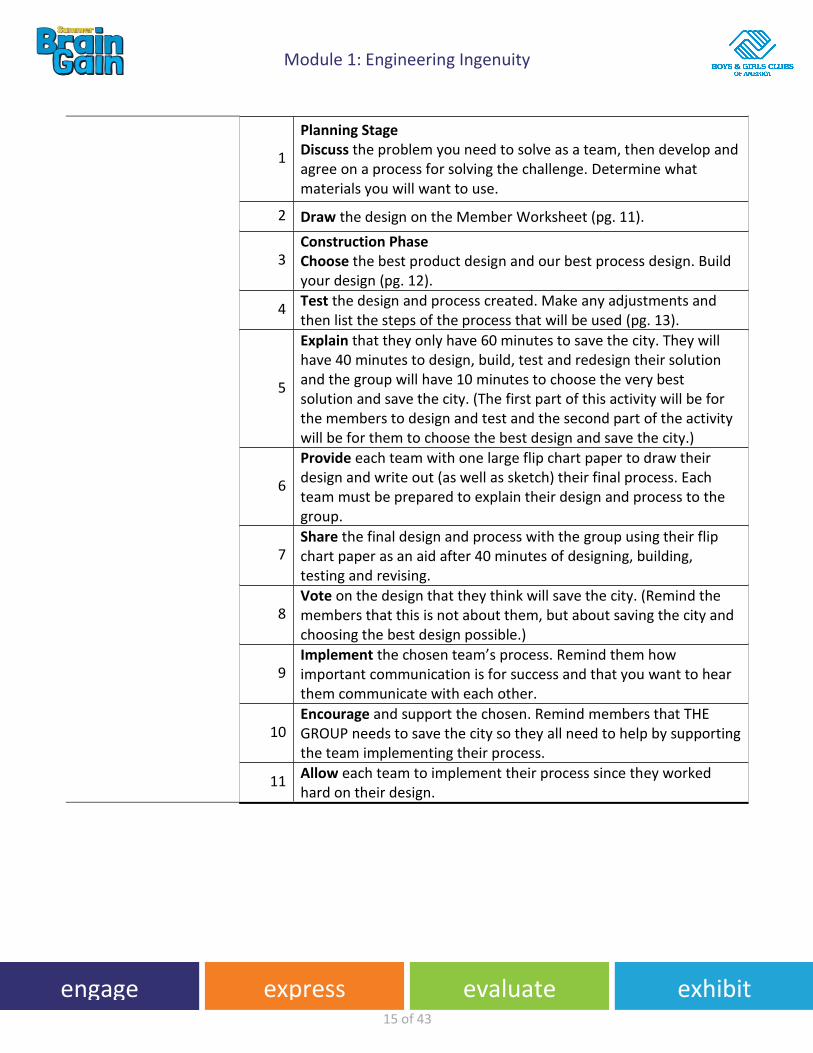
1
Planning Stage Discuss the problem you need to solve as a team, then develop and agree on a process for solving the challenge. Determine what materials you will want to use.
2 Draw the design on the Member Worksheet (pg. 11).
3 Construction Phase Choose the best product design and our best process design. Build your design (pg. 12).
4 Test the design and process created. Make any adjustments and then list the steps of the process that will be used (pg. 13).
5
Explain that they only have 60 minutes to save the city. They will have 40 minutes to design, build, test and redesign their solution and the group will have 10 minutes to choose the very best solution and save the city. (The first part of this activity will be for the members to design and test and the second part of the activity will be for them to choose the best design and save the city.)
6
Provide each team with one large flip chart paper to draw their design and write out (as well as sketch) their final process. Each team must be prepared to explain their design and process to the group.
7 Share the final design and process with the group using their flip chart paper as an aid after 40 minutes of designing, building, testing and revising.
8 Vote on the design that they think will save the city. (Remind the members that this is not about them, but about saving the city and choosing the best design possible.)
9 Implement the chosen team’s process. Remind them how important communication is for success and that you want to hear them communicate with each other.
10 Encourage and support the chosen. Remind members that THE GROUP needs to save the city so they all need to help by supporting the team implementing their process.
11 Allow each team to implement their process since they worked hard on their design.
Module 1: Engineering Ingenuity
16
16 of 43
engage express evaluate exhibit
Monday Cool Down
Estimated Time 5 minutes
Steps to Follow
1 Snowstorm Members write down what they learned on a piece of scratch paper.
2 Given a signal, they throw their paper snowball in the air.
3 Members will pick up a nearby response and read it aloud.

Module 1: Engineering Ingenuity
17
17 of 43
engage express evaluate exhibit
Monday Warm-up
Location Multipurpose Room Estimated Time 15 minutes
Steps to Follow
1 Ask: What is the engineering process? What steps do you take in this process to get to a finished product?
2 Watch the video of the steps of the engineering process.
3 The Engineering Process https://www.youtube.com/watch?v=fxJWin195kU&list=PLPwoZbg0fLjavtmKZ2uW75YNjrsbU4Mff (5:16)
Tuesday: Collaboration is Key

Module 1: Engineering Ingenuity
18
18 of 43
engage express evaluate exhibit
Tuesday Activity 1 Object Construction – Part 1
Location Multipurpose Room Estimated Time 45 minutes
Description
Members will work collaboratively to build structures from food cans and boxes. This activity will provide members with a hands-on exercise in engineering technology, experience in teamwork and creativity that is necessary for good design and effective problem solving.
Objective Members will discuss and employ the engineering design cycle. Members will practice communication, teamwork and problem solving skills.
What You Need
Non-perishable food items, both canned good of various sizes and boxed goods of various shapes and sizes. (This can be limited to certain types of food items.)
Sketching or graphing paper
Pens/Pencils
Copies of instructions
Prizes or computer generated certificates
How to Prepare
Combine this activity with a food drive for a local food pantry and donate the food items after the event.
Determine the number of teams before the activity begins.
Assign participants to teams ahead of time.
Divide the food items before the activity. Provide each team with a variety of shapes and sizes.
1
Say: Today you will experience what it might be like to be an engineering designer. Engineering designers help design buildings, machines, robots, bridges, cars, trains, musical instruments, parts, programs, controls, almost anything you can think of, down to the tiniest nuts and bolts. You will be working on a team since that is the way engineering designers work.
Steps to Follow
2 Review the rules and judging criteria.
3 Divide members into teams.
4 Look at the food items you have and discuss possible structures.
Module 1: Engineering Ingenuity
19
19 of 43
engage express evaluate exhibit
5 Decide what type of structure to build and make a sketch of it using the sketch paper.
6 Organize your materials (food items) and build the structure.
7 Revise your sketch if your team modifies the design while building. Use additional sketch paper if needed.
8 Explain your structures design – why certain food items were used, the placement of the food items etc.
Module 1: Engineering Ingenuity
20
20 of 43
engage express evaluate exhibit
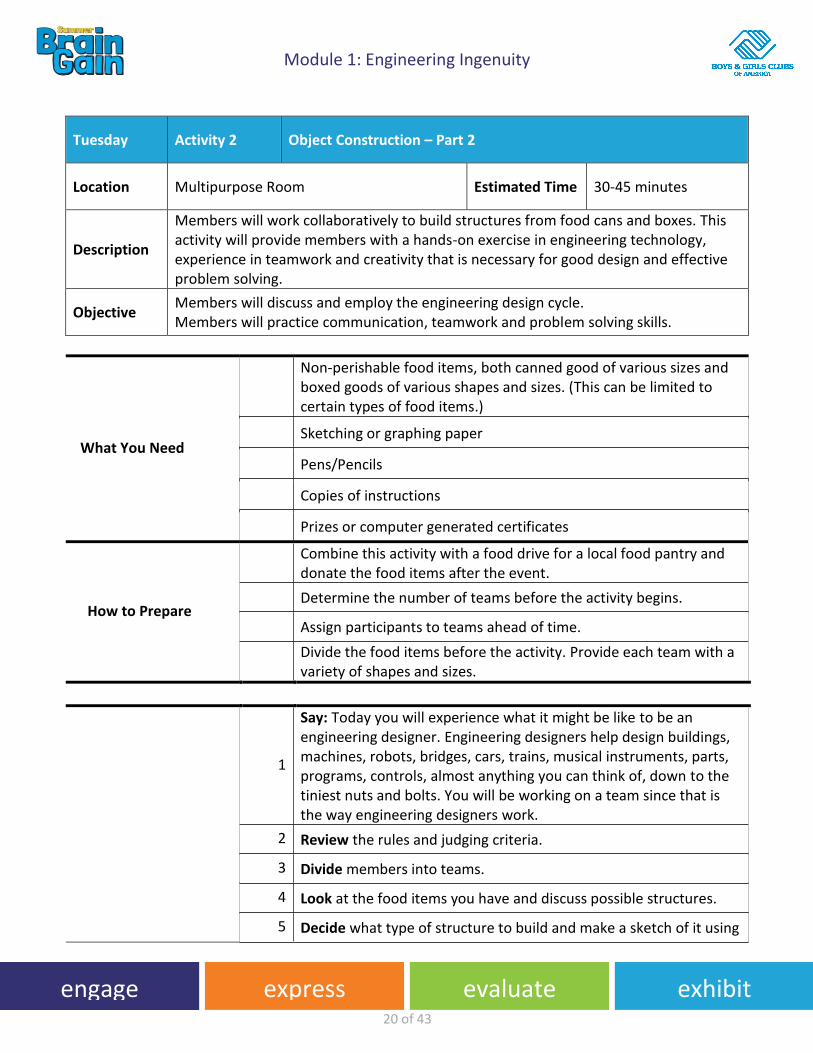
Tuesday Activity 2 Object Construction – Part 2
Location Multipurpose Room Estimated Time 30-45 minutes
Description
Members will work collaboratively to build structures from food cans and boxes. This activity will provide members with a hands-on exercise in engineering technology, experience in teamwork and creativity that is necessary for good design and effective problem solving.
Objective Members will discuss and employ the engineering design cycle. Members will practice communication, teamwork and problem solving skills.
What You Need
Non-perishable food items, both canned good of various sizes and boxed goods of various shapes and sizes. (This can be limited to certain types of food items.)
Sketching or graphing paper
Pens/Pencils
Copies of instructions
Prizes or computer generated certificates
How to Prepare
Combine this activity with a food drive for a local food pantry and donate the food items after the event.
Determine the number of teams before the activity begins.
Assign participants to teams ahead of time.
Divide the food items before the activity. Provide each team with a variety of shapes and sizes.
1
Say: Today you will experience what it might be like to be an engineering designer. Engineering designers help design buildings, machines, robots, bridges, cars, trains, musical instruments, parts, programs, controls, almost anything you can think of, down to the tiniest nuts and bolts. You will be working on a team since that is the way engineering designers work.
2 Review the rules and judging criteria.
3 Divide members into teams.
4 Look at the food items you have and discuss possible structures.
5 Decide what type of structure to build and make a sketch of it using
Module 1: Engineering Ingenuity
21
21 of 43
engage express evaluate exhibit
the sketch paper.
6 Organize your materials (food items) and build the structure.
7 Revise your sketch if your team modifies the design while building. Use additional sketch paper if needed.
8 Explain your structures design – why certain food items were used, the placement of the food items etc.

Module 1: Engineering Ingenuity
22
22 of 43
engage express evaluate exhibit
Tuesday Activity 3 Teamwork vs. Me-work
Location Multipurpose Room Estimated Time 30-45 minutes
Description Members will work in teams in an activity that illustrates competition versus teamwork.
Objective Members will demonstrate the benefits of teamwork.
What You Need Pieces of small candy to use as rewards
Steps to Follow
1 Pair up with a partner.
2 Explain that points will be earned when the partner’s arm touches the table.
3 Say: You have one minute and each partnership will keep their own count.
4 Signal the members to begin, then time the activity.
5 Distribute candy as earned.
6 Discuss the outcome of the activity. Who won? Did some partnerships create a win/win by cooperating?
7 Discuss competition vs. cooperation.
8 Ask: Is competition always good?

Module 1: Engineering Ingenuity
23
23 of 43
engage express evaluate exhibit
Tuesday Cool Down Estimated Time: 5 minutes
Steps to Follow 1
Three W's Members will discuss or write:
What did we learn today?
So What? (relevancy, importance, usefulness)
Now What? (how does this fit into what we are learning,
does it affect our thinking, can we predict where we are
going)

Module 1: Engineering Ingenuity
24
24 of 43
engage express evaluate exhibit
Wednesday Warm-up
Location Multipurpose Room Estimated Time 15 minutes
Steps to Follow
1 Say: Today we will explore how to design some things that fly. Let’s watch a video on one of the activities you’ll be doing.
2 Hoop Glider https://www.youtube.com/watch?v=j4PZyvlgf24
Wednesday: Built to Soar

Module 1: Engineering Ingenuity
25
25 of 43
engage express evaluate exhibit
Wednesday Activity 1 Puff Mobile
Location Multipurpose Room Estimated Time 45 minutes
Description Members will use cross-disciplinary and critical thinking skills to explore, design and build an object that will MOVE with simple supplies.
Objective Members will implement a strategy to design and construct an object that moves from simple supplies.
What You Need
50 centimeters of tape
3 straws
4 lifesavers
1 piece of paper
2 paper clips
Sketch paper
Pens/Markers/Pencils
How to Prepare Put all materials for each team on the tables prior to the activity.
1 Say: Design a car using only the materials on the table. Here are the constraints—the car can only move if you blow on it.
2 Divide members into teams.
3 Sketch the car design on paper. All team members need to have input on the sketch and can add/delete anything they don’t agree on.
4 Use the materials that are available to construct the car.
5 Test the car to see if it works and make any adjustments as necessary.
6 Share car designs with the groups.
7
Redesign your car so that it will travel the same distance with fewer puffs. What happens if you change the size of the car? What happens if you use fewer materials? Or, what happens if you add a new material like thread spools? Choose one thing to change (that’s the variable) and make a prediction.

Module 1: Engineering Ingenuity
26
26 of 43
engage express evaluate exhibit
Wednesday Activity 2 Hoop Glider
Location Multipurpose Room Estimated Time 45 minutes
Description Members will be challenged to build a glider that will glide as far as possible.
Objective
Members will be able to analyze data from tests to determine similarities and differences among several design solutions to identify the best characteristics of each that can be combined into a new solution to better meet the criteria for success.
What You Need
3-4 3x5 index cards
1 roll of scotch or masking tape
Scissors
3-4 straws
Markers
Member’s Instruction Sheet
How to Prepare Set up the materials for each team prior to the activity.
Make a paper airplane to use in the introduction of the activity.
Steps to Follow
1 Divide members into groups.
2
Say: Who is good at making paper airplanes? (Throw a paper airplane that you have made.) Actually, paper airplanes are gliders. Today we will have a competition. We will be building Hoop Gliders to see which team can get theirs to glide the farthest.
3 Say: This challenge will test your team’s ability to work together in building a hoop glider that will travel the farthest distance before touching the ground.
4 Write names on a piece of masking tape. This tape will be used to mark the distance that the glider travels.
5 Direct the members to follow the instruction sheet.
7 Ask members why they are doing what they are doing as they
Module 1: Engineering Ingenuity
27
27 of 43
engage express evaluate exhibit
work. Direct all questions to their team members.
8 Extension: Research real hoop gliders and see what makes them glide.
Module 1: Engineering Ingenuity
28
28 of 43
engage express evaluate exhibit
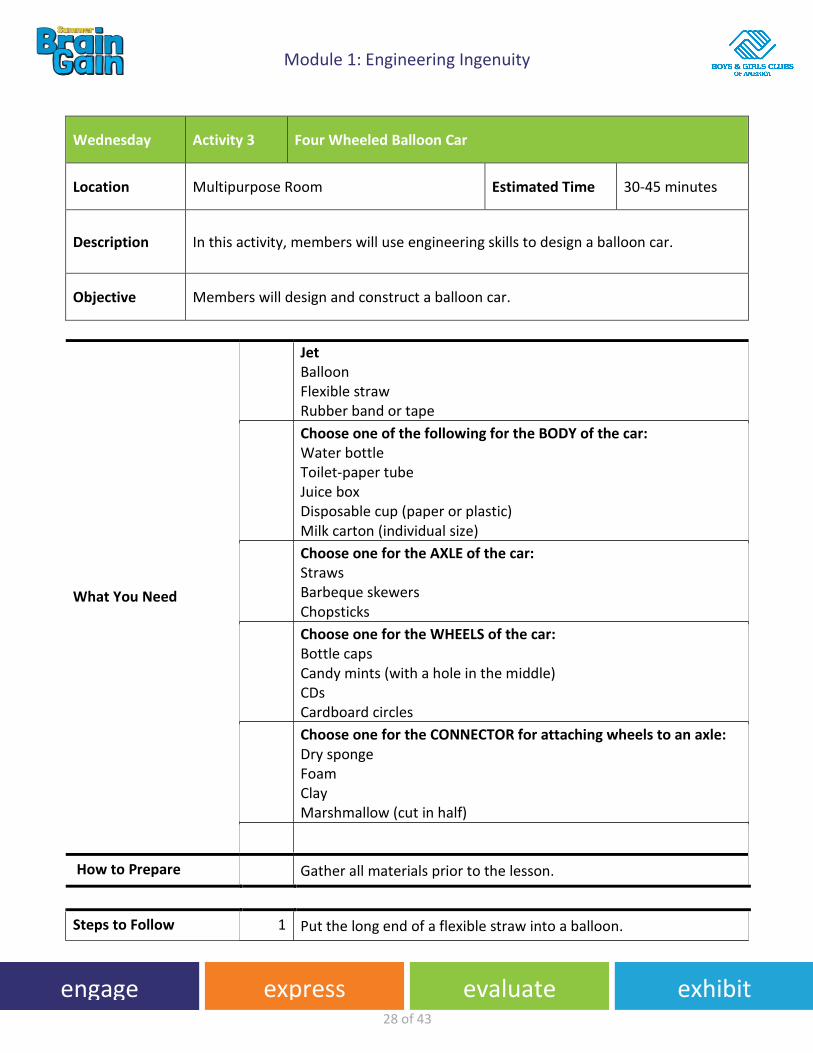
Wednesday Activity 3 Four Wheeled Balloon Car
Location Multipurpose Room Estimated Time 30-45 minutes
Description In this activity, members will use engineering skills to design a balloon car.
Objective Members will design and construct a balloon car.
What You Need
Jet Balloon Flexible straw Rubber band or tape
Choose one of the following for the BODY of the car: Water bottle Toilet-paper tube Juice box Disposable cup (paper or plastic) Milk carton (individual size)
Choose one for the AXLE of the car: Straws Barbeque skewers Chopsticks
Choose one for the WHEELS of the car: Bottle caps Candy mints (with a hole in the middle) CDs Cardboard circles
Choose one for the CONNECTOR for attaching wheels to an axle: Dry sponge Foam Clay Marshmallow (cut in half)
How to Prepare Gather all materials prior to the lesson.
Steps to Follow 1 Put the long end of a flexible straw into a balloon.

Module 1: Engineering Ingenuity
29
29 of 43
engage express evaluate exhibit
2 Attach the straw and the balloon so that no air can escape, using either a rubber band or tape.
3 Poke two holes in the bottles sides on the part of the bottle that will be the bottom of the car. Make the holes directly across from each other so the axle goes straight across.
4 Slide a straw through the two holes and adjust it so the axel goes straight across. Repeat for the second axle.
5 Slide a barbeque skewer through each straw.
7 Wedge a square sponge (or marshmallow or foam) into a bottle cap to make a wheel. Make four of these wheels.
8 Push a skewer in the sponge and use the skewer to poke holes in the sponges.
9
Explain: Your balloon car uses jet power to move. The stored air in the balloon pushes through the straw, creating thrust—the force that pushes the car forward. So when air from the balloon moves in one direction, it pushes the car in the opposite direction.

Module 1: Engineering Ingenuity
30
30 of 43
engage express evaluate exhibit
Wednesday Cool Down Estimated Time 5 minutes
Steps to Follow 1
3-2-1 Members will share three things they learned, two things they have a question about and one thing with the facilitator.

Module 1: Engineering Ingenuity
31
31 of 43
engage express evaluate exhibit
Thursday Warm-up
Location Multipurpose Room Estimated Time 15 minutes
Steps to Follow
1 Say: If given the opportunity, what could you invent? Let’s watch a video of some high school members who invent a new type of desk.
2 InvenTeens: A High School Engineering Design Challenge https://www.youtube.com/watch?v=KFW8LzU1vLg&index=16&list=PLPwoZbg0fLjavtmKZ2uW75YNjrsbU4Mff
3 Ask: Why do you think these members were so successful? What did you notice about the way they worked together? What leadership skills did you observe?
4 Say: Today you will have the opportunity to design/invent your own masterpieces!
Thursday: Designing with a Purpose

Module 1: Engineering Ingenuity
32
32 of 43
engage express evaluate exhibit
Thursday Activity 1: Working as ONE
Location Multipurpose Room Estimated Time: 45 minutes
Description. Members will use teamwork to successfully maneuver an activity.
Objective Members will collaborate to solve a common problem.
What You Need
2“ binder ring
18 pieces of string
Tennis ball
Plastic cup
Plastic ball
Medium to small stuffed toy
How to Prepare
Create the binder ring with string prior to the activity.
Each length of string is doubled and tied to the middle ring so it makes 36 strings dangling.
Steps to Follow
1 Say: What is teamwork? What does it mean to collaborate? Today, you will practice collaboration in an activity called “Working as ONE.”
2
Chart members answers and discuss the importance of collaboration and teamwork when working on the engineering activities. Form a circle around the strings on the floor.

Module 1: Engineering Ingenuity
33
33 of 43
engage express evaluate exhibit
3 Pick up one or two of the strings and hold it without lifting. (Just be sure all of the strings are being held!)
4 Place an object on the ring and let the members know they must keep the object in place!
5 Signal the members to lift the strings so that the center ring remains stable. Members will slowly rise from the floor trying to get completely in a standing position.
6 Signal again so that members slowly lower back down to lay the strings gently back on the floor.
7
Add the cup with the plastic ball to the middle and have members try the activity again.
8 Challenge members to see how many times they can raise and lower the object in the middle.
9 Encourage positive communication between the members as they work together to raise and lower the object.
10 Add the stuffed animal to the middle and repeat the activity.
11 Discuss some of the pros and cons that were faced when working together. What are some things that could have been done differently?
Module 1: Engineering Ingenuity
34
34 of 43
engage express evaluate exhibit
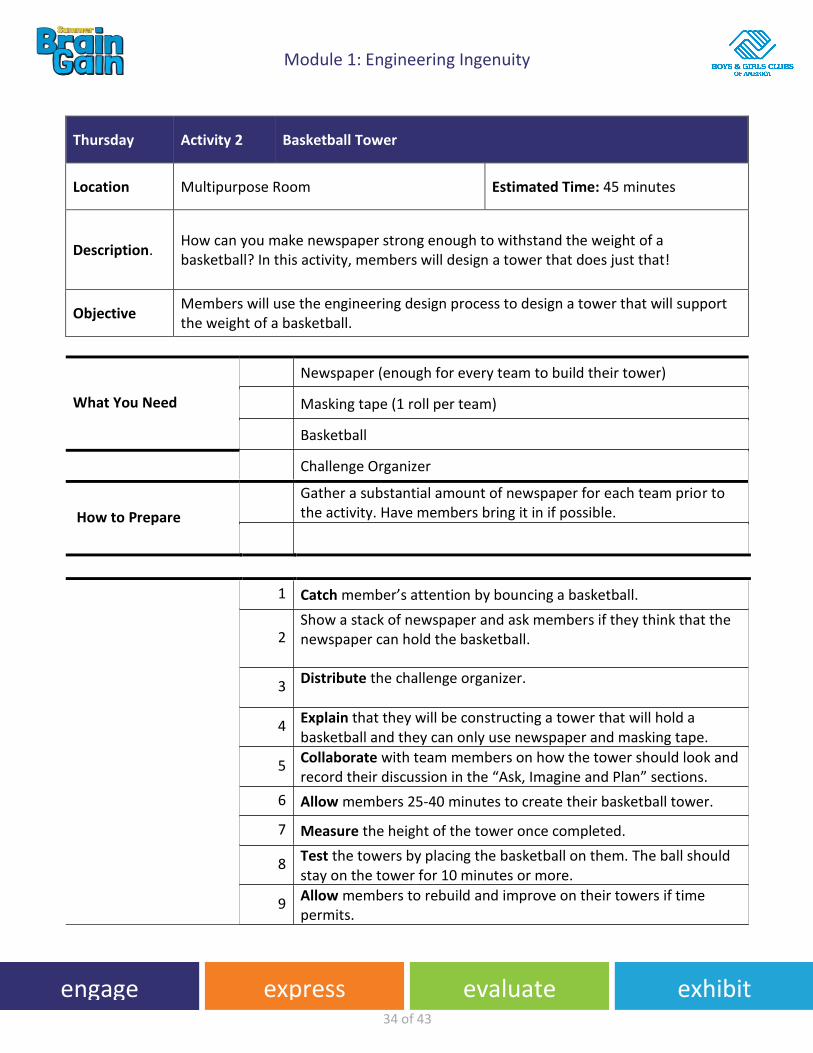
Thursday Activity 2 Basketball Tower
Location Multipurpose Room Estimated Time: 45 minutes
Description. How can you make newspaper strong enough to withstand the weight of a basketball? In this activity, members will design a tower that does just that!
Objective Members will use the engineering design process to design a tower that will support the weight of a basketball.
What You Need
Newspaper (enough for every team to build their tower)
Masking tape (1 roll per team)
Basketball
Challenge Organizer
How to Prepare
Gather a substantial amount of newspaper for each team prior to the activity. Have members bring it in if possible.
1 Catch member’s attention by bouncing a basketball.
2 Show a stack of newspaper and ask members if they think that the newspaper can hold the basketball.
3 Distribute the challenge organizer.
4 Explain that they will be constructing a tower that will hold a basketball and they can only use newspaper and masking tape.
5 Collaborate with team members on how the tower should look and record their discussion in the “Ask, Imagine and Plan” sections.
6 Allow members 25-40 minutes to create their basketball tower.
7 Measure the height of the tower once completed.
8 Test the towers by placing the basketball on them. The ball should stay on the tower for 10 minutes or more.
9 Allow members to rebuild and improve on their towers if time permits.

Module 1: Engineering Ingenuity
35
35 of 43
engage express evaluate exhibit
Thursday Activity 3 Marshmallow Bridge – Part 1 (The Planning)
Location Multipurpose Room Estimated Time: 45 minutes
Description. Members will design a structure that will span a specified width using marshmallows and toothpicks. By working collaboratively, members will solve the Marshmallow Bridge challenge!
Objective Members will design a bridge using only toothpicks and marshmallows that will span a gap and bear weight.
What You Need
STEAM Bridge Design https://www.youtube.com/watch?v=0qwiUzBS9dw
Round toothpicks – 100 per team
Small marshmallows – 50 per team
Paper plate or bowl
Copies of lab sheet (Version 1)
Copies of lab sheet (Version 2)
Stacks of books or boxes to use to suspend a bridge over a 6” opening
Ziploc bags
Hand sanitizer or wet wipes
How to Prepare
Count out marshmallows and toothpicks and place in a Ziploc bag
Determine how the final bridge will be suspended (suggestions include: between two books, between two boxes, between two desks, etc.)
Copy the lab sheets
Prepare a chart listing the rules of the task
Have hand sanitizer or wet wipes handy
Steps to Follow 1 Watch the video: STEAM Bridge Design.

Module 1: Engineering Ingenuity
36
36 of 43
engage express evaluate exhibit
2 Discuss the collaboration that took place and how it helped the task run smoothly.
3 Read 21 Elephants and Still Standing by Phil Bildner.
4
Ask questions about the story that will encourage members to think about how they should design their bridge. What provides the bridge’s strength? Does the bridge need side rails? Does the bridge need columns? What holds the roadway in place?
5 Write answers to the questions on the lab sheet.
6 Explain the bridge challenge constraints.
7 Identify the problem to be solved.
8 Sketch and label ideas about the bridge the team will be creating. Each member of the team should do this and then all ideas will be combined into one sketch.
9 Write the reason the sketch is the best one for the team.
10 Collaborate on sketches and ask members to share sketches, decide which idea is best or how to combine ideas, then draw what the final design will be and write the reason for the choice.

Module 1: Engineering Ingenuity
37
37 of 43
engage express evaluate exhibit
Thursday Cool Down Estimated Time: 5 min
Steps to Follow 1
3-2-1
Members will share three things they learned, two things they have a question about and one thing they want to share with the facilitator.

Module 1: Engineering Ingenuity
38
38 of 43
engage express evaluate exhibit
Friday Warm-up
Location Multipurpose Room Estimated Time 15 minutes
Steps to Follow
1 Say: The engineering design process can be used in many different ways. Today you will work collaboratively to invent some designs for specific things.
2 Distribute the Roll-A-Challenge sheets and have members put them together.
Friday: Engineering Gallery

Module 1: Engineering Ingenuity
39
39 of 43
engage express evaluate exhibit
Friday Activity 1 Marshmallow Bridge – Part 2 (The Construction)
Location Multipurpose Room Estimated Time 45 minutes
Description Members will design a structure that will span a specified width using marshmallows and toothpicks. By working collaboratively, members will solve the Marshmallow Bridge challenge!
Objective Members will design a bridge using only toothpicks and marshmallows that will span a gap and bear weight.
What You Need
Round toothpicks – 100 per team
Small marshmallows – 50 per team
Paper plate or bowl
Copies of lab sheet (Version 1)
Copies of lab sheet (Version 2)
Stacks of books or boxes to use to suspend bridge over a 6” opening
Ziploc bags
Hand sanitizer or wet wipes
How to Prepare
Count out marshmallows and toothpicks and place in a Ziploc bag
Determine how the final bridge will be suspended (suggestions include: between two books, between two boxes, between two desks, etc.)
Copy the lab sheets
Prepare a chart listing the rules of the task
Have hand sanitizer or wet wipes handy
Steps to Follow
1 Review the discussion yesterday and the events that took place.
2 Explain that each team will have a testing area to test their completed bridges and make adjustments as necessary.
3 Improve bridge design as construction takes place.
4 Share bridges after they are completed.

Module 1: Engineering Ingenuity
40
40 of 43
engage express evaluate exhibit
Friday Activity 2 Roll-A-Challenge
Location Multipurpose Room Estimated Time 45 minutes
Description
It’s time to design on your own creation! Members will roll-a-challenge dice and determine what they will create in an instant! Members will use the supplies listed on the “USE” die and determine what will be made and what their creation will need to do.
Objective Members will design and construct an object based on chance.
What You Need
Plastic bags
Plastic cups
Popsicle sticks
Rubber bands
Cardboard
How to Prepare Gather all of the materials prior to the activity.
Steps to Follow
1 Say: We have spent the week practicing the design process. It is now time for you to design your own creation. You will work as a team and go through the steps of the process.
2 Divide the members into teams.
3
Roll the “USE” (red) die and determine the materials they will need. Roll the “TO MAKE” die to determine what they will be making. Roll the “THAT WILL” die to determine what the design will need to do.
4 Sketch out designs and begin creating!
5 Share all creations.

Module 1: Engineering Ingenuity
41
41 of 43
engage express evaluate exhibit
Friday Activity 3 Roll-A-Challenge
Location Multipurpose Room Estimated Time 45 minutes
Description
It’s time to design on your own creation! Members will roll-a-challenge dice and determine what they will create in an instant! Members will use the supplies listed on the “USE” die and determine what will be made and what their creation will need to do.
Objective Members will design and construct an object based on chance.
What You Need
Plastic bags
Plastic Cups
Popsicle Sticks
Rubber Bands
Cardboard
How to Prepare Gather all of the materials prior to the activity.
1 Say: We have spent the week practicing the design process. It is now time for you to design your own creation. You will work as a team and go through the steps of the process.
2 Divide the members into teams.
3
Roll the “USE” (red) die and determine the materials they will need. Roll the “TO MAKE” die to determine what they will be making. Roll the “THAT WILL” die to determine what the design will need to do.
4 Sketch out designs and begin creating!
5 Share all creations.
6 Determine all designs that will be on displayed in the Design Gallery Walk.
Module 1: Engineering Ingenuity
42
42 of 43
engage express evaluate exhibit
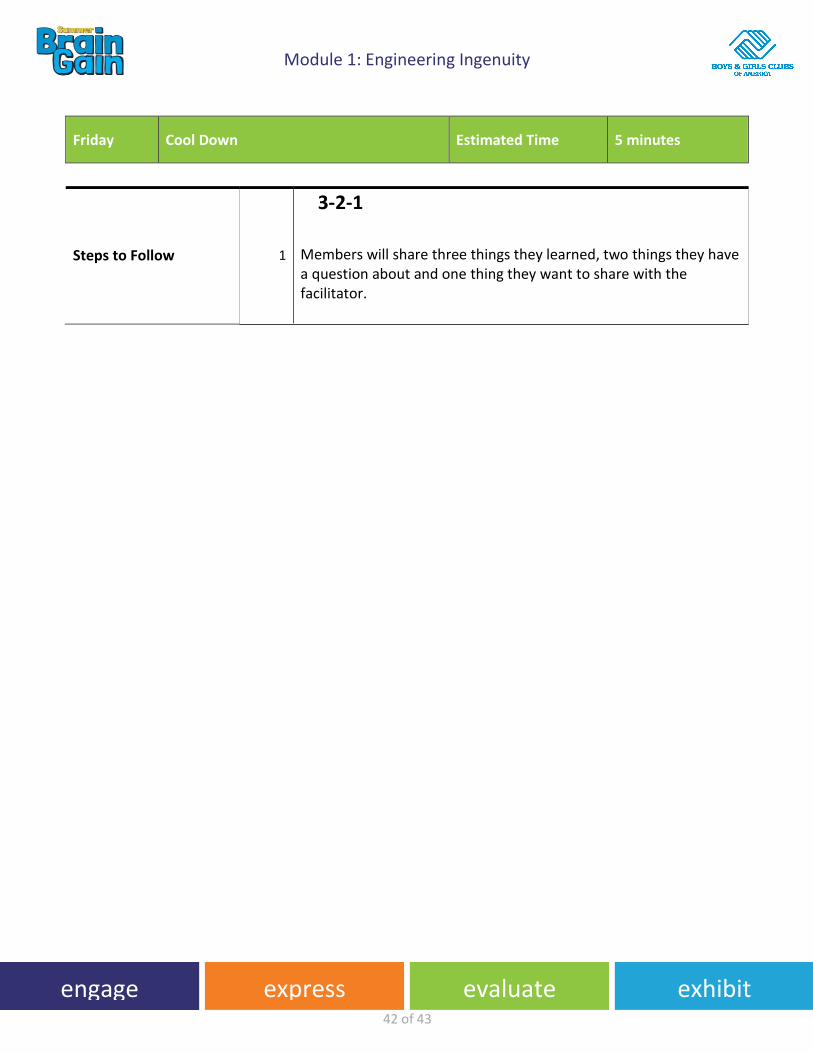
Friday Cool Down Estimated Time 5 minutes
Steps to Follow 1
3-2-1
Members will share three things they learned, two things they have a question about and one thing they want to share with the facilitator.

Table of Contents
express
exhibit
engage
evaluate
High School STEM! Modules

Module 2: Body Works
2
2 of 76
engage express evaluate exhibit
ABOUT THIS MODULE 3
ACADEMIC VOCABULARY 4
REQUIRED MATERIALS 6
EVENT PLANNER 11
MONDAY: HEAD SPRUNG 12
TUESDAY: BREATHE IN…BREATHE OUT 23
WEDNESDAY: BONES, BONES, BONES 35
THURSDAY: FIX ME! 51
FRIDAY: DESIGNS OF THE FUTURE 65

Module 2: Body Works
3
3 of 76
engage express evaluate exhibit
Objective
Your body is a brilliant machine with many important parts. In this module, members will be traveling from their heads through the systems of the body as biomedical engineers. They will be amazed at the variety of devices that are created to help our bodies function.
Driving Questions
What does a Biomedical Engineer do?
What types of mechanisms does a Biomedical Engineer make?
What is the design process?
Products of the Week
Brain Model, Lungs Model, Eye Model, Circulation Station, Non Pollutant Face Mask, Protective Eyewear
Community Sharing Event
Gallery Walk of Engineering Designs created during the week.
Introduction
Who do you think is behind the design of products, such as artificial organs, artificial devices that replace body parts, and machines for diagnosing medical problems? Well, that would be a Biomedical Engineer! Members will be introduced to some of the things this type of engineer does and how they create the extraordinary devices that help to keep bodies functioning.
About This Module
Module 2: Body Works
4
4 of 76
engage express evaluate exhibit
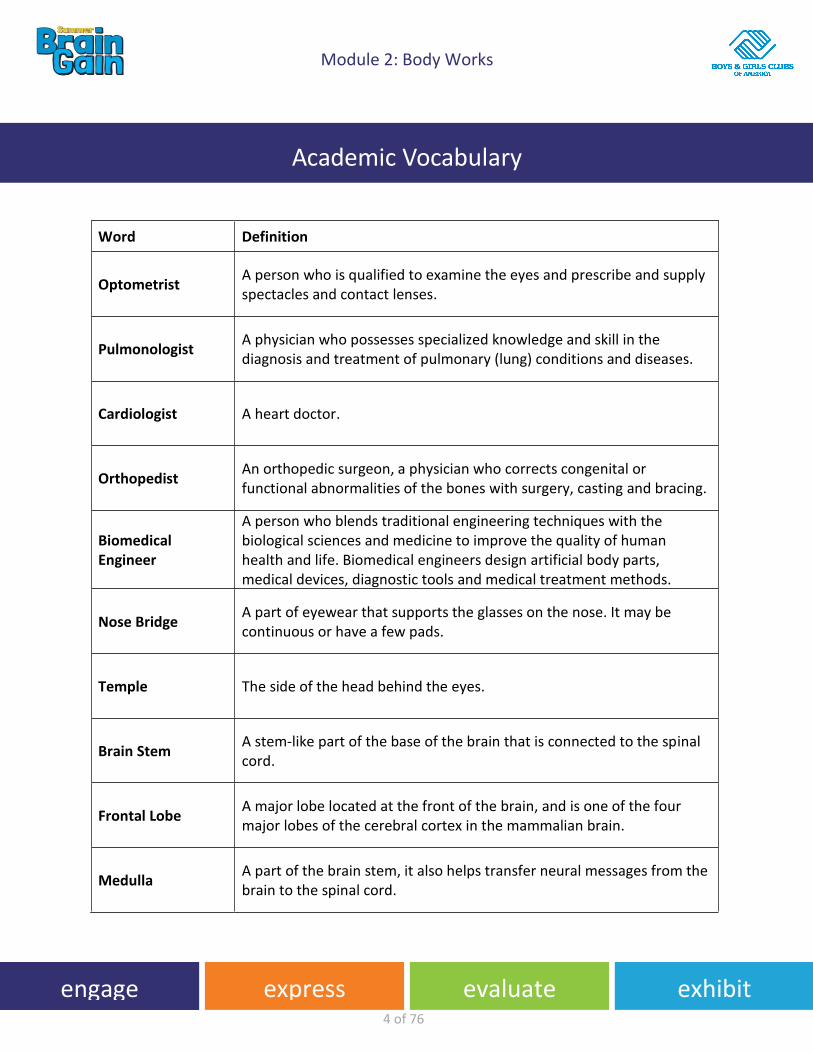
Word Definition
Optometrist A person who is qualified to examine the eyes and prescribe and supply spectacles and contact lenses.
Pulmonologist A physician who possesses specialized knowledge and skill in the diagnosis and treatment of pulmonary (lung) conditions and diseases.
Cardiologist A heart doctor.
Orthopedist An orthopedic surgeon, a physician who corrects congenital or functional abnormalities of the bones with surgery, casting and bracing.
Biomedical Engineer
A person who blends traditional engineering techniques with the biological sciences and medicine to improve the quality of human health and life. Biomedical engineers design artificial body parts, medical devices, diagnostic tools and medical treatment methods.
Nose Bridge A part of eyewear that supports the glasses on the nose. It may be continuous or have a few pads.
Temple The side of the head behind the eyes.
Brain Stem A stem-like part of the base of the brain that is connected to the spinal cord.
Frontal Lobe A major lobe located at the front of the brain, and is one of the four major lobes of the cerebral cortex in the mammalian brain.
Medulla A part of the brain stem, it also helps transfer neural messages from the brain to the spinal cord.
Academic Vocabulary

Module 2: Body Works
5
5 of 76
engage express evaluate exhibit
Parietal Lobe A part of the cortex. It is where information such as taste, temperature and touch are integrated, or processed.
Occipital Lobe An important component to being able to correctly understand what your eyes are seeing.
Temporal Lobe A lobe that mainly revolves around hearing and selective listening.
Cornea A transparent layer forming the front of the eye.
Iris A flat, colored, ring-shaped membrane behind the cornea of the eye, with an adjustable circular opening (pupil) in the center.
Retina A layer at the back of the eyeball containing cells that are sensitive to light and that trigger nerve impulses that pass through the optic nerve to the brain, where a visual image is formed.
Prototype A first attempt or early design of a new product or creation. It may be revised many times.
Diaphragm A strong wall of muscle that, when moved downward, creates suction in the chest that draws in air and expands the lungs. The diaphragm separates the chest cavity from the abdominal cavity.
Constraint A limitation or restriction. For engineers, constraints are the limitations and requirements that must be considered when designing a workable solution to a problem.
Bioengineering A means of using artificial tissues, organs or organ components to replace damaged or absent parts of the body, such as artificial limbs and heart pacemakers.
Pandemics When an epidemic spreads quickly to infect a widespread population, affecting multiple countries or continents, it has become a pandemic.

Module 2: Body Works
6
6 of 76
engage express evaluate exhibit
Note: Facilitator Resource materials and handouts are included at the end of the day
and should be printed in advance.
Facilitator
Facilitator Demonstration:
2 S-hooks (or strong hooks)
1 ft. (30 cm) chain link (or strong rope)
Large water or paint bucket
Weights, 5 lbs. (2.3 kg) each, for a total of 50 lbs. (22.7 kg); if no weights are available, use equivalent weight of bricks, rocks, sand, heavy books or other material
1 chicken bone (a thoroughly-cleaned chicken wing is ideal)
2 strips of duct tape (6-in [10cm] each)
Clear plastic bin or container, for protection from splintering bone
1 uncoated aspirin tablet [inexpensive "uncoated" generic aspirin works best]
1 enteric-coated aspirin tablet
2 clear plastic cups
1 cup vinegar
1.5 teaspoons baking soda
Pinch of salt
Half cup water
1 per Team
Brain Model
1.5 cups of instant potato flakes
2.5 cups hot water
2 cups clean sand
Required Materials

Module 2: Body Works
7
7 of 76
engage express evaluate exhibit
1 gallon Ziploc bags
Protect That BRAIN!
2 raw eggs
Egg "Helmet" (a variety of materials) Newspaper Styrofoam Balloons Cotton Bubble wrap
Tape (to hold the helmet on the egg)
Newspaper – a few sheets to spread on the ground so clean up is easy
Yardstick
Markers - you could draw a picture of Mr. Egghead on your eggs
White ping pong ball
Black and dark blue markers
Pencils
6” wide Styrofoam ball
Knife
Fine artist paintbrush
Red acrylic paint
Ruler
One cow’s eye for every two participants Cow’s Eye Dissection Kit http://www.hometrainingtools.com/cow-eye-dissection-kit
One single-edged razor blade or scalpel for every two participants
Scissors (optional)
Wax paper and paper towels
Plastic garbage bag
A cutting board or other surface on which you can cut
A sheet of newspaper
Soap, water and paper towels for cleaning up
How to Dissect a Cow’s Eye Document http://www.exploratorium.edu/learning_studio/cow_eye/coweye.

Module 2: Body Works
8
8 of 76
engage express evaluate exhibit
2 model "blocked arteries" made from about 4” (10 cm) of flexible tubing (1.5-in [3.8-cm] diameter) clogged with play dough or peanut butter; (PVC pipe may be used instead of tubing)
2 clown balloons (long and thin)
Timer (such as the clock with second hand or a person's watch or phone)
Three Treatment Methods Images, an overhead projector transparency or printouts to show members
Air pump, for clown balloons
2 straws
2 paper clips
Thin wire
1 pipe cleaner
4 rubber bands
Tape
Square of aluminum foil, about 3 x 3” [7.6 x 7.6 cm]
1 (optional) strip of metal mesh screen, about 4 x 1” [10 x 2.54cm]
Clearing Blocked Arteries Measurements Worksheet, one per student
For the entire group to share:
Water source
2 liter container (from which to pour the same amount of water)
Large jug, bin or container, to catch poured water
Markers
Chart Paper
Creating a Model Lung, each group needs:
2L plastic bottle with cap, with the bottom cut off and holes drilled into the cap
2 plastic drinking straws or 6” (15 cm) of tubing (clear flexible tubing works well, 0.5-1.0 cm in diameter; available at hardware or pet supply stores)
3 balloons (1 large enough to stretch over bottom of 2L bottle; 2 smaller ones, representing lungs)
2 rubber bands

Module 2: Body Works
9
9 of 76
engage express evaluate exhibit
2” (5-cm) cube of soft modeling clay
Respiratory System Worksheet, one per person
Team Members 1 model lung from first part of activity
A variety of materials from which members may select to make a face mask filter, such as white paper, cotton balls, coffee filters, cloth, felt, gauze, foam, cotton batting, string, rubber bands, tape, etc.
Scissors
Members:
Spray bottle of water
Timing device
Each team needs:
Plastic sheeting, 9 x 4” (23 x 10-cm) piece (much thinner than Plexiglas; available at hardware stores)
Cardboard or poster board, 9 x 6” (23 x 15-cm) piece
White paper (for design and template)
Protective Eyewear - Design Brainstorming Worksheet, one per person
Engineering Design Report Template, one per person
For the entire group to share:
Colored plastic saran wrap
Colored and bendable plastic drinking straws
Popsicle sticks
Clear tape
Felt and rubber pieces
String and yarn
Markers
Ruler
Rubber bands, colored paper, play dough or modeling clay (optional)
Items for testing stations, such as a fan; grass clippings; small, clean spray bottle and water; towel; flashlight (optional, for extension

Module 2: Body Works
10
10 of 76
engage express evaluate exhibit
activity)
Scissors

Module 2: Body Works
11
11 of 76
engage express evaluate exhibit
Note: Complete the following table early during the week to prepare for the Community
Sharing event. Share the answers with the CPO for approval.
Type of Event on Friday
Event Name
Who’s Invited
Publicity to Use (Circle all that apply, use blank spaces for additional items)
Fliers Website
Invitations
Ads
Event Location
Display Area for Projects
Supplies Needed (Circle all that apply, use blank spaces for additional items)
Chairs Scissors
Tables Markers
Signs CD Player
Tape Video Equipment
Cups Napkins Refreshments (Try to select items that tie into the theme)
Task Assigned to: Due Date:
Task Assigned to: Due Date:
Task Assigned to: Due Date:
Task
Assigned to: Due Date:
Task Assigned to: Due Date:
Event Planner
Module 2: Body Works
12
12 of 76
engage express evaluate exhibit
Monday Warm-up
Location Multipurpose Room Estimated Time 15 minutes
Steps to Follow
1
Say: Does anyone know what a neurosurgeon is? (Physician who specializes in the diagnosis and surgical treatment of disorders of the central and peripheral nervous system including congenital anomalies, trauma, tumors, vascular disorders, infections of the brain or spine, stroke, or degenerative diseases of the spine.)
2 Let’s look at a video about a neurosurgeon and what her job entails.
3 Dr. Sonia Eden, Neurosurgeon https://www.youtube.com/watch?v=0yyy7DAGvGs
Monday: Head Sprung
Module 2: Body Works
13
13 of 76
engage express evaluate exhibit
Monday Activity 1 The Beautiful Brain
Location Multipurpose Room Estimated Time 45 minutes
Description The brain is a marvelously complex and intricate organ of the body. Neurologists are learning new things about the brain and how it works every day. Members will explore some of the unique traits of the brain in this activity.
Objective Members will create a model brain and participate in a design challenge.
What You Need
Brain Model
1.5 cups of instant potato flakes
2.5 cups hot water
2 cups clean sand
1 gallon Ziploc bags
Protect That BRAIN!
Two raw eggs
Egg "Helmet" (a variety of materials) Newspaper Styrofoam Balloons Cotton Bubble wrap
Tape (to hold the helmet on the egg)
Newspaper - a few sheets to spread on the ground to clean up more easily
Yardstick
Markers - you could draw a picture of Mr. Egghead on your eggs
How to Prepare
Watch the video for background on the challenge. The Brain Safety Challenge https://www.teachingchannel.org/videos/applying-stem-middle-school
Module 2: Body Works
14
14 of 76
engage express evaluate exhibit
Steps to Follow
1
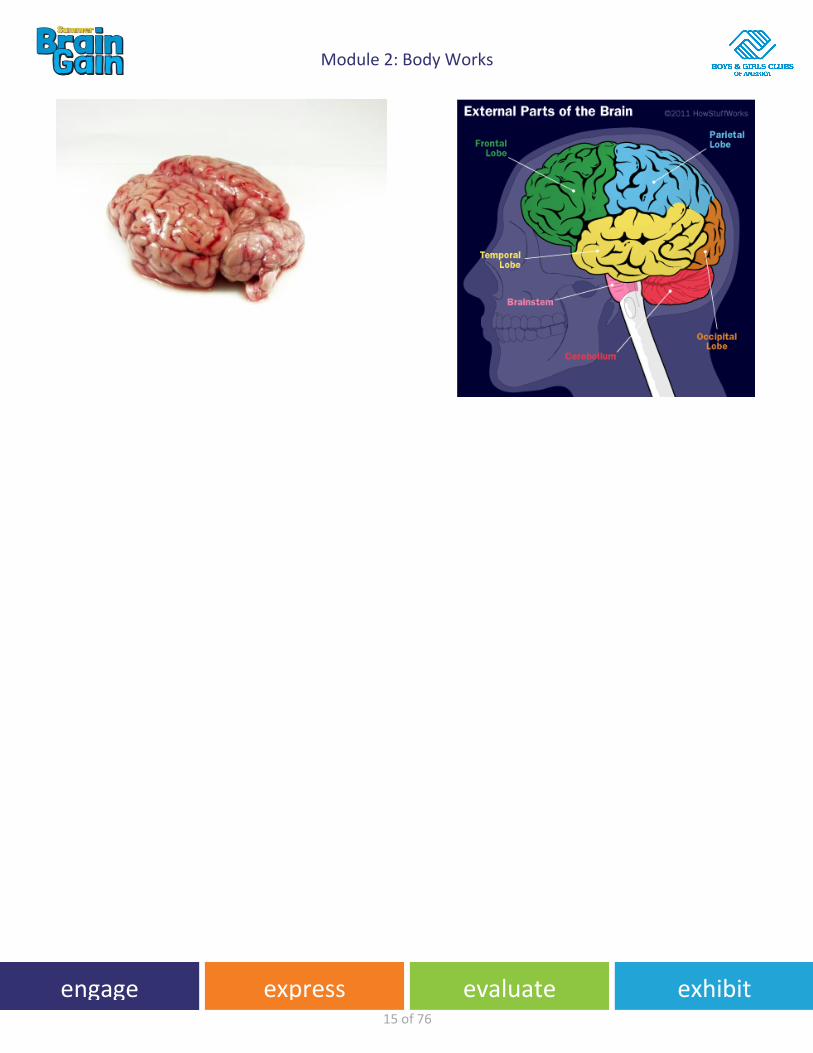
Say: The Cerebral Cortex is made up of tightly packed neurons and is the wrinkly, outermost layer that surrounds the brain. It is also responsible for higher thought processes including speech and decision making. The cortex is divided into four different lobes, the frontal, parietal, temporal and occipital, which are each responsible for processing different types of sensory information.
2 Divide members into teams.
3 Research information on the brain and what injury can do to change it.
4 Use the research to assist with the challenge.
5 Explain that members will create their own brain using the materials.
6 Combine all ingredients in a Ziploc bag and mix thoroughly. It should weigh about 3 lbs. and have the consistency of a real brain.
7 Brain Safety Challenge Say: Whether you bike, skateboard or rollerblade, it is a good idea to wear a helmet to protect your brain.
8 Demonstrate what could happen when you aren’t wearing a helmet in these activities.
9 Use two eggs. Pretend that the eggshell is a skull and the inside of the egg is a brain.
10 Spread newspaper on the ground (it helps clean-up).
11 Drop one of the eggs on the newspaper...it should break. Explain that it was not wearing a helmet.
12 Challenge the members to create a helmet for the second egg. This helmet can be made of paper, Styrofoam or anything else that will cushion the egg.
13 Drop the eggs wearing the "helmets,” to see if the design protects the “brain.”
14
Challenge the members to think about the following questions while designing their “helmets.”
Is the "helmet" unsafe?
Is it possible for the egg to fall at an angle so that it is not protected?
How can you make the best helmet?
Module 2: Body Works
15
15 of 76
engage express evaluate exhibit
Module 2: Body Works
16
16 of 76
engage express evaluate exhibit
Monday Activity 2 Looking Through the Lens
Location Multipurpose Room Estimated Time 45 minutes
Description
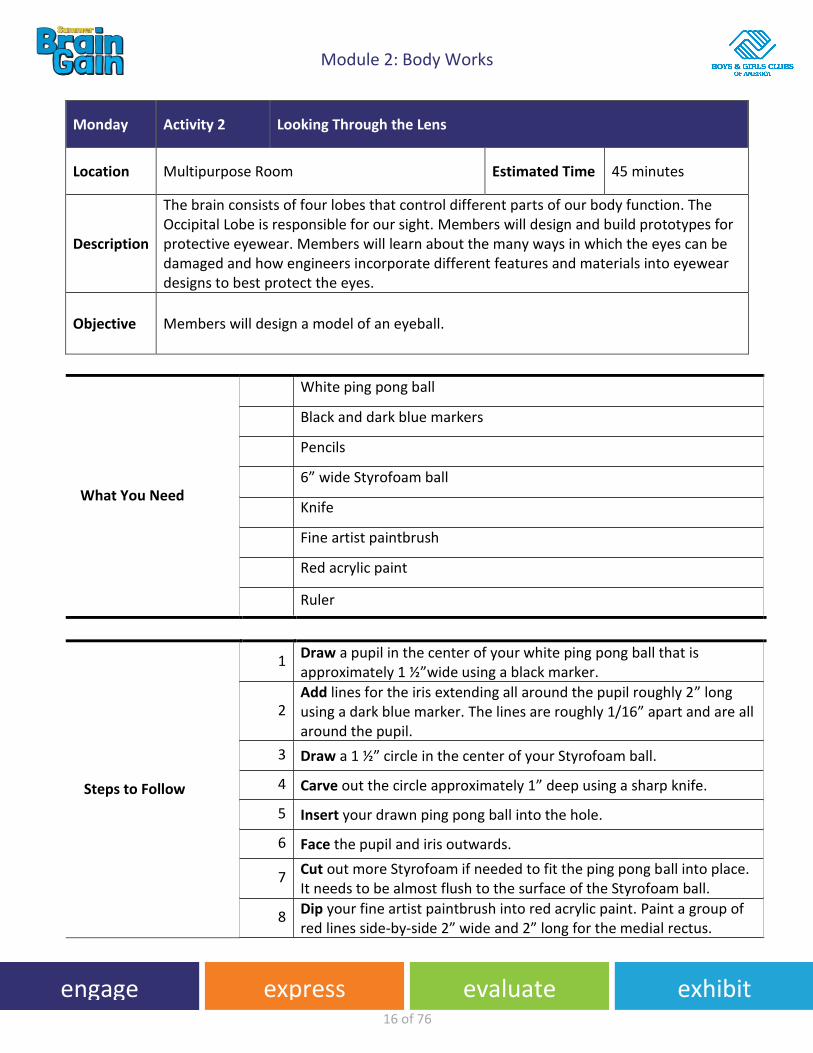
The brain consists of four lobes that control different parts of our body function. The Occipital Lobe is responsible for our sight. Members will design and build prototypes for protective eyewear. Members will learn about the many ways in which the eyes can be damaged and how engineers incorporate different features and materials into eyewear designs to best protect the eyes.
Objective Members will design a model of an eyeball.
What You Need
White ping pong ball
Black and dark blue markers
Pencils
6” wide Styrofoam ball
Knife
Fine artist paintbrush
Red acrylic paint
Ruler
Steps to Follow
1 Draw a pupil in the center of your white ping pong ball that is approximately 1 ½”wide using a black marker.
2 Add lines for the iris extending all around the pupil roughly 2” long using a dark blue marker. The lines are roughly 1/16” apart and are all around the pupil.
3 Draw a 1 ½” circle in the center of your Styrofoam ball.
4 Carve out the circle approximately 1” deep using a sharp knife.
5 Insert your drawn ping pong ball into the hole.
6 Face the pupil and iris outwards.
7 Cut out more Styrofoam if needed to fit the ping pong ball into place. It needs to be almost flush to the surface of the Styrofoam ball.
8 Dip your fine artist paintbrush into red acrylic paint. Paint a group of red lines side-by-side 2” wide and 2” long for the medial rectus.

Module 2: Body Works
17
17 of 76
engage express evaluate exhibit
muscle.
9 Form the lines so that they are almost touching.
10 Add a similar group of lines on each side of the Styrofoam ball.

Module 2: Body Works
18
18 of 76
engage express evaluate exhibit
Monday Activity 3 Looking through a Cow’s Eye
Location Multipurpose Room Estimated Time 45 minutes
Description One way to figure out how something works is to look inside it. To learn about how eyes work, members will dissect a cow’s eye.
Objective Members will dissect a cow’s eye.
What You Need
One cow’s eye for every two participants Cow’s Eye Dissection Kit http://www.hometrainingtools.com/cow-eye-dissection-kit
One single-edged razor blade or scalpel for every two participants
Scissors (optional)
Wax paper and paper towels
Plastic garbage bag
A cutting board or other surface on which you can cut
A sheet of newspaper
Soap, water and paper towels for cleaning up
How to Dissect a Cow’s Eye Document http://www.exploratorium.edu/learning_studio/cow_eye/coweye.pdf
How to Prepare
Say: Today you will use a scalpel or a razor to cut the cow’s eye. Be careful. A scalpel or razor can cut you as easily as it cuts the cow’s eye. Whenever you handle raw meat (whether it’s a cow’s eye or a steak), you wash your hands thoroughly afterward to wash away any bacteria you picked up from the meat. If you have cuts on your hand, we also recommend you wear gloves so that no bacteria from the cow’s eye infects your cut.
Clean-up: When you’re done dissecting the cow’s eye, wrap all the pieces of the eye in plastic and throw them away. If you used a razor blade, dispose of it properly. A razor blade is only good for one or two dissections.
Steps to Follow 1 Say:

Module 2: Body Works
19
19 of 76
engage express evaluate exhibit
Wouldn’t it be neat to see what it looks like to see through our own eyes? Today, we will do that by dissecting the eye of a cow.
2
Examine the outside of the eye. See how many parts of the eye you can identify. You should be able to find the whites (or sclera), the tough, outer covering of the eyeball. You should also be able to identify the fat and muscle surrounding the eye. You should be able to find the covering over the front of the eye (the cornea). When the cow was alive, the cornea was clear. In your cow’s eye, the cornea may be cloudy. You may be able to look through the cornea and see the iris, the colored part of the eye, and the pupil, the dark oval in the middle of the iris.
3 Cut away the fat and muscle.
4
Use a scalpel to make an incision in the cornea. Be careful – don’t cut yourself! Cut until the clear liquid under the cornea is released. That clear liquid is the aqueous humor. It’s made of mostly of water and keeps the shape of the cornea.
5 Use the scalpel to make an incision through the sclera in the middle of the eye.
6
Use your scissors to cut around the middle of the eye, cutting the eye in half. You’ll end up with two halves. On the front half will be the cornea. The cornea is made of pretty tough stuff—it helps protect your eye. It also helps you see by bending the light that comes into your eye. Once you have removed the cornea, place it on the board (or cutting surface) and cut it with your scalpel or razor. Listen. Hear the crunch? That’s the sound of the scalpel crunching through layers of clear tissue. The cow’s cornea has many layers to make it thick and strong. When the cow is grazing, blades of grass may poke the cow’s eye, but the cornea protects the inner eye.
7
Pull out the iris. The iris is between the cornea and the lens. It may be stuck to the cornea or it may have stayed with the back of the eye. Find the iris and pull it out. It should come out in one piece. You can see that there’s a hole in the center of the iris. That’s the pupil, the hole that lets light into the eye. The iris contracts or expands to change the size of the pupil. In dim light, the pupil opens wide to let light in. In bright light, the pupil shuts down to block light out. The back of the eye is filled with a clear jelly. That’s the vitreous humor, a mixture of protein and water. It’s clear so light can pass through it. It also helps the eyeball maintain its shape.
8
Remove the lens. It’s a clear lump about the size and shape of a squashed marble. The lens of the cow’s eye feels soft on the outside and hard in the middle. Hold the lens up and look through it. What do you see?

Module 2: Body Works
20
20 of 76
engage express evaluate exhibit
9 Put the lens down on a newspaper and look through it at the words on the page. What do you see?
10
Look at the rest of the eye. If the vitreous humor is still in the eyeball, empty it out. On the inside of the back half of the eyeball, you can see some blood vessels that are part of a thin fleshy film. That film is the retina. Before you cut the eye open, the vitreous humor pushed against the retina so that it lay flat on the back of the eye. It may be all pushed together in a wad now. The retina is made of cells that can detect light. The eye’s lens uses the light that comes into the eye to make an image, a picture made of light. That image lands on the retina. The cells of the retina react to the light that falls on them and send messages to the brain.
11
Use your finger to push the retina around. The retina is attached to the back of the eye at just one spot. Can you find that spot? That’s the place where nerves from all the cells in the retina come together. All these nerves go out the back of the eye, forming the optic nerve, the bundle of nerves that carries messages from the eye to the brain. The brain uses information from the retina to make a mental picture of the world. The spot where the retina is attached to the back of the eye is called the blind spot. Because there are no light sensitive cells at that spot, you can’t see anything that lands in that place on the retina.
12
Look under the retina, the back of the eye is covered with shiny, blue-green stuff. This is the tapetum. It reflects light from the back of the eye. Have you ever seen a cat’s eyes shining in the headlights of a car? Cats, like cows, have a tapetum. A cat’s eye seems to glow because the cat’s tapetum is reflecting light. If you shine a light at a cow at night, the cow’s eyes will shine with a blue-green light because the light reflects from the tapetum.
13
Look at the other side of the back of the eye. Can you find the optic nerve? To see the separate fibers that make up the optic nerve, pinch the nerve with a pair of scissors or your fingers. If you squeeze the optic nerve, you may get some white goop. That is myelin, the fatty layer that surrounds each fiber of the nerve.

Module 2: Body Works
21
21 of 76
engage express evaluate exhibit
Glossary
Aqueous humor: A clear fluid that helps the cornea keep its rounded shape. Blind spot: The place where all nerves from the retina join to form the optic nerve. Each eye has a blind spot where there are no light-sensitive cells. Cones: One kind of light-sensitive cell in the retina. Cones give you color vision in bright light. Cornea: A tough, clear covering over the iris and the pupil that helps protect the eye. Light bends as it passes through the cornea. The cornea begins bending light to make an image; the lens finishes the job. Iris: A muscle that controls how much light enters the eye. It is suspended between the cornea and the lens. A cow’s iris is brown. Human irises come in many colors, including brown, blue, green and gray. Lens: A clear, flexible structure that makes an image on the eye’s retina. The lens is flexible so that it can change shape, focusing on objects that are close up and objects that are far away. Myelin: The fatty layer that surrounds each nerve fiber. Optic nerve: The bundle of nerve fibers that carry information from the retina to the brain. Pupil: The dark circle in the center of your iris. It’s a hole that lets light into the inner eye. Your pupil is round. A cow’s pupil is oval. Retina: The layer of light-sensitive cells at the back of the eye. The retina detects images focused by the cornea and the lens. The retina is connected to the brain by the optic nerve. Rods: One kind of light-sensitive cell in the retina. Rods respond in dim light. Sclera: The thick, tough, white outer covering of the eyeball. Tapetum: The colorful, shiny material located behind the retina. Found in animals with good night vision, the tapetum reflects light back through the retina. Vitreous humor: The thick, clear jelly that helps give the eyeball its shape.

Module 2: Body Works
22
22 of 76
engage express evaluate exhibit
Monday Cool Down Estimated Time
5 minutes
Steps to Follow 1
3-2-1
Members will share three things they learned, two things they have a question about and one thing they won’t to share with their facilitator.
Module 2: Body Works
23
23 of 76
engage express evaluate exhibit
Monday Warm-up
Location Multipurpose Room Estimated Time 15 minutes
Steps to Follow
1
Say: The circulatory system is centered on the heart, which is a muscular organ that rhythmically pumps blood around a complex network of blood vessels extending to every part of the body. Let’s meet a doctor who specializes in keeping the heart at its best.
2 Show Cardiologist: Monique L. Anderson, MD https://www.youtube.com/watch?v=5ymfqkAsWU0
3 Say: Blood carries necessary body fluids throughout the system and then carries waste away. Blood is made up of four different parts, and each part is important and unique.
4
What You Need: Candy red hots Corn syrup White jelly beans or marshmallows Candy sprinkles Small mixing bowl
5
As you read, allow members to mix the four components of blood. Say: Plasma makes up 55 percent of our blood and 90 percent of it is water. It carries dissolved nutrients like glucose, protein and hormones to parts of the body and picks up waste to bring back to the organs to be cleaned or filtered out. Fill 55 percent of the bowl with corn syrup.
Tuesday: Breathe In…Breathe Out…
Module 2: Body Works
24
24 of 76
engage express evaluate exhibit
Tuesday Activity 1 Circulation Station – Part 1
Location Multipurpose Room Estimated Time 45 minutes
Description
Following the steps of the engineering design process and acting as biomedical engineers, teams use everyday materials to design and develop devices and approaches to unclog blood vessels. Through this open-ended design project, they learn about the circulatory system, biomedical engineering and conditions that lead to heart attacks and strokes.
Objective Members will describe what happens when a blood vessel is blocked and design a technique to "open up" a blocked blood vessel.
What You Need
2 model "blocked arteries" made from about 4” (10 cm) of flexible tubing (1.5-in [3.8-cm] diameter) clogged with play dough or peanut butter; (PVC pipe may be used instead of tubing)
2 clown balloons (long and thin)
Timer (such as the clock with second hand or a person's watch or phone)
Three Treatment Methods Images, an overhead projector transparency or printouts to show members
Air pump, for clown balloons
2 straws
2 paper clips
Thin wire
1 pipe cleaner
4 rubber bands
Tape
Square of aluminum foil, about 3 x 3” [7.6 x 7.6 cm]
1 (optional) strip of metal mesh screen, about 4 x 1” [10 x 2.54cm]
Clearing Blocked Arteries Measurements Worksheet, one per member
For the entire group to share:
Water source

Module 2: Body Works
25
25 of 76
engage express evaluate exhibit
2L container (from which to pour the same amount of water)
Large jug, bin or container, to catch poured water
Markers
Chart paper
How to Prepare
Make two models blocked arteries
Three Treatment Methods Documents Clearing Blocked Arteries Measurements Worksheet
Chart the following questions:
Did your artery clearing devices work? If so, how well did it work? If not, why do you think it did not work?
How could your design be improved in the future?
Steps to Follow
1
Say: Engineers of all types—biomedical, mechanical, chemical and electrical—work together with medical professionals to apply basic biological and medical science to solving real-world problems. Devices such as catheters, balloon catheters and stents help people avoid or live beyond life-threatening heart attacks and strokes.
2
Watch the video on artery blockage. Blocked Coronary Arteries https://www.youtube.com/watch?v=kUQe6I6vv74
3 Divide the group into groups of three. Hand out the worksheets.
4 Explain the design project to the teams. Your challenge today is to create a device that could remove or flatten the built-up plaque material inside artery walls.
5
Demonstrate that blocked arteries have a different flow than clear arteries by asking the group to time how long it takes for two liters of water to flow through a clear piece of piping at a 45° angle versus through a blocked piece of piping at the same angle (see Figure 2). Have members record these measurements on their worksheets.
6
Say: Today you and your team are engineers working together to create a device that could remove or flatten the built-up plaque inside artery walls. Your team has two identical blocked arteries and a set of materials. Use the materials to develop a device to improve the flow in the artery. Remember, you do not have to use all of the materials.

Module 2: Body Works
26
26 of 76
engage express evaluate exhibit
7 Ask members what ideas they have for unblocking their model arteries.
8
Improve on your design. Keep in mind that you do not want to just knock the plaque off the wall and leave it in the blood stream, and you do not want to hurt the fragile inside wall of the arteries.
9
Probe the members on how they will solve the challenge. What are the steps a design team of engineers would take? (After members have suggested ideas, write the steps all engineers go through in designing and solving problems on the board. Understand the need, brainstorm ideas, design and plan, create and test a prototype, and review and improve.) Well, first engineers must have a problem or a need. Then, they brainstorm creative ideas and solutions to that problem or need. Next, they select the most promising idea and create a design that they can draw or communicate to others. They make a prototype of that design and test it to evaluate whether or not the design is successful.
10 Circulate among the groups. Remind them that they do not want the treatment to hurt the patient!
11
Determine by timing how fast two liters of water flow through a team's cleared arteries after the treatment method. Hold the arteries at 45° angle while the water flows. Have members record these measurements on their worksheets.
12
Discuss and chart the answers to the following questions:
Why did your group decide on this design?
How does this device work?
What happens to the plaque after you use the device?
Which specific blood vessel in the body might this represent?
What would happen if you were able to unblock part, but not all, of the artery?
How would having partially blocked blood vessels affect a person's body?

Module 2: Body Works
27
27 of 76
engage express evaluate exhibit

Module 2: Body Works
28
28 of 76
engage express evaluate exhibit
Tuesday Activity 2 Circulation Station – Part 2
Location Multipurpose Room Estimated Time 45 minutes
Description
Following the steps of the engineering design process and acting as biomedical engineers, student teams use everyday materials to design and develop devices and approaches to unclog blood vessels. Through this open-ended design project, they learn about the circulatory system, biomedical engineering, and conditions that lead to heart attacks and strokes.
Objective
Describe what happens when a blood vessel is blocked. Describe how bioengineering techniques can be used to "open up" a blocked blood vessel. Apply the engineering design process to create solutions to a problem. Investigate the anatomy of vertebrate animal vision by making a model eyeball using a Styrofoam ball.
What You Need
2 model "blocked arteries" made from about 4”(10 cm) of flexible tubing (1.5-in [3.8-cm] diameter) clogged with play dough or peanut butter; (PVC pipe may be used instead of tubing)
2 clown balloons (long and thin)
Timer (such as the clock with second hand or a person's watch or phone)
Three Treatment Methods Images, an overhead projector transparency or printouts to show members
Air pump, for clown balloons
2 straws
2 paper clips
Thin wire
1 pipe cleaner
4 rubber bands
Tape
Square of aluminum foil, about 3 x 3” [7.6 x 7.6 cm]
1 (optional) strip of metal mesh screen, about 4 x 1” [10 x 2.54cm]
Clearing Blocked Arteries Measurements Worksheet, one per member
For the entire group to share:
Module 2: Body Works
29
29 of 76
engage express evaluate exhibit
Water source
2L container (from which to pour the same amount of water)
Large jug, bin or container, to catch poured water
Markers
Chart paper
How to Prepare
Make two models blocked arteries
Three Treatment Methods Documents Clearing Blocked Arteries Measurements Worksheet
Chart the following questions:
Did your artery clearing devices work? If so, how well did it work? If not, why do you think it did not work?
How could your design be improved in the future?
Steps to Follow
1
Say: Engineers of all types—biomedical, mechanical, chemical and electrical—work together with medical professionals to apply basic biological and medical science to solving real-world problems. Devices such as catheters, balloon catheters and stents help people avoid or live beyond life-threatening heart attacks and strokes.
2 Divide the group into groups of three. Hand out the worksheets.
3 Explain the design project to the student teams: Your challenge today is to create a device that could remove or flatten the built-up of plaque inside artery walls.
4
Demonstrate that blocked arteries have a different flow than clear arteries by asking the group to time how long it takes for two liters of water to flow through a clear piece of piping at a 45° angle versus through a blocked piece of piping at the same angle (see Figure 2). Have members record these measurements on their worksheets.
5
Say: Today you and your team are acting as engineers who will work together to create a device that could remove or flatten the built-up of plaque inside artery walls. Your team has two identical blocked arteries and a set of materials. Use the materials to develop a device to improve the flow in the artery. Remember, you do not have to use all of the materials.
6 Ask members what ideas they have for unblocking their model arteries
7 Improve on your design. Keep in mind that you do not want to just knock the plaque off the wall and leave it in the blood stream, and
Module 2: Body Works
30
30 of 76
engage express evaluate exhibit
you do not want to hurt the fragile inside wall of the arteries.
8
Probe the members on how they will solve the challenge. What are the steps a design team of engineers would take? (After members have suggested ideas, write the steps all engineers go through in designing and solving problems on the board. Understand the need, brainstorm ideas, design and plan, create and test a prototype, and review and improve.) Well, first engineers must have a problem or a need. Then, they brainstorm creative ideas and solutions to that problem or need. Next, they select the most promising idea and create a design that they can draw or communicate to others. They make a prototype of that design and test it to evaluate whether or not the design is successful.
9 Circulate among the groups. Remind them that they do not want the treatment to hurt the patient!
10
Time how fast two liters of water flow through a team's cleared arteries after the treatment method. Hold the arteries at 45° angle while the water flows. Have members record these measurements on their worksheets.
11
Discuss and chart the answers to the following questions:
Why did your group decide on this design? How does this device work? What happens to the plaque after you use the device? Which specific blood vessel in the body might this
represent? What would happen if you were able to unblock part, but
not all, of the artery? How would having partially blocked blood vessels affect a
person's body?

Module 2: Body Works
31
31 of 76
engage express evaluate exhibit
Tuesday Activity 3 The Lung Life - Part 1
Location Multipurpose Room Estimated Time 45 minutes
Description Members will discuss the respiratory system and see the role that engineers play in helping us stay healthy by designing machines and medicines that support respiratory health and function.
Objective Members will be able to explain how the air in the lungs and chest cavity changes according to air intake and diaphragm movement.
What You Need
Creating a Model Lung, each group needs:
2L plastic bottle with cap, with the bottom cut off and holes drilled into the cap
2 plastic drinking straws or 6” (15 cm) of tubing (clear flexible tubing works well, 0.5-1.0 cm in diameter; available at hardware or pet supply stores)
3 balloons (1 large enough to stretch over bottom of 2L bottle; 2 smaller ones, representing lungs)
2 rubber bands
2” (5-cm) cube of soft modeling clay
Respiratory System Worksheet, one per person
How to Prepare
Use scissors to cut the plastic bottle
Drill, to make two holes in bottle cap to receive straws or tubing
Guide the teams to make the lung using these instructions:
1. Stick two straws [or tubing] through the two holes in the bottle cap. The straws represent the bronchi.
2. Place a balloon on the end of each straw [or tube] and secure with a rubber band. The balloons represent the lungs.
3. Feed the balloon ends of the straws through the top of the bottle and screw the lid on tightly. As necessary, use the clay to secure the straws in place.
4. Stretch out the larger balloon and place it over the open [cut-off] bottom of the bottle. The larger balloon represents

Module 2: Body Works
32
32 of 76
engage express evaluate exhibit
the diaphragm.
Steps to Follow
1
Say: Some engineers work with doctors to find engineering solutions to problems affecting the human body and the respiratory system. Engineers use their knowledge of respiration, air flow, fluid flow and membranes to devise systems to provide functions of the respiratory system to patients when their respiratory system, or parts of it, fail.
2
Explain that today members will use balloons, straws and plastic bottles to make model lungs that include diaphragms and chest cavities, enabling them to see how air moving in and out of the lungs coincides with diaphragm movement.
3
Say: Put your hands on your ribcage and take a few deep breaths. Can you feel expansion occurring? When the rib muscles contract, the ribs lift slightly. At the same time, the diaphragm contracts down. This allows for more space in the lungs as the air enters (inhalation). Air travels through into the lungs. The opposite occurs during exhalation.
To better understand how a system works, engineers often create models. The respiratory system is one such system in which creating a model helps us understand it and figure out what might happen to it if some input to the system changes. Engineers must understand the respiratory process in detail if they are to design machines and medicines to help people whose respiratory systems are not functioning properly.
4
Review the primary respiratory system components by showing the following video: The Respiratory System https://www.youtube.com/watch?v=hc1YtXc_84A (3:28) (Show the video twice, first to watch and the second time to complete the worksheet)
5 Label parts and describe their functions on the Respiratory System Worksheet.
6 Divide members into partners.
7 Provide each team with the materials, cut-off bottle, screw lid with holes, straws (or tubing), balloons, rubber bands and clay.
8 Guide members who are having trouble by asking questions, such as: Which material might be used to move air through? Which

Module 2: Body Works
33
33 of 76
engage express evaluate exhibit
materials might be able to be filled up with air? Of what might the bottom of the chest cavity be made?
9
Direct teams to use the materials to make basic, functioning models of the human respiratory system, with tubes to carry air into the lungs and a diaphragm that when pushed or pulled illustrates what happens to the lung cavity.
10
Note: This portion of the activity is not open-ended, as each team should come up with the same design [see Figure 1], but do not give instructions on how to do it; let the members figure it out!
11 Demonstrate how to use the lung models to demonstrate what happens when the cavity fills up with air.
12
Ask: What happens when the diaphragm is pulled? (Pulling the diaphragm down, away from the lungs, inflates the lungs by making the chest cavity larger and decreasing the pressure.) What happens when the diaphragm is pushed? (Pushing the diaphragm in, toward the lungs, deflates the lungs by making the chest cavity smaller and increasing the pressure.) (Make sure members see how air moving in and out of the lungs coincides with diaphragm movement.)
13
Say: Our breathing is very important in a practice called Yoga. Yoga uses breathing of the diaphragm to allow for a more full and conscious type of breathing. Yoga can quiet and calm the entire nervous system (brain), which can reduce stress and anxiety and improve self-awareness.
14
Say: Lie comfortably on your back with your knees bent and your feet flat on the floor about hip-distance apart. Place a palm on your abdomen and breathe comfortably for a few moments, noticing the quality of your breath. Does the breath feel tense, strained, uneven or shallow? Then gradually begin to make your breathing as relaxed and smooth as possible, introducing a slight pause after each in-

Module 2: Body Works
34
34 of 76
engage express evaluate exhibit
breath and out-breath.
Once the breath feels relaxed and comfortable, notice the movement of the body. As you inhale, the abdomen naturally expands; as you exhale, feel the slight contraction of the abdomen. In a gentle way, try to actively expand the abdomen on the inhale and contract the abdomen on the exhale to support the natural movement of the diaphragm and experience the pleasure of giving yourself a full, relaxed breath. Continue the practice for 6 to 12 breaths. This is called “Conscious Breathing.”
Tuesday Cool Down Estimated Time: 15 minutes
Steps to Follow 1
Three W's Members will discuss or write:
What did we learn today?
So What? (relevancy, importance, usefulness)
Now What? (how does this fit into what we are learning,
does it affect our thinking, can we predict where we are
going)

Module 2: Body Works
35
35 of 76
engage express evaluate exhibit
Wednesday Warm-up
Location Multipurpose Room Estimated Time 15 minutes
Steps to Follow
1 Say: Have you ever heard of an Orthopedic doctor? What do you think they specialize in? Let’s watch the video and find out.
2 Meet Dr. Craig S. Radnay, Orthopedic Surgeon https://www.youtube.com/watch?v=FM1lryrFDdc
Wednesday: Bones, Bones, Bones

Module 2: Body Works
36
36 of 76
engage express evaluate exhibit
Wednesday Activity 1 The Lung Life - Part 2
Location Multipurpose Room Estimated Time 45 minutes
Description Members will discuss the respiratory system and see the role that engineers play in helping us stay healthy by designing machines and medicines that support respiratory health and function.
Objective Members will be able to explain how the air in the lungs and chest cavity changes according to air intake and diaphragm movement.
What You Need
Creating a Model Lung, each group needs:
2L plastic bottle with cap, with the bottom cut off and holes drilled into the cap
2 plastic drinking straws or 6” (15 cm) of tubing (clear flexible tubing works well, 0.5-1.0 cm in diameter; available at hardware or pet supply stores)
3 balloons (1 large enough to stretch over bottom of 2L bottle; 2 smaller ones, representing lungs)
2 rubber bands
2” (5-cm) cube of soft modeling clay
Respiratory System Worksheet, one per person
Yoga mat/Beach towel
How to Prepare
Use scissors to cut the plastic bottle
Drill, to make two holes in bottle cap to receive straws or tubing
Guide the teams to make the lung using these instructions:
1. Stick two straws [or tubing] through the two holes in the bottle cap. The straws represent the bronchi.
2. Place a balloon on the end of each straw [or tube] and secure with a rubber band. The balloons represent the lungs.
3. Feed the balloon ends of the straws through the top of the bottle and screw the lid on tightly. As necessary, use the clay to secure the straws in place.
Module 2: Body Works
37
37 of 76
engage express evaluate exhibit
4. Stretch out the larger balloon and place it over the open [cut-off] bottom of the bottle. The larger balloon represents the diaphragm.
Steps to Follow
1
Say: Some engineers work with doctors to find engineering solutions to problems affecting the human body and the respiratory system. Engineers use their knowledge of respiration, air flow, fluid flow and membranes to devise systems to provide functions of the respiratory system to patients when their respiratory system, or parts of it, fail.
2
Explain that today members will use balloons, straws and plastic bottles to make model lungs that include diaphragms and chest cavities, enabling them to see how air moving in and out of the lungs coincides with diaphragm movement.
3
Say: Put your hands on your ribcage and take a few deep breaths. Can you feel expansion occurring? When the rib muscles contract, the ribs lift slightly. At the same time, the diaphragm contracts down. This allows for more space in the lungs as the air enters (inhalation). Air travels through into the lungs. The opposite occurs during exhalation.
To better understand how a system works, engineers often create models. The respiratory system is one such system in which creating a model helps us understand it and figure out what might happen to it if some input to the system changes. Engineers must understand the respiratory process in detail if they are to design machines and medicines to help people whose respiratory systems are not functioning properly.
4
Review the primary respiratory system components by showing the following video: The Respiratory System https://www.youtube.com/watch?v=hc1YtXc_84A (3:28) (Show the video twice, first to watch and the second time to complete the worksheet)
5 Label parts and describe their functions on the Respiratory System Worksheet.
6 Divide members into partners.
7 Provide each team with the materials, cut-off bottle, screw lid with holes, straws (or tubing), balloons, rubber bands and clay.
8
Guide members who are having trouble by asking questions, such as: Which material might be used to move air through? Which materials might be able to be filled up with air? Of what might the bottom of the chest cavity be made?
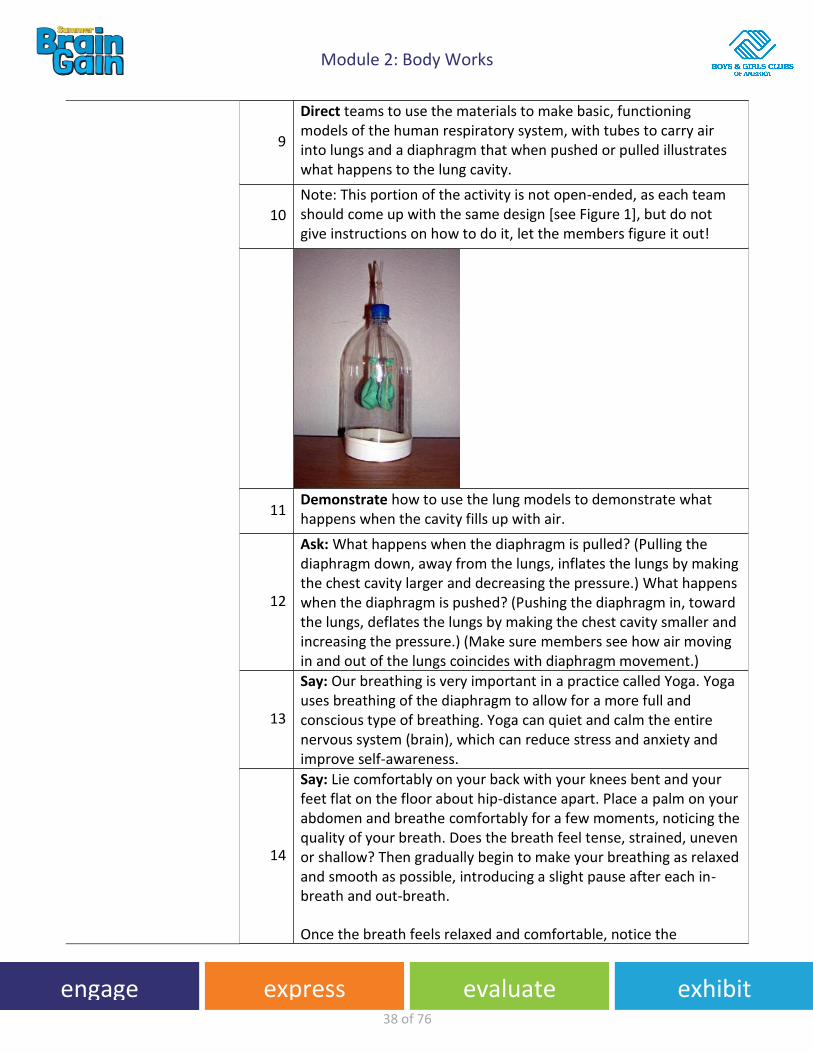
Module 2: Body Works
38
38 of 76
engage express evaluate exhibit
9
Direct teams to use the materials to make basic, functioning models of the human respiratory system, with tubes to carry air into lungs and a diaphragm that when pushed or pulled illustrates what happens to the lung cavity.
10
Note: This portion of the activity is not open-ended, as each team should come up with the same design [see Figure 1], but do not give instructions on how to do it, let the members figure it out!
11 Demonstrate how to use the lung models to demonstrate what happens when the cavity fills up with air.
12
Ask: What happens when the diaphragm is pulled? (Pulling the diaphragm down, away from the lungs, inflates the lungs by making the chest cavity larger and decreasing the pressure.) What happens when the diaphragm is pushed? (Pushing the diaphragm in, toward the lungs, deflates the lungs by making the chest cavity smaller and increasing the pressure.) (Make sure members see how air moving in and out of the lungs coincides with diaphragm movement.)
13
Say: Our breathing is very important in a practice called Yoga. Yoga uses breathing of the diaphragm to allow for a more full and conscious type of breathing. Yoga can quiet and calm the entire nervous system (brain), which can reduce stress and anxiety and improve self-awareness.
14
Say: Lie comfortably on your back with your knees bent and your feet flat on the floor about hip-distance apart. Place a palm on your abdomen and breathe comfortably for a few moments, noticing the quality of your breath. Does the breath feel tense, strained, uneven or shallow? Then gradually begin to make your breathing as relaxed and smooth as possible, introducing a slight pause after each in-breath and out-breath.
Once the breath feels relaxed and comfortable, notice the

Module 2: Body Works
39
39 of 76
engage express evaluate exhibit
movement of the body. As you inhale, the abdomen naturally expands; as you exhale, feel the slight contraction of the abdomen. In a gentle way, try to actively expand the abdomen on the inhale and contract the abdomen on the exhale to support the natural movement of the diaphragm and experience the pleasure of giving yourself a full, relaxed breath. Continue the practice for 6 to 12 breaths. This is called “Conscious Breathing.”
Module 2: Body Works
40
40 of 76
engage express evaluate exhibit
Wednesday Activity 2 Bendable, Breakable Bones - Part 1
Location Multipurpose Room Estimated Time 45 minutes
Description Your bones are tough stuff — but even tough stuff can break. Like a wooden pencil, bones will bend under strain. But if the pressure is too much, or too sudden, bones can snap. Members will demonstrate the strength of bones.
Objective Members will design a model to illustrate how a load might affect a bone.
What You Need
Teacher Demonstration:
2 S-hooks (or strong hooks)
1 ft. (30 cm) chain link (or strong rope)
Large water or paint bucket
Weights, 5 lbs. (2.3 kg) each, for a total of 50 lbs. (22.7 kg); if no weights are available, use equivalent weight of bricks, rocks, sand, heavy books or other material
1 chicken bone (a thoroughly-cleaned chicken wing is ideal)
2 strips of duct tape (6” [10cm] each)
Clear plastic bin or container, for protection from splintering bone
How to Prepare
Use two tables or desks and follow the next steps to set-up the load testing area for the group demonstration
Move tables or desks to create an open 1.5”span between them
Arrange two tables to create a 1.5” (3.8-cm) open span between their tops (right) Connect the S-hooks to the pieces of chain link
Using the S-hooks, connect a hook to each end of the link chain
Hook an end of the chain, using the S-hook to the bucket handle
Note: Most chicken bones are capable of holding 40-50 lbs.

Module 2: Body Works
41
41 of 76
engage express evaluate exhibit
Steps to Follow
1
Say: Today, we will be talking about the strength of bones. There are medical devices used to help repair a fractured bone. Listen to this story about Juan.
2
Say: In our activity today, we are going to see that even though Juan’s bones are strong, too much load or force causes bones to fracture. A fracture is the same as a broken bone; the word "fracture" is the term that doctors use. The cast, it is a medical device designed by biomedical engineers to help repair broken bones. Its purpose is to maintain the bone in a fixed position so that it does not move (get re-injured) and can heal. Today, we are going to measure the load that a bone can hold before it breaks and then you can design your own casts, just like biomedical engineers.
3
Observing Bones and Group Demonstration – Bone Breaking
Give each team a fractured chicken bone to observe. It should be similar to the one you are using for the demonstration, or pass around the bone that you are using for the demonstration to each group. Review briefly the functions of bones and the skeletal system.
4 Divide the members into teams.
5 Study the bones for characteristics, such as size, color, shape,

Module 2: Body Works
42
42 of 76
engage express evaluate exhibit
strength, etc. Encourage members to examine the bone by sight, touch and smell. Tell them not to taste the bone or break it.
6
Collect information on the activity worksheet. Draw the bone, write down any observations about it (size, color, strength, etc.), as well as predict the total amount of load (weight) that the bone will be able to carry before failure (fracture).
7 Gather members around the testing station after information has been gathered.
8 Tape the chicken bone securely to tabletops, across the open span (right). Using a second S-hook, attach the loose end of the chain to the middle of the bone.
9 Hang the chain and the bucket in the middle of the opening. Make sure the bucket is suspended above the floor.
10 Use an S-hook to attach the loose end of the chain to the middle of the bone.
11
Adjust the chain link to hang the bucket from the bone so it is above the floor and between the tabletop openings.
(For safety, keep bone pieces, marrow and other fragments from flying, by placing a clear plastic bin or container over the bone while you are adding weight to the bucket.)
12
Add weight into the bucket in 5 lb. (2.3-kg) increments, pausing for 5-10 seconds to allow the additional weight to settle. Do not drop weights into bucket; place them gently into the bucket.
Module 2: Body Works
43
43 of 76
engage express evaluate exhibit
13 Add weight until the bone cracks.
14 Record the amount of weight that caused the demonstration bone to fail (fracture) on worksheets.
Bones Information
The human body has 20 main bones: cranium, mandible, clavicle, scapula, vertebrae, sternum, ribs, humerus, radius, ulna, pelvis, femur, patella, fibula, tibia, carpus (carpal bones), metacarpus (metacarpal bones), tarsus (tarsal bones), metatarsus (metatarsal bones) and phalanges.
1. The cranium, also known as the skull, supports the face structure and protects the head from injury.
2. The mandible makes up the lower jaw and keeps the lower teeth in place.
3. The clavicle, also known as the collarbone, is located between the scapula and sternum and makes up part of the shoulder.
4. The scapula, also known as the shoulder blade, connects the humerus (upper arm bone) with the clavicle (collarbone).
5. The vertebrae make up the vertebral column, which is the backbone or spine.
6. The sternum is the long flat bone in the middle of the chest that forms (along with the ribs) the rib cage, which protects the lungs, heart and blood vessels.
7. The ribs are long curved bones that help form the rib cage and enable the lung expansion.
8. The humerus is the long bone in the upper arm, connecting the shoulder and the elbow.
9. The radius is the smaller, shorter long bone in the lower arm, between the elbow and the thumb-side of the wrist.
10. The ulna is the larger, longer long bone in the lower arm, on the side of the pinky finger.
11. The pelvis rests between the abdomen and the thighs and it bears the weight of the upper body.
12. The femur, the thigh bone, is the largest and strongest bone of the body.
13. The patella, or kneecap, is a flat triangular bone found at the front of the knee joint. It protects and covers the joints of the knee.
14. The fibula is found at the outer side of the lower leg and forms the outer part of the ankle joint.
15. The tibia is the larger and stronger bone below the knee in the leg.

Module 2: Body Works
44
44 of 76
engage express evaluate exhibit
16. The carpus (carpal bones) is a cluster of eight bones making up the wrist.
17. The metacarpus (metacarpal bones) includes the five long bones, connecting each finger to the wrist.
18. The tarsus (tarsal bones) is a cluster of seven bones, making up the ankle, heel and arch of the foot.
19. The metatarsus (metatarsal bones) includes five long bones, connecting each of the toes to the ankle.
20. The phalanges are the bones that make up the toes and fingers.
Almost every bone in your body is made of the same materials:
The outer surface of bone is called the periosteum (say: pare-ee-OSS-tee-
um). It's a thin, dense membrane that contains nerves and blood vessels that
nourish the bone.
The next layer is made up of compact bone. This part is smooth and very
hard. It's the part you see when you look at a skeleton.
Within the compact bone are many layers of cancellous (say: KAN-sell-us)
bone, which looks a bit like a sponge. Cancellous bone is not quite as hard as
compact bone, but it is still very strong.
In many bones, the cancellous bone protects the innermost part of the bone,
the bone marrow (say: MAIR-oh). Bone marrow is sort of like a thick jelly, and
its job is to make blood cells.

Module 2: Body Works
45
45 of 76
engage express evaluate exhibit
Wednesday Activity 3 Bendable, Breakable Bones - Part 2
Location Multipurpose Room Estimated Time 45 minutes
Description Your bones are tough stuff — but even tough stuff can break. Like a wooden pencil, bones will bend under strain. But if the pressure is too much, or too sudden, bones can snap. Members will demonstrate the strength of bones.
Objective Members will design a model to illustrate how a load might affect a bone.
What You Need
Teacher Demonstration:
2 S-hooks (or strong hooks)
1 ft. (30 cm) chain link (or strong rope)
Large water or paint bucket
Weights, 5 lbs. (2.3 kg) each, for a total of 50 lbs. (22.7 kg); if no weights are available, use equivalent weight of bricks, rocks, sand, heavy books or other material
1 chicken bone (a thoroughly-cleaned chicken wing is ideal)
2 strips of duct tape (6” [10cm] each)
Clear plastic bin or container, for protection from splintering bone
How to Prepare
Use two tables or desks and follow the next steps to set-up the load testing area for the group demonstration
Move tables or desks to create an open 1.5” span between them
Arrange two tables to create a 1.5” (3.8-cm) open span between their tops (right) Connect the S-hooks to the pieces of chain link
Using the S-hooks, connect a hook to each end of the link chain
Hook an end of the chain, using the S-hook to the bucket handle
Note: Most chicken bones are capable of holding 40-50 lbs.

Module 2: Body Works
46
46 of 76
engage express evaluate exhibit
Steps to Follow
1
Say: Today, we will be talking about the strength of bones. There are medical devices used to help repair a fractured bone. Listen to this story about Juan.
2
Say: In our activity today, we are going to see that even though Juan’s bones are strong, too much load or force causes bones to fracture. A fracture is the same as a broken bone; the word "fracture" is the term that doctors use. A cast is a medical device designed by biomedical engineers to help repair broken bones. Its purpose is to maintain the bone in a fixed position so that it does not move (get re-injured) and can heal. Today, we are going to measure the load that a bone can hold before it breaks and then you can design your own casts, just like biomedical engineers.
Observing Bones and Group Demonstration – Bone Breaking
Give each team a fractured chicken bone to observe. It should be similar to the one you are using for the demonstration, or pass around the bone that you are using for the demonstration to each group. Review briefly the functions of bones and the skeletal system.
Divide the members into teams.
Study the bones for characteristics, such as size, color, shape,

Module 2: Body Works
47
47 of 76
engage express evaluate exhibit
strength, etc. Encourage members to examine the bone by sight, touch and smell. Tell them not to taste the bone or break it.
Collect information on the activity worksheet. Draw the bone, write down any observations about it (size, color, strength, etc.), as well as predict the total amount of load (weight) that the bone will be able to carry before failure (fracture).
Gather members around the testing station after the information has been gathered.
Tape the chicken bone securely to tabletops, across the open span. (right). Using a second S-hook, attach the loose end of the chain to the middle of the bone.
Hang the chain and the bucket in the middle of the opening. Make sure the bucket is suspended above the floor.
Use an S-hook to attach the loose end of the chain to the middle of the bone.
Adjust the chain link to hang the bucket from the bone so it is above the floor and between the tabletop openings.
(For safety, keep bone pieces, marrow and other fragments from flying, by placing a clear plastic bin or container over the bone while you are adding weight to the bucket.)
Add weight into the bucket, in 5 lb. (2.3-kg) increments, pausing for 5-10 seconds to allow the additional weight to settle. Do not drop weights into bucket; place them gently into the bucket.
Module 2: Body Works
48
48 of 76
engage express evaluate exhibit
Add weight until the bone cracks.
Record on worksheets the amount of weight that caused the demonstration bone to fail (fracture).

Module 2: Body Works
49
49 of 76
engage express evaluate exhibit
Wednesday Cool Down Estimated Time 15 minutes
Steps to Follow
1 Snowstorm Members write down what they learned on a piece of scratch paper.
2 Given a signal, they throw their paper snowball in the air.
3 Members will pick up a nearby response and read it aloud.

Module 2: Body Works
50
50 of 76
engage express evaluate exhibit
Wednesday Facilitator Resource
Story about Juan:
Juan Skeleton is a healthy fourth-grader who loves to play soccer. One day he is outside at recess playing soccer with his friends when something happens to him. In our activity today, we are going to see that even though Juan's bones are strong, too much load or force causes bones to fracture. A fracture is the same as a broken bone; the word "fracture" is the term that doctors use. As for the cast, it is a medical device designed by biomedical engineers to help repair broken bones. Its purpose is to maintain the bone in a fixed position so that it does not move (get re-injured) and can heal. Today, we are going to measure the load that a bone can hold before it breaks and then you can design your own casts, just like biomedical engineers. Are you ready for some fun with bones and casts and splints? As Juan slides to take the ball away from his friend Julia, his foot gets stuck in a hole in the ground and he hears something crack. This crack is in his lower right leg and it is very painful. Juan does not realize what just happened to him but he knows something is wrong. Bravely, he tries to stand up and walk off the field, but he cannot because the pain is too much to bear. Juan cries for help and his friends call the teacher who sees that Juan's leg is starting to swell.
The teacher, Mrs. Maria, carries Juan into the nurse's office. He explains what happened on the field, and both the teacher and the nurse realize that Juan just fractured the bone in his leg. Juan's parents are called and he goes to the hospital.
At the hospital, Dr. Arenas helps treat Juan's fractured leg. X-rays are taken to determine exactly where the fracture is located and how severe it is. After the tests and x-rays, Dr. Arenas tells Juan's parents that the fracture is not too severe. Juan has a simple closed fracture. Phew!! Good news for Juan (no surgery required to re-set the broken bones). The doctor tells his parents that Juan needs to have his leg wrapped in a cast to help heal the fractured bone.
The next day, Juan goes to school with a comfortable, light-weight and cool-looking cast on his leg. Since Juan cannot put any load on his leg or move it, he must use crutches to help him move. Juan is sad because for the next six weeks he cannot play soccer at recess, but he knows that the cast will protect his bone so it can heal and get better.
Many weeks after Juan hurt his leg, the cast is removed. After his leg regains its strength, he will be able to play soccer again! Yay for Juan!!
Did Juan's leg magically get fixed? What is the cast he had to wear? How did his bone fracture if he is a strong, healthy person? What is a fracture and is it different from a break? Why did Juan use crutches and why was he not able to apply any load/weight to his leg? You might be thinking about these questions and more!

Module 2: Body Works
51
51 of 76
engage express evaluate exhibit
Thursday Warm-up
Location Multipurpose Room Estimated Time 15 minutes
Steps to Follow
1 Say: Let’s look at a video of another career in STEM called a Biomedical Engineer.
2 So You Want to be a Biomedical Engineer https://www.youtube.com/watch?v=QlnZpv713V4 (2:30)
3 Meet a Biomedical Engineer https://www.youtube.com/watch?v=HWaK7Tkm63A (2:06)
Thursday: Fix Me!

Module 2: Body Works
52
52 of 76
engage express evaluate exhibit
Thursday Activity 1 Digestion Simulation
Location Multipurpose Room Estimated Time: 45 minutes
Description. Biomedical engineers develop medical devices that aid doctors, pharmacists and other medical professionals in their work. Members will learn what simulation means and how it relates to the engineering process, particularly in biomedical engineering.
Objective
Members will define "simulation" and explain its importance in the science and engineering fields and list several ways in which engineers can help people with medical problems.
What You Need
1 uncoated aspirin tablet [inexpensive "uncoated" generic aspirin works best]
1 enteric-coated aspirin tablet
2 clear plastic cups
1 cup vinegar
1.5 teaspoons baking soda
Pinch of salt
Half a cup of water
How to Prepare
The facilitator will lead this experiment with help from the members.
Gather all materials prior to the experiment.
Steps to Follow 1
Say: Did you know that biomedical engineers recently created the world's first artificial stomach? It mimics many of the activities that take place in your body and can even throw up! You might be wondering what anyone would want to do with a machine that works like a digestive system and throws up on occasion. In reality, this machine is expected to be very beneficial to scientists, doctors and pharmacists who want to know more about how our bodies work. What happens to your food or medicine after you swallow it? How does your body absorb food or medicine into your system? This is very important to know!
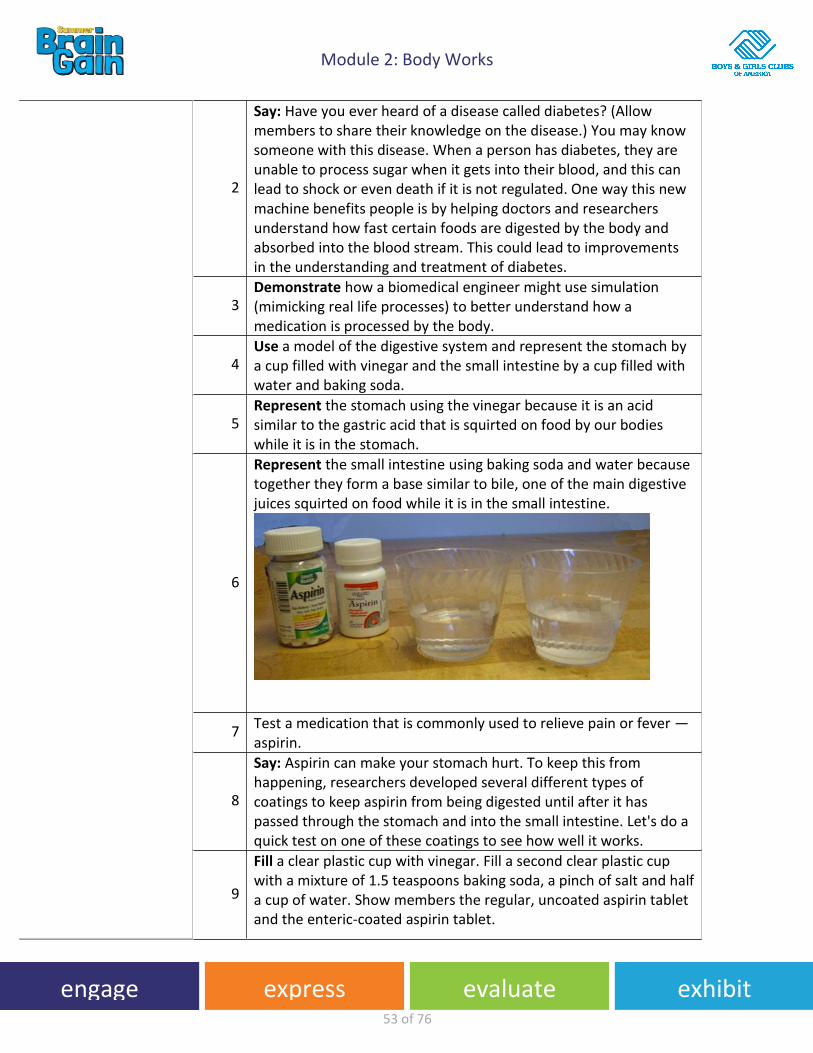
Module 2: Body Works
53
53 of 76
engage express evaluate exhibit
2
Say: Have you ever heard of a disease called diabetes? (Allow members to share their knowledge on the disease.) You may know someone with this disease. When a person has diabetes, they are unable to process sugar when it gets into their blood, and this can lead to shock or even death if it is not regulated. One way this new machine benefits people is by helping doctors and researchers understand how fast certain foods are digested by the body and absorbed into the blood stream. This could lead to improvements in the understanding and treatment of diabetes.
3 Demonstrate how a biomedical engineer might use simulation (mimicking real life processes) to better understand how a medication is processed by the body.
4 Use a model of the digestive system and represent the stomach by a cup filled with vinegar and the small intestine by a cup filled with water and baking soda.
5 Represent the stomach using the vinegar because it is an acid similar to the gastric acid that is squirted on food by our bodies while it is in the stomach.
6
Represent the small intestine using baking soda and water because together they form a base similar to bile, one of the main digestive juices squirted on food while it is in the small intestine.
7 Test a medication that is commonly used to relieve pain or fever — aspirin.
8
Say: Aspirin can make your stomach hurt. To keep this from happening, researchers developed several different types of coatings to keep aspirin from being digested until after it has passed through the stomach and into the small intestine. Let's do a quick test on one of these coatings to see how well it works.
9
Fill a clear plastic cup with vinegar. Fill a second clear plastic cup with a mixture of 1.5 teaspoons baking soda, a pinch of salt and half a cup of water. Show members the regular, uncoated aspirin tablet and the enteric-coated aspirin tablet.
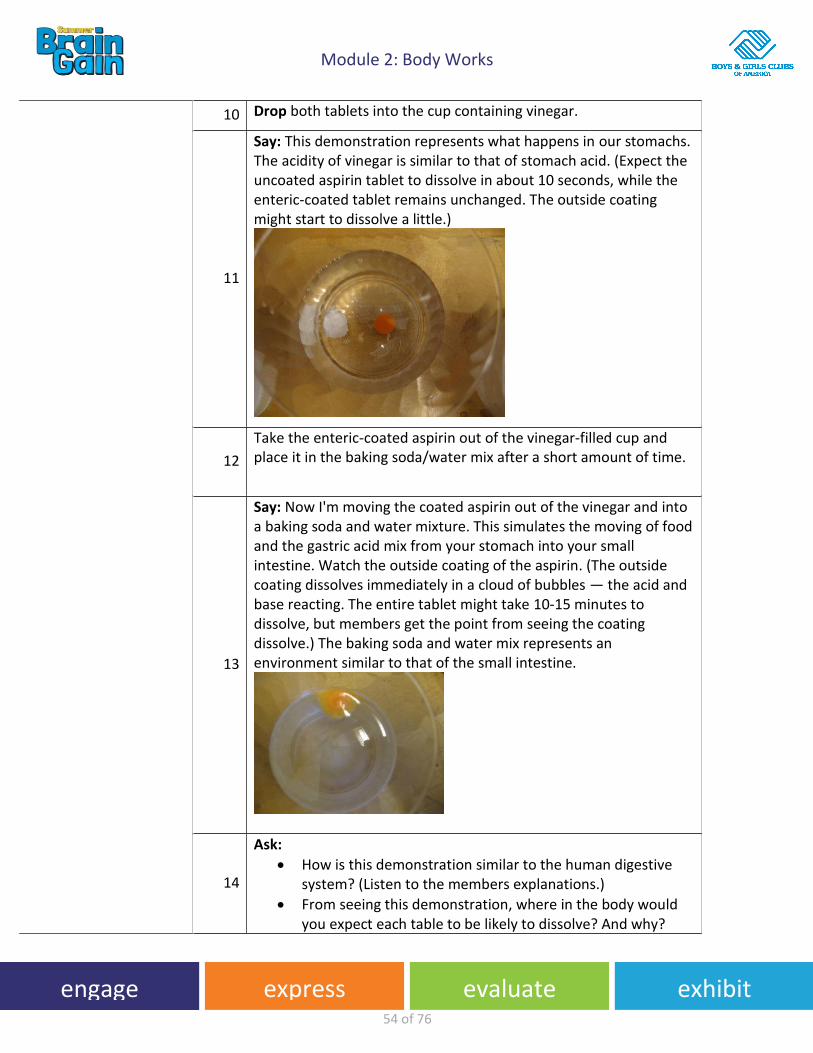
Module 2: Body Works
54
54 of 76
engage express evaluate exhibit
10 Drop both tablets into the cup containing vinegar.
11
Say: This demonstration represents what happens in our stomachs. The acidity of vinegar is similar to that of stomach acid. (Expect the uncoated aspirin tablet to dissolve in about 10 seconds, while the enteric-coated tablet remains unchanged. The outside coating might start to dissolve a little.)
12
Take the enteric-coated aspirin out of the vinegar-filled cup and place it in the baking soda/water mix after a short amount of time.
13
Say: Now I'm moving the coated aspirin out of the vinegar and into a baking soda and water mixture. This simulates the moving of food and the gastric acid mix from your stomach into your small intestine. Watch the outside coating of the aspirin. (The outside coating dissolves immediately in a cloud of bubbles — the acid and base reacting. The entire tablet might take 10-15 minutes to dissolve, but members get the point from seeing the coating dissolve.) The baking soda and water mix represents an environment similar to that of the small intestine.
14
Ask:
How is this demonstration similar to the human digestive system? (Listen to the members explanations.)
From seeing this demonstration, where in the body would you expect each table to be likely to dissolve? And why?
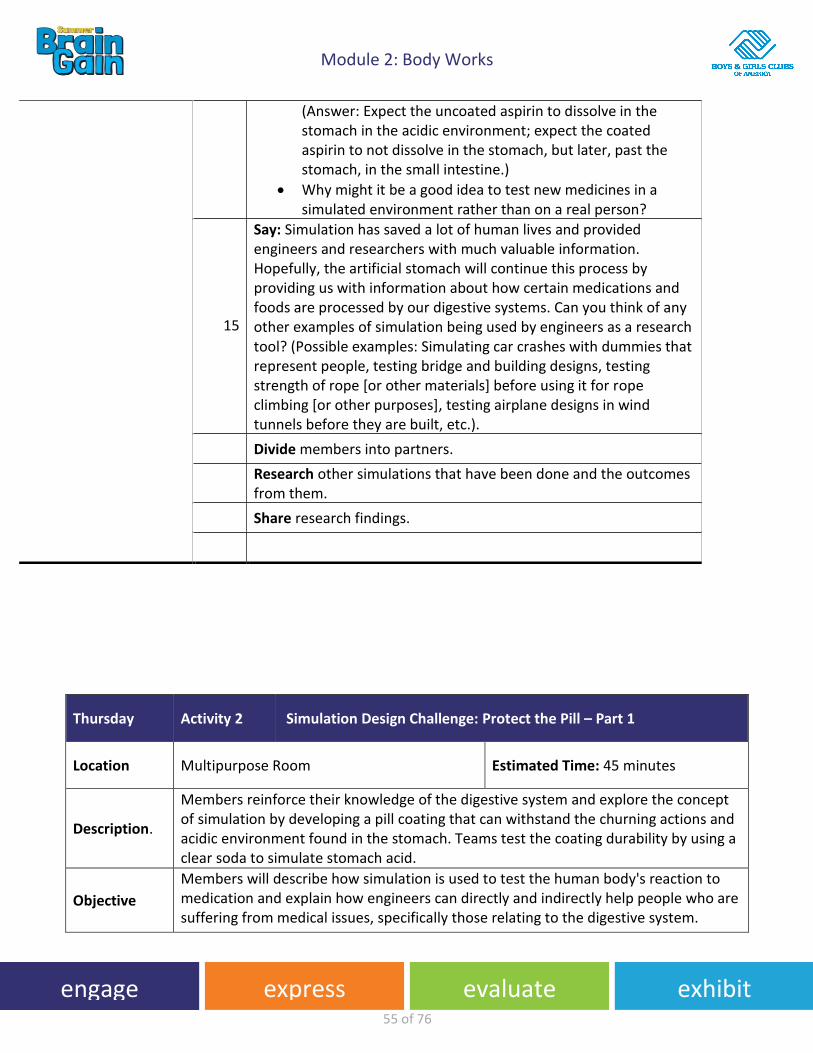
Module 2: Body Works
55
55 of 76
engage express evaluate exhibit
Thursday Activity 2 Simulation Design Challenge: Protect the Pill – Part 1
Location Multipurpose Room Estimated Time: 45 minutes
Description.
Members reinforce their knowledge of the digestive system and explore the concept of simulation by developing a pill coating that can withstand the churning actions and acidic environment found in the stomach. Teams test the coating durability by using a clear soda to simulate stomach acid.
Objective
Members will describe how simulation is used to test the human body's reaction to medication and explain how engineers can directly and indirectly help people who are suffering from medical issues, specifically those relating to the digestive system.
(Answer: Expect the uncoated aspirin to dissolve in the stomach in the acidic environment; expect the coated aspirin to not dissolve in the stomach, but later, past the stomach, in the small intestine.)
Why might it be a good idea to test new medicines in a simulated environment rather than on a real person?
15
Say: Simulation has saved a lot of human lives and provided engineers and researchers with much valuable information. Hopefully, the artificial stomach will continue this process by providing us with information about how certain medications and foods are processed by our digestive systems. Can you think of any other examples of simulation being used by engineers as a research tool? (Possible examples: Simulating car crashes with dummies that represent people, testing bridge and building designs, testing strength of rope [or other materials] before using it for rope climbing [or other purposes], testing airplane designs in wind tunnels before they are built, etc.).
Divide members into partners.
Research other simulations that have been done and the outcomes from them.
Share research findings.

Module 2: Body Works
56
56 of 76
engage express evaluate exhibit
What You Need
60 ml (¼ cup) flour
30 ml (1/8 cup) cornstarch
60 ml (¼ cup) sugar
30 ml (1/8 cup) vegetable oil
1 paper plate
4 small paper or plastic bowls or cups
1 clear plastic cup
1 cup clear diet (to avoid stickiness) soda
1 small plastic spoon
2 pieces of color-coated candy per group (Runts or Skittles work well)
Recipe and Fraction Worksheet, one per person
For the entire group to share:
Marker, to write team names on plastic cups
1 cup clear diet soda in a plastic cup (for experiment control)
Timer
How to Prepare
Gather materials and measure specified amounts of flour, cornstarch, sugar and vegetable into individual bowls.
Make enough copies of the Recipe and Fraction Worksheet to provide one per person.
Steps to Follow
1
Say: Now it’s time for you to design a pill that will withstand the acid in the stomach. You all are now Biomedical Engineers designing with a purpose.
2
Say: Many medicines help our bodies fight sicknesses and diseases, but can also make our stomachs hurt. To prevent this stomach pain while still allowing the medication to get into our bodies, engineers and pharmacists have developed pill coatings that do not dissolve until after they have passed through our stomachs. These specially-coated pills are called "enteric-coated" pills or tablets.
Today, we are going to help Sarah by acting as engineers and developing our own "enteric" coating. We will create a recipe for

Module 2: Body Works
57
57 of 76
engage express evaluate exhibit
our coating, and then test it by observing its effectiveness in protecting a piece of candy placed in an environment that simulates the environment found in our stomachs.
3
Ask: Why is it better to test the pill in a simulated environment rather than testing it on a human? (Possible answers: The coating could fail and make the person's stomach hurt, it is easier to observe how the pill dissolves in the simulated environment, etc.). Then, just like engineers, we will analyze our coating and make suggestions for improvements to our design.
4 Divide the group into two or three members each.
5 Pass out worksheets and materials to each group.
6
Discuss with the group the different properties of each ingredient. Oil helps the dry ingredients stick together, helps make the mixture less sticky, and makes the coating less soluble. Flour and cornstarch are thickening agents with fairly similar properties. They also improve the workability of the overall mixture. Sugar thickens the mixture to some extent and makes the texture grainier, but can also make it less soluble when used in the right proportion, thereby improving its performance as a protective coating.
7
Discuss in teams how much of each ingredient (in spoonfuls) they think they want in their coatings. These become their recipes, which they document on their worksheets.
8
Follow the recipes created by their teams and begin mixing coatings on paper plates. If a team feels that more of a certain ingredient is called for, have them carefully measure it and add it into the mixture, remembering to make the changes to the recipe on their worksheets.
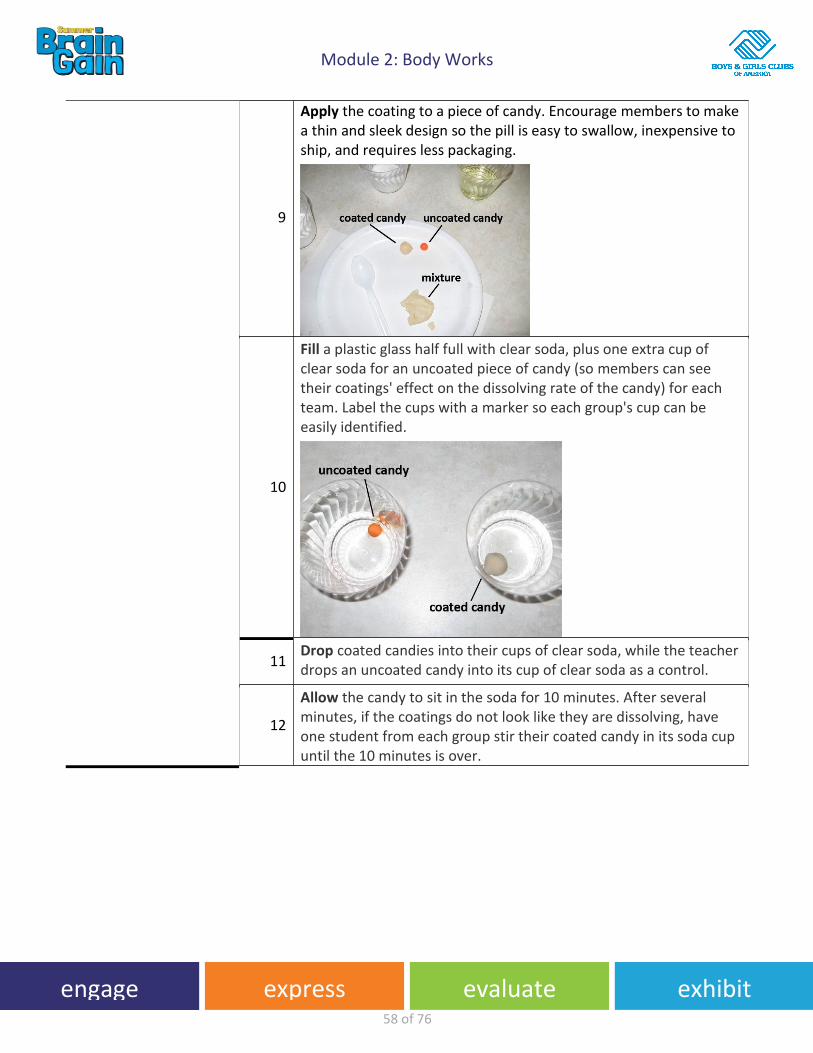
Module 2: Body Works
58
58 of 76
engage express evaluate exhibit
9
Apply the coating to a piece of candy. Encourage members to make a thin and sleek design so the pill is easy to swallow, inexpensive to ship, and requires less packaging.
10
Fill a plastic glass half full with clear soda, plus one extra cup of clear soda for an uncoated piece of candy (so members can see their coatings' effect on the dissolving rate of the candy) for each team. Label the cups with a marker so each group's cup can be easily identified.
11 Drop coated candies into their cups of clear soda, while the teacher drops an uncoated candy into its cup of clear soda as a control.
12
Allow the candy to sit in the soda for 10 minutes. After several minutes, if the coatings do not look like they are dissolving, have one student from each group stir their coated candy in its soda cup until the 10 minutes is over.
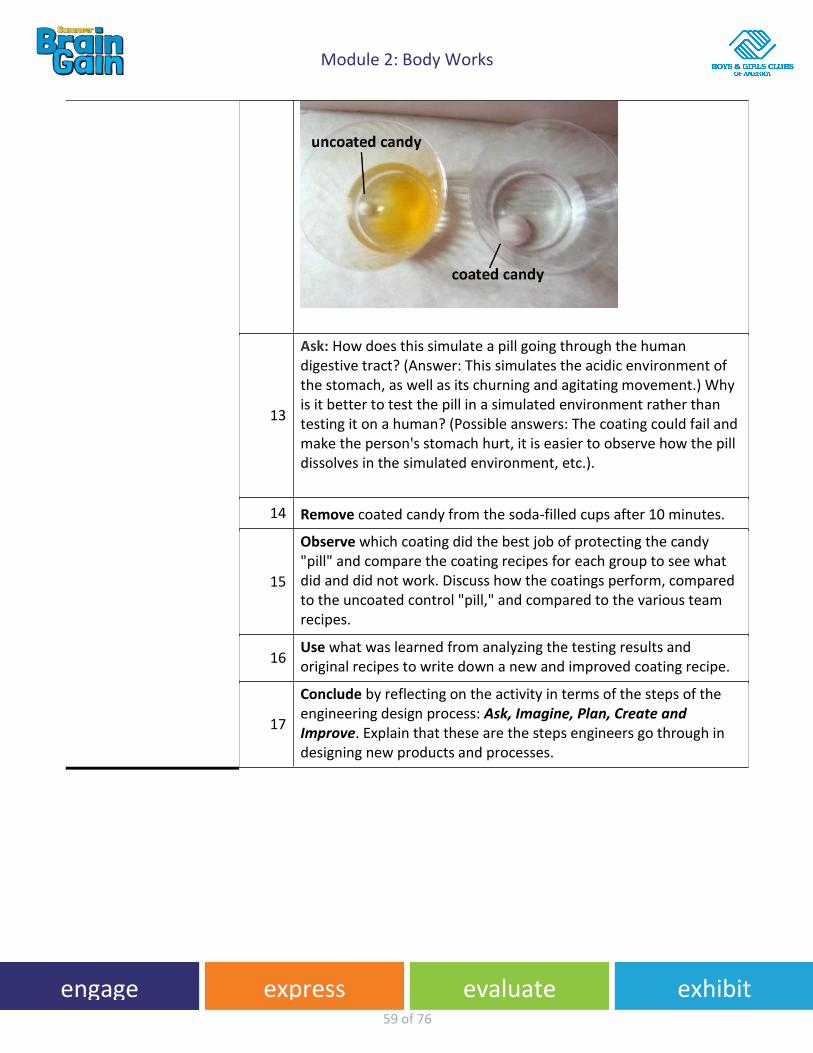
Module 2: Body Works
59
59 of 76
engage express evaluate exhibit
13
Ask: How does this simulate a pill going through the human digestive tract? (Answer: This simulates the acidic environment of the stomach, as well as its churning and agitating movement.) Why is it better to test the pill in a simulated environment rather than testing it on a human? (Possible answers: The coating could fail and make the person's stomach hurt, it is easier to observe how the pill dissolves in the simulated environment, etc.).
14 Remove coated candy from the soda-filled cups after 10 minutes.
15
Observe which coating did the best job of protecting the candy "pill" and compare the coating recipes for each group to see what did and did not work. Discuss how the coatings perform, compared to the uncoated control "pill," and compared to the various team recipes.
16 Use what was learned from analyzing the testing results and original recipes to write down a new and improved coating recipe.
17
Conclude by reflecting on the activity in terms of the steps of the engineering design process: Ask, Imagine, Plan, Create and Improve. Explain that these are the steps engineers go through in designing new products and processes.
Module 2: Body Works
60
60 of 76
engage express evaluate exhibit
Story of Sarah
Sarah is a fifth-grade student with an extremely sensitive stomach that is irritated by certain foods and many medications. Sarah recently came down with an illness that caused her to have a high fever, among other symptoms. Her mother wants to help Sarah fight the fever by giving her some aspirin, but she is afraid that the medicine might make Sarah's stomach hurt. Can you think of some ways you might be able to help Sarah? (Possible answers: Have Sarah take the medication with food, use a different type of medication that does not cause stomach pain, use a coated aspirin, drink fluids and take a cooling sponge bath, have Sarah take the aspirin with another type of medication that helps stomach pain, etc.)
Thursday Activity 3 Simulation Design Challenge: Protect the Pill – Part 2: Remix
Location Multipurpose Room Estimated Time: 45 minutes
Description.
Members reinforce their knowledge of the digestive system and explore the concept of simulation by developing a pill coating that can withstand the churning actions and acidic environment found in the stomach. Teams test the coating durability by using a clear soda to simulate stomach acid.
Objective Members will improve on their previous simulation using the engineering design.
What You Need
60 ml (¼ cup) flour
30 ml (1/8 cup) cornstarch
60 ml (¼ cup) sugar
30 ml (1/8 cup) vegetable oil
Module 2: Body Works
61
61 of 76
engage express evaluate exhibit
1 paper plate
4 small paper or plastic bowls or cups
1 clear plastic cup
1 cup clear diet (to avoid stickiness) soda
1 small plastic spoon
2 pieces of color-coated candy per group (Runts or Skittles work well)
Recipe and Fraction Worksheet, one per person
For the entire group to share:
Marker, to write team names on plastic cups
1 cup clear diet soda in a plastic cup (for experiment control)
Paper
Pencils/Pens
Timer
How to Prepare
Gather materials and measure specified amounts of flour, cornstarch, sugar and vegetable into individual bowls.
Make enough copies of the Recipe and Fraction Worksheet to provide one per person.
Steps to Follow
1
Say: Now it’s time for you to design a pill that will withstand the acid in the stomach. You all are now Biomedical Engineers designing with a purpose.
2
Say: Many medicines help our bodies fight sicknesses and diseases, but can also make our stomachs hurt. To prevent this stomach pain while still allowing the medication to get into our bodies, engineers and pharmacists have developed pill coatings that do not dissolve until after they have passed through our stomachs. These specially-coated pills are called "enteric-coated" pills or tablets.
Today, we are going to help Sarah by acting as engineers and developing our own "enteric" coating. We will create a recipe for our coating, and then test it by observing its effectiveness in
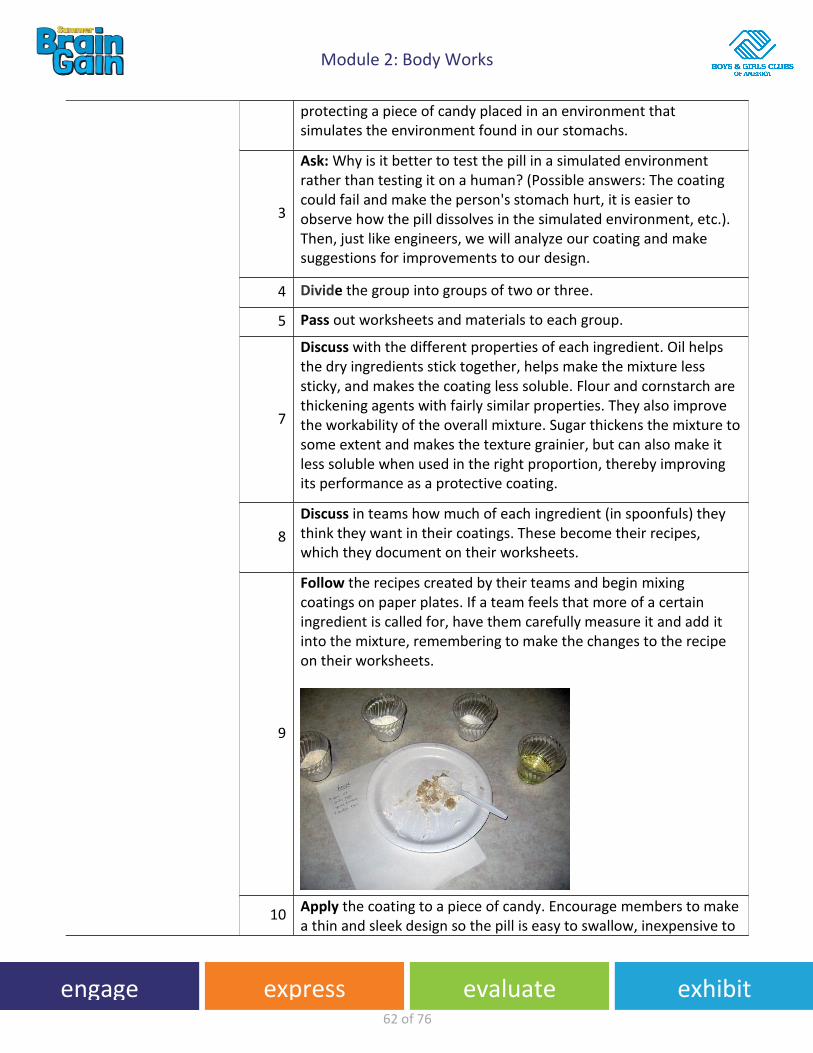
Module 2: Body Works
62
62 of 76
engage express evaluate exhibit
protecting a piece of candy placed in an environment that simulates the environment found in our stomachs.
3
Ask: Why is it better to test the pill in a simulated environment rather than testing it on a human? (Possible answers: The coating could fail and make the person's stomach hurt, it is easier to observe how the pill dissolves in the simulated environment, etc.). Then, just like engineers, we will analyze our coating and make suggestions for improvements to our design.
4 Divide the group into groups of two or three.
5 Pass out worksheets and materials to each group.
7
Discuss with the different properties of each ingredient. Oil helps the dry ingredients stick together, helps make the mixture less sticky, and makes the coating less soluble. Flour and cornstarch are thickening agents with fairly similar properties. They also improve the workability of the overall mixture. Sugar thickens the mixture to some extent and makes the texture grainier, but can also make it less soluble when used in the right proportion, thereby improving its performance as a protective coating.
8
Discuss in teams how much of each ingredient (in spoonfuls) they think they want in their coatings. These become their recipes, which they document on their worksheets.
9
Follow the recipes created by their teams and begin mixing coatings on paper plates. If a team feels that more of a certain ingredient is called for, have them carefully measure it and add it into the mixture, remembering to make the changes to the recipe on their worksheets.
10 Apply the coating to a piece of candy. Encourage members to make a thin and sleek design so the pill is easy to swallow, inexpensive to

Module 2: Body Works
63
63 of 76
engage express evaluate exhibit
ship, and requires less packaging.
11
Fill a plastic glass half full with clear soda, plus one extra cup of clear soda for an uncoated piece of candy (so members can see their coatings' effect on the dissolving rate of the candy) for each team. Label the cups with a marker so each group's cup can be easily identified.
12 Drop coated candies into their cups of clear soda, while the teacher drops an uncoated candy into its cup of clear soda as a control.
13
Allow the candy to sit in the soda for 10 minutes. After several minutes, if the coatings do not look like they are dissolving, have one member from each group stir their coated candy in its soda cup until the 10 minutes is over.
Module 2: Body Works
64
64 of 76
engage express evaluate exhibit
14
Ask: How does this simulate a pill going through the human digestive tract? (Answer: This simulates the acidic environment of the stomach, as well as its churning and agitating movement.) Why is it better to test the pill in a simulated environment rather than testing it on a human? (Possible answers: The coating could fail and make the person's stomach hurt, it is easier to observe how the pill dissolves in the simulated environment, etc.).
15 Remove coated candy from the soda-filled cups after 10 minutes.
16
Observe which coating did the best job of protecting the candy "pill" and compare the coating recipes for each group to see what did and did not work. Discuss how the coatings perform, compared to the uncoated control "pill," and compared to the various team recipes.
17 Use what was learned from analyzing the testing results and original recipes to write down a new and improved coating recipe.
18
Conclude by reflecting on the activity in terms of the steps of the engineering design process: Ask, Imagine, Plan, Create and Improve. Explain that these are the steps engineers go through in designing new products and processes.
Thursday Cool Down Estimated Time: 15 minutes
Steps to Follow 1
Three W's Members will discuss or write:
1. What did we learn today?
2. So What? (relevancy, importance, usefulness)
3. Now What? (how does this fit into what we are learning,
does it affect our thinking, can we predict where we are
going)

Module 2: Body Works
65
65 of 76
engage express evaluate exhibit
Friday Warm-up
Location Multipurpose Room Estimated Time 15 minutes
Steps to Follow
1 Say: It’s now time to tie all of the different engineering types together. Let’s see how all of these engineers connect.
2
What is engineering: How different disciplines work together to create a vending machine https://www.youtube.com/watch?v=3KQm8cHmqIw
Friday: Designs of the Future
Module 2: Body Works
66
66 of 76
engage express evaluate exhibit
Friday Activity 1 Design Station – Non Pollutant face Mask
Location Multipurpose Room Estimated Time 45 minutes
Description Members will design a mask that will prevent polluted air from entering the lungs and develop a prototype air filter to be worn over the nose and mouth.
Objective Members will design and create a prototype air filter to be worn over the nose and mouth.
What You Need
Team Members 1 model lung from first part of activity
A variety of materials from which members may select to make a face mask filter, such as white paper, cotton balls, coffee filters, cloth, felt, gauze, foam, cotton batting, string, rubber bands, tape, etc.
Scissors
Timer
Spray bottle of water
How to Prepare
Dust in the Respiratory System Visual Aid, overhead transparency or handout
Steps to Follow
1
Divide the members into groups.
2
Use the lung prototype that was made in an earlier activity. Have one member in each group blow into the straws to inflate the lungs.
3 Time the group together by having them count how many breaths they can take through the straws in one minute.
4 Record this number to use when testing the facemask filters later.

Module 2: Body Works
67
67 of 76
engage express evaluate exhibit
5 Say: Today you will design and create prototype face filters that could be worn to reduce the amount of air pollution entering the respiratory system.
6
Say: Environmental engineers are concerned with how air pollution occurs (both outdoors and indoors), how to mediate it (clean it up), and how to prevent it. Biomedical, electrical and chemical engineers are interested in finding ways to help a person's respiratory system if the system is weakened by disease, air pollution or other factors. They might design an artificial lung or a respiration machine for patients whose lungs are recovering from injury or illness, or are waiting for a transplant. Biomedical and materials engineers also create products that can keep people safe from air pollution before their lungs are affected.
7
Research the answers to the following questions:
What happens when polluted air enters your body?
What happens to your lungs?
What happens to your diaphragm?
How does our respiratory system adapt to polluted air?
What is in polluted air?
8 Discuss the answers to the questions.
9
Say: Polluted air may contain many things, including dust, mold spores, pollen, car exhaust toxins, ozone, lead and bacteria. When air pollutants and bacteria in the air enter the body, the respiratory system's functions may become impaired.
10
Say: One easy way to protect your respiratory system from harmful air pollutants is a facemask. A variety of facemasks are on the market today for use by people with allergies, medical personnel in hospitals, and even bicyclists and pedestrians who travel through heavy traffic areas. Engineers design these masks to filter the air by combining different materials. Materials might include porous foam, activated charcoal, filter paper, absorbent cellulose and gauze. Engineers design different facemasks for different situations. Something that works effectively at filtering pollen out of the air may not work as well in filtering carbon monoxide from car exhaust.
11 Ask: What do you think an engineer must consider when designing a facemask filter? (Listen to student suggestions.)
12 Write these "design requirements" on the board.
13 Say: Engineers think about the problem to be solved and translate the needs of the problem into design requirements. These

Module 2: Body Works
68
68 of 76
engage express evaluate exhibit
requirements and limitations must be considered when designing a workable solution to a problem.
14
Consider the following in the design:
The mask covers both the mouth and nose.
The mask allows the person to breath normally in and out through the filter, and it captures the particles in the air that the person wants to avoid.
The mask is comfortable (easy to put on, stays in place, non-irritating).
15 Design a facemask filter that could be worn to prevent air pollution from entering the respiratory system.
16 Draw your design first as a team.
17 Use the materials to create your mask.

Module 2: Body Works
69
69 of 76
engage express evaluate exhibit
Friday Activity 2 Designing Protective Eyewear - Part 1
Location Multipurpose Room Estimated Time 45 minutes
Description Engineers have been designing protective eyewear for centuries, with much improvement as new materials and technologies have become available. Members will create and design their version of protective eyewear in this interactive activity.
Objective Members will design and create a prototype of protective eyewear.
What You Need
Each team needs:
Plastic sheeting, 9 x 4” (23 x 10 cm) piece (much thinner than Plexiglas; available at hardware stores)
Cardboard or poster board, 9 x 6” (23 x 15 cm) piece
White paper (for design and template)
Protective Eyewear - Design Brainstorming Worksheet, one per person
Engineering Design Report Template, one per person
For the entire group to share:
Colored plastic saran wrap
Colored and bendable plastic drinking straws
Popsicle sticks
Clear tape
Felt and rubber pieces
String and yarn
Markers
Scissors
Ruler
Rubber bands, colored paper, play dough or modeling clay (optional)
Items for testing stations, such as: fan; grass clippings; small, clean spray bottle and water; towel; flashlight (optional, for extension

Module 2: Body Works
70
70 of 76
engage express evaluate exhibit
activity)
Gather materials and make copies of the Protective Eyewear – Design Brainstorming Worksheet and Engineering Design Report Template, one each per person.
Discuss with members the importance of being cautious when working near the eyes. Instruct them not to grab the glasses off another student's face or work on them while they are being worn.
Steps to Follow
1
Say: Have any of you ever had an eye injury? Have you ever been poked in the eye? How did that feel? Did it take a lot of force to hurt your eye or just something tapping it? What happens if someone claps in front of your eyes? (You automatically close them.) Closing your eyes is your body's reflex to protect your eyes because they are so vulnerable and important. Your eyelids also protect your eyes from objects or substances that might injure them. But sometimes our natural reflexes and our eyelids are not enough. What might damage your eyes if it came in contact with them?
2 Write on five things that could damage a person's eyes a piece of paper. Chart the answers.
3
Say: Can you think of any sports or activities in which you would want to wear eye protection?
(Possible answers: Sports: snowboarding, mountain biking, swimming, dirt biking; activities/hobbies: chemistry set, paintballing, woodworking, mowing the lawn, welding.)
4 Write down five sports or activities in which you would want to wear eye protection. Chart the answers.
5 Divide the group into teams of two members each. Hand out the worksheets.
6
Sketch the design of the eyewear for the sport or activity chosen. Identify possible eye risks and hazards, determining desired features of their glasses that address the various hazards, and a sketching the design, labeled with parts and materials.
7
Give the members a sheet of paper with which to make a template for their glasses. Have them draw the shape of the glasses to size and cut it out to see how it fits their face.
8
Give members the plastic sheet and other materials to make the eyewear after they have found the right shape for their lenses and frame, through trial and error.

Module 2: Body Works
71
71 of 76
engage express evaluate exhibit
9 Use the template to trace the lens shape onto the plastic sheet. (Help members cut or manipulate any difficult material.)
10
Say: As you work, as engineers, you are creating prototypes — a first attempt or early design of a new product or creation. A prototype gets revised many, many, many times with much testing and improvement before it becomes mass-produced and available to the public.
11 Have member write an engineering design report (hand out the report template forms), and present their designs to the group.
12
Explain the design advantages and possible improvements.

Module 2: Body Works
72
72 of 76
engage express evaluate exhibit
Friday Activity 3 Designing Protective Eyewear - Part 2
Location Multipurpose Room Estimated Time 45 minutes
Description Engineers have been designing protective eyewear for centuries, with much improvement as new materials and technologies have become available. Members will create and design their version of protective eyewear in this interactive activity.
Objective Members will design and create a prototype of protective eyewear.
What You Need
Each team needs:
Plastic sheeting, 9 x 4” (23 x 10 cm) piece (much thinner than Plexiglas; available at hardware stores)
Cardboard or poster board, 9 x 6” (23 x 15 cm) piece
White paper (for design and template)
Protective Eyewear - Design Brainstorming Worksheet, one per person
Engineering Design Report Template, one per person
For the entire group to share:
Colored plastic saran wrap
Colored and bendable plastic drinking straws
Popsicle sticks
Clear tape
Felt and rubber pieces
String and yarn
Markers
Scissors
Ruler
Rubber bands, colored paper, play dough or modeling clay (optional)
Items for testing stations, such as: fan; grass clippings; small, clean spray bottle and water; towel; flashlight (optional, for extension

Module 2: Body Works
73
73 of 76
engage express evaluate exhibit
activity)
How to Prepare
Gather materials and make copies of the Protective Eyewear – Design Brainstorming Worksheet and Engineering Design Report Template, one each per person.
Discuss with members the importance of being cautious when working near the eyes. Instruct them not to grab the glasses off another student's face or work on them while they are being worn.
Steps to Follow
1
Say: Have any of you ever had an eye injury? Have you ever been poked in the eye? How did that feel? Did it take a lot of force to hurt your eye or just something tapping it? What happens if someone claps in front of your eyes? (You automatically close them.) Closing your eyes is your body's reflex to protect your eyes because they are so vulnerable and important. Your eyelids also protect your eyes from objects or substances that might injure them. But sometimes our natural reflexes and our eyelids are not enough. What might damage your eyes if it came in contact with them?
2 Write on pieces of paper five things that could damage a person's eyes. Chart the answers.
3
Say: Can you think of any sports or activities in which you would want to wear eye protection?
(Possible answers: Sports: snowboarding, mountain biking, swimming, dirt biking; activities/hobbies: chemistry set, paintballing, woodworking, mowing the lawn, welding.)
4 Write down five sports or activities in which you would want to wear eye protection. Chart the answers.
5 Divide the group into teams of two members each. Hand out the worksheets.
6
Sketch the design of the eyewear for the sport or activity chosen. Identify possible eye risks and hazards, determining desired features of their glasses that address the various hazards, and a sketching the design, labeled with parts and materials.
7
Give the members a sheet of paper with which to make a template for their glasses. Have them draw the shape of the glasses to size and cut it out to see how it fits their face.
8
Give members the plastic sheet and other materials to make the eyewear after they have found the right shape for their lenses and frame, through trial and error.

Module 2: Body Works
74
74 of 76
engage express evaluate exhibit
9 Use the template to trace the lens shape onto the plastic sheet. (Help members cut or manipulate any difficult material.)
10
Say: As you work, as engineers, you are creating prototypes — a first attempt or early design of a new product or creation. A prototype gets revised many, many, many times with much testing and improvement before it becomes a mass-produced and available to the public.
11 Write an engineering design report (hand out the report template forms), and present their designs to the group.
12
Explain the design advantages and possible improvements.

Module 2: Body Works
75
75 of 76
engage express evaluate exhibit
Friday Cool Down Estimated Time 5 minutes
Steps to Follow
1 Snowstorm Members write down what they learned on a piece of scratch paper.
2 Given a signal, they throw their paper snowball in the air.
3 Members will pick up a nearby response and read it aloud.