fifa 09 guide - fifarus.ru · fifa 09 guide ... 4-4-1-1 one of the strikers pulls back, ......
TRANSCRIPT

FIFAFIFAFIFAFIFA 09 09 09 09 GUIDEGUIDEGUIDEGUIDE www.easportsfootball.com
TEAM MANAGEMENT FORMATIONS
The key to success with formations is understanding what your opponent is
running and countering with the correct numbers on the field. It is all a numbers
game. Find ways to gain numerical superiority where you need it and you will be
successful. Even strong players become vulnerable when outnumbered!
There are 17 total base formations in FIFA 09. When broken down in positions
and strategy, there are really four general formations (the Big 4) and all the
others are basically spun out of variations of each of those. This section takes the
Big 4, breaks them down in detail and then explains how each variation can be
adapted to a particular game situation you may face.
The Three Basic Tactical Approaches in the Big 4
1) Defensive Mentality (5-3-2)
2) Controlling the middle of the field (Balanced) (4-4-2), (4-3-3)
3) Attacking Mentality (3-5-2)
POSITIONAL BREAKDOWN
ZONE ABBREV. DEFINITION DESCRIPTION
LWB LEFT WING BACK Wide wing defender used to
strengthen defense against a
strong attacking team. Will run the
wing to create support & width in
the midfield & the attack.
LB LEFT BACK True solid holding back, strong
player and used to mark attacking
ST or CF or stop the outside run
and cross. Also a good marking
back on through runs.
LCB LEFT CENTER BACK Supporting defender primarily
responsible for stopping direct
attacks and are good in the air.
Used to break up attacks from
crosses or through balls
CB CENTER BACK The leader of the defense
sometimes used as a true sweeper.
In a 3 man defense is the strong
defender responsible for center
attacking threats.
RCB RIGHT CENTER BACK Supporting defender primarily
responsible for stopping direct
attacks and are good in the air.
Used to break up attacks from
crosses or through balls
DEFENDERS
RB RIGHT BACK True solid holding back, strong
player and used to mark attacking
ST or CF or stop the outside run
and cross. Also a good marking
back on through runs.

RWB RIGHT WING BACK Wide wing defender used to
strengthen defense against a
strong attacking team. Will run the
wing to create support & width in
the midfield & the attack.
LAM LEFT ATTACKING MID This players’ primary role is to
provide ultimate width to the attack
and serve
the forwards on attacks by
providing crosses, through balls or
shots on goal.
LM LEFT MIDFIELD Much like the LAM, the LM is the
true work horse of the midfield
running the Wings. Unlike the LAM
the LM must also defend the
opponents wide attack
LCM LEFT CENTER MID Always in tandem with the RCM as
the two work together compact
securing
the middle of the field. Also can
alternate supporting the attack &
the defense
CM CENTER MIDFIELD The most active player. Strong
player as he is key to supporting
the attack
and the defense. Spends his game
running up and back. Watch his
fatigue.
CDM CTR DEFENSIVE MID Acts as a stopper as the true first
line of defense and controls the
area
between the defense and the
midfield. Transition man to mids &
forwards.
CAM CTR ATTACKING MID He is the one of the most active
players on the field. Possess great
ball skills and fast. Primary role is
to add to the forward threat.
RCM RIGHT CENTER MID Always in tandem with the LCM as
the two work together compact
securing
the middle of the field. Also can
alternate supporting the attack &
the defense.
RM RIGHT MIDFIELD Much like the RAM, the RM is the
true work horse of the midfield
running the
Wings. Unlike the RAM the RM
must also defend the opponents
wide attack
MIDFIELDERS
RAM RIGHT ATTACKING
MID
This players’ primary role is to
provide ultimate width to the attack
and serve
the forwards on attacks by
providing crosses, through balls or
shots on goal.

LW LEFT WING True winger, very fast and a great
crosser of the ball. Has great ability
to
attack wide as well as feed the
striker. Also possesses a powerful
shot.
LF LEFT FORWARD Works in tandem with the RF
providing the transition between
the mids and
the forwards. Looks always to
check to the mids as well as attack
the goal
LS LEFT STRIKER Works in tandem with the RS
constantly moving and pressuring
the
opponents defense. Strong at
holding off defenders & a great
finisher.
CF CENTER FORWARD Is the craftiest player on the field.
The playmaker. Plays in the hole
between
the mids and the striker(s). Strong
shot and fast.
ST STRIKER Strongest finisher on the field. The
goal scoring machine. Strong on
the
ground & in the air. Always looking
to exploit holes in the opponents
defense.
RS RIGHT STRIKER Works in tandem with the LS
constantly moving and pressuring
the
opponents defense. Strong at
holding off defenders & a great
finisher.
RF RIGHT FORWARD Works in tandem with the LF
providing the transition between
the mids and
the forwards. Looks always to
check to the mids as well as attack
the go
FORWARDS
RW RIGHT WING True winger, very fast and a great
crosser of the ball. Has great ability
to
attack wide as well as feed the
striker. Also possesses a powerful
shot.
4-4-2

Strengths
The most popular, balanced and versatile of all formations. Works well against
almost any other system with built-in flexibility. Works well against a 3 player
defence, since the RM and LM can act as true wing forwards then return to
midfield to secure the center of the field or assist the defenders. The LS and RS
work in tandem either together in the center or making opposing runs, making
them tough to defend and creating more attacking opportunities. The 4-4-2 can
shift into other formations on the fly, and so can easily be used to create surprise
attacks. This is tough to counter attack as well, because this system is so evenly
distributed across the field and provides players the most balanced distribution of
workload responsibilities of any of the formations.
Weaknesses
If too many players get caught up in the attack from the midfield, the defenders
will have to move up to cover and can cause holes in the defence that could be
exploited by another 4-4-2 or a 3-5-2 system. If balance is not maintained, the
opponent can quickly gain numerical superiority.
Tips
Use the width of the line up to work the ball around the field. Use possession and
be patient for openings in your opponents. Switch the ball around the back and
regroup and start the progression on the opposite side. Use numerical superiority
to attack. When defending, gain numerical superiority in the middle of the field by
having the LM and RM tuck in and letting the LB and RB pick up the attacking
wings. The LS and RS should work in tandem to try and pull the defenders out of
position.
Best Formations to Counter the 4-4-2
3-5-2 with attacking mentality can outnumber the defence, 4-4-2
Variations

4-1-2-1-2
Used by the Argentina National Team, this variation of the 4-4-2 basically takes a
flat defence and shifts them to a diamond defence. The CDM becomes a holding
back and assumes the stopper position. Likewise, the CAM assumes the attacking
midfield role and acts as another attacker to keep the pressure on the opponent’s
defence.
4-2-3-1
The two central defenders become defensive oriented midfielders (LDM and
RDM). The wing midfielders assume an attacking mentality (LAM and RAM). One
striker now assumes the role of a CF and becomes the free roaming attacking
playmaker.
4-2-2-2

Also known as the box midfield and made popular by the Brazil National Team,
this formation lets the LAM and RAM roam more into the attack, letting the
opponent’s attack on the wing be covered by the LB and RB.
4-4-1-1
One of the strikers pulls back, becomes a CF, and plays in the hole between the
midfielders and the remaining ST. The ST has freedom to roam and seek out
weaknesses in the opponent’s defence.
4-3-3

Strengths
The beauty of this formation lies in controlling the middle of the field (or hole)
where the 3 center mids play more compact and move laterally or vertically
across the field almost as a single unit.
The LW and RW keep the width on the attack and are largely responsible for not
only attacking with width but also preventing wide threats from your opponent
when turning over the ball.
The other strength of this formation is the ability to have your CM take a more
defensive posture (like a stopper), and your RCM and LCM more of an attacking
posture bringing great balance to your defence (and at the same time more
numbers for the attack).
Weaknesses
If the LW or RW players do not get back to mark the wings, it forces one of the
forwards to drop back, thus converting it to a 4-4-2 and losing the power of the
attacking strength upon regaining possession. Also, if the LW or RW do not get
back when possession is lost, your opponent can attack with width and break up
your CM trio, leaving holes for your opponent to build a center field possession
attack.
Tips
If the forward wingers successfully get up and down the wings and the 3 center
mids can stay compact, this formation will dominate a traditional 4-4-2. This is
because the traditional 4-4-2 only leaves 2 true center mids and two wing mids,
giving the 4-3-3 numerical superiority and allowing a lot of possession due to
frequent 3v2 situations. The 4-3-3 is even good against the midfield dominant 3-
5-2 because of the 5v5 in the middle of the field, and more importantly, the 3v3
for your opponent’s defence. If you can spring one more attacker of the three CM,
you have you now have a distinct 4v3 advantage, which Chelsea runs successfully
for the Barclays Premiere League.
Best Formations to Counter the 4-3-3
The 3-5-2 can be used as mentioned above to force the 4-3-3 to have to shift to
a 4-4-2 and lose attacking strength. The 3-4-1-2, the 3-4-2-1, and the 5-4-1 all
provide a threat to unbalance the center 3 CM trio of the 4-3-3.
Variations

4-3-1-2
This formation is usually deployed if the opponent has the three forwards of the
4-3-3 marked very well on attacks. This variation of the 4-3-3 takes one of the
forward wingers and makes him a second true striker. At the same time, the
other winger falls into a supporting role of the crafty playmaking center forward
(CF). Playing just behind the strikers, the CF can wreak havoc for the opposition’s
defence by his constant movement and ability to feed a striker quickly.
4-3-2-1 (Christmas Tree Formation)
The 4-3-2-1 gets its strength from taking the wing forwards and giving them both
the same ability to be playmakers for the striker. Instead of primary responsibility
to run the wings, they now play slightly behind the striker, working in tandem
and opening space to allow overlapping runs from a LCM, RCM, LB or RB player.
The 3 attackers (LF, RF and ST) can now move as a unit, and with the overlap of
mid or defensive players, create a lot of bodies for your opponent to pick up.
Through runs and overlapping runs down the middle now become a bigger
weapon for you.
4-5-1

The main purpose of shifting your 4-3-3 to this formation is to keep a strong
team from scoring. It is very simple to switch to this more defensive-oriented
formation by simply taking your LW and RW attackers and pulling them back into
attacking midfield players (LAM and RAM). Their primary role is to support the
attack, but more importantly to bring numerical balance back to the middle of the
field to prevent great possession teams from possessing you on counter attacks.
Brazil, Club America, and other possession-oriented teams are very good at
breaking down a traditional 4-3-3 since the wing forwards tend to stay too high in
the attack.
3-5-2

Strengths
This formation utilizes a true sweeper CB (the clean up man) and two wing
defenders (LCB & RCB) who usually man mark. The true strength of this
formation comes from the stacked midfield which usually gives them numerical
superiority in the middle of the field. The LDM & RDM alternate, acting as a
stopper (or holding mid). At the same time, when being attacked the LM & RM
can drop back to cover the defensive wings, shifting from a 3-5-2 to a 5-3-2
easily. The sweeper will determine how high the defensive line is kept to force the
offside trap.
The main difference between a “3 back” system as opposed to a “4 back” system
is the 3 backs need to stay more compact and work as a unit, not trying to cover
the entire width of the field. If one of the wing backs does push wide to cover,
then one of the defensive mids must slide back to fill the gap.
This formation works really well if your opponent is running a line up with a 1 or 2
man striker system. This system also has great strength when attacking to
trigger numerical superiority by using 3 midfielders and 2 strikers (usually against
4 defenders).
Weaknesses
Take great care in noticing your opponent’s line up when using this system, as it
can be weak against a team running 3 forwards of any type. Also, the midfield
must be able to support the attack and return to support the defence. As
mentioned above, the most vulnerable aspect of this line up is if your opponent
can force the 3 backs to have to cover the width of the field without midfield
support (say, from a quick counter attack), which creates holes for strikers to get
clean looks at your goal or make threatening through runs.
Tips
Be very aware of the positioning of your defensive midfielders to act as a stopper,
almost making a diamond defence, and act as that first line of attack to disrupt
your opponent’s flow. Also, use your midfield strength to your advantage in both
attack and defence. Look at your LDM, RDM, and CAM as a triangle in the middle
of the field. If the LDM and RDM are next to each other with the CAM in front, this
has the midfield triangle in a “defensive posture” used against a threatening
attacking team and in essence gives you two stoppers. Likewise, if one defensive
mid acts as a holding back (or stopper) and the other defensive mid pushes up
next to the CAM, then this deploys an “attacking posture” used to pressure the
opponent’s defence or capitalize with numerical superiority.
Best Formations to Counter the 3-5-2

Any formation deploying 3 regular attackers keeps the constant threat of a
counter attack from allowing the defensive mids from moving up in the attack too
far. Also, a 3-5-2 can be very effective for all the reasons mentioned above.
Variations
3-4-1-2
This version of the 3-5-2 basically takes the CAM and turns him into a true
playmaker--the crafty CF. So his posture is now to pressure the opponent’s
defence as the third attacker, making creative runs and maintaining an attacking
mentality.
3-4-2-1
This version takes one of the two Strikers and makes him into a more supporting
forward role. Likewise, the CAM also becomes his counterpart, occupying the
opposite forward role, both behind the pressing attacking line of the single
striker. There is now one true striker target left to push high; however, there is
great flexibility to attack with forwards who can either pinch closer together or
spread wide and keep the ball in your opponent’s danger zone. Look for
opportunities to send one of your forwards on a through run, even ahead of the
striker for a quick goal scoring opportunity.

3-4-3
This version takes one of the two Strikers and makes him into a true winger.
Likewise, the CAM also becomes his counterpart, occupying the opposite forward
winger role. There is now one true striker target left, but great flexibility to attack
wide. This creates all sorts of aerial threatening crosses to pull the defenders out
of position, creating holes for your striker to slash through and bury the ball in
the old onion bag.

5-3-2
Strengths
Simply put, if you are against a serious threat of attack constantly in the game or
are trying to hold onto a lead in the closing moments of a white knuckle game,
then this system shores up and basically puts your team into a strong defensive
posture. Once again, there are an odd number of true defenders, which means
that the center player is usually the sweeper, or the clean up man.
The LWB and RWB are great at running up the wings and provide additional
numbers into the attack. Roberto Carlos for Brazil and Real Madrid was a master
at creating the odd man attacking threat from the wing. He would come up from
so far back so fast that mids and defenders alike were often caught off guard,
instantly giving his team numerical superiority and creating a lot of goal scoring
opportunities. The 3 center defenders stay compact and make it tough for your
opponent to get through runs. The center mids likewise have great flexibility to
play compact and move as a unit which can dominate the middle of the field.
Weaknesses
The ability to keep the ball in your opponent’s third of the field is tough against
certain line ups, like the 4-4-2, where your players need to be creative to
penetrate successfully. Also, if the 3 center mids start to spread wide to play the
width of the field, it does leave holes for teams with strong midfield numbers (like
the 3-5-2) to take over the middle of the field and exploit any holes on your
defence. You may find yourself always under attack and seemingly starved for
possession of the ball. Your opponent will look for opportunities to attack quickly
when the wing defender is in their third of the field.
Tips
Most importantly, make sure that only one wing back at a time makes that long
run into the attack so that the other can hold, leaving 4 remaining in the back so
that you are not vulnerable to a quick counter attack. If you commit too many
players into the attack, then the strength of this formation starts to break down
quickly. Have your center mids jockey more when on the attack to try and stop
the threat of attack down the middle of the field, and force your opponent to play
wide into where your defensive strength is strategically waiting. This line up is
just like the 3-5-2, with the exception that the LM and RM have defensive
priority.
Best Formations to Counter the 5-3-2
The 3-5-2, based on numbers controlling the middle of the field, as well as the
balance from a 4-4-2 can be very good at keeping the heat on your defence and
out possessing you.

Variations
5-2-1-2
This variation takes the center midfield player and turns him into a better
playmaker for the striker as a CF. This gives more flexibility to roam across the
width of the field and leaves the 2 remaining center mids with more of a
supporting role.
5-2-2-1
This is another version of the Brazilian “box” midfield. It takes one of the strikers
and puts him into more of an attacking supporting role as a true forward. It also
takes the CM and makes him into his counterpart as the other forward. The two
play in tandem behind the striker, but do have great flexibility to make or serve
through runs or launch in crosses.

5-4-1
This variation is deployed to create a true diamond midfield. One striker becomes
a center attacking mid (CAM) and one CM becomes a center defensive mid (CDM)
playing right above the defensive line much like a stopper. This leaves two wing
mids (LM & RM) and one true striker. The CAM is strongest and goes to a
checking back striker. The is best to run when your CB can drop a step back to
take on the sweeper role and allow your RCB and LCB to work as central
defensive pair. RM and LM can pinch in to the middle of the field when your LWB
or RWB make attacking wing runs.
EDITING FORMATIONS
With the introduction of Custom Tactics in FIFA 09, you can dictate your style of
play without having to play much with your formation. However, for the true
footballing wizard who wants to tweak every aspect of his team, learning how to
edit formations is a must.
When you enter into Team Management, you will have the option to edit your
formation. This feature allows you to move players into new positions and change
their roles on your team. You have three options for each player that you can
adjust: Player Base Position, Player Work Rate, and Player Positioning.

For purposes of this break down, we are going to make a couple of adjustments
to Manchester United’s trademark 4-4-2. Let’s start things off with Carrick. We
select him and then move his icon further back and into the center of the pitch.
Since we have moved him into a new position, his role is going to change as well.
We can choose to make him a Right Defensive Midfielder or a Center Defensive
Midfielder based on his new location on the pitch.
Next, we click on Paul Scholes and choose to adjust his Work Rate. We are going
to ramp up his attacking rate and decrease his defending rate. We want him to
surge into the attack at the expense of his defensive responsibilities. We have
Carrick in the hole now to cover things.
Attacking Work Rate influences how often the player considers making forward
runs. Defensive Work Rate affects the amount of importance the player places on
getting back to defence. Cristiano Ronaldo, for example, has a low defensive work
rate, as his primary focus is to attack. A Defensive Midfielder, however, will have
a high defensive work rate and a low offensive one. Be careful of giving a player
both a high attacking and high defensive work rate as they will fatigue very
quickly.

We are going to make one final adjustment to our team. We take Wayne Rooney
and give him a defensive position adjustment backward. We want him to drop a
bit more when the other team has the ball so that he can lead the charge back
down the field. Many FIFA gamers confuse this positional adjustment with runs.
These are not runs. They merely instruct the player to favour adjusting his
position in a direction when the team is either on offense or defence. Be careful
when moving this around too much as you will create holes in your squad.
You can also use these adjustments to help cover the field when defenders go
forward. Patrice Evra will make overlapping runs and his positional adjustment on
the attack is to move forward. Carrick has a positional adjustment to shade back
towards Evra’s position, so he can pick up the counter attack.
When you match up different Formations, Player Positioning, Work Rates, and
Custom Tactics, you have a game that is ever-changing and never runs out of
replay value.
CUSTOM TACTICS
Custom Tactics is one of the biggest additions to the FIFA franchise this year.
Eleven different settings can be adjusted to control how the team plays. This
includes how the team passes, moves, positions and creates scoring chances.
Now teams like Arsenal will zip the ball around the field with short passes, while
teams like Celtic will bomb the ball forward and try to attack via Route 1.
There are two components to the Custom Tactics. The CPU both positions players
and executes based on the team’s Custom Tactics settings. For Human controlled
players, the Custom Tactics settings influence the way the other nine field players
move in relation to the player that you are controlling.
In this section of the guide, we will explore the different settings available for
FIFA 09 and then take them on the pitch to show you how they impact gameplay.
Build Up Play
There are three Build Up settings in the game: Speed, Passing, and Positioning.
Build Up settings affect how your team will play in the first two-thirds of the
pitch. The CPU will execute passes based on these settings. Your players will
position themselves based on these settings. It is still up to you to make the
correct passes. Build Up settings mostly affect the Central Midfielders, Wing
Defenders and Outside Midfielders.
Speed – Build Up speed determines the speed at which the attacking team
advances play in the first two thirds of the pitch. This not only changes the
emphasis on Forward, Lateral, or Negative play, but also alters the urgency

that teammates have getting into forward positions.
o Slow – The team is patient building plays, often passing the ball
around in defence with players regularly passing backwards.
Players are more selective in their runs going forward, and put the
emphasis on finding good space over finding forward space.
o Balanced – The team does not build play particularly fast or slow.
o Fast – The team looks to get the ball from back to front as quickly
as possible. Players choose to position themselves in more
advanced positions on the pitch. Players make more forward runs.
Passing – Build Up Passing Distance determines the general passing
direction, and the style of support play from teammates in the first two thirds
of the pitch. This changes the emphasis on long or short passes both on and
off the ball.
o Short – The team will try to build using short passes. Players
closest to the ball will come to support.
o Mixed – the team does not build using a particularly short or long
passing game.
o Long – the team will look to play the longer ball, perhaps targeting
a tall striker or looking for a ball over the top. Players farther from
the ball possessor will attempt to find space. Close players will
anticipate the long ball and push up to look for the knock down or
flick on.
Positioning – Build Up Positioning determines the freedom that players have
to make runs, and support in positions that stray from their formation position
in the first two thirds of the pitch.
o Organized – Players tend not to stray too far from their assigned
positions during the course of the match. The team maintains
structure when building play.
o Free Form – Players have the freedom to make runs out of position.
For example, forwards can make more runs wide to collect the ball,
fullbacks can make more overlapping runs, wide players can cut in
more, and central midfielders can make runs to the corner or
overlap the strikers.

How it Works on the Pitch
Short Passing
In a short passing system, you will see more “check to” runs by players as they
drop back into space to receive the ball. The team will arrange itself in such a
way that there are multiple short passing options available. Ultimately, you
control when and where you pass, but the CPU will position your support players
in good position to maintain possession.
When our defender receives the ball (highlighted in yellow), notice how many red
highlighted targets he has. This is the advantage of the short passing system.
You typically have multiple options for the dribbler.
Long Passing
In a long passing system, players will make anticipatory runs and look for
knockdowns from Target players. Opposite wingers will make runs looking for the
big switch. Strikers will either make get behind runs, or check back to receive
long passes from the defence.
Notice with this Long passing team that the nearest open player is 30 yards or so
down the field. This is pretty typical of teams set to use a Long Passing tactic.

When playing against highly aggressive pressing teams, you will want to set up
the long ball to take advantage of their defensive attitude. If you use a long
passing team, you’ll need to be comfortable with looking at your Radar while
playing so you can pick out deep players.
We receive the ball in the center circle, and you can already see that our winger
is calling for the ball.
We hit a through ball to get the ball to him on a dead sprint.

His “get behind” run does the trick and he is free to go one-on-one with the
keeper.
Slow Build Up
Teams with Slow Build Up Speed settings will drop back more into support
positions. The emphasis is on keeping control of the ball rather than advancing it
down the field.
Our attacker is moving with the ball at the top of the screen. He sees that a
defender is cutting off his attack.

In typical Slow Build fashion, he doesn’t force the issue, but instead lays the ball
back so that his team can keep possession. The Slow Build style is often a game
of Two Steps Forward, One Step Back.
Club America has kept possession and now begins to reverse fields to probe the
defence with another attack.

Fast Build Up
With Fast Build Up Speed, players will look to quickly release and make more
advanced runs. Players will make lots of quick runs and dashes to open space.
Use plenty of wall passes and one-touch passes to keep the action flowing
quickly. Trap, pass, and move is the name of the game.
We receive the ball in the center circle with our midfielder. We are immediately
looking for the next pass to get it going forward.
As soon as we make the pass, we instigate a forward run to hit the open space.

The wing pops open instead, so we fire the ball outside.
Again, we want to keep things moving, so we push the ball ahead to our Striker
near the top of the box. You’ll want a big player here who can hold up the ball for
the rest of the attackers to come into play.

Our initial passer is streaking into the box and will be wide open for a through ball
and attempt on goal.
Positioning
Positioning affects the movement of your players in your half of the pitch. With
Organized positioning, players will tend to stay more or less in their positional
area. With Free Form positioning, you will see players make more flexible runs
and take up different positions on the field. This setting does not have as strong
an effect on Build Up as it does on Chance Creation.
Putting It All Together
The real fun when working with Custom Tactics comes when you start to combine
different Speeds and Passing settings. For example, short passing with Slow build
up results in lots of touches by the midfield and defenders, and they knock the
ball around to each other in close proximity. Mexican teams like Club America will
often use this style of play.
Short passing with a Fast build up speed results in play much like you see with
Arsenal and Manchester United. The team uses short passes to keep the ball
moving between players, but the pace is pushed to get the ball down the field
rapidly.
Slow build up with the long ball may sound like a contradiction. The defence will
typically swing the ball around in the back while looking for the big pass. A strong
Target man is preferred with these types of teams.
Fast build up with long passing set results in a “hump & chase” style of game.
While it’s not very pretty, it can work if you have the right type of personnel. This
style can be a great deal of fun to play with.
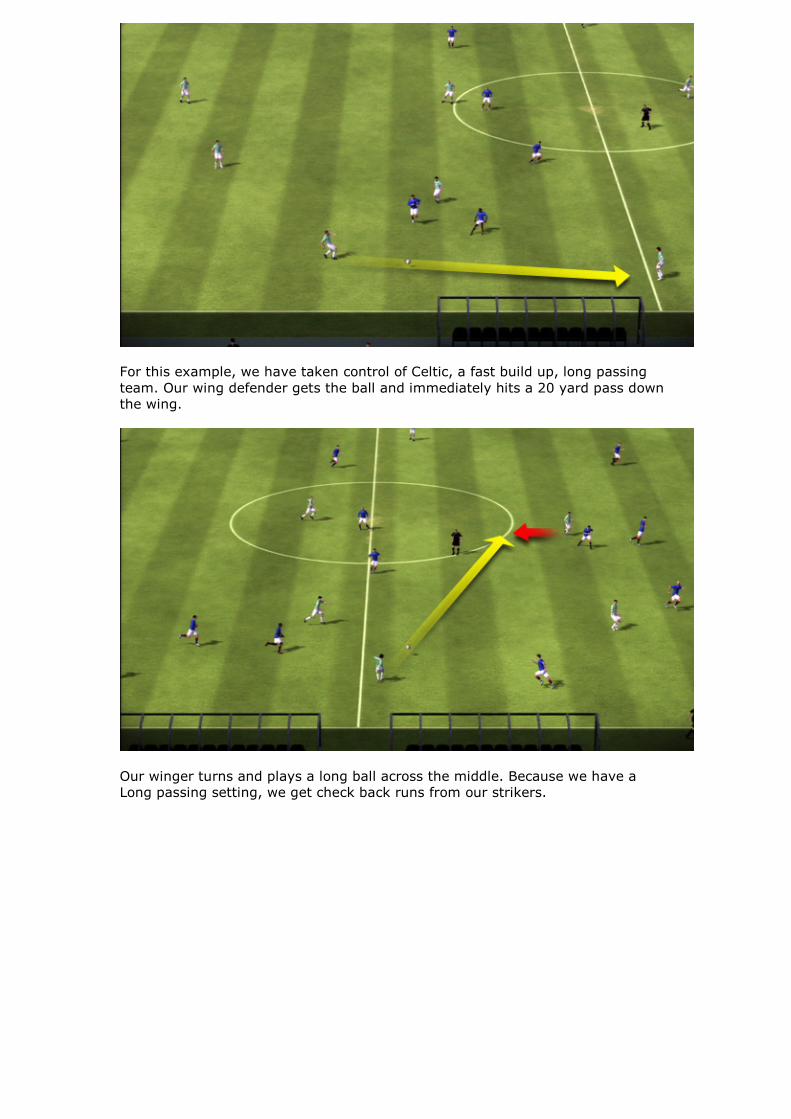
For this example, we have taken control of Celtic, a fast build up, long passing
team. Our wing defender gets the ball and immediately hits a 20 yard pass down
the wing.
Our winger turns and plays a long ball across the middle. Because we have a
Long passing setting, we get check back runs from our strikers.

Our striker drops in the hole to collect the ball.
A quick turn and through pass to the outside keeps things moving.

We are able to hold off the defender and get our cross in to the striker making
the run. He looks offside now, but he was onside when the ball was struck.
Our striker skies from the header as the keeper can only look on in despair.
Chance Creation
Chance Creation relates to how teams perform in the attacking third of the field.
It covers what types of passes they will attempt, the frequency of their crosses,
how often they like to shoot, and what types of runs they will make. Chance
Creation has the most effect on Forwards and Attacking Midfielders. There are
four settings for Chance Creation: Passing, Crossing, Shooting, and Positioning.
Passing – Affects the amount of risk the ball possessor takes when making
passes in the final third. This also affects the emphasis on forward runs and
support runs by teammates of the ball carrier.
o Safe – To maintain possession, the team will rarely try a pass that
may risk losing the ball, choosing to wait for the ideal opportunity.
Players will ensure that the ball possessor has safe options when
positioning themselves, and will wait for a good opportunity to
make a penetrating run.

o Normal - The team does not look to play particularly safely or
riskily.
o Risky – The team will always try for the killer pass. Players look for
every opportunity to make runs into space and behind the defence.
Teammates won’t be as concerned about ensuring safe options for
the ball possessor.
Crossing – Affects the tendency and frequency for players to put crosses into
the box. This also affects the timing of when players make runs into the box,
and how many players will look to get into the box to get on the end of a
cross.
o Little – The team tries to avoid crossing the ball. Instead, they will
try to play out of the crossing zone by passing back, or getting to
the end line looking to cut the ball back to a teammate for a shot.
o Normal – The team will put crosses into the box when there is a
good opportunity.
o Lots – The team tries to get the ball into the box at every
opportunity. The ball possessor will try to cross the ball early.
Teammates will make earlier runs into the box.
Shooting – Chance Creation Shooting affects the amount of shots that the
team will take in the final third.
o Little – The team will be patient, and only shoot if the opportunity
is extremely good, opting to keep possession. Long shots will be
rare.
o Normal – The team will perform a variety of long shots and short
shots depending on the situation.
o Lots – The team will shoot at every opportunity. Teammates will
make the extra effort to position themselves looking for shooting
opportunities, for example staying just outside the box looking for
a layoff, or positioning themselves for the cutback.
Positioning – Chance Creation Positioning determines the freedom that
players have to make runs, and support in positions in the final third.
o Organized – Players tend not to stray too far from their assigned
positions during the course of the match. The team maintains
structure when creating chances.
o Free Form – Players have the freedom to make runs out of position.
For example, forwards can make runs wide to collect the ball,
fullbacks can make more overlapping runs, wide players can cut in
more, central midfielders can make runs to the corner or overlap
the strikers or wide midfielders.

How it Works on the Pitch
Safe vs. Risky Passing
For the CPU, passing will affect both the types of runs and the choices that are
made for passes in the attacking third. For your team, the passing setting will
determine how your players position themselves. A Safe team concept will
provide you with more support. Players will make their runs more to support
possession than to create aggressive scoring chances.
A Risky team concept will put a premium on players getting into dangerous
space. They will make aggressive runs to try to create chances. The downside is
that possession is more difficult to keep. Players aren’t as concerned with helping
the man with ball as they are with getting into space. You will need to be very
comfortable with the ball at your feet if you are going to use this passing style.
We receive the ball in the center of the field and have a Target man ahead of us.
With a Safe passing custom tactic choice, he would check back towards us to
receive the ball.
Instead of a “check to” run, our striker turns to attack the open space near the
net. It’s a riskier pass, but if we can complete it we have a good chance to get a
look at the goal.

We complete the pass and our Striker has some room in the box to make a turn.
The defence arrives to make a late challenge, but we are able to get the shot off.

Heartbreak for Sao Paulo as our shot caroms off the post.
Crossing
The Crossing settings refer to the attacking third of play for the most part. CPU
teams with Crossing set to Lots will send in more early crosses. Human controlled
teams will send more players crashing into the box looking for the cross. You will
also see more crossing runs from your strikers and midfielders. Schalke 04 will
look to use this style of play as they whip the ball in for 6’3” striker Kevin
Kuranyi.
Our winger is able to beat his man and get into a dangerous position just inside
the box. Notice that we have three players lined up in case we cross. The near
post, back post, and middle of the box are all covered. Since our Crossing slider
is set to Lots, our players will work hard to get into position for our service.

We place a great ball across the goal that freezes the keeper on his line.
Our Striker rises on the back post to beat his man and put a head on the ball

Goal! A great cross leads to an even better finish for Schalke 04.
The other extreme of the Crossing slide is to set it to Little. When Crossing is set
to Little, more players will check wide to receive balls at their feet. You won’t see
as many players in the box. They will instead step out and look for one-twos and
cut backs. Arsenal is a prime example of a team that uses this style of play. If
you have a team with slower wing players, you will definitely want to set your
Crossing to Little as well.
The Arsenal Midfielder takes the ball down to the far wing. You can see a couple
of players in the box, but they will start moving shortly.

The winger lays the ball off to the top of the box.
We work the quick passing game inside the box. Our player turns and fires the
ball inside to our striker.

We make a quick Cruyff turn, hoping to get a look at the goal.
We experience some heavy contact, but we are able to get the shot away and
into the net. Goal for Arsenal!
Shooting
CPU teams with Shooting set on Lots will blast away at the goal any chance that
they get. They will take more shots from the top of the box and outside as well.
The Shooting setting doesn’t have as great an effect on your team, as you control
when you shoot. However, you will see your team try to set up in good shooting
positions. They will stake out the top of the penalty area looking for the wingers
to penetrate to the end line and cut it back.

As our wing player approaches the penalty area, our striker steps to the top of
the box and looks for the ball.
We reward his movement with a pass to his feet so he can turn to goal.
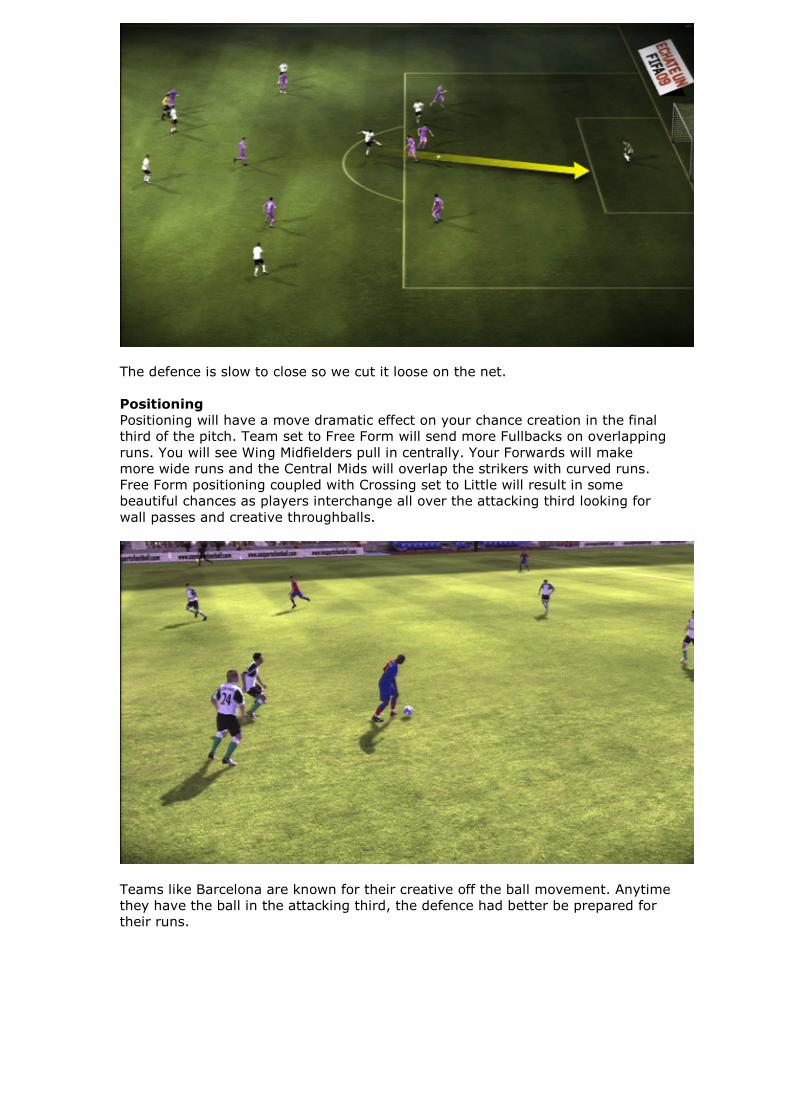
The defence is slow to close so we cut it loose on the net.
Positioning
Positioning will have a move dramatic effect on your chance creation in the final
third of the pitch. Team set to Free Form will send more Fullbacks on overlapping
runs. You will see Wing Midfielders pull in centrally. Your Forwards will make
more wide runs and the Central Mids will overlap the strikers with curved runs.
Free Form positioning coupled with Crossing set to Little will result in some
beautiful chances as players interchange all over the attacking third looking for
wall passes and creative throughballs.
Teams like Barcelona are known for their creative off the ball movement. Anytime
they have the ball in the attacking third, the defence had better be prepared for
their runs.

Messi vacates his normal wing position and slashes to the top of the penalty area.
A quick pass catches the defence by surprise and gives Messi room to receive the
ball.

Messi has a clear look at the goal, and you know what comes next… he’s going to
rip a shot.
Organized positioning will cause players to stay in their area of the field as
opposed to running free. They will make a move to space, but their priority is to
keep the team’s shape. A team like the Houston Dynamo runs a pretty strict style
with safe passing, organized play and lots of crossing. Fuelled by an aggressive
pressing, they are able to create scoring chances off of their opponent’s mistakes.
Defence
Manchester United may have the most prolific scorer in the world with Cristiano
Ronaldo, but the reason they won the Premiership was their defence. With a
league low of 22 goals against, Man U locked it down in the back all season long.
While you may not have the same tools in your arsenal, applying the proper
Custom Tactics will help you keep the ball out of your own net.
You can adjust where on the field your defence starts to bring pressure, how
aggressively they tackle, the width of your defence, and what kind of line they
hold in the back.
Pressure – Defensive Pressure determines how high up the pitch the team
will start to pressure the opposition.
o Deep – The team drops back and allows the opposition time in their
own half in exchange for getting numbers behind the ball.
o Medium – The team will start to defending in their opponent’s half,
but not the full length of the pitch.
o High – The team will apply full pressure in their opponent’s half.
Wide midfielders and fullbacks will push high on the ball side to
make it difficult for the opposition to play out. This tactic is
effective but leaves lots of space open for the ball over the top
behind the defence.
Aggression – Defensive Aggression determines how hard the team will tackle
and how much pressure is applied to the ball possessor. But be careful,
because high aggression can result in a higher number of fouls.
o Contain – The team tries to contain the ball possessor, with players
rarely diving into tackles or trying to outnumber the ball carrier.

o Press – The team dives into tackles hard, and will slide whenever
possible.
o Double – The team will look to tackle fiercely and in numbers,
sending an extra player to the ball possessor as often as possible.
Team Width – Defensive width affects how much the team will shift to the
ball side when defending.
o Narrow – The team will defend compactly. Players will pinch in on
the far side to cover teammates and allow for ball side pressure.
When the ball is central, the team will pack the middle of the pitch
and allow more room on the wings.
o Normal – The team will not try to defend particularly narrowly or
widely.
o Wide – The team will not pinch as much. Players on the far side will
mark opponent tightly, sacrificing cover in favour of making it
difficult for the opposition to pull them out of shape.
Defender Line – Defender Line affects the shape of your defence, and
whether or not they play the offside trap.
o Cover – The players in the back pinch, drop, and cover each other
providing depth in defence. This makes through balls more difficult
to play, but allows the opposition the freedom to pinch higher.
o Offside Trap – The team plays with a flat backline, and looks for the
opportunity to step up and catch the opposition offside. The
opposition won’t have the freedom of pushing high, but this is a
dangerous tactic. When the trap is broken it usually results in an
easy scoring opportunity.
How it Works on the Pitch
Pressure
Pressure determines when the defence starts to pick up the opposing team. With
high pressure settings, the defence will begin to pick up their defensive coverage
at the opposing team’s 18 yard box. No matter what pressure setting you use,
the defence will begin to tighten their coverage as the offense begins to penetrate
into the attacking third. The more you press, the quicker your team will become
fatigued.

The defence is operating with a Deep Pressure tactic. With this tactic in place, the
defence only brings light pressure on the offence while the ball is not in its half of
the field. As the offense crosses the halfway line, the defence will bring to tighten
the noose. Against high pressure defences, you will want to keep the ball moving
quickly. As defenders try to double, you will find more open players for passers.
With the high pressure setting on, the defence begins to attack our ball handlers
all the way into our own penalty box. This strategy can create turnovers in
dangerous areas of the field, but if the offense breaks the pressure and get the
ball down the field, the team can get outnumbered quickly. This style of play does
take a toll on your team’s physical condition.
Aggression
The Aggression settings are more CPU related than human related. You alone
determine how you defend the dribbler. However, when playing against the CPU,
you will see these aggressiveness ratings play out in full effect.
With low aggression settings (Contain), the defenders will contain, jockey, and
defend as a team. The distance they keep from their attackers will decrease the
closer they get to their own goal.
Middle aggression settings (Press) will cause the defenders to stay a bit tighter to
their men, slide tackle more, and take more half chances and stabs at the ball.
High aggression settings (Double) will cause defenders to fly into tackles, stick
tight to dribblers, and bring in secondary defenders to press the ball handler.
There is a strong fatigue element to this setting. The more you press and double
press, the faster your team will fatigue. They will run out of gas around the 60
minute mark if you lead of the game with heavy pressure. At that point, your
players will hit a wall and won’t be able to press anymore.

The dribbler has the ball in the middle of the field with two defenders in close
proximity.
As the secondary defender steps up, the rear defender throws himself into the
slide tackle.

The attacker is upended, the ball comes loose, and the second defender takes
possession. You won’t typically see this hard of a challenge when the attacker is
contained unless you are up against a highly aggressive tactic.
Team Width
As mentioned above, Team Width determines how compact or spread out the
defensive line plays in the back. It is easier to transition into possession when
your backline is compact. On the other hand, it is easier to get the ball out to the
wings and move into the attack with a wide setting in the back.
Narrow width settings facilitate opportunities for double teams and secondary
pressure. Your team can defend in a zone and collapse on the dribbler. Wide
settings put your in more of a man-to-man situation.
Celtic is playing a wide defensive line. You will notice that the four defenders are
spread out, and the one furthest away from the ball is only shaded slightly inside.

Sporting CP prefers to keep a narrow width. You will see all four defenders
collapse together tightly so they can assist each other and double team attacking
players.
Defender Line
This last tactic setting is pretty simple as there are only two choices: Cover and
Offside Trap. If you are going to run the Offside Trap, you will need to have some
serious speed on your defensive line. They will need to have the pace necessary
to make up for mistakes and quality runs by the offense. As a general rule, we
recommend avoiding the Offside Trap setting as it leaves you too vulnerable to
through runs and passes over the top.
This is the nightmare scenario for a Trapping team. Tevez is going to receive the
ball on a full sprint to attack the goal. Notice how the defensive line is stretched
across the field. Unless they have serious makeup speed, Tevez is going to notch
another goal for Manchester United.
The Cover setting gives you defensive depth. Each defender acts as a sweeper of
sorts for the man next to him. This type of defensive line is much tougher to get
behind. The Cover also helps with one-on-one situations by giving the defender
back up in case he is beaten by his man.

As the attacker breaks into the center of the defence, you can see Patrice Evra
drop back behind the line to prevent the run. This is what the Cover setting is all
about. You receive good defensive depth as your backline works together to
defend as a unit and protect the dangerous space behind your line.
Teams & Styles
We’ve taken a look at many different teams and tactical scenarios in this section.
As we close out our look at Custom Tactics, we want to give you a list of some
interesting teams to play with based on their unique styles. If you play through a
series of games with each team, you’ll become well versed on how the Custom
Tactics feature affects the pace and flow of the game.
Arsenal
Arsenal plays a free-flowing attacking style of offense. They build up quickly with
short passes. Once they reach the attacking third, they typically look to play one-
two passes in the box instead of crossing. They are frugal with their shot
selection, waiting patiently for quality chances on the net. Defensively, they don’t
press too hard, but instead wait for the right opportunity to go for the steal and
counterattack. Arsenal plays with a 4-4-2 formation.
Chelsea
Chelsea is a bit more patient than Arsenal in their build up. They take their time,
but will look for longer passes than any of the other Big 4 English teams. Once in
the attacking third, they will look to whip a cross in to players like Didier Drogba.
Chelsea will crack a shot from pretty much anywhere with long-range sniper
Frank Lampard leading the way. Chelsea doesn’t press defensively, but will go
hard into their tackles. Chelsea plays with a 4-3-3 formation.
Sydney FC
Australian club Sydney FC likes to beat you over the top with the long ball. Their
strategy is to hold the ball and pass it around in the back while their players
make runs down the field. Once they find space, they are going to go Route 1 and
make your backline defend all game long. Defensively they are going to press and
get in your face to try to take the ball in your end of the pitch. Sydney FC plays a
4-3-3 formation.
Palmeiras
Palmeiras will build up play from the back with extremely short passes. They stay
organized and build the attack slowly. Once they get into the attacking third, they
flip the switch on their style of play. Palmeiras will begin to look for risky through
passes and runs to dangerous space. They don’t cross too often, but aren’t afraid
to shoot from just about anywhere on the pitch. They are extremely passive on
defence. They will give away ground and keep their line nice and compact.
Palmeiras plays a 4-2-2-2 formation.

Bordeaux
Bordeaux plays a quick passing game on offense with its players making plenty of
support runs to keep the passes short. They stay organized, but aren’t averse to
some risky passes in the attacking third. Where Bordeaux really shows their
diversity is on defence. They run an aggressive, pressing defence that keeps
plenty of width so they can work the ball out wide and counterattack. Be careful
when playing with them as they do run the Offside Trap. Bordeaux plays a 4-2-3-
1.
Club America
Club America plays with a fairly typical Mexican league system. They will work the
ball slowly and patiently with tons of short passes. They stay organized, play safe
passes, and don’t cross the ball often. They will wait for the quality shooting
attempt as opposed to firing away. Defensively they will hold deep and not apply
pressure until their opponent crosses the halfway line. They will contain and play
solid one-on-one defence. Club America plays a 4-2-2-2 formation.
Celtic
Celtic can be a great deal of fun to play with; however, the games often don’t
look very pretty. They build quickly, almost at a frenetic pace. They constantly
look to make the long pass or through ball. They will stay organized, but look to
cross the ball into the area. Celtic will shoot anytime they get a clear look at the
net. They play a moderate pressing defence, but hit their tackles pretty hard.
Celtic runs a 4-4-2 formation.
Barcelona
Barcelona’s team concept is all about pace. They build up fairly quickly with short
passes and lots of creative movement. You can expect to see curved runs and
overlaps from penalty area to penalty area. Defensively they press and double
while keeping a pretty wide backline. Combined with the Offside Trap, playing
with Barcelona can be a scary proposition defensively if you make a mistake, but
they are a lot of fun! Barcelona plays a 4-3-3 formation.

QUICK TACTICS
Quick Tactics allow you to change the way your team plays on the fly. This is
different than simply adjusting your team’s Mentality, or sending your Central
Defenders on the attack. Quick Tactics enable you to totally change the way your
team plays by switching to either a preset or custom tactic in game. You don’t
have to even exit out of the pause menu. Simply push up on the D-pad to get the
Quick Tactics menu.
Each team has four tactical slots to choose from. You can assign any of the
following tactics to those slots:
• Default Team Tactic
• Counter Attack
• High Pressure
• Possession
• Long Ball
• Up to 28 Custom Tactics that you have created
For example, if you take the lead late in the contest and want to kill off the game,
you could switch up to the Possession tactic. If your opponent is sending players
forward to press you in your own penalty area, switch to the Long Ball tactic. Now
you can punish him for his aggressive game plan.
PLAYER ROLES
The Player Roles screen allows you to pick which players you wish to use for set
pieces and dead ball situations. You will assign players for the following roles:
• Left Corner Kick
• Right Corner Kick
• Direct Free Kick
• Direct Free Kick-Long
• Penalties
• Caption
These roles are pretty much self-explanatory. The nice feature of this screen is
the quick view you can get to the key ratings for each player. Power, Free Kick
Accuracy, Curve, and Penalty taking ability are all shown at the top of the screen.
Take a moment to look at the primary foot for your corner kickers. If you prefer
to hit out swinging corners all the time, you’ll want a right footer on the right side
and a left footer on the left side.

Be sure to double-check your Player Roles when you make substitutions. You
want to make sure you have your best possible kick takers assigned to each role.