final advert editing process
DESCRIPTION
Final Advert Editing ProcessTRANSCRIPT
Final Advert Editing Process
Advert One
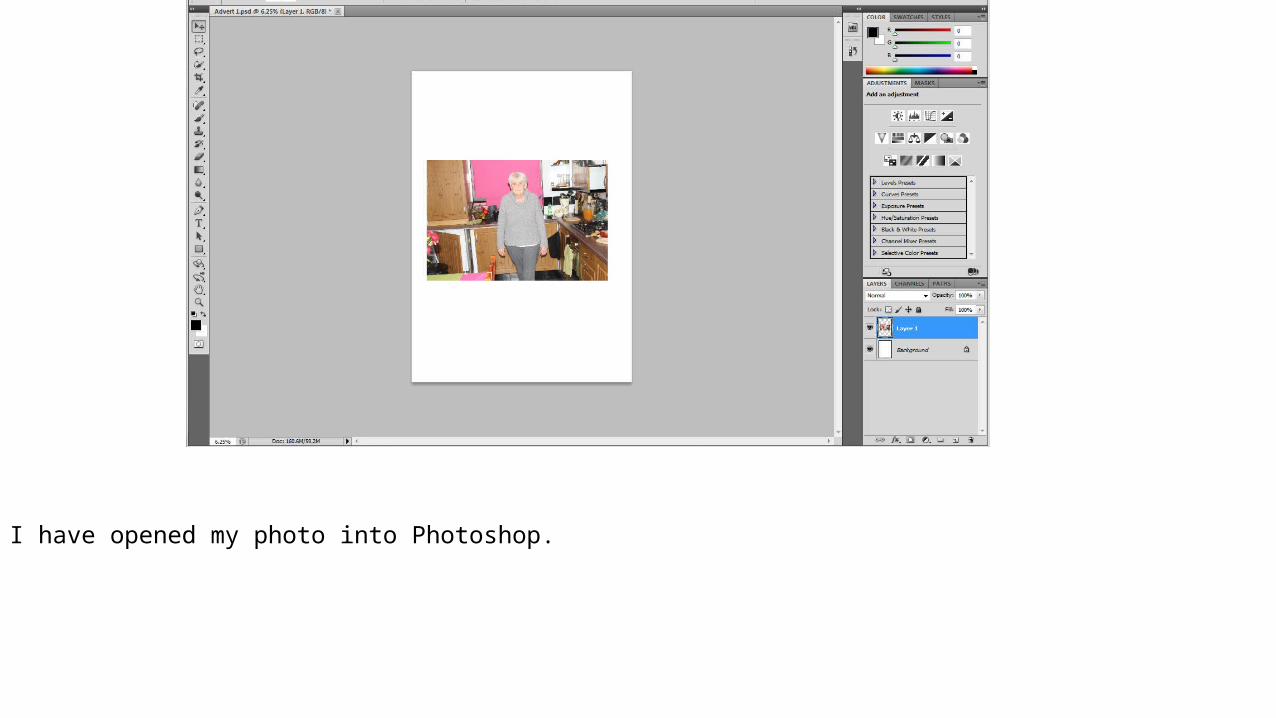
I have opened my photo into Photoshop.
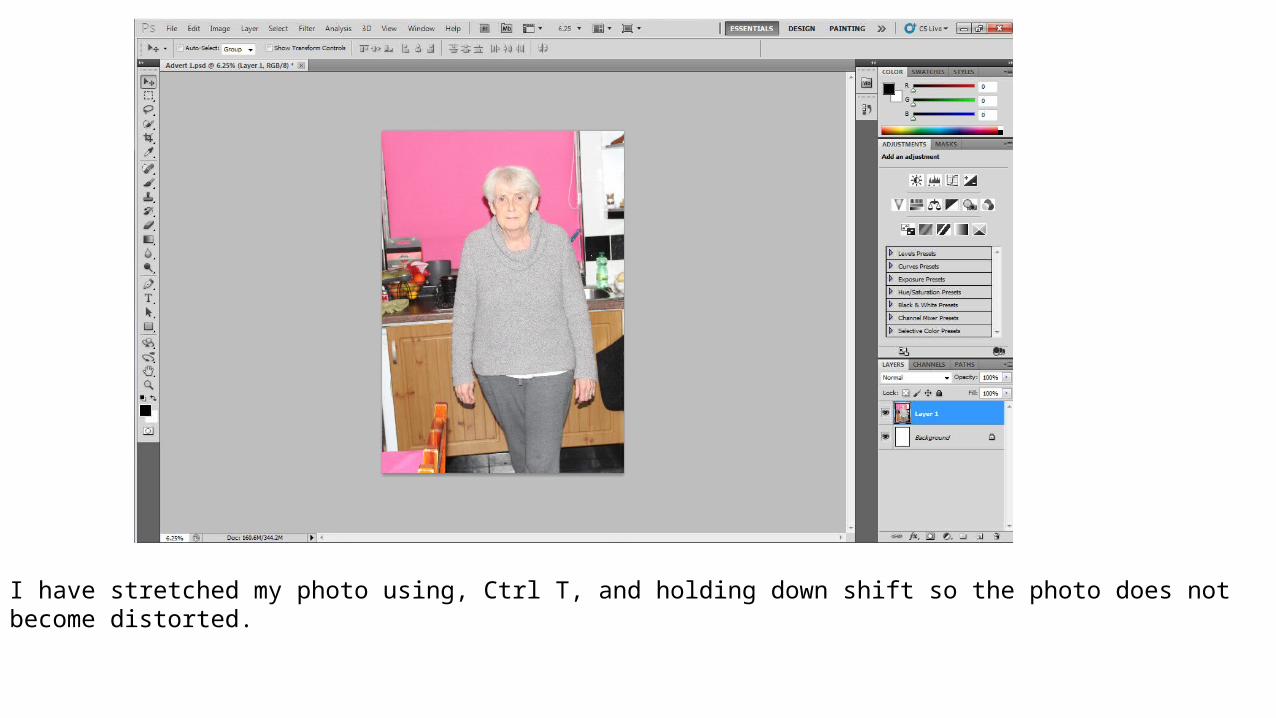
I have stretched my photo using, Ctrl T, and holding down shift so the photo does not become distorted.
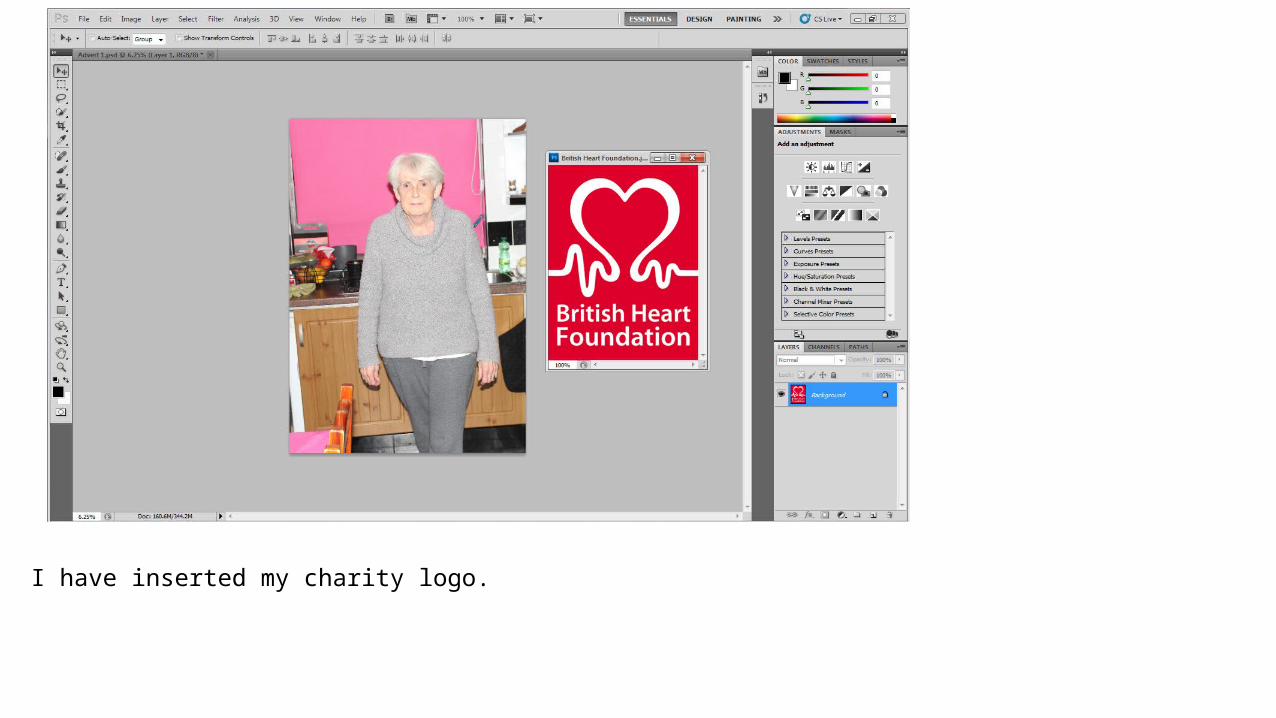
I have inserted my charity logo.
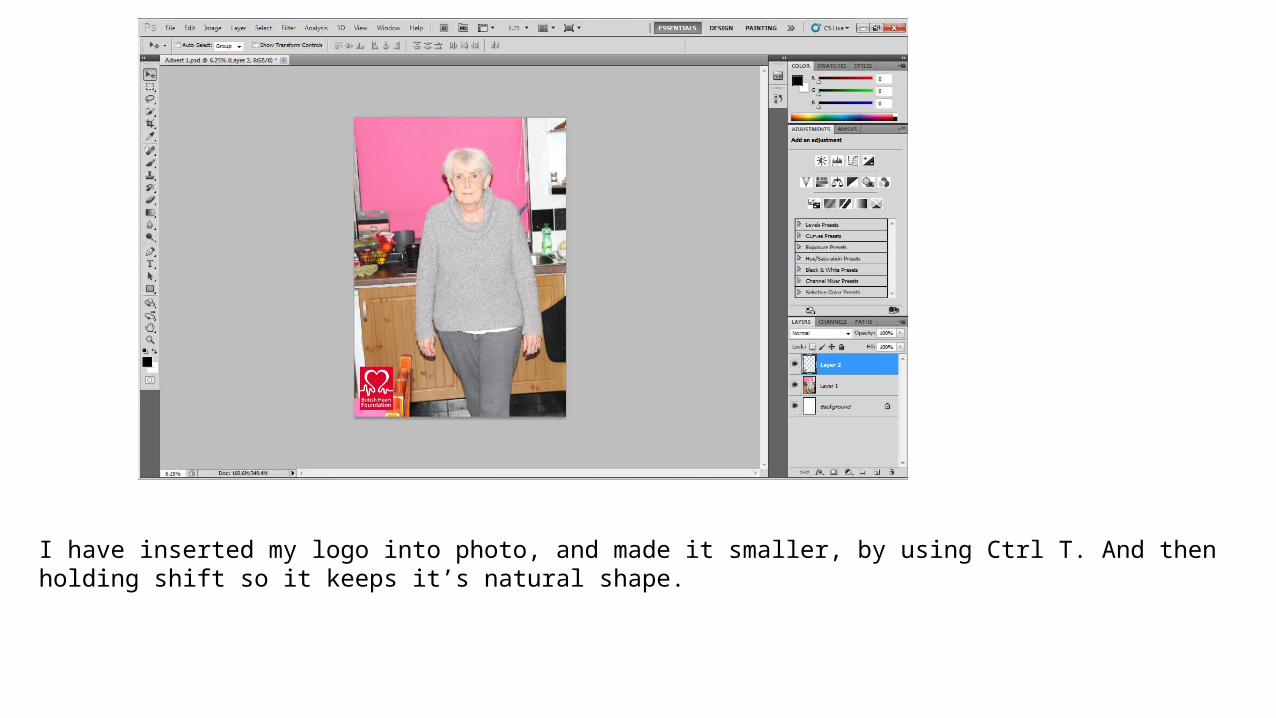
I have inserted my logo into photo, and made it smaller, by using Ctrl T. And then holding shift so it keeps it’s natural shape.
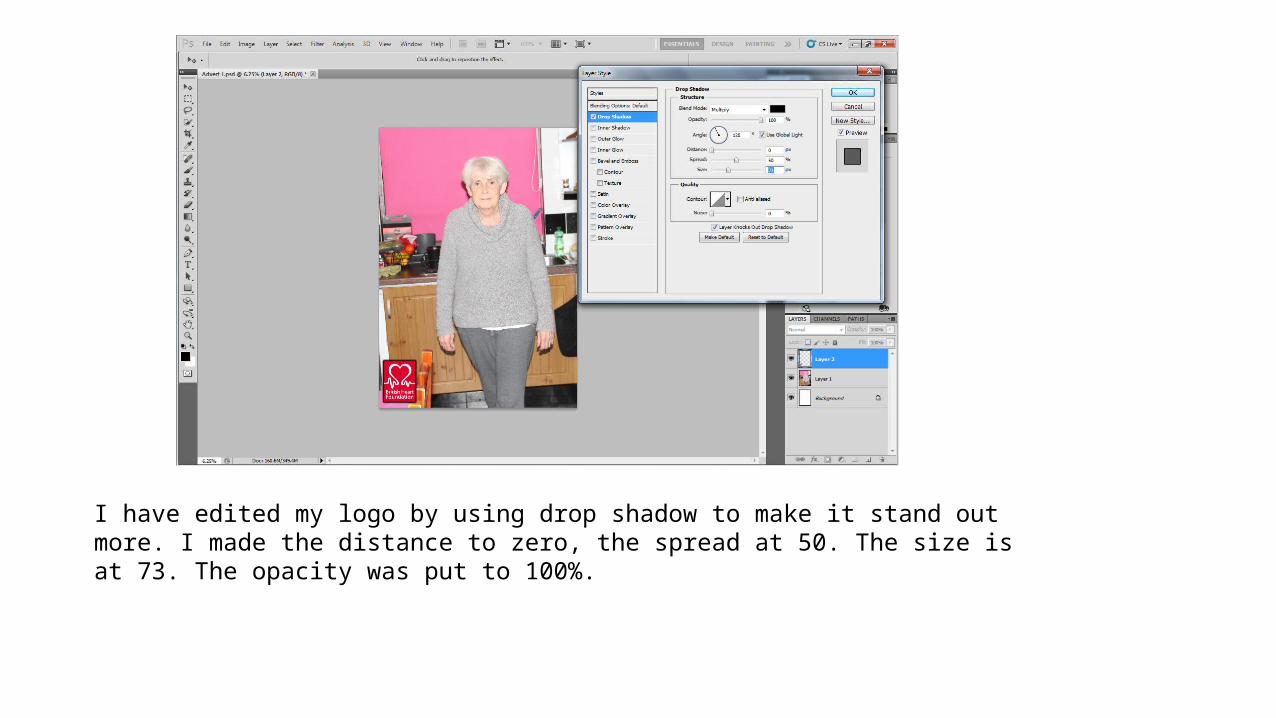
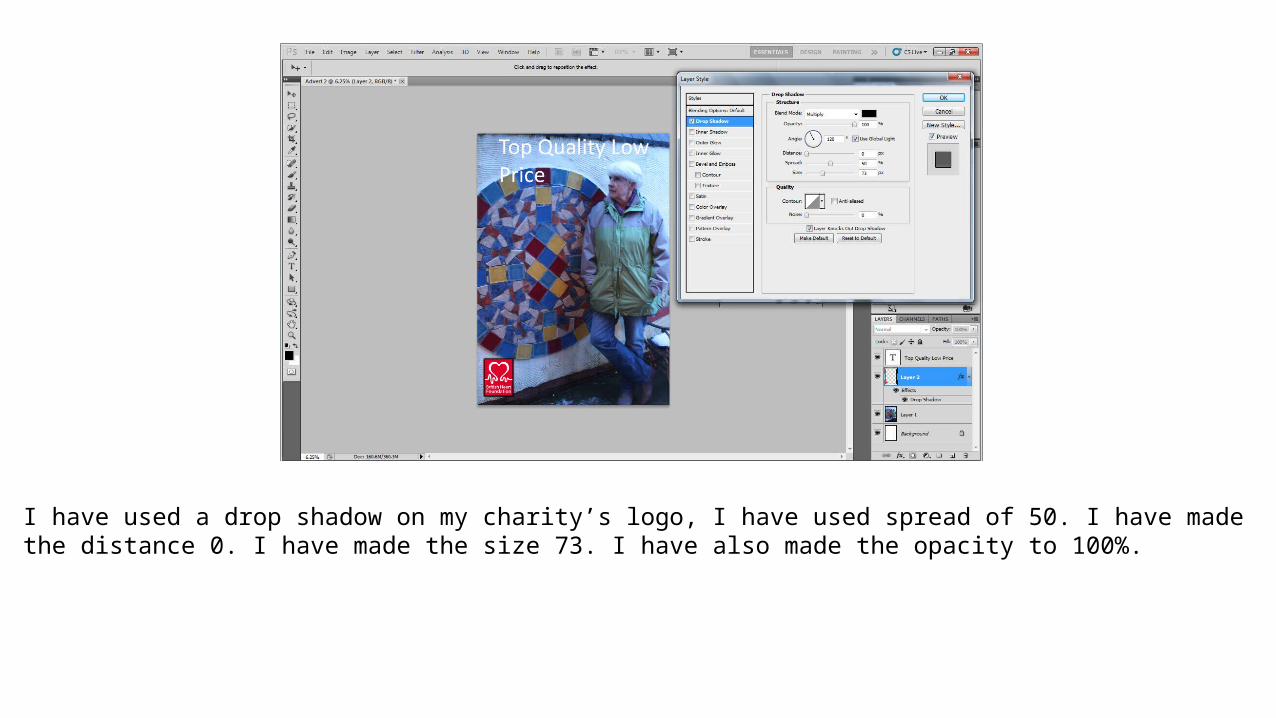
I have edited my logo by using drop shadow to make it stand out more. I made the distance to zero, the spread at 50. The size is at 73. The opacity was put to 100%.
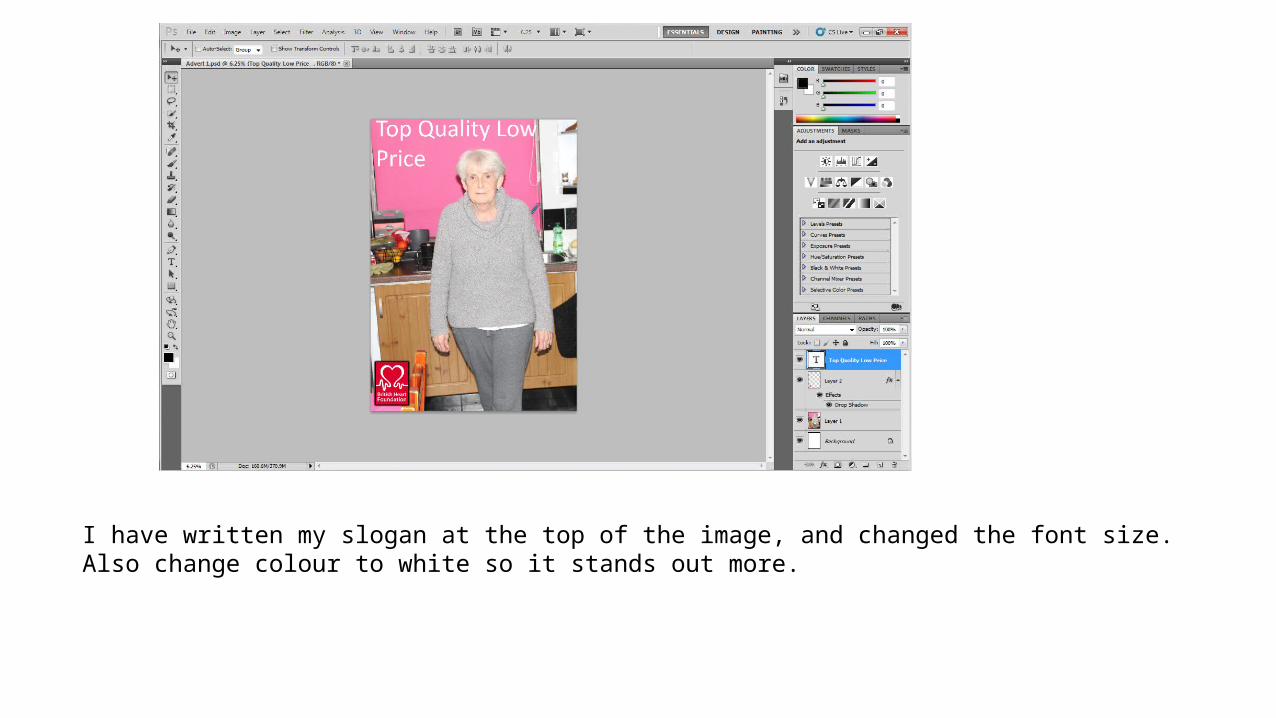
I have written my slogan at the top of the image, and changed the font size. Also change colour to white so it stands out more.
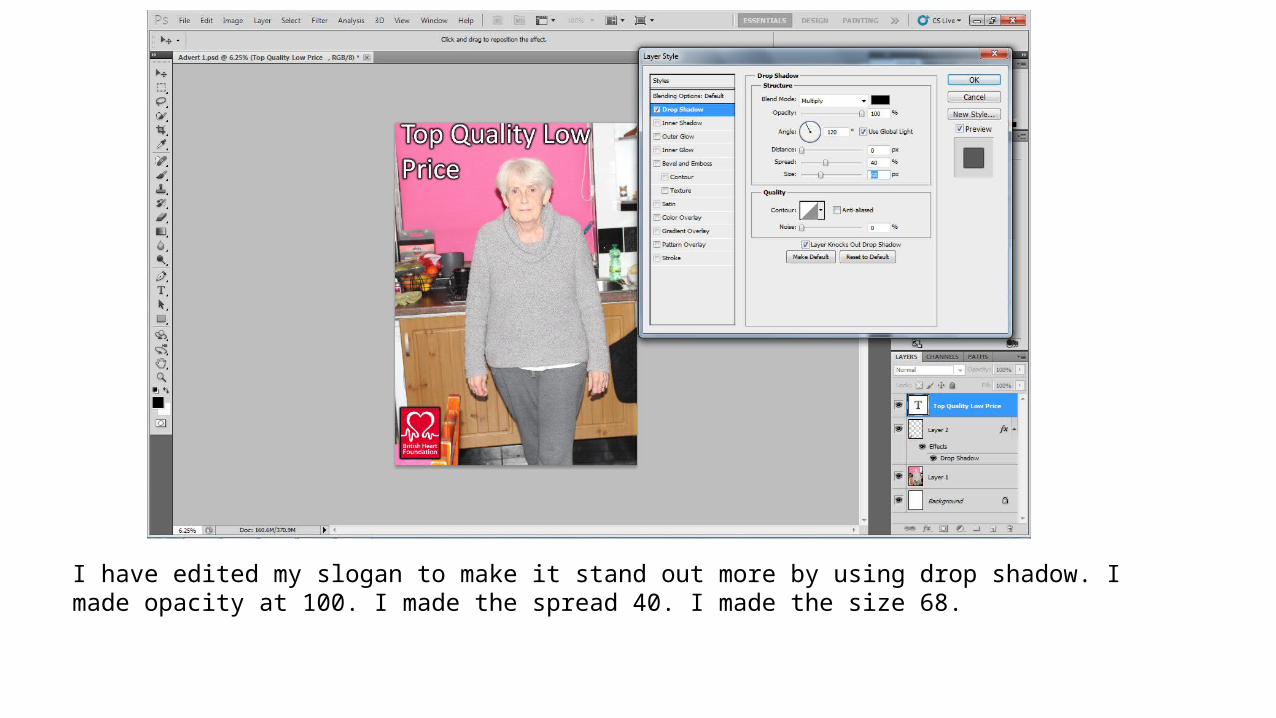
I have edited my slogan to make it stand out more by using drop shadow. I made opacity at 100. I made the spread 40. I made the size 68.
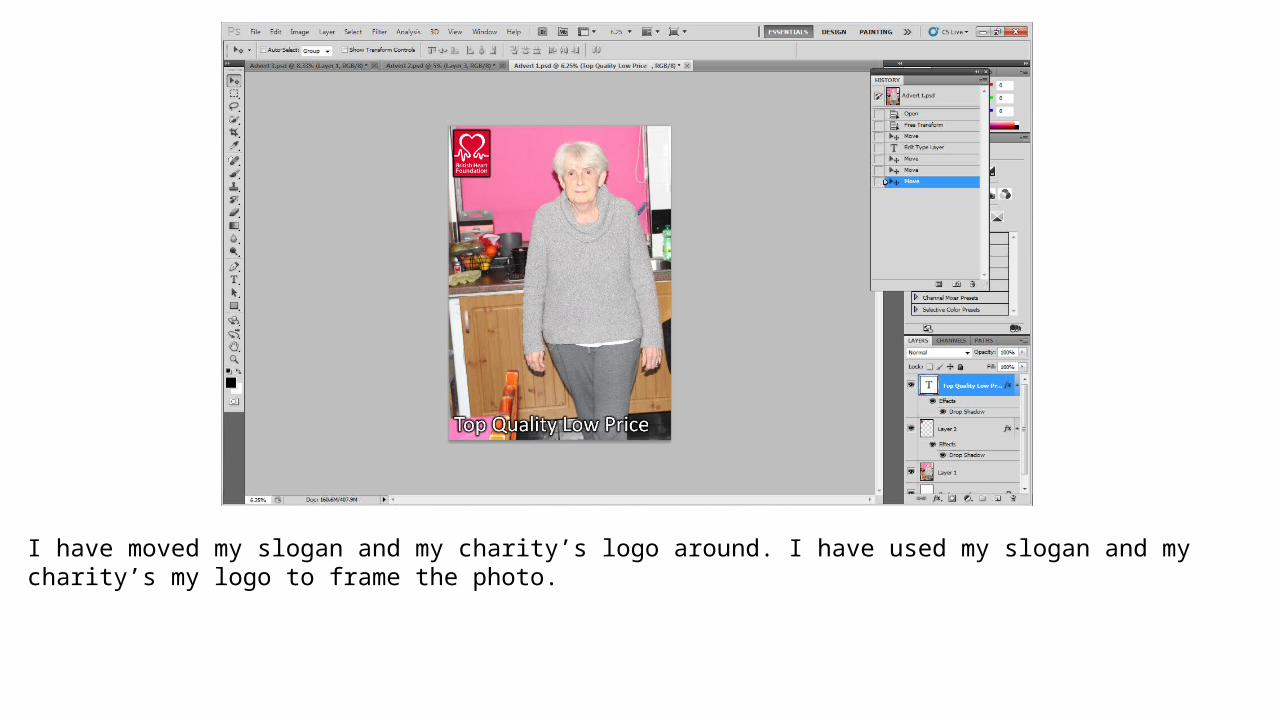
I have moved my slogan and my charity’s logo around. I have used my slogan and my charity’s my logo to frame the photo.
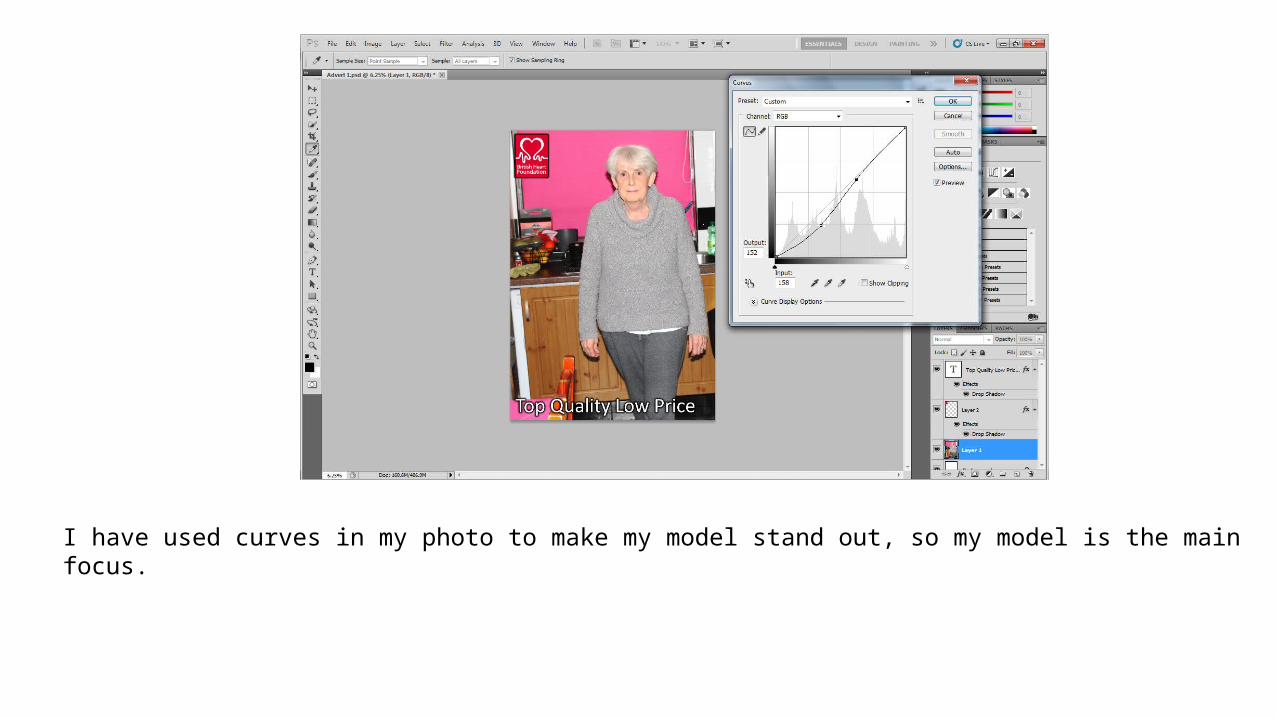
I have used curves in my photo to make my model stand out, so my model is the main focus.
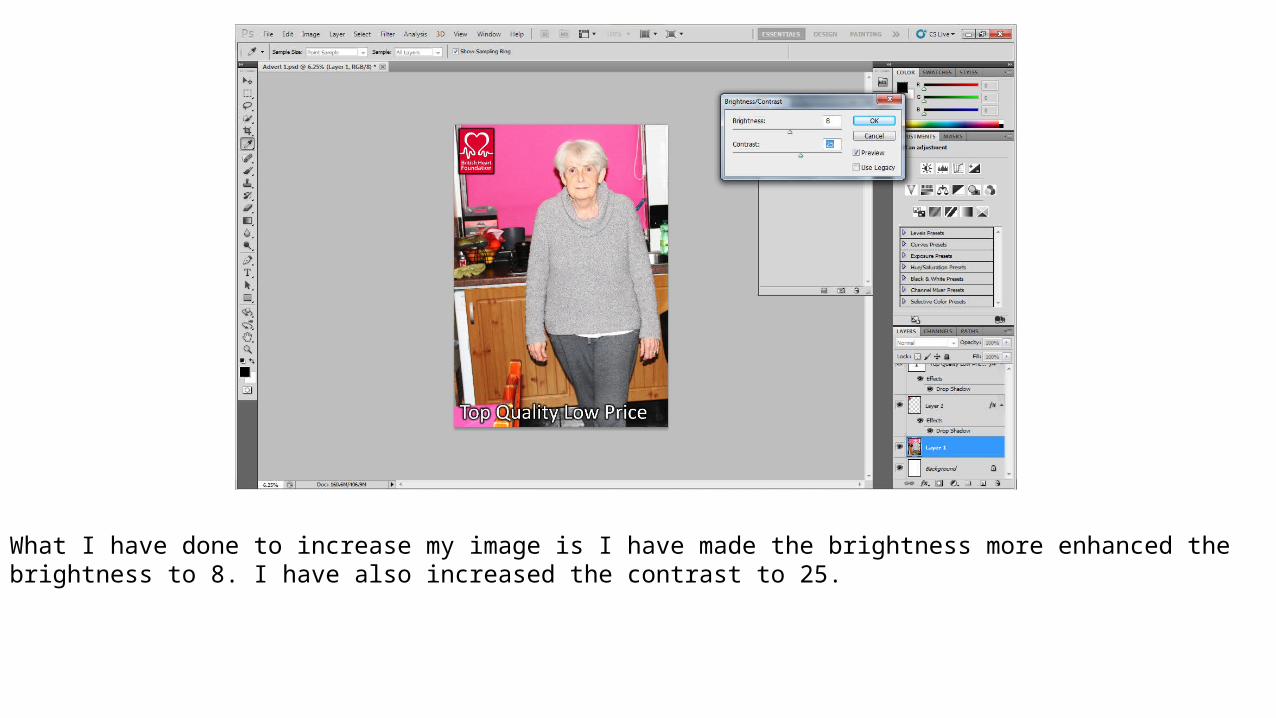
What I have done to increase my image is I have made the brightness more enhanced the brightness to 8. I have also increased the contrast to 25.
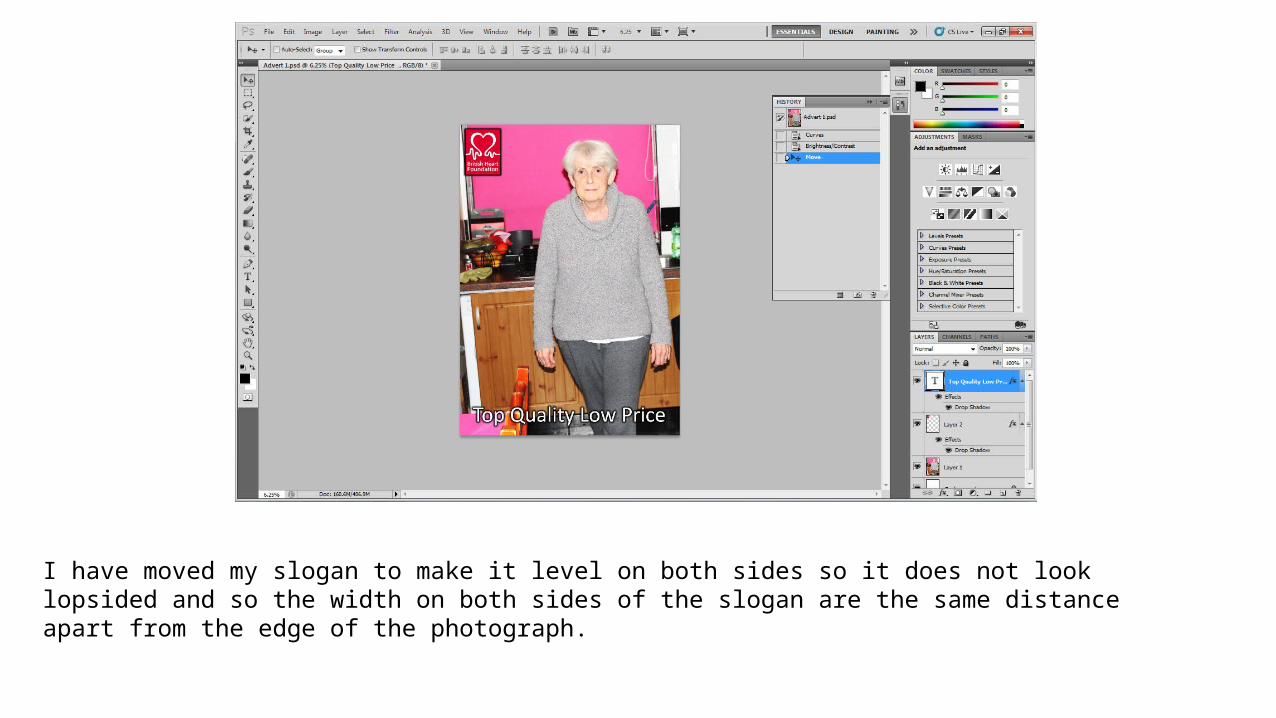
I have moved my slogan to make it level on both sides so it does not look lopsided and so the width on both sides of the slogan are the same distance apart from the edge of the photograph.
Advert Two
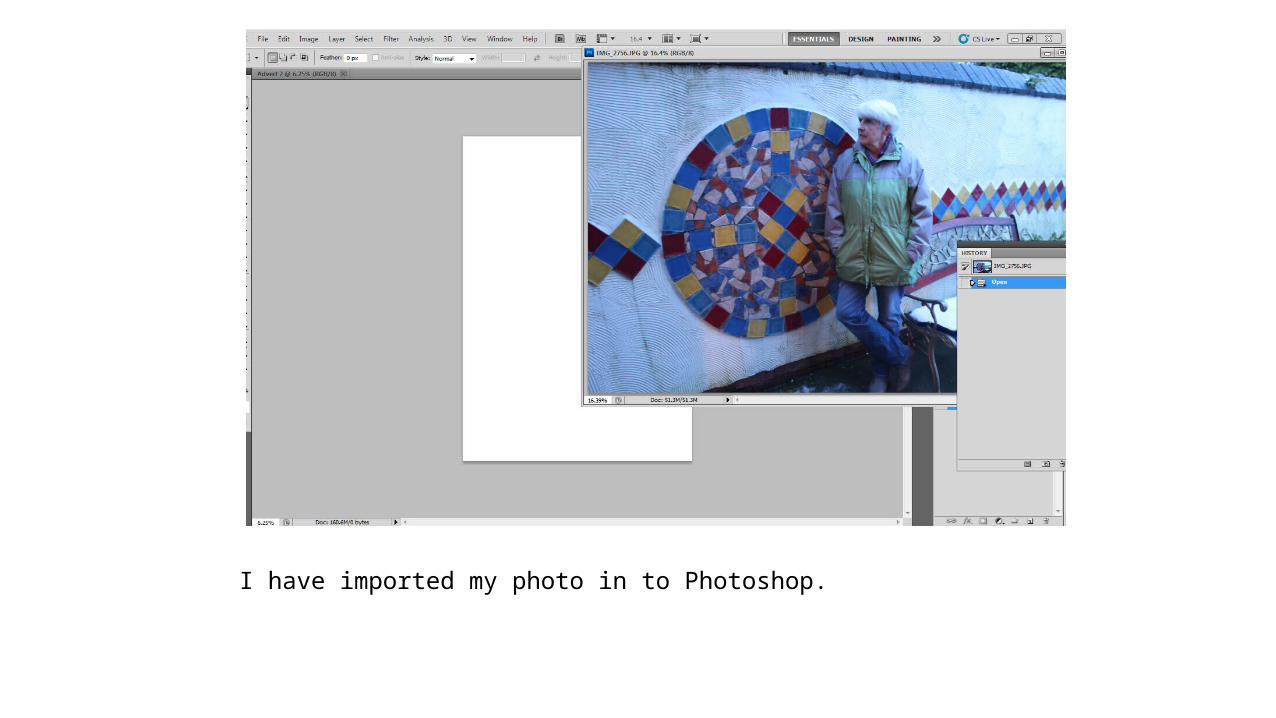
I have imported my photo in to Photoshop.
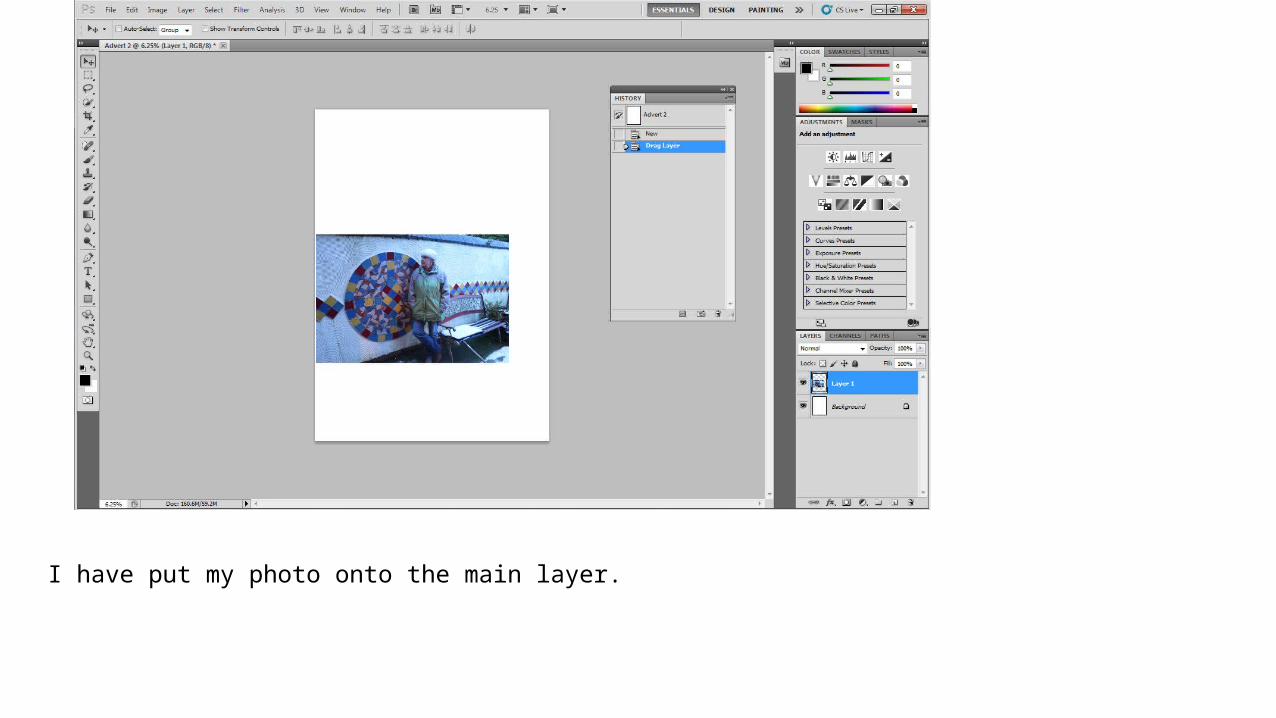
I have put my photo onto the main layer.
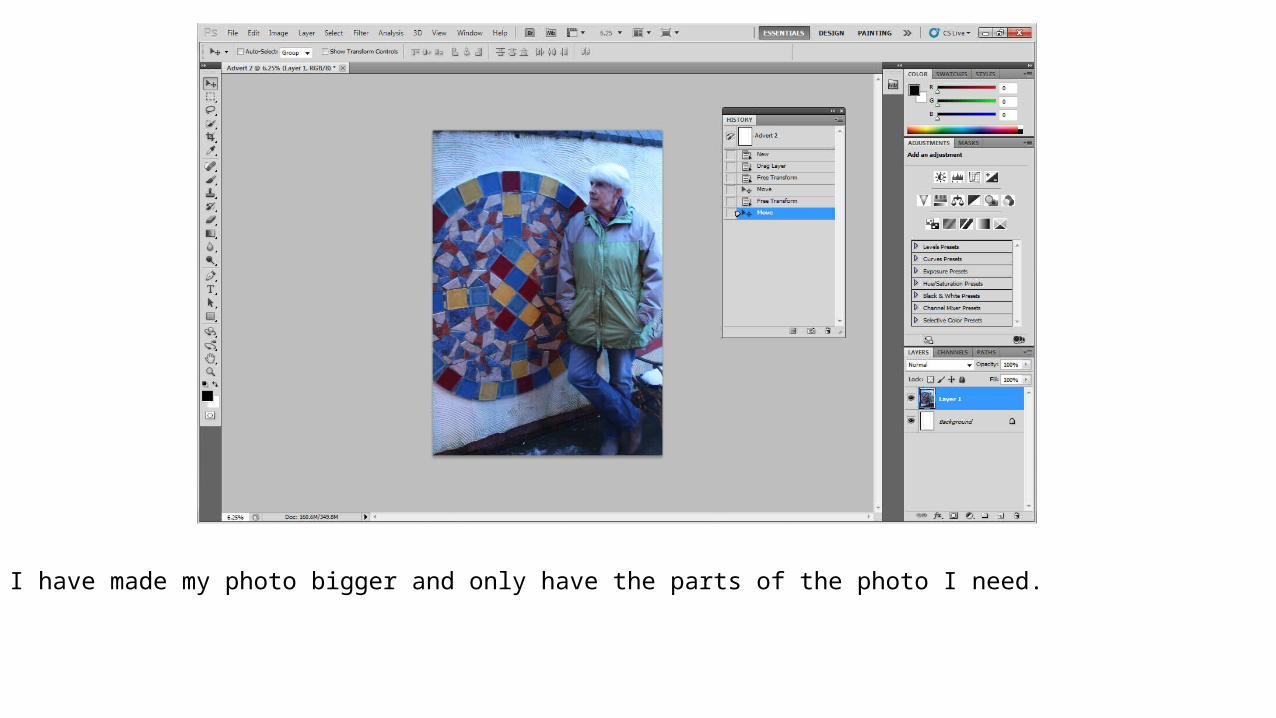
I have made my photo bigger and only have the parts of the photo I need.
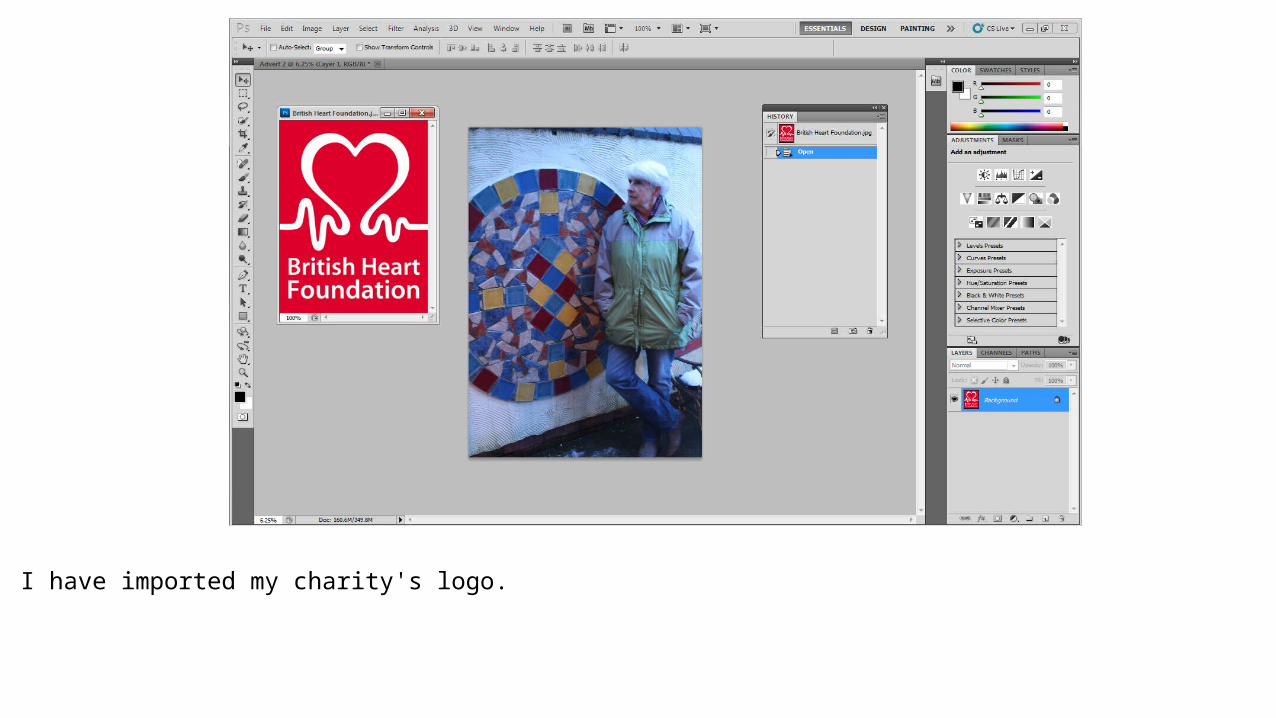
I have imported my charity's logo.
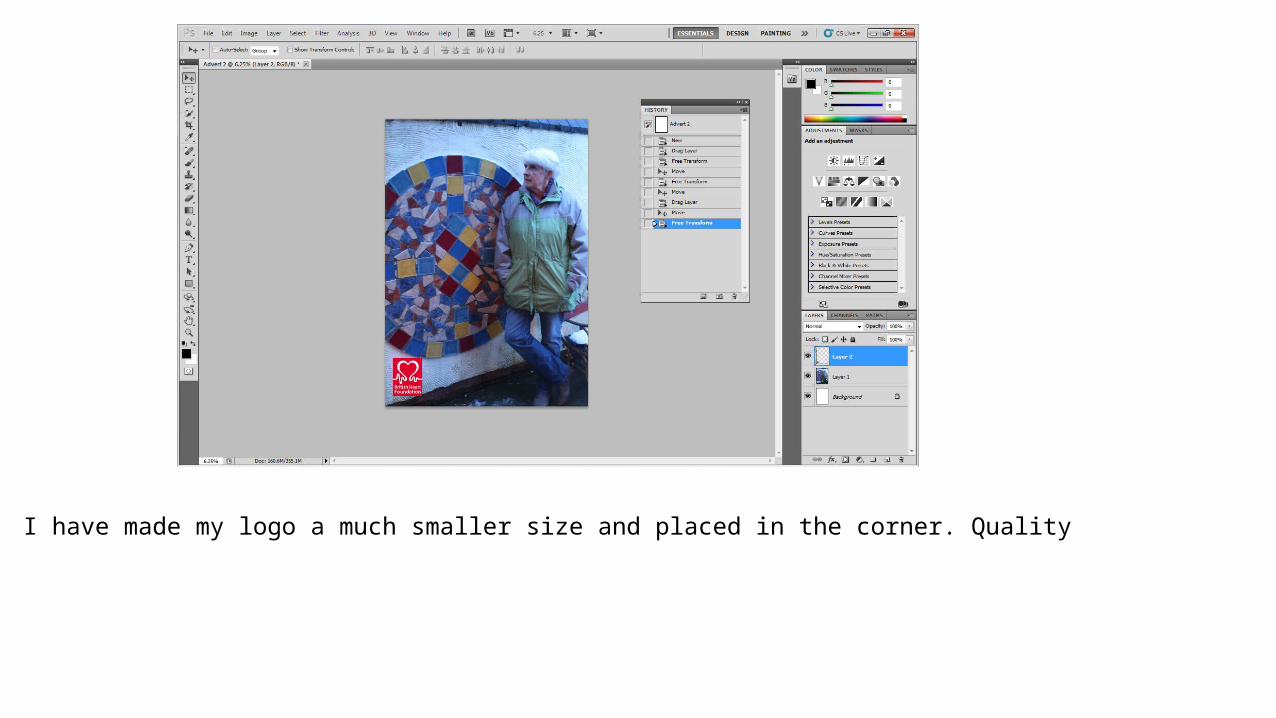
I have made my logo a much smaller size and placed in the corner. Quality
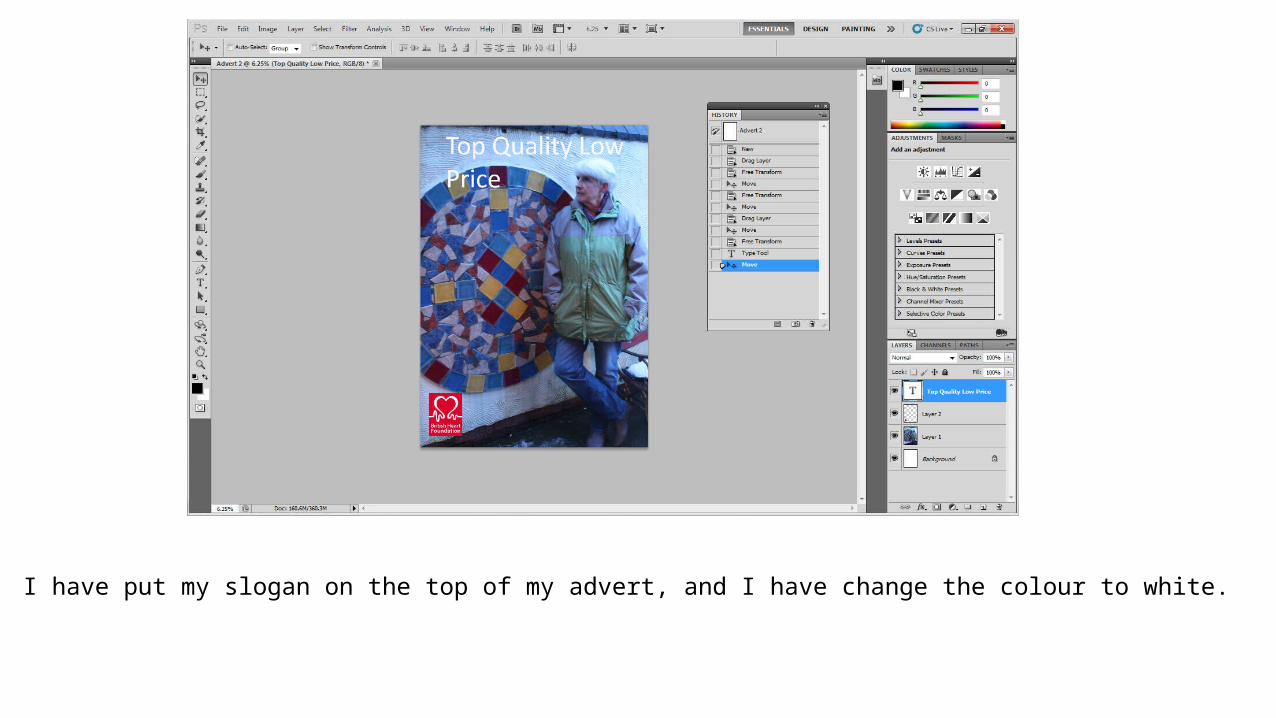
I have put my slogan on the top of my advert, and I have change the colour to white.
I have used a drop shadow on my charity’s logo, I have used spread of 50. I have made the distance 0. I have made the size 73. I have also made the opacity to 100%.
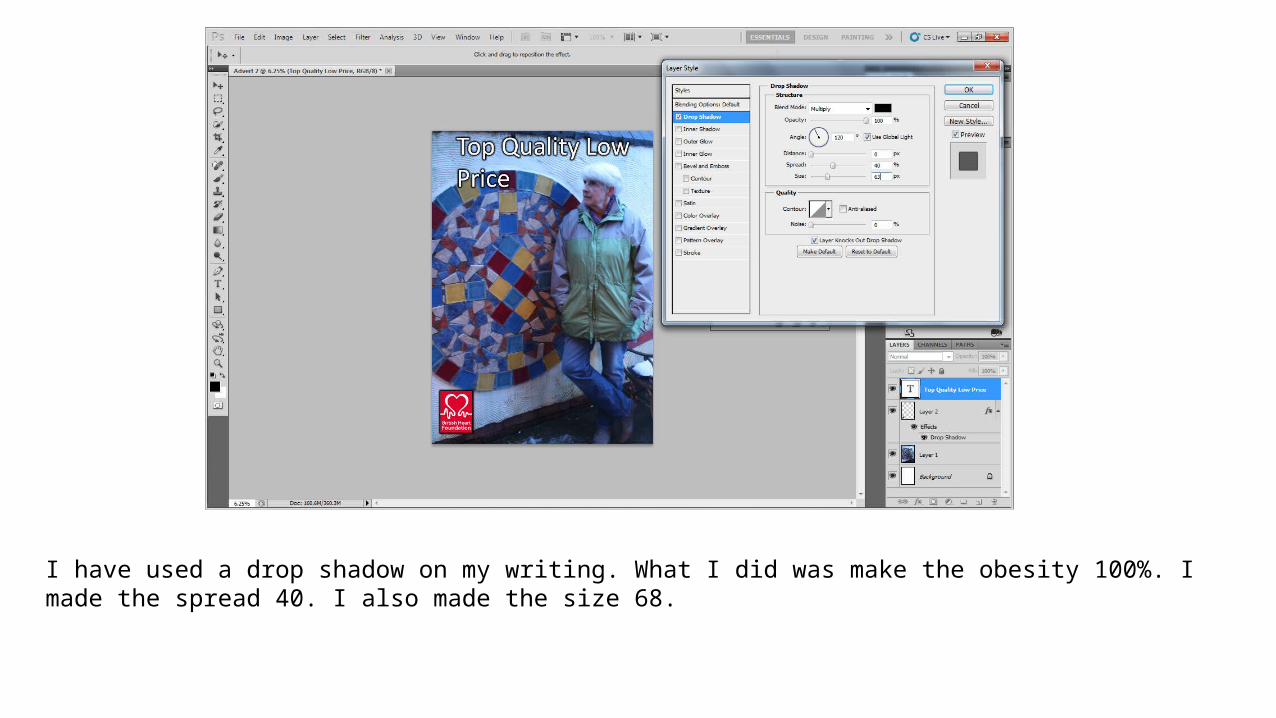
I have used a drop shadow on my writing. What I did was make the obesity 100%. I made the spread 40. I also made the size 68.
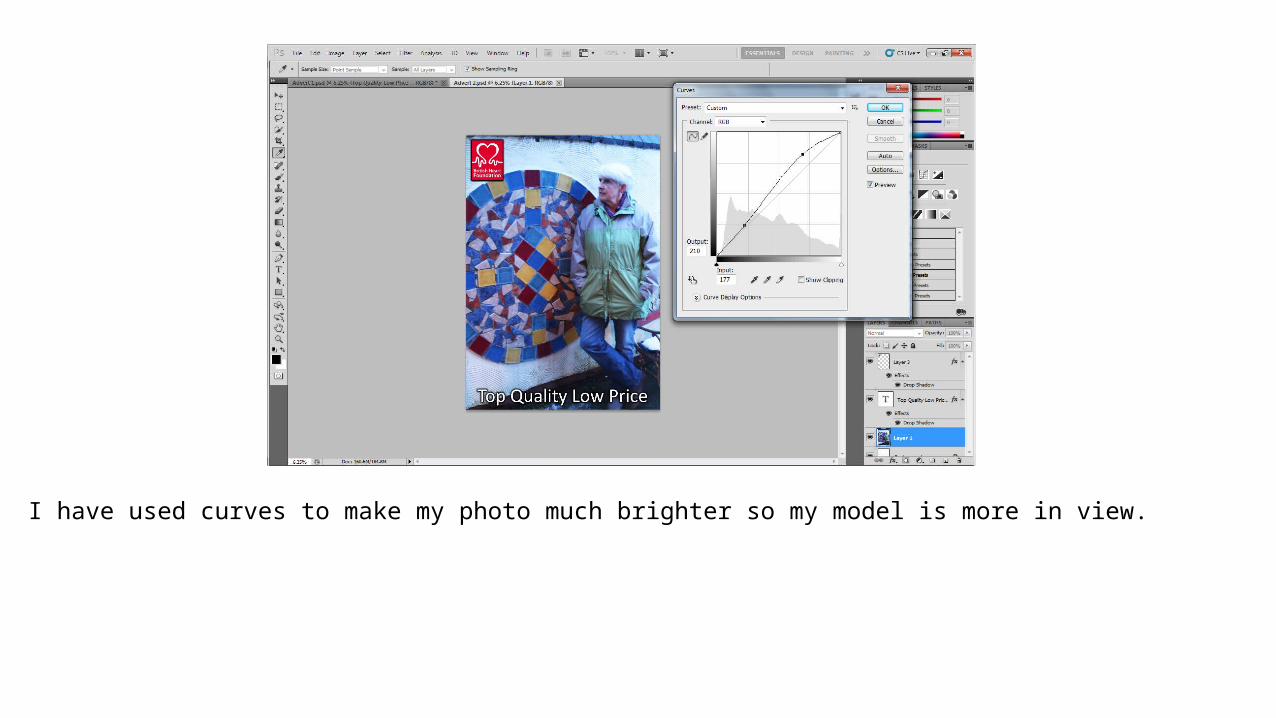
I have used curves to make my photo much brighter so my model is more in view.
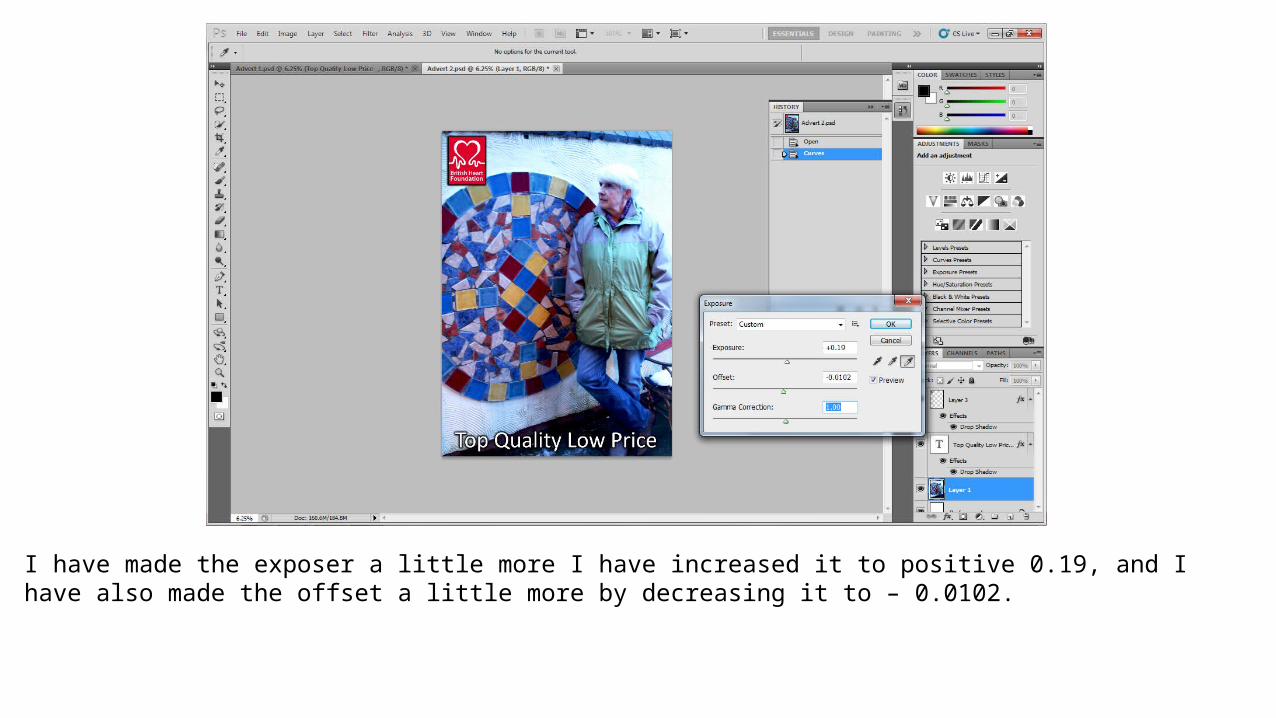
I have made the exposer a little more I have increased it to positive 0.19, and I have also made the offset a little more by decreasing it to – 0.0102.
Advert Three
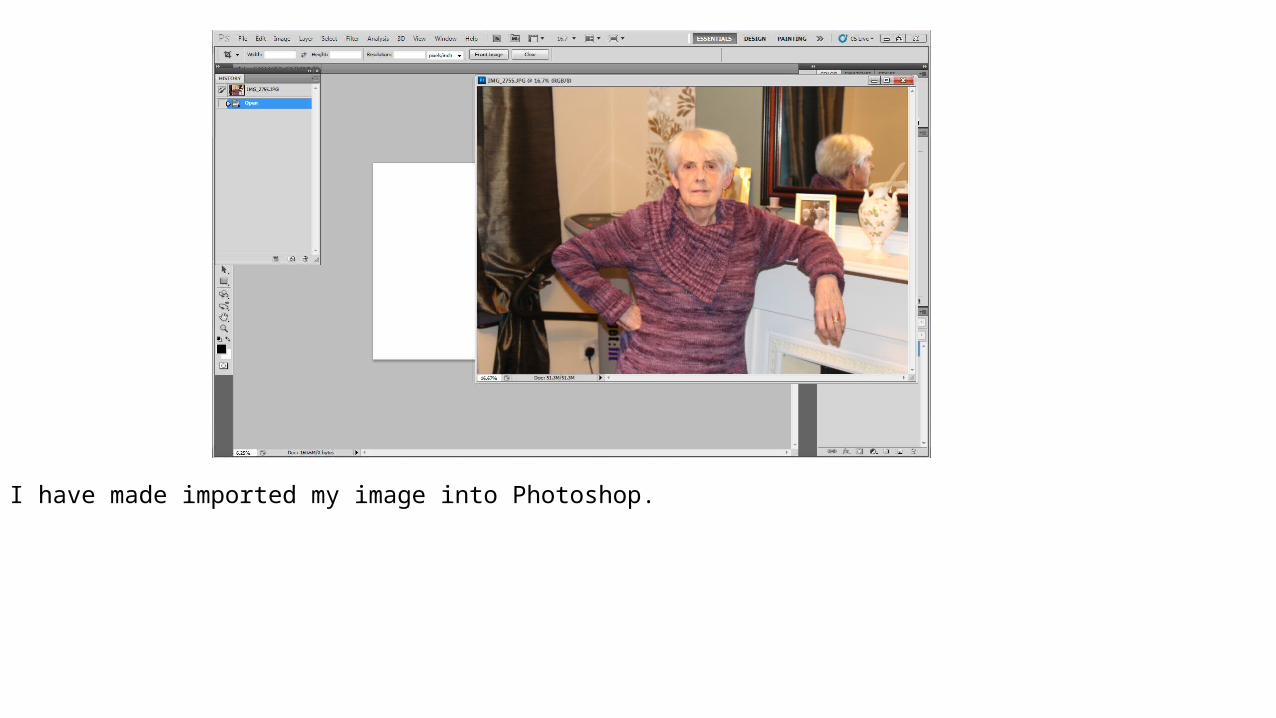
I have made imported my image into Photoshop.
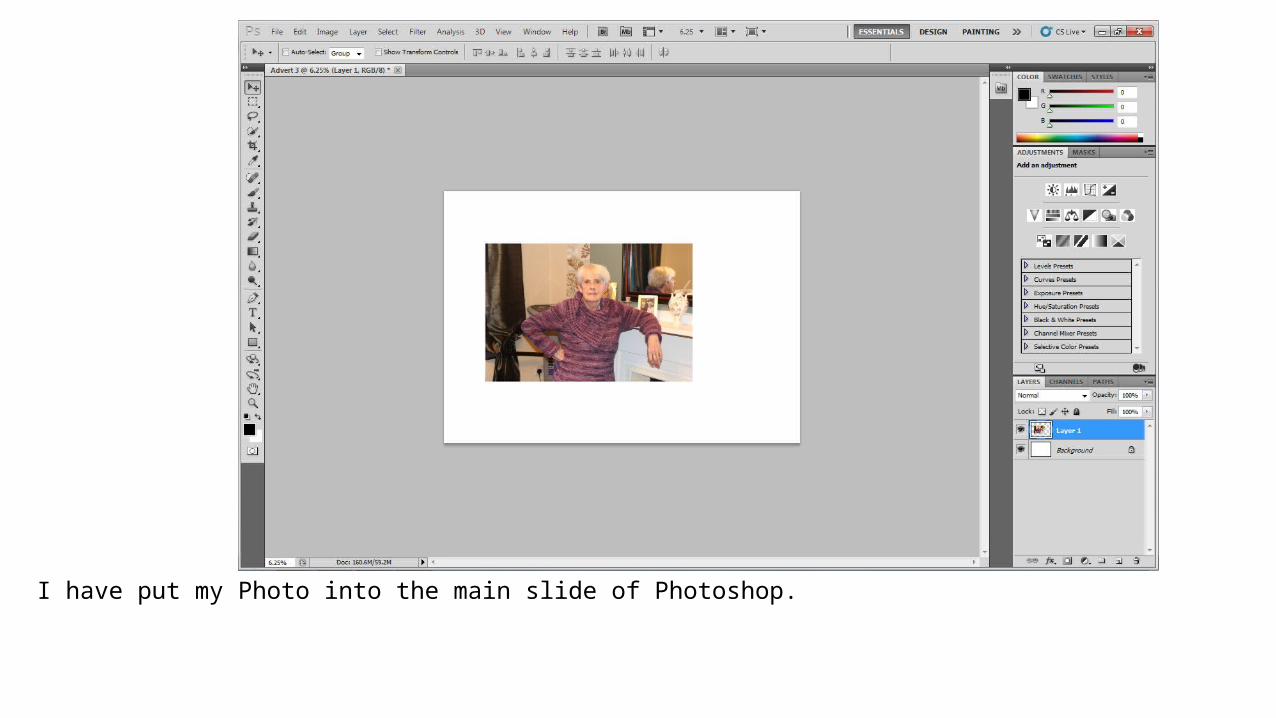
I have put my Photo into the main slide of Photoshop.
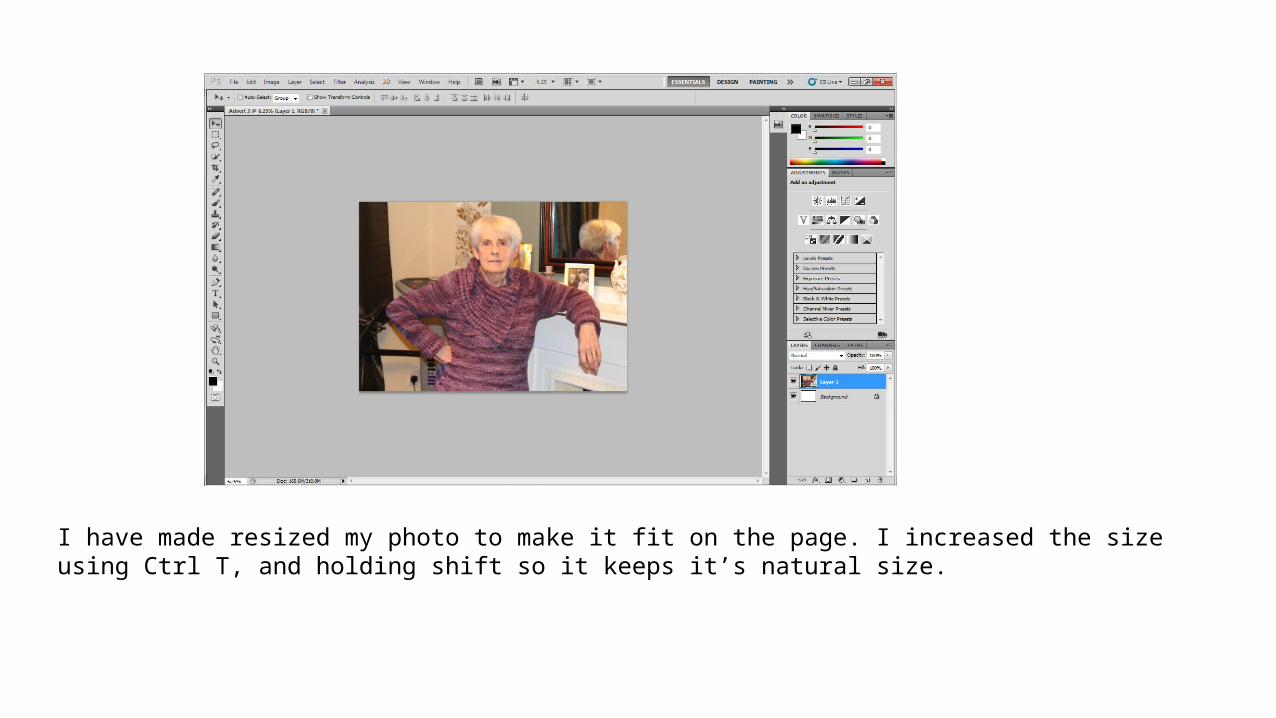
I have made resized my photo to make it fit on the page. I increased the size using Ctrl T, and holding shift so it keeps it’s natural size.
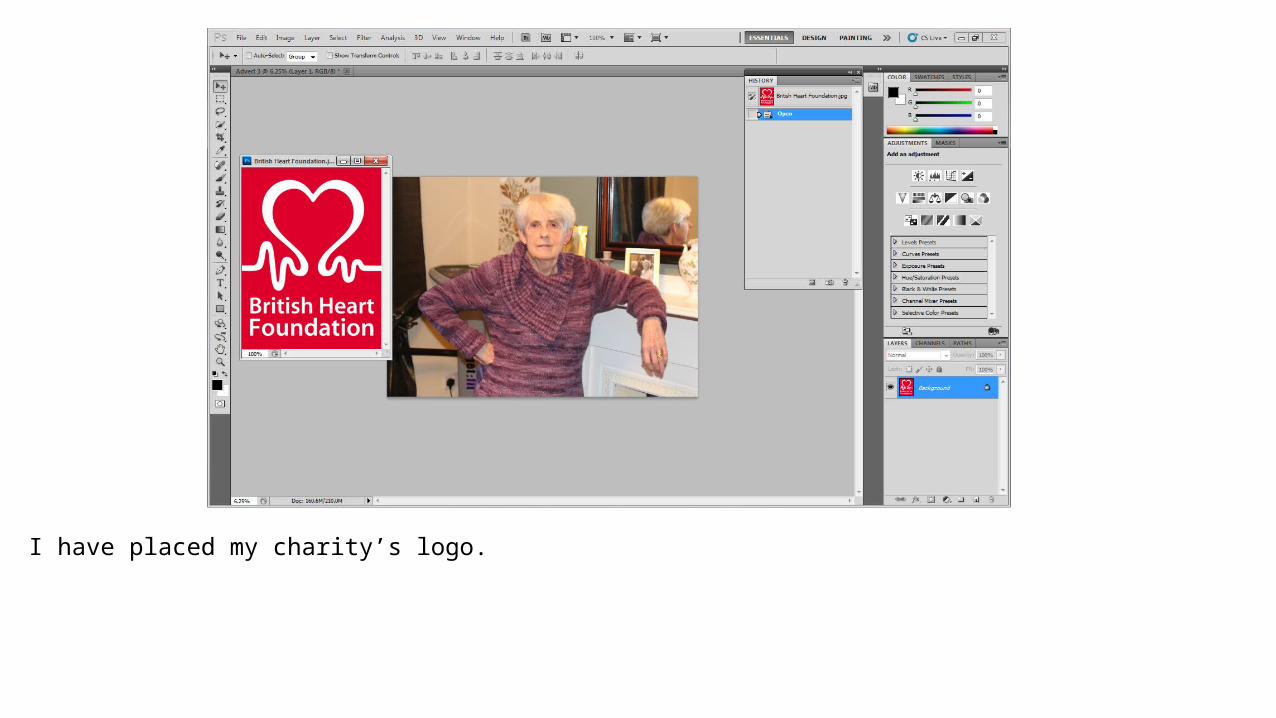
I have placed my charity’s logo.
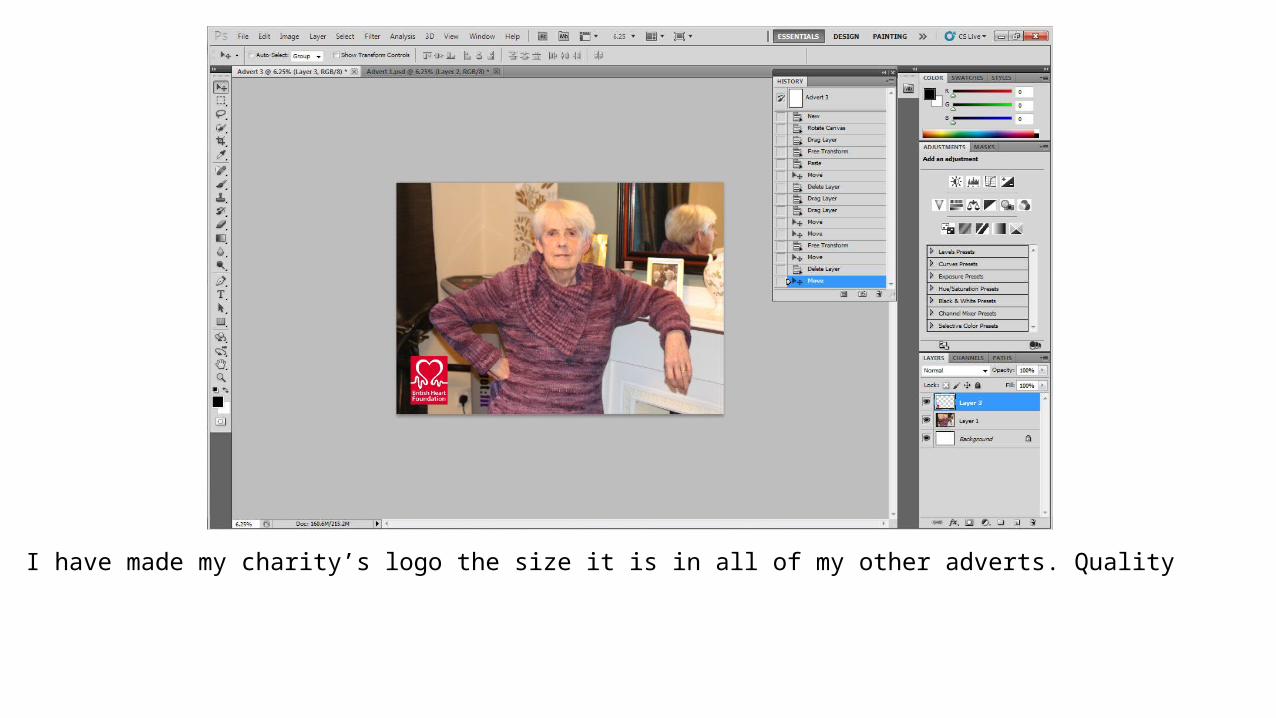
I have made my charity’s logo the size it is in all of my other adverts. Quality
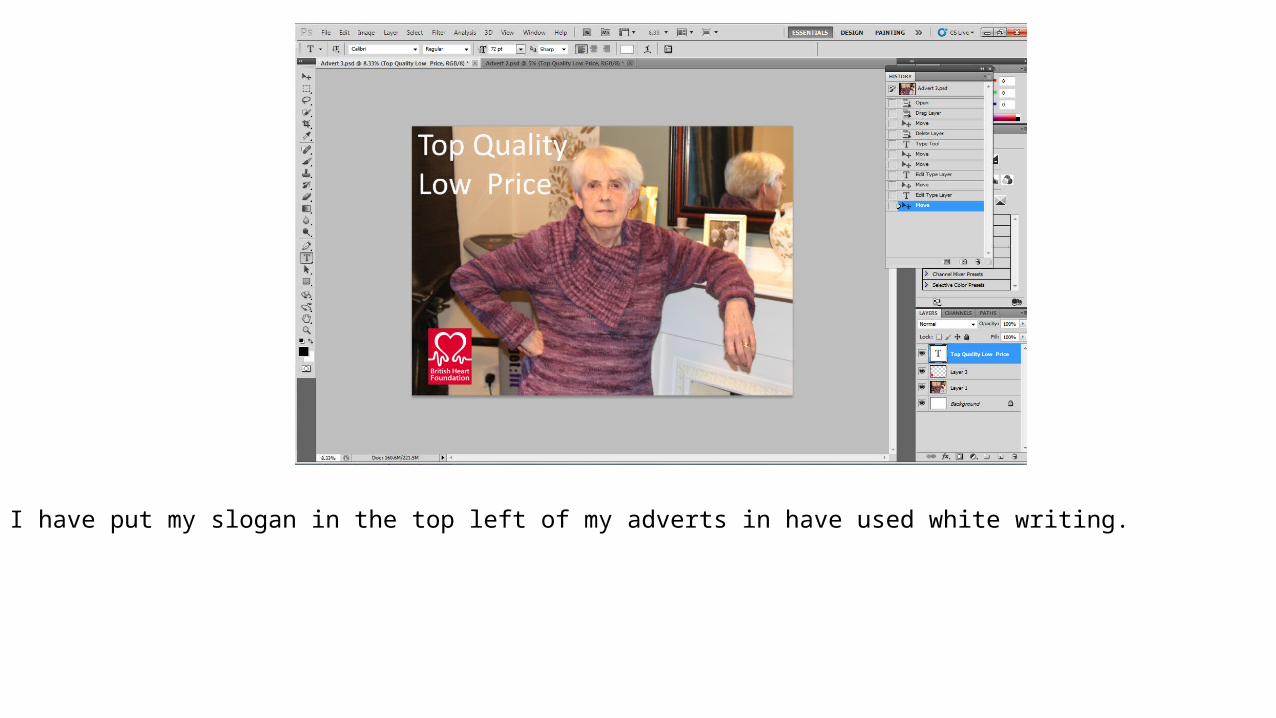
I have put my slogan in the top left of my adverts in have used white writing.
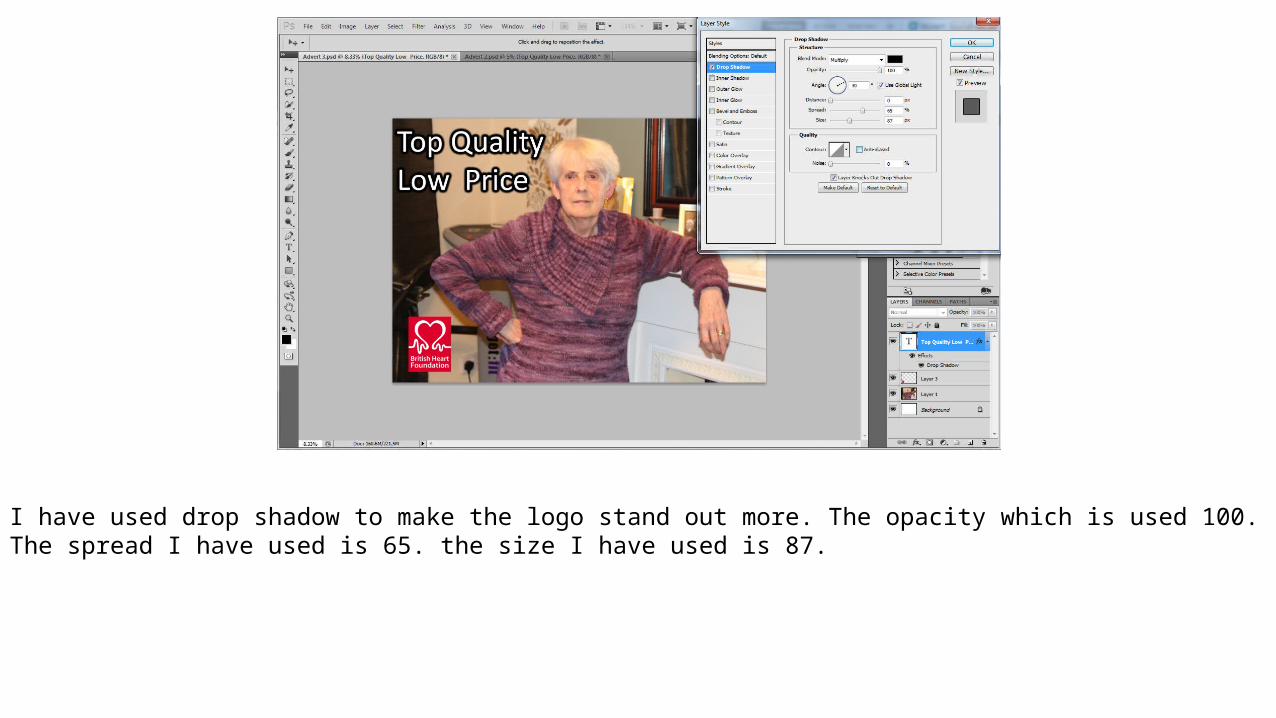
I have used drop shadow to make the logo stand out more. The opacity which is used 100. The spread I have used is 65. the size I have used is 87.
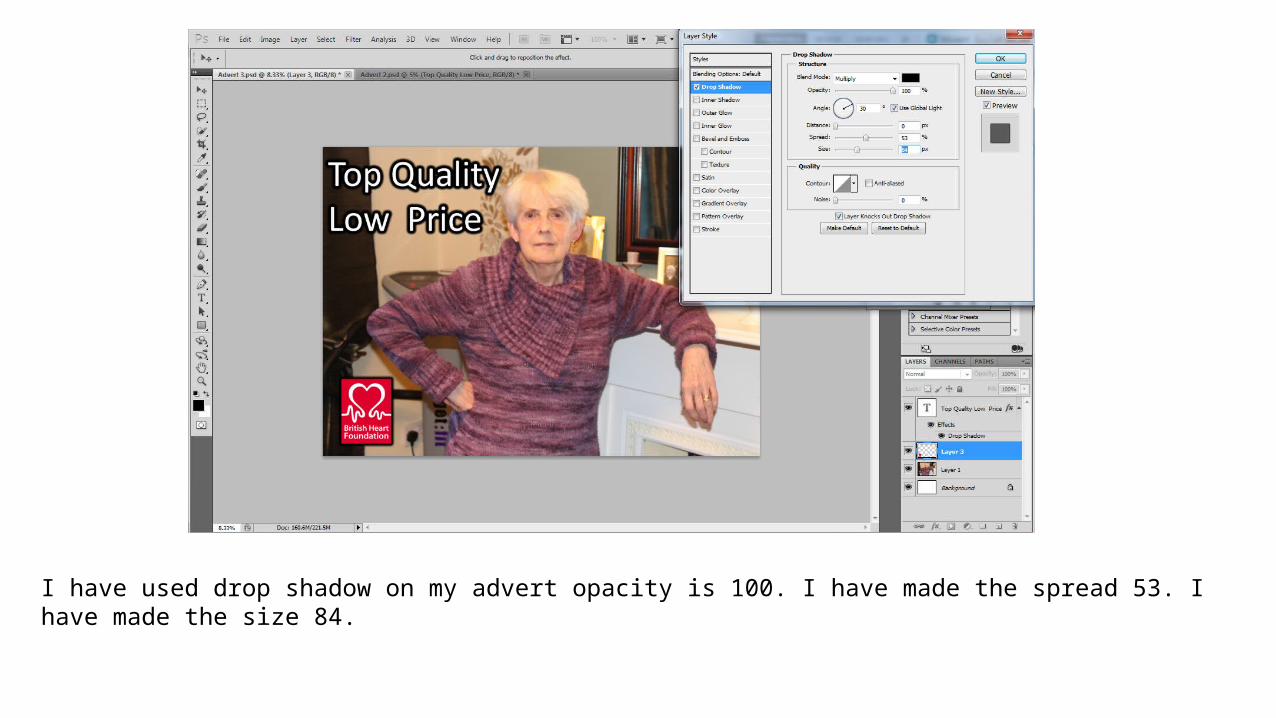
I have used drop shadow on my advert opacity is 100. I have made the spread 53. I have made the size 84.
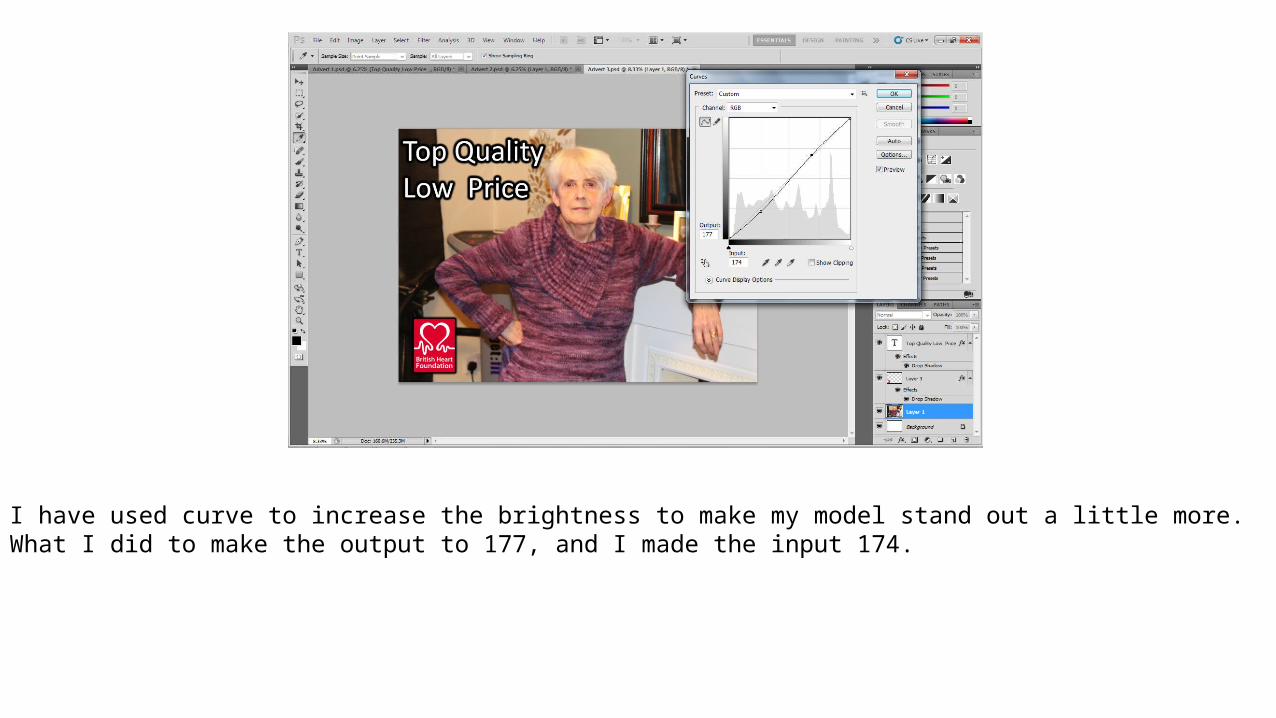
I have used curve to increase the brightness to make my model stand out a little more. What I did to make the output to 177, and I made the input 174.
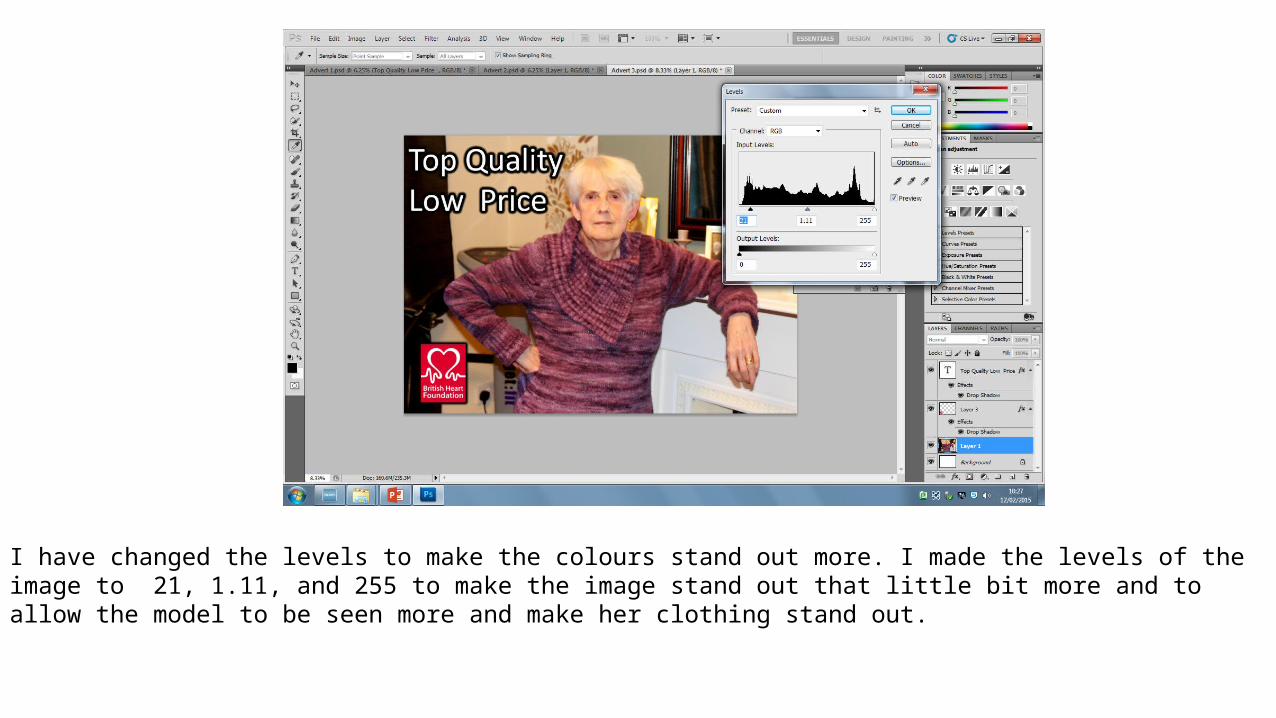
I have changed the levels to make the colours stand out more. I made the levels of the image to 21, 1.11, and 255 to make the image stand out that little bit more and to allow the model to be seen more and make her clothing stand out.
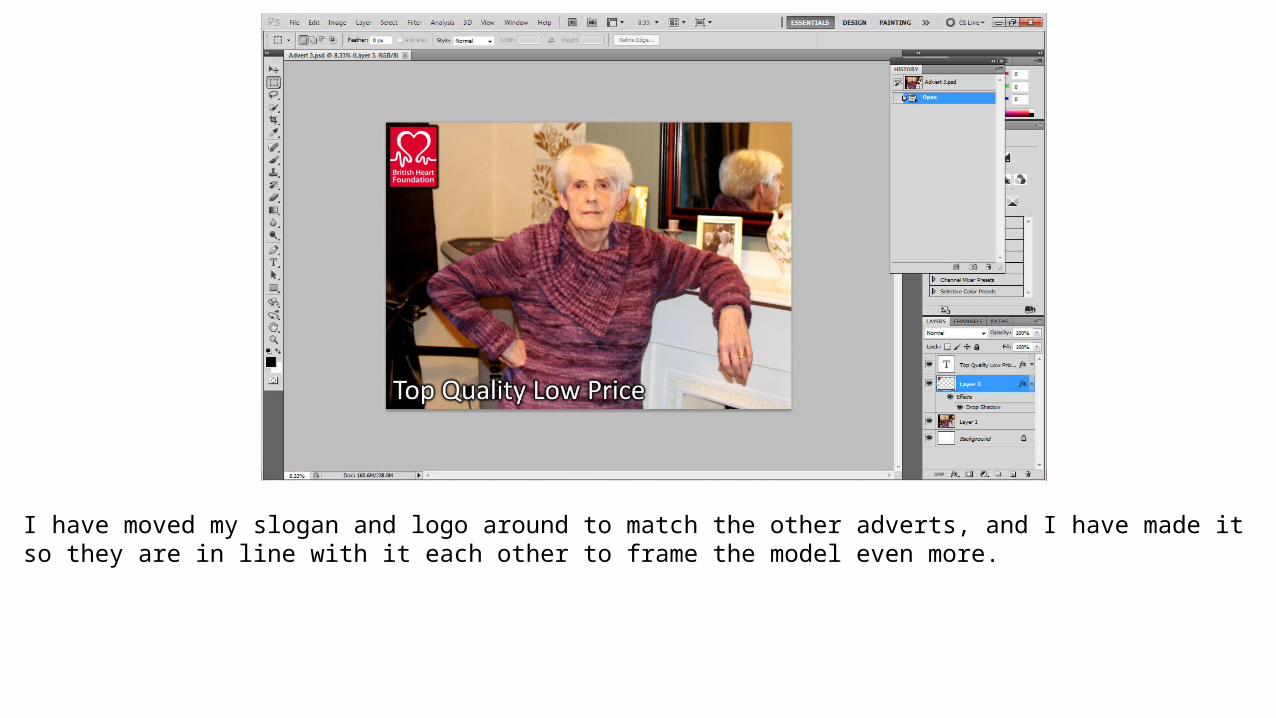
I have moved my slogan and logo around to match the other adverts, and I have made it so they are in line with it each other to frame the model even more.