fly box tasmanian a basic - flylife
TRANSCRIPT

The concept for this collection arose out of a 2002 conversation with Graham Howard, a fellow member of the Tasmanian Fly Tyers Club, Hobart, in which we spoke about the huge variety of
patterns we both carried and won-dered what a rationalised minimal-ist fly box for Tasmania ought to contain.
I have no doubt this conversation was reflective of thousands of similar conversations between fly fishermen all over the globe about the same basic question: what is the best pos-
sible minimalist fly selection? There is of course a range of articles and other publications, which aim to answer this question from a variety of perspectives, and for a variety of locations.
This selection is a very personal one, specifically aimed at Tasmania from the perspective of one who fishes the lakes more than the rivers and who, more often than not, fishes from a boat.
It was also clear that any collec-tion had to be able to cover a range of circumstances met on the water
during the course of the season and, if possible, contain flies that could be pressed into service to cover more than one role. The selection below aims at that sort of flexibility.
The collection is literally that: a collection of short notes I pre-pared for, and which were published in, the Tasmanian Fly Tyers Club Newsletter The Vice, from 2002 to 2006.
I trust some fly tyer-anglers will find the selection of interest.
Tony Dell, Hobart
A BasicTasmanian Fly Box
Part 2 - Floating Flies
• Mayfly duns/emergers • Black spinners• Red spinners • Adult caddis • Jassids• Beetles• Adult midges • Hoppers
CONTENTS
Phot
o: B
rad
Har
ris
Photography by John Pinfold
Compiled by Tony Dell

Mayfly artificials, which sit low in the water to mimic duns and/or emergers, have had a long history in Tasmanian fly fishing practice. David Scholes, in his classic Fly Fisher in Tasmania (1961), refers to the Cocky Spinner (devised by the late Major W B Powlett)—a conventional hackled fly with the underside of its hackle pushed aside by use of a figure-of-eight tying procedure. I was a bit more brutal and like, I suspect, a number of other tyers just took the scissors to the underside of the hackle.
This solution to tricking the emerging dun feeders was, and probably still is, an effective method.I also recall long-time Little Pine specialists, Bill and Daph Twining, using a dark brown floating nymph back in the
70’s. This was just a shaggily tied conventional nymph greased up with floatant. For them it proved deadly and this method is still used today but needs extremely good eyesight or close-quarters fishing for it to be effective.
Another effective solution to tricking dun and emerger feeders is the use of soft hackle (poor cock or, preferably, hen) which collapses under the fly on the surface of the water. The late Barry Lodge’s well-known and widely used Lodge Emerger uses this principle in combination with a feather slip ‘backwing’. Other permutations of this basic principle have been developed using different materials, such as possum tail, for the backwing.
The solution I wish to highlight, however, is the Parachute Dun. The thing I like most about the ‘parachute’ solution is the fact that the fly not only sits so low in the water but also that it always lands correctly.
I first came upon the technique of tying parachute hackles in my first fly tying book, John Veniard’s Fly Dressers Guide (1952) in the early 1970’s and at that stage it was, with my level of skill, unattainable from my vice.
I subsequently admired the beautiful cut-wing parachute dun pattern in Poul Jorgensen’s Dressing Flies for Fresh and Salt Water (1973) and I laboriously tied a couple, (one of which ended up as one of the flies photographed on the cover of Australia’s Best Trout Flies) but they never became a regular part of my armoury because they tended to twist my leaders horribly during casting no matter how carefully I tied them.
The first practical parachute fly for Tasmanian conditions which grabbed my attention was the ‘OBE’ or O’Brien Emerger tied by David O’Brien with a loop wing made out of possum tail. It was an elegant little fly which fished very well (i.e. it didn’t cause the dreaded pigtails in the leader) but the loop wing was a bit fiddly to tie.
After the OBE I started using a deer hair post which was very effective, but brittle after I had caught a few fish, so I went back to using possum tail, not the loop wing but a straight post. I know a few tyers also use a bunch of cul de canard (CDC) as a post.
To save the bulk inherent in tying in the post on top of the hook and bending it vertical I began to tie in the post cross-ways under the hook with a figure-of-eight tie in, then bring both sides up vertically and wind a thread base around the post on top of the hook for the parachute. This method also makes the post virtually indestructible in the fishing situation and it produces a post which is very easy to see.
The other breakthrough I made in ensuring a neat and durable parachute hackle was tying off the hackle round the post rather than round the hook. The basis of this came from reading about the tying of the Klinkhamer Special in a magazine article by its creator, Hans van Klinken. This method allows you to tie a neat thorax before you tie in the hackle or without having to tie down the hackle over it or disturb the lie of the hackle by having to lift it up at the front to tie it in.
I also gained an important tip on making sure parachute hackles wound cleanly and neatly from that monumental book The Fly Tier’s Benchside Reference by Ted Leeson and Jim Schollmeyer (1998). This involved making sure when tying in the hackle prior to winding that you leave a little bare shaft so that you can make your first turn of the bare hackle stalk at an angle of 45 degrees up the post and then wind it horizontally down the post towards the hook shank the requisite number of turns (I use about 5) prior to tying it off. This ensures you do not wind over previously wound barbules and makes a much neater fly.
So finally to the fly pattern, the Black Possum Emerger which is tied with a black dyed possum fur body and a post from the base of the possum tail which is not usually as starkly black as further up the tail and is a bit finer.
MAYFLY DUNS/EMERGERS

Tying Notes• Tie in post material crossways under the hook shank about 1/3 back from the eye using figure-of-eight tie, bring both sides vertical and make a wound thread base above the hook shank.• Strip fibres from base of hackle feather (I use a saddle hackle), tie in behind the post so hackle points to the front and lies behind the post as you look at it. If you wind your hackle anti-clockwise have the hackle in front of the post.• Wind thread back to point above the barb and form a small knob of thread to assist in splaying the tails• Tie in small bunch of Coq de Leon fibres immediately in front of the knob of thread.• Dub fine body and thicker thorax of black possum fur ending the dubbing under the post. Alternatively you can use a ‘chenille’ of peacock herl for the thorax.• Wind hackle as described in the commentary above, let surplus hackle hang down on the side of the hook facing you (if you have hackle pliers attached) or hold it down while you whip finish round the post. This is most easily done using my ‘paper clip’-style whip-finishing tool.• Use a bodkin to put a drop of head cement on the tie-off point round the post under the hackle. After I finish tying my dries and before I put them in my fly box I give them a spray with silicon fabric protector and let them dry.
Back to contents page >>
Black Possum EmergerHook: 1X long shank #12 or #14 (Kamasan B830 or similar) Tails: Bunch of dark Coq de Leon hackle fibresBody: Dyed black possum dubbingPost: Small bunch of fur from base of possum tail, underfur excludedHackle: Dark blue dun

Black spinner imitations are a key dry fly for fisherman in Tasmania. Not only does the State play host to three sep-arate species, but one or other of the species is important over a wide geographical range of trout fishing venues.
The importance of the black spinner extends from the lowland rivers, to the larger lakes and to the remote Western Lakes mainly in the warmer parts of the year but starting from late October and stretching through to March. You can get spinner activity in all sorts of conditions particularly if you find a sheltered corner on river or lake where the ‘dance’ is being played out over the water.
The three species can be easily differentiated by size. The large black spinner (Atalophlebia albiterminata) is about an inch (2.5cm.) long overall, equating to about a #12 long-shank hook, and occurs on both lakes and rivers. Max Christensen’s ‘Macquarie Black’ is a well known high floating imitation, which is written up in Max Stokes’ 1978 Tasmanian Trout Flies.
The medium black spinner (Nousia (previously Atalonella) fuscula) is only about half the size of its larger relative, about a #14 hook, and seems to prefer running water although it or its slightly smaller relative can also be found around some lakes, particularly the Western Lakes. A normal black hackle quill tie is the usual imitation.
The small black spinner (N. delicatula) is slightly smaller again, about a #16 hook, and is believed to favour slower flowing lowland streams but is hard to differentiate from its medium relative without close inspection. It has speckled tails.
There is an emerging view that there are several different species of medium and small black spinners across the State. Further information on these black spinners can be gained from David Scholes’ classic 1961 Fly-fisher in Tasmania or from Dr. Ron Thresher’s 1998 article in FlyLife Magazine, Volume 12.
It seems that black spinner patterns are an Australian innovation. Veniard in his 1952 Fly Dresser’s Guide indicates an antipodean origin to the fly. His pattern is a quill-bodied hackle-only dry fly.
Looking at some of our earliest fly fishing books, there is no mention of the black spinner as a popular fly. Blackwood in his 1926 The Quest of the Trout only mentions Halford’s tail-less, winged Black Gnat but it is obvious that the Veniard tie owes its origins to the Halford quill-style of fly.
McCausland in his 1949 Fly Fishing in Australia and New Zealand also only highlights the Black Gnat but Scholes, not surprisingly, notes the importance of black spinner patterns in his 1961 book referred to earlier. He does not, however, give a specific pattern, which leads me to think that by that time a quill-style black spinner pattern was the norm.
Given Dick Wigram’s known affinity with, and knowledge of, the English tying style I guessed that his writings would shed some light on any early Tasmanian black spinner patterns. Thanks to Ron Ruthven, I managed to gain access to Wigram’s The Fly, a limited edition, sourced from an unpublished 1968 manuscript, published by Mike Stephens in 2002. On pages 14 and 15 of this book, Wigram bemoans the fact that (I presume, in the late 1920s, see below) no suitable pattern to imitate the local black spinner was available unless he tied it himself.
Having turned his attention to it he says that the resultant pattern altered little for forty years (to the date of the manuscript) and he outlines it as follows:
Hook: Old No. 2 (#13)Setae: 4-5 fibres from spade hackle of an old black roosterBody: Black silkRib: Fine gold wireHackle: Two stiff hackles from old black rooster, tied reversed (inside of hackle facing forward)
Phillip Fisher, a fly tyer and regular fishing mate, gave me typescript of patterns compiled from a small notebook reputedly kept by Wigram but indicating no date. This compilation has two black spinner patterns, one with a purple raffia body and the other as above. Interestingly this is very similar to the black spinner pattern attributed by Max Stokes in his book to Noel Jetson.
Noel Jetson also claims the pattern as his own in Malcolm Crosse and Rob Sloane’s 1997 Australia’s Best Trout Flies and the notes associated with his contribution contend that it differs from the Wigram pattern by having longer tails and gold rib rather than silver. Obviously this latter difference is not correct, given the information outlined above.
The first specific New South Wales Black Spinner pattern I am aware of in the Australian fly fishing literature is John Turnbull’s elegant ‘Wonder-wing’ detached bodied and winged black spinner pattern imitating a large NSW
BLACK SPINNERS

Monaro mayfly documented in his 1968 book A Fly on the Stream which he found very effective during egg-laying swarming behaviour.
The pattern I want to feature is slightly different in that it has a sparsely dubbed body, no rib and a peacock herl thorax which gives the fly a bit more life or sparkle and represents the medium to small black spinners. I was shown this pattern by Keith Chadbourne, a South Australian angler who, until he was transferred back to the mainland with his work, was a member of the Tasmanian Fly Tyers Club.
Tying notes:• Wind a base of thread from head to tail.• Form a small “lump” of thread immediately above the barb to assist in spreading the tails.• Tie in tail whisks immediately in front of the thread lump and spread tails.• Sparsely dub fine dubbing and wind forward until about 1/3 of hook shank remains.• Tie in hackle, fibres should not be too much bigger than hook gape.• Tie in peacock herl, wind closely to eye of hook and tie off.• Wind forward hackle and tie off at eye.• Whip finish and varnish head.
Back to contents page >>
Small Black Spinner
Hook: #14 Kamasan B830 or Mustad 80000BRThread: # 8/0 BlackTail: Black hackle fibresBody: Fine black dubbingThorax: Peacock herlHackle: Black, preferably natural (I use dark dun)

Red spinners to most Tasmanian fly fisherman conjure up the magic of fishing the Macquarie River with the big gem-like red spinners shining in the bright sunshine as they rise and fall in swarms in any little lee on the river pro-tected from the breeze.
However, they have a much wider geographic importance than just for river fishing in the northern midlands. They also extend to the two eastern lowland lakes, Leake and Tooms, to Lake Sorell and Woods Lake, Lagoon of Islands, Penstock Lagoon, Arthurs Lake and Little Pine Lagoon. I have also seen small numbers in the Julians Lake system of the Western Lakes area and, I am reliably informed, they make an appearance as far west as Lake Pedder.
There are, of course, more than one species of mayfly that are tagged as red spinners. The classic red spinner of the Macquarie, Atalophlebia australis, is a fairly big beast which is usually tied as a #12 and sometimes as big as a #10 and is particularly important during October and November with a little resurgence in March.
The red spinner of the highlands, Atalophlebia superba, is usually slightly smaller than its lowland cousin being mostly tied as a #14 or a #12 and is normally a duller red-brown rather than the shiny brick red of the Macquarie denizens. The highland red spinners also appear later than their lowland cousins, generally starting to show in mid-November and running through to late February or March depending on the year and the altitude.
A very good run-down on these flies can be found in David Scholes’ 1961 classic, Fly Fisher in Tasmania, Tony Ritchie’s 1994 book, Dry Fly fishing for Trout, and Dr Ron Thresher’s two 1998 articles in FlyLife magazine, volumes 11 and 12.
My reason for including it in the Basic Tasmanian Fly Box is that it can be used so flexibly as a general searching fly as well as for matching the hatch.
My introduction to it as a searching fly/fly-of-last-resort came during a very heavy fall of gum beetles on Arthurs Lake when we could not interest the fish on a range of beetle patterns. I was with my fishing mates Joss Jones and Brian McCullagh, all of us getting mightily frustrated, when Joss remembered that in similar situations in earlier years he had had success fishing a large Macquarie Red spinner pattern. Macca and I were dubious to say the least, but after Joss had landed his third fish we were converts. I have since used a red spinner successfully on many occasions as a searching pattern in summer, particularly on Little Pine and Penstock Lagoons when nothing is happening.
There are a number of patterns around to choose from starting from Max Christensen’s high floating Macquarie Red mentioned above with its red thread/palmer hackle body, blended natural red and cree hackles and peacock herl tho-rax, to dyed red quill-bodied flies very like its English ancestor, the Red Quill, and to various orange dubbed-bodied versions such as Noel Jetson’s seals fur-bodied Orange Spinner.
The other virtue of most spinner patterns is that they can be tied very simply and robustly, as in the case of the fly I want to highlight under this banner. It is the ‘Onion Bag’ devised originally for Lagoon of Islands by the late Joe Mar-tak.
As the name suggests the fly is tied using the teased out fibre of a red mesh onion bag for its body. It is a material that is still widely available, robust, has some buoyancy and fits the bill colour-wise to make a good red spinner.
The fly was born at one of the legendary camps at Lagoon of Islands during the hey-day of that water in the early to mid-1970s, out of frustration about hooks being straightened by the big, red spinner-feeding rainbows close to the floating islands in the lagoon.
Joe, being a fairly aggressive striker and fighter of fish in this situation in order to prevent them breaking him off by heading back under the islands, finally resorted by a process of elimination to #12 Wilson dry fly salmon hooks on which to tie up his red spinners.
Having apparently run short of appropriate body material he lit on the bag containing the camp’s onion supplies and the rest is history!
The fly has subsequently proved its acceptability at both Penstock and Little Pine and it is sad that it has fallen out of favour as it is still extremely effective and simplicity itself to tie.
RED SPINNERS

Tying Notes• Wind a base of thread from head to tail.• Form a small ‘lump’ of thread immediately above the barb to assist in spreading the tails.• Tie in tail whisks immediately in front of the thread lump and spread tails.• Tie in onion bag material immediately in front of the tails so that you have enough tag to reach the hook eye to provide an even base over which to wind the body.• Tie in hackle at the eye of the hook with shiny side of the feather facing you and feather extending forward of the hook eye (English-style), fibres should not be too much bigger than hook gape.• Wind onion bag material forward evenly to the hook eye, tie off and wind thread a third of the way to the tail of the fly.• Take hackle back at 90 degrees to the hook shank with shiny side to the front and wind it from the eye of the hook towards the tail, catch the tip of the hackle with the thread to secure and wind thread forward through hackle carefully to avoid squashing the fibres and tie off at eye (it can also be varied to sit flush on the water to imitate a spent spinner by dividing the bottom of the hackle by a figure-of-eight tie fore and aft).• Whip finish and varnish head.
Back to contents page >>
Onion Bag
Hook: #12 or 14 Kamasan B830Thread: 8/0 black or redTail: dark red/brown hackle fibres
(or Coq de Leon)Body: Red onion bag fibre (as red as
you can find)Thorax: Continue body to the eyeHackle: Natural dark red/brown

Talk about caddis hatches to Tasmanian fly fishermen, particularly those 60 and over, and their first thought is usu-ally of the ‘Shannon Rise’, a spectacular emergence of Shannon Moth or snowflake caddis (Asmicridea grisea) which used to take place in the fast tail-water section of the Shannon River between the Miena dam on the Great Lake and the Shannon Lagoon in early December each year.
Unfortunately, the ‘Rise’ is now defunct since the Hydro Electric Commission ceased putting water through the Waddamana Power Station in the early 1960s and re-routed the water through Poatina. But, according to most who wrote about it, the ‘Rise’ was already tapering off considerably by the mid 1950s
Like all legendary hatches it did give rise to a number of fly patterns to specifically represent the Shannon Moth. Dick Wigram, a great innovator of Tasmania-specific fly patterns, designed a very successful pair of patterns, male and female, for the Shannon Moth, which apparently date from the 1930’s. These patterns are recorded in Max Stokes’ 1978 Tasmanian Trout Fly Patterns and are not much used these days but original ties are still much sought after by collectors.
Max Christensen also contributed two adult caddis patterns for more general use, the Orange Caddis and Senator’s Choice, the first of which has become a Tasmanian standard and is also recorded in Stokes’ book.
All these patterns have feather slip wings tied flat, are conventionally hackled and are designed to float low in the water.
Most caddis hatches in Tasmania are spasmodic these days and restricted generally, on both lake and stream, to warm and still summer evenings. Caddis hatches do, however, still provide some very interesting surface fishing and a serviceable general caddis pattern is an important inclusion in the basic Tasmanian fly box.
The pattern I developed for this role is an all possum fur fly which has an interesting history. It started its journey in the mid-1970s as a small caddis/stonefly pattern for Lake Sorell with a grey possum under-
fur body, a backwing from the base of a possum tail and a white and a black hackle tied together and cut flat at about half hook gape. It was particularly effective in the November stonefly hatch there.
The original idea came from an article by an American fly tyer, Tom Wendelburg, who wrote an article for the Fly Fisherman magazine on back wing flies in 1975. He used fine deer hair for his backwing caddis but I felt that we had a fantastic local wing material in possum tail that would be a perfect substitute.
It developed to having a grizzle hackle when Metz and Hoffman capes first became available and was still very effective.
More recently, an article in FlyLife #24 of Winter 2001 on New Zealand fly tyer, John Morton, and men-tion of his Sparkle Caddis tied with a few strands of flashabou for a tail, a grey rabbit underfur body and a coastal deer hair wedge shaped wing without any hackle, got me thinking.
I added a few strands of pearl mylar for a tail, retained the grey possum underfur body, thickened up the pos-sum tail wing and did away with the hackle. It still worked a treat and the possum fur body and wing float-ed brilliantly without the hackle.
The final tweak (so far) was the result of reading about the ‘hedgehog’-style deer hair flies in the Scottish Fly Tying and Fly Fishing magazine. The tying method for that fly seemed to solve the problem I had with getting the proper caddis wing profile tying the possum tail fur in just behind the head.
Tying the wing in three bunches along the hook shank proved a winner. In addition, our foray into dying possum skins gave me some alternatives for body colour and I have used both olive and orange to good effect.
It is a very flexible fly and can be used as a dry or as a bob fly in a loch-style team. Tied in bigger sizes, and using a darker possum tail wing, it can be grimpled across the surface in late evening to good effect
You will need to experiment with the amount of possum tail you use in the wing bunches and less is usually better. You can also add an extra bunch if you wish and it is sometimes necessary in the bigger sizes. It is also important to use the finer fur at the base of the possum tail for best results. I always give my flies a good spray of floatant as I tie them and let them dry well before I put them in my box.
ADULT CADDIS

Tying Notes• Apply tying thread base from eye to above the barb of the hook.• Tie in short sparse tail of possum tail with two strands of pearl mylar.• Dub slim body of chosen colour possum underfur to half way up hook shank.• Tie in first part of wing so it reaches just short of the tips of the tail.• Dub remainder of body just short of eye.• Tie in last part of wing so it reaches just short of the previous wing bunch.• Dub a small head with body underfur to cover tie-in of wing.• Finish with a small neat whip finish in front of the head.
Back to contents page >>
Possum-Tail Caddis
Hook: #12-16 Kamasan B170Tail: Short, possum tail and 2-3 strands pearl mylarBody: Possum underfur, natural grey or dyed to colour preferenceWing: Possum tail tied in bunches along hook shank
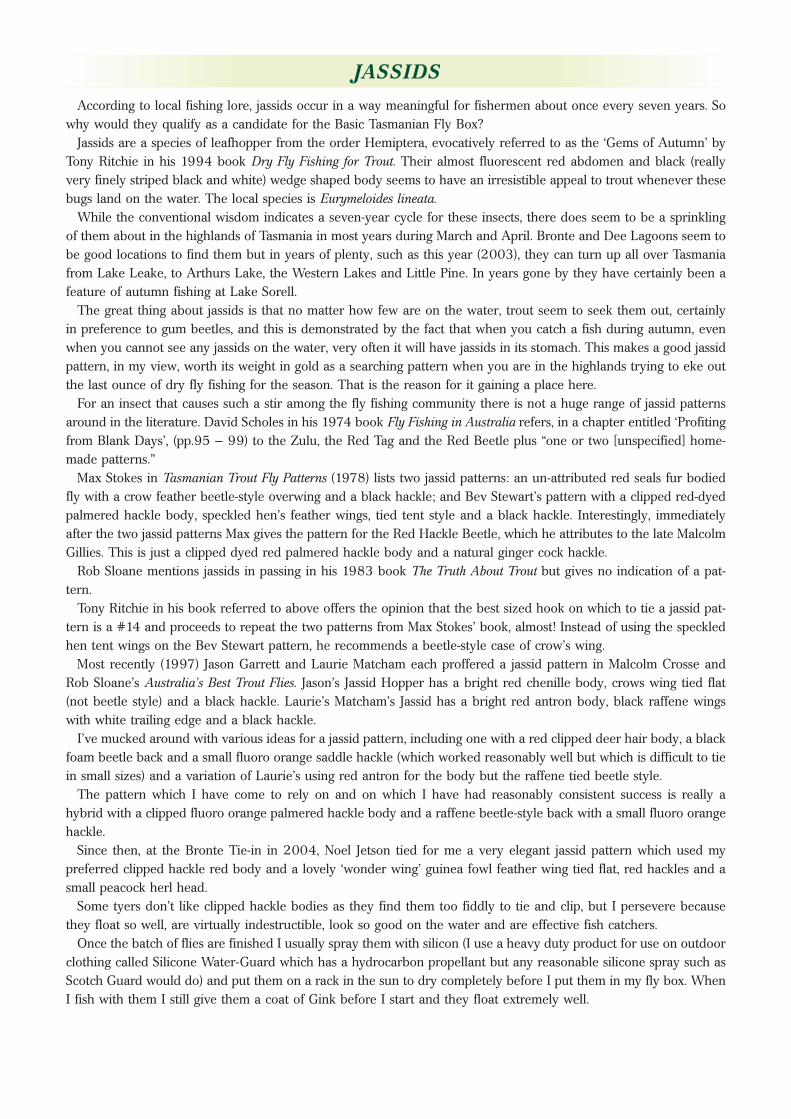
According to local fishing lore, jassids occur in a way meaningful for fishermen about once every seven years. So why would they qualify as a candidate for the Basic Tasmanian Fly Box?
Jassids are a species of leafhopper from the order Hemiptera, evocatively referred to as the ‘Gems of Autumn’ by Tony Ritchie in his 1994 book Dry Fly Fishing for Trout. Their almost fluorescent red abdomen and black (really very finely striped black and white) wedge shaped body seems to have an irresistible appeal to trout whenever these bugs land on the water. The local species is Eurymeloides lineata.
While the conventional wisdom indicates a seven-year cycle for these insects, there does seem to be a sprinkling of them about in the highlands of Tasmania in most years during March and April. Bronte and Dee Lagoons seem to be good locations to find them but in years of plenty, such as this year (2003), they can turn up all over Tasmania from Lake Leake, to Arthurs Lake, the Western Lakes and Little Pine. In years gone by they have certainly been a feature of autumn fishing at Lake Sorell.
The great thing about jassids is that no matter how few are on the water, trout seem to seek them out, certainly in preference to gum beetles, and this is demonstrated by the fact that when you catch a fish during autumn, even when you cannot see any jassids on the water, very often it will have jassids in its stomach. This makes a good jassid pattern, in my view, worth its weight in gold as a searching pattern when you are in the highlands trying to eke out the last ounce of dry fly fishing for the season. That is the reason for it gaining a place here.
For an insect that causes such a stir among the fly fishing community there is not a huge range of jassid patterns around in the literature. David Scholes in his 1974 book Fly Fishing in Australia refers, in a chapter entitled ‘Profiting from Blank Days’, (pp.95 – 99) to the Zulu, the Red Tag and the Red Beetle plus “one or two [unspecified] home-made patterns.”
Max Stokes in Tasmanian Trout Fly Patterns (1978) lists two jassid patterns: an un-attributed red seals fur bodied fly with a crow feather beetle-style overwing and a black hackle; and Bev Stewart’s pattern with a clipped red-dyed palmered hackle body, speckled hen’s feather wings, tied tent style and a black hackle. Interestingly, immediately after the two jassid patterns Max gives the pattern for the Red Hackle Beetle, which he attributes to the late Malcolm Gillies. This is just a clipped dyed red palmered hackle body and a natural ginger cock hackle.
Rob Sloane mentions jassids in passing in his 1983 book The Truth About Trout but gives no indication of a pat-tern.
Tony Ritchie in his book referred to above offers the opinion that the best sized hook on which to tie a jassid pat-tern is a #14 and proceeds to repeat the two patterns from Max Stokes’ book, almost! Instead of using the speckled hen tent wings on the Bev Stewart pattern, he recommends a beetle-style case of crow’s wing.
Most recently (1997) Jason Garrett and Laurie Matcham each proffered a jassid pattern in Malcolm Crosse and Rob Sloane’s Australia’s Best Trout Flies. Jason’s Jassid Hopper has a bright red chenille body, crows wing tied flat (not beetle style) and a black hackle. Laurie’s Matcham’s Jassid has a bright red antron body, black raffene wings with white trailing edge and a black hackle.
I’ve mucked around with various ideas for a jassid pattern, including one with a red clipped deer hair body, a black foam beetle back and a small fluoro orange saddle hackle (which worked reasonably well but which is difficult to tie in small sizes) and a variation of Laurie’s using red antron for the body but the raffene tied beetle style.
The pattern which I have come to rely on and on which I have had reasonably consistent success is really a hybrid with a clipped fluoro orange palmered hackle body and a raffene beetle-style back with a small fluoro orange hackle.
Since then, at the Bronte Tie-in in 2004, Noel Jetson tied for me a very elegant jassid pattern which used my preferred clipped hackle red body and a lovely ‘wonder wing’ guinea fowl feather wing tied flat, red hackles and a small peacock herl head.
Some tyers don’t like clipped hackle bodies as they find them too fiddly to tie and clip, but I persevere because they float so well, are virtually indestructible, look so good on the water and are effective fish catchers.
Once the batch of flies are finished I usually spray them with silicon (I use a heavy duty product for use on outdoor clothing called Silicone Water-Guard which has a hydrocarbon propellant but any reasonable silicone spray such as Scotch Guard would do) and put them on a rack in the sun to dry completely before I put them in my fly box. When I fish with them I still give them a coat of Gink before I start and they float extremely well.
JASSIDS

Tying Notes: • Tie in raffene slightly round the bend of the hook.• Tie in saddle hackle at same point as raffene and wind thread just past 3⁄4 way to eye of hook.• Palmer hackle closely to thread just past 3⁄4 mark and tie off and whip finish.• Clip hackle so it is flat underneath and has a roughly wedge shape, not too short on top of the hook. It is best to tie about six to a dozen to this stage and clip them all at once.• Re-attach thread and wind back to start of clipped hackle.• Open out raffene to appropriate width and bring forward to front of clipped hackle and tie down (trial and error will show you the ideal width).• Tie in short barbed saddle hackle and wind three to five turns, tie off, whip finish and varnish head.
Back to contents page >>
Clipped Hackle Jassid
Hook: #12 Kamasan B160Thread: 8/0 BlackOverwing: Black raffeneBody: Palmered fluoro orange-dyed grizzle saddle hackle (Hoffmans), clippedHackle: Small fluoro orange-dyed saddle hackle

More recently, beetles in the Tasmanian trout-fishing context have generally meant gum beetles or certainly terres-trial beetles. So if you talk about beetle patterns today you are generally assumed to be talking about floating patterns and no self-respecting Tasmanian angler would be without various sizes of Red Tag in his or her fly box.
There is also, however, a strong tradition of using wet beetle patterns such as the classic English North Country Black and Peacock Spider, the Black Crows-wing Beetle and the Fiery Brown Beetle. This tradition also led to the development of a classic generalist wet pattern, the Nymbeet, by Longford angler Stuart Napier, I think in the 60’s.
Rob Sloane is a great proponent of the wet beetle in his quest for wind-lane feeders in the Dee Lagoon. In my early fishing days before boat fishing appealed to my innate laziness I often fished an inert wet black beetle pattern from the shore to tailing fish in shallow water with some success.
The wet beetle, although a bit unfashionable, continues to be a versatile, productive and easy-to-tie option for fisher-men coming to Tasmania, particularly in the early part of the season.
But it is the floating beetle imitations that I want to concentrate on here.
Apart from the Red Tag mentioned above the traditional Welsh Coch-y-bonddu still has a strong following. Another innovative and very effective Tasmanian generalist pat-tern is the Trothodg developed by Dick Trotter in the 1980’s which is basically a beetle/wasp cross tied with Peacock herl.
Rob Sloane, in his 1983 book The Truth About Trout, introduced us to his father Tony’s foam gum beetle imita-tion and development and, hopefully, improvement of the concept has proceeded apace since then.
Far from the need then to nefariously nick budding junior soccer players’ shin pads to obtain suitable foam, today one is able to purchase packaged fly-tying foam in all sorts of colours and thicknesses. Ah, the challenge of material collection for fly tying is not what it was!
But back to the fly in question.I want to feature a foam beetle with a spun deer-hair body that is both robust and has a very ‘natural’ look on the
water. That is, it doesn’t sit too high and it has the added advantage that the deer-hair body when trimmed flat under-neath provides the impression of legs and life.
The first version came from Lynden Cubbins, a member of the Tasmanian Fly Tyers Club and who is a keen Arthurs Lake fisherman, several years ago. Subsequently a slightly different and easier method of spinning the deer-hair body has been developed during Monday evening club fly tying sessions during winters.
BEETLES
Deerhair Foam Beetle
Hook: #12 Short shank wide gape (Kamasan B160 or similar) Thread: 6/0 Uni threadCase: Strip of yellow ‘Evasote’ closed- cell foam, 4mm thick by about 9mm wideBody: Red/brown, olive or yellow deer body hair

Tying Notes• Make a thread base from the eye of the hook to slightly round the bend.• Tie in foam at the bend leaving enough foam towards the eye so that when it is bound down and fully compressed you have an even under body.• Take the thread back to the tie-in point at the bend of the hook and create a locked dubbing loop about 5cms long after the loop is formed and insert dubbing spinner in the loop.• Cut a quantity of deer-hair about the diameter of a pencil, clean out the under-fur from the butt end, insert in the loop and spread out at right angles to the thread between the hook and the spinning tool. (You may wish to use some sticky dubbing wax until you master keeping the deer-hair in the dubbing loop).• Trim each side of the deer-hair to a width manageable for tying and spin the dubbing tool to form a deer-hair ‘che-nille’.• Wind “chenille” closely from bend to eye, stroking it to the rear at every turn, and tie off just behind the eye. Dis-pose of any surplus.• Cut deer-hair flat on top of the hook and pull forward strip of foam without stretching; • Tie down foam at eye with about 3 or 4 turns of thread, lift up surplus foam and tie off thread at eye in normal manner and whip finish.• Stretch surplus foam away from hook eye and cut it off not too close to the tie down point. This will leave a small ‘head’ which may have to be gently pushed back between thumb and fingernail to clear the eye of the hook.• Trim bottom deer-hair flat leaving a few hairs either side for legs.• Colour foam back with waterproof markers to match natural (Texta Parcel Mate brown or green are both useful colours) or leave as per foam colour.• NB. If you are going to tie smaller or larger sizes you will need to reduce or increase the foam width.
Back to contents page >>

These little buggers are rightly called the ‘Fisherman’s Curse’ for several reasons.Firstly they are, in the Tasmanian context, extremely small making imitations difficult to tie as well as difficult to
see on the water; and secondly, when the fish are feeding on the adult midge, it is often extremely difficult to interest them whatever pattern you choose to use.
Notwithstanding this, there is no doubt that fishing to midging fish using a dry fly imitation is one of the most exit-ing, frustrating and rewarding pastimes a fly fisher can experience whether it is patrolling the shore on one of those glass-still early mornings or out patrolling a wind lane on waters such as Dee Lagoon or Great Lake.
There have been many approaches to dealing with the challenges of adult midge and Kaj Busch’s balling midge imi-tation is a way to deal with the size and visibility issue.
In the Tasmanian context, I have very seldom seen the balling phenomenon here but it was much more in evidence at Eucumbene and Jindabyne in NSW. I have, however, used the pattern in Tassie with some limited success with a modified version using pearl mylar for the body and trailing shuck overwound with a very small palmered grizzle hackle even without the balling behaviour being in evidence.
A couple of good general purpose patterns when midg-es are about are a conventionally hackled #18 Iron Blue Dun with grizzle hackle-tip wings and a #18 parachute Adams. Both these can be extremely difficult to see on the water at any distance but on occasion are both very effective, especially on those glassy still mornings from the shore.
I have already mentioned in my piece on Buzzers, Tony Ritchie’s very informative discussion on Chironomids in the Tasmanian context in Dry Fly Fishing for Trout (1994, pp.36-42) which is well worth reading.
My favourite adult midge pattern is a very small Klinkhamer with a body of Uniflex stretched as it is wound to keep it slim and somewhat translucent. This body material also has the benefit of not being buoyant so it easily breaks through the surface film and hangs down under the parachute hackle.
I tie this fly with various coloured bodies; my favourites in order being green, black and grey. Like a number of other flies I have written up, this pattern is a flexible all-purpose fly which can be used for a range of other situations.
I originally used a B100 #16 hook but I’m a bit heavy handed on the strike and having straightened a couple on largish fish have now gone to the slightly heavier B110 which necessitates a slightly heavier (i.e. more turns) parachute hackle.
ADULT MIDGE
Klinkhamer Midge
Hook: #16 Kamasan B100, B110 or equivalent)Thread: 8/0 Black Uni thread or #10 Herb HowardPost: Possum tail fur or Float VizHackle: Grizzle, natural or dyed oliveBody: Uniflex green, black or greyThorax: Peacock herl chenille

Tying Notes• Tie in thread at the eye and wind back about 3mm.• Tie in post material crossways under the hook shank using figure-of-eight tie, bring both halves of post material vertical and make a wound thread base about 2mm above the hook shank.• Strip fibres from base of hackle feather (I use a saddle hackle), tie in immediately adjacent to the post towards the bend of the hook, shiny side up, so hackle points to the front and the stem lies behind the post as you look at it in the vice and leaving a millimetre or so of bare stem to assist in winding later. (If you wind your hackle anti-clock-wise have the hackle stem to the front of the post as you look at it in the vice).• Tie in Uniflex over the top of the tied in stripped hackle stem with a couple of firm turns then stretch the Uniflex and tie over it as far round the bend if the hook as you can manage, (i.e. as close to where the hook is fixed in the vice as possible) then wind the thread back up to the point where you tied in the Uniflex and let the bobbin hang.• Stretch the Uniflex again and wind it, in touching turns, back to the tie-in point then tie off before allowing the stretch to relax and don’t cut it off too short.• Tie in one or two peacock herls and wind the thread through them to reinforce.• Wind reinforced herls forward to the eye passing under the post, then wind back and tie off on the hook bend side of the post.• Cut off surplus herl (not including thread) and leave thread hanging under post.• Commence winding the hackle (see detailed discussion in my piece on the parachute dun emerger) by bringing up the bare stem 45 degrees from the hook alignment to the top of the thread base on the post, then wind the hackle from the top underneath itself about five or six turns.• Pull remaining unwound hackle down vertically below the hook shank, tie off and whip finish round the post.• Cut off surplus hackle and carefully apply a spot of head cement to the tie off point.
Back to contents page >>

My introduction to hopper fishing was in the small streams east of Cooma and north of Canberra in the early 1970s. I was a beginning fly fisher and I found that normally careful trout tended to abandon their caution in the hopper sea-son making for enjoyable, i.e. more successful, fishing.
All you had to do from about February to well into April on was to find a steep bank with overhanging or adjacent grass and prospect by splotting down a hopper pattern close to the bank then wait for the take. Fishing, using this method, to rising fish was even more exciting and productive, plus having the added benefit of sharpening up a begin-ners casting!
Tasmania’s rivers offer the same hopper fishing opportunities, particularly those running through predominantly grazing country but there are also opportunities around many of our lakes for a range of terrestrial fishing to compli-ment the beetles where hopper-type patterns are extremely productive both as a searching pattern and fishing to rises.
The first hopper pattern I can remember using was a bought ‘Hackle Hopper’ with its wound Golden Pheasant tip-pet hackle but, after getting into fly tying, I graduated to a small spun deer’s hair number with a yellow spun deer’s hair body, a natural coloured small ‘muddler’-style head and green and yellow ‘legs’. I still have some of these in my box but they are fiddly and time consuming to tie.
The availability of coloured high-density closed-cell foam has solved the body problem and the deer hair bullet-head has given an easier option for those who don’t like spinning muddler heads. All manner of options are now available for legs, from knotted pheasant tail feather fibres, to appropriately coloured knotted raffene, to rubber legs. You can now get proprietary formed foam bodies and legs!
From my experience, and from what is reported in the literature, the addition of mobile legs to a hopper pattern (or any pattern, come to that) is a real trout turn-on.
Turning now to my choice of fly to cover this particular niche, I have chosen an English ‘Hopper’ pattern (even though it was designed to represent a Crane Fly or ‘Daddy Long Legs’, a Tipulidae, rather than an actual grasshopper, an Orthoptera) both because it is in keeping with my theme of flexibility and because of its ease of tying.
There are a number of differently named flies that you see in the English magazines called ‘hoppers’, but all of them are variations on the one theme: a dubbed body, knotted pheasant tail fibre legs and either a head or a palmered hackle. An example of the latter is a Bibio Hopper with its black seals fur body with central red flash, black palmered hackle and legs tied in at the head.
An example of the former is the Yellow Hopper, which is the fly I want to feature. Its roughly dubbed yellow seals fur body, its dark legs and its dark ginger hackle can be used to cover a whole range of terrestrials including the originally intended cranefly. It can also be pressed into service as a very good impressionistic grasshopper pattern. Its flexibility can be increased by just changing the body and hackle colours.
The fly can be used as a conventional dry, fishing to rises or slammed down on a stream situation as discussed above. Alternatively, it can be part of a team of English-style dries such as ‘Bobs Bits’ or a straight ‘Bibio’ for drifting in a boat searching the lake surface in blowy conditions. I have found it productive in both guises.
I have had good success using it as a single searching fly while walking the western shore of the Great Lake late on summer afternoons with a westerly blowing.
HOPPERS
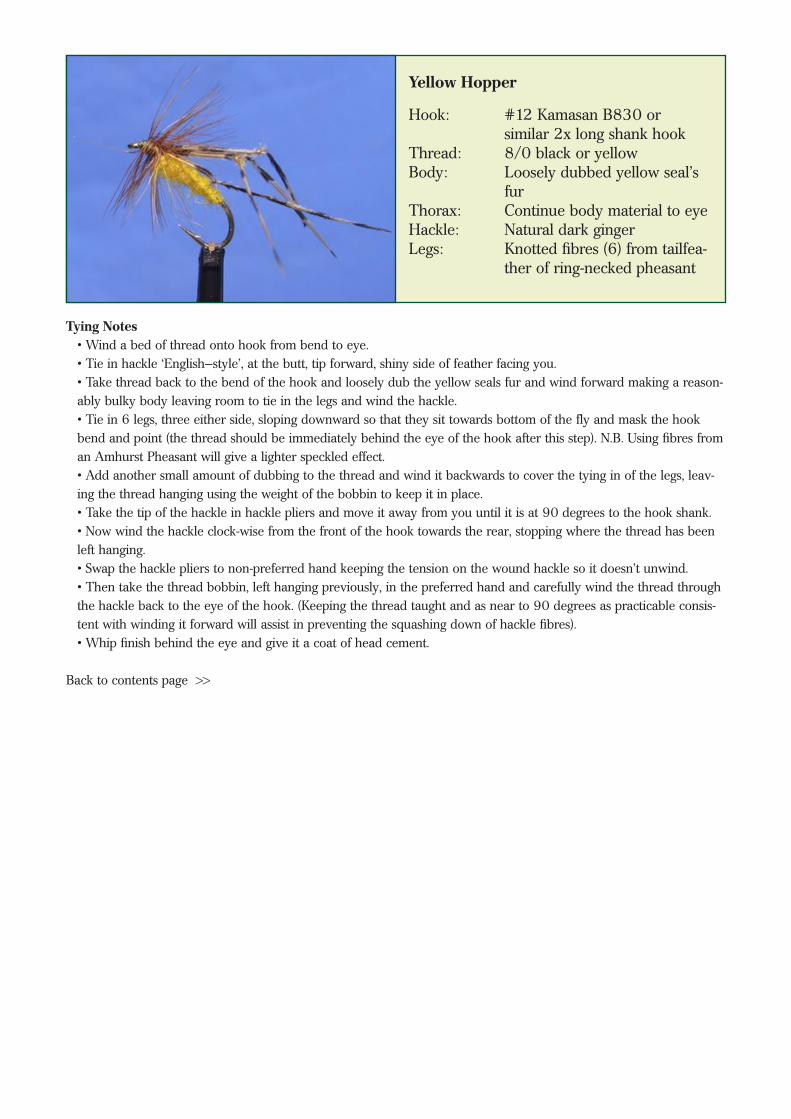
Tying Notes• Wind a bed of thread onto hook from bend to eye.• Tie in hackle ‘English–style’, at the butt, tip forward, shiny side of feather facing you.• Take thread back to the bend of the hook and loosely dub the yellow seals fur and wind forward making a reason-ably bulky body leaving room to tie in the legs and wind the hackle.• Tie in 6 legs, three either side, sloping downward so that they sit towards bottom of the fly and mask the hook bend and point (the thread should be immediately behind the eye of the hook after this step). N.B. Using fibres from an Amhurst Pheasant will give a lighter speckled effect.• Add another small amount of dubbing to the thread and wind it backwards to cover the tying in of the legs, leav-ing the thread hanging using the weight of the bobbin to keep it in place.• Take the tip of the hackle in hackle pliers and move it away from you until it is at 90 degrees to the hook shank.• Now wind the hackle clock-wise from the front of the hook towards the rear, stopping where the thread has been left hanging.• Swap the hackle pliers to non-preferred hand keeping the tension on the wound hackle so it doesn’t unwind.• Then take the thread bobbin, left hanging previously, in the preferred hand and carefully wind the thread through the hackle back to the eye of the hook. (Keeping the thread taught and as near to 90 degrees as practicable consis-tent with winding it forward will assist in preventing the squashing down of hackle fibres).• Whip finish behind the eye and give it a coat of head cement.
Back to contents page >>
Yellow Hopper
Hook: #12 Kamasan B830 or similar 2x long shank hookThread: 8/0 black or yellowBody: Loosely dubbed yellow seal’s furThorax: Continue body material to eyeHackle: Natural dark gingerLegs: Knotted fibres (6) from tailfea- ther of ring-necked pheasant