focus foibles n’frustrations · the big screen with good (possibly ... focus focusing slr dslr...
TRANSCRIPT
blake nancarrow11 dec 13
focus foibles n’ frustrations
Delivered by Blake Nancarrow to the Royal Astronomical Society of Canada-Toronto
Centre at the Ontario Science Centre on 11 December 2013.
Denis Grey talked at the Oct 2013 meeting about a motorised computer-controlled
focusing rig for SLR cameras and small telescopes.
I thought I’d share some of my experiences trying to achieve focus with a DSLR
camera—for free—during visual astronomy and astrophotography.
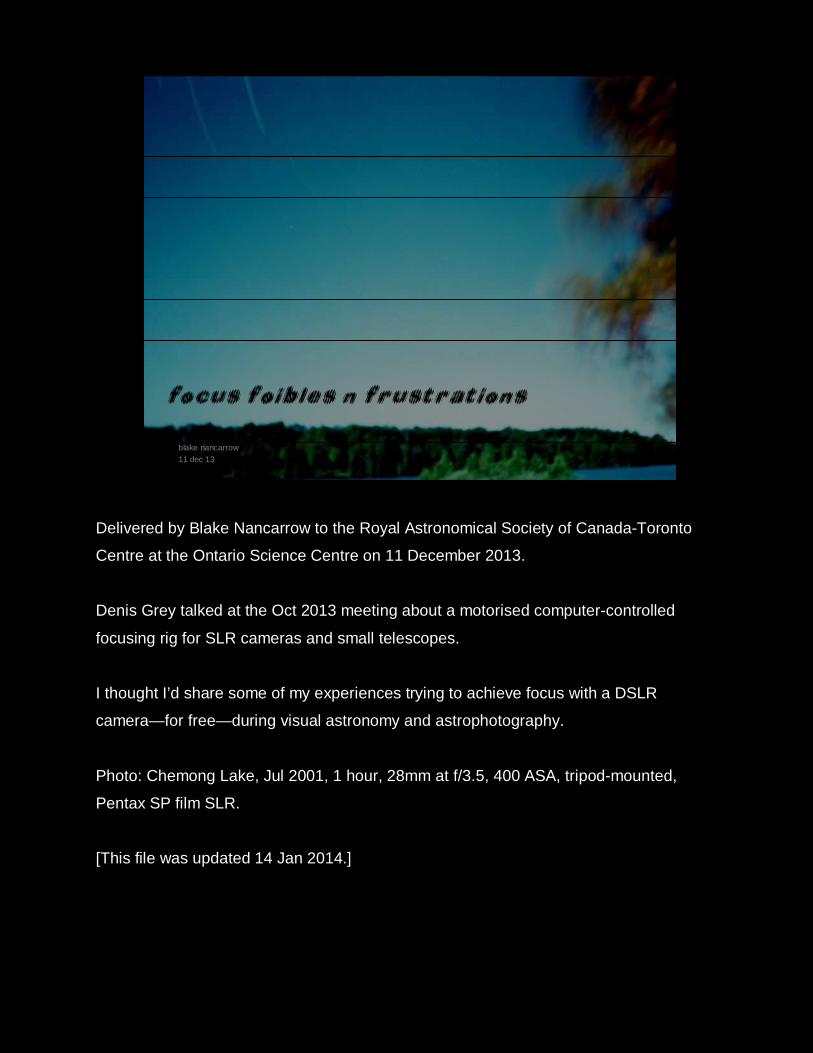
Photo: Chemong Lake, Jul 2001, 1 hour, 28mm at f/3.5, 400 ASA, tripod-mounted,
Pentax SP film SLR.
[This file was updated 14 Jan 2014.]
brief history
My first Single Lens Reflex experience was circa 1980 with a Canon TLB. One of the
first through-the-lens metered film SLR cameras. Taught myself how to use it and I shot
thousands of black and white and colour prints and slides.
Bought my first telescope circa 1990. An 8-inch Celestron Schmidt-Cassegrain
Telescope (SCT). Immediately wanted to do astrophotography.
While the Vixen Super Polaris mount was highly-regarded, mine came without motors.
And manual guiding was a mystery to me. I shelved deep sky imaging…
Still, I picked up the Pentax t-ring (M42) & 8" SCT t-adapter.
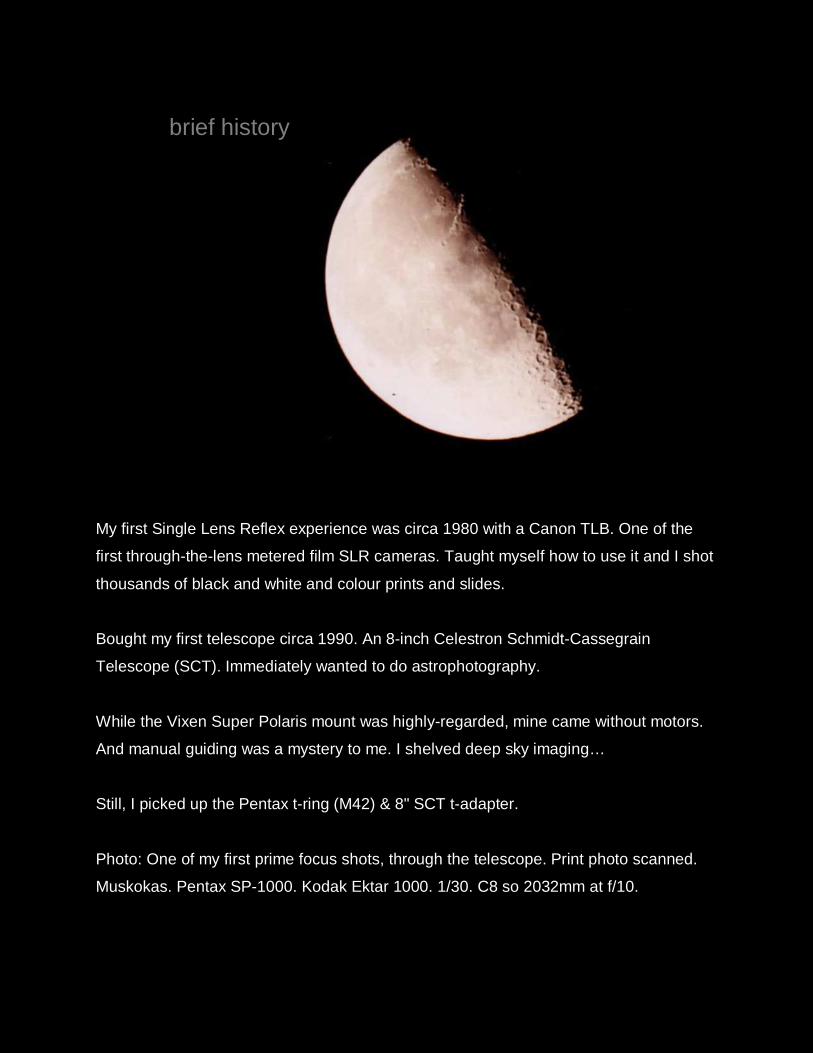
Photo: One of my first prime focus shots, through the telescope. Print photo scanned.
Muskokas. Pentax SP-1000. Kodak Ektar 1000. 1/30. C8 so 2032mm at f/10.
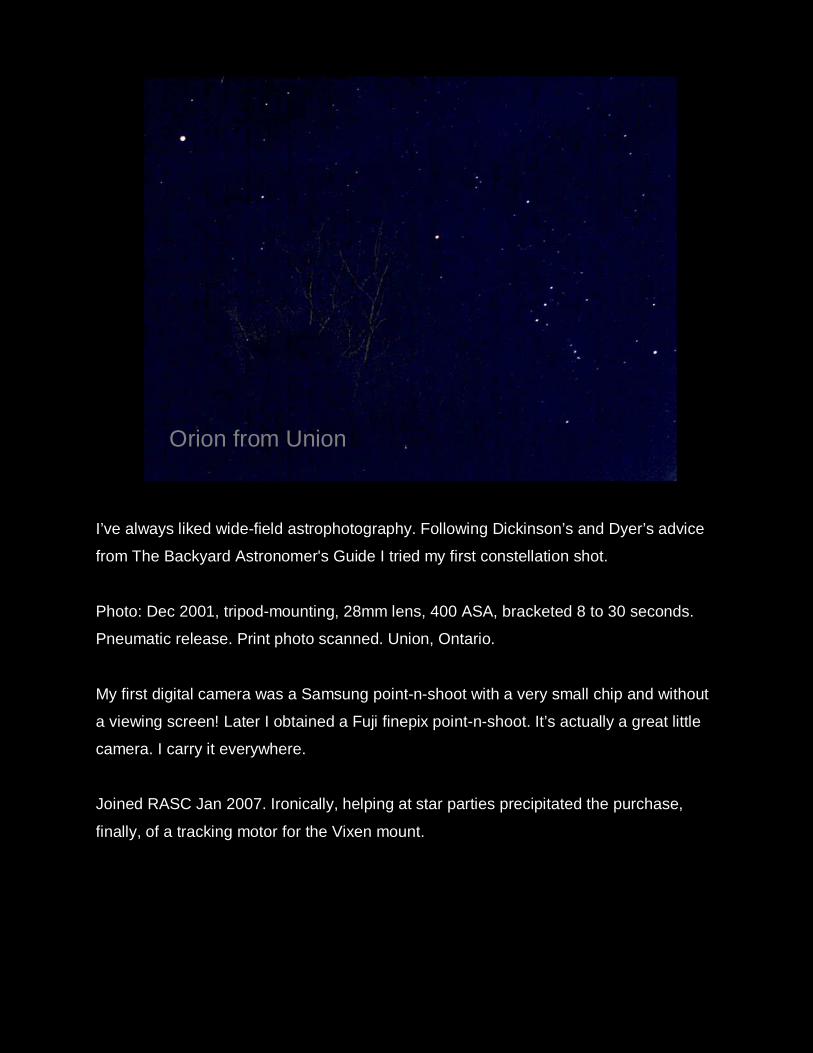
Orion from Union
I’ve always liked wide-field astrophotography. Following Dickinson’s and Dyer’s advice
from The Backyard Astronomer's Guide I tried my first constellation shot.
Photo: Dec 2001, tripod-mounting, 28mm lens, 400 ASA, bracketed 8 to 30 seconds.
Pneumatic release. Print photo scanned. Union, Ontario.
My first digital camera was a Samsung point-n-shoot with a very small chip and without
a viewing screen! Later I obtained a Fuji finepix point-n-shoot. It’s actually a great little
camera. I carry it everywhere.
Joined RASC Jan 2007. Ironically, helping at star parties precipitated the purchase,
finally, of a tracking motor for the Vixen mount.

made mask
So to improve collimation of the telescope, help split very tight double stars, and to coax
out planetary surface details, I wanted a focusing mask.
Feb 2011, I made my own using an on-line tool. Printed out the template for an 8"
Bahtinov mask. Glued the sheet to thick cardboard. Then with a box cutter knife, I cut
out the slots. Took a very long time...
I was blown away by how easy and fast focusing was with a Bahtinov mask.
reawakening
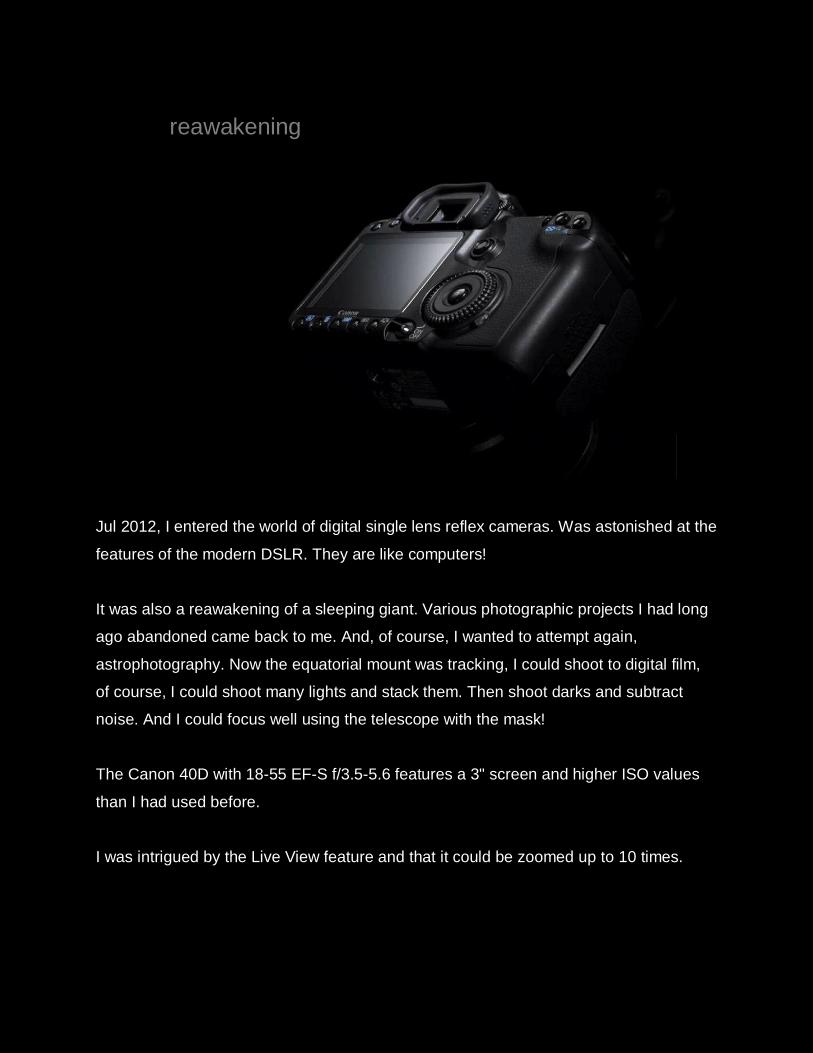
Jul 2012, I entered the world of digital single lens reflex cameras. Was astonished at the
features of the modern DSLR. They are like computers!
It was also a reawakening of a sleeping giant. Various photographic projects I had long
ago abandoned came back to me. And, of course, I wanted to attempt again,
astrophotography. Now the equatorial mount was tracking, I could shoot to digital film,
of course, I could shoot many lights and stack them. Then shoot darks and subtract
noise. And I could focus well using the telescope with the mask!
The Canon 40D with 18-55 EF-S f/3.5-5.6 features a 3" screen and higher ISO values
than I had used before.
I was intrigued by the Live View feature and that it could be zoomed up to 10 times.
remote ops
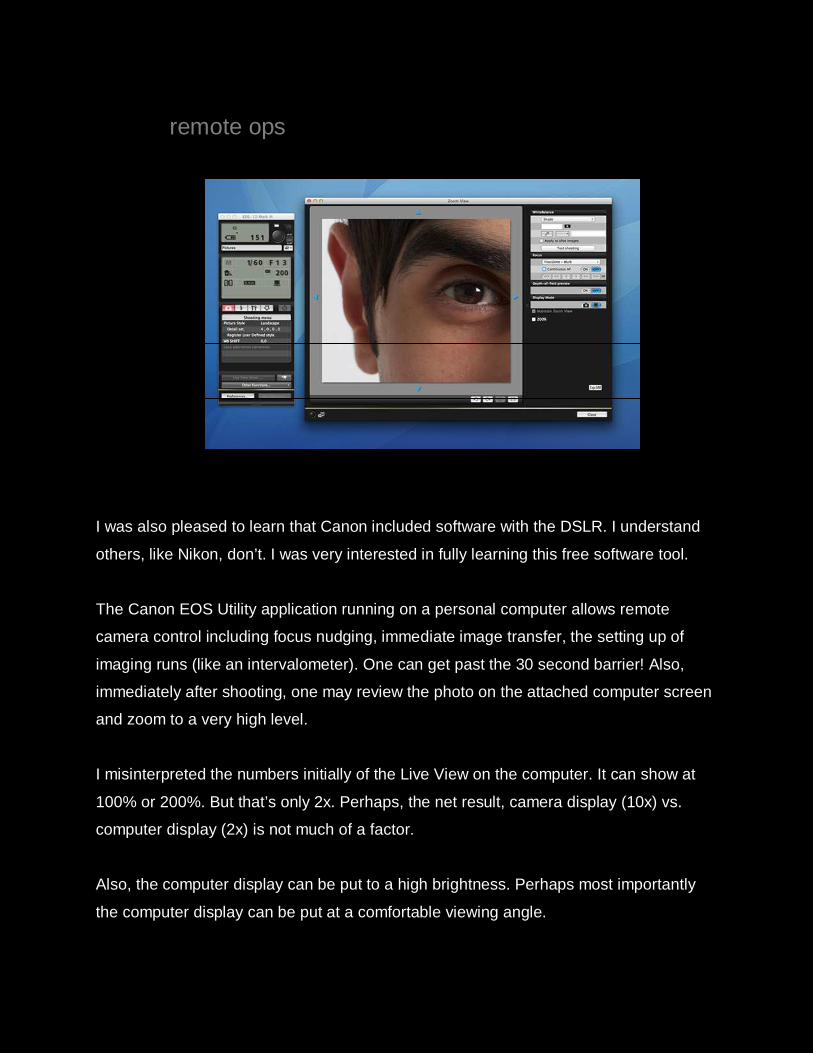
I was also pleased to learn that Canon included software with the DSLR. I understand
others, like Nikon, don’t. I was very interested in fully learning this free software tool.
The Canon EOS Utility application running on a personal computer allows remote
camera control including focus nudging, immediate image transfer, the setting up of
imaging runs (like an intervalometer). One can get past the 30 second barrier! Also,
immediately after shooting, one may review the photo on the attached computer screen
and zoom to a very high level.
I misinterpreted the numbers initially of the Live View on the computer. It can show at
100% or 200%. But that’s only 2x. Perhaps, the net result, camera display (10x) vs.
computer display (2x) is not much of a factor.
Also, the computer display can be put to a high brightness. Perhaps most importantly
the computer display can be put at a comfortable viewing angle.
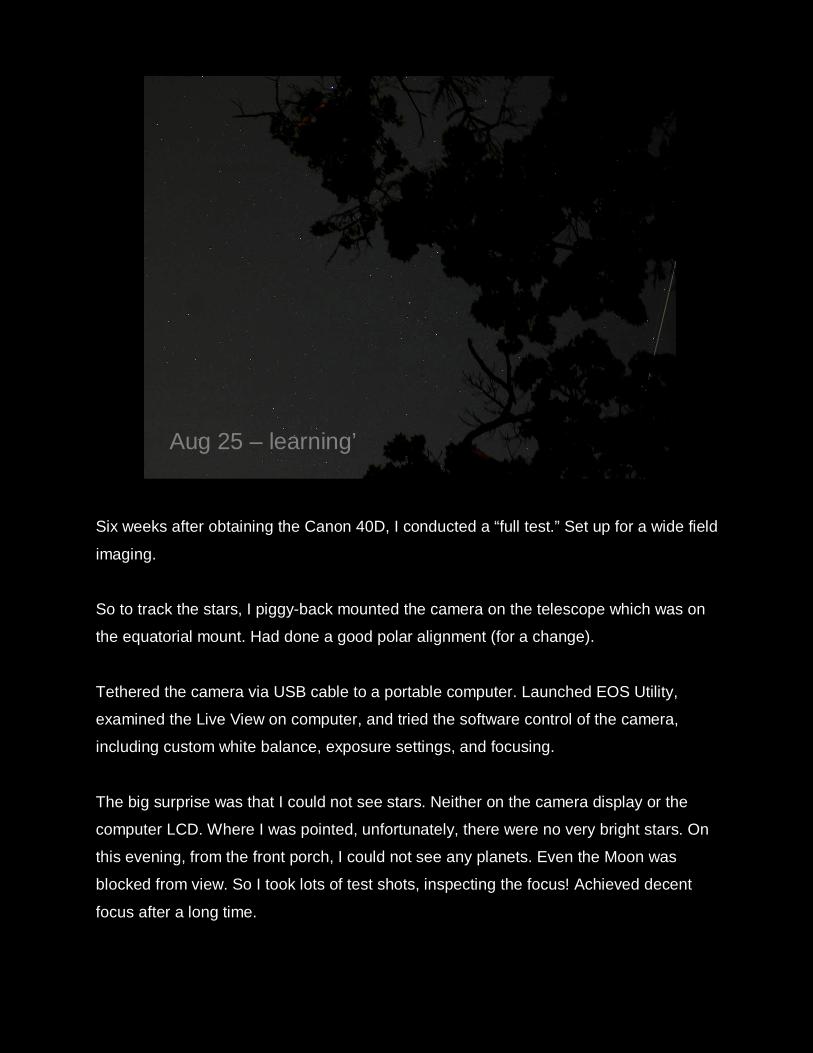
Aug 25 – learning’
Six weeks after obtaining the Canon 40D, I conducted a “full test.” Set up for a wide field
imaging.
So to track the stars, I piggy-back mounted the camera on the telescope which was on
the equatorial mount. Had done a good polar alignment (for a change).
Tethered the camera via USB cable to a portable computer. Launched EOS Utility,
examined the Live View on computer, and tried the software control of the camera,
including custom white balance, exposure settings, and focusing.
The big surprise was that I could not see stars. Neither on the camera display or the
computer LCD. Where I was pointed, unfortunately, there were no very bright stars. On
this evening, from the front porch, I could not see any planets. Even the Moon was
blocked from view. So I took lots of test shots, inspecting the focus! Achieved decent
focus after a long time.
nudging
outinlens
ol.,kikeyboard
∞∞∞∞>>>>>><<<<<<mouse
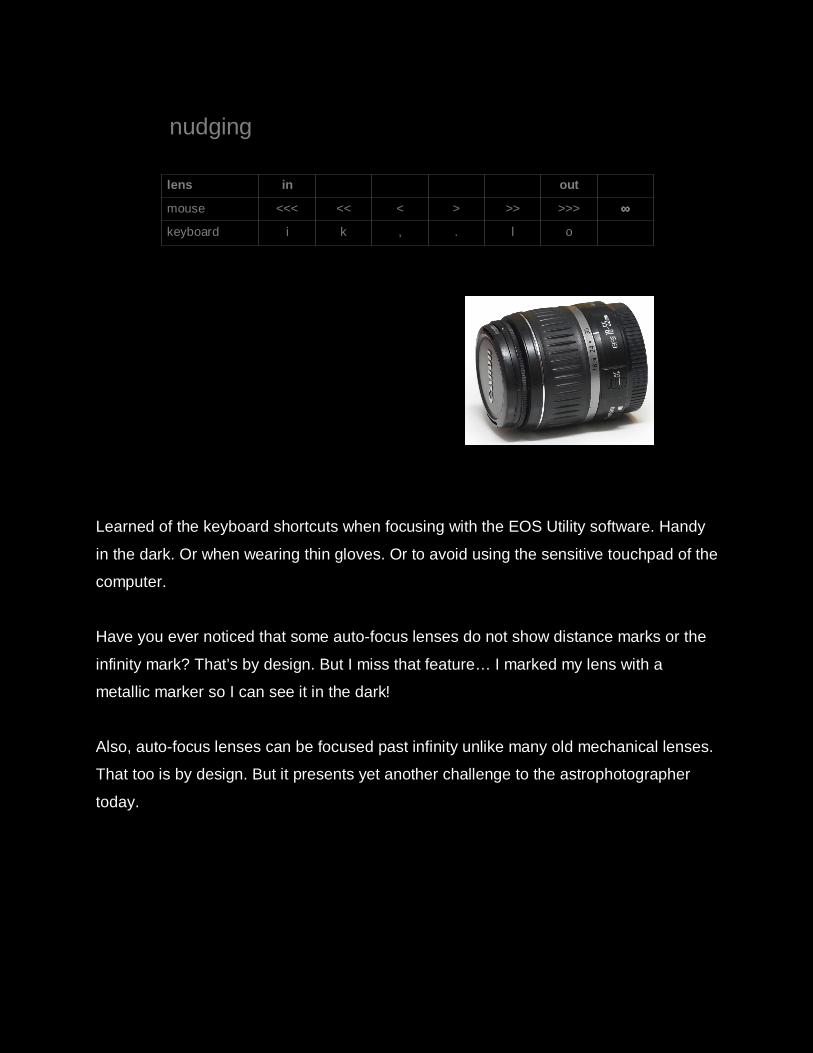
Learned of the keyboard shortcuts when focusing with the EOS Utility software. Handy
in the dark. Or when wearing thin gloves. Or to avoid using the sensitive touchpad of the
computer.
Have you ever noticed that some auto-focus lenses do not show distance marks or the
infinity mark? That’s by design. But I miss that feature… I marked my lens with a
metallic marker so I can see it in the dark!
Also, auto-focus lenses can be focused past infinity unlike many old mechanical lenses.
That too is by design. But it presents yet another challenge to the astrophotographer
today.
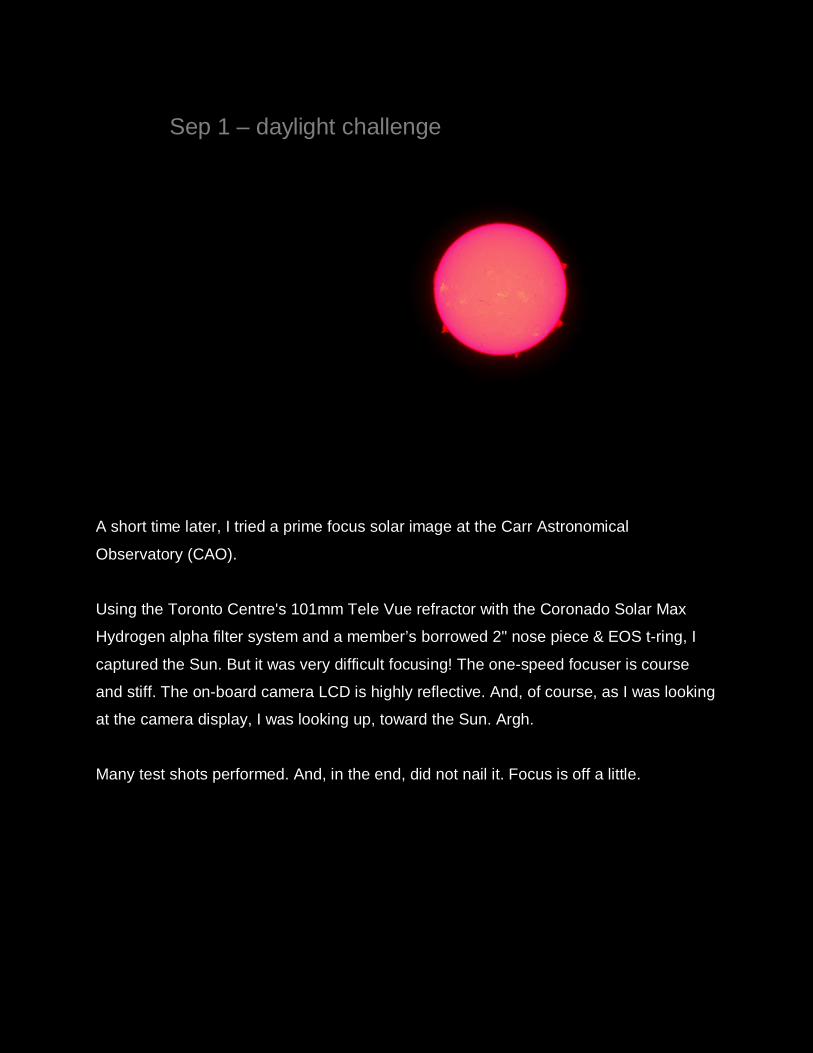
Sep 1 – daylight challenge
A short time later, I tried a prime focus solar image at the Carr Astronomical
Observatory (CAO).
Using the Toronto Centre's 101mm Tele Vue refractor with the Coronado Solar Max
Hydrogen alpha filter system and a member’s borrowed 2" nose piece & EOS t-ring, I
captured the Sun. But it was very difficult focusing! The one-speed focuser is course
and stiff. The on-board camera LCD is highly reflective. And, of course, as I was looking
at the camera display, I was looking up, toward the Sun. Argh.
Many test shots performed. And, in the end, did not nail it. Focus is off a little.
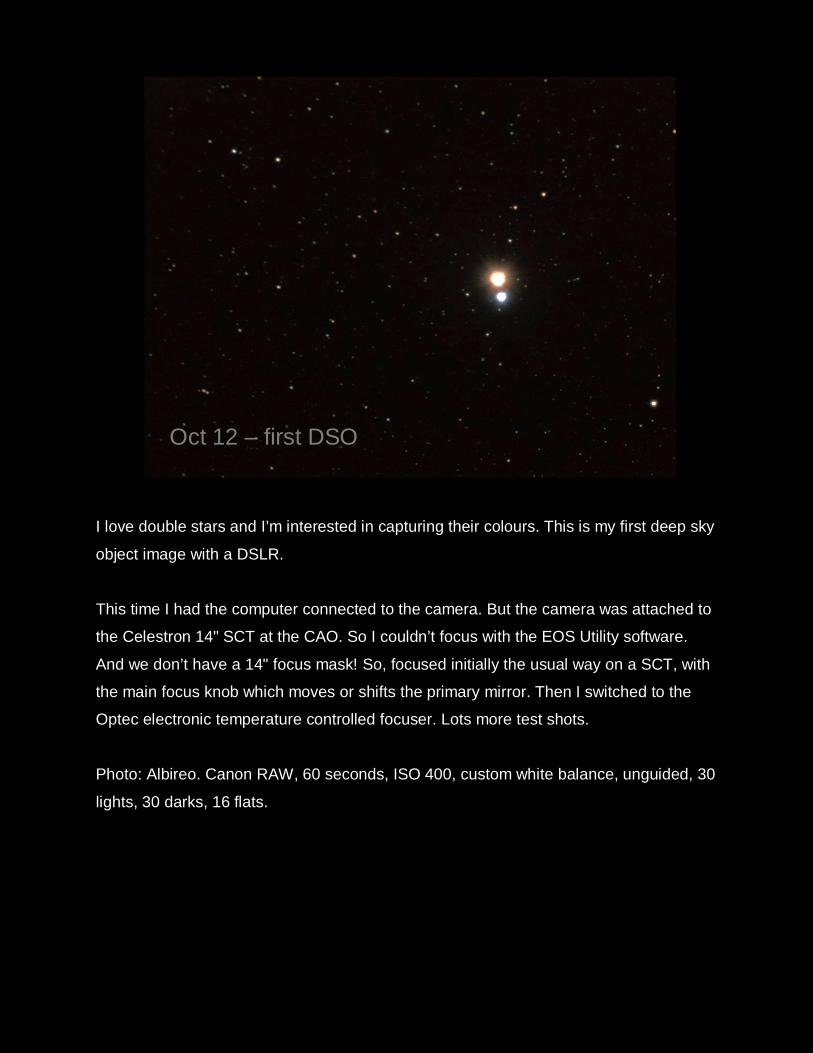
Oct 12 – first DSO
I love double stars and I’m interested in capturing their colours. This is my first deep sky
object image with a DSLR.
This time I had the computer connected to the camera. But the camera was attached to
the Celestron 14" SCT at the CAO. So I couldn’t focus with the EOS Utility software.
And we don’t have a 14" focus mask! So, focused initially the usual way on a SCT, with
the main focus knob which moves or shifts the primary mirror. Then I switched to the
Optec electronic temperature controlled focuser. Lots more test shots.
Photo: Albireo. Canon RAW, 60 seconds, ISO 400, custom white balance, unguided, 30
lights, 30 darks, 16 flats.
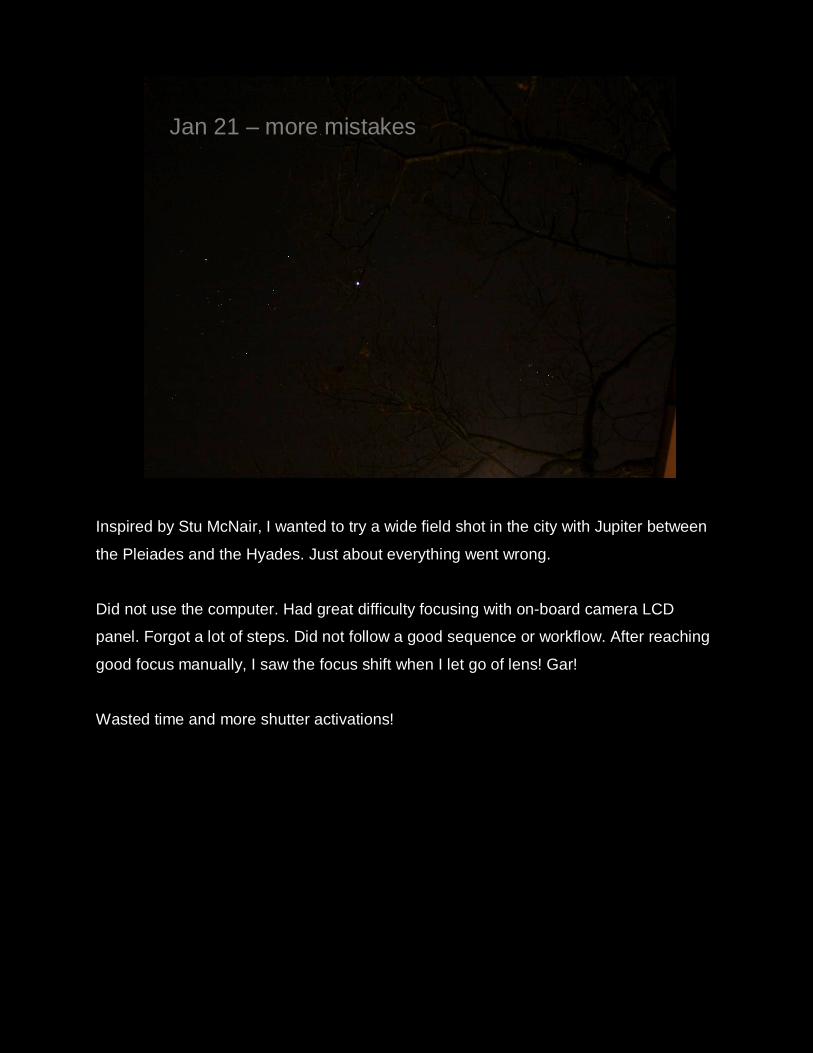
Jan 21 – more mistakes
Inspired by Stu McNair, I wanted to try a wide field shot in the city with Jupiter between
the Pleiades and the Hyades. Just about everything went wrong.
Did not use the computer. Had great difficulty focusing with on-board camera LCD
panel. Forgot a lot of steps. Did not follow a good sequence or workflow. After reaching
good focus manually, I saw the focus shift when I let go of lens! Gar!
Wasted time and more shutter activations!
assessment
Everything culminated mid-January 2013. I wanted to reduce frustration, reduce shutter
activations, reduce time wasted. I began serious research into techniques, accessories,
masks, software solutions, for focusing.
I was curious to see what was available for free…
tethered
Part of my decision process was based on the fact that I was prepared to have the
computer nearby. Yes, it would mean more set-up time and more cables and power
issues! But I was ready to lug around the computer for the many advantages.
The computer offers the same benefits as an intervalometer, being able to set up
imaging run scripts. And, again, get exposures longer than 30 seconds.
The big screen with good (possibly deeper) zooming. Instantaneous image review (at
high zoom) on a large screen. “Touch-less” lens focusing control. And, again, the
comfortable viewing angle.
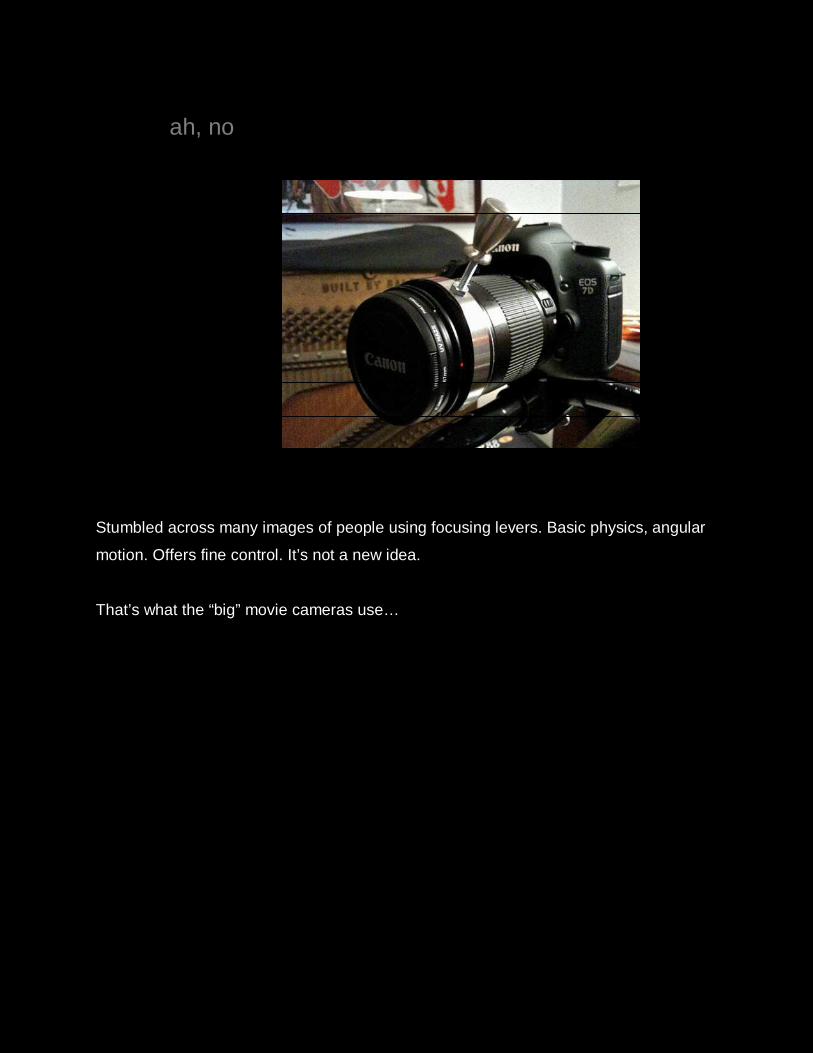
ah, no
Stumbled across many images of people using focusing levers. Basic physics, angular
motion. Offers fine control. It’s not a new idea.
That’s what the “big” movie cameras use…
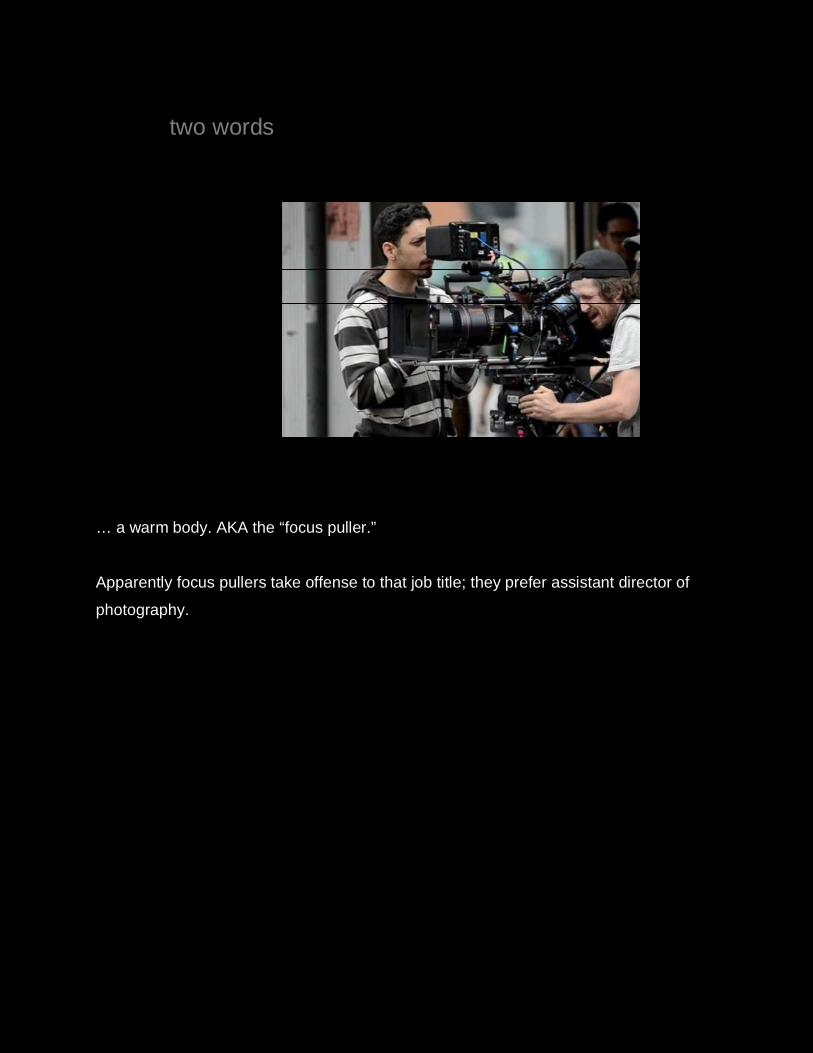
two words
… a warm body. AKA the “focus puller.”
Apparently focus pullers take offense to that job title; they prefer assistant director of
photography.
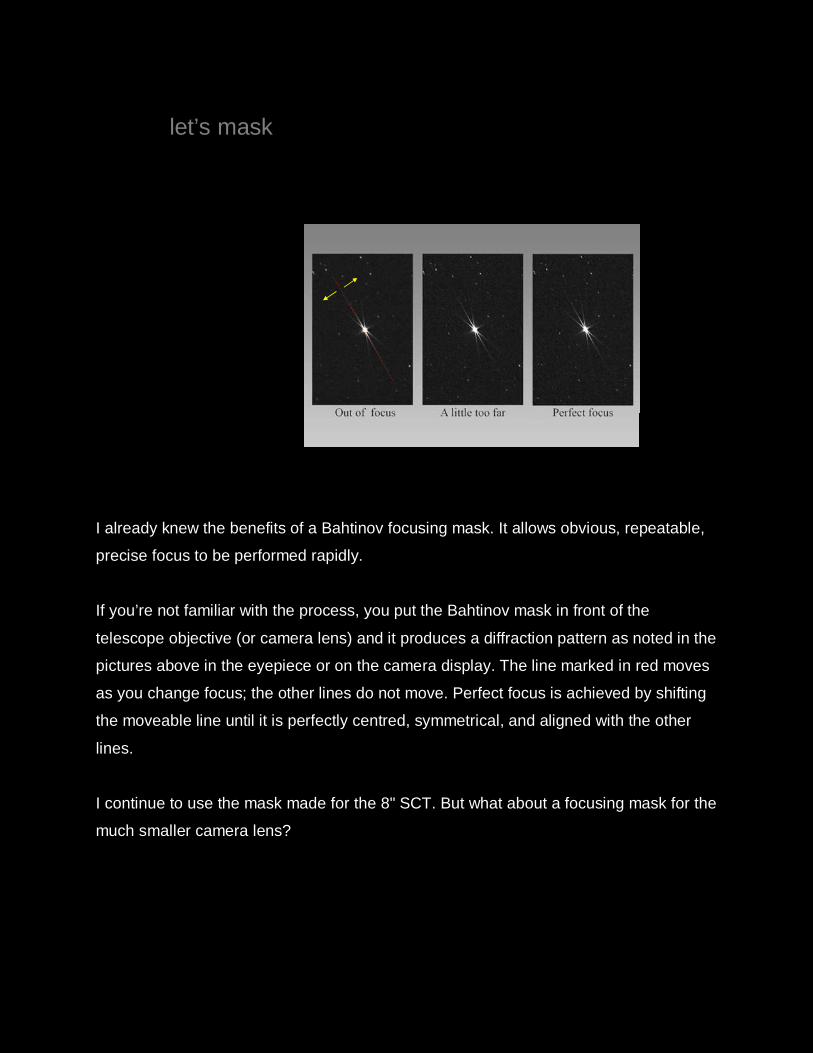
let’s mask
I already knew the benefits of a Bahtinov focusing mask. It allows obvious, repeatable,
precise focus to be performed rapidly.
If you’re not familiar with the process, you put the Bahtinov mask in front of the
telescope objective (or camera lens) and it produces a diffraction pattern as noted in the
pictures above in the eyepiece or on the camera display. The line marked in red moves
as you change focus; the other lines do not move. Perfect focus is achieved by shifting
the moveable line until it is perfectly centred, symmetrical, and aligned with the other
lines.
I continue to use the mask made for the 8" SCT. But what about a focusing mask for the
much smaller camera lens?
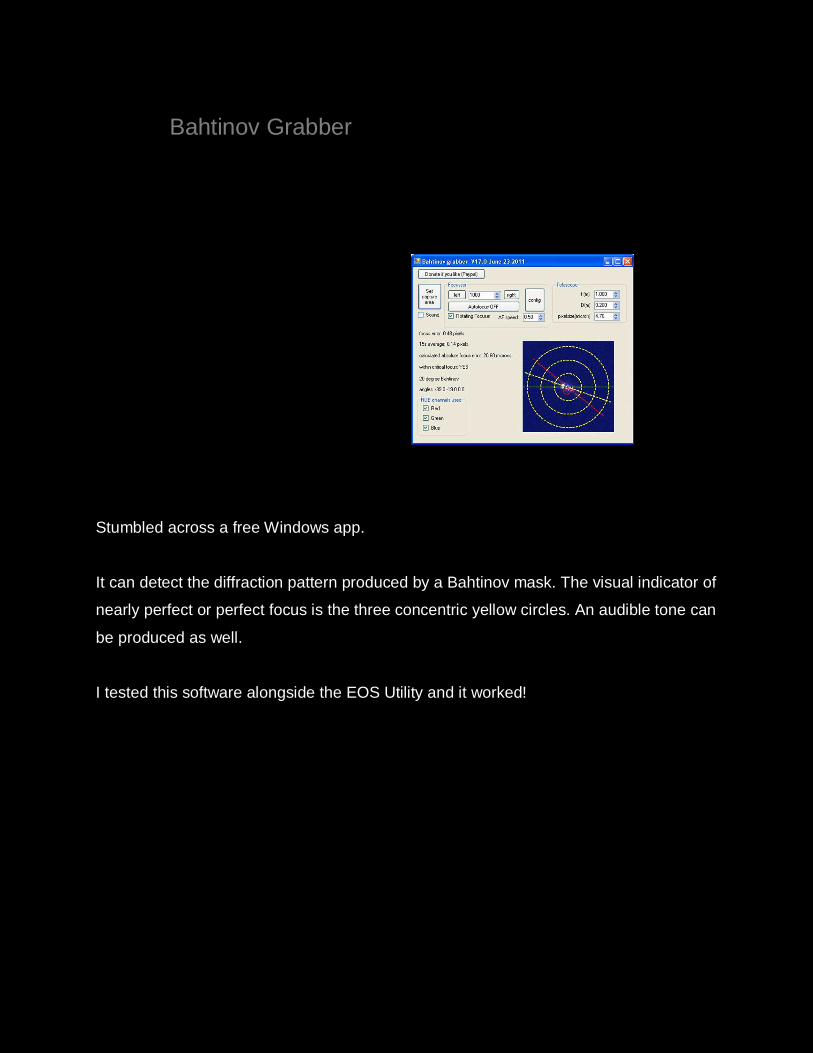
Bahtinov Grabber
Stumbled across a free Windows app.
It can detect the diffraction pattern produced by a Bahtinov mask. The visual indicator of
nearly perfect or perfect focus is the three concentric yellow circles. An audible tone can
be produced as well.
I tested this software alongside the EOS Utility and it worked!
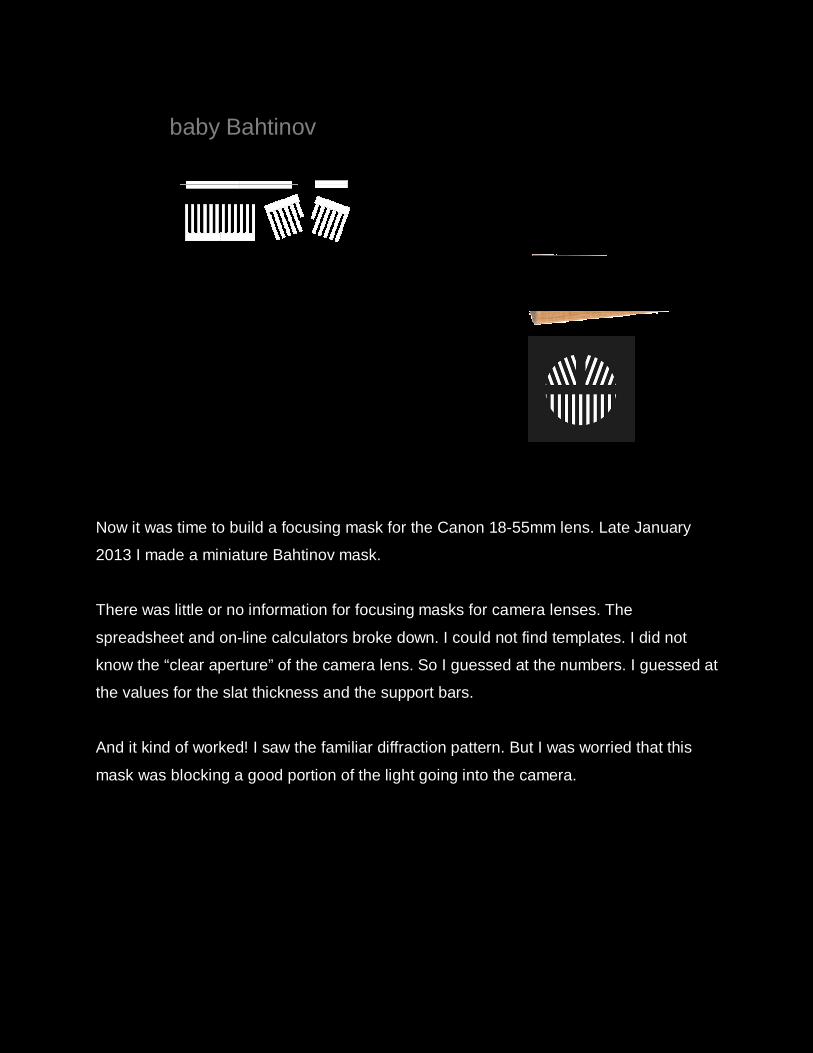
baby Bahtinov
Now it was time to build a focusing mask for the Canon 18-55mm lens. Late January
2013 I made a miniature Bahtinov mask.
There was little or no information for focusing masks for camera lenses. The
spreadsheet and on-line calculators broke down. I could not find templates. I did not
know the “clear aperture” of the camera lens. So I guessed at the numbers. I guessed at
the values for the slat thickness and the support bars.
And it kind of worked! I saw the familiar diffraction pattern. But I was worried that this
mask was blocking a good portion of the light going into the camera.
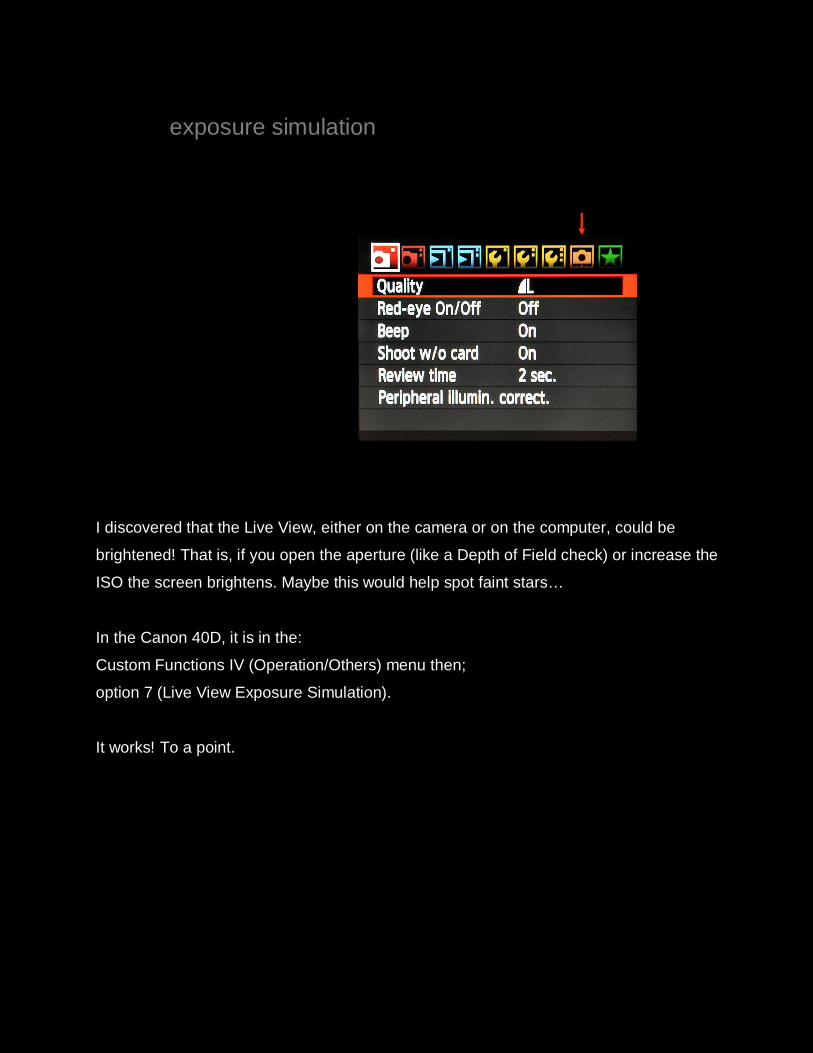
exposure simulation
I discovered that the Live View, either on the camera or on the computer, could be
brightened! That is, if you open the aperture (like a Depth of Field check) or increase the
ISO the screen brightens. Maybe this would help spot faint stars…
In the Canon 40D, it is in the:
Custom Functions IV (Operation/Others) menu then;
option 7 (Live View Exposure Simulation).
It works! To a point.
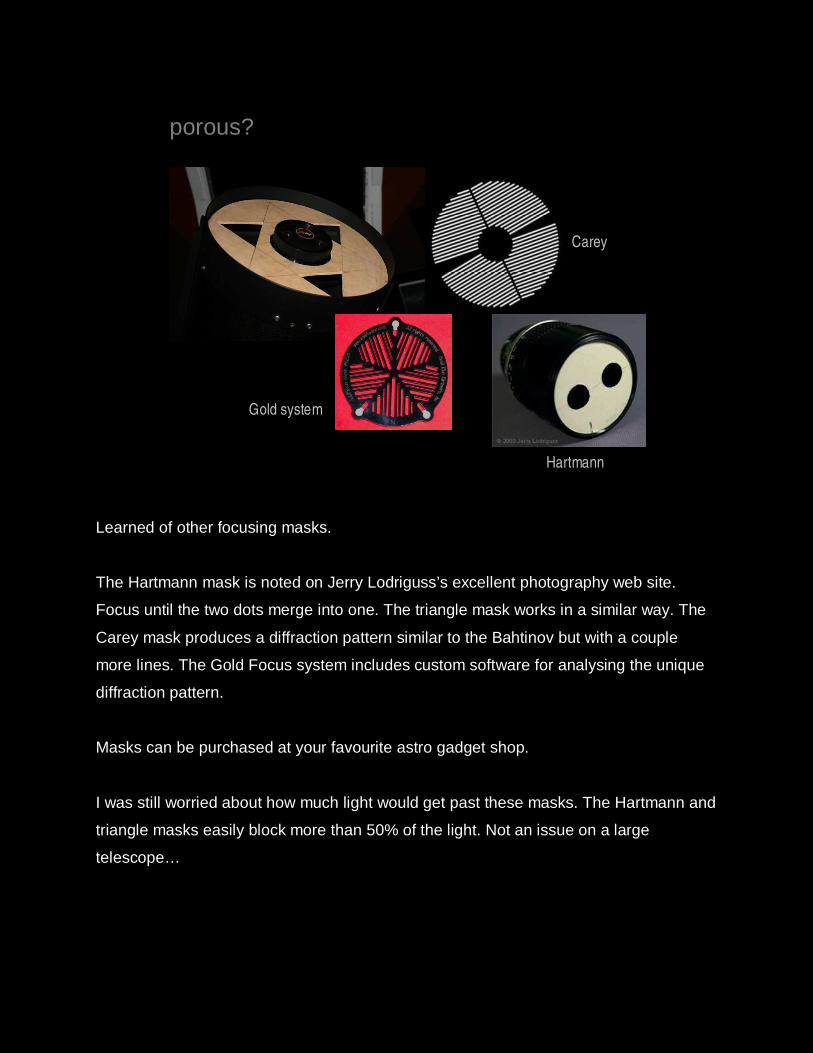
porous?
Learned of other focusing masks.
The Hartmann mask is noted on Jerry Lodriguss’s excellent photography web site.
Focus until the two dots merge into one. The triangle mask works in a similar way. The
Carey mask produces a diffraction pattern similar to the Bahtinov but with a couple
more lines. The Gold Focus system includes custom software for analysing the unique
diffraction pattern.
Masks can be purchased at your favourite astro gadget shop.
I was still worried about how much light would get past these masks. The Hartmann and
triangle masks easily block more than 50% of the light. Not an issue on a large
telescope…
Carey
Hartmann
Gold system
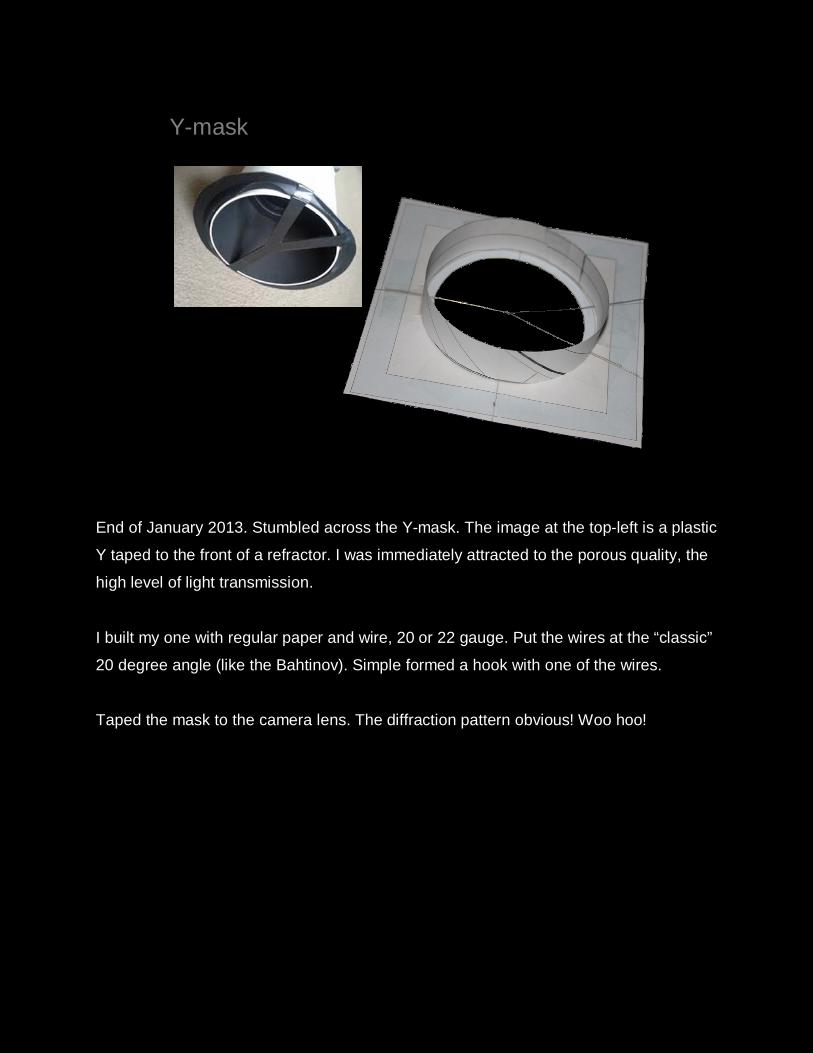
Y-mask
End of January 2013. Stumbled across the Y-mask. The image at the top-left is a plastic
Y taped to the front of a refractor. I was immediately attracted to the porous quality, the
high level of light transmission.
I built my one with regular paper and wire, 20 or 22 gauge. Put the wires at the “classic”
20 degree angle (like the Bahtinov). Simple formed a hook with one of the wires.
Taped the mask to the camera lens. The diffraction pattern obvious! Woo hoo!
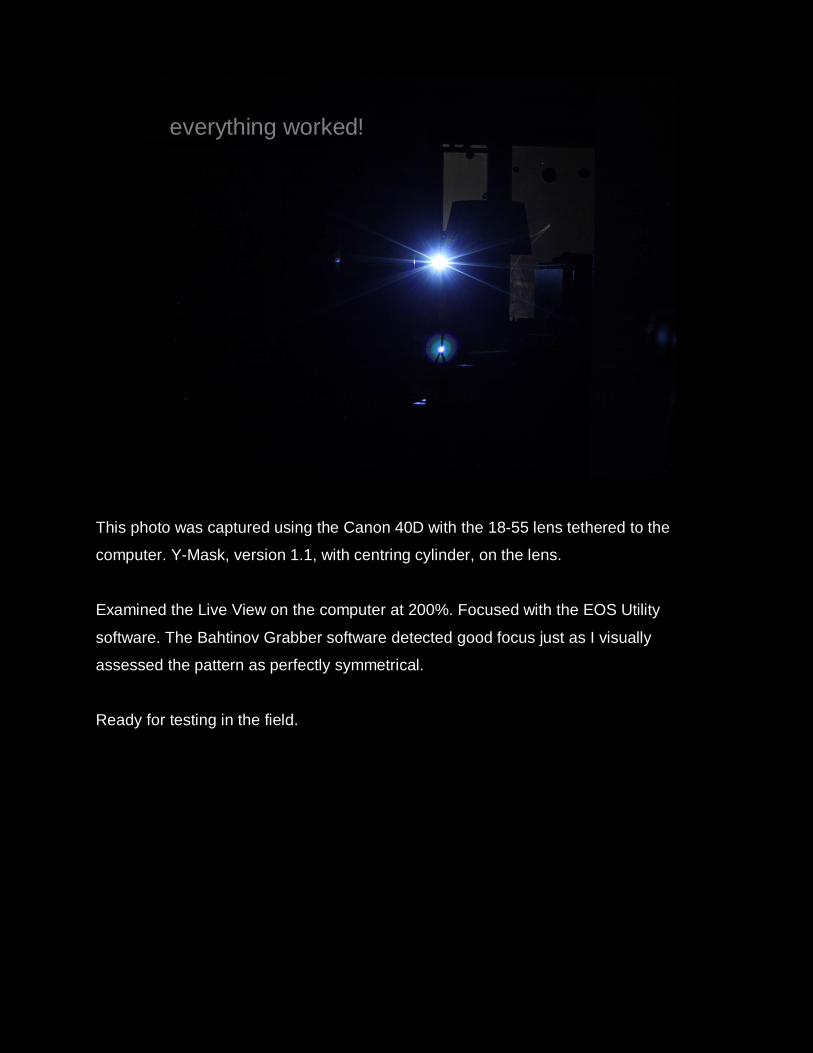
everything worked!
This photo was captured using the Canon 40D with the 18-55 lens tethered to the
computer. Y-Mask, version 1.1, with centring cylinder, on the lens.
Examined the Live View on the computer at 200%. Focused with the EOS Utility
software. The Bahtinov Grabber software detected good focus just as I visually
assessed the pattern as perfectly symmetrical.
Ready for testing in the field.
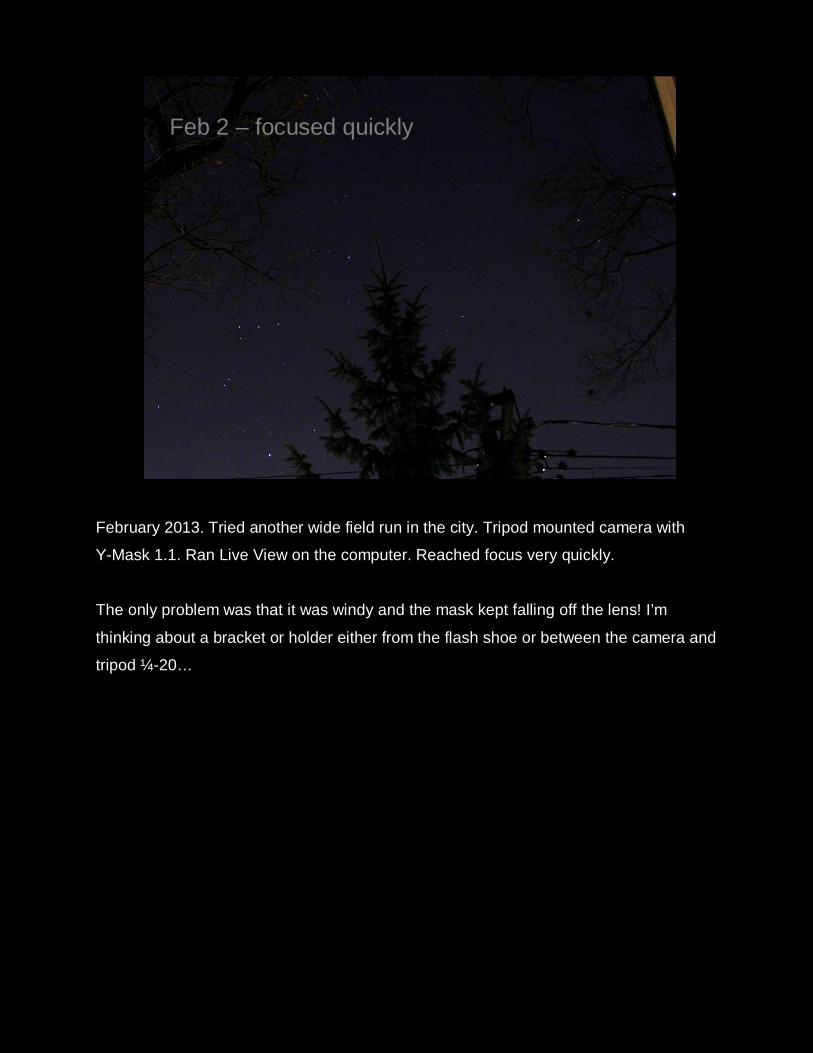
Feb 2 – focused quickly
February 2013. Tried another wide field run in the city. Tripod mounted camera with
Y-Mask 1.1. Ran Live View on the computer. Reached focus very quickly.
The only problem was that it was windy and the mask kept falling off the lens! I’m
thinking about a bracket or holder either from the flash shoe or between the camera and
tripod ¼-20…
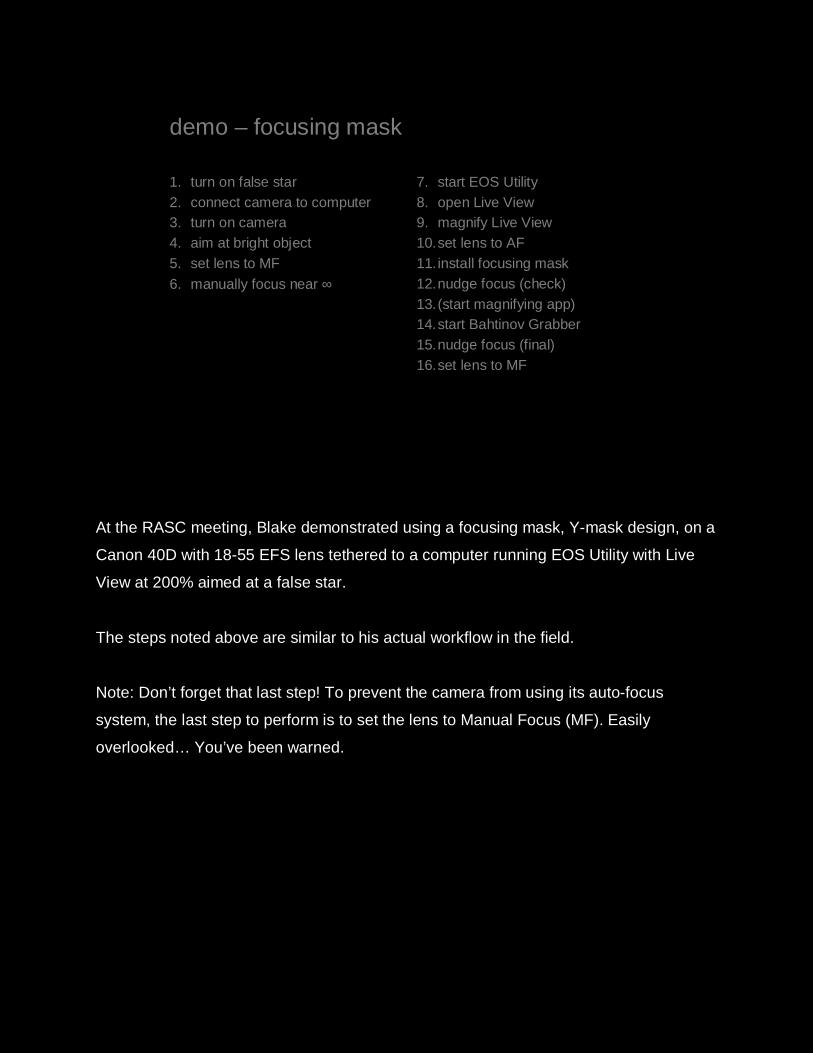
demo – focusing mask
1. turn on false star2. connect camera to computer3. turn on camera4. aim at bright object5. set lens to MF
6. manually focus near ∞
7. start EOS Utility 8. open Live View9. magnify Live View10.set lens to AF11. install focusing mask12.nudge focus (check)13.(start magnifying app)14.start Bahtinov Grabber15.nudge focus (final)16.set lens to MF
At the RASC meeting, Blake demonstrated using a focusing mask, Y-mask design, on a
Canon 40D with 18-55 EFS lens tethered to a computer running EOS Utility with Live
View at 200% aimed at a false star.
The steps noted above are similar to his actual workflow in the field.
Note: Don’t forget that last step! To prevent the camera from using its auto-focus
system, the last step to perform is to set the lens to Manual Focus (MF). Easily
overlooked… You’ve been warned.
lessons learned
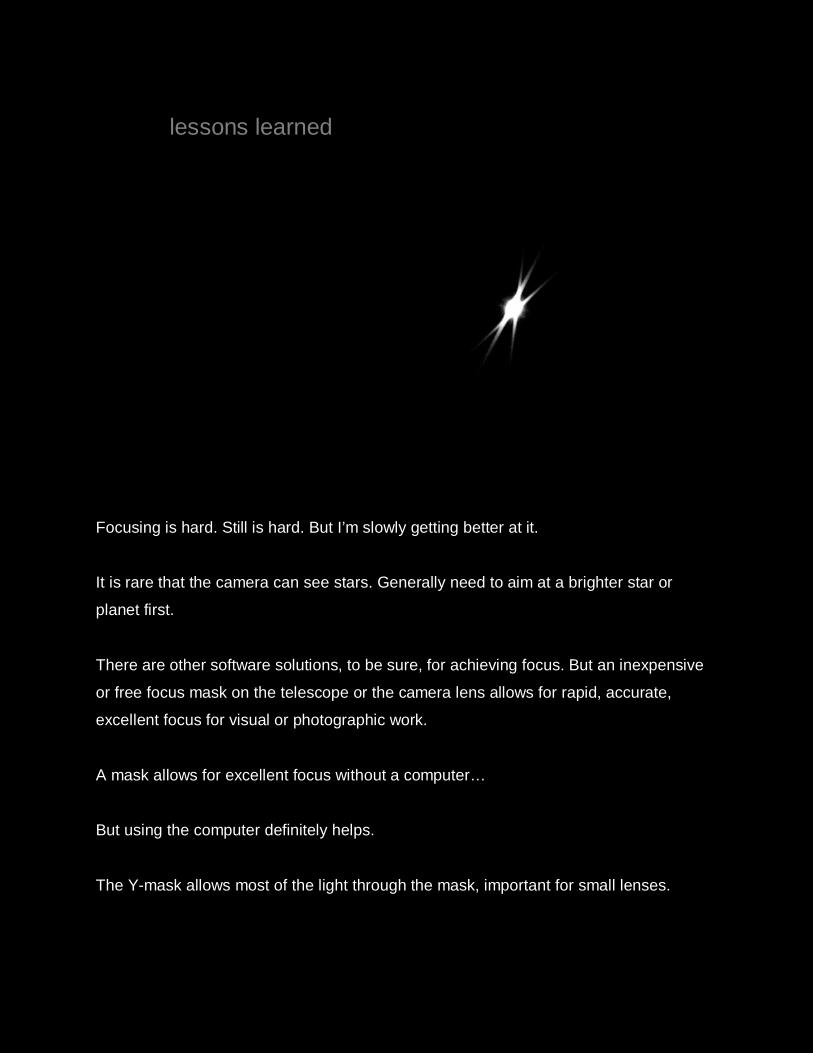
Focusing is hard. Still is hard. But I’m slowly getting better at it.
It is rare that the camera can see stars. Generally need to aim at a brighter star or
planet first.
There are other software solutions, to be sure, for achieving focus. But an inexpensive
or free focus mask on the telescope or the camera lens allows for rapid, accurate,
excellent focus for visual or photographic work.
A mask allows for excellent focus without a computer…
But using the computer definitely helps.
The Y-mask allows most of the light through the mask, important for small lenses.
omega
• thank you• questions?
Thank you.
Contact Blake Nancarrow regarding errors or omissions or to ask questions.
astronomy AT computer-ease DOT com
bibliog.
• Lodriguss’s sitehttp://www.astropix.com/
• Bahtinov mask templateshttp://astrojargon.net/MaskGen.aspx
• Bahtinov Grabberhttp://www.njnoordhoek.com/
• Magnifying Glass Freehttp://workerscollection.com/wcollect/english/html/mg.html
• tethering optionshttp://www.tethertools.com/plugging-in/software/
• BackyardEOShttp://www.backyardeos.com/
Some references.
• Astrophotographer Jerry Lodriguss has a very helpful web site. Lots of tips and
tricks. He also sells some astrophotography e-books.
• The astrojargon web site has a Bahtinov mask generator. Enter the numbers for
your ‘scope and it will produce an image file you download and print.
• The late Niels Noordhoek wrote the Bahtinov Grabber software for Windows.
There is a version with an autofocus function and one without. 32- or 64-bit.
• Windows and Mac operating systems have a magnifying accessibility feature so
to zoom in on the screen. Magnifying Glass Free for Windows is more powerful.
• Tether Tools has a good summary of tethering software for Canon, Nikon,
Pentax, and Sony. Free and commercial, vendor and third party products noted.
• A popular software product designed for astronomers with Canon cameras is
BackyardEOS. It works with focusing masks.