focusing lighting instruments the107. focusing lights this presentation will walk you through the...
TRANSCRIPT
Focusing Lighting Focusing Lighting InstrumentsInstruments
THE107THE107
Focusing LightsFocusing Lights
This presentation will walk you through the This presentation will walk you through the basic steps of focusing a theatrical lighting basic steps of focusing a theatrical lighting instrumentinstrument
This demonstration will use a 36 degree This demonstration will use a 36 degree source four lekosource four leko
Later, we will cover the basic differences Later, we will cover the basic differences of other unitsof other units
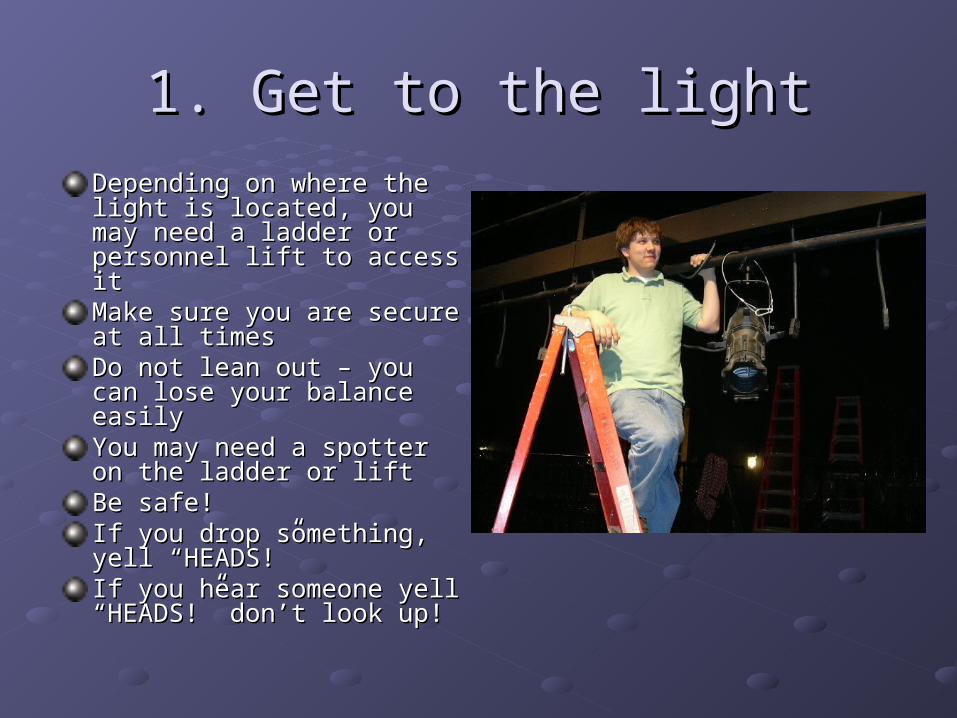
1. Get to the light1. Get to the light
Depending on where the light Depending on where the light is located, you may need a is located, you may need a ladder or personnel lift to ladder or personnel lift to access itaccess itMake sure you are secure at Make sure you are secure at all timesall timesDo not lean out – you can lose Do not lean out – you can lose your balance easilyyour balance easilyYou may need a spotter on the You may need a spotter on the ladder or liftladder or liftBe safe!Be safe!If you drop something, yell If you drop something, yell “HEADS!”“HEADS!”If you hear someone yell If you hear someone yell “HEADS!” don’t look up!“HEADS!” don’t look up!
2. Observe the light2. Observe the light
Ensure that the light is rough focused in Ensure that the light is rough focused in the correct general directionthe correct general direction
Check safety chainCheck safety chain
Make sure shutters have been pulledMake sure shutters have been pulled
Check electrical connectionCheck electrical connection
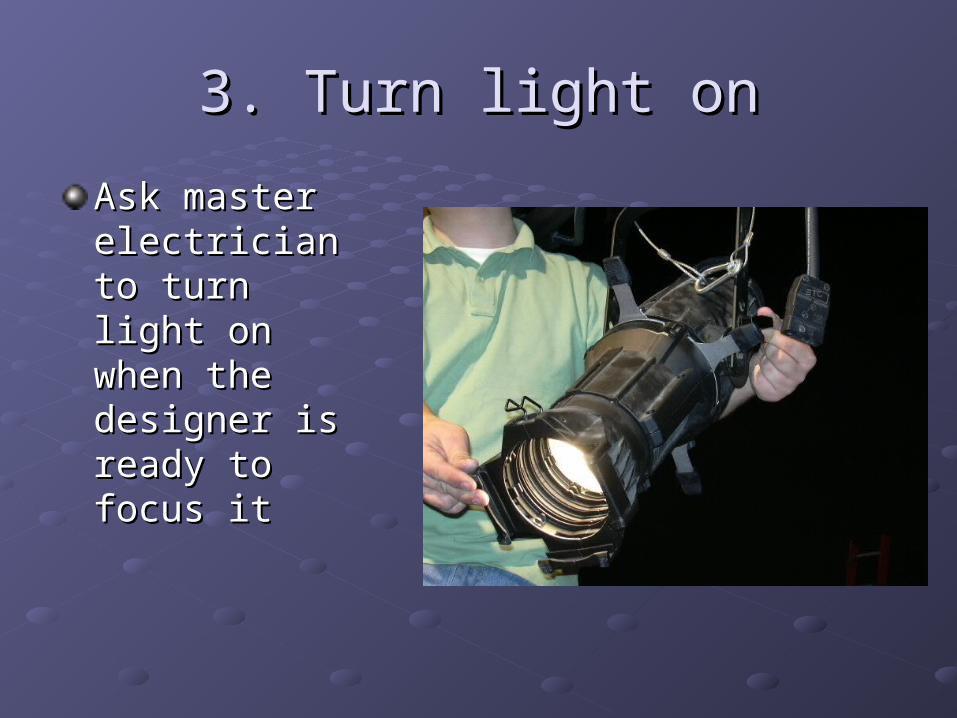
3. Turn light on3. Turn light on
Ask master Ask master electrician to turn electrician to turn light on when the light on when the designer is ready designer is ready to focus itto focus it
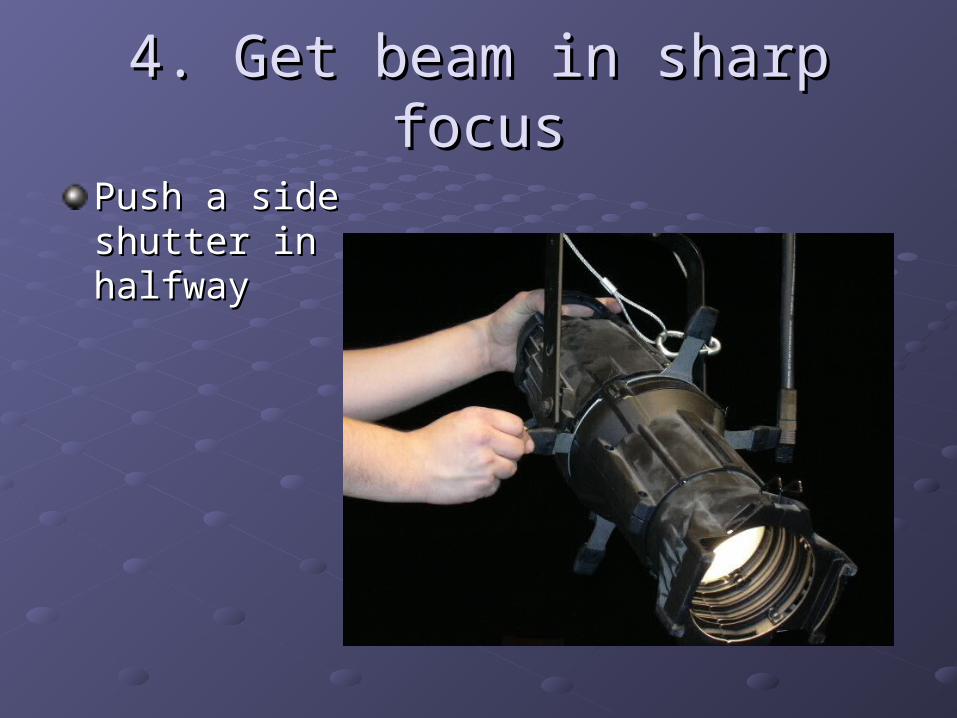
4. Get beam in sharp focus4. Get beam in sharp focus
Push a side shutter in Push a side shutter in halfwayhalfway
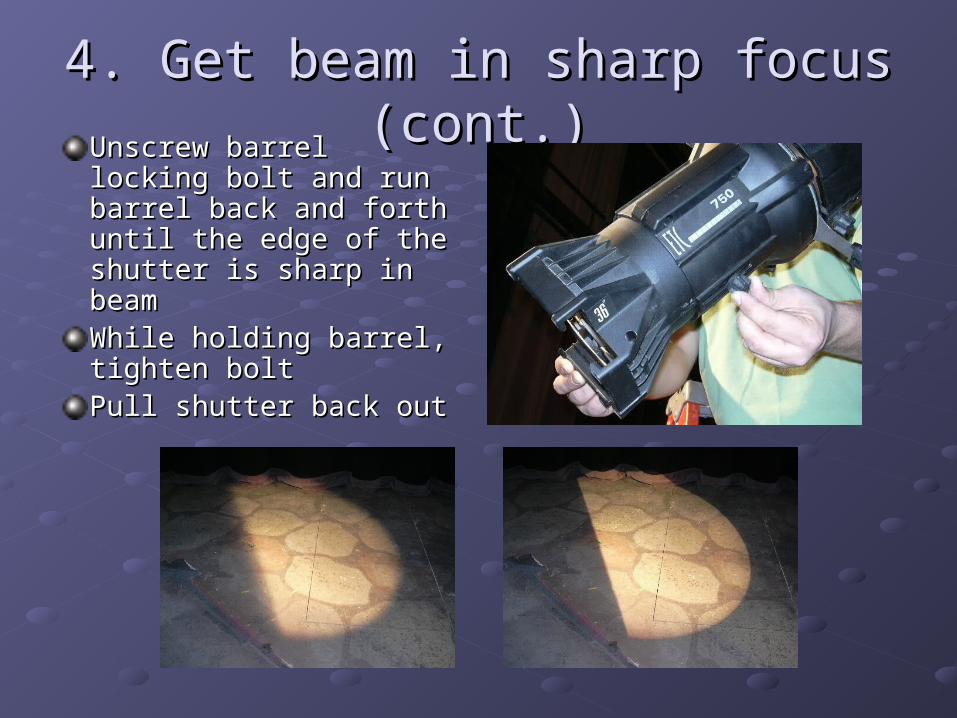
4. Get beam in sharp focus (cont.)4. Get beam in sharp focus (cont.)Unscrew barrel locking Unscrew barrel locking bolt and run barrel back bolt and run barrel back and forth until the edge of and forth until the edge of the shutter is sharp in the shutter is sharp in beambeamWhile holding barrel, While holding barrel, tighten bolttighten boltPull shutter back outPull shutter back out

5. Adjust pan5. Adjust pan
Using pan Using pan bolt, focus bolt, focus light to light to designer’s designer’s directionsdirections
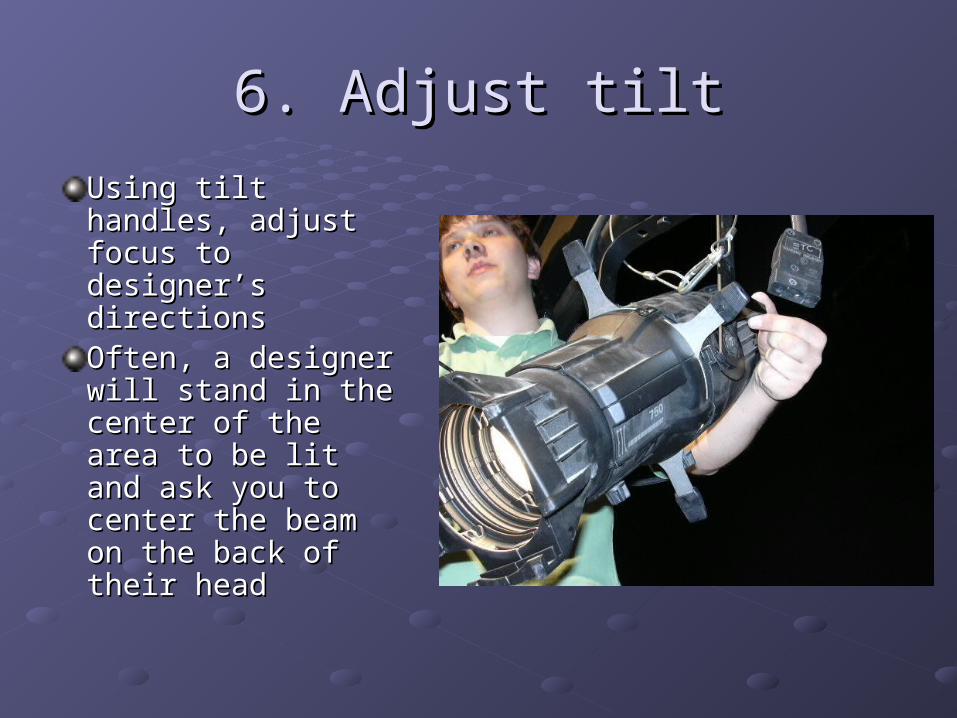
6. Adjust tilt6. Adjust tilt
Using tilt handles, Using tilt handles, adjust focus to adjust focus to designer’s designer’s directionsdirectionsOften, a designer Often, a designer will stand in the will stand in the center of the area center of the area to be lit and ask to be lit and ask you to center the you to center the beam on the back beam on the back of their headof their head
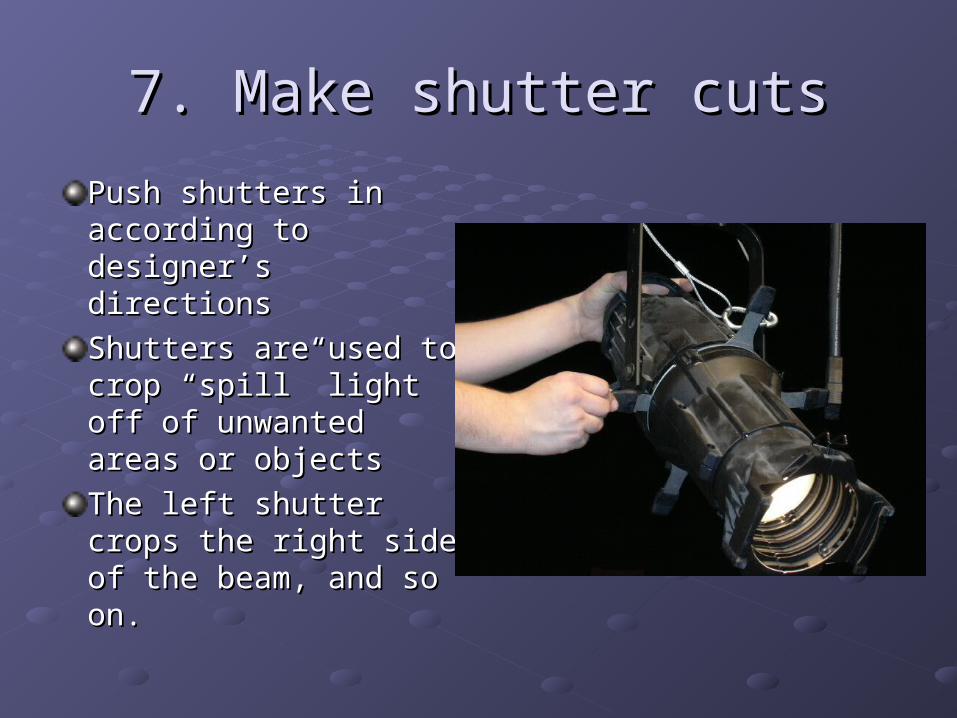
7. Make shutter cuts7. Make shutter cuts
Push shutters in Push shutters in according to according to designer’s directionsdesigner’s directions
Shutters are used to Shutters are used to crop “spill” light off of crop “spill” light off of unwanted areas or unwanted areas or objectsobjects
The left shutter crops The left shutter crops the right side of the the right side of the beam, and so on.beam, and so on.
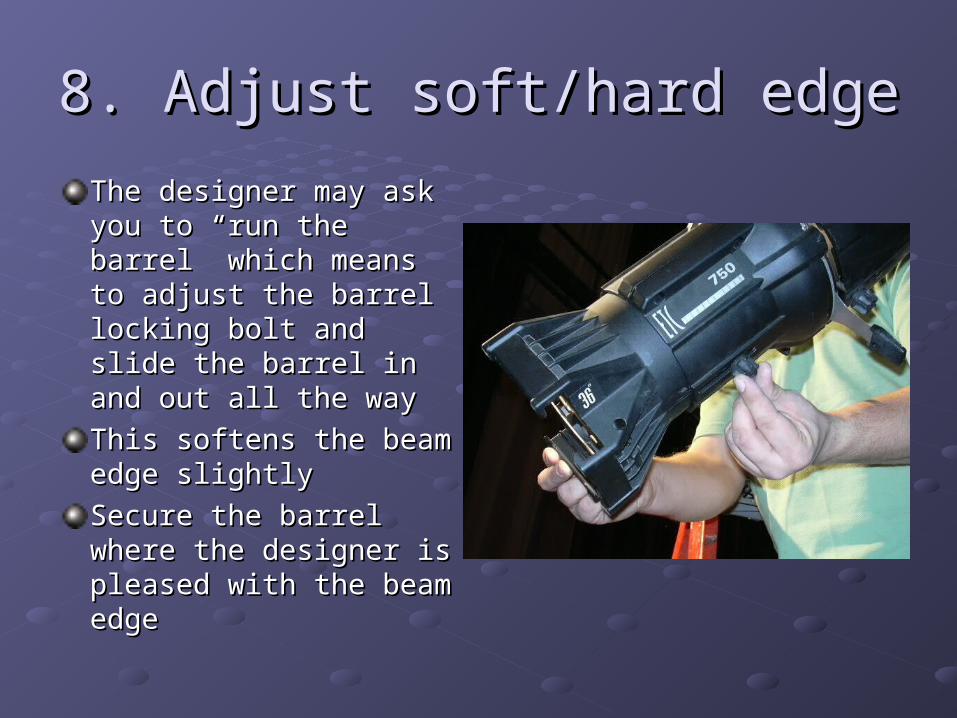
8. Adjust soft/hard edge8. Adjust soft/hard edge
The designer may ask The designer may ask you to “run the barrel” you to “run the barrel” which means to adjust which means to adjust the barrel locking bolt and the barrel locking bolt and slide the barrel in and out slide the barrel in and out all the wayall the way
This softens the beam This softens the beam edge slightlyedge slightly
Secure the barrel where Secure the barrel where the designer is pleased the designer is pleased with the beam edgewith the beam edge

9. Drop color9. Drop color
Means to put Means to put color in color color in color slotslot
Do not actually Do not actually dropdrop
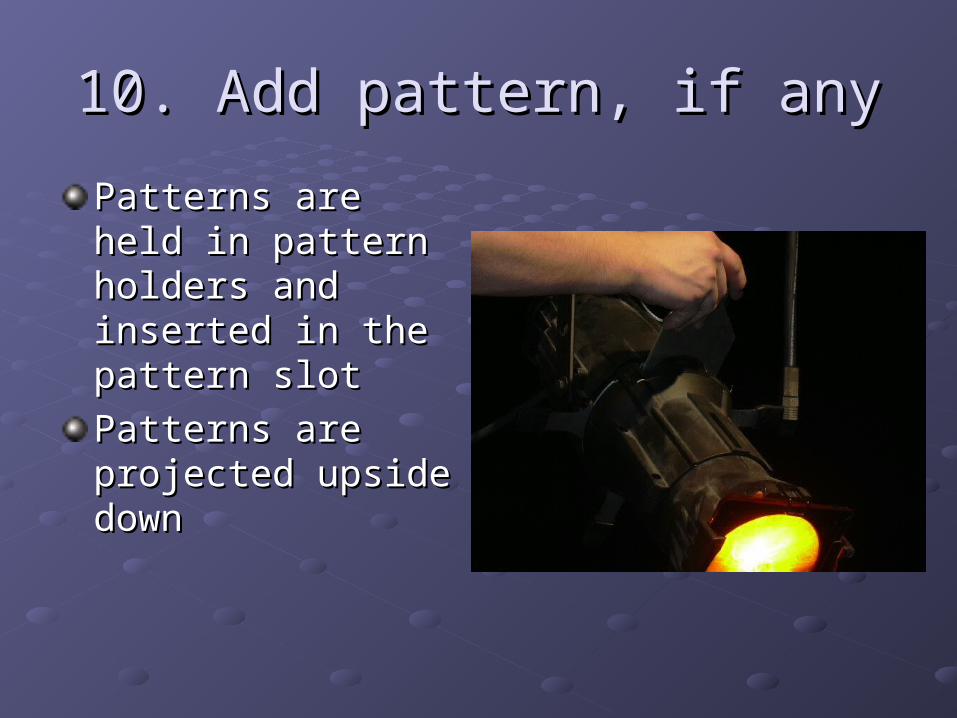
10. Add pattern, if any10. Add pattern, if any
Patterns are held in Patterns are held in pattern holders and pattern holders and inserted in the pattern inserted in the pattern slotslot
Patterns are projected Patterns are projected upside downupside down
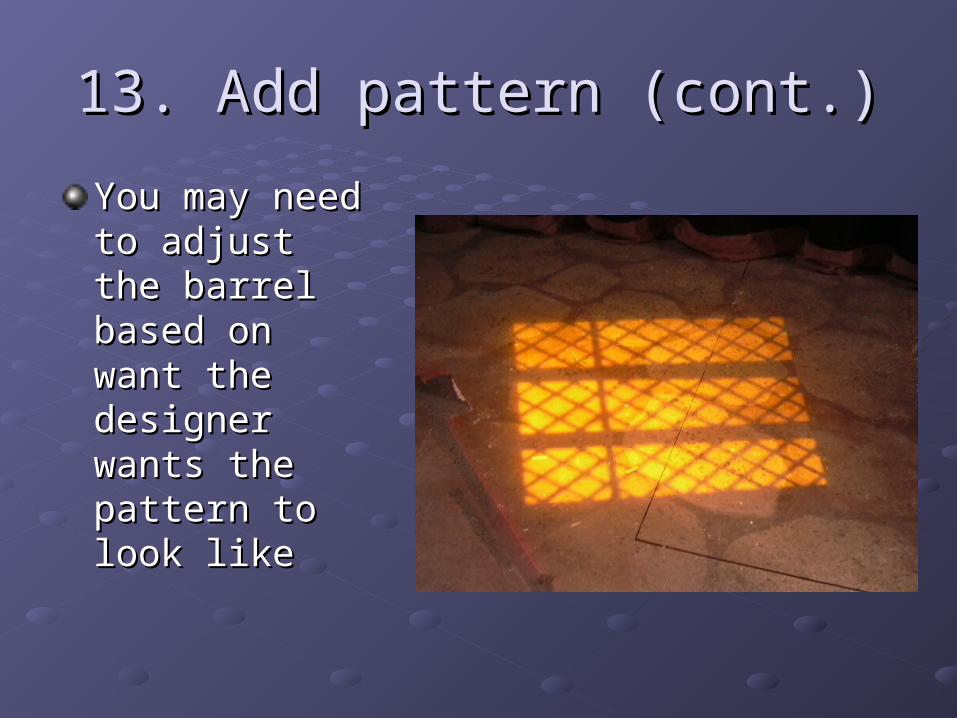
13. Add pattern (cont.)13. Add pattern (cont.)
You may need You may need to adjust the to adjust the barrel based on barrel based on want the want the designer wants designer wants the pattern to the pattern to look likelook like
14. Finish14. Finish
Make sure everything is tightMake sure everything is tight
Unit should not move if jostledUnit should not move if jostled
Inform master electrician that unit is Inform master electrician that unit is completecomplete
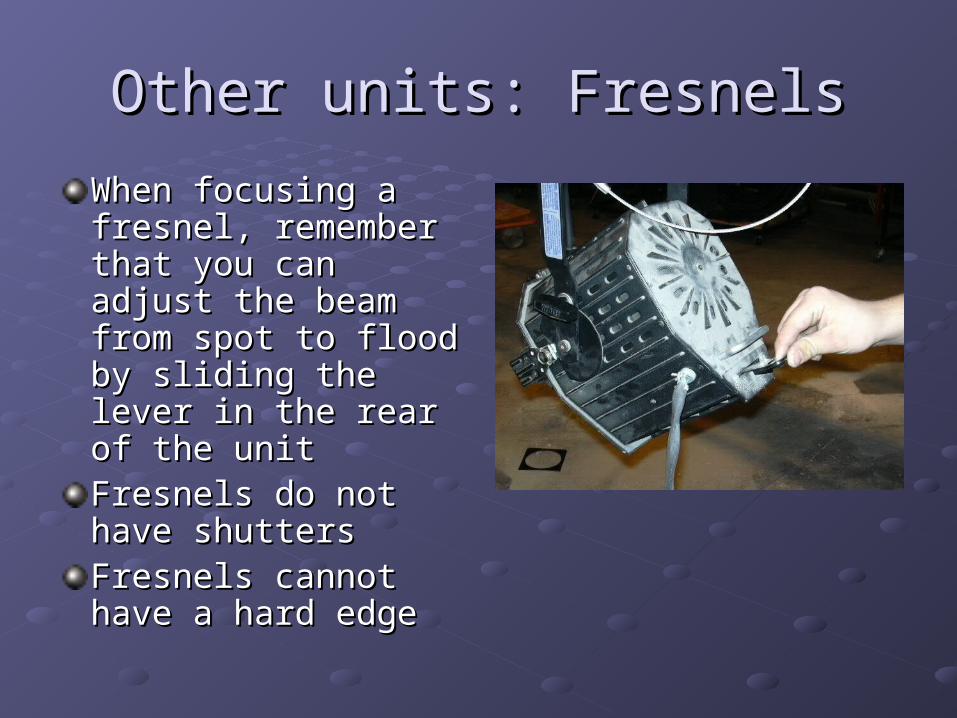
Other units: FresnelsOther units: Fresnels
When focusing a When focusing a fresnel, remember fresnel, remember that you can adjust that you can adjust the beam from spot to the beam from spot to flood by sliding the flood by sliding the lever in the rear of the lever in the rear of the unitunitFresnels do not have Fresnels do not have shuttersshuttersFresnels cannot have Fresnels cannot have a hard edgea hard edge
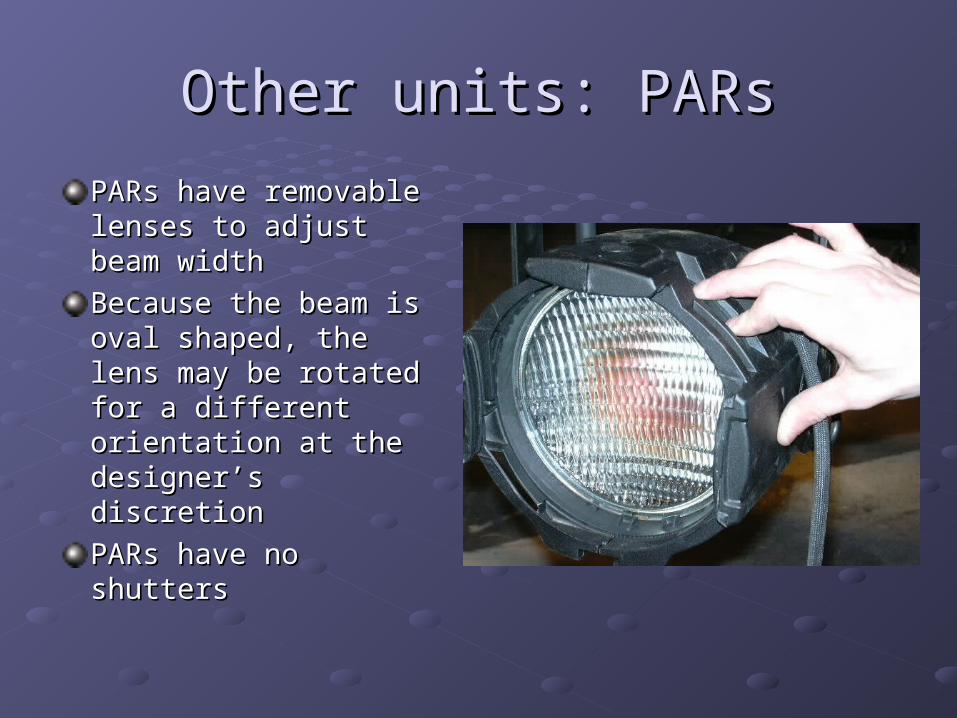
Other units: PARsOther units: PARs
PARs have removable PARs have removable lenses to adjust beam lenses to adjust beam widthwidth
Because the beam is Because the beam is oval shaped, the lens oval shaped, the lens may be rotated for a may be rotated for a different orientation at different orientation at the designer’s the designer’s discretiondiscretion
PARs have no shuttersPARs have no shutters
Other units: Cyc LightsOther units: Cyc Lights
Cyc lights and other broad wash units Cyc lights and other broad wash units generally are only adjusted for tiltgenerally are only adjusted for tilt
They have no shuttersThey have no shutters
They have no hard edgeThey have no hard edge