for jacobean creatures embroidery - hazelblomkamp.com · for jacobean embroidery following the...
TRANSCRIPT

HAZEL Blomkamp
Crewel creatures
Fresh ideas for Jacobean embroidery
Following the success of Crewel Intentions and Crewel Twists, which introduced embroiderers to needle-lace and loom-weaving techniques in their designs, comes Crewel Creatures, the third title in this series by renowned embroiderer Hazel Blomkamp.
Animals and birds are popular subjects in crewel embroidery, and here Hazel introduces needleworkers to the beautiful, exotic creatures found in the African wild. Using the Jacobean embroidery style for which she is well known, and incorporating the subtle in� uence of the fractal designs found in zentangle art, Hazel also brings beads and other three-dimensional elements into her designs to capture the stunning and colourful art that is traditionally associated with Africa. Those new to Hazels work will � nd the essential crewel stitches, needle-lace and needle-weaving techniques needed in an easy-to-follow how-to section and stitch gallery inside the book, and all embroiderers will be impressed by the wealth of design ideas and inspiration Crewel Creatures has to offer.
With every project, step-by-step instructions and gorgeous photographs are included, along with a template of the design. All the projects are stitched and embellished on natural coloured linen, making them not only perfect for framing for display but also wonderfully economical for embroiderers to work on.
For readers looking for something different and new to stitch, and for those keen to challenge themselves with more complex embroidery techniques, this latest addition to Hazels Crewel series is an absolute must-have.
9 7 8 1 9 2 8 3 7 6 3 6 1
ISBN 978-1-928376-36-1
METZ PRESSwww.metzpress .co.za
Available April 2018RRP: R295:00Size: 260 x 193 mm with fl aps176 pages full colourISBN 978-1-928376-36-1
HAZEL BlomkampHazel Blomkamp has dabbled with all the needlecrafts since childhood. When her children were babies she developed a passion for embroidery to break the tedium of life with toddlers, using it as her evening reward for having got through the day with her sanity intact. Her children are now young adults and she still embroiders in front of the television every night. She has been designing for the past 20 years. Preferring to design projects which appear to be traditional, she pushes the boundaries by introducing other forms of needlecraft into traditional techniques in everything that she does. Along with designing, she runs a busy website from home. She teaches at her home studio, in Pieter maritzburg, KZN, and travels throughout South Africa and the rest of the world teaching embroidery and fine beadwork. She is a regular contributor to South African, British and Australian embroidery magazines and an occasional columnist for South African Stitches magazine.
Published by Metz Press1 Cameronians AvenueWelgemoed 7530South Africa
First published in 2018
Copyright © Metz Press 2018Copyright text © Hazel BlomkampPhotography copyright © Metz Press
All rights reserved. No part of this publication may be reproduced, stored in a retrieval system or transmitted in any form or by any means, electronic, mechanical, photocopying, recording or otherwise, without the prior written permission of the copyright owners.
Publisher Wilsia MetzPhotography Kenny Irvine, Di van NiekerkIllustrations Hazel BlomkampDesign and layout Liezl MareeProofreader Glynne NewlandsReproduction Robert Wong, ColorFuzionPrinted and bound by WKT Company, China
ISBN 978-1-928376-36-1
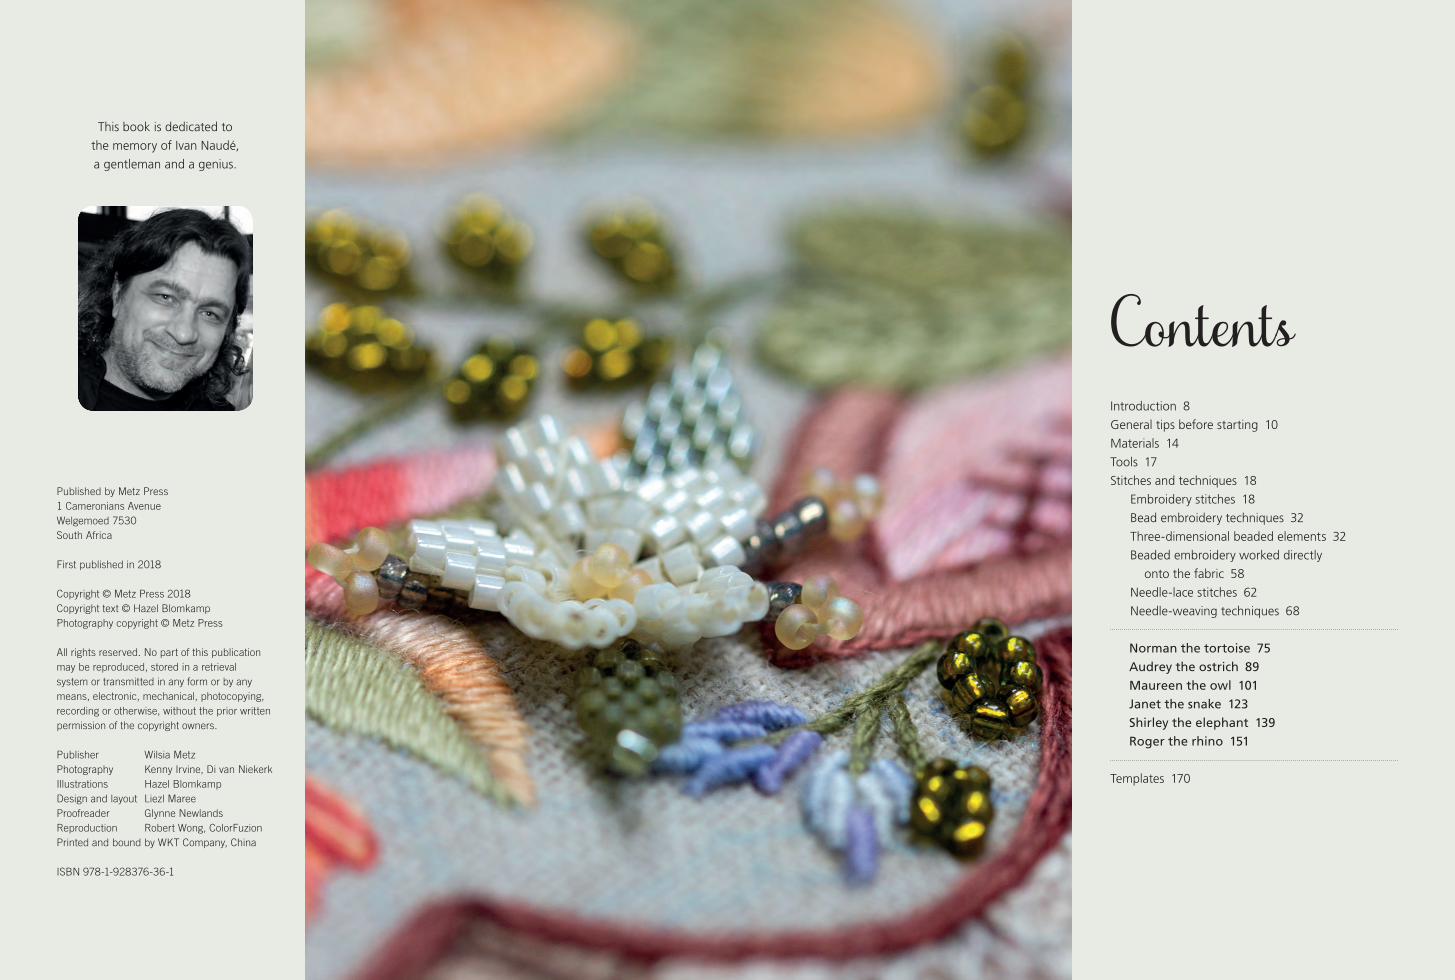
ContentsIntroduction 8
General tips before starting 10
Materials 14
Tools 17
Stitches and techniques 18
Embroidery stitches 18
Bead embroidery techniques 32
Three-dimensional beaded elements 32
Beaded embroidery worked directly
onto the fabric 58
Needle-lace stitches 62
Needle-weaving techniques 68
Norman the tortoise 75Audrey the ostrich 89Maureen the owl 101Janet the snake 123Shirley the elephant 139Roger the rhino 151
Templates 170
This book is dedicated to
the memory of Ivan Naudé,
a gentleman and a genius.
STITCHES & TECHNIQUES 1918
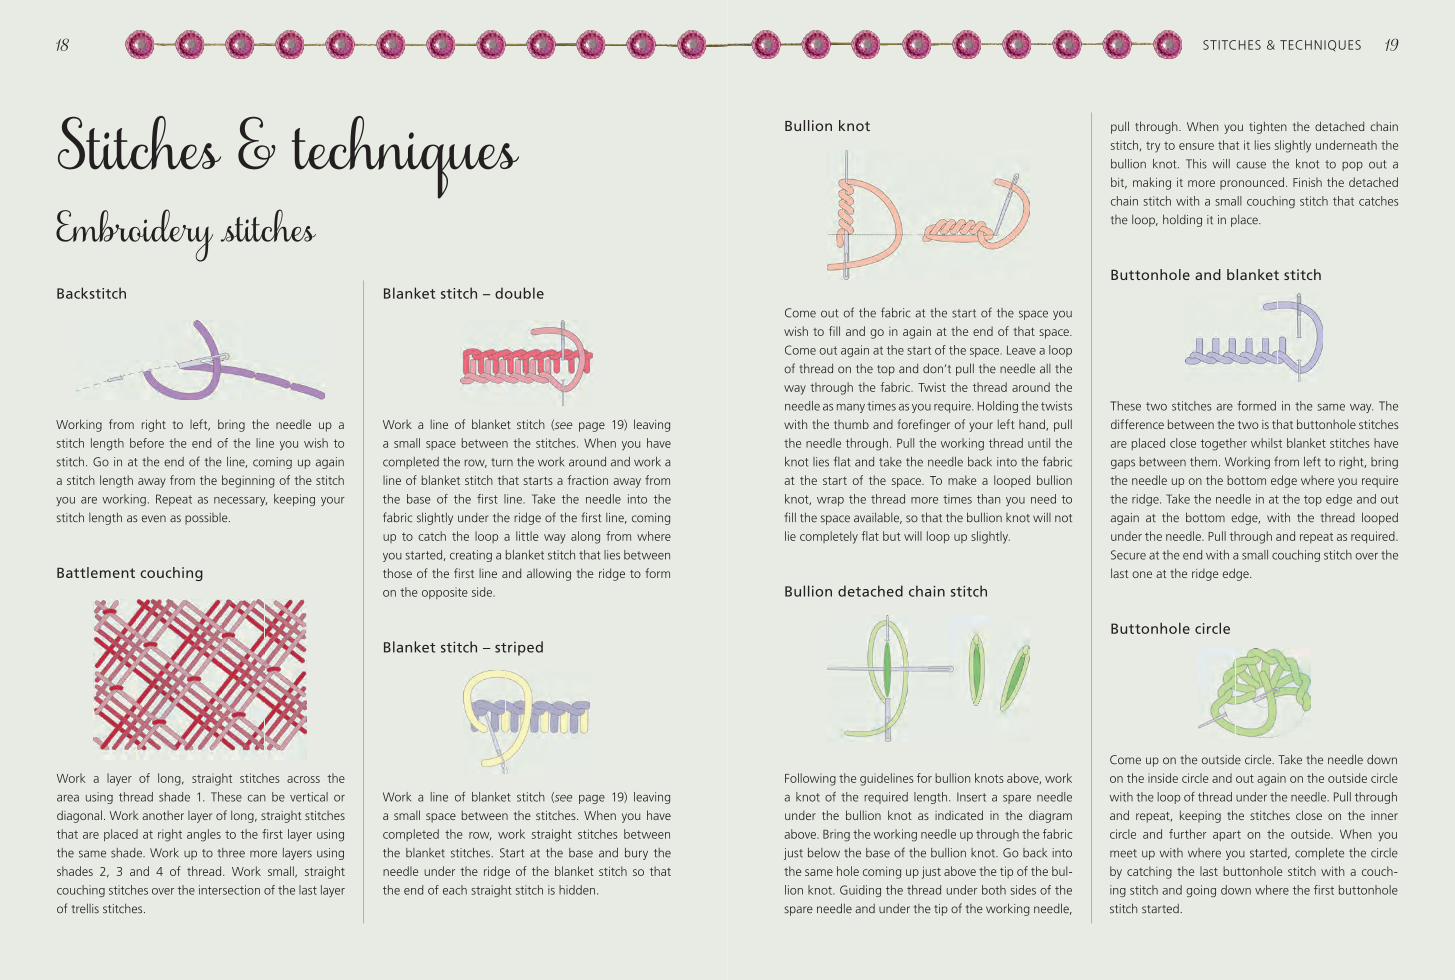
Stitches & techniquesEmbr oidery stitches
Working from right to left, bring the needle up a
stitch length before the end of the line you wish to
stitch. Go in at the end of the line, coming up again
a stitch length away from the beginning of the stitch
you are working. Repeat as necessary, keeping your
stitch length as even as possible.
Battlement couching
Blanket stitch – doubleBackstitch
Bullion knot pull through. When you tighten the detached chain
stitch, try to ensure that it lies slightly underneath the
bullion knot. This will cause the knot to pop out a
bit, making it more pronounced. Finish the detached
chain stitch with a small couching stitch that catches
the loop, holding it in place.
Buttonhole and blanket stitch
Work a layer of long, straight stitches across the
area using thread shade 1. These can be vertical or
diagonal. Work another layer of long, straight stitches
that are placed at right angles to the fi rst layer using
the same shade. Work up to three more layers using
shades 2, 3 and 4 of thread. Work small, straight
couching stitches over the intersection of the last layer
of trellis stitches.
Work a line of blanket stitch (see page 19) leaving
a small space between the stitches. When you have
completed the row, turn the work around and work a
line of blanket stitch that starts a fraction away from
the base of the fi rst line. Take the needle into the
fabric slightly under the ridge of the fi rst line, coming
up to catch the loop a little way along from where
you started, creating a blanket stitch that lies between
those of the fi rst line and allowing the ridge to form
on the opposite side.
Blanket stitch – striped
Work a line of blanket stitch (see page 19) leaving
a small space between the stitches. When you have
completed the row, work straight stitches between
the blanket stitches. Start at the base and bury the
needle under the ridge of the blanket stitch so that
the end of each straight stitch is hidden.
Come out of the fabric at the start of the space you
wish to fi ll and go in again at the end of that space.
Come out again at the start of the space. Leave a loop
of thread on the top and don’t pull the needle all the
way through the fabric. Twist the thread around the
needle as many times as you require. Holding the twists
with the thumb and forefi nger of your left hand, pull
the needle through. Pull the working thread until the
knot lies fl at and take the needle back into the fabric
at the start of the space. To make a looped bullion
knot, wrap the thread more times than you need to
fi ll the space available, so that the bullion knot will not
lie completely fl at but will loop up slightly.
Bullion detached chain stitch
Following the guidelines for bullion knots above, work
a knot of the required length. Insert a spare needle
under the bullion knot as indicated in the diagram
above. Bring the working needle up through the fabric
just below the base of the bullion knot. Go back into
the same hole coming up just above the tip of the bul-
lion knot. Guiding the thread under both sides of the
spare needle and under the tip of the working needle,
These two stitches are formed in the same way. The
difference between the two is that buttonhole stitches
are placed close together whilst blanket stitches have
gaps between them. Working from left to right, bring
the needle up on the bottom edge where you require
the ridge. Take the needle in at the top edge and out
again at the bottom edge, with the thread looped
under the needle. Pull through and repeat as required.
Secure at the end with a small couching stitch over the
last one at the ridge edge.
Buttonhole circle
Come up on the outside circle. Take the needle down
on the inside circle and out again on the outside circle
with the loop of thread under the needle. Pull through
and repeat, keeping the stitches close on the inner
circle and further apart on the outside. When you
meet up with where you started, complete the circle
by catching the last buttonhole stitch with a couch-
ing stitch and going down where the fi rst buttonhole
stitch started.

101
Owls are found on every continent, except Antarctica, and being one of the
oldest species of vertebrate animals in existence, have featured signifi cantly in
world folklore. Many believe the owl to be a bad omen whereas others believe
it to be a symbol for good. Whatever you believe, it is an interesting bird and
certainly a fi ne subject for an embroidery project. This owl is a big girl and
whilst probably not for the faint-hearted, comprises a wide variety of stitches
and techniques. When framed, it will fi nd pride of place on any wall.
MaureenOWL
Dimensions: 560 x 340 mm (22 x 133/8")

141140 SHIRLEY
MaterialsFABRIC
550 x 450 mm (21½ x 18") natural coloured cotton linen blend base fabric
550 x 450 mm (21½ x 18") off-white cotton voile backing fabric
EMBROIDERY FRAME
18" x 14" stretcher bars
NEEDLES
Size 7 Embroidery needlesSize 10 Embroidery needlesSize 11 Sharps quilting needlesSize 12 Long beading needles Size 26 Tapestry needles
THREADS AND BEADS
DMC STRANDED COTTONECRU Ecru315 Medium Dark Antique Mauve316 Medium Antique Mauve 520 Dark Fern Green522 Fern Green523 Light Fern Green524 Very Light Fern Green 646 Dark Beaver Grey x 2648 Light Beaver Grey 778 Very Light Antique Mauve844 Ultra Dark Beaver Grey x 23072 Very Light Beaver Grey3726 Dark Antique Mauve3782 Light Mocha Brown
DMC DENTELLES #80ECRU Ecru x 2
DMC PERLE #12524 Very Light Fern Green778 Very Light Antique Mauve
PRESENCIA FINCA PERLE #124000 Ultra Very Light Tan 1984 Dark Antique Mauve
SUPERLON BEADING THREAD AABurgundyGrey
DI VAN NIEKERK HAND-PAINTED SILK RIBBON2 mm No. 134 Ecru
MIYUKI BEADSSize 15°4g 15° 650 Rustic Grey SL Alabaster2g 15° 1630 Semi-Matte SL Moss Green2g 15° 2442 Crystal Ivory Gold Luster
Size 11°2g 11° 4557 Vitrail Matte 4g 11° 4571 Magic Orchid
Size 8°2g 8° 4557 Vitrail Matte
Size 11° Delica Beads6g DB11-108 Cinnamon Gold Luster
PRECIOSA VIVA 12 FLAT-BACK CRYSTALS2 pieces 20ss Smoke Topaz AB
GENERAL INSTRUCTIONS
• Stretch the fabric print over 18" x 14" stretcher
bars. The original was worked on Edmunds
stretcher bars.
• Make sure that the print is taut. This will improve
the quality of your work.
• Assume that threads are stranded cotton unless
otherwise described.
• If you are unsure of any of the stitches, practise on
a scrap of fabric before working on the project.
• When working with stranded cotton, use two
strands in a size 7 embroidery needle, unless
otherwise advised.
• If advised to use a single strand, work with a size
10 embroidery needle.
• Work with a single strand, doubled over and
threaded onto a size 11 sharps quilting needle for
all bead embroidery stitches.
• Work with a long beading needle and beading
thread when constructing the three-dimensional
beaded elements.
• Work with a single strand of Perle and Dentelles
threads.
• Use a size 7 embroidery needle when you work
the warp stitches in the weaving.
• Use a size 26 tapestry needle for the weaving's
weft stitches and the needle-lace detached but-
tonhole stitches.
STITCHING INSTRUCTIONS
1. Work the main area of the trunk with Vermi-
celli couching using two strands of 646 couched
down with a single strand of the same colour.
To ensure unbroken curves in the couching, work
over the entire area, ignoring the lines of the
curved teardrop and other shapes that go down
the trunk. You will work these shapes later by
going over the couching.
2. Pad the circle at the top of the trunk, just
above where the bead line starts, with horizontal
satin stitch using two strands of 844.
3. With a single strand of the same thread, work
vertical satin stitch over the padding.
4. The curved teardrop shapes on either side of
the centre line are worked in the same way with
the shapes on the one side being a mirror image
of those on the other.

ROGER 157156
14. Refer to the freestyle stitching index to identify
the numbered stitches in the colour image below left.
15. Use a single strand of 646 for the darker areas at
the bottom and right side of the face, slowly moving
to a single strand of 648 for the lighter, inner parts of
the face. This requires that you work stitches in one
or other of the threads in the same area as the two
shades merge.
16. All outlines around the edge of the face are 2:1
whipped backstitch worked with 844.
weaving in the needle weaving gallery and using the
colour image as your guide, partially fi ll the rest of the
eye using a single strand of 844.
8. Using two strands of the same colour, outline the
eye with whipped backstitch.
9. Now working with a single strand of the same
thread, 844, couch eyelashes on the lines provided.
10. The wrinkles above and below the eye are
whipped backstitch. Use two strands of 844 to work
the backstitch and a single strand of the same thread
to whip. For the purposes of these instructions I am
going to call this 2:1 whipped backstitch.
11. Moving to the nose, partially fi ll the nostril with
shading with single weaving using a single strand
of 844.
12. Fill the solid area that depicts the mouth, below
the nose, with split stitch using two strands of 844.
13. Work 2:1 whipped backstitch using 844 on all
the lines of the nose and mouth, outlining the nostril
at the same time.
21. All the small leaves are fi lled with diagonal long
and short stitch shading which faces into the vein of
the leaf.
22. Each leaf is blue against the vein shading out to
green on the edge as under:
• The single leaves at the tip of each stem use a
single strand each of 927 and 772;
• The pair below the tip uses a single strand each of
926 and 3348;
• The pair at the base of each stem uses a single
strand each of 3768 and 3348;
• The single leaf between the orchids uses a single
strand each of 926 and 3348.
23. With a single strand of 3768, defi ne the left side
of each leaf with outline stitch worked from base to tip.
24. Working from base to tip, work stem stitch along
each stem using two strands of 924, continuing up
the vein of the leaf. Bring the needle up from under
the stem stitch at the base of the leaf and whip the
17. The ears are worked referring to the freestyle
stitching index.
18. Starting on the left of the left ear, use 646 merg-
ing into 648 on the right side of the ear.
19. Starting at the bottom of the right ear, use 844
merging into 646 at the top of the ear.
20. Work the line that runs down within the right ear,
as well as the outline of both ears with 2:1 whipped
backstitch using 844.
stem stitch back down to the bottom (this does not
include the vein of the leaf).
25. Using two strands of 648, pad each petal of the
3-petal orchid with horizontal satin stitch.
26. Work single strand vertical long and short stitch
shading over the padding using 3856 at the base of
each petal shading up to 3354 at the tip.
27. Work the stem of each fl ower and the bead bud
stems in whipped stem stitch using two strands of
3731.
28. Using the colour image alongside to guide you,
defi ne one side of each petal with outline stitch using
a single strand of 3731.
29. Using a doubled-over single strand of 648 and
following the guidelines for attaching a single bead
on page 58, attach a bead 8° 2035 in middle of each
fl ower.
30. Bring the needle up next to that bead and fol-
lowing the instructions for bead circles on page 58,
work a circle of 10 beads 15° 1630 around the central
large bead.
31. Using the same thread, attach three single beads
15° 553 in a semi-circle around the outside of the
bead circle fl ower centre.
32. Using the same thread and beads, attach single
beads on either side of the bead bud stems, using the
colour image to guide you.
33. Referring to the three-dimensional elements
in the bead embroidery gallery on page 48, work a
beaded orchid with 10 beads in the fi rst row of each
petal. Use beads 15° 574 and light orchid beading
thread.
TIP
Because your thread may be inclined to snag
while stitching, consider making the three-
dimensional beaded elements, but only attaching
them to the fabric later.
1
88
104
4
9
9
9
9
9
9
72
99
96
6
6
5
5
5
1
1
1
2 7
10
1
8
9
5
89
7