g450 / g460 bump-test and calibration...
TRANSCRIPT
1
January 12, 2013 G450 / G460 Calibration Slide 1
G450 / G460
Bump-test and Calibration Procedures
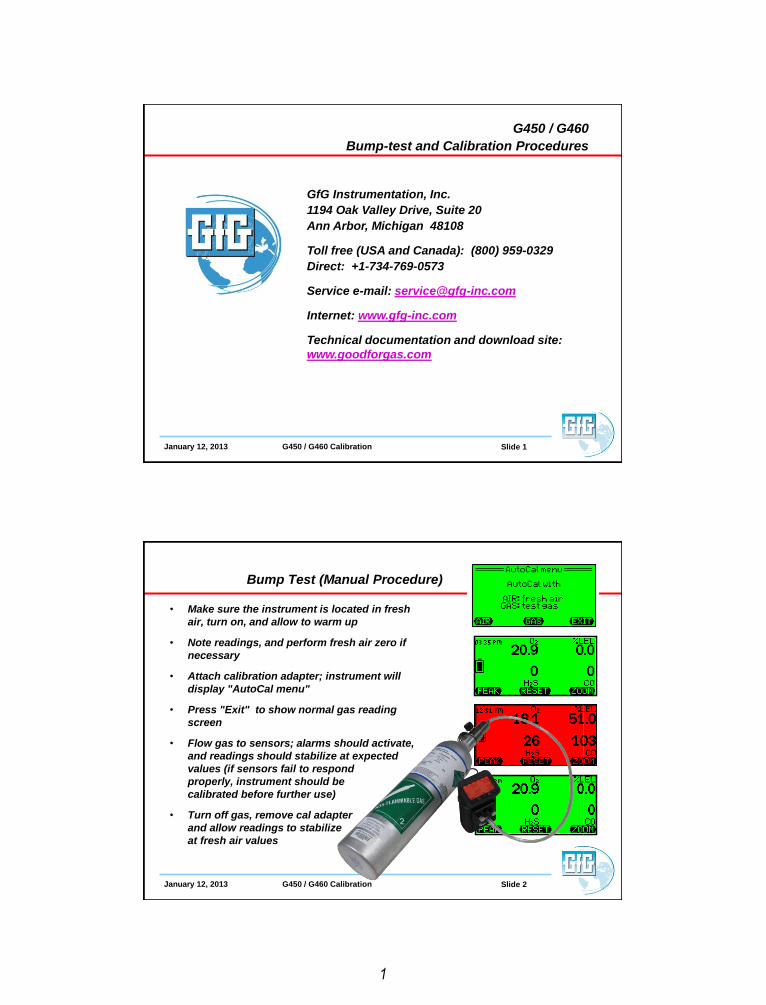
GfG Instrumentation, Inc.
1194 Oak Valley Drive, Suite 20
Ann Arbor, Michigan 48108
Toll free (USA and Canada): (800) 959-0329
Direct: +1-734-769-0573
Service e-mail: [email protected]
Internet: www.gfg-inc.com
Technical documentation and download site:
www.goodforgas.com
January 12, 2013 G450 / G460 Calibration Slide 2
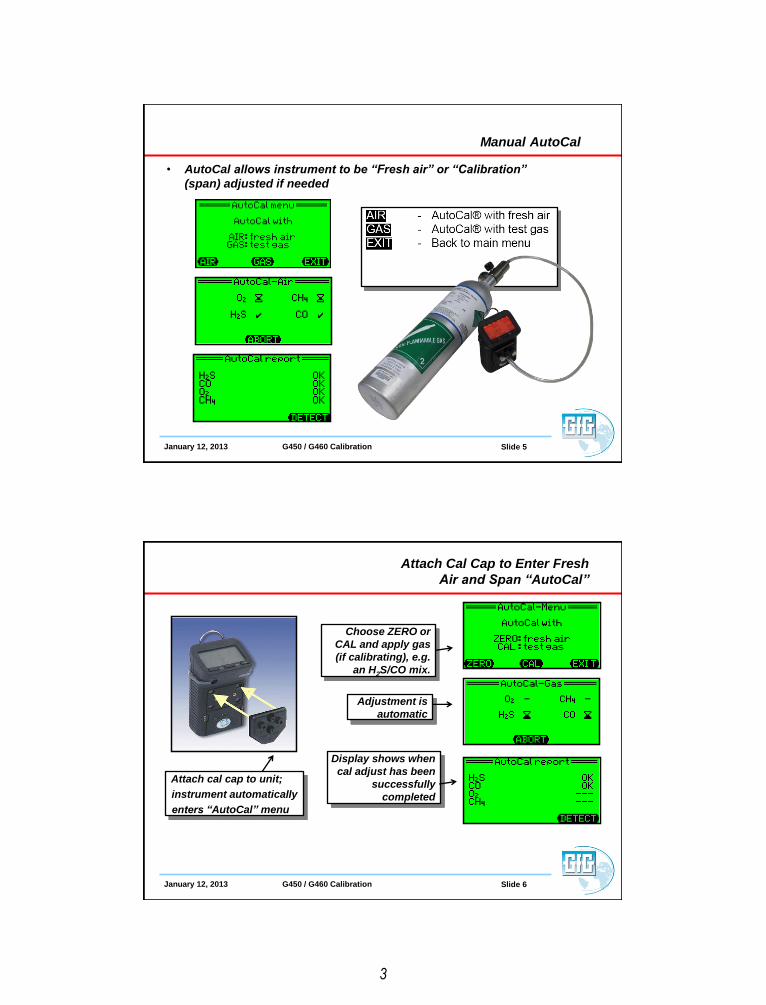
Bump Test (Manual Procedure)
• Make sure the instrument is located in fresh
air, turn on, and allow to warm up
• Note readings, and perform fresh air zero if
necessary
• Attach calibration adapter; instrument will
display "AutoCal menu"
• Press "Exit" to show normal gas reading
screen
• Flow gas to sensors; alarms should activate,
and readings should stabilize at expected
values (if sensors fail to respond
properly, instrument should be
calibrated before further use)
• Turn off gas, remove cal adapter
and allow readings to stabilize
at fresh air values

2
January 12, 2013 G450 / G460 Calibration Slide 3
Bump Test
• Response of
sensors to Quad
Mix (graphs)
• Readings recorded
while instrument
operated in normal
gas reading mode
• Simultaneous
response to all four
gases, as well as
match between cal
gas concentrations
and readings
January 12, 2013 G450 / G460 Calibration Slide 4
Bump Test
• Response of
sensors to Quad
Mix (table)
• Readings
recorded while
instrument
operated in
normal gas
reading mode
• When a sensor is
in alarm readings
are recorded in
red
3
January 12, 2013 G450 / G460 Calibration Slide 5
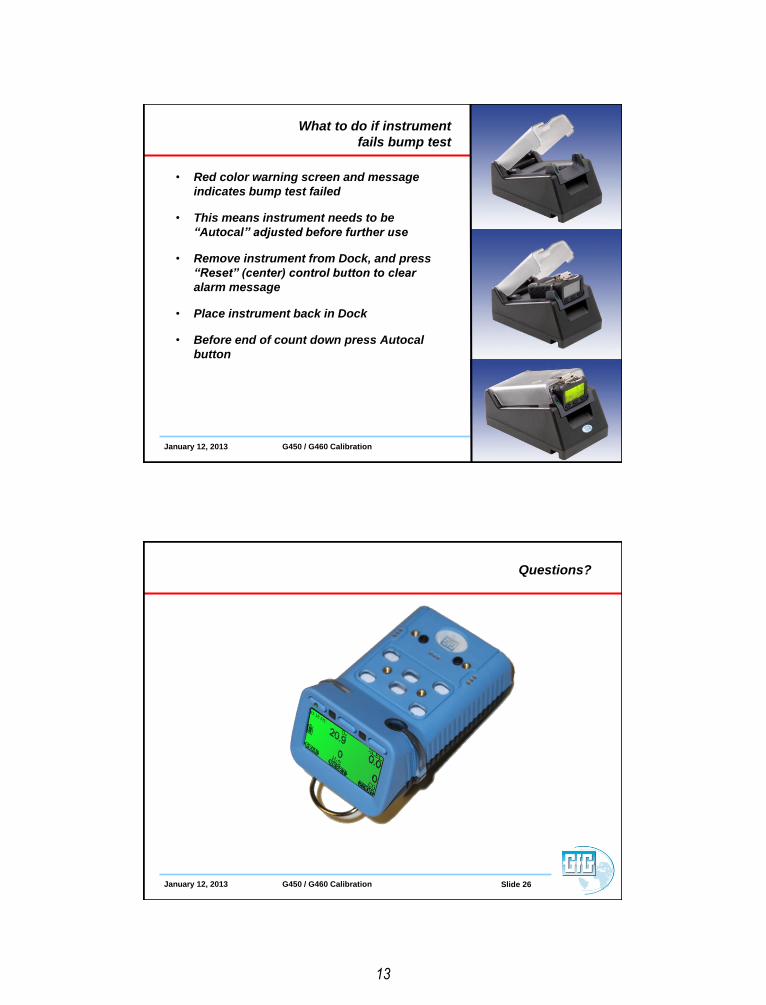
Manual AutoCal
• AutoCal allows instrument to be “Fresh air” or “Calibration”
(span) adjusted if needed
January 12, 2013 G450 / G460 Calibration Slide 6
Attach cal cap to unit;
instrument automatically
enters “AutoCal” menu
Choose ZERO or
CAL and apply gas
(if calibrating), e.g.
an H2S/CO mix.
Adjustment is
automatic
Display shows when
cal adjust has been
successfully
completed
Attach Cal Cap to Enter Fresh
Air and Span “AutoCal”

4
January 12, 2013 G450 / G460 Calibration Slide 7
Choose ZERO or
CAL and apply gas
(if calibrating), e.g.
an H2S/CO mix.
Adjustment is
automatic
Display shows
when AutoCal
adjust has been
successfully
completed
Can also enter “AutoCal” mode by pushing “Reset”
and “Zoom” buttons at same time
Push “Reset” and
“Zoom” at same
time; instrument
automatically enters
“AutoCal” menu
January 12, 2013 G450 / G460 Calibration Slide 8
Calibration gas
concentrations
• Best to use the default cal gas
concentrations
• Default GfG concentrations used to
calibrate instrument:
• 200 ppm CO
• 20 ppm H2S
• 50% LEL methane (CH4)
• If you use different concentrations you
must change instrument settings!

5
January 12, 2013 G450 / G460 Calibration Slide 9
What should you do if you fail
AutoCal adjustment?
• AutoCal adjusts all of the sensors that can be
adjusted based on the calibration gas being
used
• The display will show an “Error” for any sensors
that were not successfully adjusted
• The most common reasons for failing AutoCal
adjustment are:
• Forgetting to attach the cal adapter
• Forgetting to turn on the flow of gas
• Empty calibration gas cylinder
• Wrong cylinder / wrong concentration(s) in calibration gas
• Gas has expired dating and is no longer usable
• Before giving up, check the gas and fittings and
try again
January 12, 2013 G450 / G460 Calibration Slide 10
What if you check the gas and fittings
but still fail AutoCal adjustment?
• To avoid accidentally using the wrong
cal gas, or zeroing the instrument in the
presence of contaminants;
• AutoCal has a maximum permitted
change in adjustment between one fresh
air zero, or one span calibration and the
next
• If the change between the zero or span
setting exceeds this maximum, the
instrument will not properly adjust
• In this case you will need to perform a
single-sensor calibration on the sensor or
sensors that have failed to calibrate
properly

6
January 12, 2013 G450 / G460 Calibration Slide 11
Single sensor calibration
procedure (part 1)
• Use single sensor calibration procedure
whenever you need to calibrate one sensor at a
time
• Press and hold “Reset” button to show the “Main
Menu” then chose “Service”
• For “Security Code” use “1100” as the password
• Choose “Sensors” then select the sensor that
you intend to calibrate
Make sure to use “1100” as
password.
“1100” is a special password
that allows a wider maximum
calibration adjustment
window.
January 12, 2013 G450 / G460 Calibration Slide 12
Single sensor calibration
procedure (part 2)
• A screen will show the menu choices for the
selected sensor
• If the sensor needs to be fresh air adjusted choose
“Zero”
• If the sensor does not need to be fresh air adjusted
choose “Calibrate”

7
January 12, 2013 G450 / G460 Calibration Slide 13
Single sensor calibration
procedure (part 3)
• To perform a fresh air zero:
• Make sure the sensor is exposed to fresh, contaminant free air
• Make sure to remove the cal adapter if you are using the surrounding air to adjust the sensor
• The “Zero” screen will show the current reading
• Press “Start” to begin the fresh air adjustment
• An “OK” indicates when the procedure is complete, after which the screen returns to the “Zero” screen
You MUST save the results of the
fresh air or calibration adjustment or
they will not be saved to the
instrument’s memory!
January 12, 2013 G450 / G460 Calibration Slide 14
Saving single-sensor “Zero” and
“Calibration” results (part 4)
• If you do not deliberately save the results, after a few
minutes the instrument will return to normal operation
and the results will not be saved!
• Press “Exit” to save the results and return to normal
operation
• Each time you press “Exit” you move up one level in
the instrument program
• The final screen will ask whether you want to “Save
new adjustment?”
• Press “Yes” to update the instrument memory

8
January 12, 2013 G450 / G460 Calibration Slide 15
Single sensor calibration
procedure (part 5)
• To perform a span Calibration:
• Choose the sensor to be calibrated
• Choose “Calibrate” from the menu
• Make sure the calibration adapter, calibration gas and regulator are attached to the instrument
• The “Span” calibration screen shows the “CalGas” concentration that the instrument will use to adjust the sensor
• Verify the concentration of gas in the cylinder matches the “CalGas” value
• If needed, you can adjust the “CalGas” value by selecting “Gas” then using the arrow (↑↑ or ↓↓) buttons to change the concentration
• Press “Exit” after you finish adjusting the “CalGas” concentration
January 12, 2013 G450 / G460 Calibration Slide 16
Single sensor calibration
procedure (part 6)
• To perform a span Calibration:
• The “Readout” shows the current sensor reading
• Open the regulator valve to begin flowing gas to the sensor
• The “Readout” number will begin to rise as the sensor is responds to the gas
• Press “Start” to begin the calibration adjustment
• The “Span” calibration screen will show an hour-glass icon while the sensor is being adjusted, then an “OK” message when the adjustment is complete
• Press “Exit” to return the instrument to normal operation.
• Remember to “Save” the new adjustment or the results of the calibration will not be updated to the instrument memory

9
January 12, 2013 G450 / G460 Calibration Slide 17
• Standalone operation:
• No computer required!
• Docking station controlled by
instrument’s control buttons:
• Push "Test" for Bump Test
• Push "Cal" for Auto Cal
• Push "Cancel" to charge only
DS-400 Docking Station for daily bump
check and / or periodic calibration
January 12, 2013 G450 / G460 Calibration Slide 18
DS-404 Multi-inlet Docking Station for
bump check and periodic calibration
• Inlets for 4 cylinders of gas
• Automatic Bump and Cal for 5, 6 and 7
channel instruments
• Supports:
• Quad mix (O2, LEL, CO, H2S)
• 5-mix with SO2
• 5-mix with CO2
• Isobutylene
• HCN
• NO2
• And other individual gases

10
January 12, 2013 G450 / G460 Calibration Slide 19
• Standalone operation: DS-400
does not require connection to
an external computer
• Test results and other
messages displayed on
instrument LCD
Using DS400 Docking Station for daily bump
check and / or periodic calibration
January 12, 2013 G450 / G460 Calibration Slide 20
Using DS-400 Docking Station for daily bump
check and / or periodic calibration
• Using DS-400 allows
instrument to record
"Bump Test" as specific
event in instrument's
memory
• It is possible to set a
"Bump Test Due" date in
the instrument's memory
• Only way to reset next
"Bump Test Due" date is
by means of DS-400
Docking Station

11
January 12, 2013 G450 / G460 Calibration Slide 21
Using DS-400 Docking Station for daily
bump check and / or periodic calibration
• Make sure DS-400 attached to test gas and power
• Make sure the instrument is located in fresh air,
turn on, and allow to warm up
• Note instrument readings, and perform fresh air
zero if necessary
• Place instrument in DS-400
• Docking station controlled by instrument’s
control buttons:
• Push "Test" for Bump Test
• Push "Cal" for Auto Cal
• Push "Cancel" to charge only
January 12, 2013 G450 / G460 Calibration Slide 22
How to do bump test
• Make sure instrument turned on
• Best if instrument allowed to warm-up at least 5 minutes before bump test
• Make sure Docking Station plugged in and connected to gas
• Higher inlet is for fresh air
• Lower inlet is for span gas
• Place instrument in Docking Station
• Instrument display will indicate status and results of test

12
January 12, 2013 G450 / G460 Calibration Slide 23
How to do bump test
• After 10 second count-down; Docking
Station automatically performs bump test
• Instrument screen shows a check mark
besides each sensor as bump check
completed
• If instrument is not removed from Docking
Station; 5 minutes after test completed
instrument automatically turns off and goes
into charging mode
January 12, 2013 G450 / G460 Calibration Slide 24
DS400 Docking Station
Bump-Test includes:
Visual alarm function
Audible alarm function
Time for activation to alarm 1
Time for activationto alarm 2
Time to t50
Calibration Test Includes:
Fresh air zero adjustment
Span calibration adjustment
All test results:
Stored to instrument memory
Stored to flash memory card in Docking Station
13
January 12, 2013 G450 / G460 Calibration Slide 25
What to do if instrument
fails bump test
• Red color warning screen and message
indicates bump test failed
• This means instrument needs to be
“Autocal” adjusted before further use
• Remove instrument from Dock, and press
“Reset” (center) control button to clear
alarm message
• Place instrument back in Dock
• Before end of count down press Autocal
button
January 12, 2013 G450 / G460 Calibration Slide 26
Questions?