g4hup panoramic adaptor installation – ts2000
TRANSCRIPT
G4HUP © 2014
PAT Install TS2k 26 Jan 2014
G4HUP Panoramic Adaptor Installation – TS2000 These instruction cover installation of the PAT board in the 2nd IF of the TS2k – 10.695MHz – this
gives access to all receiver options on the main receiver, including 23cms for TS2k X versions. The process can be followed regardless of whether the TS2k has the Digital Voice Recorder or
Voice Synthesiser options installed.
The TS2k uses different Rx and Tx IF’s, due to its Satellite capability, so there is no need to mute
the PAT board during transmit.
1 Build and test the PAT kit – use a 12v supply and you should measure a gain of
approx 0dB at 10.7MHz.
2 Remove bottom cover from TS2K (10 screws). 3 The 2K has an HF RX antenna input jack (RCA) on the back panel. The centre
contact of the connector appears a metal plate, central in the rear of the connector. If you do not use this, then it is an ideal method of getting the PAT output from the
rig. The use of the socket in the normal mode is controlled by a relay – it is
recommended that this is switched out of use by accessing Menu 18 and setting to OFF (p76 of TS2k manual) when using the socket for PAT output. If you do use it
for an antenna input, then you will need to find an alternative exit from the rig, either by mounting an SMA or similar on the panel, or running a flying lead out.
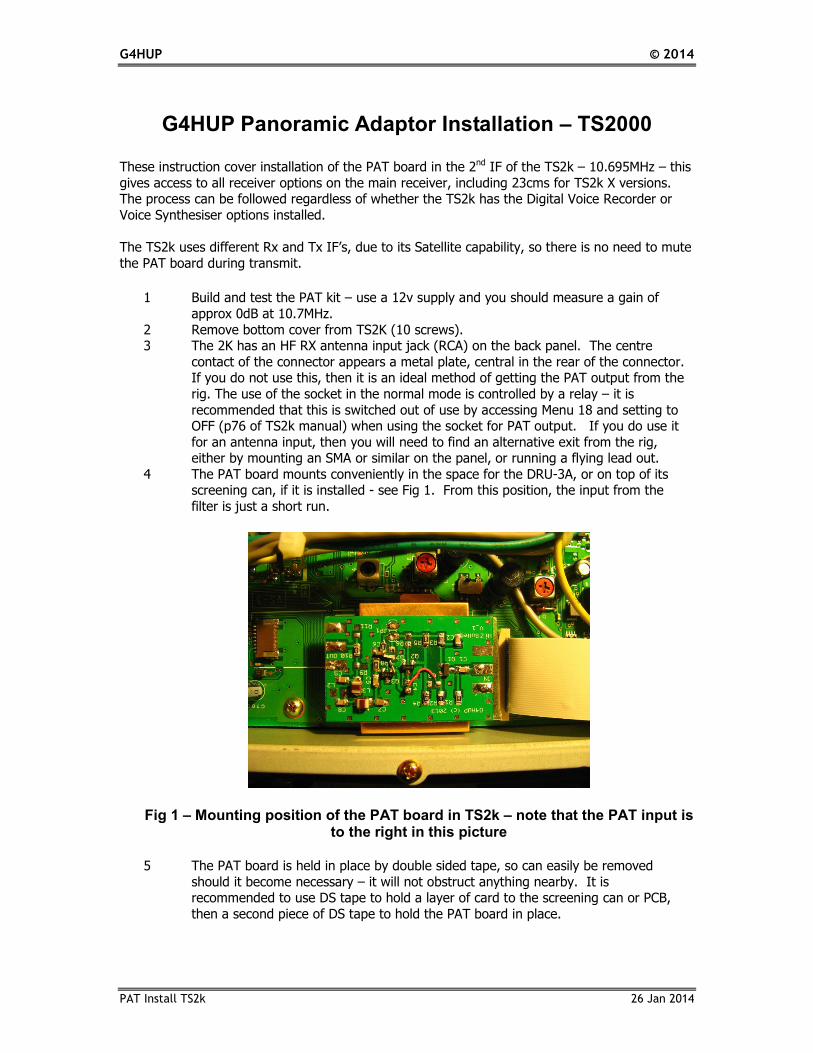
4 The PAT board mounts conveniently in the space for the DRU-3A, or on top of its screening can, if it is installed - see Fig 1. From this position, the input from the
filter is just a short run.
Fig 1 – Mounting position of the PAT board in TS2k – note that the PAT input is to the right in this picture
5 The PAT board is held in place by double sided tape, so can easily be removed
should it become necessary – it will not obstruct anything nearby. It is recommended to use DS tape to hold a layer of card to the screening can or PCB,
then a second piece of DS tape to hold the PAT board in place.

G4HUP © 2014
PAT Install TS2k 26 Jan 2014
6 The RF input to the board comes from the W1 connection, adjacent on the PCB. The
plastic around the connector must be carefully removed so that the connections can be soldered in place – see Fig 2.
7 Prepare a 10cm length of RG178 cable to make the connection between W1 and the PAT input, and a 29cm length to make the output connection to the HF Rx Ant RCA
jack. Do not pigtail the ends, but make them off as in Fig 3. See also details at the
end of this note. 8
Fig 2 – W1 connector with plastic housing removed – PAT board in right foreground
Fig 3 – RG178 cable termination
G4HUP © 2014
PAT Install TS2k 26 Jan 2014
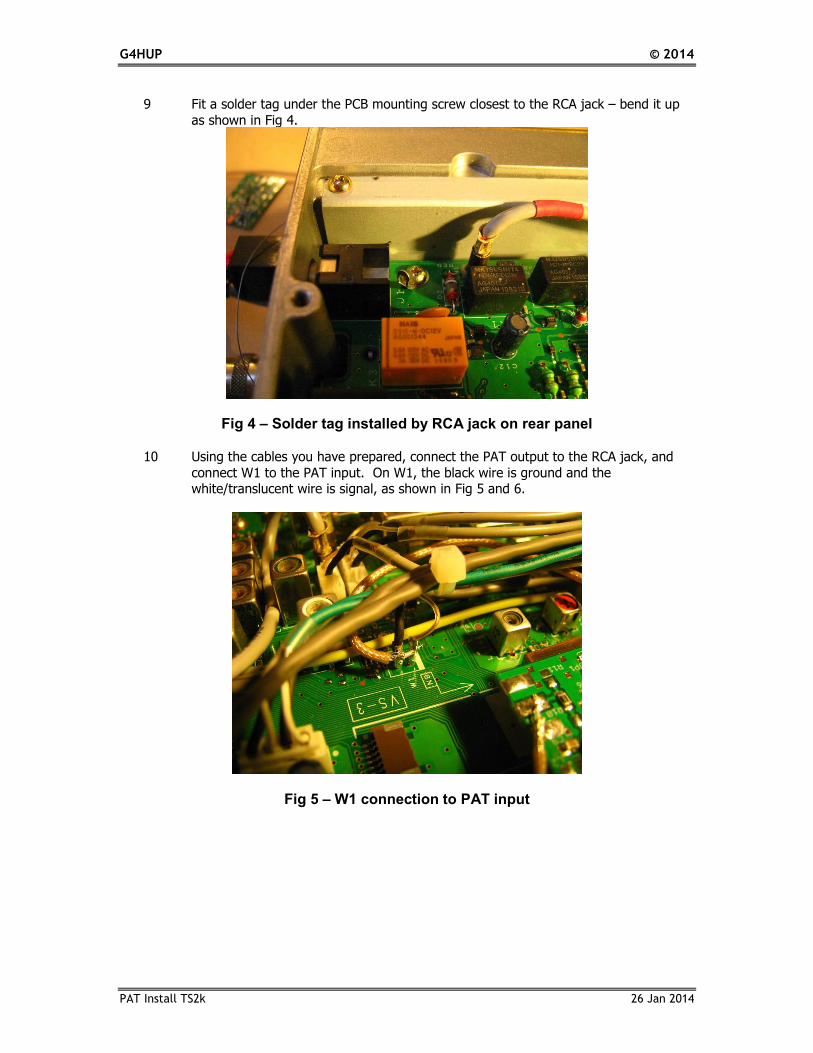
9 Fit a solder tag under the PCB mounting screw closest to the RCA jack – bend it up
as shown in Fig 4.
Fig 4 – Solder tag installed by RCA jack on rear panel
10 Using the cables you have prepared, connect the PAT output to the RCA jack, and
connect W1 to the PAT input. On W1, the black wire is ground and the white/translucent wire is signal, as shown in Fig 5 and 6.
Fig 5 – W1 connection to PAT input
G4HUP © 2014
PAT Install TS2k 26 Jan 2014
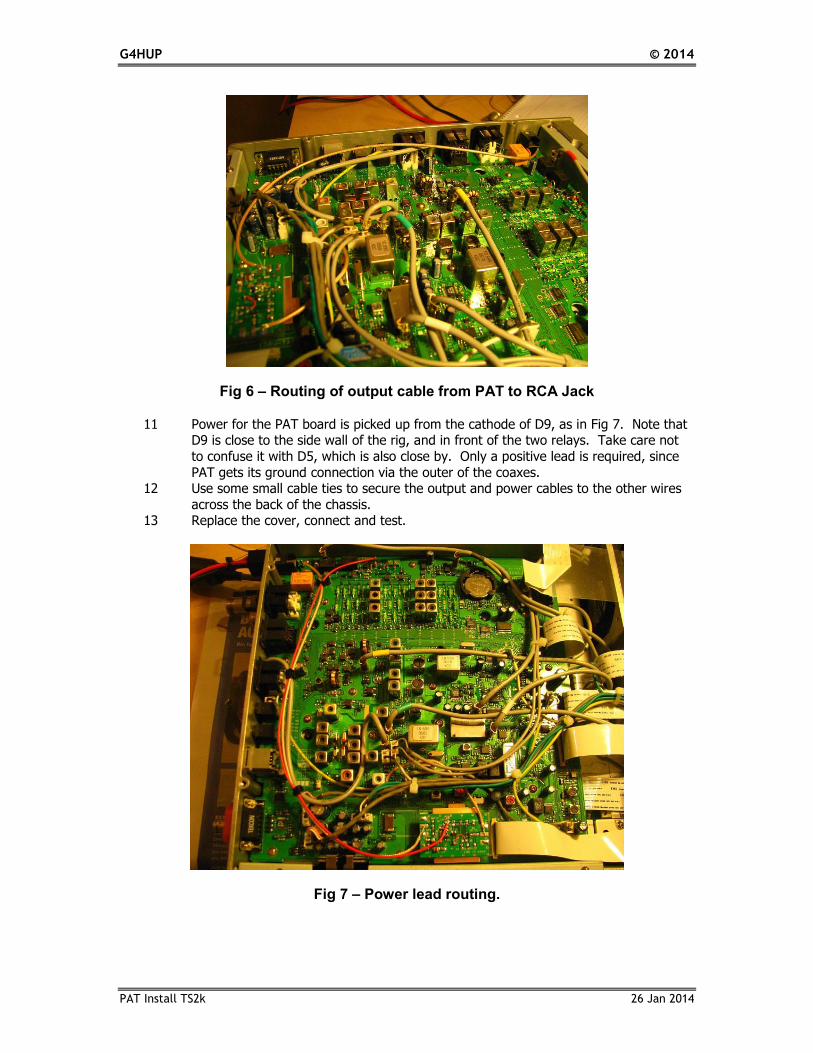
Fig 6 – Routing of output cable from PAT to RCA Jack
11 Power for the PAT board is picked up from the cathode of D9, as in Fig 7. Note that D9 is close to the side wall of the rig, and in front of the two relays. Take care not
to confuse it with D5, which is also close by. Only a positive lead is required, since
PAT gets its ground connection via the outer of the coaxes. 12 Use some small cable ties to secure the output and power cables to the other wires
across the back of the chassis. 13 Replace the cover, connect and test.
Fig 7 – Power lead routing.
G4HUP © 2014
PAT Install TS2k 26 Jan 2014
Terminating PTFE Coax cables These instructions could be used, with suitable modification, to correctly terminate any of the
PTFE coax cables, such as RG142, RG178, RG188, RG196, RG316, etc. The termination method ensures good quality RF connections up to higher microwave frequencies
Using a scalpel, cut the sheath back at the required length.
With a hot iron, tin the exposed braid fully.
With the scalpel, score around the point where the screen must end. Use long-nose pliers to bend the end of the coax outside the score line – the braid will crack on
the score and the excess can be slid off the dielectric. Strip the dielectric to reveal the inner.
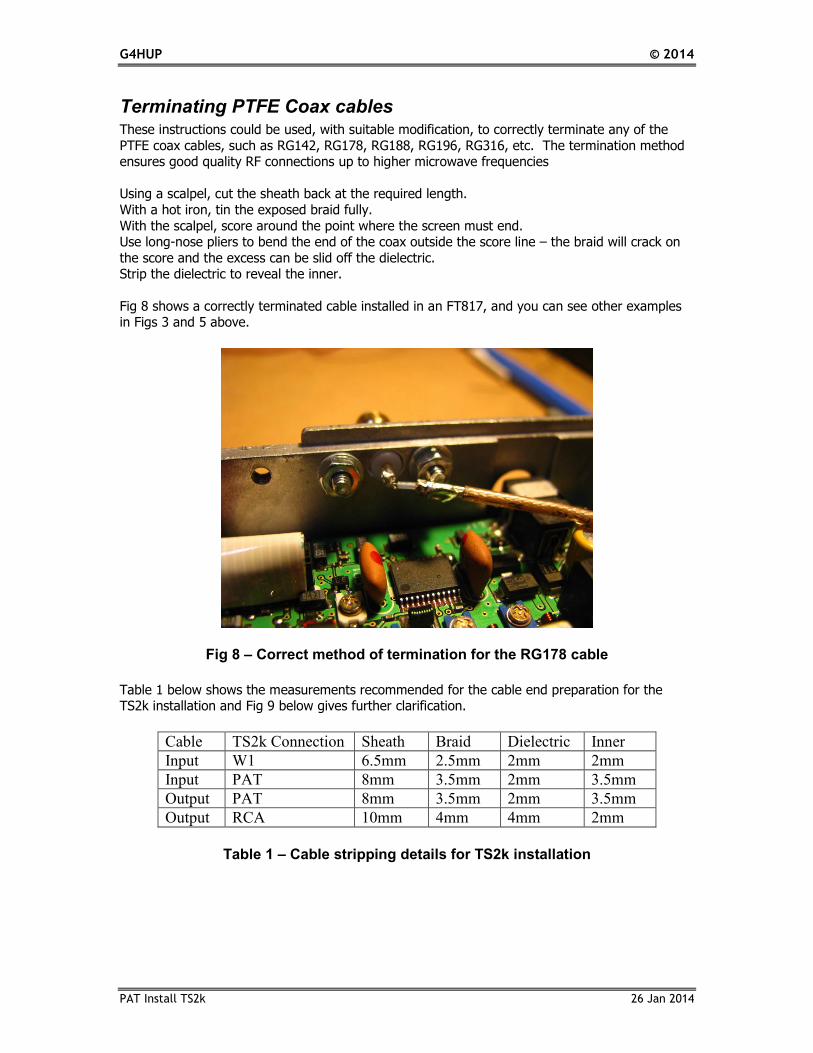
Fig 8 shows a correctly terminated cable installed in an FT817, and you can see other examples in Figs 3 and 5 above.
Fig 8 – Correct method of termination for the RG178 cable
Table 1 below shows the measurements recommended for the cable end preparation for the TS2k installation and Fig 9 below gives further clarification.
Cable TS2k Connection Sheath Braid Dielectric Inner
Input W1 6.5mm 2.5mm 2mm 2mm
Input PAT 8mm 3.5mm 2mm 3.5mm
Output PAT 8mm 3.5mm 2mm 3.5mm
Output RCA 10mm 4mm 4mm 2mm
Table 1 – Cable stripping details for TS2k installation

G4HUP © 2014
PAT Install TS2k 26 Jan 2014
Fig 9 – Cable termination preparation details
Fig 10 – Screen shot of CW activity on 10m
The screen shot in Fig 10 was taken via an SDR-IQ using the PAT board in the TS2000 connected
to a very inefficient antenna. Note that the display is 50kHz wide, and whilst the centre 30kHz is plainly the most sensitive, this demonstrates that useful information can be seen over the full
range.
Other sources
See also www.telepostinc.com/Mods/K4DSP-TS-2000-mod.pdf as a useful source of
information