gameboy color - bad button troubleshootingretrosampling.se/temp/gameboy color bad button...
TRANSCRIPT
GAMEBOY COLOR - BAD BUTTON TROUBLESHOOTINGFirst you need to open the unit up and for this you will need a small phillips screwdriver and the proprietary gameboy
tri-winged, when open the first thing to do is to clean the pcb contact point and also the rubber with alcohol (isopropyl/ethanol), you can detach the screen from the front and lay it firm on the pcb and you can start the gameboy with the back mounted and also with inserted gamepak and batteries, this way you can try the buttons while on, if the now cleaned pcb contact points still have a dark surface that won't go away with rubbing alcohol on it you can scratch
the surface a little bit to remove some of the oxide build up and rub it with more alcohol after, now take one of the rubber buttons and try it on every contact point to see that every button respond and that the respond fast enough. If this
worked good for you, if it didn't then this guide is actually made for you, it's very uncommon but it happens and somewhere on the pcb there's is a break in the one of the pcb's pathways, now this is where the hard part comes in.
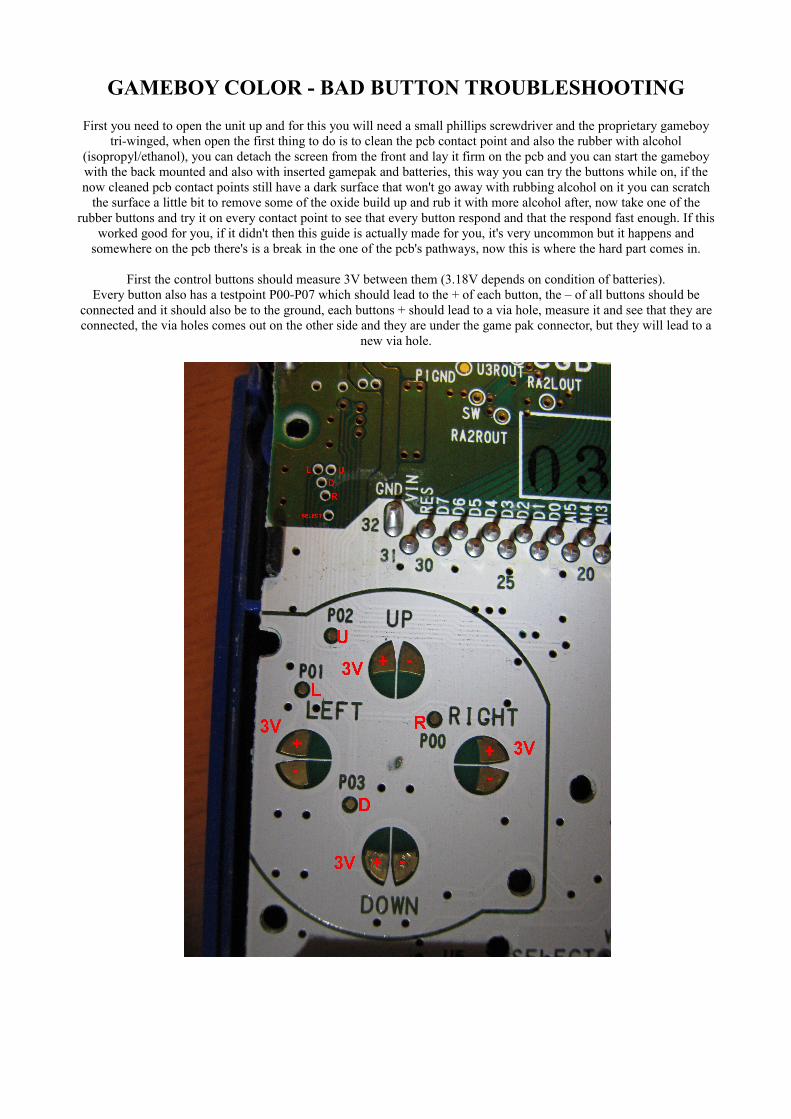
First the control buttons should measure 3V between them (3.18V depends on condition of batteries).Every button also has a testpoint P00-P07 which should lead to the + of each button, the – of all buttons should be
connected and it should also be to the ground, each buttons + should lead to a via hole, measure it and see that they are connected, the via holes comes out on the other side and they are under the game pak connector, but they will lead to a
new via hole.
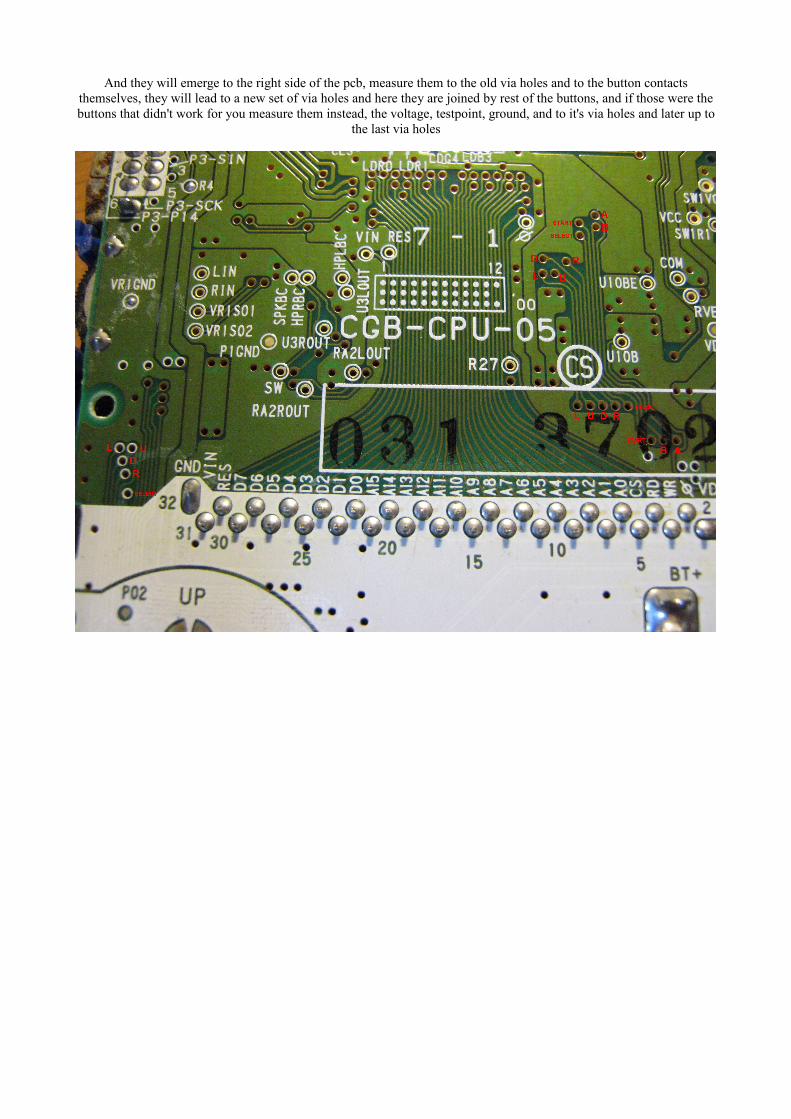
And they will emerge to the right side of the pcb, measure them to the old via holes and to the button contacts themselves, they will lead to a new set of via holes and here they are joined by rest of the buttons, and if those were the buttons that didn't work for you measure them instead, the voltage, testpoint, ground, and to it's via holes and later up to
the last via holes
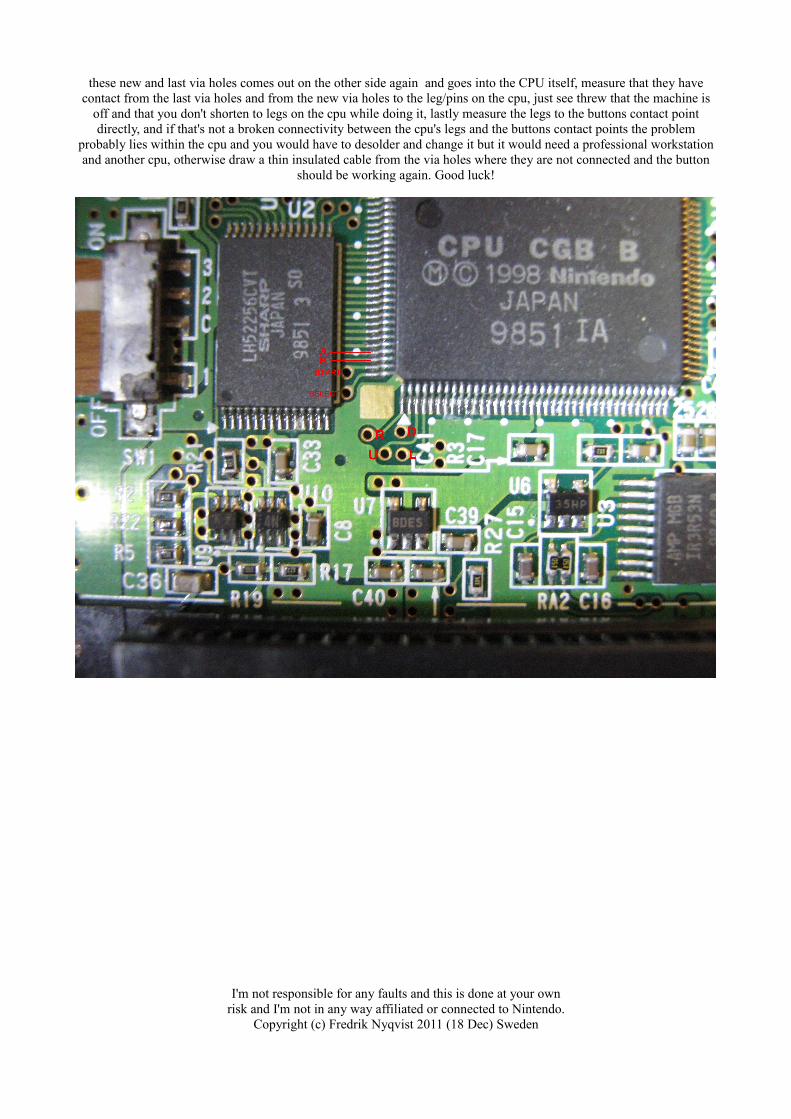
these new and last via holes comes out on the other side again and goes into the CPU itself, measure that they have contact from the last via holes and from the new via holes to the leg/pins on the cpu, just see threw that the machine is
off and that you don't shorten to legs on the cpu while doing it, lastly measure the legs to the buttons contact point directly, and if that's not a broken connectivity between the cpu's legs and the buttons contact points the problem
probably lies within the cpu and you would have to desolder and change it but it would need a professional workstation and another cpu, otherwise draw a thin insulated cable from the via holes where they are not connected and the button
should be working again. Good luck!
I'm not responsible for any faults and this is done at your ownrisk and I'm not in any way affiliated or connected to Nintendo.
Copyright (c) Fredrik Nyqvist 2011 (18 Dec) Sweden