germany finosint kompaktdata.dt-shop.com/fileadmin/media/ga/06839_ga_enu.pdf · • the operator...
TRANSCRIPT
Gebrauchsinformation • User Information • Mode d’emploi Inform ación sobre e l uso • Informazioni d’uso G e b r u i k s a a n w i j z i n g • I n s t r u k c j a
FINO • der feine Unterschied • the fine difference • la fine différence • la fina diverencia • la fine differenza
Original FINO Germany
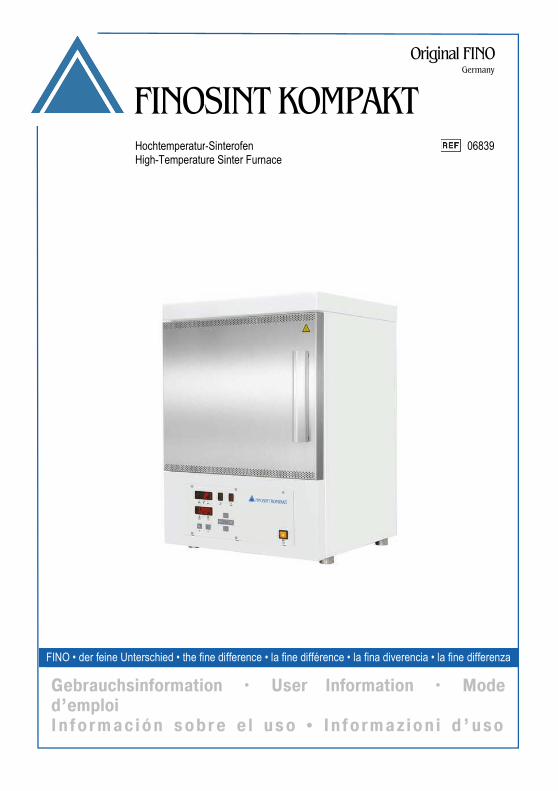
FINOSINT KOMPAKT
Hochtemperatur-Sinterofen High-Temperature Sinter Furnace
06839
2
Version 1/2017. Read the User Manual prior to commencing work.
TABLE OF CONTENTS
1. General Information • Limitation of liability • Responsibilities of the operator
2. Documentation • Content and structure • Labelling scheme • Formatting and symbols
3. Safety • Requirements for personnel
4. Transport, packaging, storage • Transport • Packaging • Storage
5. Technical description • Function • Intended use • Potential misuse
6. Technical Data
7. Installation • Installation location • Local installation
8. Operation • Operating elements and displays • Switching on the sintering oven
9. Initial commissioning • Feeding the sintering oven • Selecting and loading a heating program • Starting/stopping a
heating program • Removing the sintering dish from the heating oven • Programming the
heating phases • Programming phase temperatures, holding times • Saving the heating
program • Starting a heating program automatically • Preparing the sintering aid •
Recommended filling of the standard sintering dish • Sintering with the sintering disc
10. Basic settings • Parameter settings • Setting the day and the time • Switching off the sintering oven
11. RS-232 interface
12. Care and maintenance • Service programs
13. Faults and error messages • Safety • Faults • Error messages
14. Decommissioning
15. Disposal
1. General Information 1.1 Limitation of liability
The content of this operating manual has been created taking the applicable laws and standards into ac-count. The unit has been developed using state-of-the-art technology.
1.2 Responsibilities of the operator The unit is used for commercial purposes. The operator of the unit is therefore subject to the statutory obliga-tions relating to occupational safety. In addition to the safety instructions in this operating manual, the regulations on safety, accident prevention and environmental protection that apply to the unit's field of use must be complied with. In particular, the following apply:
• The operator must be familiar with the applicable occupational safety regulations.
• The operator must ensure that all employees who use the unit have read and understood this operating manual.
• The operator must also train personnel at regular intervals and inform them of the dangers that can arise when using the unit.
• The operator must provide personnel with the necessary protective equipment.
• The operator must have all safety devices checked regularly for operability and completeness.
NOTICE
The manufacturer assumes no liability for damage resulting from:
➤ Disregard/non-observance of the operating manual
➤ Intentional misuse
➤ Use other than as intended
➤ Operation by untrained personnel
➤ Operation by lay persons (to carry out maintenance work, etc.)
➤ Technical modifications to the unit that have not been agreed with the manu-
facturer
➤ Use of replacement parts that have not been approved by the manufacturer
4
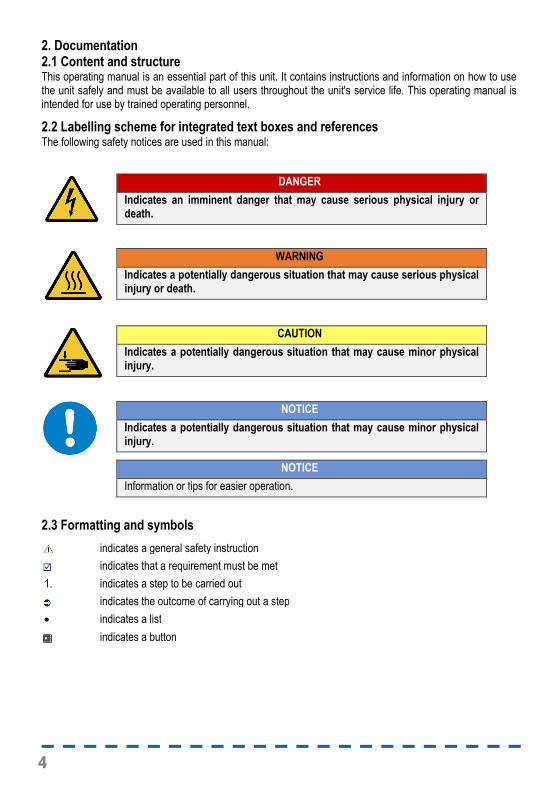
2. Documentation 2.1 Content and structure This operating manual is an essential part of this unit. It contains instructions and information on how to use the unit safely and must be available to all users throughout the unit's service life. This operating manual is intended for use by trained operating personnel.
2.2 Labelling scheme for integrated text boxes and references The following safety notices are used in this manual:
2.3 Formatting and symbols
indicates a general safety instruction
indicates that a requirement must be met
1. indicates a step to be carried out
indicates the outcome of carrying out a step
• indicates a list
indicates a button
DANGER
Indicates an imminent danger that may cause serious physical injury or death.
WARNING
Indicates a potentially dangerous situation that may cause serious physical injury or death.
CAUTION
Indicates a potentially dangerous situation that may cause minor physical injury.
NOTICE
Indicates a potentially dangerous situation that may cause minor physical injury.
NOTICE
Information or tips for easier operation.
5
ENG
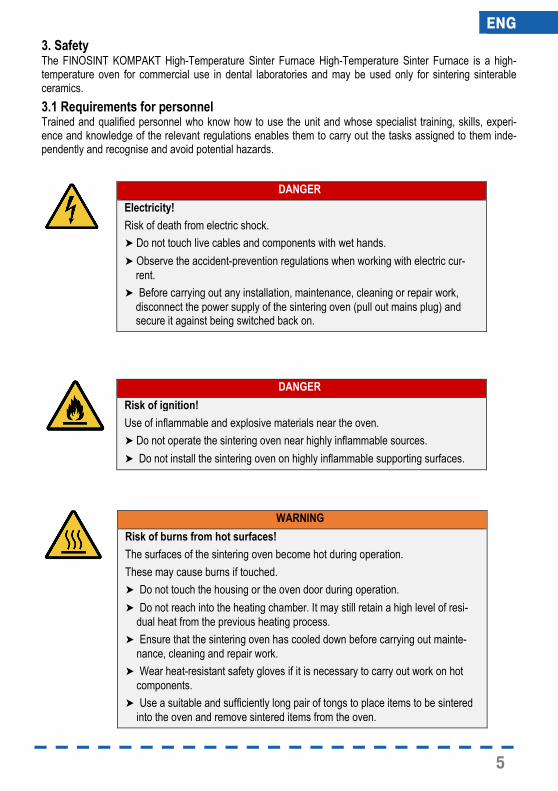
3. Safety The FINOSINT KOMPAKT High-Temperature Sinter Furnace High-Temperature Sinter Furnace is a high-temperature oven for commercial use in dental laboratories and may be used only for sintering sinterable ceramics.
3.1 Requirements for personnel Trained and qualified personnel who know how to use the unit and whose specialist training, skills, experi-ence and knowledge of the relevant regulations enables them to carry out the tasks assigned to them inde-pendently and recognise and avoid potential hazards.
DANGER
Electricity!
Risk of death from electric shock.
➤ Do not touch live cables and components with wet hands.
➤ Observe the accident-prevention regulations when working with electric cur-
rent.
➤ Before carrying out any installation, maintenance, cleaning or repair work,
disconnect the power supply of the sintering oven (pull out mains plug) and secure it against being switched back on.
DANGER
Risk of ignition!
Use of inflammable and explosive materials near the oven.
➤ Do not operate the sintering oven near highly inflammable sources.
➤ Do not install the sintering oven on highly inflammable supporting surfaces.
WARNING
Risk of burns from hot surfaces!
The surfaces of the sintering oven become hot during operation.
These may cause burns if touched.
➤ Do not touch the housing or the oven door during operation.
➤ Do not reach into the heating chamber. It may still retain a high level of resi-
dual heat from the previous heating process.
➤ Ensure that the sintering oven has cooled down before carrying out mainte-
nance, cleaning and repair work.
➤ Wear heat-resistant safety gloves if it is necessary to carry out work on hot
components.
➤ Use a suitable and sufficiently long pair of tongs to place items to be sintered
into the oven and remove sintered items from the oven.
6
CAUTION
Incorrect operation!
No liability is assumed for damage that may be caused by misuse, incorrect operation, incorrect connections or improper maintenance/repair work carried out by untrained personnel. All warranty services are also excluded in such cases.
The unit must not be used if it or the mains cable becomes damaged and no longer functions correctly. In this case contact the manufacturer immediately.
For your own safety and to increase the service life of your unit, use only original replacement parts.
To ensure safe operation of the sintering oven, regional regulations (e.g. acci-dent-prevention regulations) apply in addition to the instructions in this operating manual. The former must be made available by the operator of the unit. The safety notices on the sintering ovenmust be kept in a legible condition.
NOTICE
This operating manual must be read and understood by each user before working on and with the unit.
The operating manual must be kept for the specified service life of the sintering oven.
7
ENG
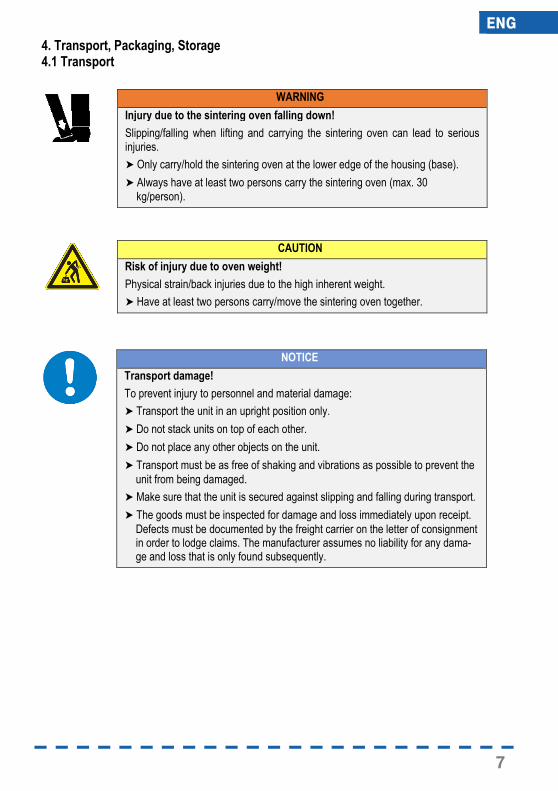
4. Transport, Packaging, Storage 4.1 Transport
WARNING
Injury due to the sintering oven falling down!
Slipping/falling when lifting and carrying the sintering oven can lead to serious injuries.
➤ Only carry/hold the sintering oven at the lower edge of the housing (base).
➤ Always have at least two persons carry the sintering oven (max. 30 kg/person).
CAUTION
Risk of injury due to oven weight!
Physical strain/back injuries due to the high inherent weight.
➤ Have at least two persons carry/move the sintering oven together.
NOTICE
Transport damage!
To prevent injury to personnel and material damage:
➤ Transport the unit in an upright position only.
➤ Do not stack units on top of each other.
➤ Do not place any other objects on the unit.
➤ Transport must be as free of shaking and vibrations as possible to prevent the
unit from being damaged.
➤ Make sure that the unit is secured against slipping and falling during transport.
➤ The goods must be inspected for damage and loss immediately upon receipt.
Defects must be documented by the freight carrier on the letter of consignment in order to lodge claims. The manufacturer assumes no liability for any dama-ge and loss that is only found subsequently.
8
3.2 Packaging
3.3 Storage
4. Technical description 4.1 Function The FINOSINT KOMPAKT High-Temperature Sinter Furnace is used to fire sinterable ceramics.
The product to be sintered is placed in the sintering dish and set on the support pins in the combustion chamber.The heat-up process starts after entering the heating parameters and pressing the Start button.
Once the heating program has ended and the sintering oven has cooled down, the finished product can be removed from the oven.
Heating chamber
The product is sintered in the heating chamber. This consists of two different ceramic insulation layers and is operated using four heating elements connected in series. The outer insulating layer is designed for tempera-tures up to 1200 °C; the inner layer for temperatures up to 1650 °C.
Oven door
The oven door consists of a two-part ceramic door panel. A safety switch disconnects the heating current as soon as the oven door is opened.
The oven door has an electronic lock and can be opened only if the temperature is below 300 °C.
Oven housing
The oven housing consists of steel plate coated with plastic on both the inside and the outside and is cooled by a permanent ventilation system.
NOTICE
The packaging protects the sintering oven against transport damage, corrosion and other forms of damage. Only remove it shortly before initial commissioning and store it in dry conditions for later reuse.
NOTICE
Temperature damage!
To prevent temperature damage:
➤ Store the unit only at temperatures between +5 and +40 °C.
➤ Always store the unit in dry and dust-free conditions.
➤ Avoid exposure to direct sunlight.
➤ Avoid mechanical vibrations.
9
ENG
Program controller
The program controller has a finishing-time setting that can be used to specify a day and time for the program to finish. The switch-on time is calculated automatically so that the heating process is stopped at the required time and the sintered item can be removed.
Operating parameters and heating programs are stored in a non-volatile memory and are retained even if the power supply fails.
The set target temperature is maintained within an accuracy of ± 1 °C. A temperature sensor integrated into the heating chamber measures the temperature of the chamber close to the product.
A thermocouple fail-safe prevents the sintering oven from overheating if the temperature sensor becomes defective.
4.2 Intended use The FINOSINT KOMPAKT High-Temperature Sinter Furnace is a high-temperature oven for commercial application in dental laboratories and may be used only for sintering sinterable ceramics using original spare parts.
At a total output >1kW, no limit values for the harmonics apply.
4.3 Potential misuse • Operation by untrained and insufficiently qualified personnel.
• Use of products that have not been approved by the manufacturer.
• Use of replacement parts that have not been approved by the manufacturer.
• Any use not in accordance with the declaration of conformity.
• Technical modifications to and conversions of the unit that have not been approved by the manufacturer.
NOTICE
The protection of persons can no longer be ensured and no liability can be assu-med for damage that is caused by misuse, incorrect operation, incorrect connec-tions or improper maintenance/repair work carried out by untrained personnel. All warranty services are also excluded in such cases.
The use of spare and wearing parts that have not been procured from the manu-facturer will render the approval and guarantee of the sintering oven null and void.
10
5. Technical Data
General information Dimensions (W x D x H) 400 x 400 x 600 mm Combustion chamber volume 1 dish ø 100 x 35 mm Max. temperature 1550 °C Weight 55 kg Minimum clearance around the sintering oven 50 mm Connected electrical load Voltage supply 200-240 V Frequency 50/60 Hz Max. power consumption 1700 W Protection Device end 10 AT Customer end Connection to a separate electrical circuit with a 16-A
circuit breaker, type K or type Z (other types of circuit breaker depending on the country of use)
Protection class IP 20 (protection against the ingress of foreign bo-dies, but not against the ingress of water)
Operating conditions Installation area Indoors only (in dry rooms) Temperature range +5 to +40 °C Relative air humidity Up to 31 °C: 80% Maximum air humidity Up to 40 °C: 50% No condensation Height Max. 2000 m Pollution degree 2
11
ENG
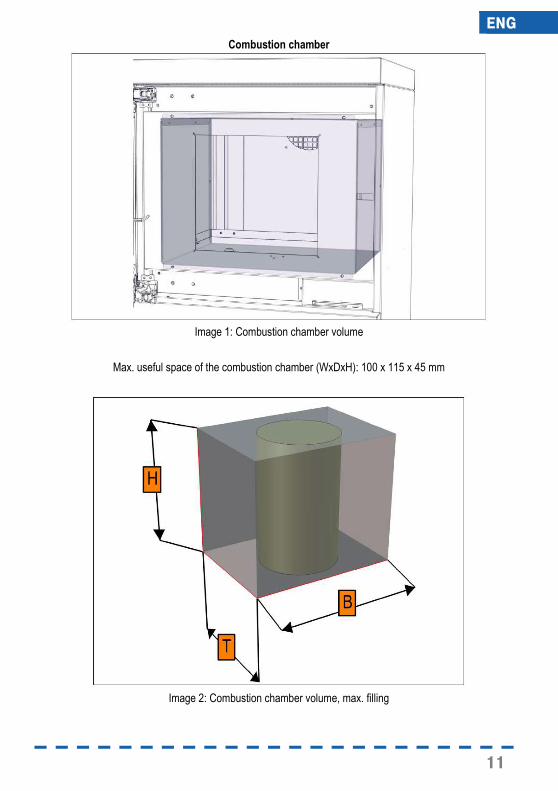
Combustion chamber
Image 1: Combustion chamber volume
Max. useful space of the combustion chamber (WxDxH): 100 x 115 x 45 mm
Image 2: Combustion chamber volume, max. filling
12
6. Installation 6.1 Installation location The FINOSINT KOMPAKT High-Temperature Sinter Furnace is designed as a table-top unit. To ensure stability, we recommend a level surface of at least 50 cm x 60 cm that can support a load of up to 60 kg. Installation conditions
➤ Always install the sintering oven in dry rooms that are as dust-free as possible and make sure that liquids
cannot penetrate the unit.
➤ Highly inflammable and combustible gases and liquids must not be stored in the installation rooms.
➤ Do not place any combustible and inflammable objects near the sintering oven.
➤ Keep a distance of 50 mm around the sintering oven for sufficient cooling.
1. Align the supporting surface horizontally.
Lift and carry the sintering oven only at the unit base.
2. Place the sintering oven on the supporting surface.
Make sure the surface is non-slip.
CAUTION
Tipping loads!
Supporting surface with an insufficient load-bearing capacity.
➤ When installing the sintering oven, make sure that the supporting surface has
a sufficient load-bearing capacity.
CAUTION
Risk of injury due to oven weight!
Physical strain/back injuries due to the high inherent weight.
➤ Have at least two persons carry/move the sintering oven together (max. 30 kg
load bearing capacity/person).
CAUTION
Risk of overheating!
In the event of overheating, the electronic system will switch the heater off.
➤ Make sure that the air vents remain clear on all sides.
13
ENG
Electrical connection 7.2 Local installation
The sintering oven requires its own electrical circuit.
The building's electrical circuit must have a type-K or type-Z circuit breaker with a rated current of at least 16 A (other types of circuit breaker depending on the country of use).
An additional residual-current circuit breaker (designed for 30 mA tripping current) must be installed.
To ensure electrically safe operation, the sintering oven requires a protective earth conductor connected to the power socket.
When selecting the installation location, ensure that the accompanying mains cable is 2.0 m long. Ex-tending the cable is not permitted. The supply voltage must be within the rated voltage range of 200 - 240 V (see section „Technical Data“).
WARNING
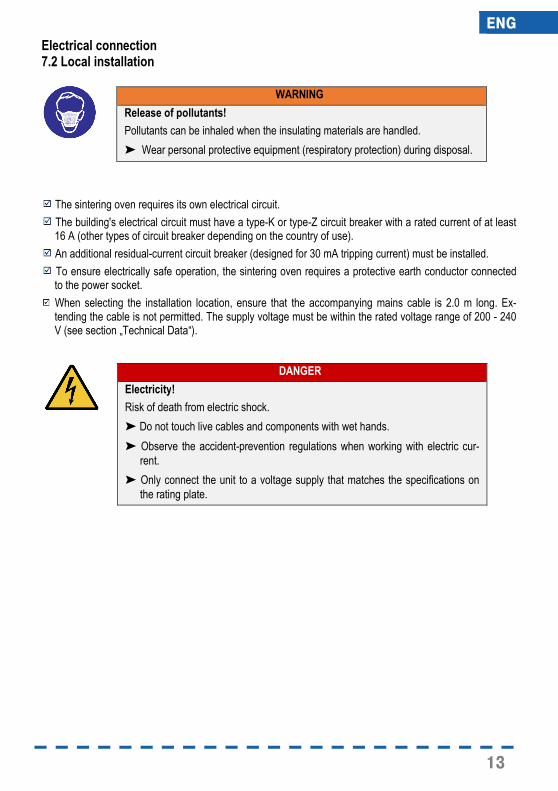
Release of pollutants!
Pollutants can be inhaled when the insulating materials are handled.
➤ Wear personal protective equipment (respiratory protection) during disposal.
DANGER
Electricity!
Risk of death from electric shock.
➤ Do not touch live cables and components with wet hands.
➤ Observe the accident-prevention regulations when working with electric cur-
rent.
➤ Only connect the unit to a voltage supply that matches the specifications on
the rating plate.
14
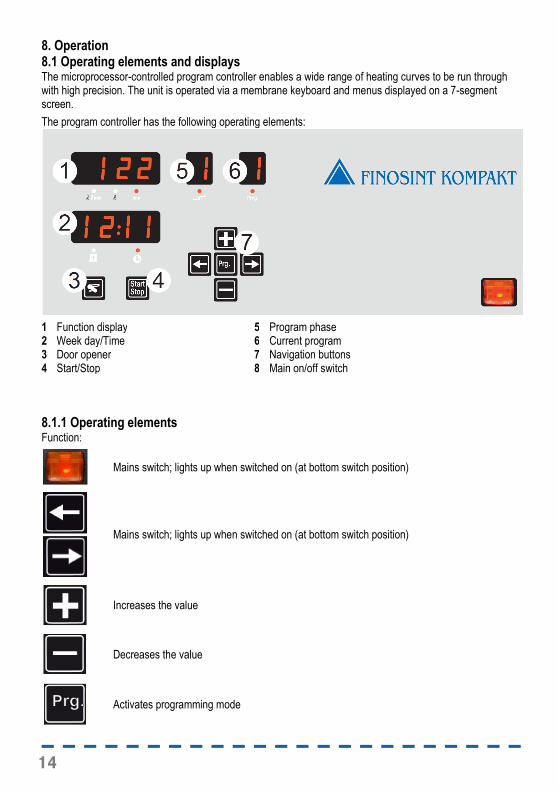
8. Operation 8.1 Operating elements and displays The microprocessor-controlled program controller enables a wide range of heating curves to be run through with high precision. The unit is operated via a membrane keyboard and menus displayed on a 7-segment screen.
The program controller has the following operating elements:
1 Function display 5 Program phase 2 Week day/Time 6 Current program 3 Door opener 7 Navigation buttons 4 Start/Stop 8 Main on/off switch
8.1.1 Operating elements Function:
Mains switch; lights up when switched on (at bottom switch position)
Mains switch; lights up when switched on (at bottom switch position)
Increases the value
Decreases the value
Activates programming mode

15
ENG
Starts/stops the program
Activates the door opener
8.1.2 Displays Function:
In heating mode: Displays the oven temperature/holding time.
In programming mode: Displays the increase rate/holding temperature/holding time.
Displays the current program phase.
Displays the current program number.
In standby mode: Displays the day (1 = Mon, 2 = Tue, 3 = Wed, etc.) and time (hh:mm).
In heating mode: Displays the finishing time.
LED lights up orange when finishing-time mode is activated.
LED lights up greenwhen heating mode is activated.
Oven door is open.

16
8.2 Switching on the sintering oven 1. Connect the voltage supply.
2. Switch the sintering ovenon at the mains switch.
The mains-switch indicator lamp lights up.
The current temperature of the oven is displayed after approx. three seconds.
9. Initial commissioning
9.1 Feeding the sintering oven
The ceramic door panel is extremely porous and sensitive to scratching and impacts.
1 Switch the sintering oven on.
2 Press the door opener button.
The electronic door lock is released for three seconds and the oven door can be opened.
3 Place the supporting stone in the sintering oven.
4 Fill the standard sintering dish included in the scope of delivery (you can find more information about filling the sintering dish in the section „9.9 Preparing the sintering aid“).
5 Place the item to be sintered into the standard sintering dish.
6 Once filled, use a pair of tongs to place the standard sintering dish on the support pins.
7 Close the oven door.
8 Start a firing program by pressing the Start/Stop button.
NOTICE
Check the basic settings of the sintering oven (see “10. Basic settings”).
NOTICE
The oven door has an electronic lock and can only be opened if the temperature is below 300 °C.

17
ENG
9.2 Selecting and loading a heating program
1 Press the Right-hand arrow button until the LED under the "Prog." display lights up.
2 Select a program (1 - 9) using the and buttons.
9.3 Starting/stopping a heating program Requirements:
The sintering oven has been fed
The heating program has been loaded
1 Press the Start/Stop button.
The heating program starts.
While the program is running:
The function display shows the oven temperature or the remaining holding time.
The day/time display shows the finishing time of the program.
The respective target temperature can be displayed by pressing the Right-hand arrow button.
The program can be stopped at any time by pressing the Start/Stop button.
Pressing the Start/Stop button again restarts the program from the beginning.
9.3 Removing the sintering dish from the heating oven Requirements:
The sintering oven has cooled down to 300 °C to enable the oven door to be opened.
1 Guide the tongs under the sintering dish and lift it off the support pins. 2 Place the sintering dish on a suitable heat-resistant surface.
18
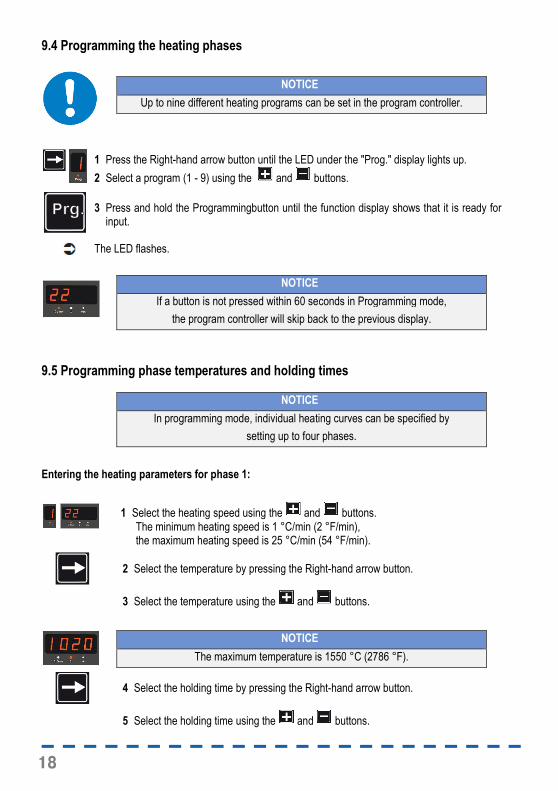
9.4 Programming the heating phases
1 Press the Right-hand arrow button until the LED under the "Prog." display lights up.
2 Select a program (1 - 9) using the and buttons.
3 Press and hold the Programmingbutton until the function display shows that it is ready for input.
The LED flashes.
9.5 Programming phase temperatures and holding times
Entering the heating parameters for phase 1:
2 Select the temperature by pressing the Right-hand arrow button.
3 Select the temperature using the and buttons.
4 Select the holding time by pressing the Right-hand arrow button.
5 Select the holding time using the and buttons.
NOTICE
Up to nine different heating programs can be set in the program controller.
NOTICE
If a button is not pressed within 60 seconds in Programming mode,
the program controller will skip back to the previous display.
NOTICE
In programming mode, individual heating curves can be specified by
setting up to four phases.
1 Select the heating speed using the and buttons. The minimum heating speed is 1 °C/min (2 °F/min), the maximum heating speed is 25 °C/min (54 °F/min).
NOTICE
The maximum temperature is 1550 °C (2786 °F).
19
ENG
6 Navigate to the level selection using the Right-hand arrow button.
The levels are selected using the and buttons.
7 Carry out steps 1 to 5 for additional phases.
9.6 Saving the heating program After programming the specific heating parameters for a phase, you can exit programming mode.
1 To exit programming mode, press and hold the Program button until the LED under the function display lights up permanently.
The program has been permanently saved.
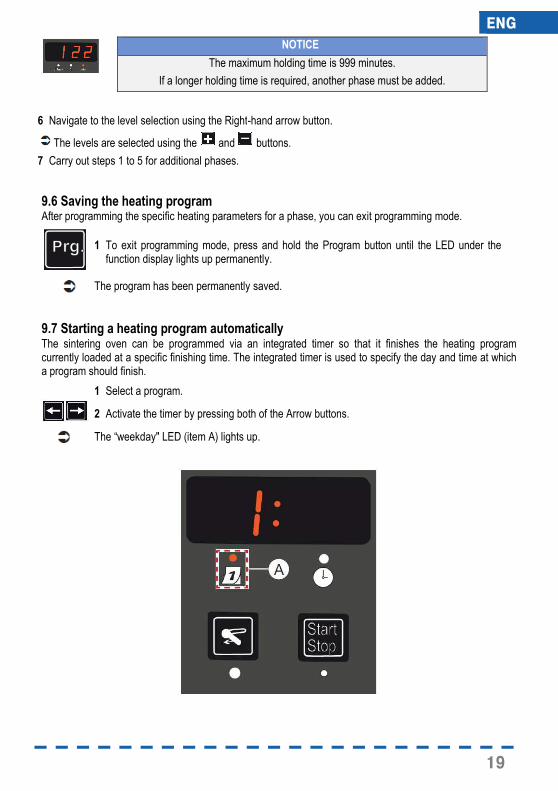
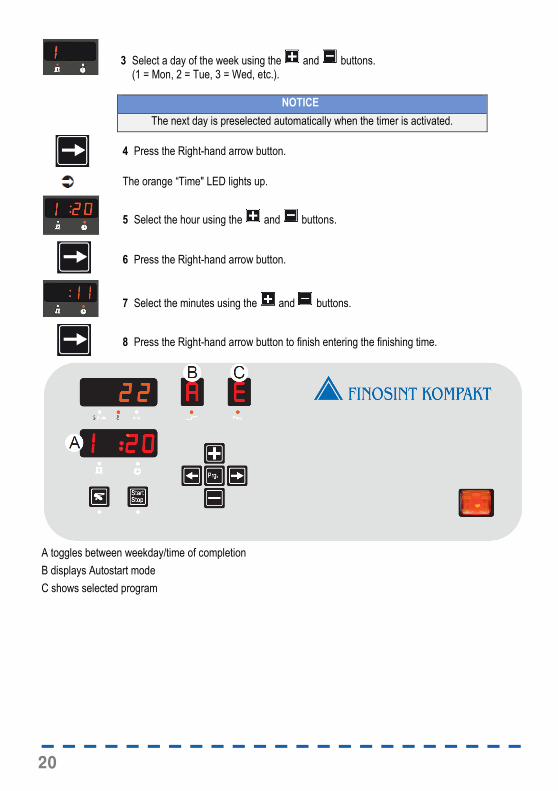
9.7 Starting a heating program automatically The sintering oven can be programmed via an integrated timer so that it finishes the heating program currently loaded at a specific finishing time. The integrated timer is used to specify the day and time at which a program should finish.
1 Select a program.
2 Activate the timer by pressing both of the Arrow buttons.
The “weekday" LED (item A) lights up.
NOTICE
The maximum holding time is 999 minutes.
If a longer holding time is required, another phase must be added.
20
4 Press the Right-hand arrow button.
The orange “Time" LED lights up.
5 Select the hour using the and buttons.
6 Press the Right-hand arrow button.
7 Select the minutes using the and buttons.
8 Press the Right-hand arrow button to finish entering the finishing time.
A toggles between weekday/time of completion
B displays Autostart mode
C shows selected program
3 Select a day of the week using the and buttons. (1 = Mon, 2 = Tue, 3 = Wed, etc.).
NOTICE
The next day is preselected automatically when the timer is activated.
21
ENG
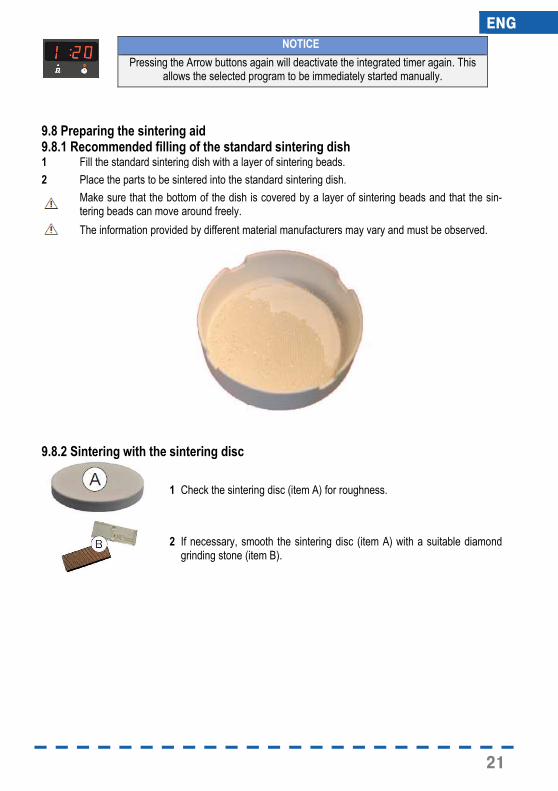
9.8 Preparing the sintering aid 9.8.1 Recommended filling of the standard sintering dish 1 Fill the standard sintering dish with a layer of sintering beads.
2 Place the parts to be sintered into the standard sintering dish.
Make sure that the bottom of the dish is covered by a layer of sintering beads and that the sin-tering beads can move around freely.
The information provided by different material manufacturers may vary and must be observed.
9.8.2 Sintering with the sintering disc
1 Check the sintering disc (item A) for roughness.
2 If necessary, smooth the sintering disc (item A) with a suitable diamond grinding stone (item B).
NOTICE
Pressing the Arrow buttons again will deactivate the integrated timer again. This allows the selected program to be immediately started manually.
22
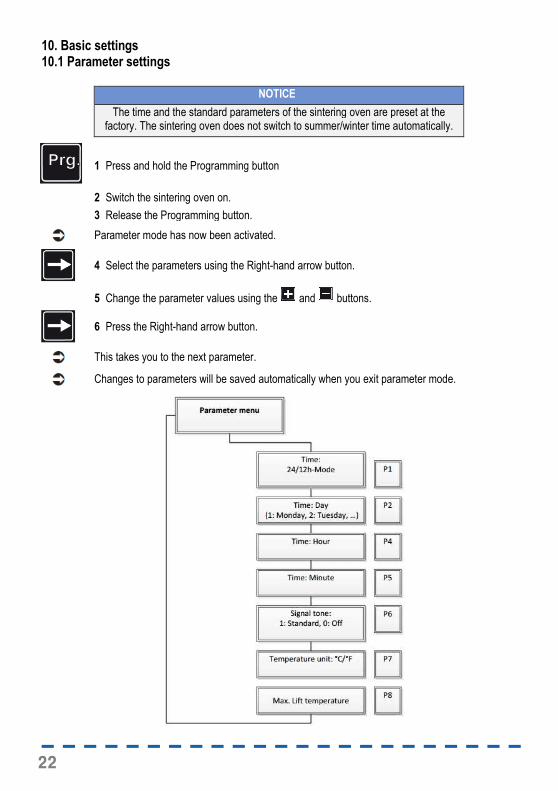
10. Basic settings 10.1 Parameter settings
1 Press and hold the Programming button
2 Switch the sintering oven on.
3 Release the Programming button.
Parameter mode has now been activated.
4 Select the parameters using the Right-hand arrow button.
5 Change the parameter values using the and buttons.
6 Press the Right-hand arrow button.
This takes you to the next parameter.
Changes to parameters will be saved automatically when you exit parameter mode.
NOTICE
The time and the standard parameters of the sintering oven are preset at the factory. The sintering oven does not switch to summer/winter time automatically.

23
ENG
10.1.1 Setting the day and the time Requirements:
You are in the "Parameter settings" menu.
1 Select the time display by pressing the and buttons.
2 Press the Right-hand arrow button.
The weekday display is activated (LED lights up orange).
The weekday display flashes.
3 Set the day of the week by pressing the and buttons
(1 = Mon, 2 = Tue, 3 = Wed, etc.).
4 Press the Right-hand arrow button.
The time display is activated (LED lights up orange).
The hour display flashes.
5 Select the hour by pressing the and buttons.
6 Press the Right-hand arrow button.
The minute display flashes.
7 Select the minutes by pressing the and buttons.
8 Press the Right-hand arrow button.
The acoustic signal settings are displayed.
9 Select the acoustic signal by pressing the and buttons (0 = Off, 1 = Default).
10 Press the Right-hand arrow button..
The settings for the temperature unit are displayed.
11 Select the temperature unit using the and buttons (C = °C, F = °F).
NOTICE
The day/time display shows the day of the week and the time alternately.
24
12 Press the Right-hand arrowbutton.
The settings for the max. oven opening temperature are displayed.
13 Select the max. oven opening temperature by pressing the and buttons
(100-300).
14 Press the Right-hand arrow button.
This takes you back to normal operating mode.
60.2 Switching off the sintering oven 1 Switch the sintering oven off at the mains switch.
The mains indicator lamp on the main switch goes out.
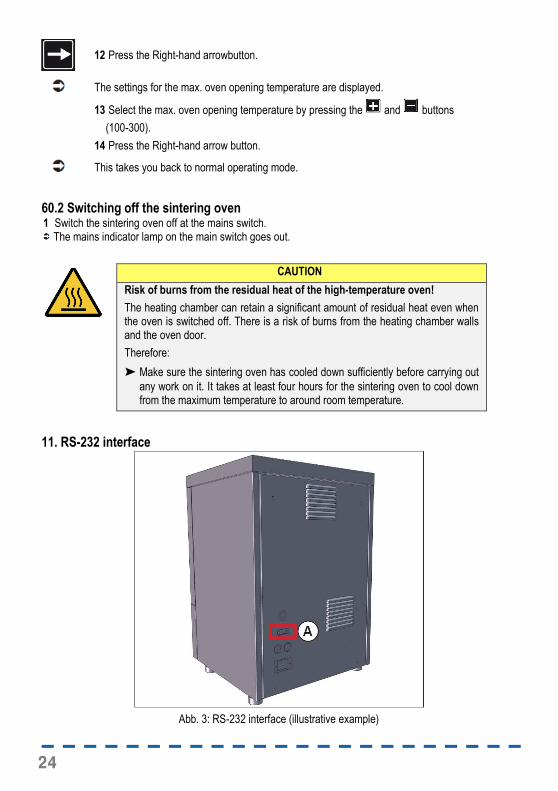
11. RS-232 interface
Abb. 3: RS-232 interface (illustrative example)
CAUTION
Risk of burns from the residual heat of the high-temperature oven!
The heating chamber can retain a significant amount of residual heat even when the oven is switched off. There is a risk of burns from the heating chamber walls and the oven door.
Therefore:
➤ Make sure the sintering oven has cooled down sufficiently before carrying out
any work on it. It takes at least four hours for the sintering oven to cool down from the maximum temperature to around room temperature.

25
ENG
The sintering oven has an RS-232 interface (A) on the rear, which is used to save log files on a computer.
Requirements:
• RS-232 interface cable
• Computer with RS-232 connection option
• Software “uCon” (available under: http://www.umonfw.com/ucon/)
• Microsoft Excel licence
1 Connect the sintering oven to the computer using the connecting cable. 2 Start the “uCon” software.
3 Set the configuration shown.
4 If the “Com Port” is not known, select a suitable one with “Portscan”.
5 Confirm your entry with “OK”.
NOTICE
If the computer to be used has no RS-232 connection option, a USB
adapter with installation CD can be ordered from the manufacturer. In this case contact the FINO customer service.
26
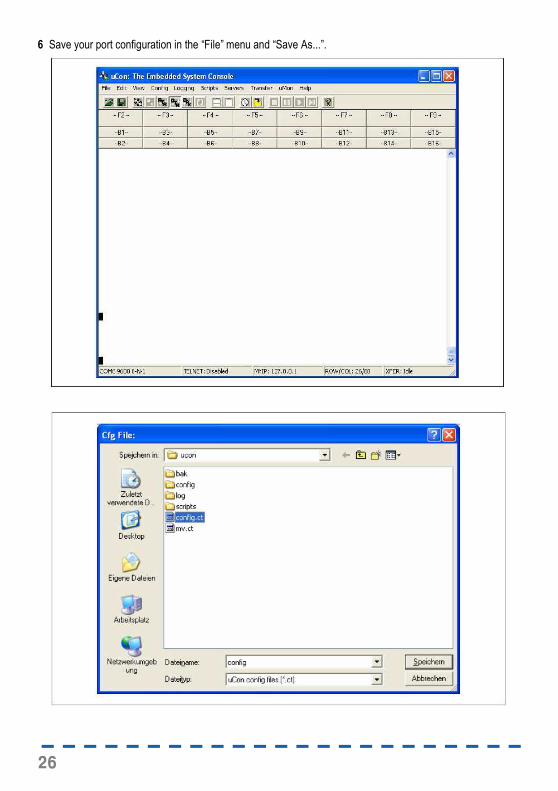
6 Save your port configuration in the “File” menu and “Save As...”.
27
ENG
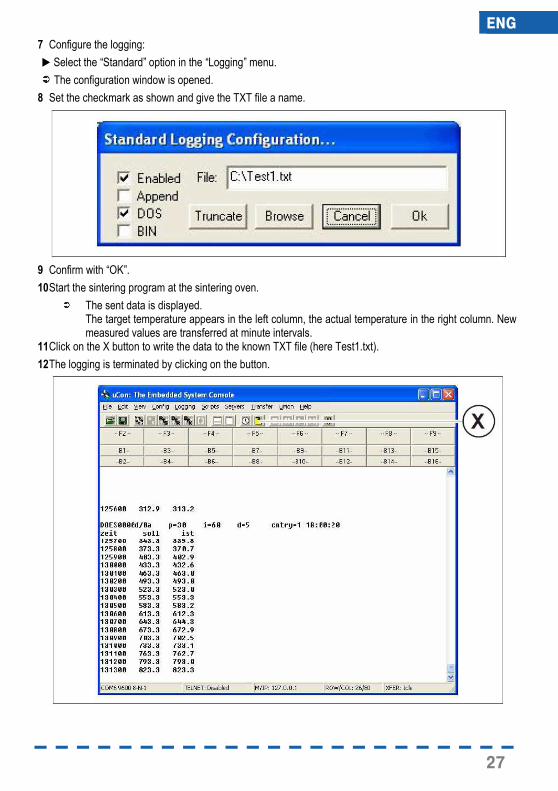
7 Configure the logging:
� Select the “Standard” option in the “Logging” menu.
The configuration window is opened.
8 Set the checkmark as shown and give the TXT file a name.
9 Confirm with “OK”.
10 Start the sintering program at the sintering oven.
The sent data is displayed. The target temperature appears in the left column, the actual temperature in the right column. New measured values are transferred at minute intervals.
11 Click on the X button to write the data to the known TXT file (here Test1.txt).
12 The logging is terminated by clicking on the button.
28
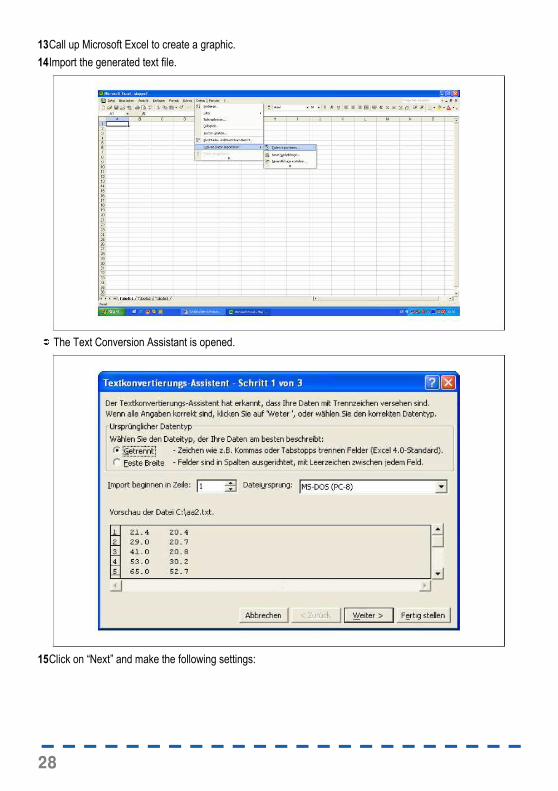
13 Call up Microsoft Excel to create a graphic.
14 Import the generated text file.
The Text Conversion Assistant is opened.
15 Click on “Next” and make the following settings:
29
ENG
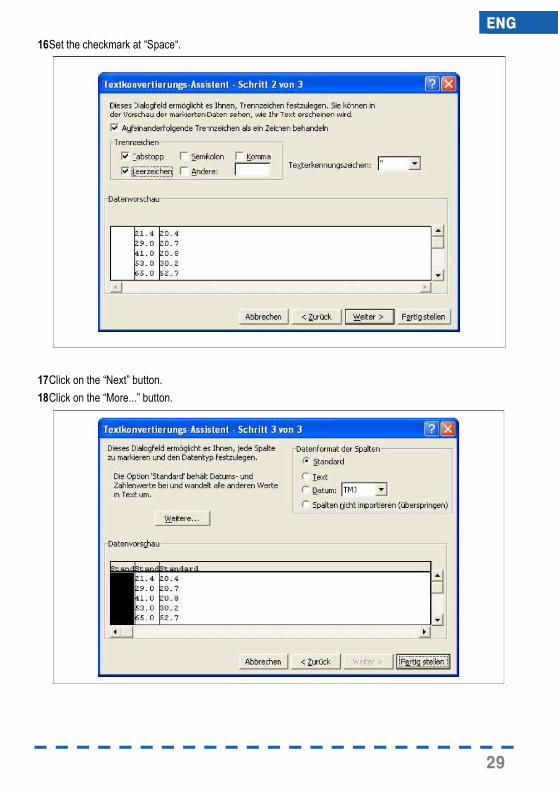
16 Set the checkmark at “Space“.
17 Click on the “Next” button.
18 Click on the “More...” button.

30
19 Permute point and comma for both settings and confirm with “OK”.
20 Click on the “Finish” button and “OK”.

31
ENG
21 The data series are displayed.
22 Select the Diagram Assistant and choose a diagram type (e.g. line).
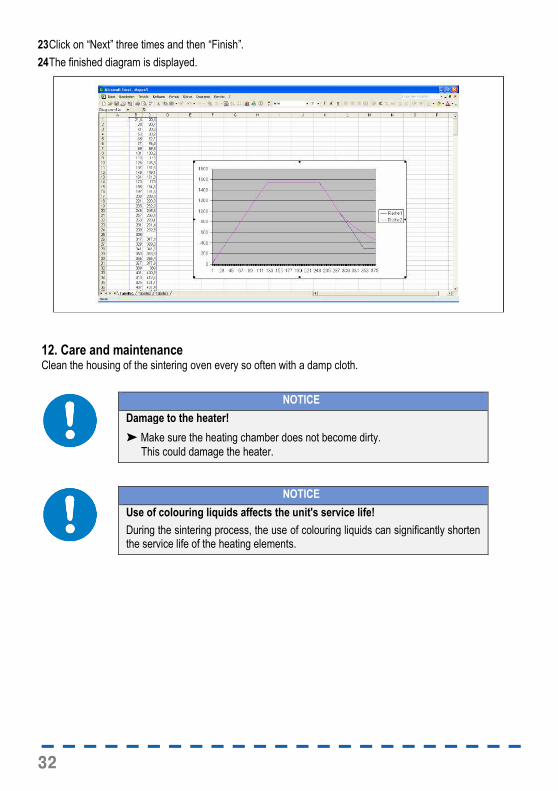
32
23 Click on “Next” three times and then “Finish”.
24 The finished diagram is displayed.
12. Care and maintenance Clean the housing of the sintering oven every so often with a damp cloth.
NOTICE
Damage to the heater!
➤ Make sure the heating chamber does not become dirty.
This could damage the heater.
NOTICE
Use of colouring liquids affects the unit's service life!
During the sintering process, the use of colouring liquids can significantly shorten the service life of the heating elements.
33
ENG
62.1 Service programs A cleaning cycle should run periodically depending on how often the oven is used. This serves to remove contamination due to liquids and other impurities that become deposited in the insulation.
Depending on the frequency of use, a regeneration cycle should also be carried out, which is necessary for regeneration of the heating elements.
Service programs follow the normal program channels 1-9, selectable after program 9 as A, C or E.
Program A - Temperature control
Program C - Heating chamber cleaning
13. Faults and error messages 13.1 Safety
DANGER
Electricity!
Risk of death from electric shock.
➤ Work on electrical systems may be performed by qualified electricians only.
➤ Before carrying out any installation, maintenance, cleaning or repair work,
disconnect the power supply of the sintering oven (pull out mains plug) and secure it against being switched back on.
➤ Do not touch live cables and components with wet hands.
➤ Observe the accident-prevention regulations when working with electric cur-
rent.
WARNING
Hot surfaces!
Risk of serious burns to the limbs.
➤ Do not touch the housing or the oven door during operation.
➤ Ensure that the sintering oven has cooled down completely before carrying
out maintenance, cleaning and repair work.
➤ Wear heat-resistant, thermally insulated safety gloves when it is necessary to
carry out work on hot components.
34
13.2 Faults
Störung Possible cause Störungsbehebung Responsibility
Incorrect time The time in the con-troller has been saved incorrectly
Set the correct time
(see 10.1.1 “Setting the day and the time”)
User
No display, mains indicator lamp is lit
Defective circuit brea-ker
Switch the oven off, wait for 10 seconds, switch the oven back on again.
If the malfunction reoccurs, replace the controller.
No display,
mains indicator lamp
does not light up
There is no mains voltage
Check the on-site circuit breakers and connection cable.
If necessary, notify a qualified electrician.
The heating programs
and the time are not permanently saved
Storage battery deple-ted
Replace the storage battery.
Service department FINO
NOTICE
Material damage due to incorrect repair of electric cables!
This may cause malfunctions and make electric components defective.
➤ Do not repair defective cables or plugs.
35
ENG
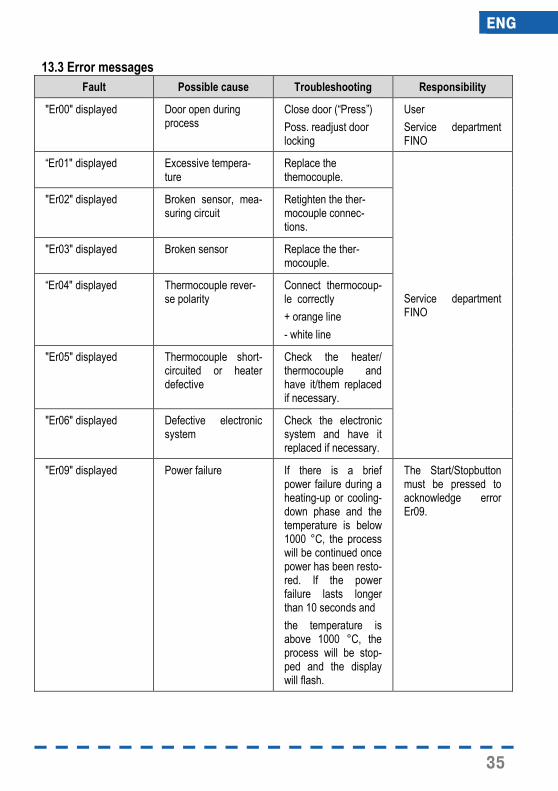
13.3 Error messages
Fault Possible cause Troubleshooting Responsibility
"Er00" displayed Door open during process
Close door (“Press”)
Poss. readjust door locking
User
Service department FINO
“Er01" displayed Excessive tempera-ture
Replace the themocouple.
Service department FINO
"Er02" displayed Broken sensor, mea-suring circuit
Retighten the ther-mocouple connec-tions.
"Er03" displayed Broken sensor Replace the ther-mocouple.
“Er04" displayed Thermocouple rever-se polarity
Connect thermocoup-le correctly
+ orange line
- white line
"Er05" displayed Thermocouple short-circuited or heater defective
Check the heater/ thermocouple and have it/them replaced if necessary.
"Er06" displayed Defective electronic system
Check the electronic system and have it replaced if necessary.
"Er09" displayed Power failure If there is a brief power failure during a heating-up or cooling-down phase and the temperature is below 1000 °C, the process will be continued once power has been resto-red. If the power failure lasts longer than 10 seconds and
the temperature is above 1000 °C, the process will be stop-ped and the display will flash.
The Start/Stopbutton must be pressed to acknowledge error Er09.
36
14. Decommissioning Decommissioning can be carried out for two reasons:
• For the purpose of reinstalling the unit at another location.
• For the purpose of final disposal.
If the sintering oven is to be reinstalled at another location, decommissioning must be well prepared. All components and fittings must be carefully removed, labelled and, if necessary, packaged for transport. This ensures that all parts can be identified correctly and refitted in the correct positions when reassembling the unit.
1 Switch the sintering oven off. 2 Disconnect the sintering ovenfrom the voltage supply (pull out mains plug). 3 Remove all connections (e.g. PC interface cable, etc.) from the sintering oven.
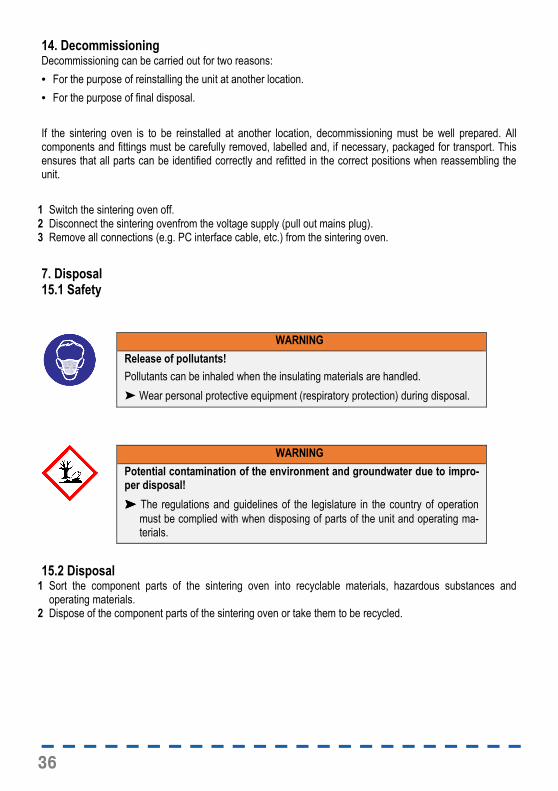
7. Disposal 15.1 Safety
15.2 Disposal 1 Sort the component parts of the sintering oven into recyclable materials, hazardous substances and
operating materials. 2 Dispose of the component parts of the sintering oven or take them to be recycled.
WARNING
Release of pollutants!
Pollutants can be inhaled when the insulating materials are handled.
➤ Wear personal protective equipment (respiratory protection) during disposal.
WARNING
Potential contamination of the environment and groundwater due to impro-per disposal!
➤➤➤➤ The regulations and guidelines of the legislature in the country of operation
must be complied with when disposing of parts of the unit and operating ma-terials.
37
ENG
38
FINO GmbH Mangelsfeld 18 D-97708 Bad Bocklet Tel +49-97 08-90 94 20 Fax +49-97 08-90 94 21 [email protected] · www.fino.com
8733; 12/17; Rev.-Nr.: 3,0