getting equipped lecturette
TRANSCRIPT

1 Getting Equipped to Bowl
Without question, the single most important fundamental of
bowling is getting properly fitted for a bowling ball; this is
clearly where it all starts. However, how you choose to get
fitted is totally up to you. You can choose to get fitted at a
local professional bowling pro shop or simply walk into your
local bowling center where you can rent bowling shoes and
utilize free community bowling balls. Mind you, there are
pros and cons to doing it both ways, depending on your
circumstances. For this lesson, we will explore both options.
The Choice is YOURS
Bowling Center
Pro Shop

2 Getting Equipped to Bowl
Great, let’s get started !!! The first step is to locate a
bowling pro shop in your area. This can be done in a few
different ways:
If you know someone who bowls in a league, you can
ask them which pro shop they use.
If not, you can use your local hardcopy telephone
book or go online and visit www.yellowpages.com
For the purposes of this lesson, we will use Brunswick’s
virtual bowling pro shop locator:
http://www.bowlwithbrunswick.com/
Bowling Pro Shop,
locate a local pro shop
You choose the bowling pro shop to get equipped to bowl
Zero Gravity – Strike Power

3 Getting Equipped to Bowl
Instructions to Access Brunswick’s Bowling Portal
http://www.bowlwithbrunswick.com/
Step 1 From your computer/cell phone, open a browser
interface
Step 2 In the address bar, type:
www.bowlingwithbrunswick.com
and click/touch the search button
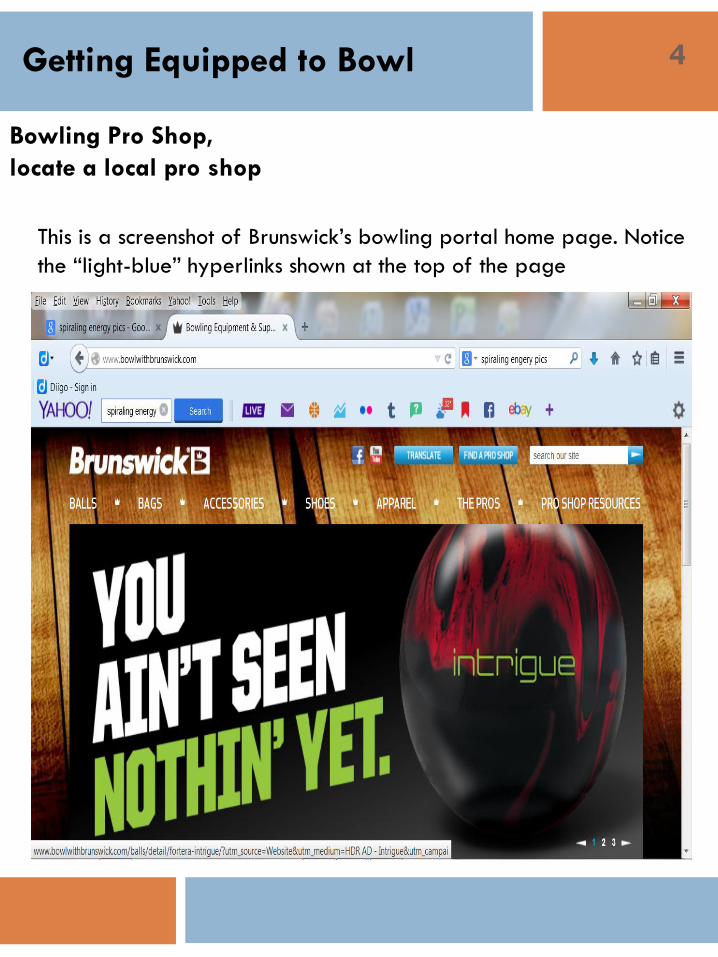
Step 3 At the top of the Brunswick home page, locate the
light-blue hyperlink “Find a Pro Shop” and click/touch
it
Step 4 In the white text box, type your zip code and hit the
enter key or click on the “Search Pro Shops” hyperlink
Bad Ass – high powered rotations
Bowling Pro Shop,
locate a local pro shop
4 Getting Equipped to Bowl
This is a screenshot of Brunswick’s bowling portal home page. Notice
the “light-blue” hyperlinks shown at the top of the page
Bowling Pro Shop,
locate a local pro shop

5 Getting Equipped to Bowl
If you choose to get equipped at a pro shop, contact the
shop, speak with a drilling expert, and set up an appointment
for a personal consultation.
Once you enter your zip and click/touch the search button,
your pro shop results should appear. As an example, I
entered my home zip code and the results are shown below.
Bowling Pro Shop,
locate a local pro shop

6 Getting Equipped to Bowl
When you walk into the pro shop, it will look something like
the picture shown below. There will be many options to
choose from, as bowling pro shops carry many different
bowling accessories to help the bowler optimize his/her
bowling scores.
Bowling Pro Shop,
locate a local pro shop

7 Getting Equipped to Bowl
Bowling Pro Shop, consult
with a drilling expert
Now, you are ready to meet your personal drilling expert !!!
Pictured above is my drilling expert, Wally Galka of Galka’s Pro
Shop located inside of Plaza Bowling Center in Highland, Indiana.
Wally has drilled my bowling balls for over 20 years and I owe a
great deal of my bowling success to his high-end expertise.

8 Getting Equipped to Bowl
As discussed earlier, getting properly fitted for a bowling ball is, by
far, the most important fundamental of bowling. It is very difficult
and, in some cases, painful trying to execute the perfect strike shot
with an ill-fitted bowling ball. Over time, using an ill-fitted bowling
ball can cause bodily damage to, not just your hands, but your arms,
shoulder, back, legs, and knees. With this in mind, if you plan to
bowl more than once a year, it is best to get equipped to bowl at a
professional pro shop. That way, you can achieve a consistent feel
every time you need to use your equipment and this will translate
directly to safety and consistent outcomes in your bowling game.
Bowling Pro Shop, consult
with a drilling expert
9 Getting Equipped to Bowl
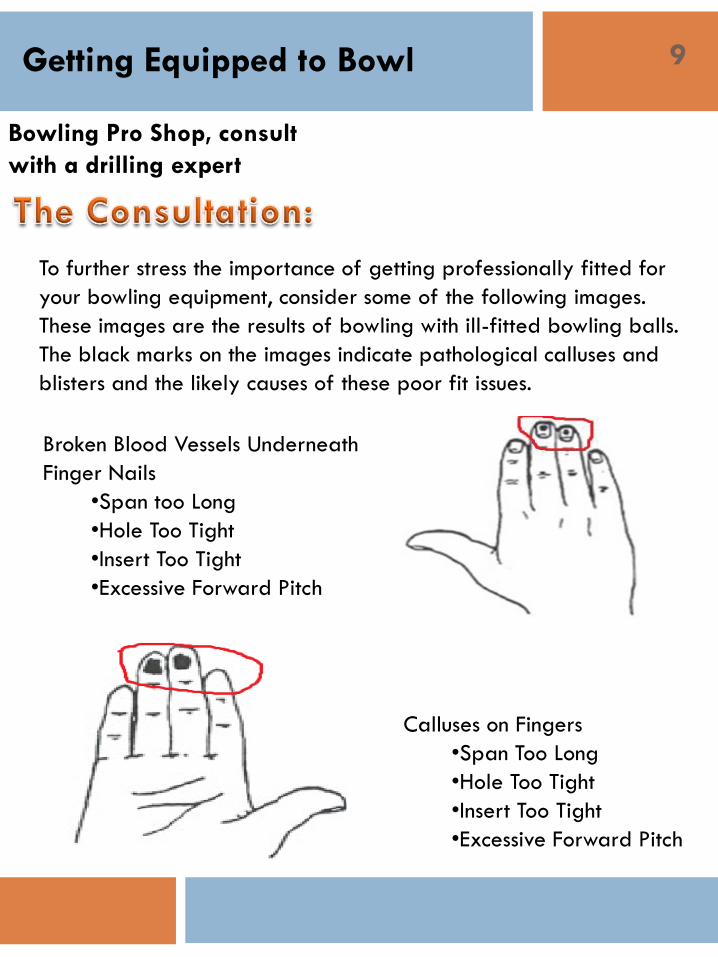
To further stress the importance of getting professionally fitted for
your bowling equipment, consider some of the following images.
These images are the results of bowling with ill-fitted bowling balls.
The black marks on the images indicate pathological calluses and
blisters and the likely causes of these poor fit issues.
Broken Blood Vessels Underneath
Finger Nails
•Span too Long
•Hole Too Tight
•Insert Too Tight
•Excessive Forward Pitch
Calluses on Fingers
•Span Too Long
•Hole Too Tight
•Insert Too Tight
•Excessive Forward Pitch
Bowling Pro Shop, consult
with a drilling expert

10 Getting Equipped to Bowl
Calluses on top of thumb:
•Excessive Reverse Pitch
•Span Too Short or Too Long
•Hole Too Big
Callus at bottom of thumb:
•Span Too Short or Too Long
•Hole Needs More Bevel
•Hole Too Big
Calluses on side of thumb:
•A - Span Too Short
•A - Excessive Reverse Pitch
•B - Excessive Left Pitch
•B - Hole Too Small
Bowling Pro Shop, consult
with a drilling expert

11 Getting Equipped to Bowl
When getting equipped to bowl at a professional pro shop, these
ill-fit issues can be avoided. However, if you choose to get fitted at
the bowling center (using community bowling balls), you are at risk
for calluses, blisters and even injuries to body parts.
During the consultation with a professional ball driller, all of these fit
issues are discussed and addressed as well as other products and
services that will help you reach your goal – “throwing strikes” !!!
While bowlers use lots of equipment for comfortable and
consistency during the bowling process, the three (3) mandatory
items are: The bowling ball, bag and shoes. In addition to the
mandatory equipment, all bowlers should be prepared for body
and climate changes that will effect the fit of the bowling ball and
the surface of the bowling shoes.
Bowling Pro Shop, consult
with a drilling expert

12 Getting Equipped to Bowl
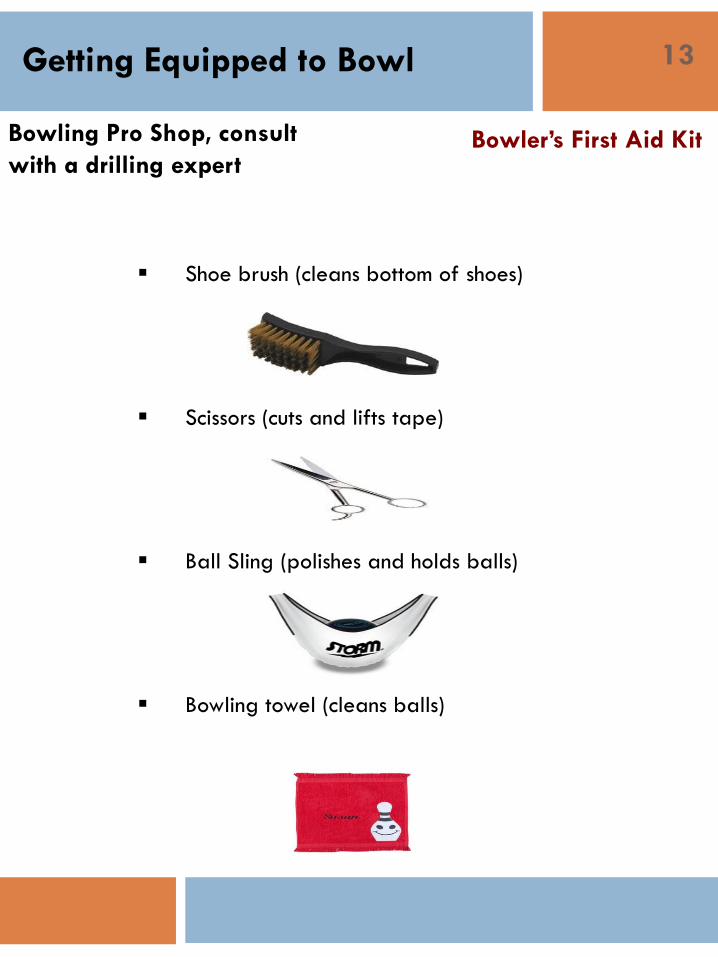
In addition to bowling balls, shoes and bags, pro shops carry lots
of bowling equipment (accessories). And it is in the best interest of
the bowler to equip him/herself with a bowler’s first aid kit. Listed
below are some of the items that are included in the bowler’s first
aid kit.
Ball tap (creates better thumb hole fit)
Grip powder sacks (creates more finger grip)
Easy Slide powder bags (creates more finger slip)
Thumb Sleeve Patches (protects thumb skin)
Bowler’s First Aid Kit Bowling Pro Shop, consult
with a drilling expert
13 Getting Equipped to Bowl
Shoe brush (cleans bottom of shoes)
Scissors (cuts and lifts tape)
Ball Sling (polishes and holds balls)
Bowling towel (cleans balls)
Bowler’s First Aid Kit Bowling Pro Shop, consult
with a drilling expert

14 Getting Equipped to Bowl
Bowling Pro Shop, getting
fitted for ball, bag and shoes:
Once your consultation is complete, it is time to get fitted.
When you are getting fitted for equipment at a pro shop,
the process itself is much easier; the professional ball driller
does all the work for you. Getting fitted for a bowling
bag and shoes is simple enough: You look at the selections;
evaluate them; pick the desired size; and make a decision.
Conversely, getting fitted for the ball is much more involved.
I will save you the technicalities because there is much more
than meets the eye when considering this process. What is
simple to know are the five (5) key factors to consider when
getting fitted for a bowling ball:
Weight of the ball
Size, span and pitch of the holes
Grip (conventional or fingertip)
Cruel Intent – Just MEAN

15 Getting Equipped to Bowl
Ball Weight: The general rule is that the weight of your bowling ball
should not exceed 10% of your body weight. This is typically a
good rule to consider for most beginner bowlers but not for all. I am
a perfect example; when I started bowling, my first bowling ball
weighed 16 pounds (lbs.) and I weighed about 130 lbs. at the time.
Because the ball was professionally drilled and fitted to my hand,
rolling a 16-pound bowling ball down the lane was never a stressful
event. And today, most women (amateur and professional) bowl
with 14 or 15-pound balls; I personally dropped to a more
comfortable weight (15 lbs.) over 15 years ago.
Hole Size: The size of the holes in your bowling ball will be
determined by the size of your fingers (thumb and two (2) middle
fingers). Ideally, you want your finger holes to fit snug but not tight.
Holes that are too tight or loose will prohibit you from exiting the
bowling ball properly. Loose holes will cause you to drop the ball
off your hand too soon and tight holes will cause you to stick (hang
on) in the ball too long.
Drill Press Machine
Bowling Pro Shop, getting
fitted for ball, bag and shoes:
16 Getting Equipped to Bowl
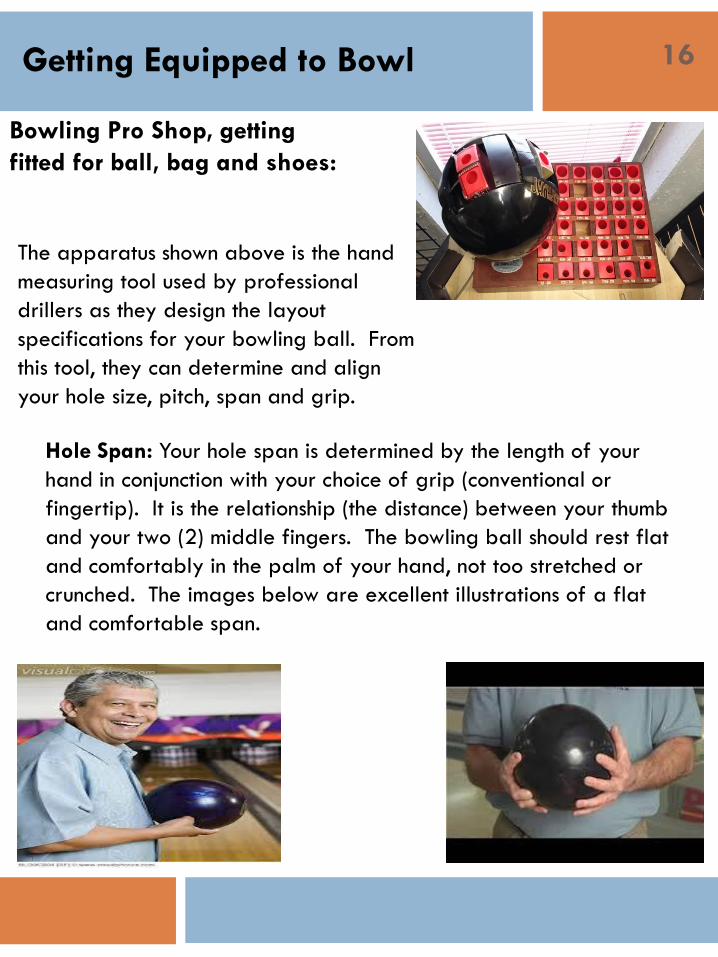
The apparatus shown above is the hand
measuring tool used by professional
drillers as they design the layout
specifications for your bowling ball. From
this tool, they can determine and align
your hole size, pitch, span and grip.
Hole Span: Your hole span is determined by the length of your
hand in conjunction with your choice of grip (conventional or
fingertip). It is the relationship (the distance) between your thumb
and your two (2) middle fingers. The bowling ball should rest flat
and comfortably in the palm of your hand, not too stretched or
crunched. The images below are excellent illustrations of a flat
and comfortable span.
Bowling Pro Shop, getting
fitted for ball, bag and shoes:

17 Getting Equipped to Bowl
Hole Pitch: As with the span, the pitch is an important factor to consider
when drilling holes into a bowling ball. The pitch is the direction in
which the holes get drilled. There are 5 different pitches (directions) to
consider when drilling holes:
Zero
Forward
Reverse
Right Lateral
Left Lateral
USBC (2013) illustrates: To better understand the concept of forward
and reverse pitch, we can use the analogy of holding a basketball
(reverse pitch) versus a softball (forward pitch). Holding each of these
objects with the palm facing the floor is very different. The softball is
easy to hold as the hand will be in more of a closed position. It will
obviously be more difficult to maintain a grip on the basketball as the
hand will be in a more open position. (p. 95) Translation, more reverse
= quicker thumb release and more forward = slower thumb release.
Reverse Forward
Zero, between
Reserve and forward
Bowling Pro Shop, getting
fitted for ball, bag and shoes:

18 Getting Equipped to Bowl
You typically do not have to worry too much about pitch changes
unless there are changes in your game. Examples – reasons for
possible pitch changes are equated to changes in:
Release
Timing
Weight Change/Growth
Ability
Age
Left Lateral Right Lateral
USBC (2013) illustrates: Lateral pitch refers to the direction
either right or left from the center of the ball. This pitch is used
primarily for comfort and for ease of release and is related to
the flexibility of the athlete’s hand and style of release. (p. 95)
Bowling Pro Shop, getting
fitted for ball, bag and shoes:
19 Getting Equipped to Bowl
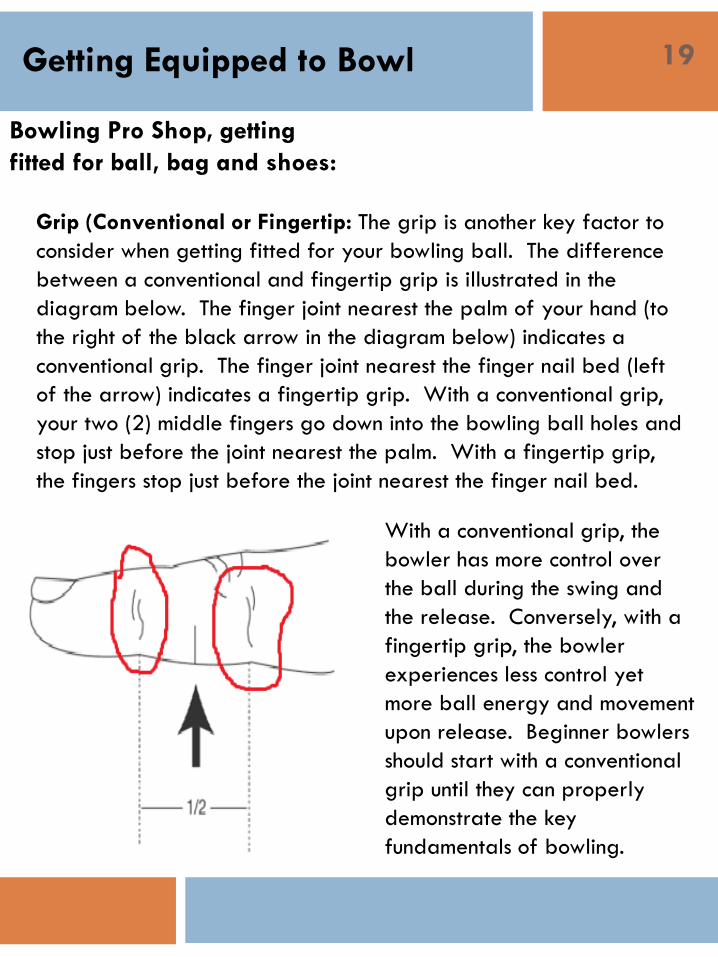
Grip (Conventional or Fingertip: The grip is another key factor to
consider when getting fitted for your bowling ball. The difference
between a conventional and fingertip grip is illustrated in the
diagram below. The finger joint nearest the palm of your hand (to
the right of the black arrow in the diagram below) indicates a
conventional grip. The finger joint nearest the finger nail bed (left
of the arrow) indicates a fingertip grip. With a conventional grip,
your two (2) middle fingers go down into the bowling ball holes and
stop just before the joint nearest the palm. With a fingertip grip,
the fingers stop just before the joint nearest the finger nail bed.
With a conventional grip, the
bowler has more control over
the ball during the swing and
the release. Conversely, with a
fingertip grip, the bowler
experiences less control yet
more ball energy and movement
upon release. Beginner bowlers
should start with a conventional
grip until they can properly
demonstrate the key
fundamentals of bowling.
Bowling Pro Shop, getting
fitted for ball, bag and shoes:
20 Getting Equipped to Bowl
Bowling Pro Shop, pay for
bowling equipment:
Now that you have located a pro shop in your area; consulted
with a drilling expert; and got fitted for a bowling ball, bag
and shoes, the only thing left to do is pay for your bowling
equipment selections.
Bowling pro shops have made this process very easy. For your
convenience, most pro shops accept a variety of payments.
Most pro shops accept Visa, Master Card and, of course, cash
payments. Just FYI – most of them do not accept personal or
business checks.
21 Getting Equipped to Bowl
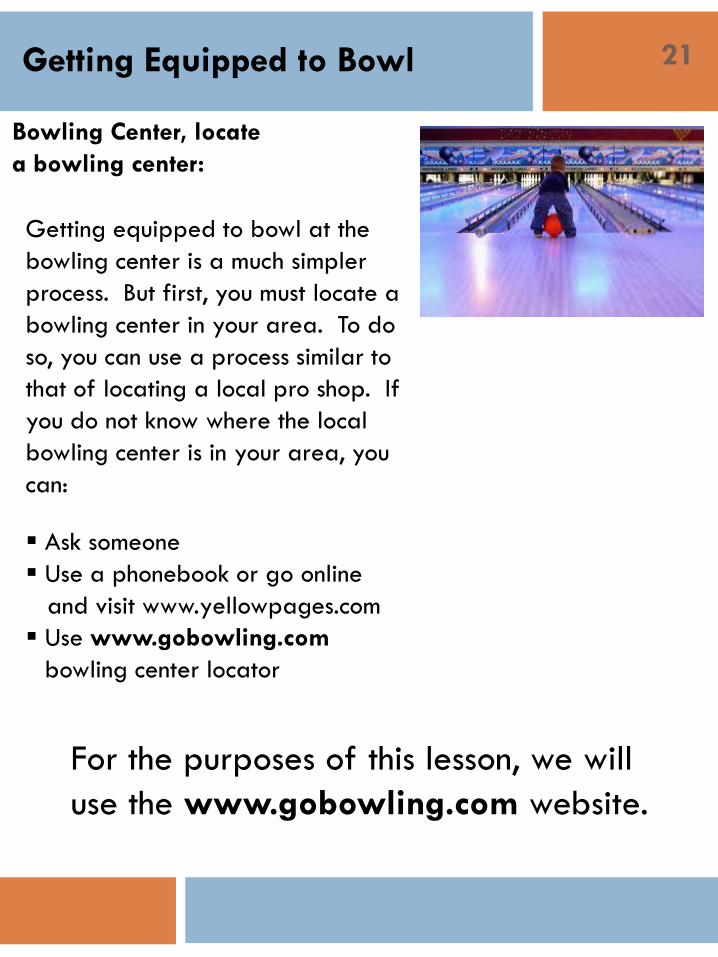
Bowling Center, locate
a bowling center:
Getting equipped to bowl at the
bowling center is a much simpler
process. But first, you must locate a
bowling center in your area. To do
so, you can use a process similar to
that of locating a local pro shop. If
you do not know where the local
bowling center is in your area, you
can:
Ask someone
Use a phonebook or go online
and visit www.yellowpages.com
Use www.gobowling.com
bowling center locator
For the purposes of this lesson, we will
use the www.gobowling.com website.

22 Getting Equipped to Bowl
Instructions to Access Portal
http://www.gobowling.com
Step 1 From your computer/cell phone, open a browser
interface
Step 2 In the address bar, type: www.gobowling.com
and click/touch the search button
Step 3 Locate the red ribbon and click on the “Find a Center”
link
Step 4 In the white text box, type your zip code and hit the
enter key or click on the Red “Search” hyperlink
Bowling Center, locate a
bowling center:

23 Getting Equipped to Bowl
The image below is a screenshot of the
www.gobowling.com home page.
Notice the “Find a Center” hyperlink
in the center on the red ribbon
Bowling Center, locate a
bowling center:
24 Getting Equipped to Bowl
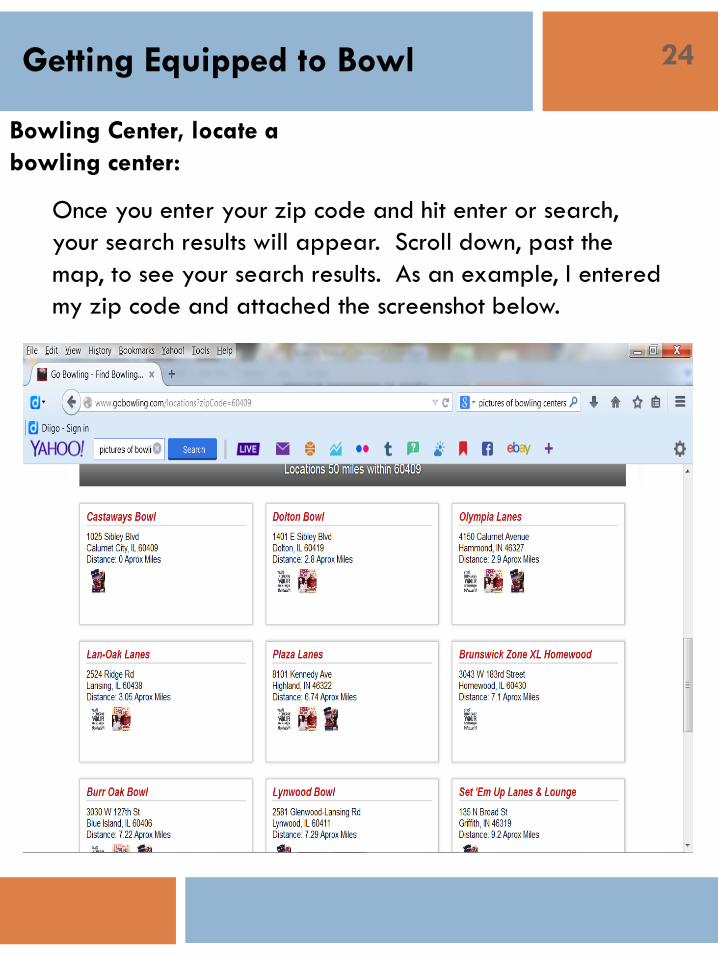
Once you enter your zip code and hit enter or search,
your search results will appear. Scroll down, past the
map, to see your search results. As an example, I entered
my zip code and attached the screenshot below.
Bowling Center, locate a
bowling center:

25 Getting Equipped to Bowl
The good thing about getting equipped to bowl at the
bowling center is that it is pretty simple; it does not require
any preplanning and the process it quick. Your equipment
decisions happen at the time you decide to go bowling.
When you decide to go bowling, simply walk into your local
bowling center, look for the customer service/front desk
area and consult with the customer service agent.
FYI – The front desk/counter is where most bowling centers
store and/or rent their bowling shoes. You can actually see
some of the bowling shoes in the background of the image
listed above. On the next page, I will show you a close up
shot.
Bowling Center, locate
ball and shoes:
26 Getting Equipped to Bowl
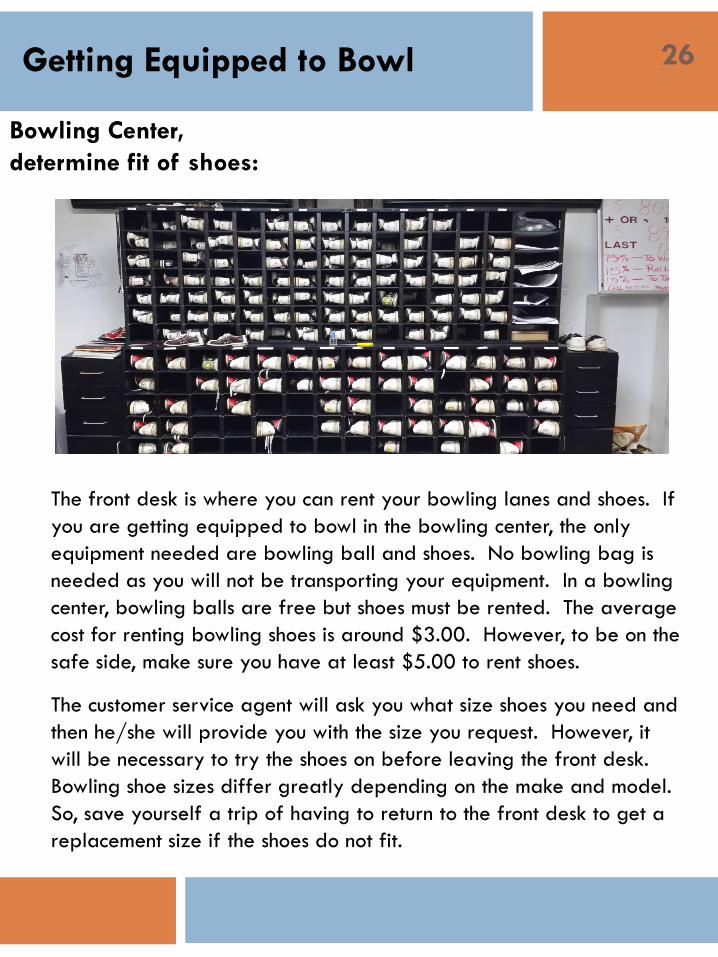
The front desk is where you can rent your bowling lanes and shoes. If
you are getting equipped to bowl in the bowling center, the only
equipment needed are bowling ball and shoes. No bowling bag is
needed as you will not be transporting your equipment. In a bowling
center, bowling balls are free but shoes must be rented. The average
cost for renting bowling shoes is around $3.00. However, to be on the
safe side, make sure you have at least $5.00 to rent shoes.
The customer service agent will ask you what size shoes you need and
then he/she will provide you with the size you request. However, it
will be necessary to try the shoes on before leaving the front desk.
Bowling shoe sizes differ greatly depending on the make and model.
So, save yourself a trip of having to return to the front desk to get a
replacement size if the shoes do not fit.
Bowling Center,
determine fit of shoes:

27 Getting Equipped to Bowl
While bowlers can use the community
bowling ball at no charge (free, using
an honor system), that is not the case
with bowling shoes. In addition to the
price for rental, many bowling centers
require that bowlers leave some form
of collateral at the front desk:
One of their personal shoes
$10 deposit
State ID
Driver’s License
Community bowling
ball can be found
sitting on racks, usually
right behind the
bowling lanes as shown
in the image below.
Bowling Center, rent
shoes:

28 Getting Equipped to Bowl
Now that you have located the bowling balls, let’s get fitted
for one. When getting fitted in the bowling center, there
are 2 key factors to consider:
Ball Weight
Finger Comfort
If you choose to use community bowling ball in the bowling
center to get equipped to bowl, your comfort options are
compromised, as you must select whatever equipment the
bowling center has available. With this in mind, you should
only concern yourself with the ball weight and finger
comfort.
Bowling Center,
determine fit of ball:

29 Getting Equipped to Bowl
Let’s determine the fingers comfort:
1. Pick up a bowling ball from the rack
2. Hold it in your non-dominate hand
3. With your dominate hand, stick your two (2) middle fingers into
the top holes of the ball and you thumb in the hole just beneath.
See images above and below for examples.
The holes should be snug but not tight; practice putting your fingers
in and out of the ball to make sure the fit is comfortable. If the
finger fit is good, let’s determine the weight comfort. If the finger
fit is not good, try the finger fit with another ball.
Bowling Center, determine
comfort for fingers:
30 Getting Equipped to Bowl
Bowling Center, determine
comfortable ball weight:
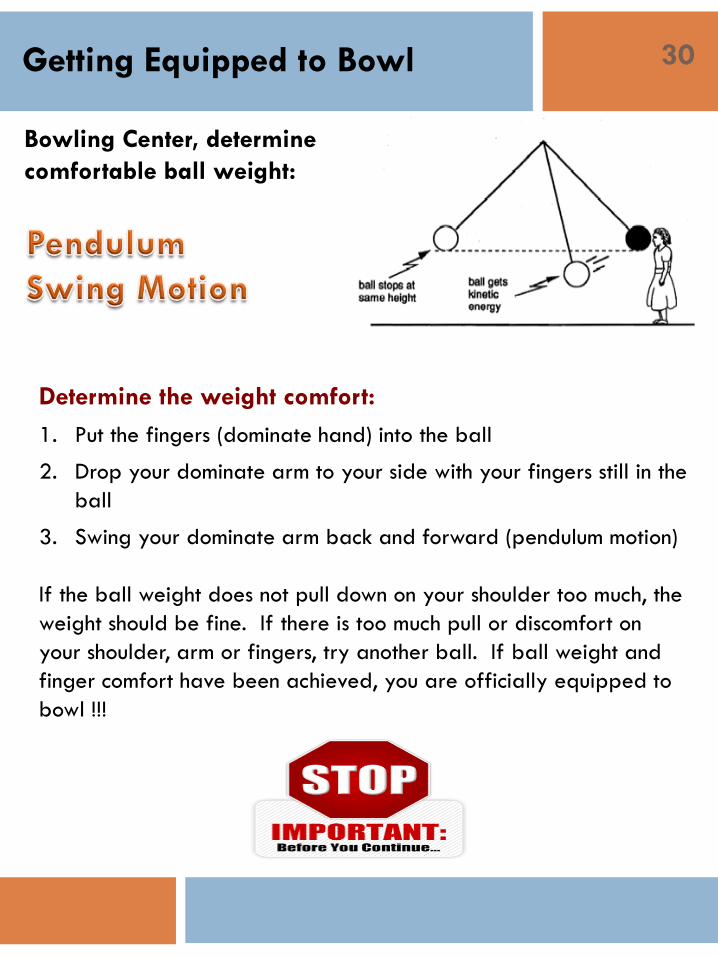
Determine the weight comfort:
1. Put the fingers (dominate hand) into the ball
2. Drop your dominate arm to your side with your fingers still in the
ball
3. Swing your dominate arm back and forward (pendulum motion)
If the ball weight does not pull down on your shoulder too much, the
weight should be fine. If there is too much pull or discomfort on
your shoulder, arm or fingers, try another ball. If ball weight and
finger comfort have been achieved, you are officially equipped to
bowl !!!