getting started with notebooks, sections, and pagesgetting started with notebooks, sections, and...
TRANSCRIPT

1 | P a g e
Why Use OneNote?
OneNote is the ultimate virtual notebook that enables users to create notes in various formats,
shares those notes, sync those notes with the cloud and collaborate with others. You can
create typed, handwritten, audio and video notes, and search those notes. You do not have to
worry about forgetting to save those notes because everything is saved automatically as you
work.
Getting Started with Notebooks, Sections, and Pages When you first start using OneNote, a notebook named “Personal” is already created for you. This notebook will contain several folders. Each folder contains pages.
Creating a New Notebook
1. Click then then
2. Select where you would like to store your notebook and type your “Notebook Name”

2 | P a g e
3. Select Create Notebook
4. Your new notebook will be created and become the active notebook.
Creating a New Section and Renaming a Section
1. Select 2. Change the default name if desired
3. If you want to change a section name later, right click to Select the section name and select
‘Rename’
Creating a New Page and Renaming a Page
1. Select 2. To change the name of a page, right Select the page name and click ‘Rename’ 3. Type the new page name in the highlighted area above the line
3 | P a g e
Changing the Color of a Section 1. Right Select the section name 2. Select ‘Section Color’ 3. Select a color
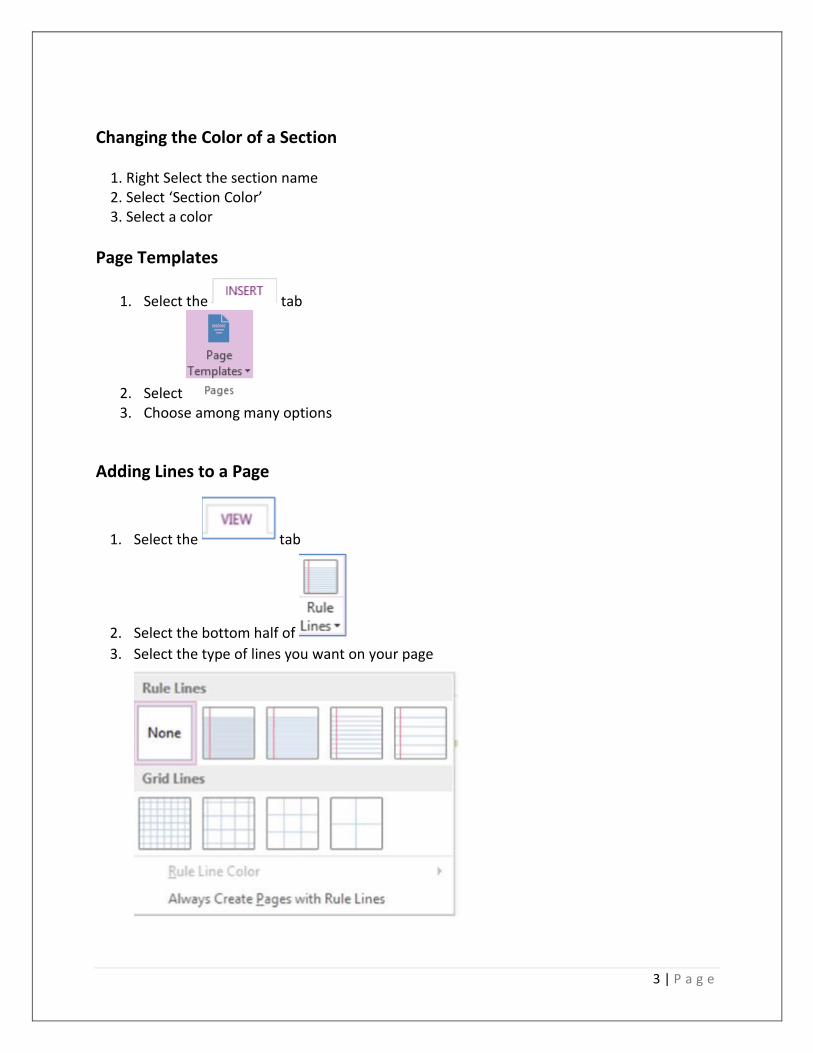
Page Templates
1. Select the tab
2. Select 3. Choose among many options
Adding Lines to a Page
1. Select the tab
2. Select the bottom half of
3. Select the type of lines you want on your page

4 | P a g e
Sending a Document to OneNote Anything that can be printed can be converted into a OneNote page.
1. Go to the printer options in whatever program you are using 2. Select ‘Send to OneNote 2013’ as your printer option and print the document 3. Select where you want the document to appear in OneNote and select ‘OK’
4. The document will appear in the desired location.
Typing and Inking OneNote supports both keyboard typing and inking with a stylus. Typing in OneNote
1. Select the tab
2. Select 3. Place your cursor somewhere on the page and begin typing
4. Font type, size, and color and be adjusted in the tab

5 | P a g e
Inking in OneNote
1. Select the tab 2. Select an ink color/thickness
3. Other colors and thicknesses can be selected using
Erase Inking
1. Select the tab
2. Select the bottom half of 3. Select the type of eraser you would like to use 4. Drag your eraser over the ink you would like to delete
6 | P a g e
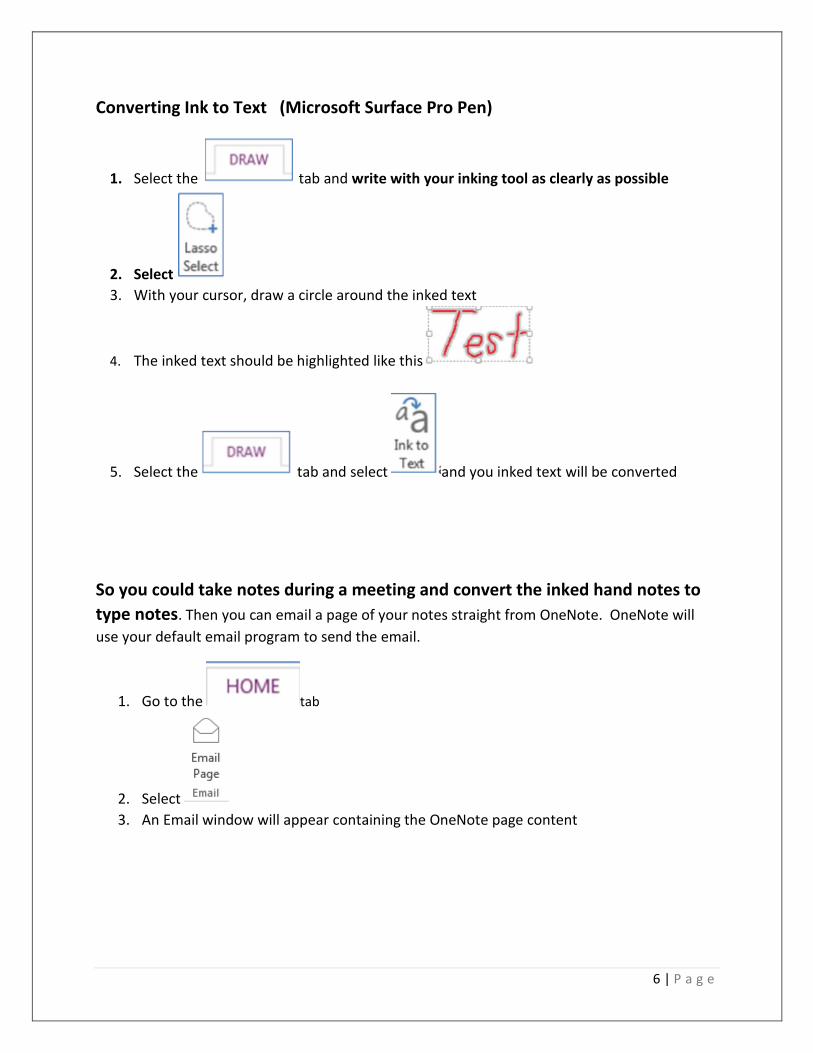
Converting Ink to Text (Microsoft Surface Pro Pen)
1. Select the tab and write with your inking tool as clearly as possible
2. Select
3. With your cursor, draw a circle around the inked text
4. The inked text should be highlighted like this
5. Select the tab and select and you inked text will be converted
So you could take notes during a meeting and convert the inked hand notes to
type notes. Then you can email a page of your notes straight from OneNote. OneNote will
use your default email program to send the email.
1. Go to the tab
2. Select
3. An Email window will appear containing the OneNote page content

7 | P a g e
Inserting Space This feature creates space between notes you have written. It works horizontally as well as
vertically.
1. Go the or the tab
2. Select
3. Drag your cursor on the screen to create additional space

8 | P a g e
Tagging your Notes
1. Go to the tab
2. Type and select something you would like to tag ( in the tab to
select the text)
3. Go to Select a tag from the list (use the
arrows to scroll and see more tags)
Creating Outlook Tasks
1. Go to the tab
2. Type and select something you would like to tag (use in the
tab to select the text)
3. Go to the Home tab
4. Select and select the task due date.

9 | P a g e
Share a Notebook created in OneNote
Open the notebook you wish to share on the Web – View Notebook
1. Click on the File tab in OneNote and select Share in the left Navigation
menu;
2. Click on OneDrive Mercy College
Click Browse

10 | P a g e
3. Enter Notebook Name and click the Move tab

11 | P a g e
4. ‘Invite people’ option will appear on the page, type the email address of
the people who should receive access to the notebook – you can choose
whether they can edit or simply view the notebook to the right of the
email address field; and
5. Click the Share button
After opening the message in Outlook, the invited people will be guided
to Office 365 (OneDrive-the cloud) to open Notebook.
If you click on in Office 365 your will see your shared
OneNote file.

12 | P a g e
Sharing your Notebook with Others
1. Select then
2. Select beside the notebook you want to share
3. Select
4. It should take you to the screen
Invite People
1. Select
2. Complete email form and select