global management system (gms) virtual...
TRANSCRIPT

DYNAMIC SECURITY FOR THE GLOBAL NETWORK™
Global Management System (GMS) Virtual Appliance 7.0 Getting Started Guide
SonicWALL GMS Virtual Appliance 7.0 Getting Started Guide
This Getting Started Guide contains installation procedures and configuration guidelines for deploying the SonicWALL GMS Virtual Appliance on a server on your network. The SonicWALL GMS Virtual Appliance is a virtual machine that runs SonicWALL GMS, which is a Web-based application that can configure, manage, and monitor the status of thousands of SonicWALL Internet security appliances and non-SonicWALL appliances from a central location.
The SonicWALL GMS Virtual Appliance provides the following benefits:
• Cost savings:
• Multiple virtual machines can run on a single server, reducing hardware costs, power consumption, and maintenance costs.
• Microsoft Windows OS is not required, eliminating the cost of the Windows licensing.
• Operational ease:
• In a virtual environment, it is easy to commission new servers or de-commission old ones, or to bring servers up or down.
• Installation is accomplished by importing a file into the virtual environment, with no need to run an installer.
• Easy reallocation of resources:
• In a virtual environment, you can easily relocate virtual machines to a datastore with more free hard disk space.
• On a physical server, you must open up the hardware to install more resources.
• Security:
• SonicWALL GMS Virtual Appliance provides the same hardened operating system that comes with the SonicWALL UMA EM5000 appliance.
Note: For SonicWALL GMS documentation, refer to the SonicWALL GMS 7.0 Administrator’s Guide. This and other documentation are available at: http://www.sonicwall.com/us/Support.html
SonicWALL GMS Virtual Appliance 7.0 Getting Started Guide Page 1
Contents
This document contains the following sections:
“Before You Begin” on page 3
• “Supported Platforms” on page 3
• “Hardware Resource Requirements” on page 3
• “Files for Installation” on page 5
“Installing SonicWALL GMS Virtual Appliance” on page 6
• “About Thick and Thin Provisioning” on page 7
• “Installing with vSphere” on page 8
“Performing Basic Tasks and Host Configuration” on page 15
• “Powering the Virtual Appliance On or Off” on page 17
• “Configuring Host Settings on the Console” on page 17
• “Configuring Host Settings on the Appliance Web Interface” on page 19
“Registering and Licensing SonicWALL GMS” on page 21
• “Creating a MySonicWALL Account” on page 21
• “Registering / Licensing the SonicWALL GMS Virtual Appliance” on page 22
• “Registering Associated Servers in a Distributed Deployment” on page 23
“Selecting the Role for a SonicWALL GMS Server” on page 25
• “Using the Role Configuration Tool” on page 26
• “Configuring Deployment Settings” on page 30
“Introduction to the Management Interfaces” on page 33
• “Overview of the Two Interfaces” on page 33
• “Switching Between Management Interfaces” on page 34
• “This section describes the two SonicWALL GMS management interfaces. An almost identical URL is used when accessing either the GMS management interface or the Universal Management Host system interface, but the URL is modified to specify either sgms or appliance.” on page 33
“Next Steps” on page 41
“Updating the SonicWALL GMS Virtual Appliance” on page 42
1
2
3
4
5
6
7
8
Page 2
Before You Begin
This section contains the following subsections:• “Supported Platforms” on page 3• “Hardware Resource Requirements” on page 3• “Files for Installation” on page 5
Supported Platforms
The elements of basic VMware structure must be implemented prior to deploying the SonicWALL GMS Virtual Appliance. SonicWALL GMS Virtual Appliance runs on the following VMware platforms:
• ESXi 5.0
• ESXi 4.0 Update 1 (Build 208167 and newer)
• ESX 4.0 Update 1 (Build 208167 and newer)
You can use the following client applications to import the image and configure the virtual settings:
• VMware vSphere – Provides infrastructure and application services in a graphical user interface for ESX/ESXi, included with ESX/ESXi. Allows you to specify Thin or Thick (Flat) provisioning when deploying SonicWALL GMS Virtual Appliance.
• VMware vCenter Server – Centrally manages multiple VMware ESX/ESXi environments. Provides Thick provisioning when deploying SonicWALL GMS Virtual Appliance.
Hardware Resource Requirements
The following hardware resources are required for SonicWALL GMS Virtual Appliance:
• RAM – 3168 MB
This is the maximum amount of RAM supported by the SonicWALL GMS Virtual Appliance operating system, SonicLinux (VM), which is a 32-bit OS. Additional RAM provided to SonicWALL GMS Virtual Appliance in the virtual environment will not be utilized. A smaller amount of RAM can be configured, but is not recommended.
• CPU – 2
This is the default number of CPUs provisioned in the SonicWALL GMS Virtual Appliance. The minimum required number of CPUs is 1, and the maximum that the SonicWALL GMS Virtual Appliance can use is 4.
1
SonicWALL GMS Virtual Appliance 7.0 Getting Started Guide Page 3
• Hard disk space:
• For the 40 GB image – Up to 40 GB on any datastore
• For the 250 GB image – Up to 250 GB on any datastore
• For the 950 GB image – Up to 950 GB on a datastore with either a 4 MB or 8 MB block size
When using Thick, or Flat, provisioning as the storage type option, the entire amount of disk space is allocated when you import and deploy the SonicWALL GMS Virtual Appliance file. When using Thin provisioning, the initial size is very small and will grow dynamically as more disk space is needed by the SonicWALL GMS application, until the maximum size is reached. Once allocated, the size will not shrink if the application space requirements are subsequently reduced.
Additional disk space provided to SonicWALL GMS Virtual Appliance in the virtual environment, beyond the respective limits of 250 GB or 950 GB, will not be utilized.
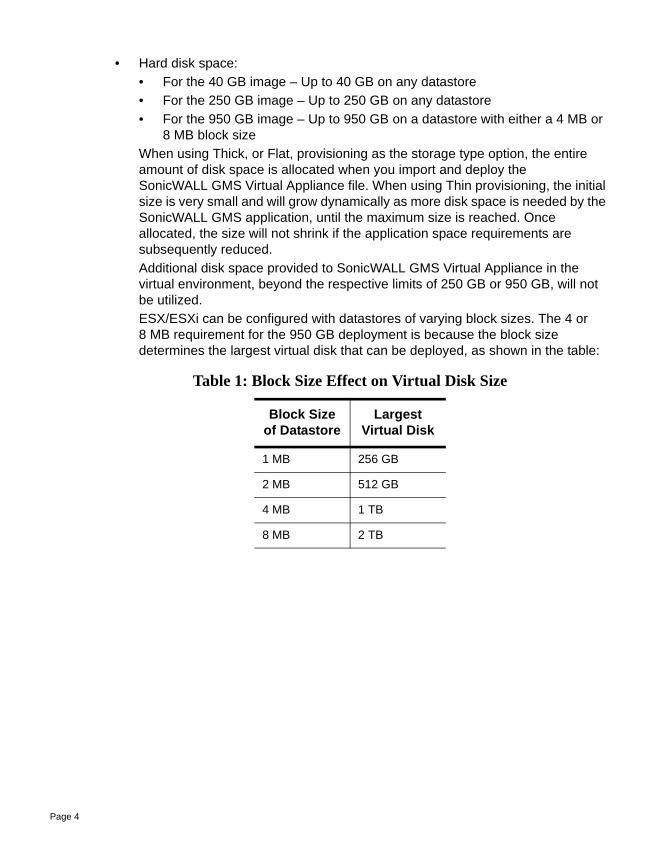
ESX/ESXi can be configured with datastores of varying block sizes. The 4 or 8 MB requirement for the 950 GB deployment is because the block size determines the largest virtual disk that can be deployed, as shown in the table:
Table 1: Block Size Effect on Virtual Disk Size
Block Size of Datastore
Largest Virtual Disk
1 MB 256 GB
2 MB 512 GB
4 MB 1 TB
8 MB 2 TB
Page 4

Files for Installation
You will use different files for a fresh installation than when updating to a newer version.
Fresh Installation Files
SonicWALL GMS Virtual Appliance is available for download from MySonicWALL. For a fresh install, two Open Virtual Appliance (OVA) files with the following file name format are available for import and deployment to your ESX/ESXi server:
• sw_gmsvp_vm_eng_7.0.xxxx.yyyy.40GB.ova
• sw_gmsvp_vm_eng_7.0.xxxx.yyyy.250GB.ova
• sw_gmsvp_vm_eng_7.0.xxxx.yyyy.950GB.ova
The 40, 250 or 950 in these file names indicates the maximum size of the deployed virtual appliance in gigabytes. The xxxx.yyyy represents the actual build number.
Note: Do not rename the OVA files.
Updater File
For a software update, a file with the following file name format is available from MySonicWALL:
• sw_gmsvp_vm_eng_7.0.xxxx.yyyy.gmsvp-updater.sh
Note: Do not rename the updater file.
The sw_gmsvp_vm_eng_7.0.xxxx.yyyy.gmsvp-updater.sh file is uploaded to the System > Settings page on the appliance management interface of your existing SonicWALL GMS deployment.
Patch and Hot Fix Files
All service packs for patches and hot fixes are identical for SonicWALL GMS deployments on Windows, SonicWALL UMA, and SonicWALL GMS Virtual Appliance.
SonicWALL GMS Virtual Appliance 7.0 Getting Started Guide Page 5

Installing SonicWALL GMS Virtual Appliance
SonicWALL GMS Virtual Appliance is installed by deploying an OVA file to your ESX/ESXi server. Each OVA file contains all software components related to SonicWALL GMS including the MySQL database, executable binary files for all GMS services, and other necessary files.
You can deploy one or both OVA files multiple times as needed for your SonicWALL GMS environment. SonicWALL GMS can be configured for a single server or in a distributed environment on multiple servers. In a distributed deployment, for example, you might use the 250GB file in a Summarizer role, and the 950GB file in a Database role. A distributed deployment can include one or more SonicWALL GMS Virtual Appliances, SonicWALL UMA EM5000s, or SonicWALL GMS instances running on Windows Server machines.
2
Page 6

You can deploy an OVA file by using the vSphere 4.1 client, which comes with ESX/ESXi. To get the vSphere 4.1 client, point a browser to your ESX/ESXi server and click on Download vSphere Client.
See the following sections:
• “About Thick and Thin Provisioning” on page 7
• “Installing with vSphere” on page 8
About Thick and Thin Provisioning
You can specify Thick or Thin provisioning when an OVA file is deployed on your ESX/ESXi server. Thick, or Flat, provisioning pre-allocates all the hard disk space (250GB or 950GB) for the virtual appliance.
Thin provisioning allows the disk space to be allocated dynamically. Your ESX/ESXi operating system will grow the disk space of the appliance based on usage needs. For example, as the syslog files get bigger, ESX/ESXi allocates more disk space. Once allocated, the disk space does not shrink even if you delete all the syslog files. But, that space will be re-used for new syslogs before more space is allocated.
SonicWALL GMS Virtual Appliance 7.0 Getting Started Guide Page 7

You can specify Thin or Thick provisioning when deploying an OVA file with the vSphere 4.1 client.
Note: There is some impact on performance with Thin provisioning whenever more disk space is being allocated. Thin provisioning is not recommended for any role configuration that includes the database, such as Database Only or All In One.
Installing with vSphere
To perform a fresh install of the SonicWALL GMS Virtual Appliance using the vSphere client, perform the following steps:
1. Download the following OVA files from MySonicWALL to a system that is accessible to your ESX/ESXi server.
• sw_gmsvp_vm_eng_7.0.xxxx.yyyy.40GB.ova
• sw_gmsvp_vm_eng_7.0.xxxx.yyyy.250GB.ova
• sw_gmsvp_vm_eng_7.0.xxxx.yyyy.950GB.ova
Note: Do not rename the OVA files.
2. Launch vSphere and use it to log on to your ESX/ESXi server.
Page 8

3. In the Home screen, navigate to a view that shows the virtual machines running on your ESX/ESXi server.
4. To begin the import process, click File and select Deploy OVF Template.
5. In the Source screen of the Deploy OVF Template window, enter the name of the OVA file to import in the Deploy from a file or URL field. To deploy from a file, click Browse and then select the OVA file to import. To deploy from a URL, type in the URL of the OVA file. Click Next.
SonicWALL GMS Virtual Appliance 7.0 Getting Started Guide Page 9
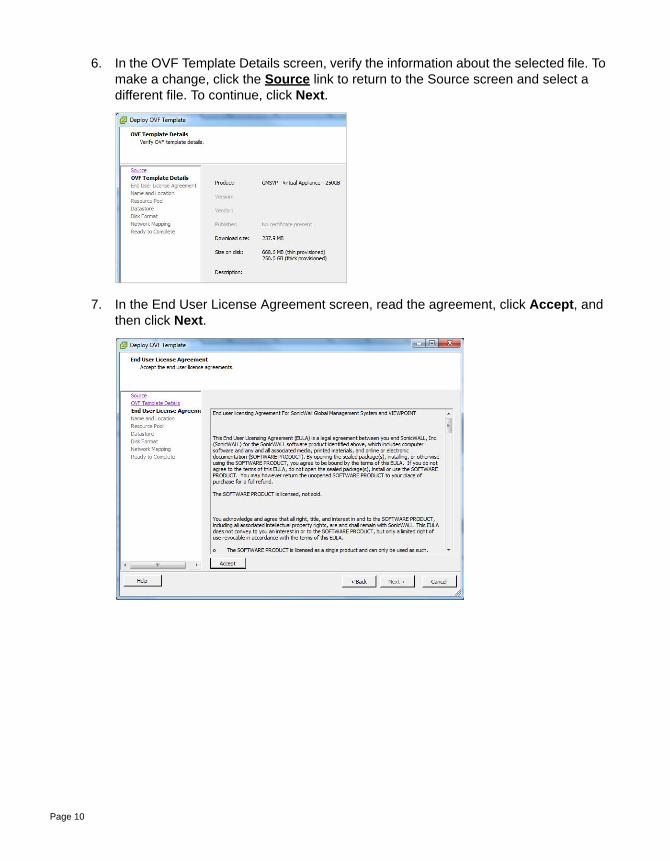
6. In the OVF Template Details screen, verify the information about the selected file. To make a change, click the Source link to return to the Source screen and select a different file. To continue, click Next.
7. In the End User License Agreement screen, read the agreement, click Accept, and then click Next.
Page 10

8. In the Name and Location screen, enter a descriptive name for the virtual appliance into the Name field, and select the desired location in the Inventory Location field. You may wish to incorporate the role or disk size as part of the name, as in “GMS_VM_Agent_250GB.” Click Next.
9. In the Resource Pool screen, select the resource pool within which to deploy this SonicWALL GMS Virtual Appliance and then click Next.
Note: When deploying a 950 GB file, be sure to select a resource pool with a block size of either 4 or 8 MB.
SonicWALL GMS Virtual Appliance 7.0 Getting Started Guide Page 11

10. In the Datastore screen, select the datastore on which to store the files for the SonicWALL GMS Virtual Appliance and then click Next.
11. In the Disk Format screen, select the format in which to store the virtual disks for the SonicWALL GMS Virtual Appliance. Select either Thin provisioned format or Thick provisioned format, and then click Next. For information about Thin and Thick provisioned formats, see “About Thick and Thin Provisioning” on page 7.
Page 12
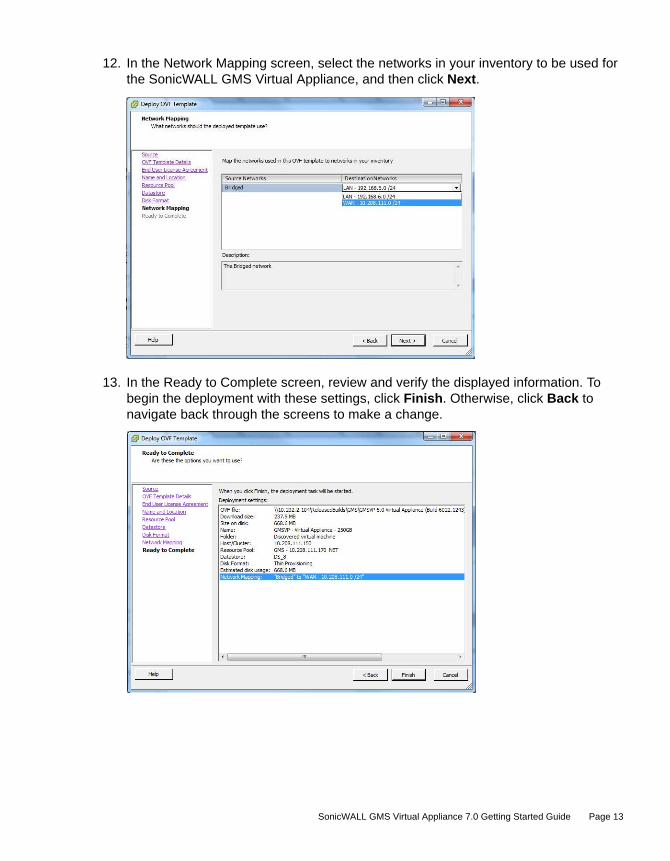
12. In the Network Mapping screen, select the networks in your inventory to be used for the SonicWALL GMS Virtual Appliance, and then click Next.
13. In the Ready to Complete screen, review and verify the displayed information. To begin the deployment with these settings, click Finish. Otherwise, click Back to navigate back through the screens to make a change.
SonicWALL GMS Virtual Appliance 7.0 Getting Started Guide Page 13

The Deploying dialog box shows the progress.
14. In the Deployment Completed Successfully dialog box, click Close.
The name of the new SonicWALL GMS Virtual Appliance appears in the left pane of the vSphere window.
15. To power on the virtual appliance and perform required host configuration, see “Performing Basic Tasks and Host Configuration” on page 15.
16. To register and license SonicWALL GMS, see “Registering and Licensing SonicWALL GMS” on page 21.
Page 14

Performing Basic Tasks and Host Configuration
This section describes how to power on and configure basic settings on the SonicWALL GMS Virtual Appliance, including virtual hardware settings and networking settings.
The following tasks are required to configure your SonicWALL GMS Virtual Appliance before registering it:
1. Power on the virtual appliance.
See “Powering the Virtual Appliance On or Off” on page 17.
2. Open the virtual appliance console and configure the following host settings:
• IP address
• Default route
See “Configuring Host Settings on the Console” on page 17.
3. Log in to the appliance system interface and configure the following:
• Host name
• Network settings
• Time settings
See “Configuring Host Settings on the Appliance Web Interface” on page 19.
The following sections are not part of the task flow, but describe how to view and edit settings on the virtual appliance:• “Viewing Settings Summary” on page 15• “Editing Virtual Machine Settings” on page 16
Viewing Settings Summary
When the SonicWALL GMS Virtual Appliance is selected in the left pane, the Summary tab of the vSphere interface displays pertinent information such as memory, powered on/off state, hard disk storage usage, network subnet settings, and other settings.
Note: This page might incorrectly indicate that VMware Tools are not installed.
A short list of commands is also provided on this page, including Power On and Edit Settings.
3
SonicWALL GMS Virtual Appliance 7.0 Getting Started Guide Page 15

When using vSphere with vCenter Server, the Migrate and Clone commands are also available.
Editing Virtual Machine Settings
You can use the vSphere client to edit settings for the SonicWALL GMS Virtual Appliance, including memory, CPUs, descriptive name, datastore, and resource allocation.
To edit virtual machine settings:
1. In the vSphere client, right-click the SonicWALL GMS Virtual Appliance in the left navigation pane and select Edit Settings from the right-click menu.
2. In the Virtual Machine Properties window, the Hardware tab displays the settings for memory, CPU, hard disk, and other hardware. Click on the row in the table to access the editable settings in the right pane.
Page 16
3. Click the Options tab to view and edit the SonicWALL GMS Virtual Appliance name, location (datastore), guest power management (for standby), and other settings.
4. Click the Resources tab to view and edit the resource allocation settings.
5. When finished, click OK.
Powering the Virtual Appliance On or Off
There are multiple ways to power the SonicWALL GMS Virtual Appliance on or off.
To power the virtual appliance on (or off):
1. Do one of the following:
• Right-click the SonicWALL GMS Virtual Appliance in the left pane and navigate to Power > Power On (or Power > Power Off) in the right-click menu.
• Select the SonicWALL GMS Virtual Appliance in the left pane and then click Power on the virtual machine (or Shut down the virtual machine) on the Getting Started tab in the right pane.
• Select the SonicWALL GMS Virtual Appliance in the left pane and then click Power On (or Shut down guest) on the Summary tab in the right pane.
Configuring Host Settings on the Console
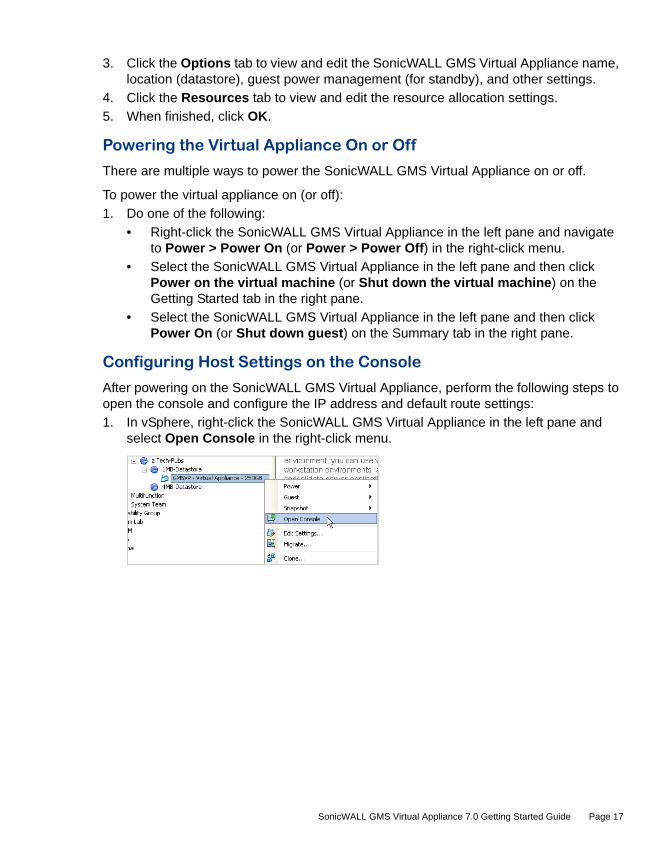
After powering on the SonicWALL GMS Virtual Appliance, perform the following steps to open the console and configure the IP address and default route settings:
1. In vSphere, right-click the SonicWALL GMS Virtual Appliance in the left pane and select Open Console in the right-click menu.
SonicWALL GMS Virtual Appliance 7.0 Getting Started Guide Page 17
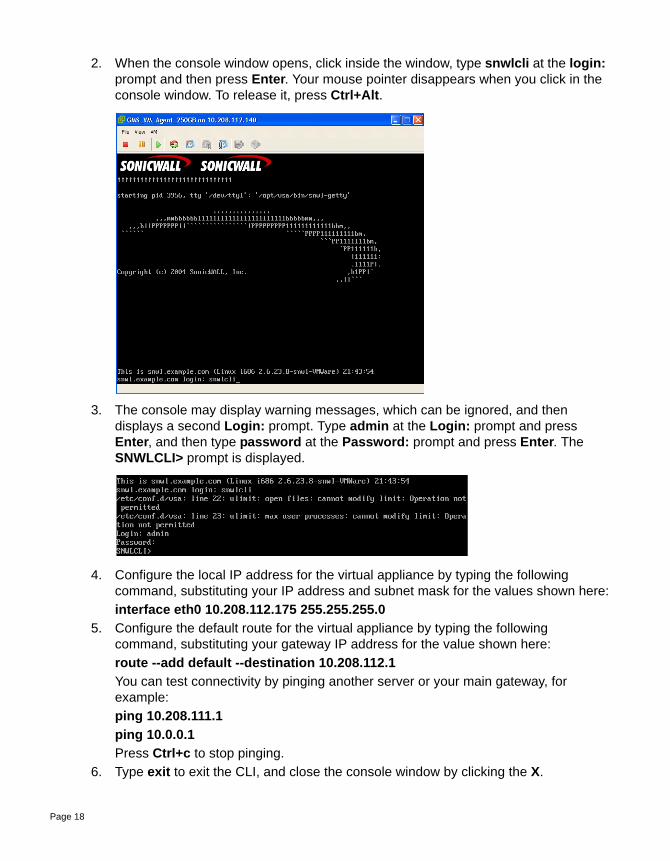
2. When the console window opens, click inside the window, type snwlcli at the login: prompt and then press Enter. Your mouse pointer disappears when you click in the console window. To release it, press Ctrl+Alt.
3. The console may display warning messages, which can be ignored, and then displays a second Login: prompt. Type admin at the Login: prompt and press Enter, and then type password at the Password: prompt and press Enter. The SNWLCLI> prompt is displayed.
4. Configure the local IP address for the virtual appliance by typing the following command, substituting your IP address and subnet mask for the values shown here:
interface eth0 10.208.112.175 255.255.255.0
5. Configure the default route for the virtual appliance by typing the following command, substituting your gateway IP address for the value shown here:
route --add default --destination 10.208.112.1
You can test connectivity by pinging another server or your main gateway, for example:
ping 10.208.111.1
ping 10.0.0.1
Press Ctrl+c to stop pinging.
6. Type exit to exit the CLI, and close the console window by clicking the X.
Page 18

Configuring Host Settings on the Appliance Web Interface
After configuring the IP address and default route settings on the SonicWALL GMS Virtual Appliance console, the next steps are to change the admin password and configure host name, network, and time settings in the appliance management interface. The password is changed during the login process, and the Host Configuration Tool changes the other settings.
The Host Configuration Tool is a wizard that takes you through several basic steps to get your SonicWALL GMS Virtual Appliance configured for your network.
The wizard starts automatically after you log in for the first time and change the admin password. You can cancel the wizard at this time, which leaves the default configuration on the virtual appliance and prevents the wizard from automatically starting again.
Note: If you log out of the appliance management interface without actually cancelling the wizard, it will start automatically on your next login.
You can manually start the wizard at any time by clicking the Wizards button at the top-right corner of the page.
Perform the following steps to complete host configuration for the virtual appliance:
1. Launch a browser and enter the URL of the virtual appliance, such as:
http://10.208.112.175
2. On the appliance interface login page, type in the default credentials and then click Submit to log in.
The default credentials are:
User – adminPassword – password
3. The first time you log in to the appliance, you must change the password. The login page re-displays with the default login credentials prepopulated. Enter a new password for the admin account in the New Password field, and enter it again in the Confirm New Password field. Click Submit.
Note: The new password must be at least 7 characters.
Alert: Be sure to save or write this password down in a secure location, as it is encrypted and is difficult to recover if you forget it.
4. The Host Configuration Tool wizard starts automatically. In the Introduction screen, click Next.
SonicWALL GMS Virtual Appliance 7.0 Getting Started Guide Page 19
5. In the Network Settings screen, configure the following network settings for the SonicWALL GMS Virtual Appliance, and then click Next:
• Name – A descriptive name for this virtual appliance
• Domain – In the form of “sonicwall.com”; this domain is not used for authentication
• Host IP Address – The static IP address for the eth0 interface of the virtual appliance
• Subnet Mask – In the form of “255.255.255.0”
• Default Gateway – The IP address of the network gateway – this is the default gateway and is required for networking purposes.
• DNS Server 1 – The IP address of the primary DNS server
• DNS Server 2 (Optional) – The IP address of the secondary DNS server
6. In the Time Settings screen, select values for the following system settings on the virtual appliance, and then click Next:
• Time (hh:mm:ss) – Hours, minutes, and seconds of current time; this field is disabled if the NTP option is selected
• Date – Month, day, and year of current date; this field is disabled if the NTP option is selected
• TimeZone – Select from the drop-down list
• Set time automatically using NTP – Select this checkbox to use an NTP server to set the virtual appliance time; a default NTP server is pre-configured
7. In the Summary screen, verify the settings. Click Back to make changes on a previous screen, or click Apply to accept the settings.
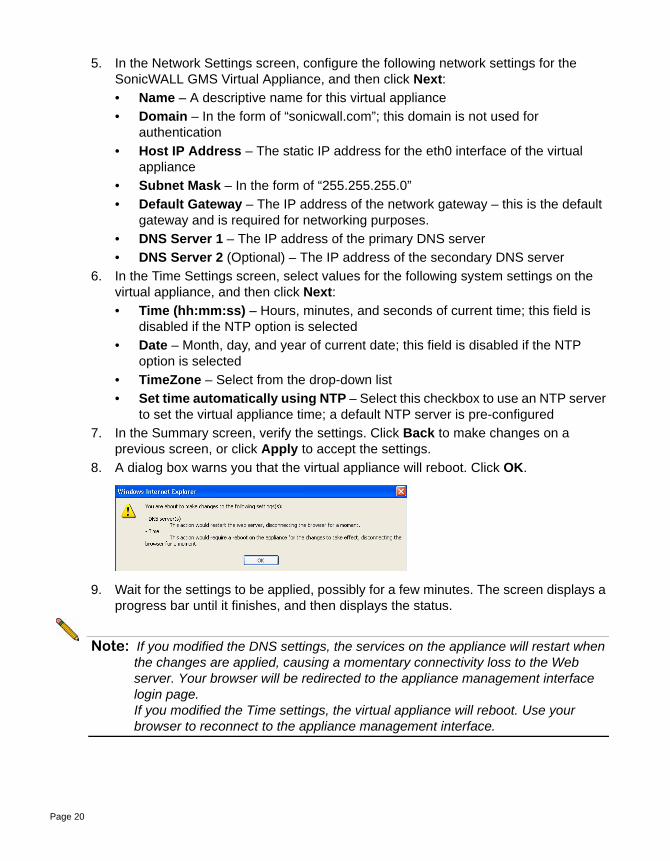
8. A dialog box warns you that the virtual appliance will reboot. Click OK.
9. Wait for the settings to be applied, possibly for a few minutes. The screen displays a progress bar until it finishes, and then displays the status.
Note: If you modified the DNS settings, the services on the appliance will restart when the changes are applied, causing a momentary connectivity loss to the Web server. Your browser will be redirected to the appliance management interface login page.If you modified the Time settings, the virtual appliance will reboot. Use your browser to reconnect to the appliance management interface.
Page 20

Registering and Licensing SonicWALL GMS
All SonicWALL GMS Virtual Appliances must be registered and licensed before use. This requirement applies to single deployments or distributed deployments on multiple datastores, to fresh or upgraded deployments, and to mixed deployments with SonicWALL UMA appliances or with SonicWALL GMS instances on Windows servers.
This section contains the following subsections:
• “Creating a MySonicWALL Account” on page 21
• “Registering / Licensing the SonicWALL GMS Virtual Appliance” on page 22
• “Registering Associated Servers in a Distributed Deployment” on page 23
Creating a MySonicWALL Account
A MySonicWALL account is required for product registration. If you already have an account, continue to the Registering / Licensing the SonicWALL GMS Virtual Appliance section. Perform the following steps to create a MySonicWALL account:
1. In your browser, navigate to www.mysonicwall.com.
2. In the login screen, click the Not a registered user? link.
3. Complete the Registration form and then click Register.
4. Verify that the information is correct and click Submit.
5. In the screen confirming that your account was created, click Continue.
Note: MySonicWALL registration information is not sold or shared with any other company.
4
SonicWALL GMS Virtual Appliance 7.0 Getting Started Guide Page 21

Registering / Licensing the SonicWALL GMS Virtual Appliance
You must register your SonicWALL GMS Virtual Appliance on MySonicWALL before you can run SonicWALL GMS on it. Registration is performed using the appliance management interface. When registration is completed, SonicWALL GMS will be licensed on your virtual appliance.
When you log in to the SonicWALL GMS Virtual Appliance after running the Host Configuration Tool, the Register button is displayed in the top right corner of the page. A Register link is also available at the top of the page. The registration process requires that the virtual appliance have access to the
Internet.
To register your SonicWALL GMS Virtual Appliance, perform the following steps:
1. In a browser, log in to the appliance management interface using the new password for the admin account.
2. On the System > Status page, the Registration Pending notification across the top of the screen indicates that the system is not registered, the Serial Number status is UNKNOWN, and the License status displays Not Licensed. To begin registration, click the Register button or Register link.
3. In the License Management page, type your MySonicWALL user name and password and then click Submit.
4. On the second License Management page, type your 12-character software serial number into the Serial Number field and your authentication code into the Authentication Code field.
Note: If this is the first SonicWALL GMS Virtual Appliance that you are registering in a multi-server deployment, the Serial Number and Authentication Code you received from your SonicWALL sales representative is entered here. As you add more SonicWALL GMS Virtual Appliances, SonicWALL UMA appliances, or instances of SonicWALL GMS to the distributed deployment, use the same serial number used for the installation of the first SonicWALL GMS. You can use the serial number to register associated servers if it is a full-retail serial number, but not if it is a Demo or Free Trial GMS serial number. See “Registering Associated Servers in a Distributed Deployment” on page 23.
5. Type a friendly name for the system into the Friendly Name field. The friendly name is displayed on MySonicWALL to more easily identify the installation on this system. Click Submit.
Note: If this is the first SonicWALL GMS that you have registered in a multi-server deployment, the Friendly Name for this system will also be used as the name for the distributed deployment. See “Registering Associated Servers in a Distributed Deployment” on page 23.
Page 22
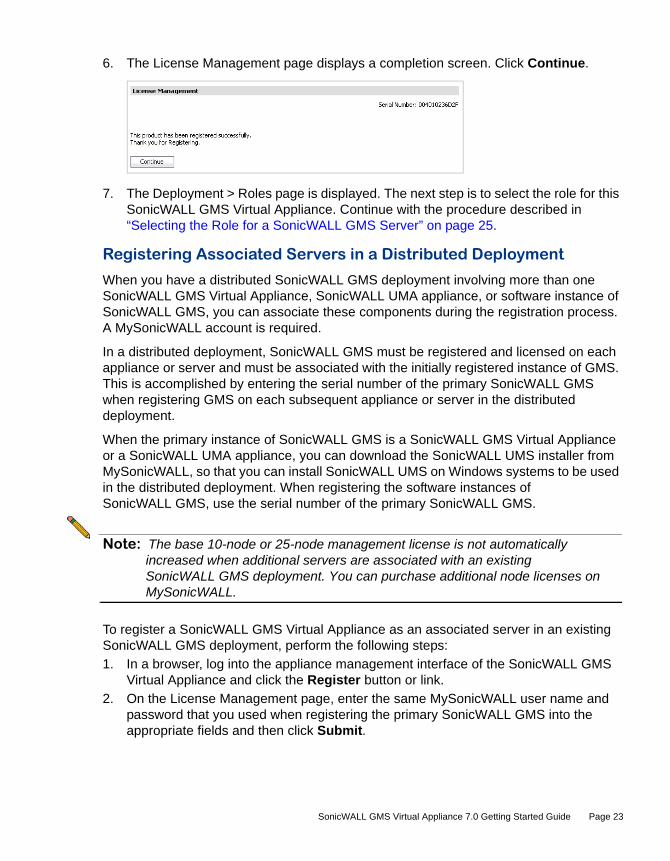
6. The License Management page displays a completion screen. Click Continue.
7. The Deployment > Roles page is displayed. The next step is to select the role for this SonicWALL GMS Virtual Appliance. Continue with the procedure described in “Selecting the Role for a SonicWALL GMS Server” on page 25.
Registering Associated Servers in a Distributed Deployment
When you have a distributed SonicWALL GMS deployment involving more than one SonicWALL GMS Virtual Appliance, SonicWALL UMA appliance, or software instance of SonicWALL GMS, you can associate these components during the registration process. A MySonicWALL account is required.
In a distributed deployment, SonicWALL GMS must be registered and licensed on each appliance or server and must be associated with the initially registered instance of GMS. This is accomplished by entering the serial number of the primary SonicWALL GMS when registering GMS on each subsequent appliance or server in the distributed deployment.
When the primary instance of SonicWALL GMS is a SonicWALL GMS Virtual Appliance or a SonicWALL UMA appliance, you can download the SonicWALL UMS installer from MySonicWALL, so that you can install SonicWALL UMS on Windows systems to be used in the distributed deployment. When registering the software instances of SonicWALL GMS, use the serial number of the primary SonicWALL GMS.
Note: The base 10-node or 25-node management license is not automatically increased when additional servers are associated with an existing SonicWALL GMS deployment. You can purchase additional node licenses on MySonicWALL.
To register a SonicWALL GMS Virtual Appliance as an associated server in an existing SonicWALL GMS deployment, perform the following steps:
1. In a browser, log into the appliance management interface of the SonicWALL GMS Virtual Appliance and click the Register button or link.
2. On the License Management page, enter the same MySonicWALL user name and password that you used when registering the primary SonicWALL GMS into the appropriate fields and then click Submit.
SonicWALL GMS Virtual Appliance 7.0 Getting Started Guide Page 23

3. On the second License Management page, do one of the following:
• Type the 12 character serial number of the primary SonicWALL GMS into the Serial Number field and type the authentication code of the primary SonicWALL GMS into the Authentication Code field. The primary SonicWALL GMS must already be registered.
• If you have an 8 character serial number because you upgraded this distributed deployment from a previous version of SonicWALL GMS, click the Click here if you have an 8 character Serial Number link and enter the 8 character serial number of the primary SonicWALL GMS.
4. Type a descriptive name for the system in the Friendly Name field and click Submit.
5. In the License Management completion screen, click Continue.
After registration, the next step is to select the role for this GMS server. Continue with the procedure described in “Selecting the Role for a SonicWALL GMS Server” on page 25.
Page 24

Selecting the Role for a SonicWALL GMS Server
The role that you assign to your SonicWALL GMS defines the services that it will provide. SonicWALL GMS uses these services to perform management, monitoring, and reporting tasks.
Your SonicWALL GMS can be deployed in any of the following roles:• All in One• Database Only• Console• Agent• Monitor• Syslog Collector
On the Deployment > Roles page of the appliance interface, clicking Details in the same row as a role provides a list of the services that run on a system in that role, and information about using the role.
As the number of managed appliances increases, a more distributed deployment provides better performance. To manage large numbers of SonicWALL appliances, you can use several SonicWALL GMS instances operating in different roles in a distributed deployment. These instances can run on SonicWALL GMS Virtual Appliances, Windows Server machines, or on SonicWALL UMA appliances.
You can include the MySQL database installation with any role. The All In One or Database Only roles automatically include the MySQL database. Only one server in a SonicWALL GMS deployment should have the MySQL database included in its role.
You can scale your deployment to handle more units and more reporting by adding more systems in the Agent role. Agents provide built-in redundancy capability, meaning that if an Agent goes down, other Agents can perform the configuration tasks and other tasks of the Agent that went down.
Note: When configuring the role for the first SonicWALL GMS in a distributed deployment, you should either include the database or be prepared to provide the IP address of an existing database server.
You can meet this database objective in one of the following ways:• By selecting a role that includes the database automatically, such as All In One or
Database Only• By selecting the Include Database (MYSQL) checkbox if configuring the system
with any other role• By setting up a compatible database on another machine and providing that IP
address when prompted
5
SonicWALL GMS Virtual Appliance 7.0 Getting Started Guide Page 25

The initial Deployment > Roles page is shown below:
Using the Role Configuration Tool
The Role Configuration Tool is a wizard that guides you through the process of defining the deployment role for SonicWALL GMS. Your system must be registered and licensed for SonicWALL GMS to run the Role Configuration Tool.
There are two ways to access the Role Configuration Tool:• After the virtual appliance is registered and licensed for SonicWALL GMS, the
System > Status page of the appliance management interface provides a link to the wizard.
• The Wizards button in the top right corner of the page provides access to the Role Configuration Tool.
Page 26
Note: In a multi-server deployment of GMS, configure port 5029 for the GMS Console Server to allow the central Web Server to communicate with the reporting databases to all GMS agents.
To use the Role Configuration Tool, perform the following steps:
1. Log into the appliance management interface and navigate to the System > Status page.
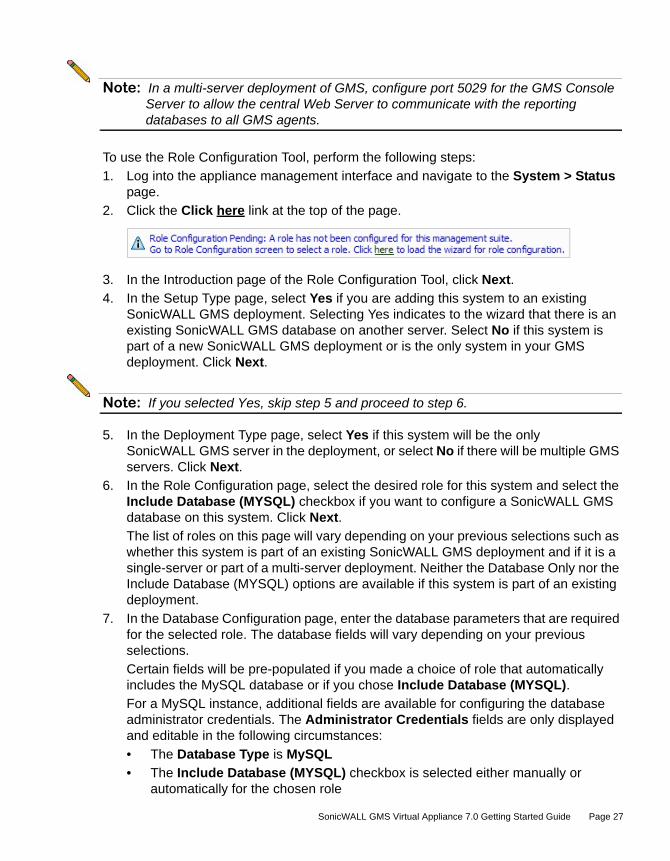
2. Click the Click here link at the top of the page.
3. In the Introduction page of the Role Configuration Tool, click Next.
4. In the Setup Type page, select Yes if you are adding this system to an existing SonicWALL GMS deployment. Selecting Yes indicates to the wizard that there is an existing SonicWALL GMS database on another server. Select No if this system is part of a new SonicWALL GMS deployment or is the only system in your GMS deployment. Click Next.
Note: If you selected Yes, skip step 5 and proceed to step 6.
5. In the Deployment Type page, select Yes if this system will be the only SonicWALL GMS server in the deployment, or select No if there will be multiple GMS servers. Click Next.
6. In the Role Configuration page, select the desired role for this system and select the Include Database (MYSQL) checkbox if you want to configure a SonicWALL GMS database on this system. Click Next.
The list of roles on this page will vary depending on your previous selections such as whether this system is part of an existing SonicWALL GMS deployment and if it is a single-server or part of a multi-server deployment. Neither the Database Only nor the Include Database (MYSQL) options are available if this system is part of an existing deployment.
7. In the Database Configuration page, enter the database parameters that are required for the selected role. The database fields will vary depending on your previous selections.
Certain fields will be pre-populated if you made a choice of role that automatically includes the MySQL database or if you chose Include Database (MYSQL).
For a MySQL instance, additional fields are available for configuring the database administrator credentials. The Administrator Credentials fields are only displayed and editable in the following circumstances:
• The Database Type is MySQL
• The Include Database (MYSQL) checkbox is selected either manually or automatically for the chosen role
SonicWALL GMS Virtual Appliance 7.0 Getting Started Guide Page 27

• The Database Host field is set to localhost and is not editable
When these conditions are met, the administrator password is required to create a regular access user account for the SonicWALL GMS application.
If you selected a role that does not include the MySQL database, you have the option of configuring the use of a SQL Server database in this screen.
• Note the following when selecting values for these fields:
• Database User – Do not use any special characters, and do not use 'sa', 'root', or 'admin'.
• Database Password – Do not use any special characters.
• Admin Login – If using MySQL, the default Admin Login is 'root'. This cannot be changed.
• Admin Password – Do not use any special characters.
When finished entering the database parameters, click Next.
8. If deploying this system in the Console or All In One role, the Redundancy page is displayed. Setting up redundancy on the Console system allows for high availability of the Web Server service. To configure this host as a redundant console, select Yes.
Note: Redundancy should be enabled only when another host has already been configured as a primary host within the current deployment. Enabling redundancy without configuring a primary will result in an incomplete setup.
9. In the Other Configuration page, the fields vary depending on the selected role, as follows:
• Gateway Parameters – Required for All in One, Console, and Agent roles
Page 28

• Syslog Server Parameters - Required for All in One, Console, Agent, and Syslog Collector roles
• SMTP Parameters - Required for All in One and Console roles
Enter the GMS Gateway IP address and connection password, if you are using a GMS gateway. Leave these fields empty if you are using HTTP/HTTPS to connect to the managed appliances.
10. In the Syslog Server Port field, type in the port used for receiving syslog messages or accept the default of 514.
11. For access to email on this system, including the ability to send email alerts, type the mail server IP address into the SMTP Server field and enter valid email addresses for the Sender Address and Administrator Address. Click Next.
12. In the Summary page, verify that all parameters are correct. Click Back to make changes on a previous screen, or click Apply to accept the settings.
13. Wait for the settings to be applied. The screen displays a progress bar until it finishes, and then displays the status. This phase can take up to 10 minutes, especially if the database was included in the deployment.
14. Click Close to exit the Role Configuration Tool.
SonicWALL GMS Virtual Appliance 7.0 Getting Started Guide Page 29

Manually Configuring the System Role
You can configure the role of the SonicWALL GMS Virtual Appliance without using the Role Configuration Tool. For manual role configuration procedures and information, see the SonicWALL GMS/UMA Administrator’s Guide, available at:http://www.sonicwall.com/us/Support.html
Configuring Deployment Settings
This section describes the Deployment > Settings page of the appliance interface, used for Web port, SMTP, and SSL access configuration.
See the following sections:• “Configuring Web Port Settings” on page 30• “Configuring SMTP Settings” on page 31• “Configuring SSL Access” on page 32
Configuring Web Port Settings
Web port settings configuration is largely the same on any role. To change the Web port settings, perform the following steps:
1. On the Deployment > Settings page under Web Port Configuration, to use a different port for HTTP access to the SonicWALL GMS Virtual Appliance, type the port number into the HTTP Port field. The default port is 80.
2. To use a different port for HTTPS access to the SonicWALL GMS Virtual Appliance, type the port number into the HTTPS Port field. The default port is 443.
3. Click Update to apply the Web port settings.
Note: Changing the Web port settings will cause the virtual appliance to restart.
Page 30

4. After the virtual appliance restarts, use the new port to access the /appliance management interface. For example:
• If you changed the HTTP port to 8080, use the URL: http://<IP Address>:8080/appliance/
• If you changed the HTTPS port to 4430, use the URL: http://<IP Address>:4430/appliance/
Configuring SMTP Settings
The SMTP settings are used for sending email alerts to the SonicWALL GMS Virtual Appliance system administrator. The SMTP Configuration section allows you to configure an SMTP server name or IP address, a sender email address, and an administrator email address. You can also test connectivity to the configured server.
If the Mail Server settings are not configured correctly, you will not receive important email notifications, such as:• System alerts for your SonicWALL GMS deployment performance• Availability of product updates, hot fixes, or patches• Availability of firmware upgrades for managed appliances• Alerts on your managed appliances’ status• Scheduled reports
To configure the SMTP settings, perform the following steps:
1. On the Deployment > Settings page under SMTP Configuration, enter the IP address of the SMTP server into the SMTP server field.
2. Select the Use Authentication checkbox, and enter your SMTP server username and password.
3. In the Sender address field, enter the email address that will appear as the ‘From’ address when email alerts are sent to the administrator.
4. In the Administrator address field, enter a valid email address for the administrator who will receive email alerts.
5. Click the Test Connectivity button to verify your SMTP server configuration settings.
6. Click Update to apply the SMTP settings.
SonicWALL GMS Virtual Appliance 7.0 Getting Started Guide Page 31
Configuring SSL Access
The SSL Access Configuration section allows you to configure and upload a custom Keystore/Certificate file for SSL access to the virtual appliance, or to select the default local keystore.
To configure SSL access:
1. On the Deployment > Settings page under SSL Access Configuration, select one of the following:
• Select the Default radio button to keep, or revert to, the default settings, in which the default SonicWALL GMS Web Server certificate with 'gmsvpserverks' keystore is used.
• Select Custom to upload a custom keystore certificate for SSL access to your SonicWALL GMS Virtual Appliance.
2. For a custom keystore certificate, click the Browse button in the Keystore/Certificate file field to select your certificate file.
Your custom file is renamed to ‘gmsvpservercustomks’ after upload.
3. Type the password for the keystore certificate into the Keystore/Certificate password field.
4. Click the View button to display details about your keystore certificate.
5. Click the Update button to submit your changes.
Page 32

Introduction to the Management Interfaces
This section describes the two SonicWALL GMS management interfaces. An almost identical URL is used when accessing either the GMS management interface or the Universal Management Host system interface, but the URL is modified to specify either sgms or appliance.
See the following sections:• “Overview of the Two Interfaces” on page 33• “Switching Between Management Interfaces” on page 34• “SonicWALL UMH System Interface Introduction” on page 34• “SonicWALL GMS Management Interface Introduction” on page 35
Overview of the Two Interfaces
The SonicWALL GMS Universal Management Suite (UMS) installs two separate management interfaces:• SonicWALL Universal Management Host (UMH) System Management Interface
– Used for system management of the host server, including registration and licensing, setting the admin password, selecting the deployment role, and configuring other system settings.
To access the UMH system management interface on the default HTTP port using a browser on the host server, use the URL:
http://localhost/appliance/
From another system, access the UMH system management interface with the URL:http://<IP address>:<port>/appliance/
If you are using the standard HTTP port, 80, it is not necessary to append the port number to the IP address.
• SonicWALL GMS Management Interface – Used to access the SonicWALL GMS application that runs on the Windows server. This interface is used to configure GMS management of SonicWALL appliances, including creating policies, viewing reports, and monitoring networks, and for configuring GMS administrative settings. The GMS management interface is only available on systems deployed in a role that runs the Web Server service, such as the All In One or Console roles.
Access the GMS management interface with one of the following URLs:
http://localhost/sgms/http://<IP address>:<port>/sgms/
6
SonicWALL GMS Virtual Appliance 7.0 Getting Started Guide Page 33

Switching Between Management Interfaces
On systems deployed in the All In One or Console role, the “superadmin” user can easily switch between the UMH system management interface and the SonicWALL GMS management interface. The SuperAdmin is the master administrator for the entire GMS installation.
When logged in to either interface, the superadmin can switch to the login page of the other interface by clicking the Switch button in the top right corner of the page. The Switch button is only visible for users with SuperAdmin privileges.
SonicWALL UMH System Interface Introduction
The SonicWALL UMH system interface is used for system management of the SonicWALL GMS instance, including registration and licensing, setting the admin password, configuring database settings, selecting the deployment role, and configuring other system settings.
When installing SonicWALL Universal Management Suite 7.0 on a host, a Web server is installed to provide the system management interface. The system interface is available by default at http://localhost/appliance/ after restarting the system.
The login screen allows you to securely login to the SonicWALL UMH system interface using your system user ID and password.
Note: The admin account on the system interface can have a different password than the admin account for SonicWALL GMS.
Page 34
SonicWALL GMS Management Interface Introduction
SonicWALL GMS is a Web-based application for configuring, managing, monitoring and gathering reports from thousands of SonicWALL Internet security appliances and non-SonicWALL appliances, all from a central location. This section provides an introduction to the main elements of the Web-based management interface. This section contains the following subsections:• “Login Screen” on page 35• “Dashboard” on page 35• “Live Monitoring” on page 36• “Multi-Solution Management” on page 36• “Management Interface” on page 37
Login Screen
The login screen allows you to securely login to SonicWALL GMS using your GMS application user ID and password. The SonicWALL GMS management interface is available by default at http://localhost/sgms/ after completing registration.
Dashboard
The Dashboard tab is a customizable dashboard of your SonicWALL GMS deployment. The Dashboard tab provides powerful network visualization reporting, monitoring, and search filtering tools consolidated into one area of the management user interface. The Dashboard tab provides administrators with an executive summary through a Universal Dashboard geographic map. As depicted in the screenshot below, the Geographic View provides a scalable map that displays your SonicWALL GMS-managed units and SonicWALL GMS servers using graphical icons—these icons provide system state information with a mouse over.
SonicWALL GMS Virtual Appliance 7.0 Getting Started Guide Page 35
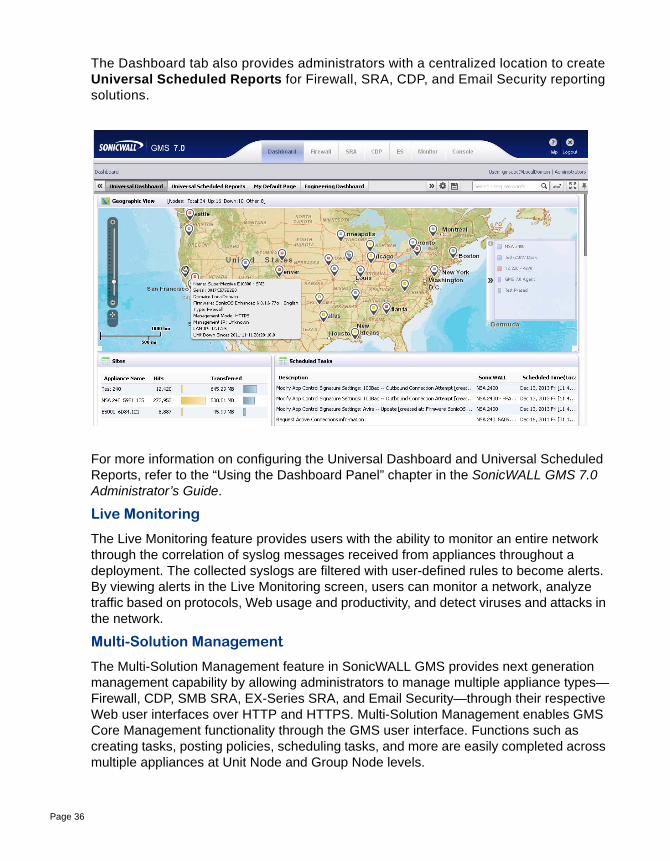
The Dashboard tab also provides administrators with a centralized location to create Universal Scheduled Reports for Firewall, SRA, CDP, and Email Security reporting solutions.
For more information on configuring the Universal Dashboard and Universal Scheduled Reports, refer to the “Using the Dashboard Panel” chapter in the SonicWALL GMS 7.0 Administrator’s Guide.
Live Monitoring
The Live Monitoring feature provides users with the ability to monitor an entire network through the correlation of syslog messages received from appliances throughout a deployment. The collected syslogs are filtered with user-defined rules to become alerts. By viewing alerts in the Live Monitoring screen, users can monitor a network, analyze traffic based on protocols, Web usage and productivity, and detect viruses and attacks in the network.
Multi-Solution Management
The Multi-Solution Management feature in SonicWALL GMS provides next generation management capability by allowing administrators to manage multiple appliance types—Firewall, CDP, SMB SRA, EX-Series SRA, and Email Security—through their respective Web user interfaces over HTTP and HTTPS. Multi-Solution Management enables GMS Core Management functionality through the GMS user interface. Functions such as creating tasks, posting policies, scheduling tasks, and more are easily completed across multiple appliances at Unit Node and Group Node levels.
Page 36
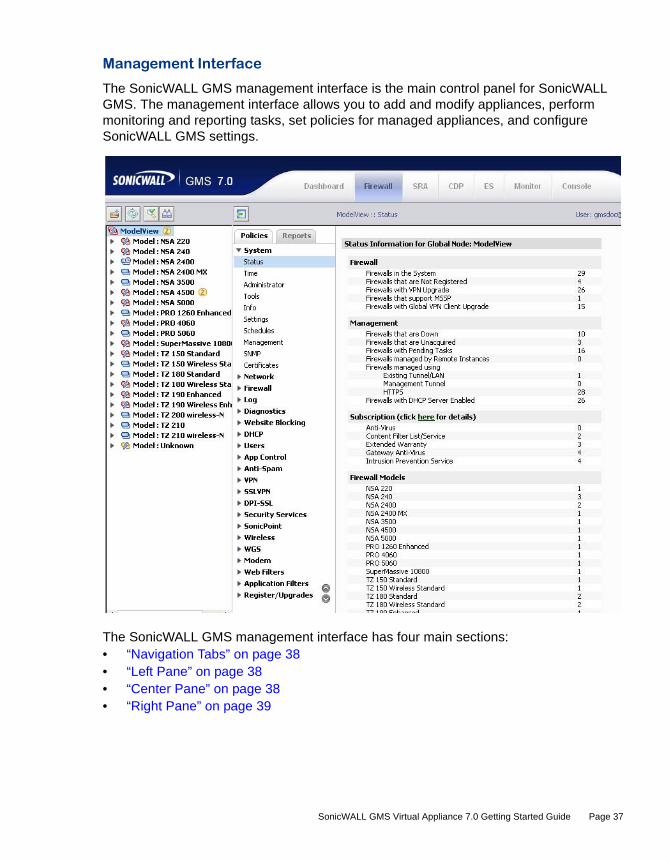
Management Interface
The SonicWALL GMS management interface is the main control panel for SonicWALL GMS. The management interface allows you to add and modify appliances, perform monitoring and reporting tasks, set policies for managed appliances, and configure SonicWALL GMS settings.
The SonicWALL GMS management interface has four main sections:• “Navigation Tabs” on page 38• “Left Pane” on page 38• “Center Pane” on page 38• “Right Pane” on page 39
SonicWALL GMS Virtual Appliance 7.0 Getting Started Guide Page 37
Navigation Tabs
The SonicWALL GMS management interface navigation tabs are located at the top of the management interface.
The seven navigation tabs are Dashboard, Firewall, SRA, CDP, ES, Monitor, and Console. The Monitor tab provides real-time monitoring at the global, group or appliance level. The Console tab provides tools to customize options found in the other SonicWALL GMS tabs and to manage SonicWALL GMS settings that affect the environment globally.
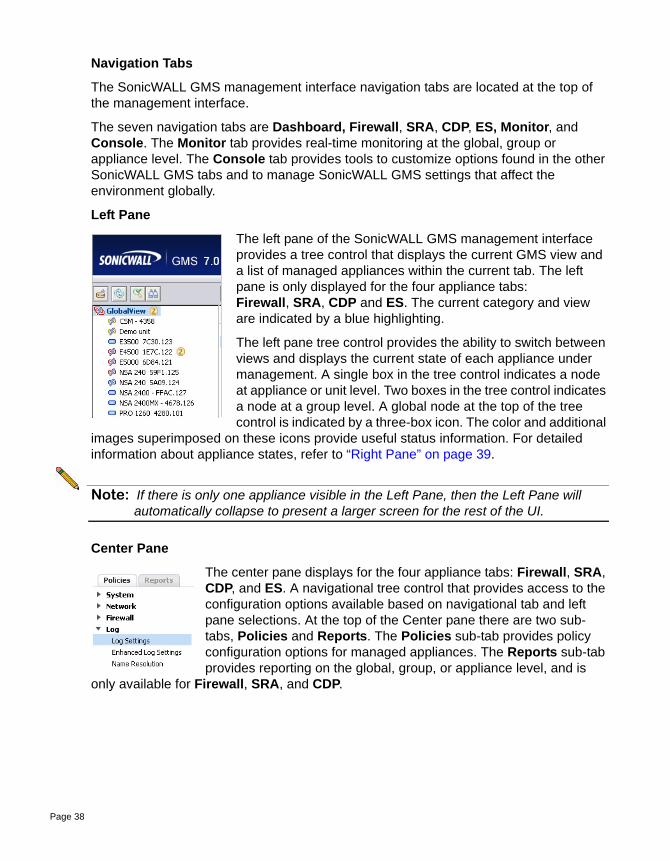
Left Pane
The left pane of the SonicWALL GMS management interface provides a tree control that displays the current GMS view and a list of managed appliances within the current tab. The left pane is only displayed for the four appliance tabs: Firewall, SRA, CDP and ES. The current category and view are indicated by a blue highlighting.
The left pane tree control provides the ability to switch between views and displays the current state of each appliance under management. A single box in the tree control indicates a node at appliance or unit level. Two boxes in the tree control indicates a node at a group level. A global node at the top of the tree control is indicated by a three-box icon. The color and additional
images superimposed on these icons provide useful status information. For detailed information about appliance states, refer to “Right Pane” on page 39.
Note: If there is only one appliance visible in the Left Pane, then the Left Pane will automatically collapse to present a larger screen for the rest of the UI.
Center Pane
The center pane displays for the four appliance tabs: Firewall, SRA, CDP, and ES. A navigational tree control that provides access to the configuration options available based on navigational tab and left pane selections. At the top of the Center pane there are two sub-tabs, Policies and Reports. The Policies sub-tab provides policy configuration options for managed appliances. The Reports sub-tab provides reporting on the global, group, or appliance level, and is
only available for Firewall, SRA, and CDP.
Page 38

The current selection in the center pane is indicated by the highlighted item. For example, the figure to the left displays the current selection Log > Log Settings. The center pane options change based on the navigational tab and left pane selections, and selections in the center pane modify the display in the right pane. For example, the figure in the next section illustrates the contents of the right pane when the global view is selected in the left pane and System > Status is selected on the Policies tab in the center pane.
Right Pane
The right pane displays the available status or tasks based on the current selection of navigational tab, left pane and center pane options. Configurations performed in the right pane modify global, group or appliance settings. For example, the right pane image below displays the status and tasks available for the Policies navigation tab, left pane selection GlobalView, and center pane selection System > Status.
SonicWALL GMS Virtual Appliance 7.0 Getting Started Guide Page 39
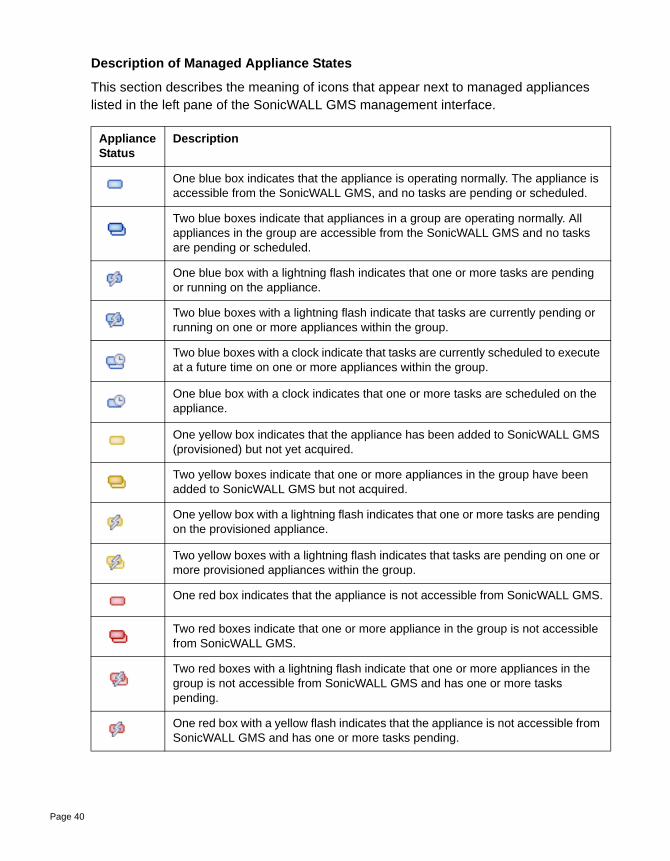
Description of Managed Appliance States
This section describes the meaning of icons that appear next to managed appliances listed in the left pane of the SonicWALL GMS management interface.
Appliance Status
Description
One blue box indicates that the appliance is operating normally. The appliance is accessible from the SonicWALL GMS, and no tasks are pending or scheduled.
Two blue boxes indicate that appliances in a group are operating normally. All appliances in the group are accessible from the SonicWALL GMS and no tasks are pending or scheduled.
One blue box with a lightning flash indicates that one or more tasks are pending or running on the appliance.
Two blue boxes with a lightning flash indicate that tasks are currently pending or running on one or more appliances within the group.
Two blue boxes with a clock indicate that tasks are currently scheduled to execute at a future time on one or more appliances within the group.
One blue box with a clock indicates that one or more tasks are scheduled on the appliance.
One yellow box indicates that the appliance has been added to SonicWALL GMS (provisioned) but not yet acquired.
Two yellow boxes indicate that one or more appliances in the group have been added to SonicWALL GMS but not acquired.
One yellow box with a lightning flash indicates that one or more tasks are pending on the provisioned appliance.
Two yellow boxes with a lightning flash indicates that tasks are pending on one or more provisioned appliances within the group.
One red box indicates that the appliance is not accessible from SonicWALL GMS.
Two red boxes indicate that one or more appliance in the group is not accessible from SonicWALL GMS.
Two red boxes with a lightning flash indicate that one or more appliances in the group is not accessible from SonicWALL GMS and has one or more tasks pending.
One red box with a yellow flash indicates that the appliance is not accessible from SonicWALL GMS and has one or more tasks pending.
Page 40

Next Steps
After installation, registration, and role configuration, the next steps in setting up your SonicWALL GMS deployment are performed in the SonicWALL GMS management interface. See the SonicWALL GMS 7.0 Administrator’s Guide for complete information about configuring SonicWALL GMS device management and reporting. This guide and other related documents are available on:http://www.sonicwall.com/us/Support.html
Suggested next steps include the following:• Provisioning units – Log into each appliance that will be managed by SonicWALL
GMS, and enable GMS Management.• Adding units – In the SonicWALL GMS management interface, right-click in the left
navigation pane and select Add Unit to add a SonicWALL appliance to GMS management.
• Scheduling reports – Use the Dashboard > Universal Scheduled Reports panel of the SonicWALL GMS management interface to set up a reporting schedule for your managed appliances.
6
SonicWALL GMS Virtual Appliance 7.0 Getting Started Guide Page 41

Updating the SonicWALL GMS Virtual Appliance
The System > Settings page of the appliance interface is used to update the SonicWALL GMS Virtual Appliance to a newer build or version.
To update the SonicWALL GMS Virtual Appliance, perform the following steps:
1. Download the updater file from MySonicWALL. The file name is in the format:
sw_gmsvp_vm_eng_7.0.xxxx.yyyy.gmsvp-updater.sh
Note: Do not rename the updater file.
2. Log on to the appliance interface of the SonicWALL GMS Virtual Appliance and navigate to the System > Settings page.
3. Click Browse and select the sw_gmsvp_vm_eng_7.0.xxxx.yyyy.gmsvp-updater.sh file on your local system.
The file must be for the virtual appliance (be sure it has vm in the file name).
4. Click Apply to update your virtual appliance with the new software.
8
Page 42

Copyright Notice
© 2012 SonicWALL, Inc.
All rights reserved.
Under the copyright laws, this manual or the software described within, cannot be copied, in whole or part, without the written consent of the manufacturer, except in the normal use of the software to make a backup copy. The same proprietary and copyright notices must be affixed to any permitted copies as were affixed to the original. This exception does not allow copies to be made for others, whether or not sold, but all of the material purchased (with all backup copies) can be sold, given, or loaned to another person. Under the law, copying includes translating into another language or format.
Specifications and descriptions subject to change without notice.
Trademarks
SonicWALL is a registered trademark of SonicWALL, Inc.
Microsoft Windows 7, Windows Vista, Windows XP, Windows Server 2003, Windows Server 2008, Internet Explorer, and Active Directory are trademarks or registered trademarks of Microsoft Corporation.
Adobe, Acrobat, and Acrobat Reader are either registered trademarks or trademarks of Adobe Systems Incorporated in the U.S. and/or other countries.
VMware, ESX, ESXi, vSphere, and VMware vCenter Server are trademarks or registered trademarks of VMware, Inc.
Firefox is a trademark of the Mozilla Foundation.
Other product and company names mentioned herein may be trademarks and/or registered trademarks of their respective companies and are the sole property of their respective manufacturers.
SonicWALL GMS Virtual Appliance 7.0 Getting Started Guide Page 43
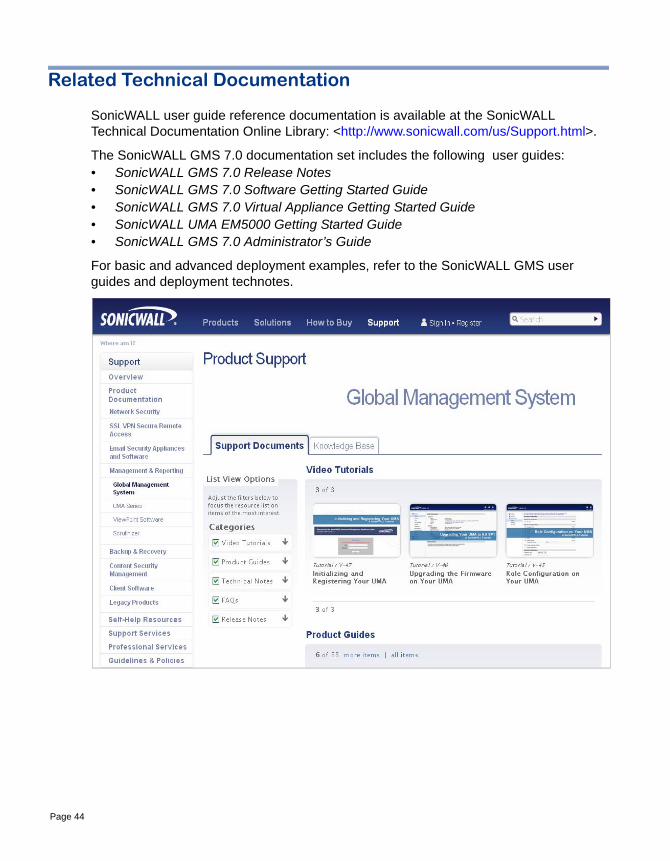
Related Technical Documentation
SonicWALL user guide reference documentation is available at the SonicWALL Technical Documentation Online Library: <http://www.sonicwall.com/us/Support.html>.
The SonicWALL GMS 7.0 documentation set includes the following user guides:• SonicWALL GMS 7.0 Release Notes• SonicWALL GMS 7.0 Software Getting Started Guide• SonicWALL GMS 7.0 Virtual Appliance Getting Started Guide• SonicWALL UMA EM5000 Getting Started Guide• SonicWALL GMS 7.0 Administrator’s Guide
For basic and advanced deployment examples, refer to the SonicWALL GMS user guides and deployment technotes.
Page 44

SonicWALL Live Product Demos
Get the most out of your Global Management System with the complete line of SonicWALL products. The SonicWALL Live Demo Site provides free test drives of SonicWALL security products and services through interactive live product installations:
• UTM/Firewall/VPN
• Continuous Data Protection
• SSL VPN Secure Remote Access
• Content Filtering
• Email Security
• GMS and Analyzer
For further information, visit:<http://livedemo.sonicwall.com/>
SonicWALL GMS Virtual Appliance 7.0 Getting Started Guide Page 45

Notes
Page 46

SonicWALL, Inc.
2001 Logic Drive T +1 408.745.9600 www.sonicwall.com
San Jose CA 95124-3452 F +1 408.745.9300
PN: 232-000759-00 Rev B 2/12
descriptions subject to change without notice. 07/07 SW 1452012
™