go to meeting login process and meeting procedures
DESCRIPTION
Go To Meeting Login Process and Meeting Procedures. Overview:. Everybody, we are thrilled by the overwhelming amount of registrations for our ongoing webinar series. We are excited to share our knowledge and know-how with you and to get to know all of you better!. - PowerPoint PPT PresentationTRANSCRIPT

Go To Meeting Login Process and Meeting Procedures

Overview:Everybody, we are thrilled by the
overwhelming amount of registrations for our ongoing webinar series. We are excited to share our knowledge and know-how with you and to get to know all of you better!

We wanted to make sure that everybody is able to make it to the webinars with as little technical difficulties (and headaches) as possible, because we understand that your time is valuable!
Below is a step by step guide to getting yourself registered and logged into the webinar.

Step 1:Getting RegisteredEach week, prior to the webinar, you’ll
receive an email from Storage Unit Auction List updating you with information for that week’s webinar and including a registration link. Click on the Registration link in the email you receive.
The link will look similar to the link listed below: https://attendee.gotowebinar.com/register/3454842906083036928

Step 1: Getting RegisteredOnce you click this link, you’ll be taken to
the meeting registration page. At the top of the page, you’ll be prompted to choose the webinar date from the drop down menu. This will automatically be selected for you based on the email link you clicked on, but if you’d like to register for a different week of the webinar, you can change the date using the drop down menu. Then you’ll enter your First and Last Name, Email Address, and State and select the Register button.
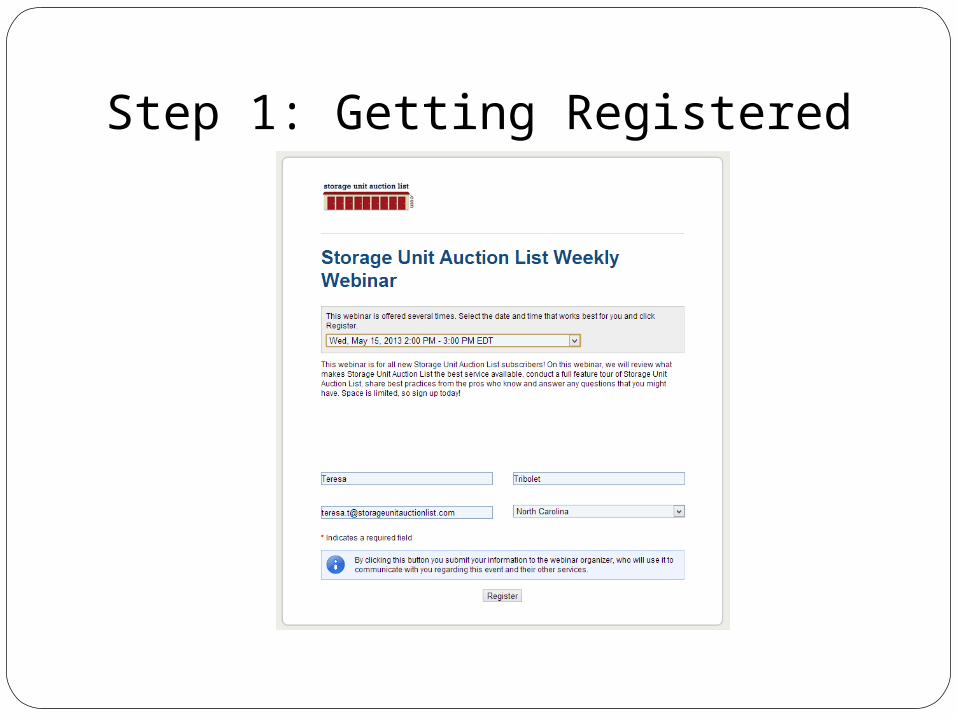
Step 1: Getting Registered

Step 2: Thank You For RegisteringOnce you click Register, you be taken to a
new page and will see a Thank You for Registering message. The Webinar information, including the name of the webinar and the date and time it will be held are listed below the Thank You message. You’ll also see a section of the page titled:
“How to Join the Webinar”. In this section you’ll see a new link and the message: At the time above, click this link to join the webinar.

Step 2: Thank You For RegisteringIf you are registering directly before the
scheduled webinar time, you can click this link to join the webinar. (Keep in mind that you may have beaten the presenter to the punch, and may have to wait a moment or two for us to log in and start the session!) Or, if you are registering early, you can simply copy and save the link to your computer and then enter this in the URL bar at the start of the webinar. The link will always look something like this: https://global.gotowebinar.com/join/2110615174201112320/924902787

Step 2: Thank You For Registering

Step 3: Downloading GoToWebinarThe first time that you click the Join the
Webinar link, you’ll need to install GoToMeeting/Webinar to your computer. This is the software that we use to run the webinar and is necessary for you to download to participate each week. You will be prompted to install the software whether you are clicking the link directly, or enter the URL into the toolbar.

Step 3: Downloading GoToWebinar

Step 3: Downloading GoToWebinarYou’ll note the red box around the
download that you need to select to install the program. Once you click on this, you’ll see a pop up window titled Citrix Online Launcher. This is highlighted in red as well. This should only take a moment. You may then receive another pop up asking you if you’d like to allow the program to make changes to your computer. Select yes. Once you do, the program will finish installing.

Step 4: Logging in to the WebinarYou may see a few different things,
depending on when you are registering and attempting to access the meeting, we’ll walk through each of these below so that you know what to except!

Step 4: Logging in to the WebinarIf you are trying to enter the webinar
before the start time, you’ll receive this screen. This is just a reminder that the meeting isn’t scheduled for this time, and will list the date and time that the webinar is set to take place. The software will only allow you to enter the session once the start time has occurred, so even if you log in a few minutes early on the day of the webinar, you’ll see this screen:
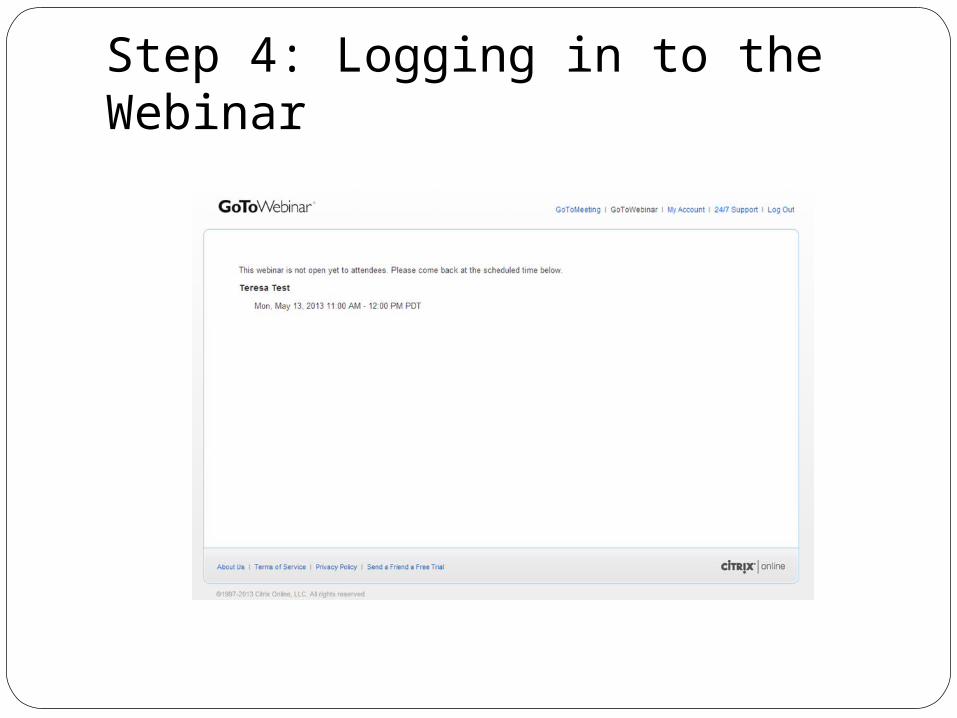
Step 4: Logging in to the Webinar

Step 4: Logging in to the WebinarIf you’ve logged into the meeting and you
receive the following pop up message, this means that you’ve successfully connected to the webinar during the scheduled session time, but we may just be running a few minutes behind. Sit tight until a presenter has logged in and started the session! (Once we’re logged in, you’ll then see a different screen. We’ll cover that next.)

Step 4: Logging in to the Webinar

Step 4: Logging in to the WebinarThe next screen image shows what you’ll
see the majority of the time. This is an image of the webinar session once you’ve logged in during the scheduled time, and the presenter is logged in as well. You’ll see one large pop up box that lists the meeting information, and a control panel on the right side of the screen.

Step 4: Logging in to the Webinar

GoToWebinar Control PanelThe control panel on the right side of the
screen allows you to do several things as a participant. Here’s a close up of the control panel so that you can get familiar with it!

GoToWebinar Control PanelYou can choose your audio options by
selecting either the Telephone or Mic & Speakers options. The Mic & Speakers options allow you to use your computer’s audio equipment to listen to the webinar and ask questions. You can choose to dial in and use a telephone as well if your computer isn’t equipped with a microphone and speakers.

GoToWebinar Control PanelIf you’re a bit shy and prefer not to ask us a
question using the audio options, you can also utilize the chat tool to type the question into the chat box that is provided. You can also use the Mute option in the upper left corner of the control panel to mute yourself. You can mute and unmute yourself by selecting the icon that looks like a microphone.

GoToWebinar Control PanelThe raise hand option can be used to grab
our attention if you have a question or are typing a question into the chat tool. There may be several hundred participants on the line at any given time, so it is important to use this tool so that we can get to everbody’s questions and make sure that we don’t miss anybody! You can select the icon on the left of the control panel that looks like a hand to utilize this feature.

Meeting EtiquetteTypically at the start of the meeting, we’ll
mute all participants to make sure that everybody gets the best audio possible, and that we don’t have any problems with echos or static from a participants connection. We ask that everybody save their questions until the end so that we can get through all the information for you as quickly as possible, and then use the tools I’ve talked about during the Q&A section to get those burning questions answered.

Need More Information???We’ve created a quick video tutorial on
how to register as well, and you can view that at the link below:
http://www.screenr.com/hky7If you still have questions on the
registration process, you can give us a shout on Facebook, Twitter, or Google+, email me at [email protected] or give me a call at 828-537-4190.