god’s eye blanket
DESCRIPTION
3 Versions of a mitered square blanket suitable for a baby blanket, nursing home shawl, pet blanket and large bedspread.Great for using up scraps of yarn. FREETRANSCRIPT

GOD’S EYE BLANKET
This blanket is a simple mitered square pattern which is knit flat. I have included photographs of 3 versions- #1 in the top photo is a full size 60”x 80” blanket, knit in 6 different colors of double knit weight cotton. I chose to knit the outer edge of each square in the same color and I did 2 rounds of single crochet in this color for a border. Version #2, in the next photo, was knit with 1 color only of variegated cotton in double knit weight. Both #1 and #2 are composed of 6” squares which were knit separately, and then sewn or crocheted together. If knitting version #1 or #2, each square can be as large or small as you choose by simply knitting the number of rows needed to achieve your desired size. If several colors are being used, make

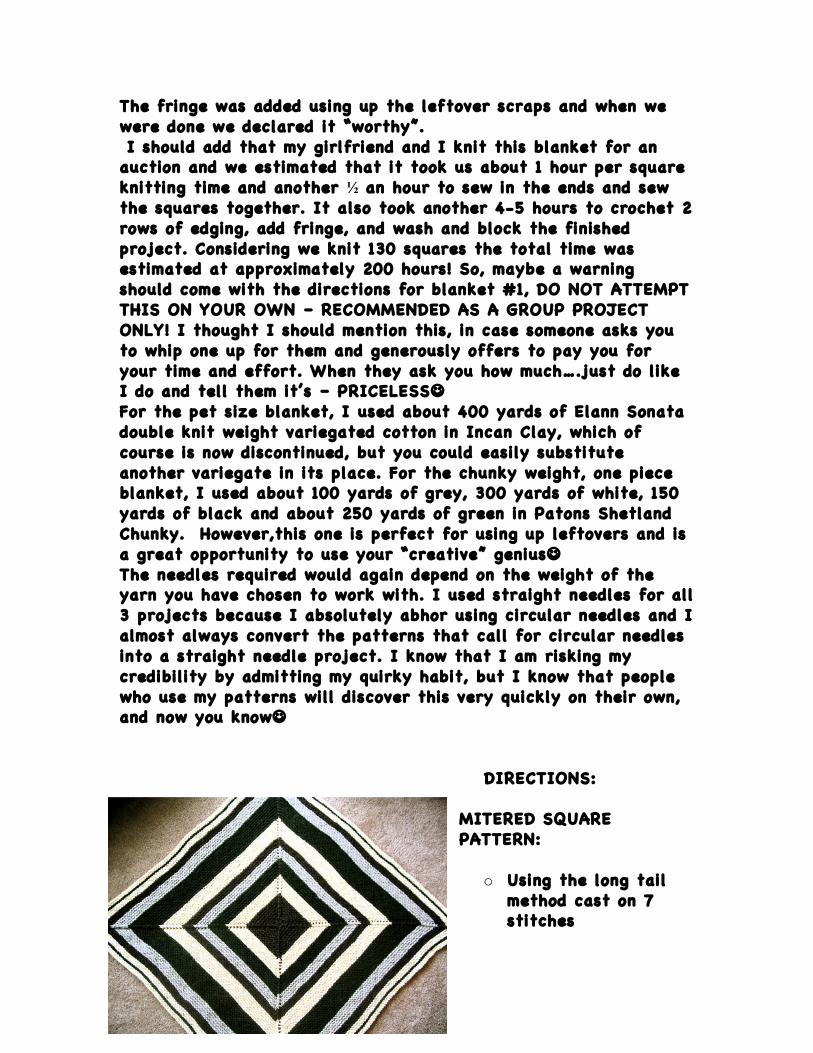
sure that the new color is added at the beginning of a right side row and remember, for those of you who detest seaming, there are numerous ends to be sewn in on completion of version #1, in addition to stitching the finished squares together. That is why I have included a photo of a pet size
blanket (version #2), made with variegated yarns, which has a striped appearance but doesn’t require as much hand finishing. Version #3 was knit using 4 colors of a chunky weight yarn. This particular version is knit as one large mitered square and has only 1 seam to sew together after completion. The following sizes are suggestions for various types of blankets.
o Pet blanket suitable for donation to animal shelters: 16”x 16”
o Baby blanket: 25” x 30” o Lap Blanket for nursing homes,etc: 36” x 36” o Full Size Blanket: 40” x 60”, 50” x 70”, or whatever size is
desired MATERIALS: YARNS: This is more a suggestion than the exact requirements because there are so many variations that you can make of this blanket and it can be made with any weight of yarn, ranging from fingering to chunky. The largest blanket – 60” x 80” required approximately 800 yards of double knit weight yarn for each of the 5 colors and at least 1000 yards of the color used for edging.
The fringe was added using up the leftover scraps and when we were done we declared it “worthy”. I should add that my girlfriend and I knit this blanket for an auction and we estimated that it took us about 1 hour per square knitting time and another ½ an hour to sew in the ends and sew the squares together. It also took another 4-5 hours to crochet 2 rows of edging, add fringe, and wash and block the finished project. Considering we knit 130 squares the total time was estimated at approximately 200 hours! So, maybe a warning should come with the directions for blanket #1, DO NOT ATTEMPT THIS ON YOUR OWN – RECOMMENDED AS A GROUP PROJECT ONLY! I thought I should mention this, in case someone asks you to whip one up for them and generously offers to pay you for your time and effort. When they ask you how much….just do like I do and tell them it’s – PRICELESS For the pet size blanket, I used about 400 yards of Elann Sonata double knit weight variegated cotton in Incan Clay, which of course is now discontinued, but you could easily substitute another variegate in its place. For the chunky weight, one piece blanket, I used about 100 yards of grey, 300 yards of white, 150 yards of black and about 250 yards of green in Patons Shetland Chunky. However,this one is perfect for using up leftovers and is a great opportunity to use your “creative” genius The needles required would again depend on the weight of the yarn you have chosen to work with. I used straight needles for all 3 projects because I absolutely abhor using circular needles and I almost always convert the patterns that call for circular needles into a straight needle project. I know that I am risking my credibility by admitting my quirky habit, but I know that people who use my patterns will discover this very quickly on their own, and now you know
DIRECTIONS:
MITERED SQUARE PATTERN:
o Using the long tail method cast on 7 stitches

o Increase in EVERY STITCH across the row by knitting into both the front and back of each stitch. You will now have 14 stitches on your needle.
o ROW 1 (rs): K2,yo(K2,yo,K1,yo)x3, K2,yo,K1 (8 increases made – 22 stitches on needle)
o ROW 2 (ws): P2(K2,P3)x4
These 2 rows establish the pattern but I have added 4 extra rows so that it will be easier to see the progression of the added stitches in each right side row, formed by the 8 yo’s. o ROW 3 (rs): K2,yo(K4,yo,K1,yo)x3, K4,yo,K1 (30 st) o ROW 4 (ws): P2,(K4,P3)x4 o ROW 5 (rs): K2,yo(K6,yo,K1,yo)x3, K6,yo,K1 (38 st) o ROW 6 (ws): P2(K6,P3)x4
* NOTE * ALL right side rows are continued in this manner, with 2 extra knit stitches added between each yo,K1,yo (8 extra in total), until you achieve your desired size.
VERSION #2: Knit at a gauge of 22 x 30 to 4”. Pattern was followed until there were 20 stitches between each yo,K1,yo and each square measured 5”. One ball made 4 squares.

VERSION #3: Knit at a gauge of 13 x 20 to 4”. Pattern was followed until there were 110 stitches between each yo,K1,yo and measured 36” x 36” FOR ALL VERSIONS: All wrong side rows consist of purling the first 2 stitches, knitting each stitch until coming to a yo,K1,yo, which is always purled,(P3 in the pattern). The last 3 stitches on the end of the row are always a P3. Also note that the yo,K1,yo stitches form the corners of the mitered square and the K1 stitch between the yo’s should always be lined up in every row. As you get more completed rows on your needle, you should be able to see the formation of an equilateral triangle between each set of corner stitches, and there will be 4 in total, thus forming a perfect square. And now isn’t that just special? FINISHING: Bind off All stitches in pattern on the wrong side row. Sew the 2 bound-off edges together using the tail from the cast on row. Close up the center of the square and then, using a mattress seam, place the tapestry needle through 2 bars between the 2 stocking stitches formed at the beginning of the right side row edge and then through the corresponding hole formed by the yo, on the opposite side. Sew the separate squares together using an overhand stitch through the lower loops only of the bind-off rows. Make sure not to pull these stitches too tight so as to maintain the shape of the squares. The 1st version of the blanket in the photo was edged with 2 rows of single crochet, but this is not necessary as the garter stitch lies very flat at the edges. Fringing can also be added if desired using the leftovers.