golden gate (gg) app training manual - saral...
TRANSCRIPT
Golden Gate Application: Training
Golden Gate (GG) App
Training Manual
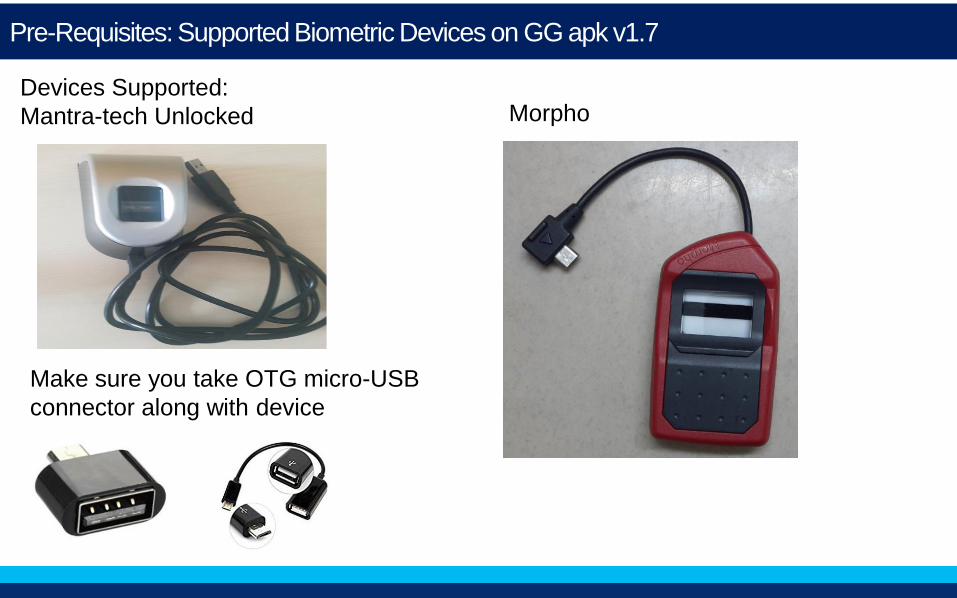
Pre-Requisites: Supported Biometric Devices on GG apk v1.7
Devices Supported:
Mantra-tech Unlocked Morpho
Make sure you take OTG micro-USB
connector along with device

Pre-Requisites: OS & Phone requirements
• Androids Versions supported are 4.2.2 to 6.0.1
• Phone should have minimum battery level of 15%
• Phone should have OTG support
For Mantra tech Unlocked Device
For Morpho Device
• Androids Versions supported are 4.X.X to 6.0.1
• Phone should have minimum battery level of 20%
• Phone should have OTG support

Pre-Requisites: OTG Support
How to check if your mobile has OTG support?
Method 1: Check mobile specifications online
4
Example: check your mobile specifications on GSM arena. Typically
if OTG support is available, it is called out explicitly.

Pre-Requisites: OTG Support
5
How to check if your mobile has OTG support?
Method 2: Install ‘OTG?’ app

Pre-Requisites
Storage permissions on Marshmallow (Android 6.X.X)
Steps to turn ON storage Permissions for Golden Gate
App:
Settings->Applications->Golden Gate
->Permissions->Storage

GG App & Kyc Form Link
GG App Link
https://drive.google.com/open?id=0B2_1dOpClvWQTDcxUGs1OHZ5WXc
KYC Form Link
https://drive.google.com/open?id=0B2_1dOpClvWQWkJ0XzZERWphV0U
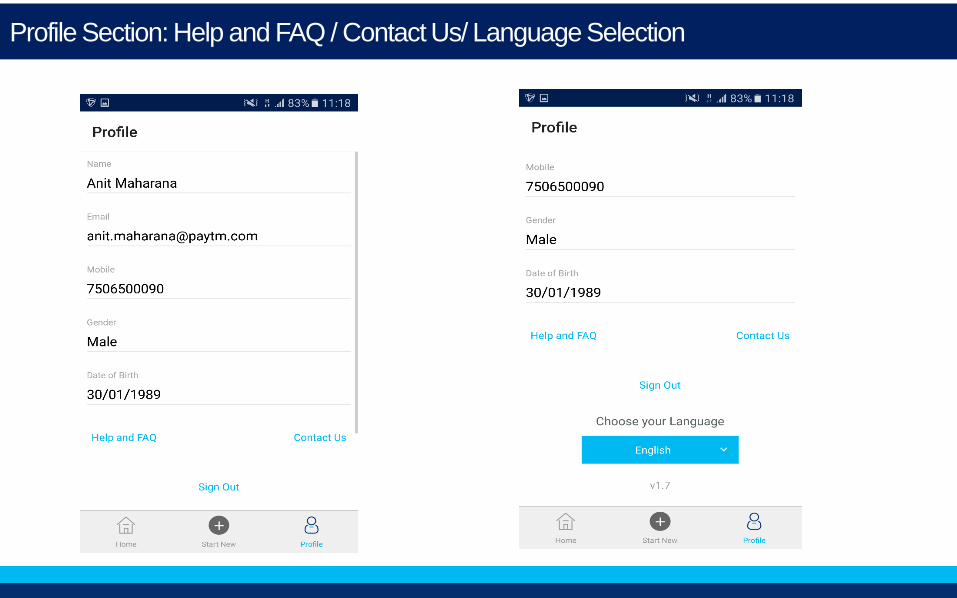
Profile Section: Help and FAQ / Contact Us/ Language Selection
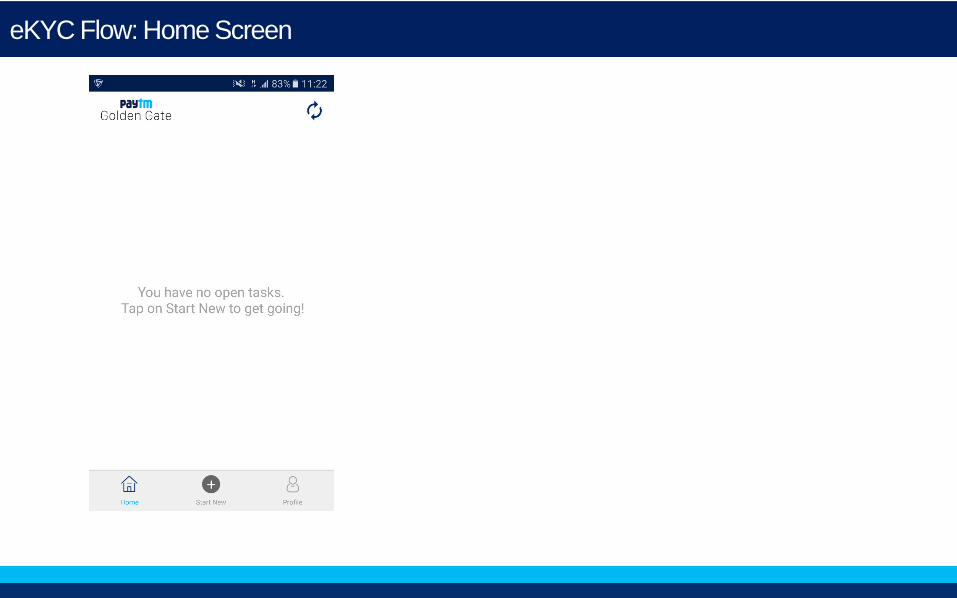
eKYC Flow: Home Screen

eKYC Flow: Enter Mobile Number
KYC can be done only
for customers who
already have a Paytm
wallet.
For customers who
don’t have the wallet,
download the app on
customer mobile and
get their wallet created
and then proceed with
KYC
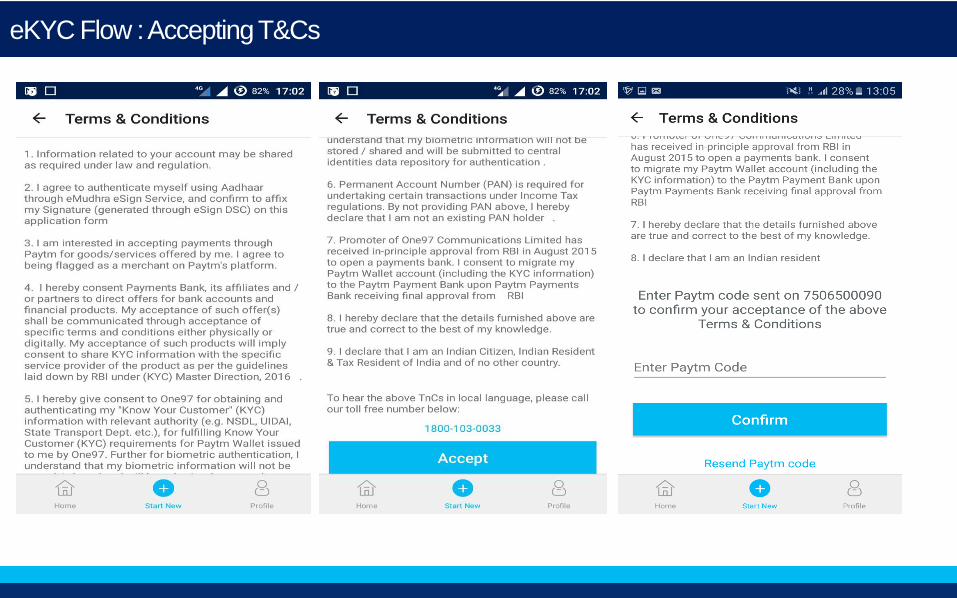
eKYC Flow : Accepting T&Cs

eKYC Flow : Accepting T&Cs

eKYC Flow: Customer Dashboard
Tap Here to do
the eKYC
If you get the status
as ‘Success’ that
means the KYC of
this number is done,
you would not be able
to proceed further.

eKYC Flow: Enter Aadhaar Number

eKYC Flow : Activate Sensor
**In case sensor does not flash light after activating sensor then connect sensor again
Tap here to
activate the
sensor

eKYC Flow: Scan Fingerprint
**In case you get any error:
1. Clean sensor 2. Try scanning different finger 3. Cross check Aadhaar number

eKYC Flow: Confirm Demographic details

eKYC Flow: Turn On Location
**You cannot proceed until Location has been switched ON. Click on OK to proceed.
Please allow the device to turn
on the Location, Click on Ok to
proceed

eKYC Flow: Marital Status & Profession
Tap on the drop-
down and
choose from the
options.
Tap on the drop-
down and choose
from the options.
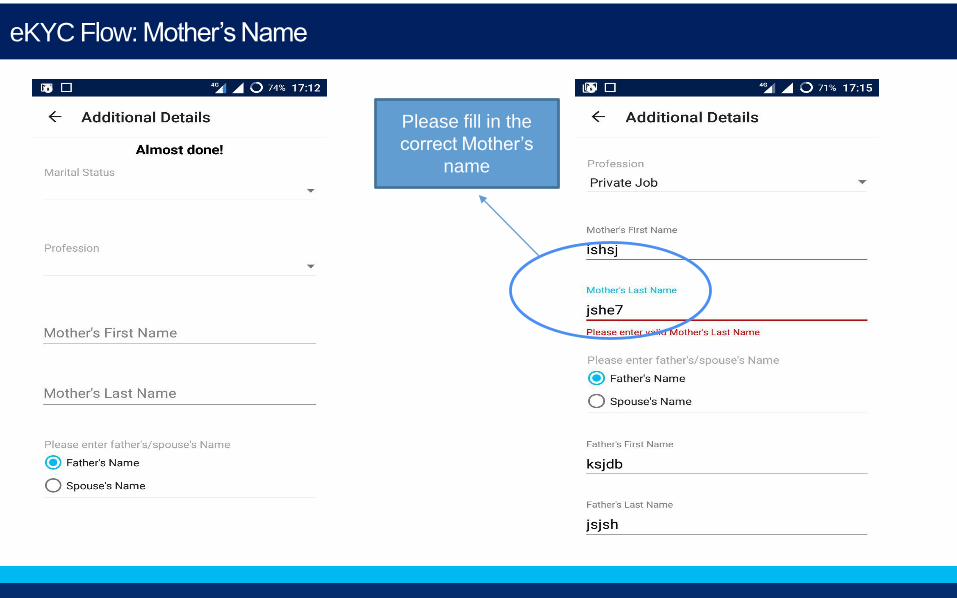
eKYC Flow: Mother’s Name
Please fill in the
correct Mother’s
name

eKYC Flow: Father’s Name
Please enter the correct
Father’s Name or Spouse
Name, whichever is selected
Please select ‘YES’ if the
Correspondence address is
same as the address on
Aadhar Card.
Please select ‘NO’ if the
Correspondence address is
not the same as the address
on Aadhar Card and proceed
to providing the
correspondence address.

eKYC Flow: Correspondence Address & PAN Number
Please enter the address, PIN code and the PAN Number of the Customer.
Please enter the
correct PAN
Number
Please fill in the
Correspondence
address of the
Customer
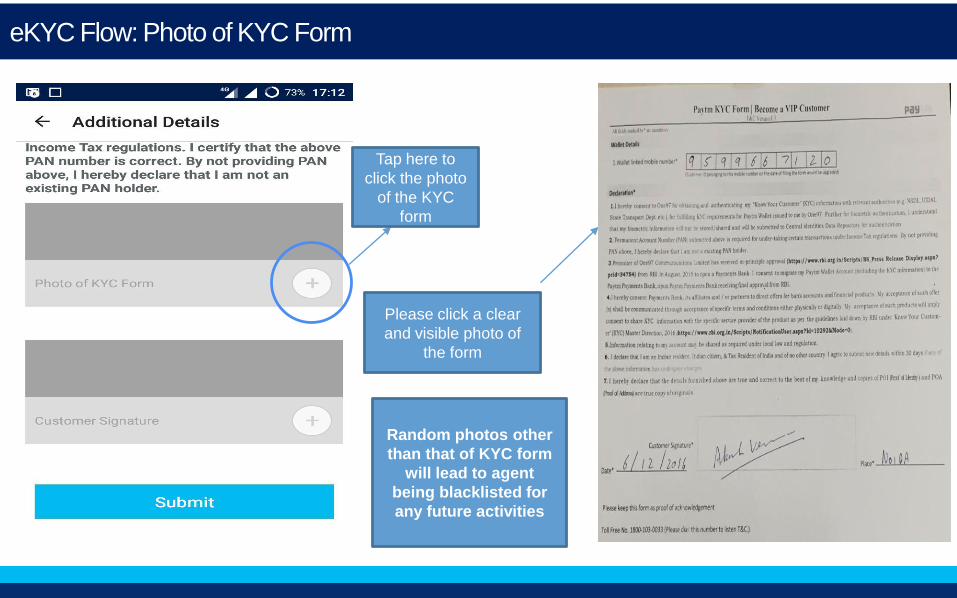
eKYC Flow: Photo of KYC Form
Tap here to
click the photo
of the KYC
form
Please click a clear
and visible photo of
the form
Random photos other
than that of KYC form
will lead to agent
being blacklisted for
any future activities
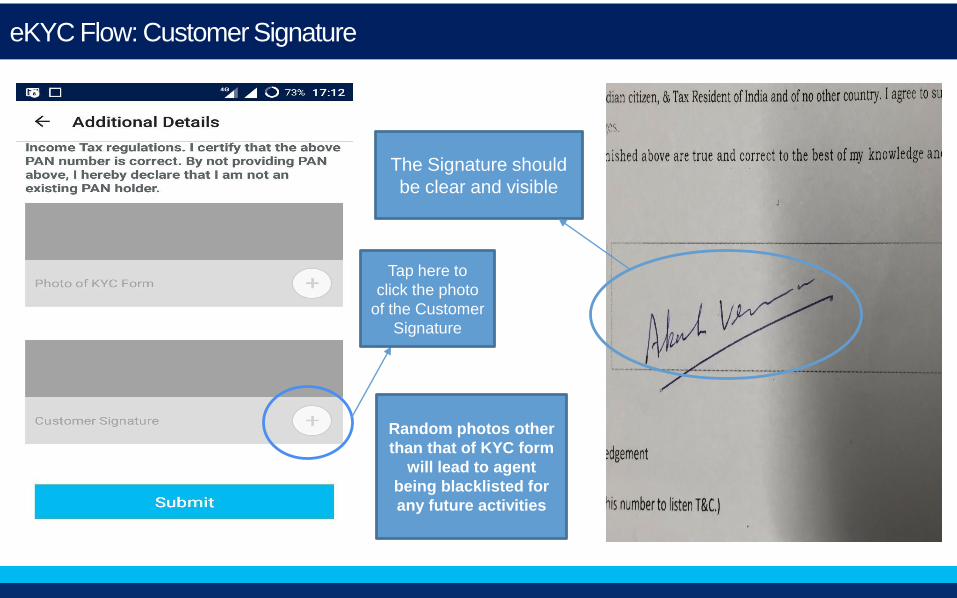
eKYC Flow: Customer Signature
Tap here to
click the photo
of the Customer
Signature
The Signature should
be clear and visible
Random photos other
than that of KYC form
will lead to agent
being blacklisted for
any future activities
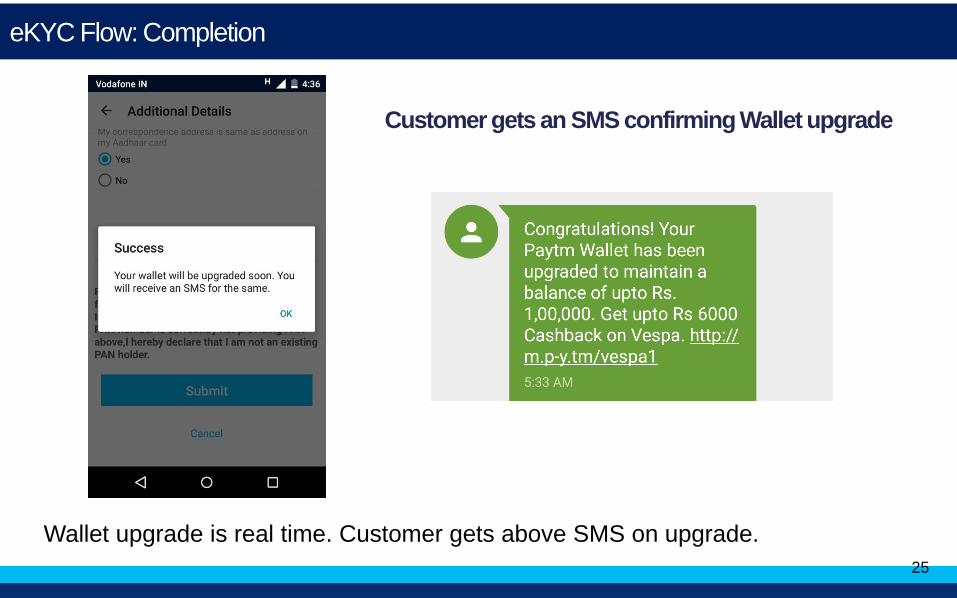
eKYC Flow: Completion
Customer gets an SMS confirming Wallet upgrade
25
Wallet upgrade is real time. Customer gets above SMS on upgrade.