google web toolkit. what is gwt? gwt is a development toolkit for building and optimizing complex...
TRANSCRIPT

Google Web Toolkit
What is GWT?
• GWT is a development toolkit for building and optimizing complex Ajax applications
• Goal is to enable productive development of high-performance web applications without the developer having to be an expert in • browser quirks
• XMLHttpRequest
• JavaScript
GWT versions
• GWT 1.0 May 17, 2006• Google announced GWT at the JavaOne conference, 2006
• GWT 1.1 August 11, 2006
• GWT 1.2 November 16, 2006
• …
• GWT 1.6 April 07, 2009
• GWT 1.7 July 13, 2009
• GWT 2.0 December 08, 2009• Current version: GWT 2.5.1 (March 8, 2013)

GWT Overview
• GWT allows to develop and debug Ajax applications in Java and then compile the source to highly optimized JavaScript that runs across all browsers
• During development - iterate quickly in the same "edit - refresh - view" cycle you're accustomed to with JavaScript
• During deployment - the GWT compiler compiles Java source code into optimized, standalone JavaScript files

Why Use Java for Ajax Development?
• Static type checking in the Java language allows to increase productivity and reduce errors
• Common JavaScript errors (typos, type mismatches) are caught at compile time rather than by users at runtime
• Java-based OO designs are easier to communicate and understand, thus making Ajax code base more comprehensible
• IDE support• Code prompting/completion
• Automated refactoring
• And other good stuff
Interesting things about GWT
• The GWT SDK provides a core set of Java APIs and libraries
• In the end, it's just JavaScript
• Don't worry about XMLHttpRequest
• GWT can handle all of the client-server communications for you
• Optimized JavaScript script downloads based on user profile
• E.g. Firefox browser displaying an application in French doesn't need to download extra code for other browsers or languages

Interesting things about GWT
• No need to build commonly used Widgets• Most of them come with GWT
• Reuse UI components across projects• Create reusable Widgets, package it up in a JAR file
for others to use
• Use other JavaScript libraries and native JavaScript code• You can write individual JavaScript methods directly
in your Java source files

Interesting things about GWT
• Easily support the browser's back button and history
• Internationalization
• Testing with JUnit• GWT is directly integrated with JUnit. You can even
unit test asynchronous RPCs.
• Free and open source
Two Modes of Running GWT App
• Development Mode• GWT application run and can be debugged within
JVM in a regular browser with the support of the
Google Web Toolkit Developer Plugin
• Uses a special engine to run your app as a mix of both Java bytecode and native JavaScript
• Production Mode• GWT application is run as pure JavaScript and
HTML, compiled from original Java
Plugin for Eclipse
• The plugin currently supports
Google Web Toolkit and
Google App Engine development
• New Web Application Wizard
• Web Application Launch Configurations
• Development Mode View
• Recognition of inline JavaScript (JSNI)
• Wizards to create entry points, modules and HTML pages
• Support for GWT JUnit tests
http://code.google.com/eclipse/index.html
Samples
• Several samples are included in the GWT SDK
• We will take a look to GWT Showcase sample• A showcase of GWT features with accompanying
source code and CSS styles
• GWT features used:• UI widgets
• Internationalization

Getting SDK and Showcase sample
• Download GWT SDK from (100 Mb)http://www.gwtproject.org/download.html
• Unzip somewhere on disk• \gwt-2.5.1\doc - Javadocs• \gwt-2.5.1\samples – Sample projects
• Go to \gwt-2.5.1\samples\Showcase
• Read README.txt and follow instructions
Creating a new GWT app in Eclipse
• Detailed instructions on GWT web page:http://www.gwtproject.org/usingeclipse.html
• StockWatcher application:http://www.gwtproject.org/doc/latest/tutorial/create.html

Notable generated artifacts
• Package /src/com/google/gwt/sample/stockwatcher• GWT module definition and initial application files
• Directory /war• Static resources that can be served publicly (images,
style sheets, HTML host pages)
• StockWatcher.gwt.xml• GWT module definition
• StockWatcher.html• host page
Notable generated artifacts
• StockWatcher.css• application style sheet
• StockWatcher.java• GWT entry point class
• GreetingService.java, GreetingServiceAsync.java, GreetingServiceImpl.java• GWT sample RPC classes
• gwt-servlet.jar• GWT server runtime library
The GWT modules
• Individual units of GWT configuration are called modules
• Modules are defined in XML, which contains the collection of resources that comprise a GWT application• inherited modules
• an entry point application class name
• source path entries
• public path entries
• deferred binding rules
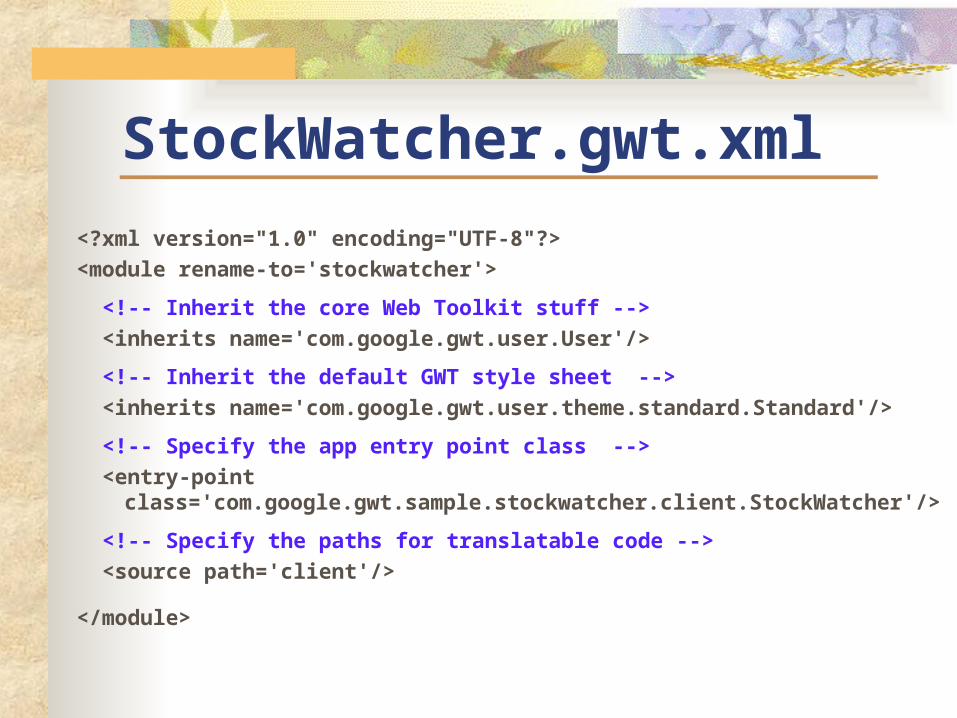
StockWatcher.gwt.xml
<?xml version="1.0" encoding="UTF-8"?>
<module rename-to='stockwatcher'>
<!-- Inherit the core Web Toolkit stuff -->
<inherits name='com.google.gwt.user.User'/>
<!-- Inherit the default GWT style sheet -->
<inherits name='com.google.gwt.user.theme.standard.Standard'/>
<!-- Specify the app entry point class -->
<entry-point class='com.google.gwt.sample.stockwatcher.client.StockWatcher'/>
<!-- Specify the paths for translatable code -->
<source path='client'/>
</module>

Which GWT modules to inherit ?
• The standard GWT modules contain big pieces of functionality designed to work independently of each other
• Standard Modules:
Which GWT modules to inherit ?
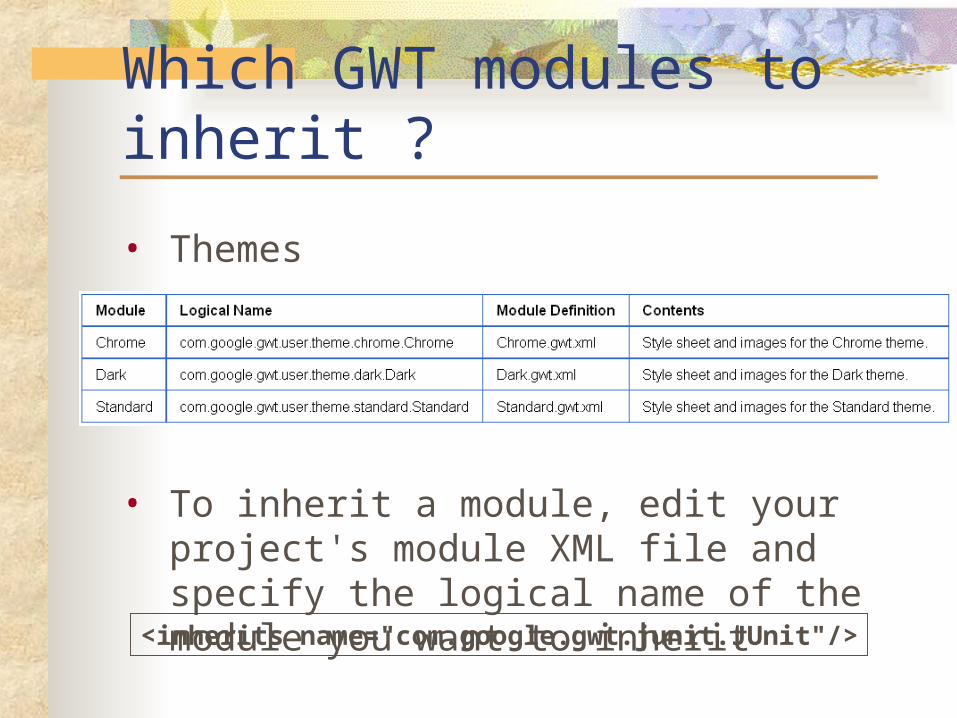
• Themes
• To inherit a module, edit your project's module XML file and specify the logical name of the module you want to inherit
<inherits name="com.google.gwt.junit.JUnit"/>
Entry-Point Classes
• Are optional, although any module referred to in HTML must have at least one entry-point class specified
• A module entry-point is any class that is assignable to EntryPoint and that can be constructed without parameters
• When a module is loaded, every entry point class is instantiated and its EntryPoint.onModuleLoad()
method gets called

Source Path
• Specify which subpackages contain translatable source
• Only files found on the source path are candidates to be translated into JavaScript
• The default source path is the client subpackage underneath where the Module XML File is stored
<source path='client'/>

Public Path
• The public path is the place in your project where static resources referenced by your GWT module, such as CSS or images, are stored
• When referencing public resources in client code, you should construct the URL like this: GWT.getModuleBaseURL() + "resourceName.png“
• The default public path is the public subdirectory underneath where the Module XML File is stored

The HTML Host Page
• In order to run the module, it must be loaded from a web page of some sort
• Any HTML page can include a GWT application via a SCRIPT tag
• A typical HTML host page might not include any visible HTML body content at all
• It is also possible to allow the GWT module to selectively insert widgets into specific places in an HTML page
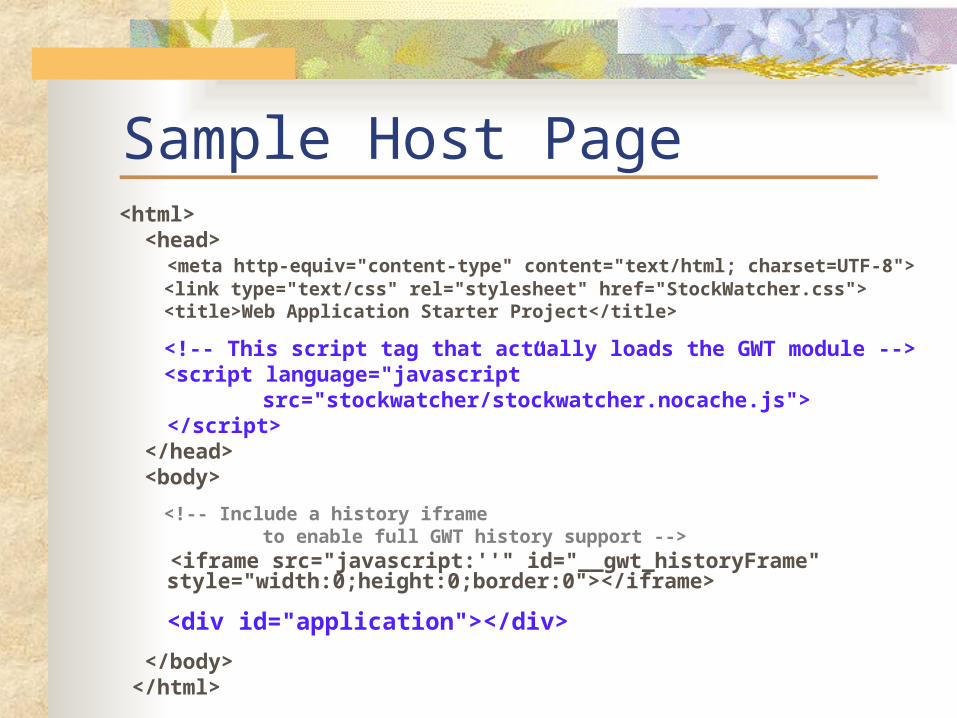
Sample Host Page<html> <head> <meta http-equiv="content-type" content="text/html; charset=UTF-8"> <link type="text/css" rel="stylesheet" href="StockWatcher.css"> <title>Web Application Starter Project</title>
<!-- This script tag that actually loads the GWT module --> <script language="javascript”
src="stockwatcher/stockwatcher.nocache.js"></script>
</head> <body>
<!-- Include a history iframe to enable full GWT history support -->
<iframe src="javascript:''" id="__gwt_historyFrame" style="width:0;height:0;border:0"></iframe>
<div id="application"></div>
</body> </html>
Preserving Browser History
• GWT provides a mechanism supporting user's ability to use the browser's back button in such situations as a multi-page wizard or a shopping cart/checkout scenario
• The host page contains the <iframe> tag necessary for incorporating history support in your GWT application
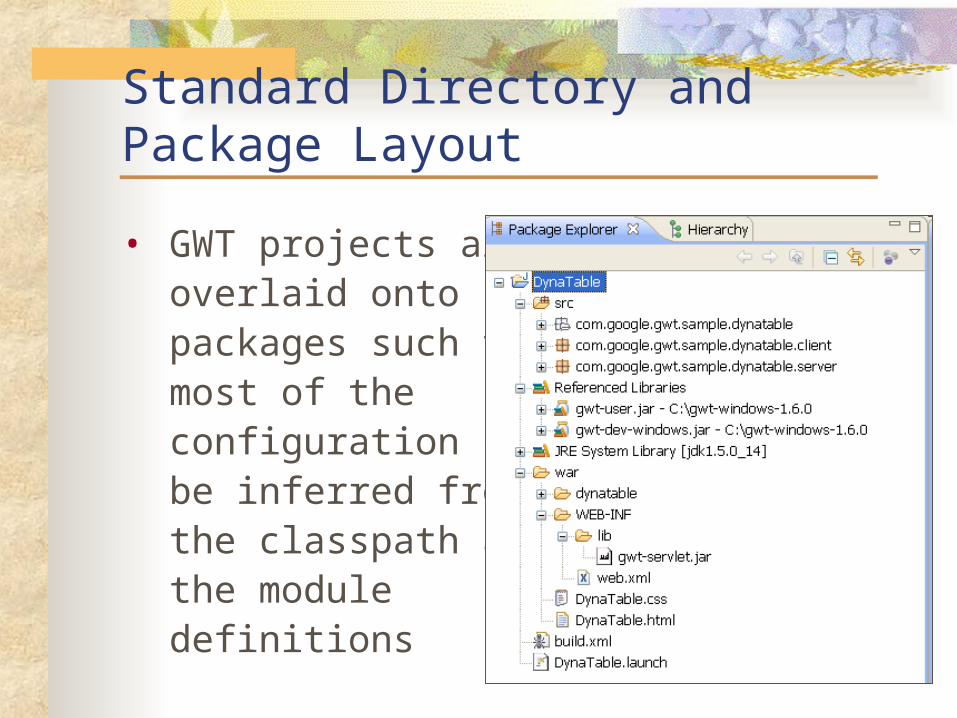
Standard Directory and Package Layout
• GWT projects are overlaid onto Java packages such that most of the configuration can be inferred from the classpath and the module definitions

More about Compile & Debug
• In development mode you are interacting with GWT application without it having been translated into JavaScript
• The JVM is actually executing the application code as compiled Java bytecode, using GWT plumbing to connect to a browser window
• This allows to remain in traditional "code-test-debug" cycle
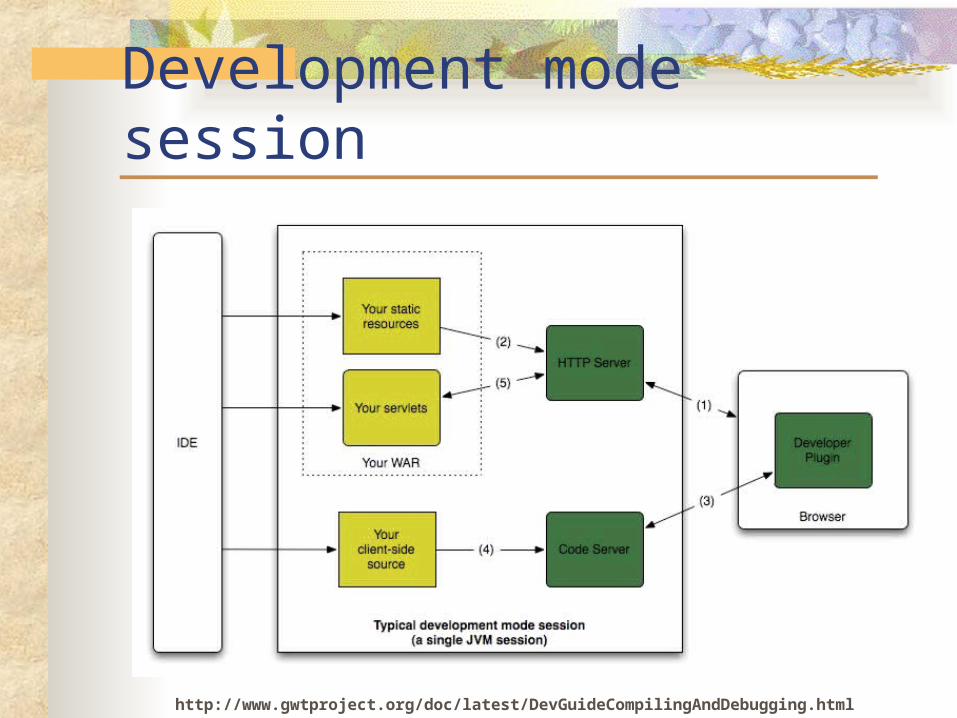
Development mode session
http://www.gwtproject.org/doc/latest/DevGuideCompilingAndDebugging.html
More about Compile & Debug
• You do not need to restart development mode after modifying source code
• On refresh, your code is recompiled with the changes and the new version is loaded into the browser
• If you have made configuration or code changes to server side code, use the Restart Server button in the Jetty tab• All server side classes will be reloaded from scratch
with fresh code

Understanding the GWT Compiler
• The heart of GWT is a compiler that converts Java source into JavaScript• supports the vast majority of the Java language
• The GWT runtime library emulates a relevant subset of the Java runtime library• supports most of the core Java language syntax and
semantics• supports only a small subset of the classes available
in the Java Standard and EE libraries• java.lang, java.lang.annotation, java.util, java.io,
java.sql
Coding Basics - Client-side code
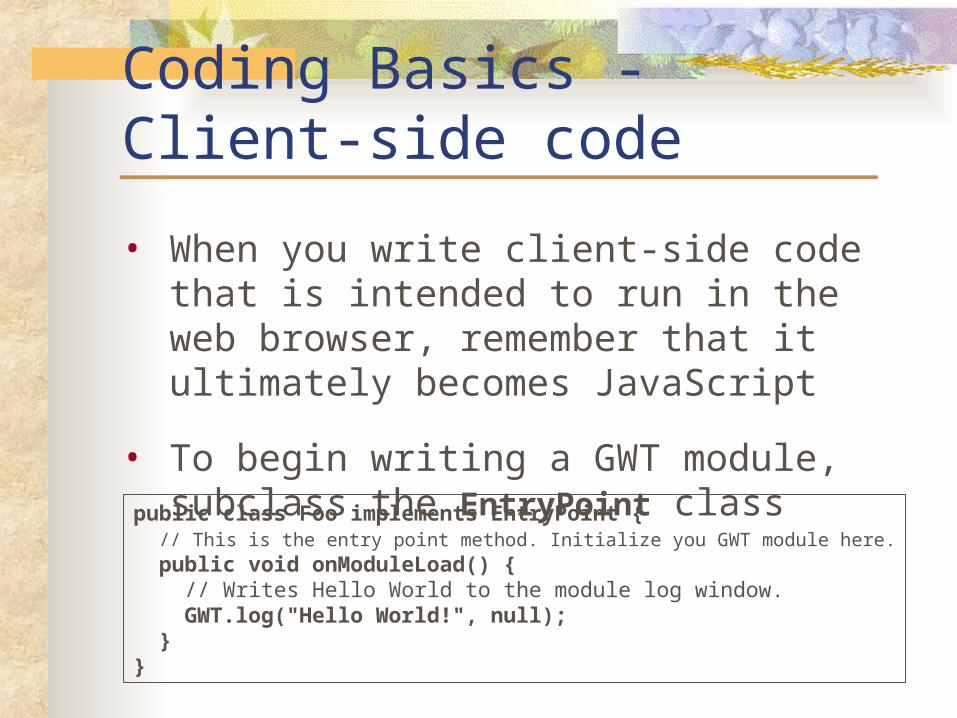
• When you write client-side code that is intended to run in the web browser, remember that it ultimately becomes JavaScript
• To begin writing a GWT module, subclass the EntryPoint class
public class Foo implements EntryPoint { // This is the entry point method. Initialize you GWT module here. public void onModuleLoad() { // Writes Hello World to the module log window. GWT.log("Hello World!", null); }}
Writing the entry point method
• The entry point method is onModuleLoad()
• Typical things to do in the onModuleLoad() method are:• create new user interface components
• set up handlers for events
• modify the browser DOM in some way

Another example of EntryPointpublic class Hello implements EntryPoint {
public void onModuleLoad() { Button b = new Button("Click me", new ClickHandler() { public void onClick(ClickEvent event) { Window.alert("Hello, AJAX"); } });
RootPanel.get().add(b); }}

Building User Interfaces
• GWT UI classes are similar to those in existing UI frameworks such as Swing, except that the widgets are rendered using dynamically-created HTML rather than pixel-oriented graphics
• While it is possible to manipulate the browser's DOM directly using the DOM interface, it is far easier to use Java classes from the Widget hierarchy• make it easier to quickly build interfaces that will
work correctly on all browsers
Panels
• Panels contain widgets and other panels
• Panels are used to define the layout of the user interface in the browser
• Basic Panels• RootPanel, FlowPanel, HTMLPanel, FormPanel,
ScrollPanel, PopupPanel...
• Layout Panels• RootLayoutPanel, DockLayoutPanel,
SplitLayoutPanel, StackLayoutPanel, TabLayoutPanel...

Example: StackLayoutPanel
StackLayoutPanel p = new StackLayoutPanel(Unit.EM);p.add(new HTML("this content"), new HTML("this"), 4);p.add(new HTML("that content"), new HTML("that"), 4);p.add(new HTML("the other content"), new HTML("the other"), 4);
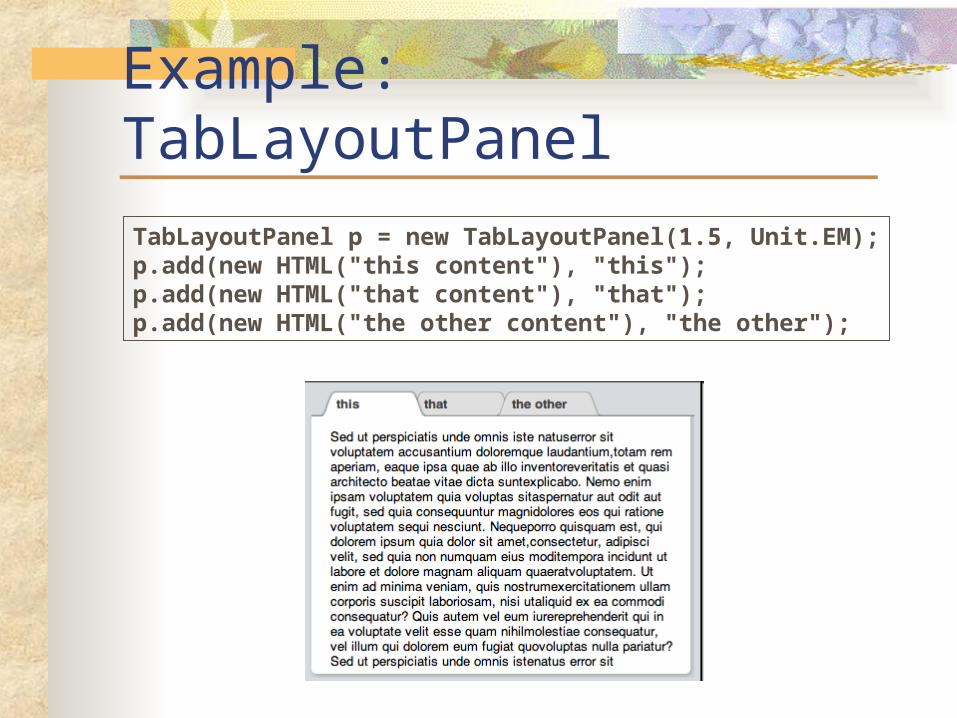
Example: TabLayoutPanel
TabLayoutPanel p = new TabLayoutPanel(1.5, Unit.EM);p.add(new HTML("this content"), "this");p.add(new HTML("that content"), "that");p.add(new HTML("the other content"), "the other");
Widgets
• You construct user interfaces in GWT applications using widgets that are contained within panels
• You are not limited to the set of widgets provided by GWT. There are a number of ways to create custom widgets:• You can bundle together existing widgets and create a
Composite widget• You can write GWT bindings to an existing JavaScript
widget• You can create your own widget from scratch using
either Java or JavaScript

Building Composites
• A composite is a specialized widget that can contain another component, but behaves as if it were its contained widget
• Rather than create complex widgets by subclassing Panel or another Widget type, it's better to create a new composite
http://www.gwtproject.org/doc/latest/DevGuideUiCustomWidgets.html

Accessing the Browser's DOM
• Sometimes you need to access the DOM, for example to:• provide a feature in your user interface that GWT
does not support
• write a new Widget class
• access an HTML element defined directly in the host page
• handle browser Events at a low level
• perform some filtering or other processing on an HTML document loaded into the browser

Accessing the Browser's DOM
• GWT provides the classes in the com.google.gwt.dom.client package for interacting with the DOM directly
• Set a style attribute to change a widget's background color:
private HTML htmlWidget;
// Other code to instantiate the widget...
// Change the description background color.htmlWidget.getElement().getStyle().setBackgroundColor("#ffee80");
The getElement() method returns a DOM Element Object representing a node in the DOM tree structure
Event Handlers
• A handler interface defines methods that the widget calls to announce an event
• A class wishing to receive events of a particular type • implements the associated handler interface • passes a reference to itself to the widget to subscribe
to a set of events
• The Button class, for example, publishes click events• The associated handler interface is ClickHandler
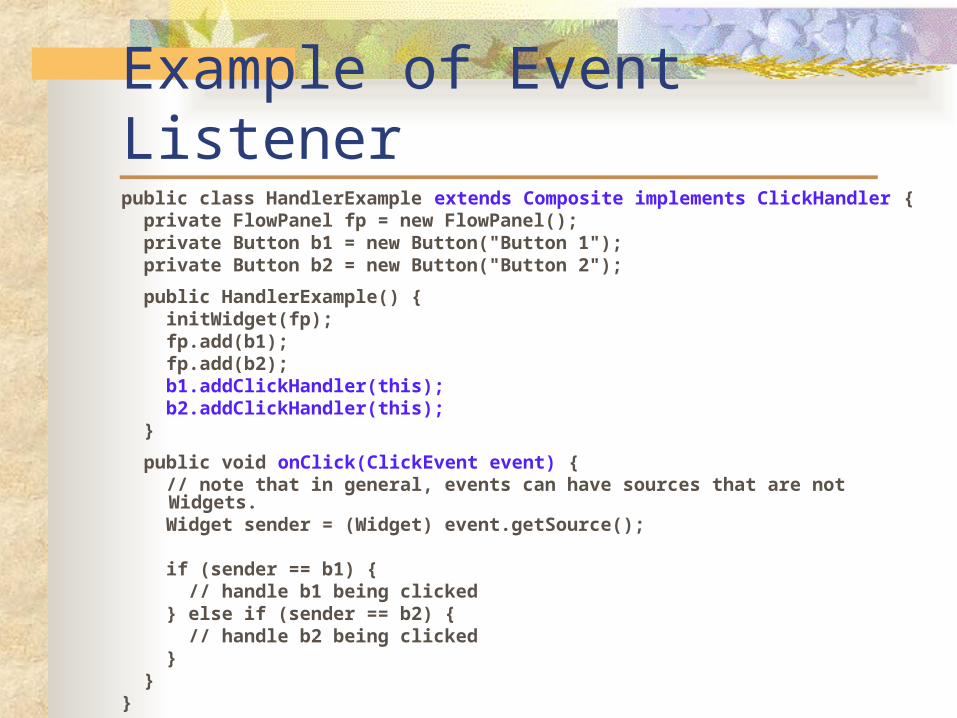
Example of Event Listenerpublic class HandlerExample extends Composite implements ClickHandler { private FlowPanel fp = new FlowPanel(); private Button b1 = new Button("Button 1"); private Button b2 = new Button("Button 2");
public HandlerExample() { initWidget(fp); fp.add(b1); fp.add(b2); b1.addClickHandler(this); b2.addClickHandler(this); }
public void onClick(ClickEvent event) { // note that in general, events can have sources that are not
Widgets. Widget sender = (Widget) event.getSource();
if (sender == b1) { // handle b1 being clicked } else if (sender == b2) { // handle b2 being clicked } }}
Communicate with a Server
• GWT provides a couple of different ways to communicate with a server via HTTP
• use the GWT RPC (remote procedure call) framework that transparently makes calls to Java servlets
• use the GWT's HTTP client classes to build and send custom HTTP requests

Remote Procedure Calls
• Mechanism for interacting with the server by invoking a method• For example: for fetching data from the server
• Makes it easy for the client and server to pass Java objects back and forth over HTTP• Marshaling/unmarshaling of Java objects are handled by the GWT
• When used properly, RPCs give you the opportunity to move all of your UI logic to the client (leaving business logic on the server)• Could result in greatly improved performance, reduced bandwidth,
reduced web server load, and a pleasantly fluid user experience

RPC Plumbing Diagram
Creating RPC Services
• In order to define your RPC interface, you need to:
• Define an interface for your service that extends RemoteService and lists all your RPC methods
• Define a class to implement the server-side code that extends RemoteServiceServlet and implements the interface you created above
• Define an asynchronous interface to your service to be called from the client-side code
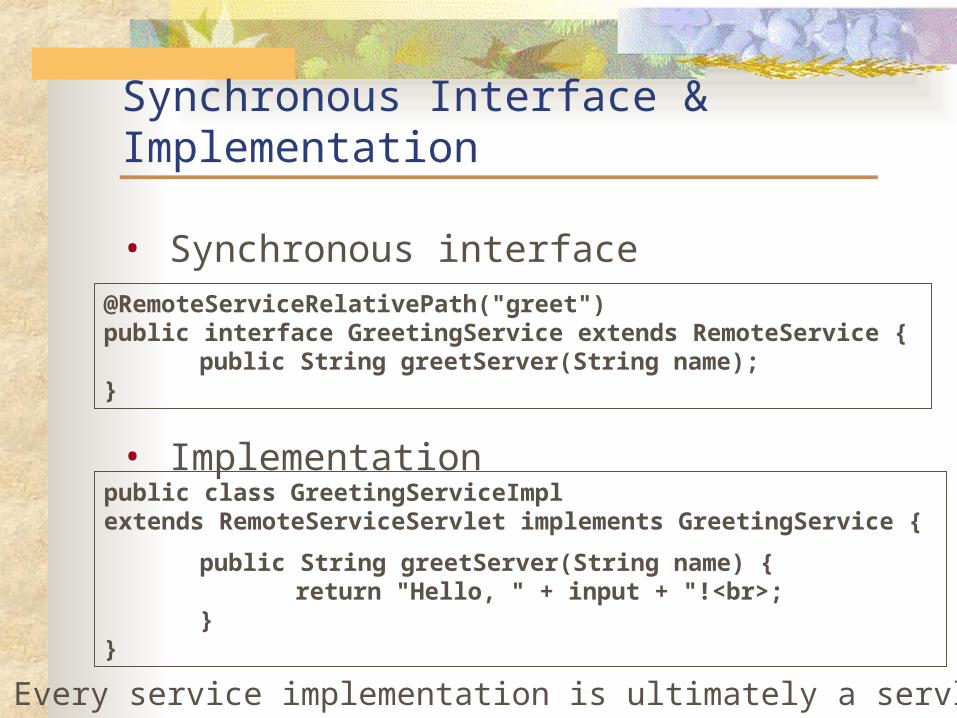
Synchronous Interface & Implementation
• Synchronous interface
• Implementation
@RemoteServiceRelativePath("greet")public interface GreetingService extends RemoteService {
public String greetServer(String name);}
public class GreetingServiceImpl extends RemoteServiceServlet implements GreetingService {
public String greetServer(String name) {return "Hello, " + input + "!<br>;
}}
Every service implementation is ultimately a servlet

Asynchronous interface
• It is not possible to call this version of the RPC directly from the client
• You must create an asynchronous interface to all your services
• Has to be named as <Sync-interface>Async• Has to pass AsyncCallback object as the last
parameter that can be notified when a call completes
• The return type is always voidpublic interface GreetingServiceAsync { public void greetServer
(String input, AsyncCallback<String> callback);}
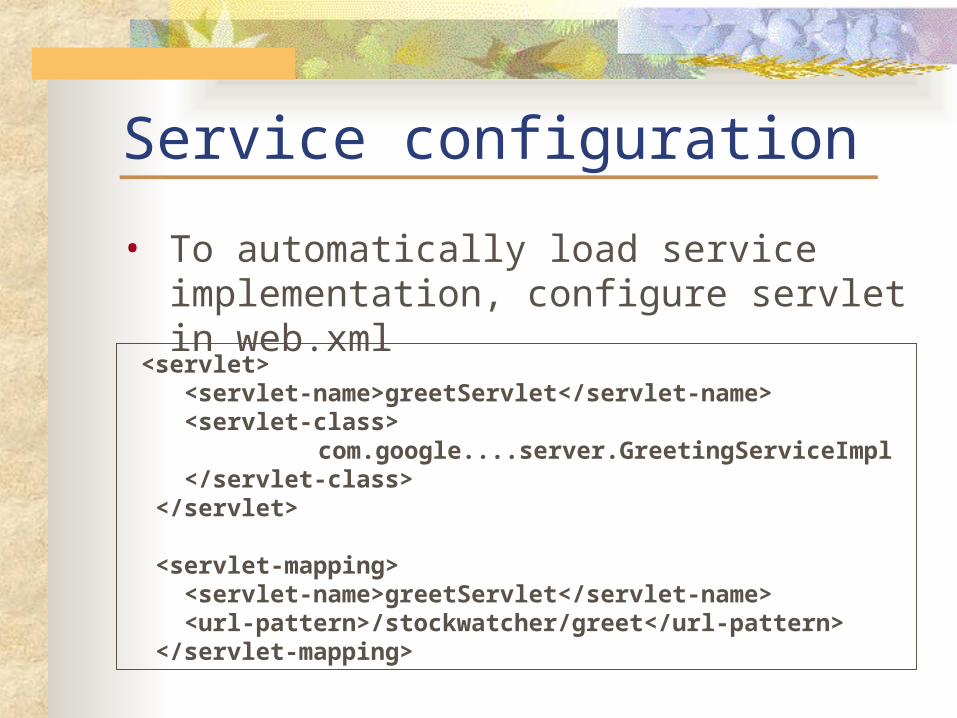
Service configuration
• To automatically load service implementation, configure servlet in web.xml
<servlet> <servlet-name>greetServlet</servlet-name> <servlet-class>
com.google....server.GreetingServiceImpl </servlet-class> </servlet> <servlet-mapping> <servlet-name>greetServlet</servlet-name> <url-pattern>/stockwatcher/greet</url-pattern> </servlet-mapping>
URL pattern convention
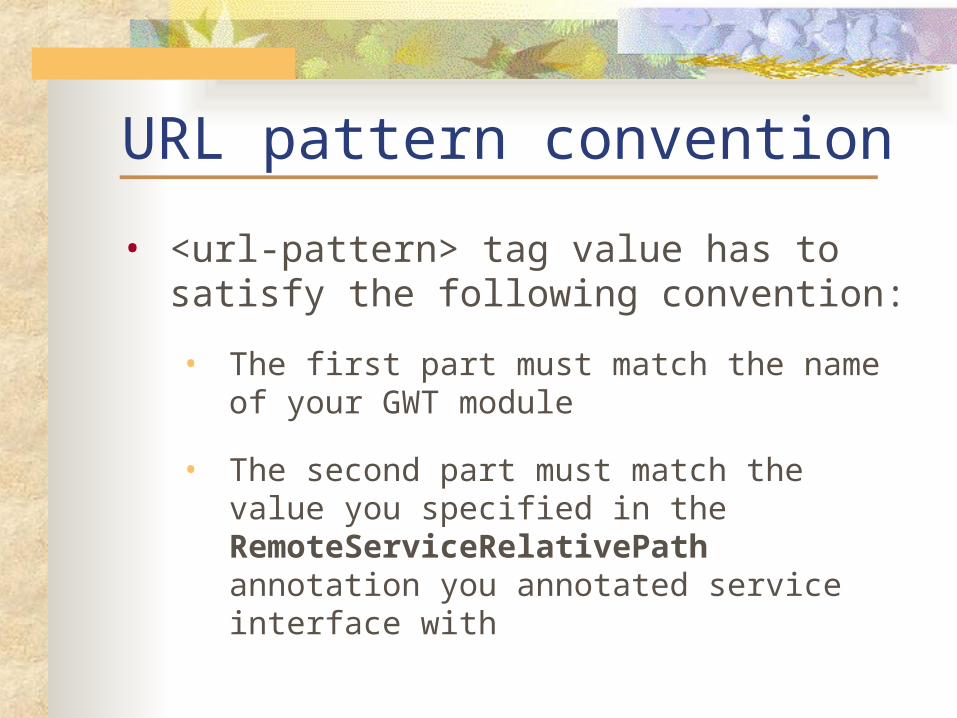
• <url-pattern> tag value has to satisfy the following convention:
• The first part must match the name of your GWT module
• The second part must match the value you specified in the RemoteServiceRelativePath annotation you annotated service interface with
Making a call from client
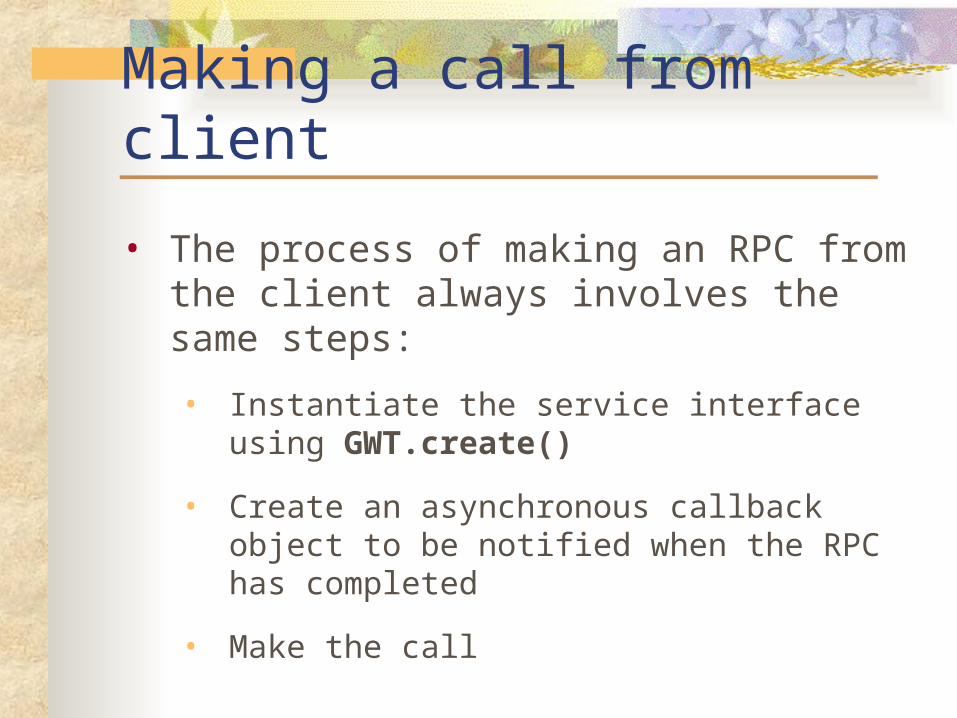
• The process of making an RPC from the client always involves the same steps:
• Instantiate the service interface using GWT.create()
• Create an asynchronous callback object to be notified when the RPC has completed
• Make the call
Example: invoking EmailService
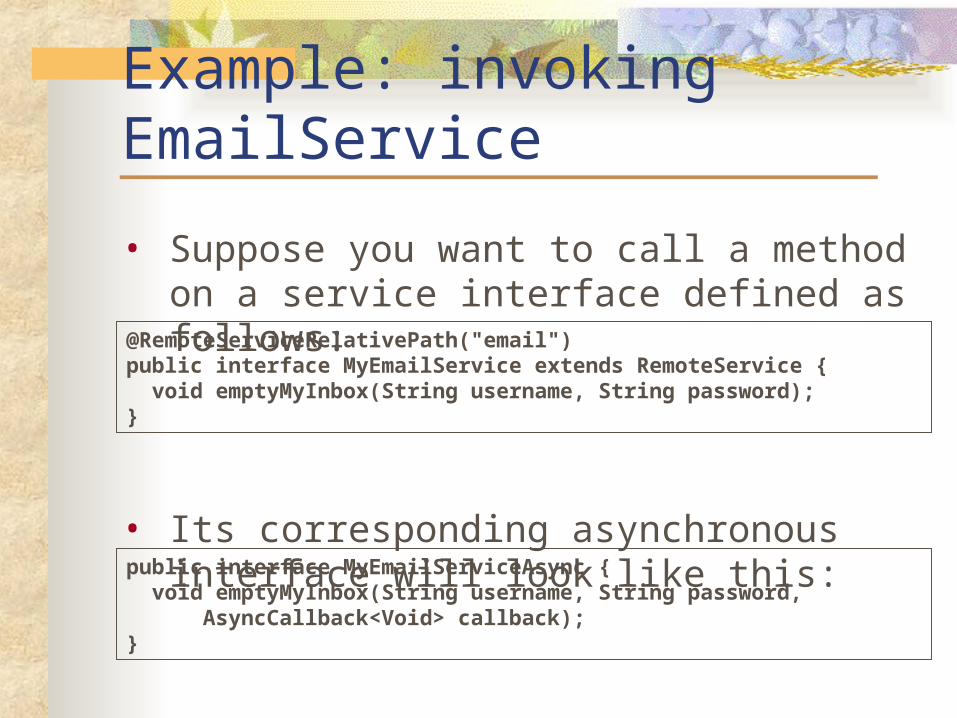
• Suppose you want to call a method on a service interface defined as follows:
• Its corresponding asynchronous interface will look like this:
@RemoteServiceRelativePath("email")public interface MyEmailService extends RemoteService { void emptyMyInbox(String username, String password);}
public interface MyEmailServiceAsync { void emptyMyInbox(String username, String password, AsyncCallback<Void> callback);}
Client code – part 1
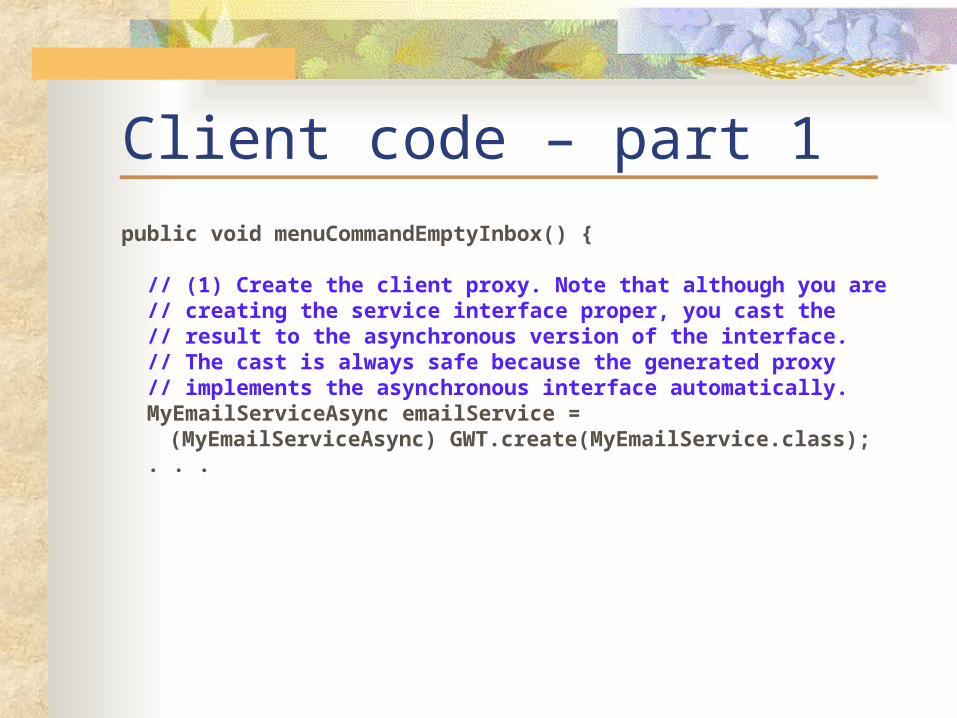
public void menuCommandEmptyInbox() {
// (1) Create the client proxy. Note that although you are // creating the service interface proper, you cast the // result to the asynchronous version of the interface. // The cast is always safe because the generated proxy // implements the asynchronous interface automatically. MyEmailServiceAsync emailService =
(MyEmailServiceAsync) GWT.create(MyEmailService.class); . . .

Client code – parts 2 and 3
. . . // (2) Create an asynchronous callback to handle the result. AsyncCallback callback = new AsyncCallback() {
public void onSuccess(Void result) { // do some UI stuff to show success }
public void onFailure(Throwable caught) { // do some UI stuff to show failure }
};
// (3) Make the call. Control flow will continue immediately // and later 'callback' will be invoked when the // RPC completes. emailService.emptyMyInbox(
fUsername, fPassword, callback);}
JavaScript Native Interface (JSNI)
• Often, you will need to integrate GWT with existing handwritten JavaScript or with a third-party JavaScript library
• The JSNI feature of GWT allows you to integrate JavaScript directly into your application's Java source code
• Writing JSNI methods is a powerful technique, but should be used sparingly

Usages of JSNI
• Implement a Java method directly in JavaScript
• Wrap type-safe Java method signatures around existing JavaScript
• Call from JavaScript code into Java code and vice-versa
• Throw exceptions across Java/JavaScript boundaries
• Read and write Java fields from JavaScript
• Use development mode to debug both Java source (with a Java debugger) and JavaScript (with a script debugger)

Writing Native JavaScript Methods
• JSNI methods are declared native and contain JavaScript code in a specially formatted comment block • begins with the exact token /*-{
• ends with the exact token }-*/
• When accessing the browser's window and document objects from JSNI, you must reference them as $wnd and $doc, respectively
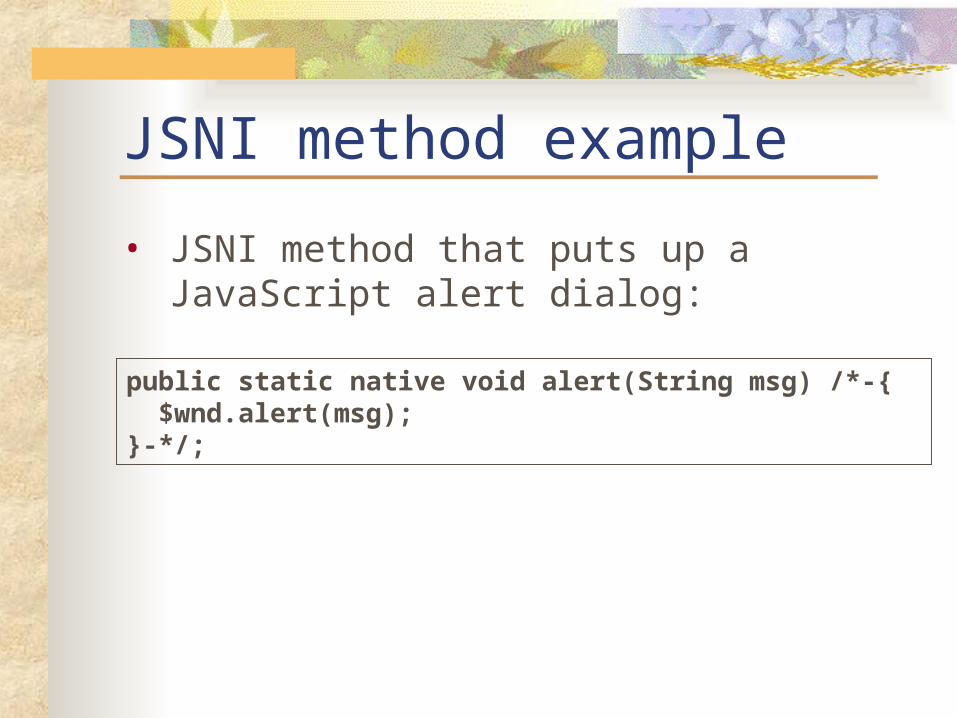
JSNI method example
• JSNI method that puts up a JavaScript alert dialog:
public static native void alert(String msg) /*-{ $wnd.alert(msg);}-*/;
Unit Testing GWT With JUnit
• GWT provides integration with the popular JUnit unit testing framework and Emma code coverage tool• JUnit test cases may run in either development mode or
production mode
• Base class - GWTTestCase• Running a compiled GWTTestCase subclass under
JUnit launches the HtmlUnit browser which serves to emulate your application behavior during test execution
http://www.gwtproject.org/doc/latest/DevGuideTesting.html

References
Find much more information at the
Google Web Toolkit Homehttp://www.gwtproject.org/
See also:http://ante.lv/web-programming-2013/GWTSpringMVCIntegration