great two-track recordings –a low-cost, recording solution
TRANSCRIPT
1
Great Two-Track
Recordings –A Low-Cost, Recording Solution Using A Hand-Held Digital Recorder And Open-Source Software
~Joseph M. Pisano, Ph.D.
This Session Sponsored by SoundTree
SoundTree.com | jpisano.com
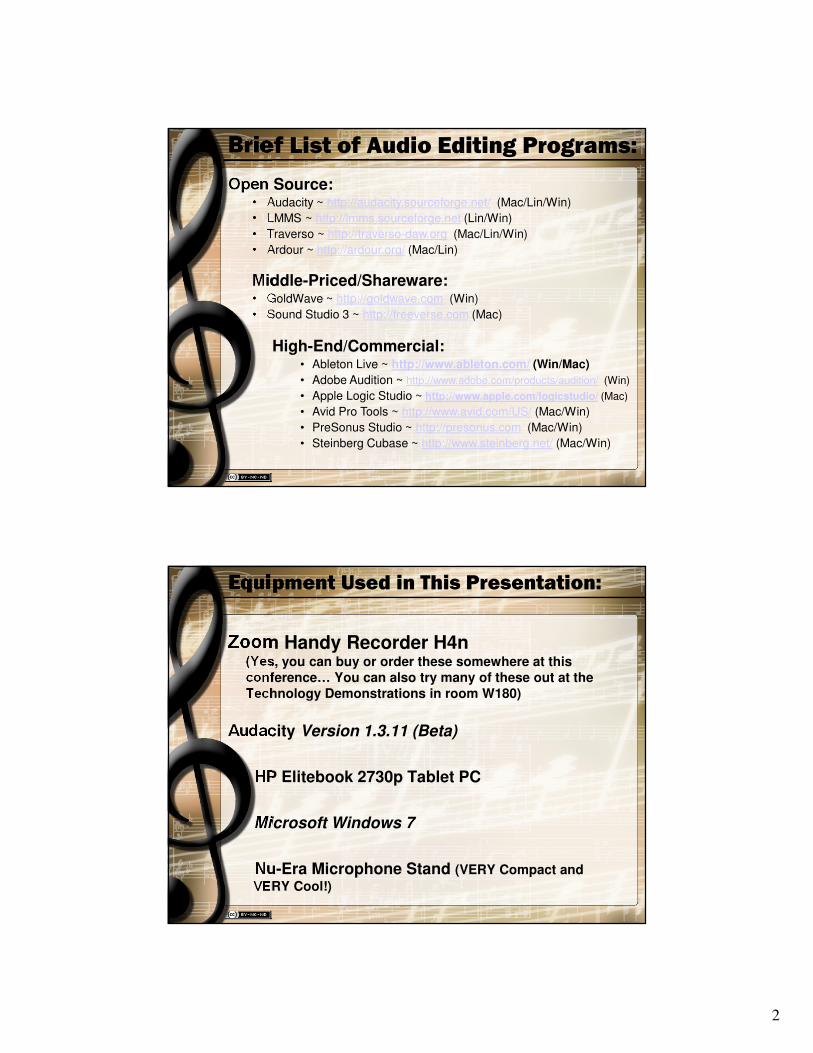
Equipment Needed:
A Digital Hand-Held RecorderRecommended (< $350.00 U.S.):
• Zoom H4n
• Zoom H2
• Edirol R-09HR
• Sony PCM-M10
• Marantz PMD620
• Yamaha W24
• Tascam DR-2d
Audacity (Free/GPL & Open Source ~ “Copyleft”):• Windows (98 - Windows 7)
• Mac OS X (OS 9 Legacy still available)
• Linux/Unix
Any CD Burning Software (If you plan to make CDs)
2
Brief List of Audio Editing Programs:
Open Source: • Audacity ~ http://audacity.sourceforge.net/ (Mac/Lin/Win)
• LMMS ~ http://lmms.sourceforge.net (Lin/Win)
• Traverso ~ http://traverso-daw.org (Mac/Lin/Win)
• Ardour ~ http://ardour.org/ (Mac/Lin)
Middle-Priced/Shareware:• GoldWave ~ http://goldwave.com (Win)
• Sound Studio 3 ~ http://freeverse.com (Mac)
High-End/Commercial:• Ableton Live ~ http://www.ableton.com/ (Win/Mac)
• Adobe Audition ~ http://www.adobe.com/products/audition/ (Win)
• Apple Logic Studio ~ http://www.apple.com/logicstudio/ (Mac)
• Avid Pro Tools ~ http://www.avid.com/US/ (Mac/Win)
• PreSonus Studio ~ http://presonus.com (Mac/Win)
• Steinberg Cubase ~ http://www.steinberg.net/ (Mac/Win)
Equipment Used in This Presentation:
Zoom Handy Recorder H4n(Yes, you can buy or order these somewhere at this conference… You can also try many of these out at the Technology Demonstrations in room W180)
Audacity Version 1.3.11 (Beta)
HP Elitebook 2730p Tablet PC
Microsoft Windows 7
Nu-Era Microphone Stand (VERY Compact and
VERY Cool!)
3
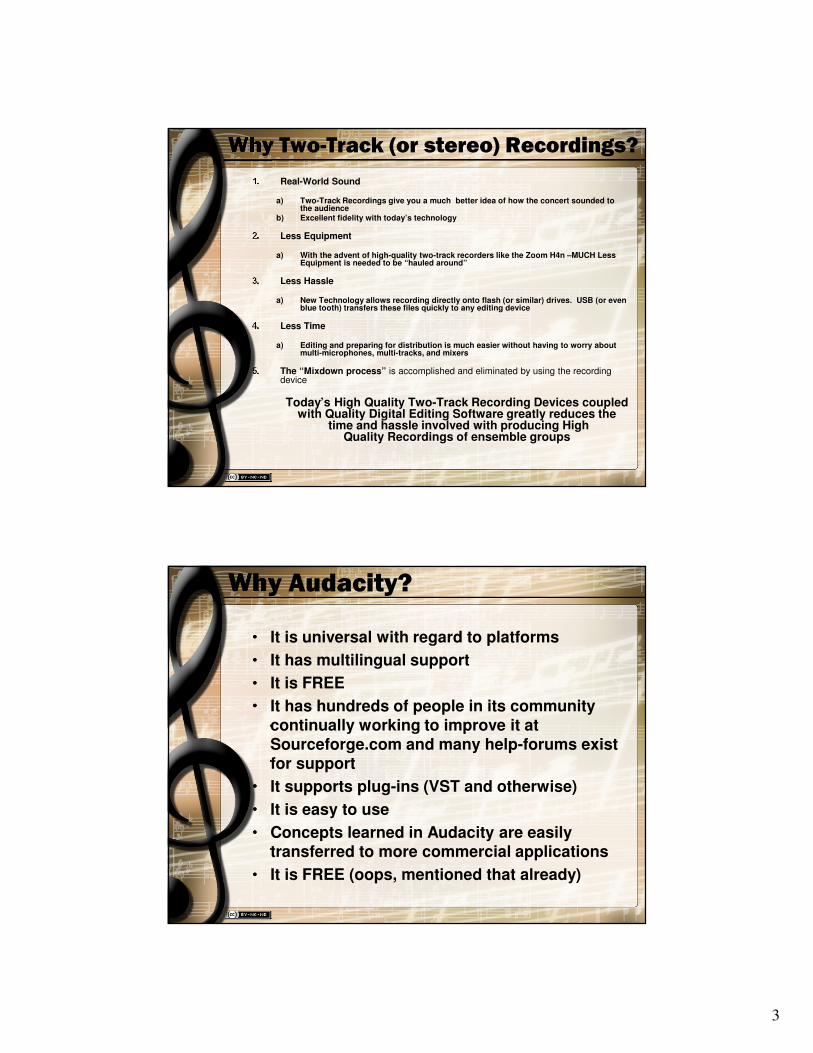
Why Two-Track (or stereo) Recordings?
1. Real-World Sound
a) Two-Track Recordings give you a much better idea of how the concert sounded to the audience
b) Excellent fidelity with today’s technology
2. Less Equipment
a) With the advent of high-quality two-track recorders like the Zoom H4n –MUCH Less Equipment is needed to be “hauled around”
3. Less Hassle
a) New Technology allows recording directly onto flash (or similar) drives. USB (or even blue tooth) transfers these files quickly to any editing device
4. Less Time
a) Editing and preparing for distribution is much easier without having to worry about multi-microphones, multi-tracks, and mixers
5. The “Mixdown process” is accomplished and eliminated by using the recording device
Today’s High Quality Two-Track Recording Devices coupled with Quality Digital Editing Software greatly reduces the
time and hassle involved with producing High Quality Recordings of ensemble groups
Why Audacity?
• It is universal with regard to platforms
• It has multilingual support
• It is FREE
• It has hundreds of people in its community continually working to improve it at Sourceforge.com and many help-forums exist for support
• It supports plug-ins (VST and otherwise)
• It is easy to use
• Concepts learned in Audacity are easily transferred to more commercial applications
• It is FREE (oops, mentioned that already)
4
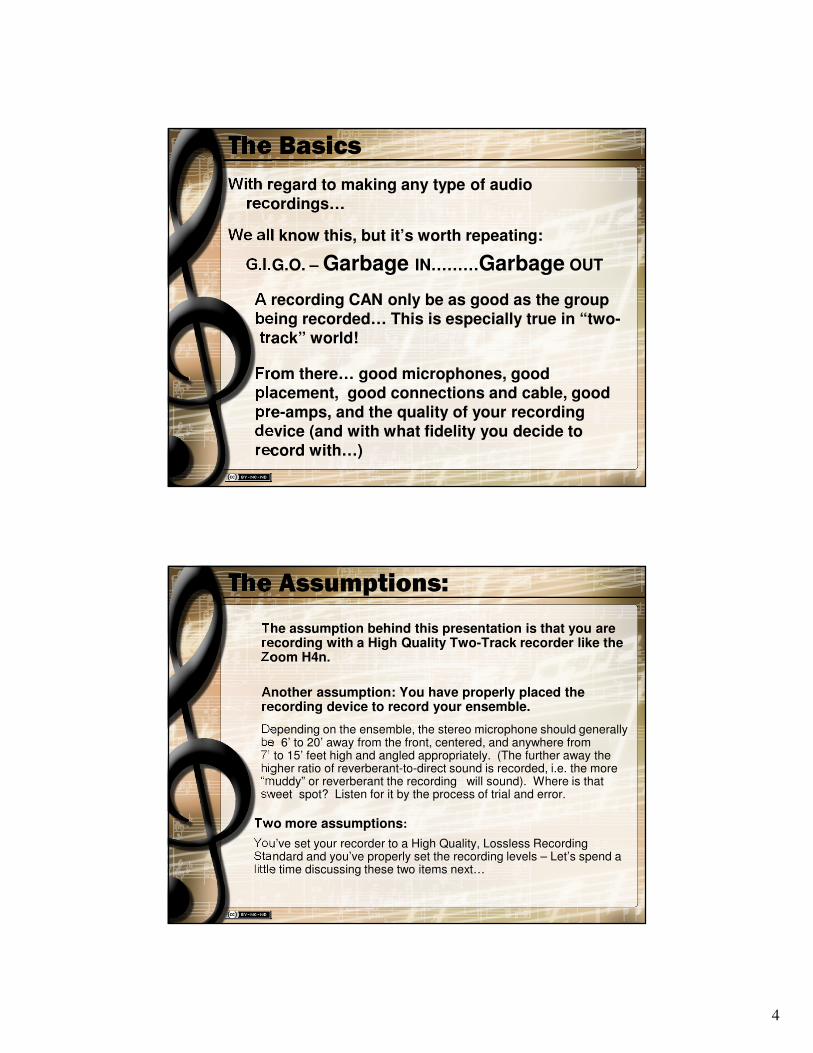
The Basics
With regard to making any type of audio recordings…
We all know this, but it’s worth repeating:
G.I.G.O. – Garbage IN………Garbage OUT
A recording CAN only be as good as the group being recorded… This is especially true in “two-track” world!
From there… good microphones, good placement, good connections and cable, good pre-amps, and the quality of your recording device (and with what fidelity you decide to record with…)
The Assumptions:
The assumption behind this presentation is that you are recording with a High Quality Two-Track recorder like the Zoom H4n.
Another assumption: You have properly placed the recording device to record your ensemble.
Depending on the ensemble, the stereo microphone should generally be 6’ to 20’ away from the front, centered, and anywhere from 7’ to 15’ feet high and angled appropriately. (The further away the higher ratio of reverberant-to-direct sound is recorded, i.e. the more “muddy” or reverberant the recording will sound). Where is that sweet spot? Listen for it by the process of trial and error.
Two more assumptions:
You’ve set your recorder to a High Quality, Lossless Recording Standard and you’ve properly set the recording levels – Let’s spend a little time discussing these two items next…
5
Mp3, Wav, 16, 24, 44, 48, 96 Hut!
Sampling and Bit-Rate:
First, unless you plan on using your recordings for reference/rehearsal purposes only –NEVER SET YOU DEVICE TO RECORD AN ENSEMBLE AS A MP3 FILE!
MP3 quality is a “lossy format”. This means that despite the best algorithms and highest bit rates for this format –some of the original sound information is lost (and can never be retrieved).
So, should I record at 44.1 kHz/16-bit rates or higher? –Great question!
Higher sampling rates (and bit rates) will allow you to make a better quality recording –no doubt…That being said, there are some compelling reasons for “us” to “keep it simple” and record at the digital standard that Audio CDs have been made at for over 25 years –at least to begin with!
Why 44.1 kHz and 16-bit?
Here are some reasons to consider:
*First, your device will be able to record 3x as much when set at this rate compared to 96 kHz/ 24-bit.
*Second, if you want to make CDs of your recording you will ultimately be transcoding or down-converting your source to this anyway.
*Third, depending on your computer, and your sound card, you may find editing at the higher sampling rates slow, and possibly –not possible. Then… there is the whole sample conversion error issue(s) with regard to sound fidelity and aliasing when down-converting from a higher sampling rates to lower ones (For more Information about sampling conversion degradation “Google” Dr. James Moorer and audio sample conversion).
*Fourth, “CD Quality” isn’t really as bad as the 96kHz/24-bit hype makes it out to be… It’s actually quite good and better than the top quality MP3 audio files.
6
Why 44.1 kHz and 16-bit?
Unless you are using a computer to edit that has great sample conversion filters (i.e. excellent quality sound hardware) and a good deal of “horse power”, start out with 44.1 kHz and 16-bit (CD Quality).
Experiment with your particular setup and higher-fidelity rates after you’ve gained some proficiency and “ear time” hearing your recordings: this will give you a reference point for later exploration into higher quality digital recording qualities and then exporting them into lower-quality formats.
The “Master” Formula
This editing process is very similar to the “mastering process” with regard to Digital Audio and typically used after the “mix-down” is finished.
The order of this process is not set in stone, especially with regard to items 3-6 and every sound “expert” will have a different opinion about this; however, there are good reasons to adhere to this formula when starting out with editing and mixing such as this. This is the way that I edit the vast majority of my stereo recordings and I have achieved great success when implementing it.
The Formula:1. Cut Edit2. DC Offset Correction (If Needed)3. Equalize4. Compression5. Equalize Tweak (May be omitted)6. Reverb7. Normalize (Depending)8. Fade IN/Out/Set Silence (If desired)9. Save, then Burn or Convert
7
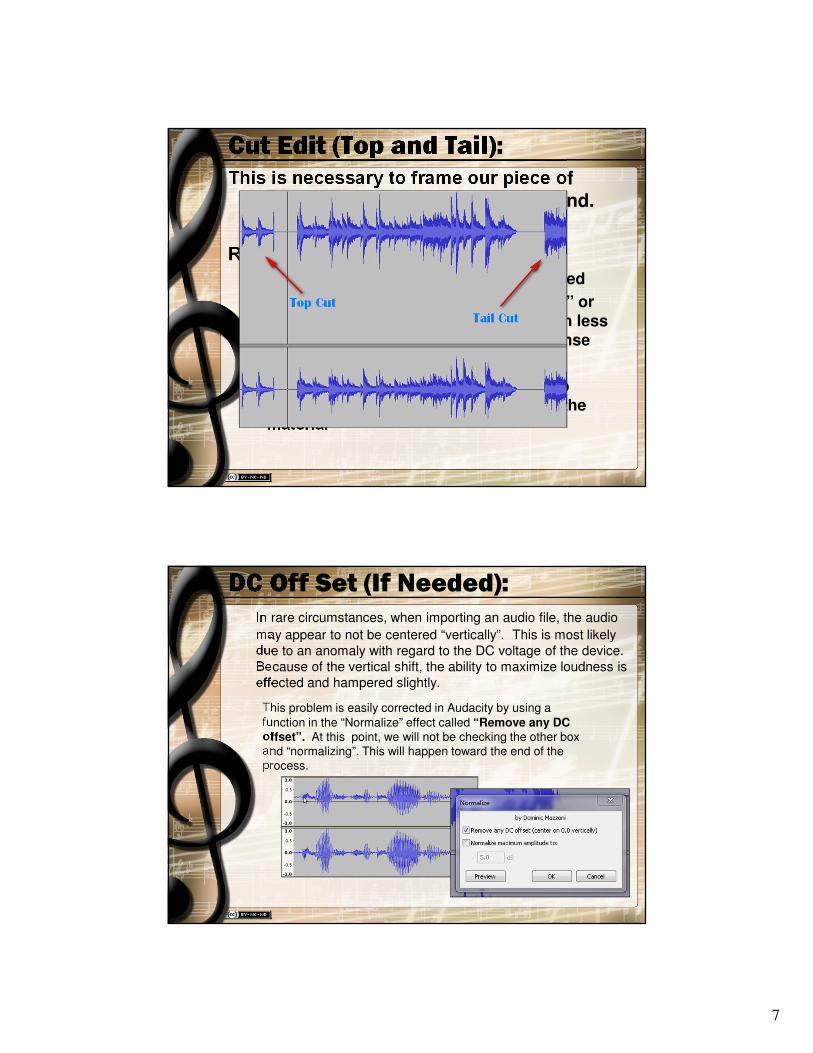
Cut Edit (Top and Tail):This is necessary to frame our piece of
music and get rid of extraneous sound.
Reasons to do this first:
– This defines the audio that is being edited
– Your computer will not have to “crunch” or compute unnecessary data –resulting in less time editing and faster computer response
“Top” refers to the beginning of the audio material and “Tail” refers to the end of the material
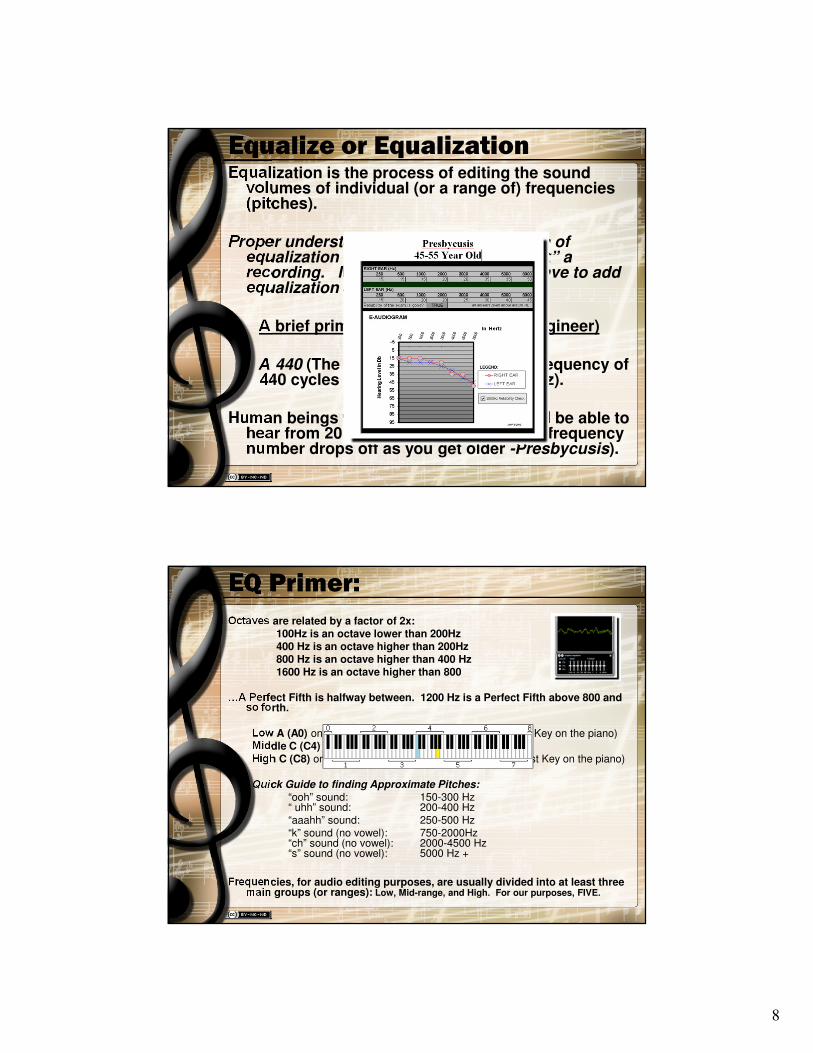
DC Off Set (If Needed):In rare circumstances, when importing an audio file, the audio
may appear to not be centered “vertically”. This is most likely due to an anomaly with regard to the DC voltage of the device. Because of the vertical shift, the ability to maximize loudness is effected and hampered slightly.
This problem is easily corrected in Audacity by using a function in the “Normalize” effect called “Remove any DC offset”. At this point, we will not be checking the other box and “normalizing”. This will happen toward the end of the process.
8
Equalize or EqualizationEqualization is the process of editing the sound
volumes of individual (or a range of) frequencies (pitches).
Proper understanding and implementation of equalization can often “make” or “break” a recording. Many times, you may not have to add equalization at all.
A brief primer of pitch (as an audio engineer)
A 440 (The A above middle C) has a frequency of 440 cycles per second or 440 Hz (Hertz).
Human beings with normal hearing should be able to hear from 20Hz to 20,000 Hz. (The high frequency number drops off as you get older -Presbycusis).
EQ Primer:
Octaves are related by a factor of 2x:100Hz is an octave lower than 200Hz400 Hz is an octave higher than 200Hz800 Hz is an octave higher than 400 Hz1600 Hz is an octave higher than 800
…A Perfect Fifth is halfway between. 1200 Hz is a Perfect Fifth above 800 and so forth.
Low A (A0) on a piano has a frequency of 27.5 Hz (Lowest Key on the piano)Middle C (C4) has a frequency of 262 Hz. (approx.)High C (C8) on a piano has a frequency of 4186 Hz (Highest Key on the piano)
Quick Guide to finding Approximate Pitches:“ooh” sound: 150-300 Hz“ uhh” sound: 200-400 Hz“aaahh” sound: 250-500 Hz“k” sound (no vowel): 750-2000Hz“ch” sound (no vowel): 2000-4500 Hz“s” sound (no vowel): 5000 Hz +
Frequencies, for audio editing purposes, are usually divided into at least three main groups (or ranges): Low, Mid-range, and High. For our purposes, FIVE.
9
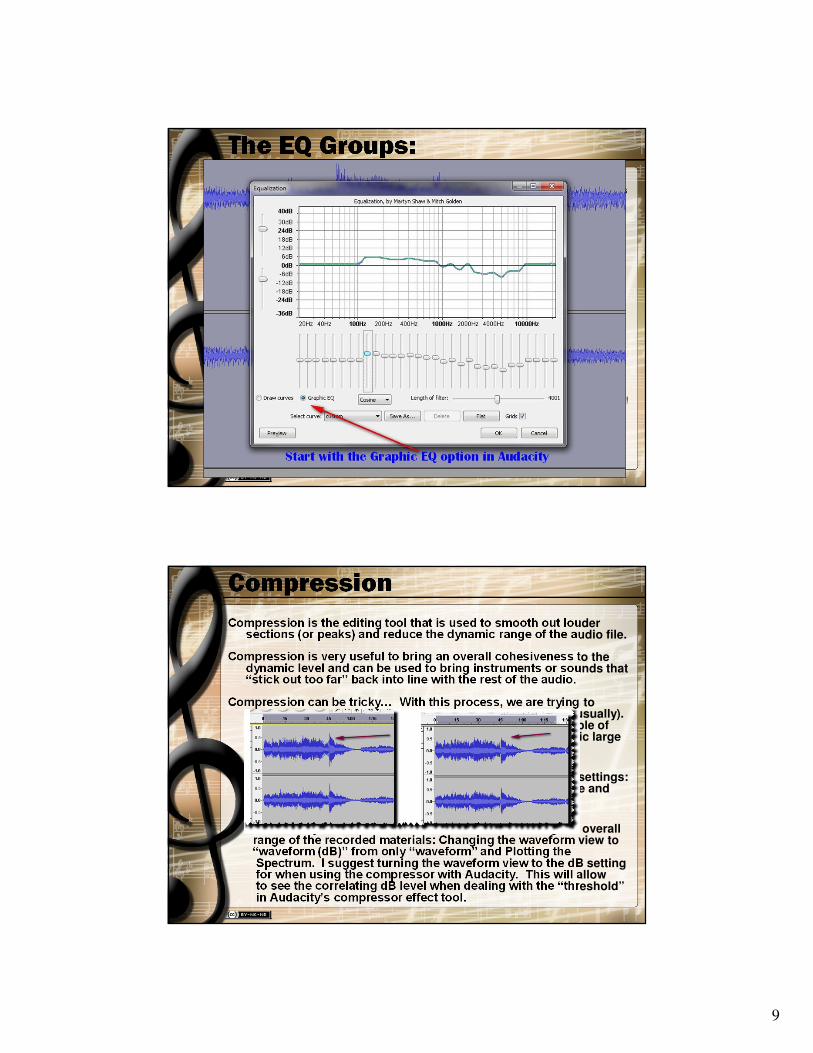
The EQ Groups:Low-Bass (20Hz - 100 Hz):
There is not a whole lot of musical material down here. Changes in this range usually results in “feeling” it rather than “hearing” it. Adjust this area to give some “kick” back into a kick drum –or take some away.
Mid-Bass (100Hz - 400Hz)Many instruments fall into this range including the instruments of the “larger” variety (tuba, double-bass, contra, etc.) Over emphasis in this area may make music sound “muddy” or “boomy”. Too little emphasis in this area and there may be no “floor” to your music.
Middle (400Hz - 2.5 kHz)This is the area where most instruments are and the better part of the human voice falls. Making changes in this area will CERTAINLY effect the overall sound of your recording. Low-Upper (2.5kHz - 6kHz)
Other than the smallest instruments and the keyboard instruments, few instruments have fundamental notes in this range. Adjusting the frequencies in this range have a lot of effect on the “clarity” or “brightness” of the music.
High-Upper (6kHz and beyond)Sibilants (“S”, “Z”, “T”) reside in this area and not enough energy in this area can hide them. Too much energy in this area can produce excessive and irritating sibilance. Also, too little energy in this area can make a recording not have any “edge” or “bite” to it.
In all of this, TREAD LIGHTLY. A change of 3dB up or down will have profound effects on the sound! IN AUDACITY, START WITH THE GRAPHIC EQ OPTION –IT’S EASIER!
Common Vocal Ranges:Bass: E2-E4 (82-330Hz) Tenor: C3-C5 (131-523 Hz)Alto: F3-F5 (175-700Hz) Soprano:A3-A5 (220-880 Hz)
Compression
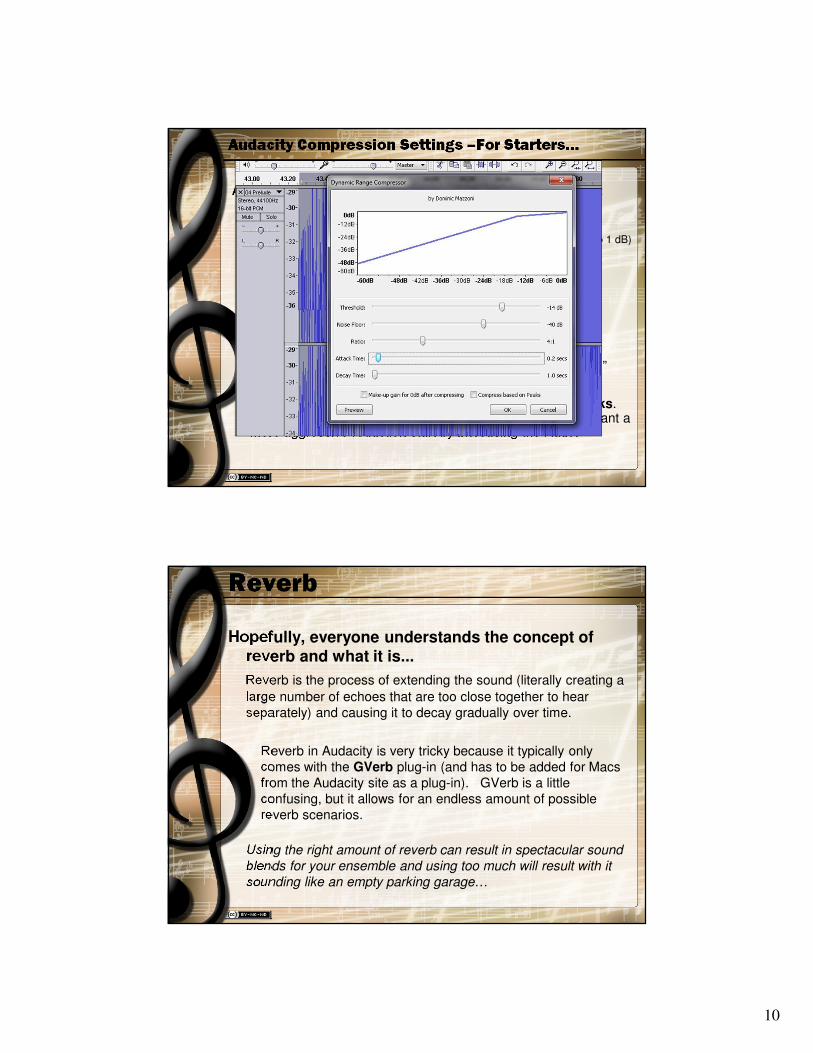
Compression is the editing tool that is used to smooth out louder sections (or peaks) and reduce the dynamic range of the audio file.
Compression is very useful to bring an overall cohesiveness to the dynamic level and can be used to bring instruments or sounds that “stick out too far” back into line with the rest of the audio.
Compression can be tricky… With this process, we are trying to accomplish only a light compression that reduces peaks (usually). Compressions should always be used lightly, rather a couple of auditioned light compressions applications than one drastic large application.
The Dynamic Range Compressor, in Audacity, offers five settings: Threshold, Noise Floor, Ratio, Attach Time, Decay Time and two check-boxes.
In Audacity there are two useful tools for discovering the overall range of the recorded materials: Changing the waveform view to “waveform (dB)” from only “waveform” and Plotting the Spectrum. I suggest turning the waveform view to the dB setting for when using the compressor with Audacity. This will allow to see the correlating dB level when dealing with the “threshold” in Audacity’s compressor effect tool.
10
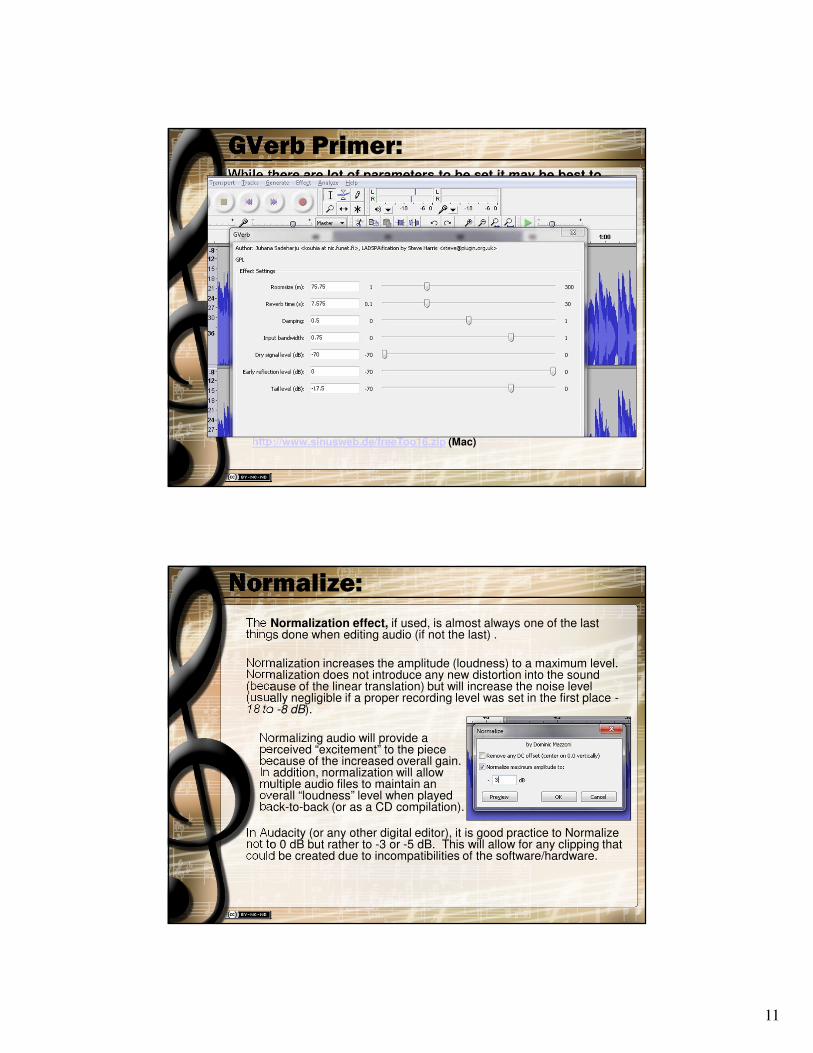
Audacity Compression Settings –For Starters…
Assuming that your peak levels are showing around -8 dB:Start by setting your threshold for -14 to 16 dB:
The Noise floor at -40 dB
The Ratio at 4:1 (For every 4 dB over the threshold it will reduce it to 1 dB)
The attack time at .2 sec
The Decay time at 1.0 sec
Then, LEAVE Both Boxes UN-CHECKED… (“Make-up gain” and “Compress based on peaks”)
Make-up gain will perform a type-of “normalization effect” which will leave you no head-room for any other edits.
Compressing based on peaks will result in an “unwanted” upwards compression.
These settings should provide a small reduction of peaks. Change the threshold as necessary for your audio. If you want a more aggressive reduction start by increasing the Ratio.
Reverb
Hopefully, everyone understands the concept of reverb and what it is...
Reverb is the process of extending the sound (literally creating a
large number of echoes that are too close together to hear separately) and causing it to decay gradually over time.
Reverb in Audacity is very tricky because it typically only comes with the GVerb plug-in (and has to be added for Macs from the Audacity site as a plug-in). GVerb is a little confusing, but it allows for an endless amount of possible reverb scenarios.
Using the right amount of reverb can result in spectacular sound blends for your ensemble and using too much will result with it sounding like an empty parking garage…
11
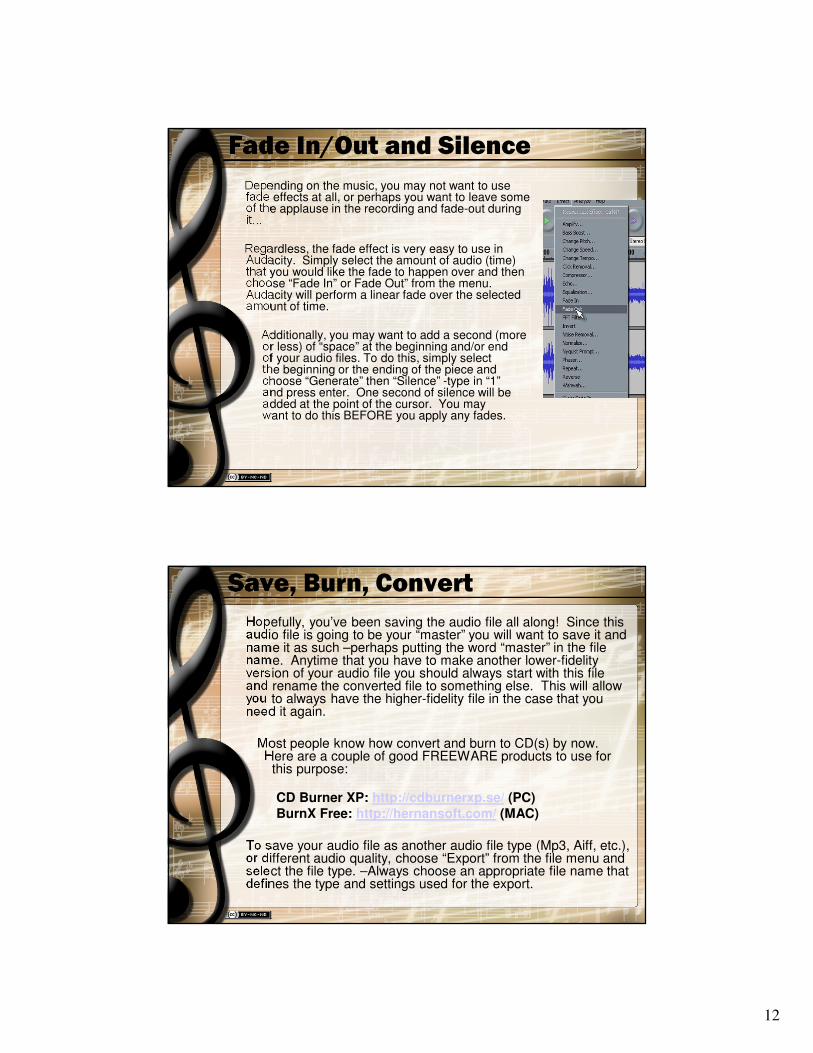
GVerb Primer:While there are lot of parameters to be set it may be best to simply give some examples of good settings to try:
Always listen to your reverb after you applied it…if you think it needs more, undo what you did and add more rather than reapplying the effect multiple times.
Be sure to monitor your file for clipping anytime that you add any effect!
Alternative Audacity plug-ins for reverb found here:
http://www.dancetech.com/file-library/PLUGIN/freeverb2.zip (PC)
http://www.sinusweb.de/freeToo16.zip (Mac)
Small Hall:
Roomsize: 45 m
Reverb time:1.5 s
Damping:0.1
Input bandwidth:0.75
Dry signal level:-1.5 dB
Early reflection level:-10 dB
Tail level:-20 dB
Large Hall:
Roomsize: 60 m
Reverb time:2.5 s
Damping:0.2
Input bandwidth:0.75
Dry signal level:-3.0 dB
Early reflection level:-10 dB
Tail level:-20 dB
Normalize:
The Normalization effect, if used, is almost always one of the last things done when editing audio (if not the last) .
Normalization increases the amplitude (loudness) to a maximum level. Normalization does not introduce any new distortion into the sound (because of the linear translation) but will increase the noise level (usually negligible if a proper recording level was set in the first place -18 to -8 dB).
Normalizing audio will provide a perceived “excitement” to the piecebecause of the increased overall gain.In addition, normalization will allow multiple audio files to maintain an overall “loudness” level when playedback-to-back (or as a CD compilation).
In Audacity (or any other digital editor), it is good practice to Normalize not to 0 dB but rather to -3 or -5 dB. This will allow for any clipping that could be created due to incompatibilities of the software/hardware.
12
Fade In/Out and Silence
Depending on the music, you may not want to use fade effects at all, or perhaps you want to leave some of the applause in the recording and fade-out during it…
Regardless, the fade effect is very easy to use in Audacity. Simply select the amount of audio (time) that you would like the fade to happen over and then choose “Fade In” or Fade Out” from the menu. Audacity will perform a linear fade over the selected amount of time.
Additionally, you may want to add a second (more or less) of “space” at the beginning and/or end of your audio files. To do this, simply select the beginning or the ending of the piece and choose “Generate” then “Silence” -type in “1” and press enter. One second of silence will be added at the point of the cursor. You may want to do this BEFORE you apply any fades.
Save, Burn, Convert
Hopefully, you’ve been saving the audio file all along! Since this audio file is going to be your “master” you will want to save it and name it as such –perhaps putting the word “master” in the file name. Anytime that you have to make another lower-fidelity version of your audio file you should always start with this file and rename the converted file to something else. This will allow you to always have the higher-fidelity file in the case that you need it again.
Most people know how convert and burn to CD(s) by now. Here are a couple of good FREEWARE products to use for this purpose:
CD Burner XP: http://cdburnerxp.se/ (PC)BurnX Free: http://hernansoft.com/ (MAC)
To save your audio file as another audio file type (Mp3, Aiff, etc.), or different audio quality, choose “Export” from the file menu and select the file type. –Always choose an appropriate file name that defines the type and settings used for the export.

13
Final Wrap up:Always remember:
You are the person that decides what sounds good!
Don’t be afraid to experiment and implement the UNDO feature FREQUENTLY! The A/B method of comparing audio changes works just as well today as it did the very first time it was discovered. Make a change, listen to it, listen to the previous sound, listen to the change again, etc.
It goes without saying (but, let’s talk about it anyway)…
Never edit anything for a distributable purpose without high-quality monitoring speakers or at least, high-quality head phones.
The average “big-deal” $75.00 U.S. multimedia sound speakers AREN’T going to cut it if you want to edit/mix/master properly!
I’ve listened to hundreds of edits that were made by my students where they used their built-in laptop speakers and/or ridiculous $5.00 “Cracker Jax” headphones… you can imagine how they turned out!
Final Wrap up (continued):
The average ensemble director probably isn’t going to have $thousands$ (or even $100s$) laying around to invest in professional quality reference monitors, but high-quality headphones are an acceptable alternative for this type of purpose…
Look a the SONY MDR7506 headphones as a baseline specification for editing-quality headphones (around $100.00 U.S.).
Give your ears a 5-10 minute break every 50-55 minutes of audio editing. If you ears are feeling fatigued, STOP and take a break!
Listen to your “final” product again after you have “stepped away” from it for a little while… It might have really been your “next-to-final”…
14
Questions?
Was there really enough time to make it to this slide?
Any Questions? ☺☺☺☺Thank you for attending this session- Please feel free to speak with me afterward. The PPT of this session (and audio) will be available online in the near future. The PowerPoint will be hosted at http://authorsteam.com and information about the sessions may be found at http://mustech.net.
Please contact me by visiting my Music, Education, and Technology website @ http://mustech.net
Follow me on Twitter (or Google buzz): @pisanojm and/or http://google.com/buzz/pisanojm
BTW, many of us are TWEETING this conference using the twitter hashtag #midwest10 – Join Us!