ground based software (gbs) citation mustang fadec= full authority digital engine control •...
TRANSCRIPT

REFERENCE ONLY
Pratt & Whitney Canada Ground Based Software (GBS)
Citation Mustang
User’s Guide

REFERENCE ONLY
This guide is designed to assist maintenance and avionics technicians in using the Pratt & Whitney Ground Based Software or GBS to troubleshoot the PW615F-A engine used on
the Cessna Citation Mustang.
The GBS system is sometimes referred to as DPHM which stands for Diagnostics, Prognostics and Health Management. In this document it will be referred to as GBS.
For further information concerning the purchase or subscription of the GBS equipment see the latest revision of P&WC Service Information Letter S.I.L. PW600-002.

REFERENCE ONLY
Caution
This document is supplemental information only, and not technical approved data. It does not replace the Cessna Citation Mustang Maintenance Manual or the Pratt & Whitney Canada PW615F-A Line Maintenance Manual.

REFERENCE ONLY
Abbreviations
• CDMS= Citation Diagnostics Maintenance System (onboard diagnostics) • DPHM= Diagnostics, Prognostics and Health Management • EEC= Electronic Engine Control • FADEC= Full Authority Digital Engine Control • GBS= Ground Based Software • TLA= Throttle Lever Angle

GBS kit P/N 3072685 consists of the following:
1) PWC69317 Download Cable Assembly 2) PWC90191 RS232-USB Adapter and Cable 3) CD containing the drivers for the RS232-USB adapter 4) CD containing the following software:
a. GBS Transfer Module b. GBS Diagnostic Module (GBSLite) c. Interactive Engine Technical Manual (IETM)
REFERENCE ONLY

Make sure that the maintenance switch is in the true position before connecting to the aircraft.
REFERENCE ONLY
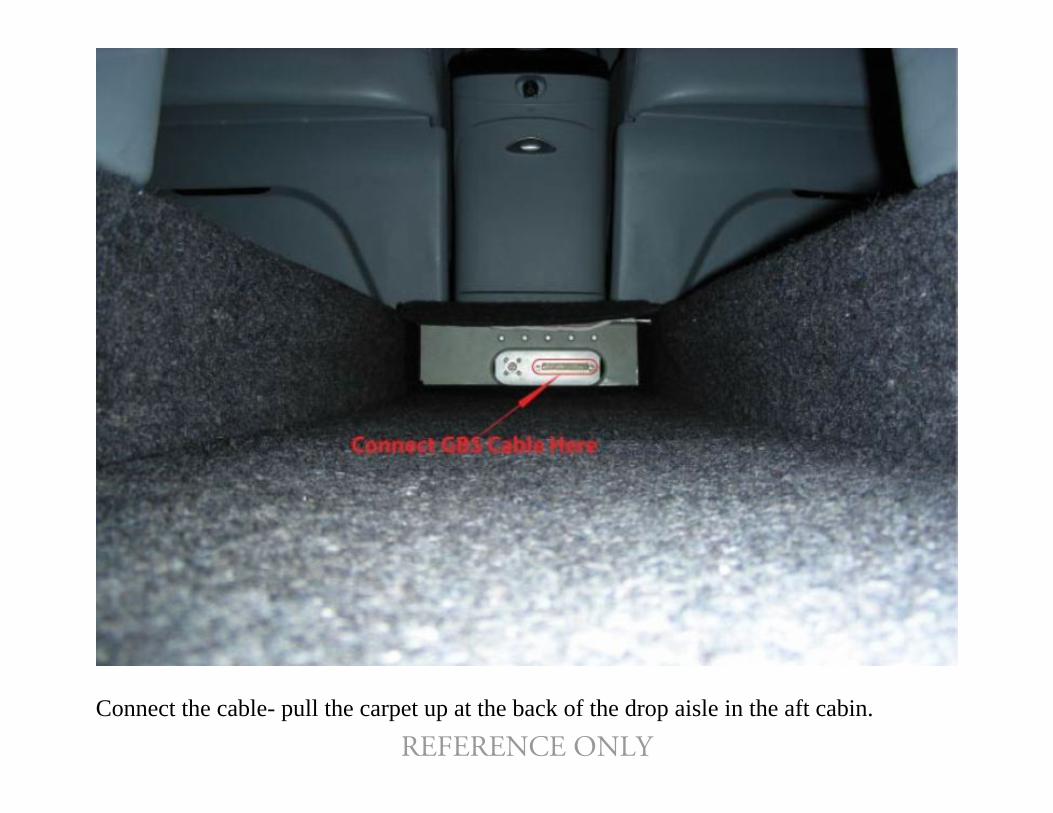
Connect the cable- pull the carpet up at the back of the drop aisle in the aft cabin.
REFERENCE ONLY

Select channel desired (Always download both engines, regardless of fault or issue).
REFERENCE ONLY

Make certain that the engine sync switch is off.
REFERENCE ONLY

Connect the cable to the laptop computer through the serial port. If the computer does not have a serial port, then use the adapter to connect to the USB port. The driver from the CD must be installed before using the adapter.
REFERENCE ONLY

Turn battery power on, avionics is not necessary.
REFERENCE ONLY

Open the GBSLite program. The first screen is referred to as the Express Screen.
REFERENCE ONLY

Click the Transfer Module button.
REFERENCE ONLY

Place PW615F in the window. Then select Download/Upload Program.
REFERENCE ONLY
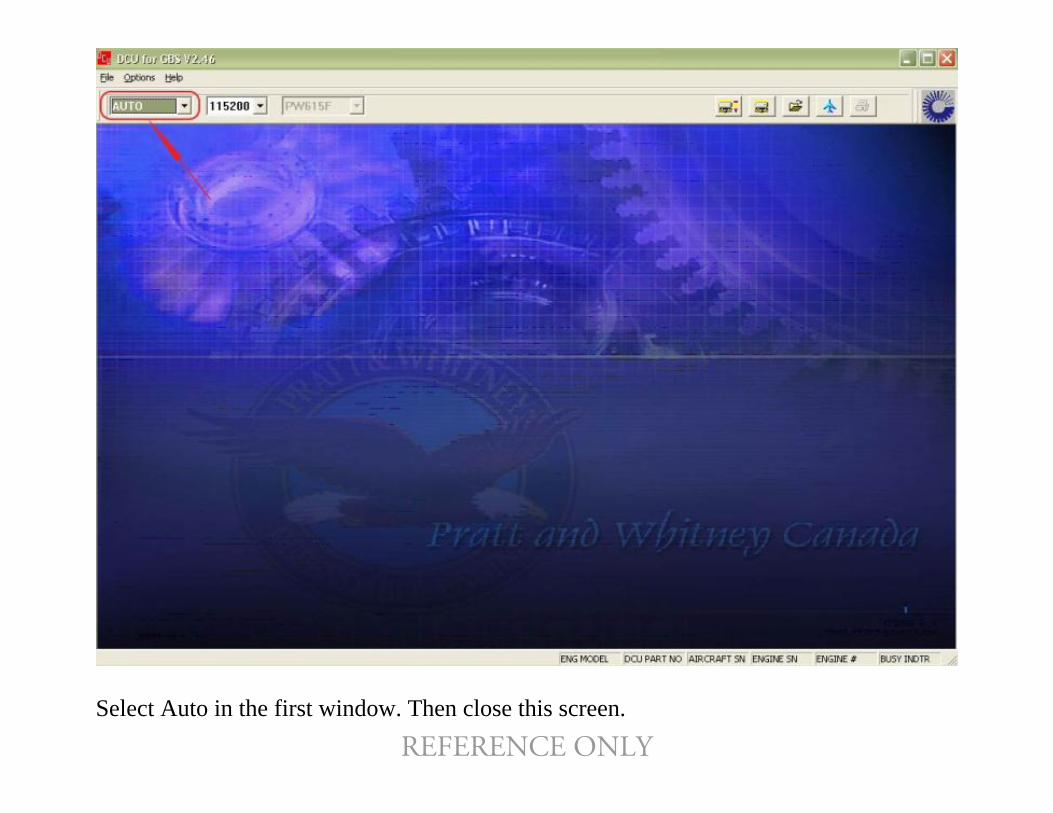
Select Auto in the first window. Then close this screen.
REFERENCE ONLY
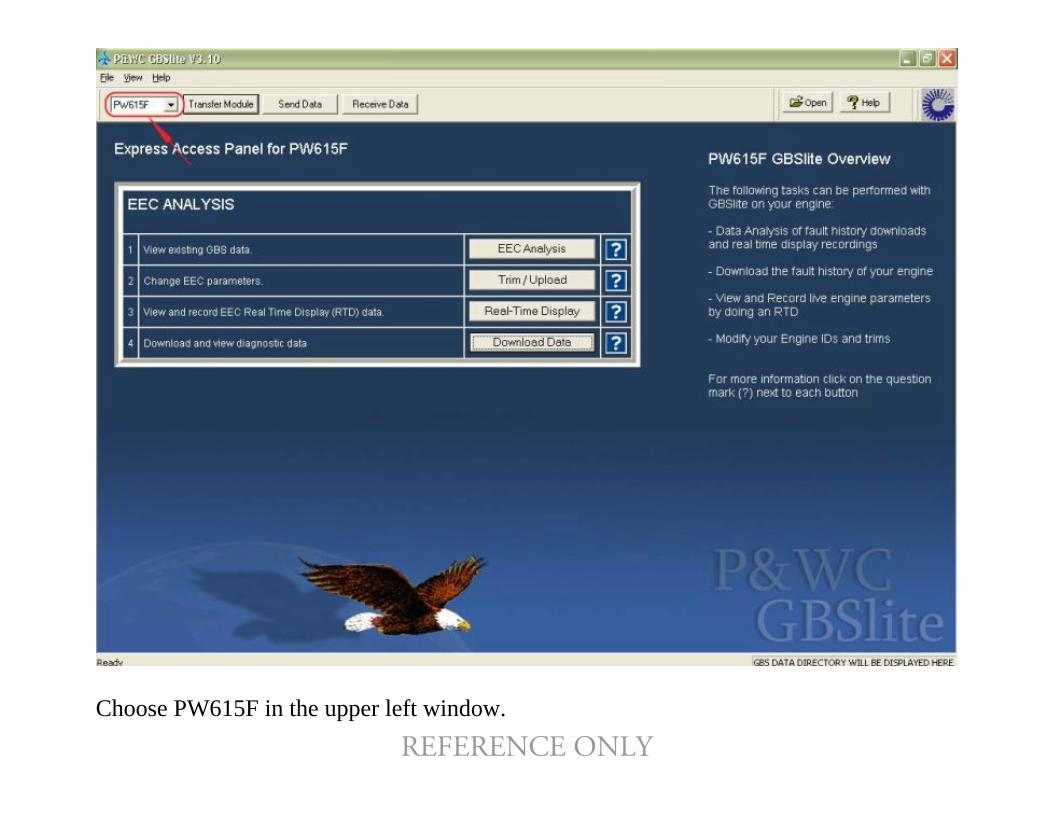
Choose PW615F in the upper left window.
REFERENCE ONLY
REFERENCE ONLY
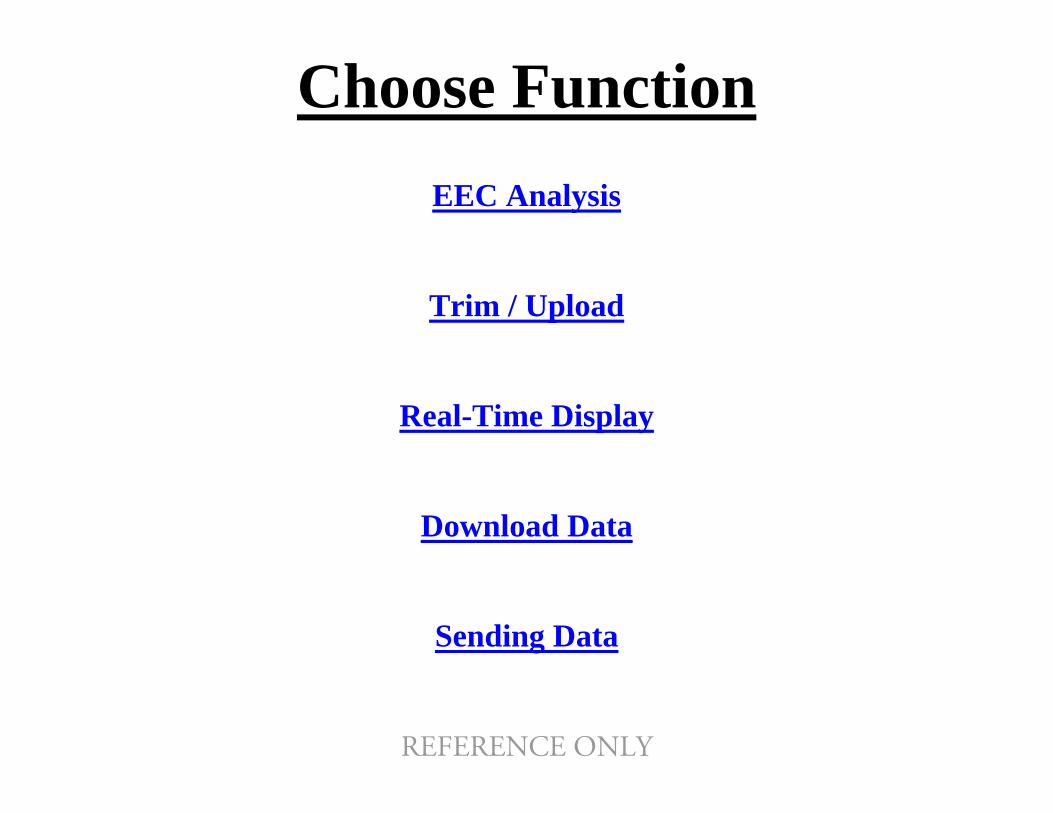
Choose Function
EEC Analysis
Trim / Upload
Real-Time Display
Download Data
Sending Data

REFERENCE ONLY
EEC Analysis

To review downloads or recordings, select choice 1- EEC Analysis.
REFERENCE ONLY

Choose the file desired for review.
REFERENCE ONLY

REFERENCE ONLY
Use this screen to review data as needed. Select the Close button to return to the Express Screen.

REFERENCE ONLY
Trim / Upload
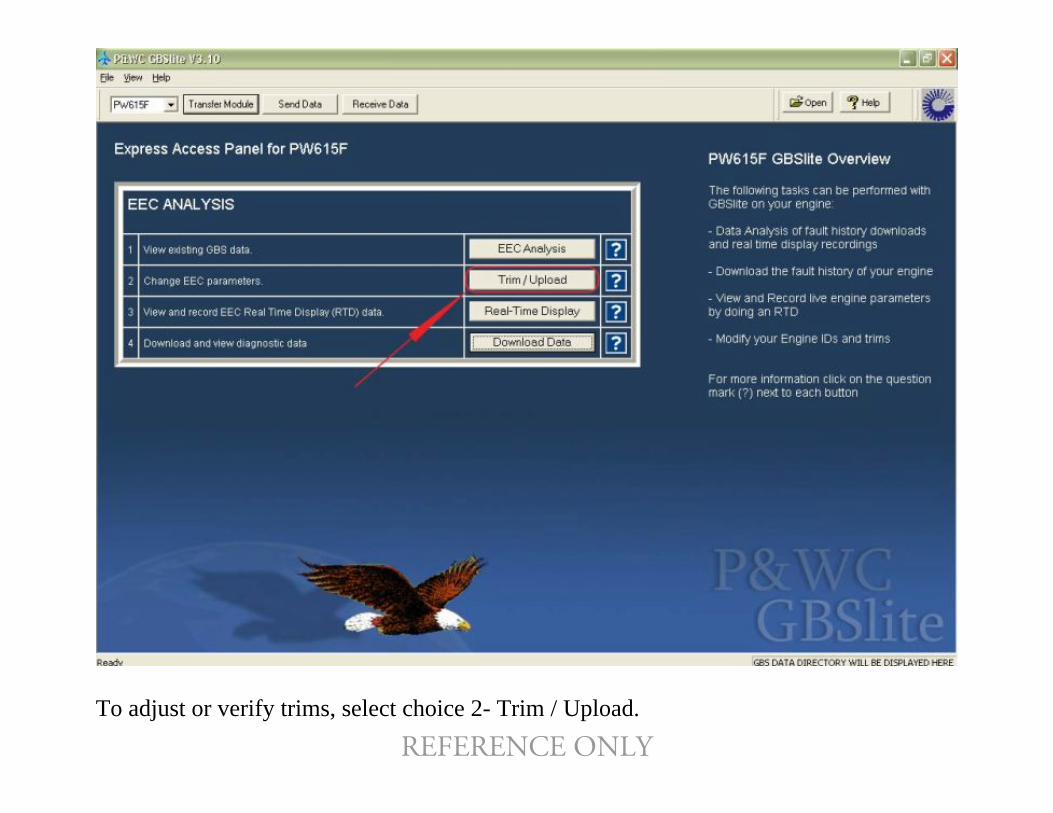
To adjust or verify trims, select choice 2- Trim / Upload.
REFERENCE ONLY

It is permissible to adjust the values in the white box as necessary for an EEC change.
REFERENCE ONLY
REFERENCE ONLY
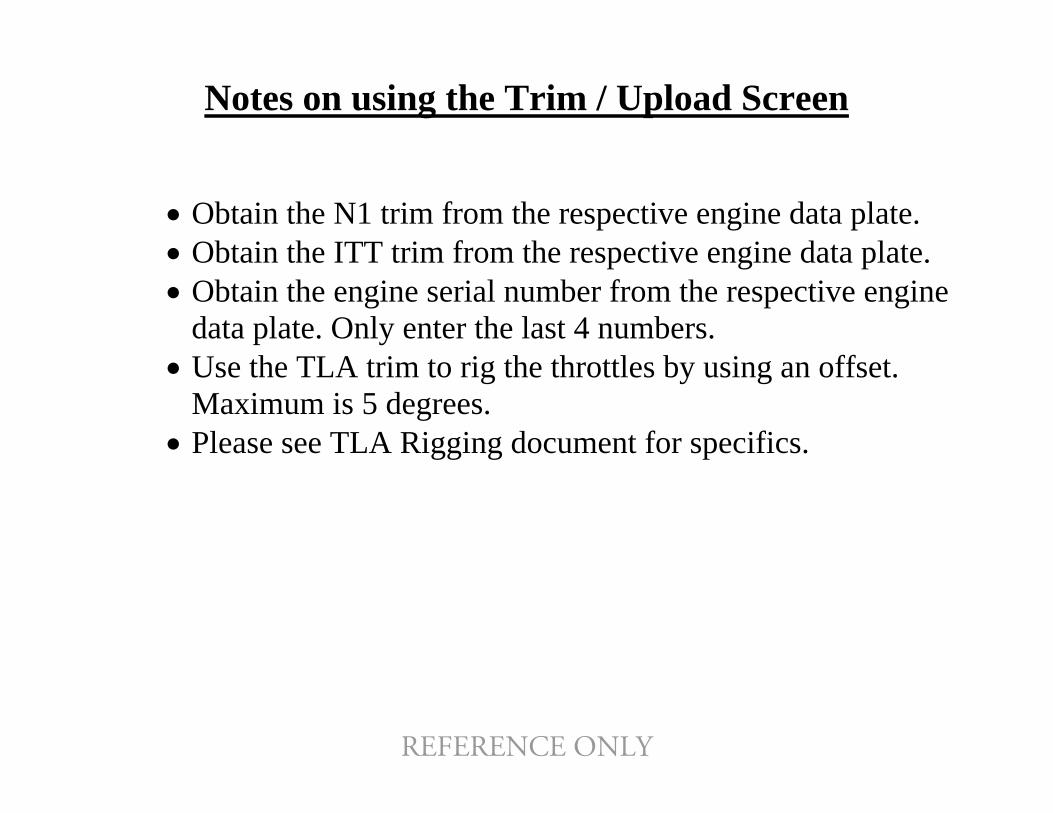
Notes on using the Trim / Upload Screen
• Obtain the N1 trim from the respective engine data plate. • Obtain the ITT trim from the respective engine data plate. • Obtain the engine serial number from the respective engine
data plate. Only enter the last 4 numbers. • Use the TLA trim to rig the throttles by using an offset.
Maximum is 5 degrees. • Please see TLA Rigging document for specifics.
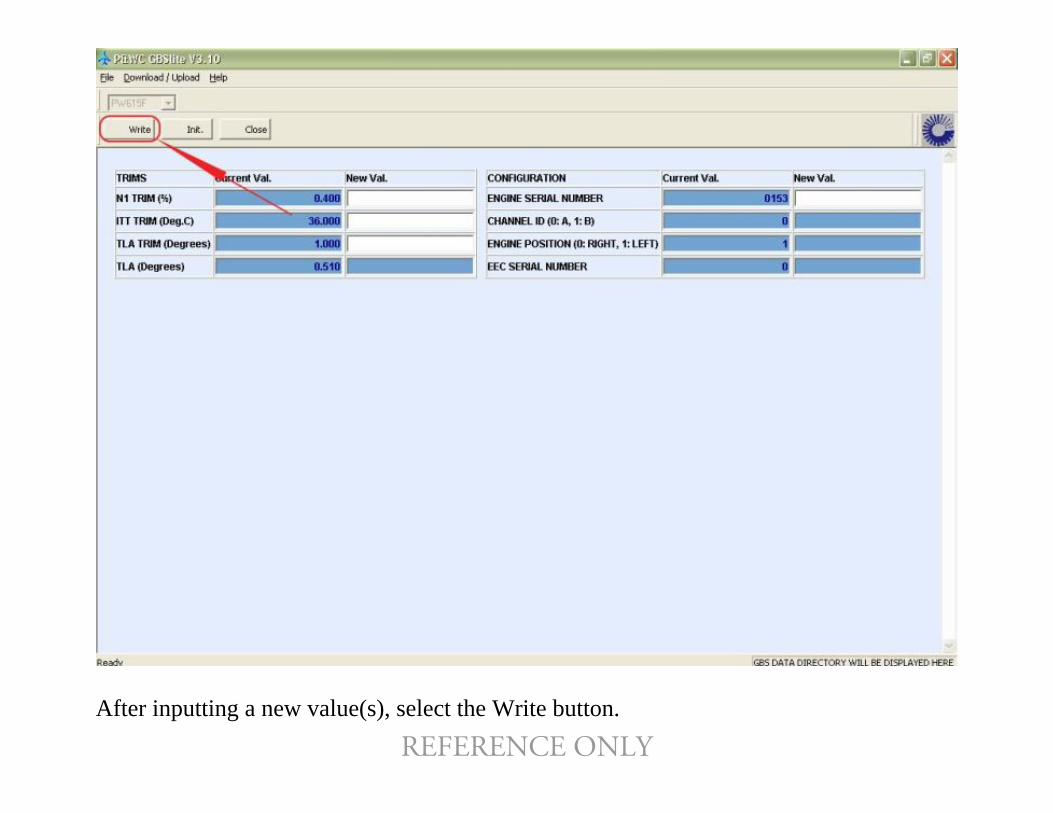
After inputting a new value(s), select the Write button.
REFERENCE ONLY
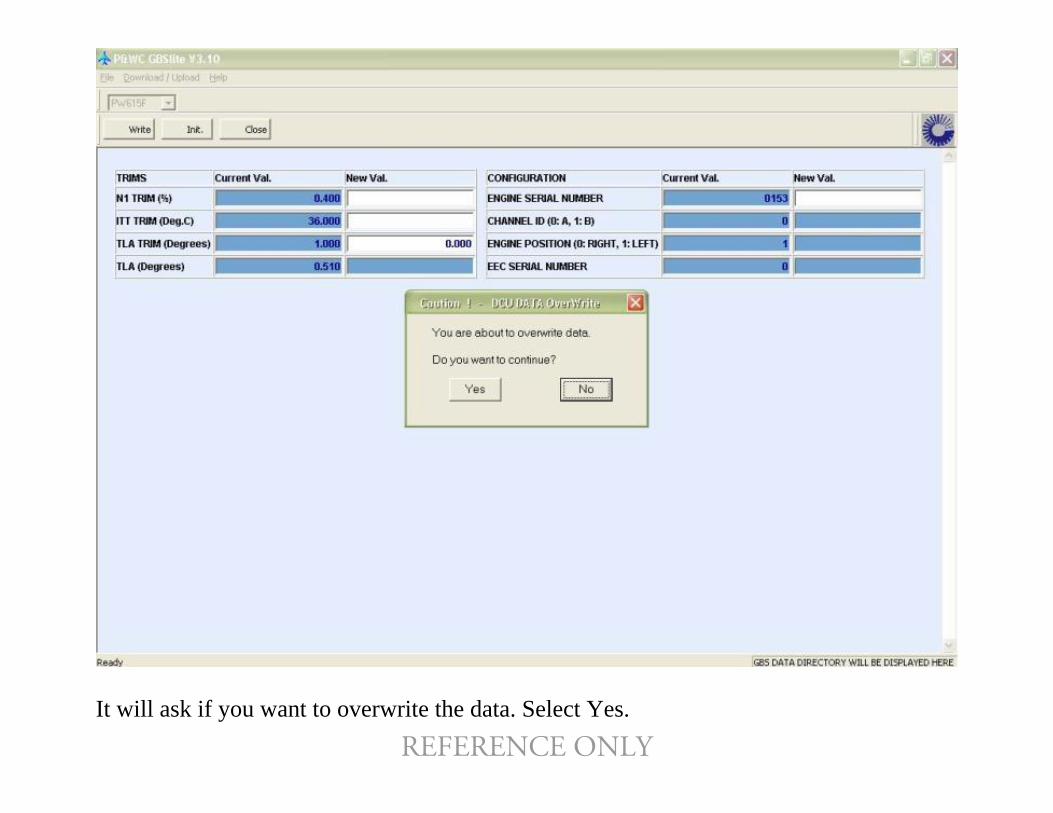
It will ask if you want to overwrite the data. Select Yes.
REFERENCE ONLY

Click on the Close button to return to the Express Screen.
REFERENCE ONLY
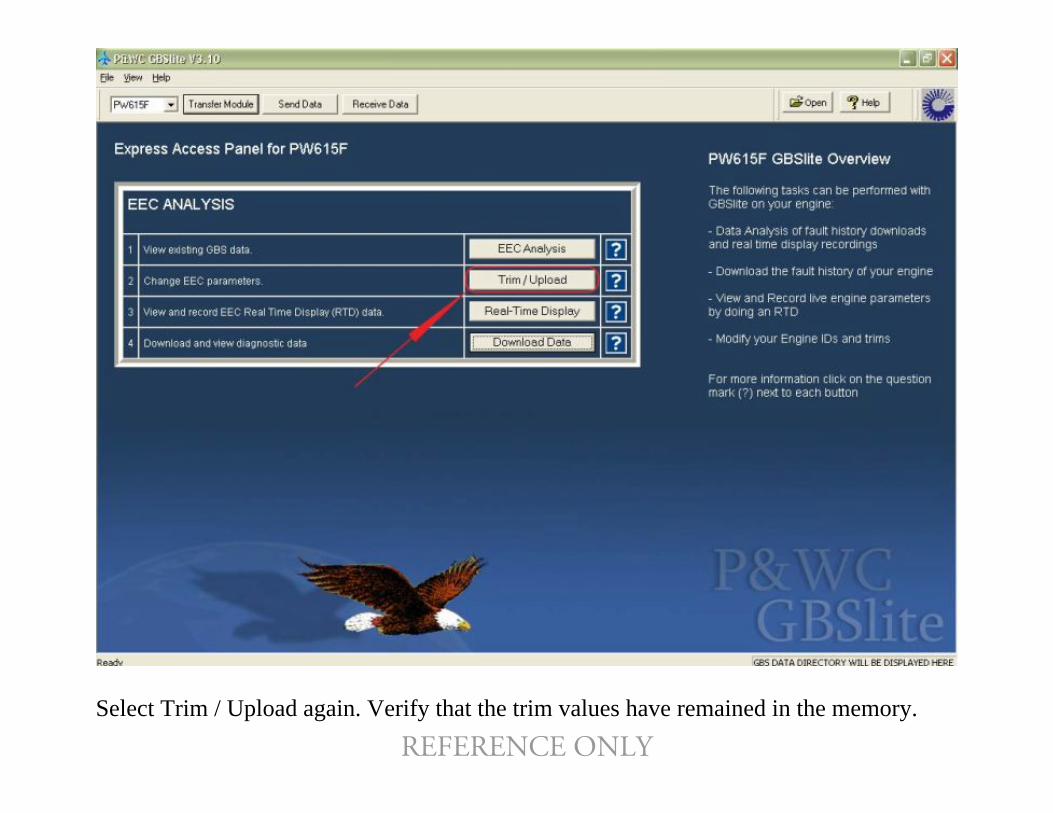
Select Trim / Upload again. Verify that the trim values have remained in the memory.
REFERENCE ONLY

REFERENCE ONLY
Real-Time Display

To perform a recording of an engine start, select choice 3- Real-Time Display.
REFERENCE ONLY
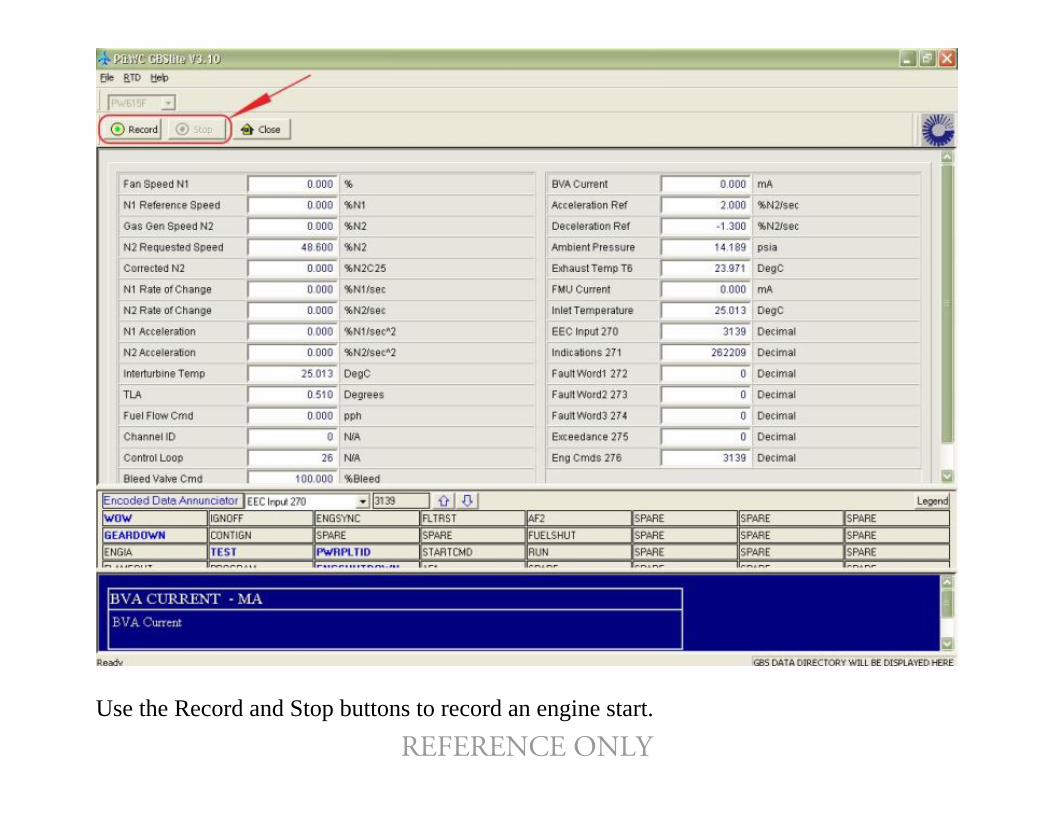
Use the Record and Stop buttons to record an engine start.
REFERENCE ONLY

Look for aircraft in upper left window. If not present then…
REFERENCE ONLY
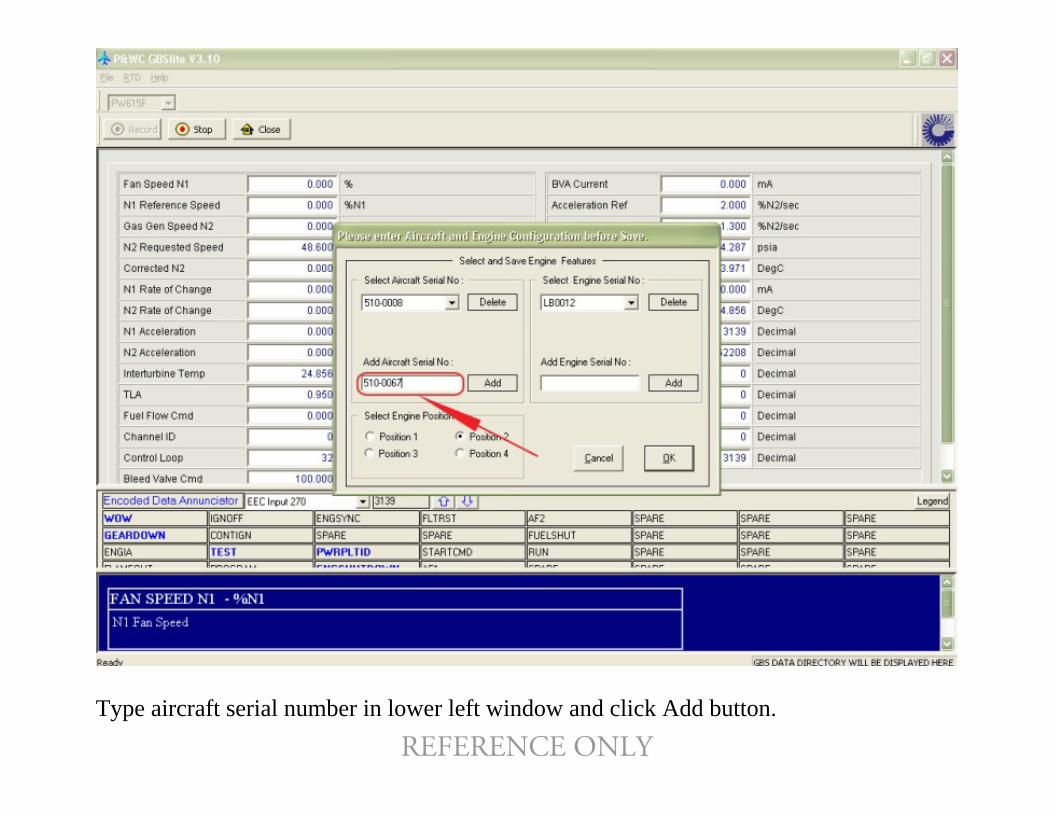
Type aircraft serial number in lower left window and click Add button.
REFERENCE ONLY

Make certain that the serial number is transferred to the upper left window.
REFERENCE ONLY

Select Position 1 for left engine or Position 2 for right engine.
REFERENCE ONLY
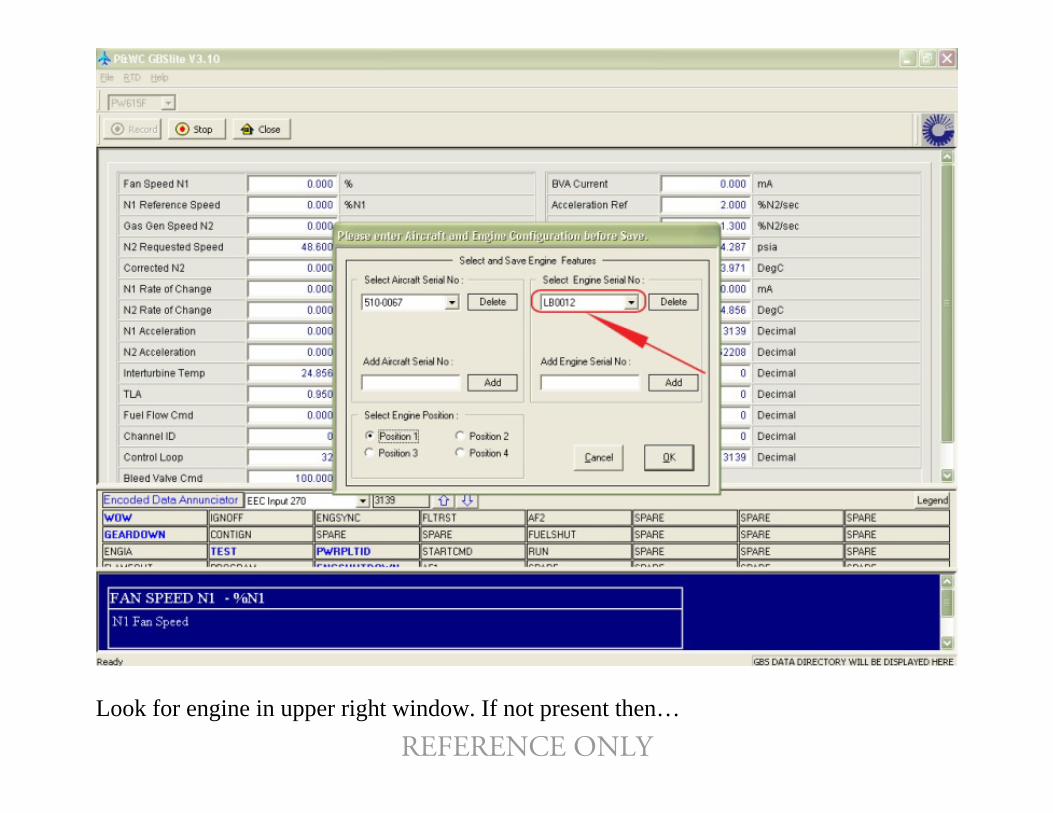
Look for engine in upper right window. If not present then…
REFERENCE ONLY
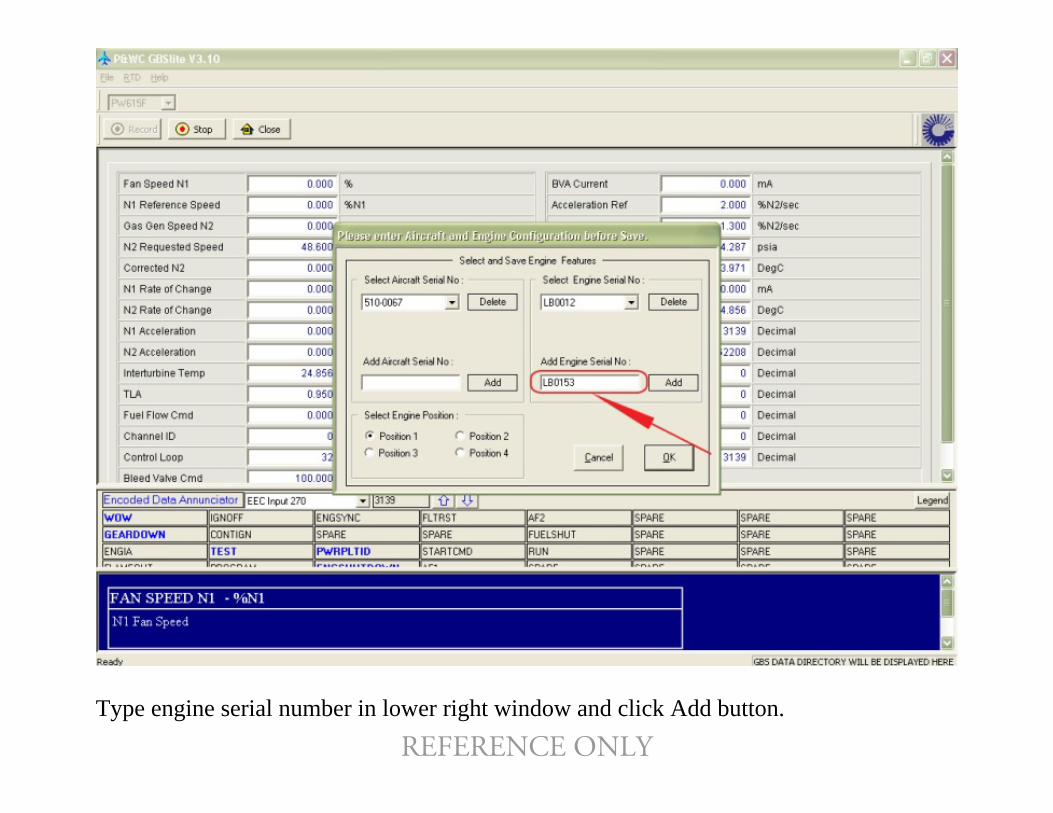
Type engine serial number in lower right window and click Add button.
REFERENCE ONLY

Make certain that the serial number is transferred to the upper right window. Click OK.
REFERENCE ONLY
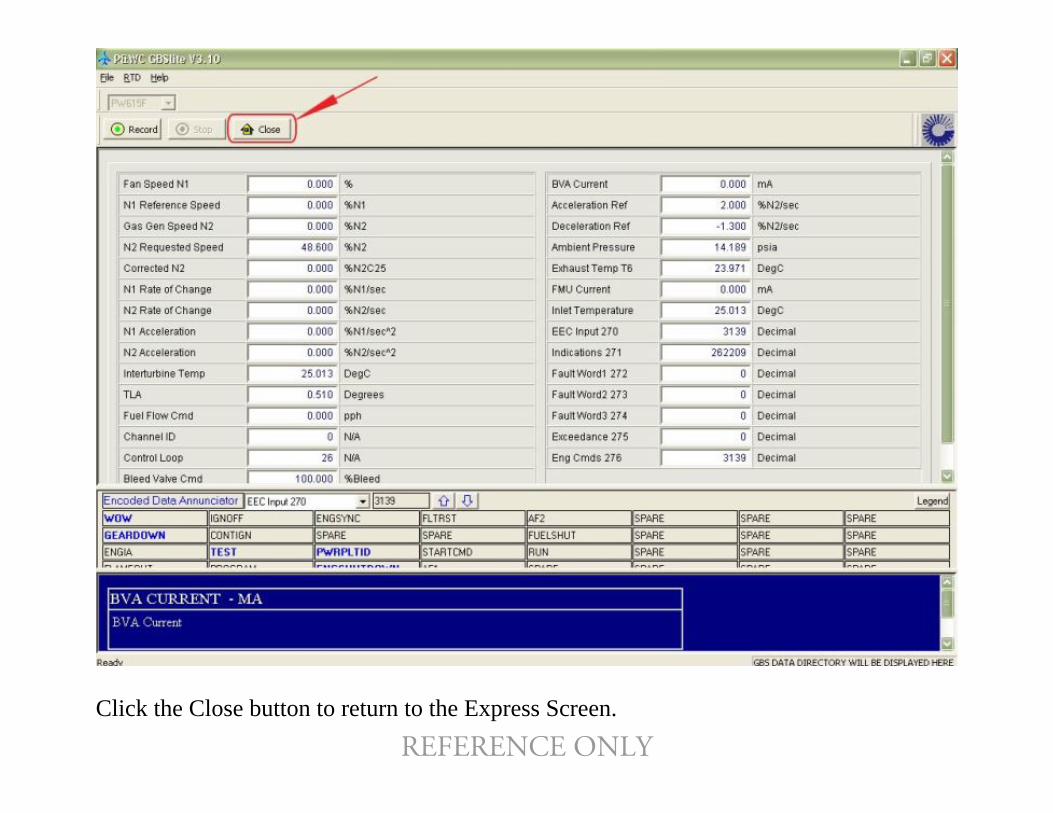
Click the Close button to return to the Express Screen.
REFERENCE ONLY

REFERENCE ONLY
Download Data
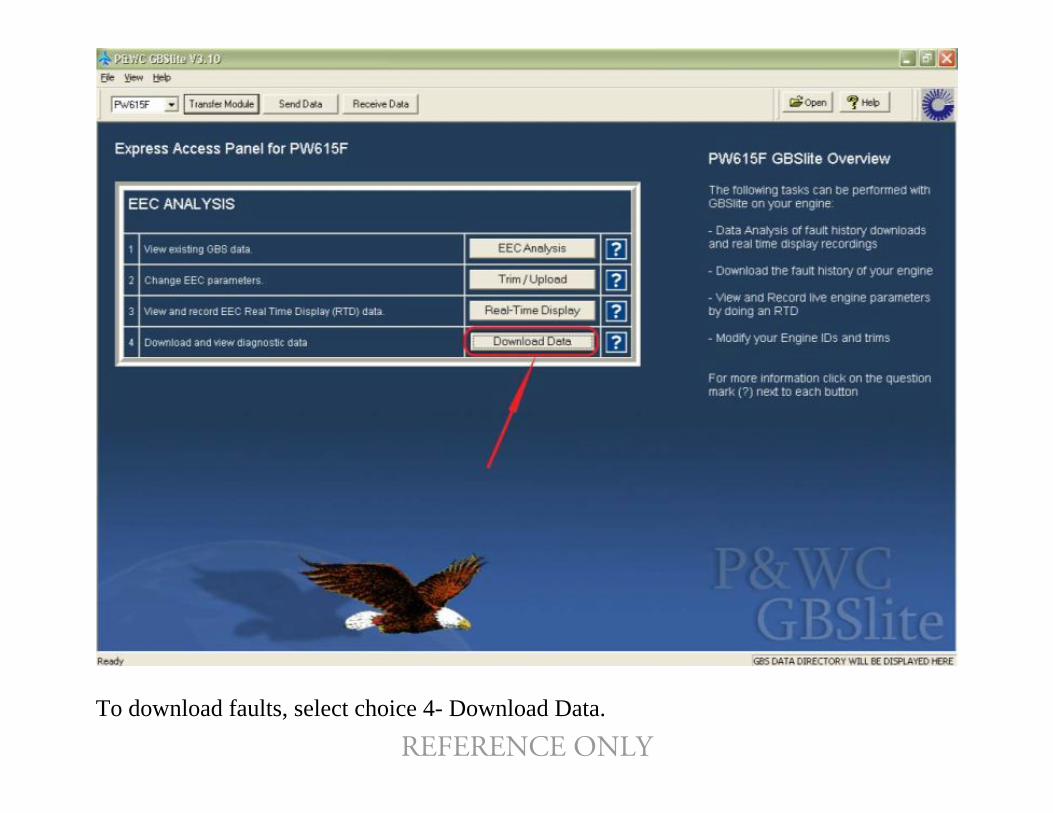
To download faults, select choice 4- Download Data.
REFERENCE ONLY
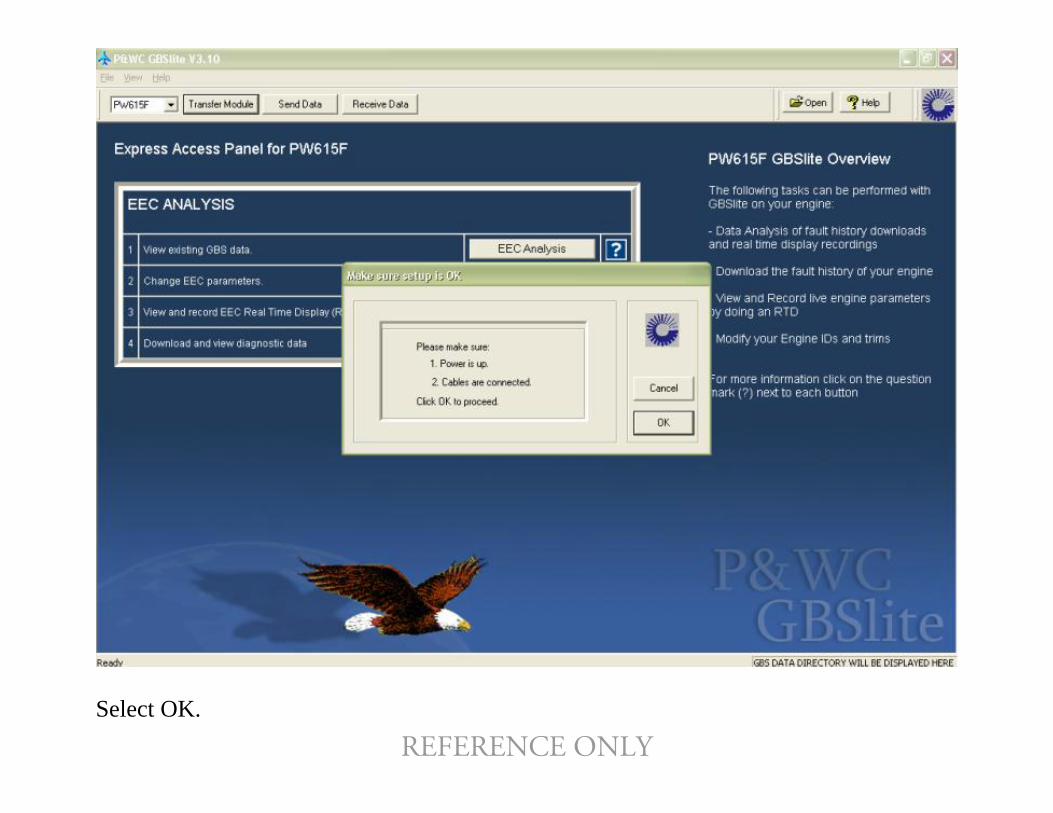
Select OK.
REFERENCE ONLY
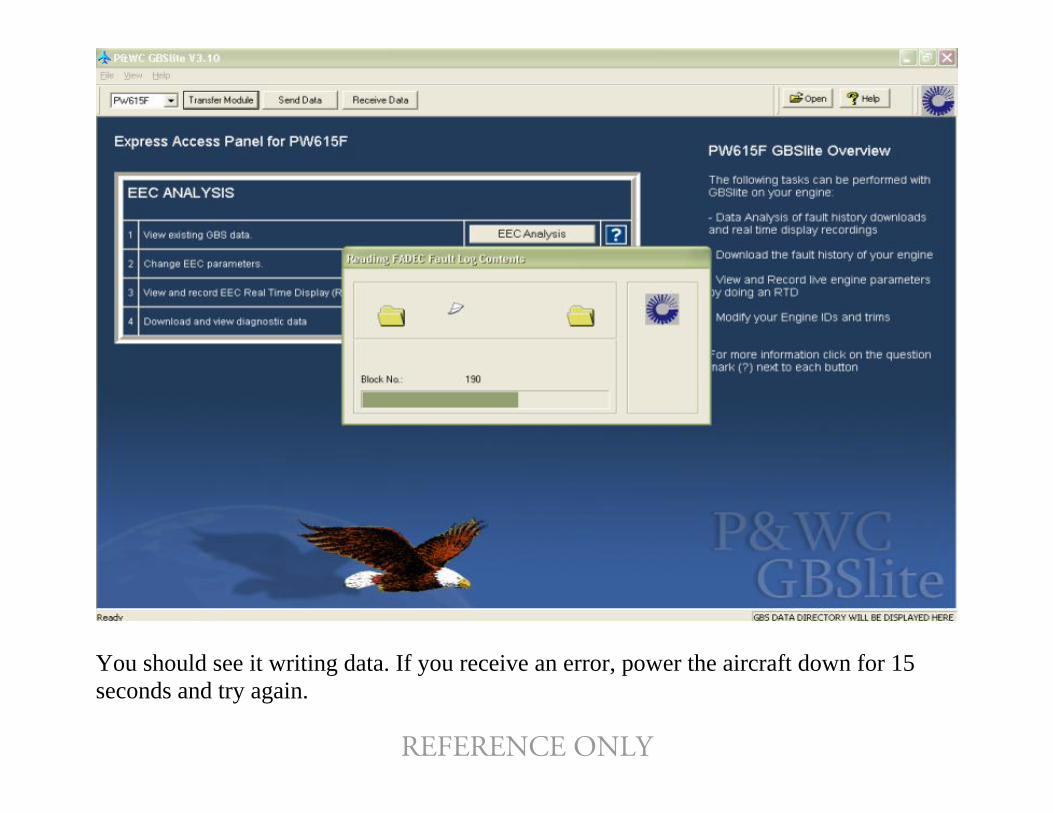
You should see it writing data. If you receive an error, power the aircraft down for 15 econds and try again. s
REFERENCE ONLY

Channel A is complete. Choose channel B before selecting yes. Then select yes.
REFERENCE ONLY

You should see it writing data again for the other channel.
REFERENCE ONLY

Select the correct aircraft in the upper left window. If not present….
REFERENCE ONLY
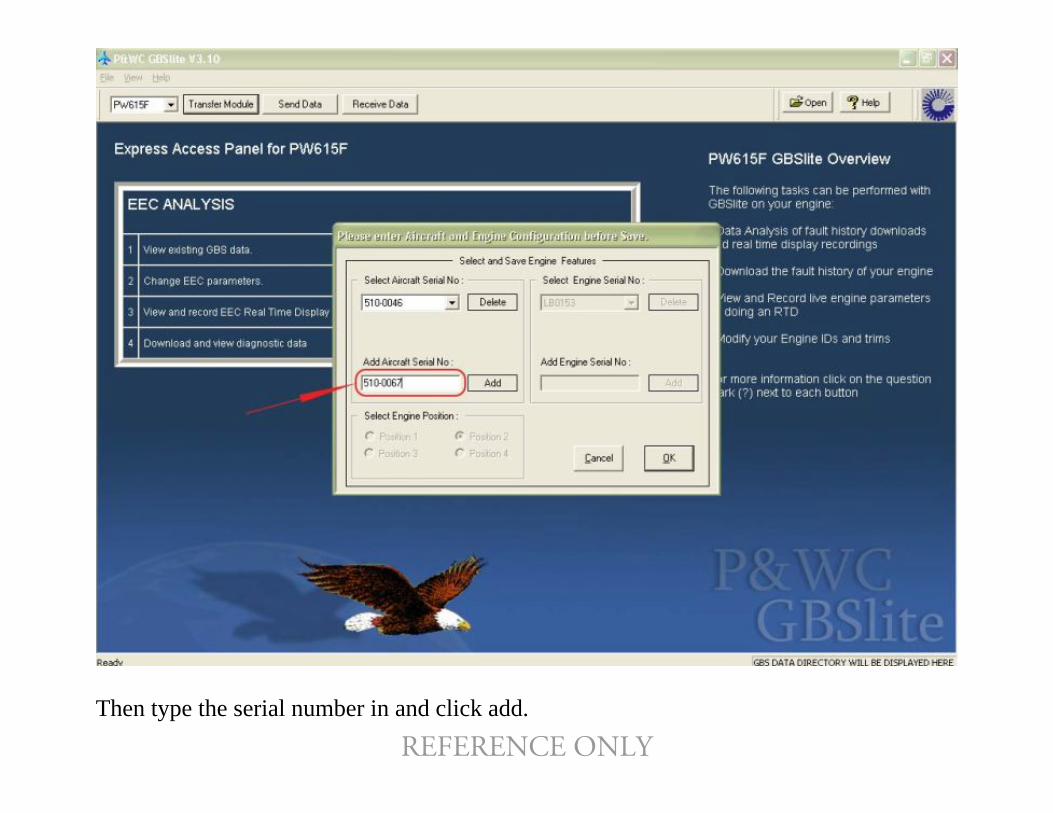
Then type the serial number in and click add.
REFERENCE ONLY

It will transfer to the top left corner. Select OK.
REFERENCE ONLY
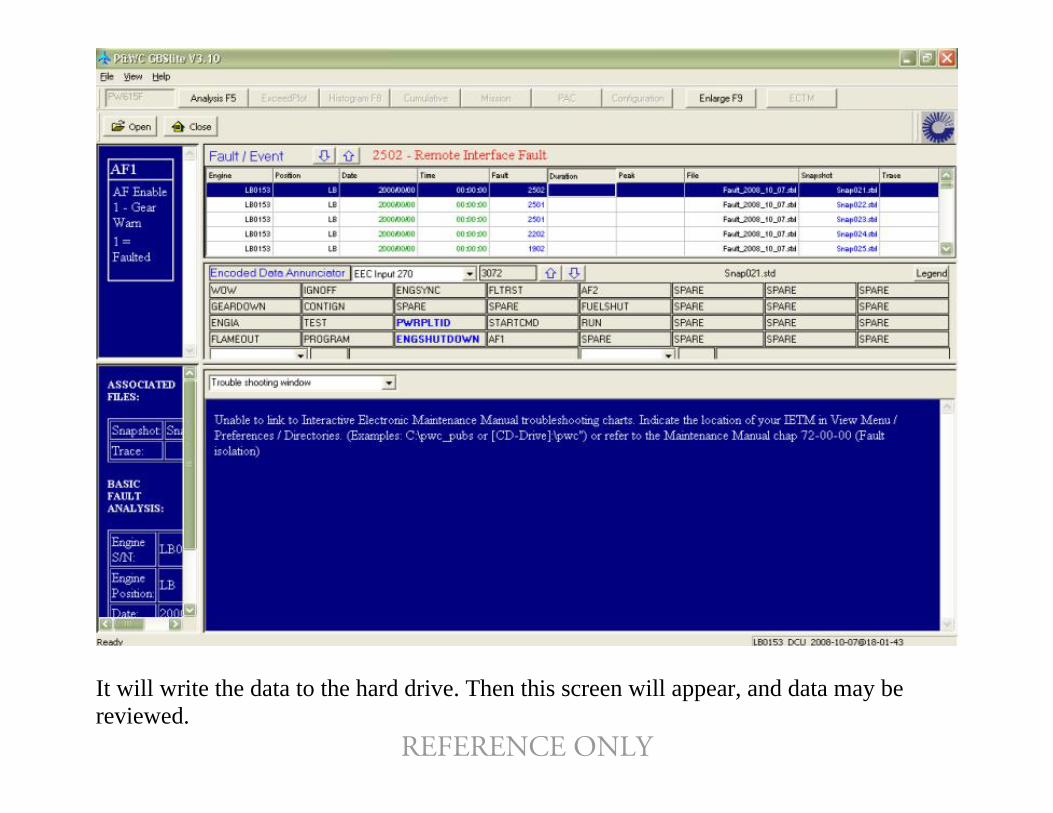
t will write the data to the hard drive. Then this screen will appear, and data may be I
reviewed. REFERENCE ONLY
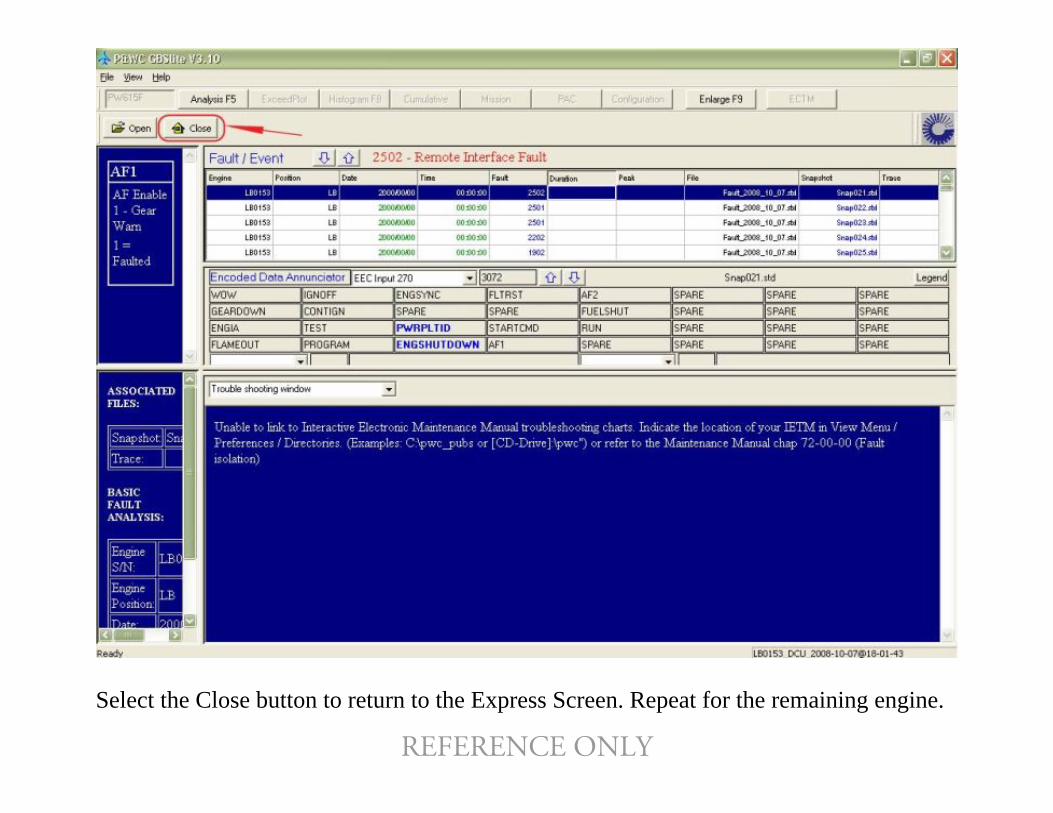
Select the Close button to return to the Express Screen. Repeat for the remaining engine.
REFERENCE ONLY

REFERENCE ONLY
Sending Data
REFERENCE ONLY
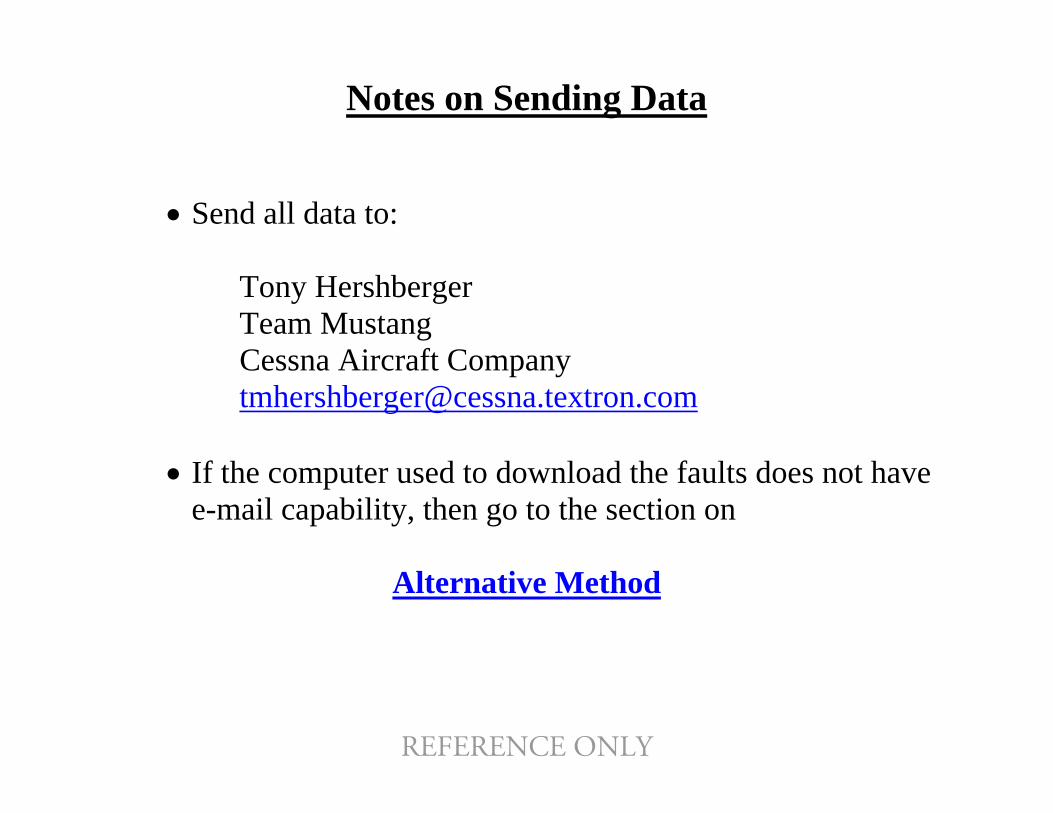
Notes on Sending Data
• Send all data to:
Tony Hershberger Team Mustang Cessna tmhersh
Aircraft Company [email protected]
• If the computer used to download the faults does not have
e-mail capability, then go to the section on
Alternative Method
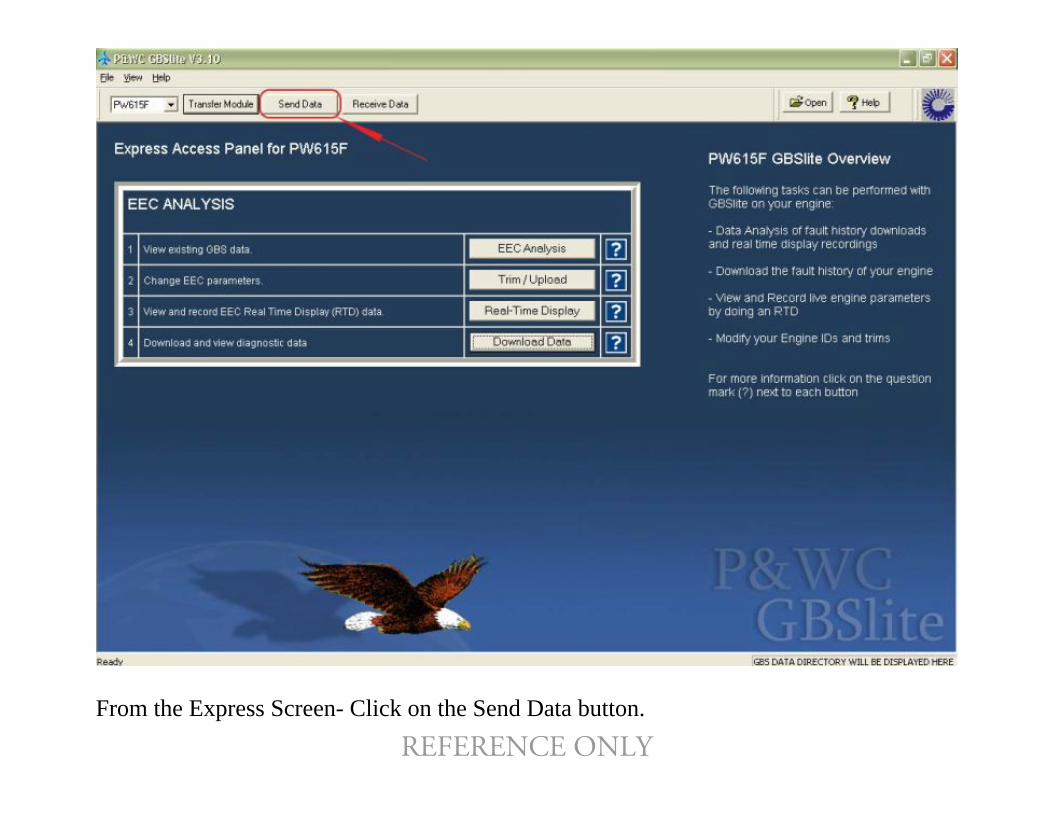
rom the Express Screen- Click on the Send Data button. F
REFERENCE ONLY

Select the Download Data button.
REFERENCE ONLY
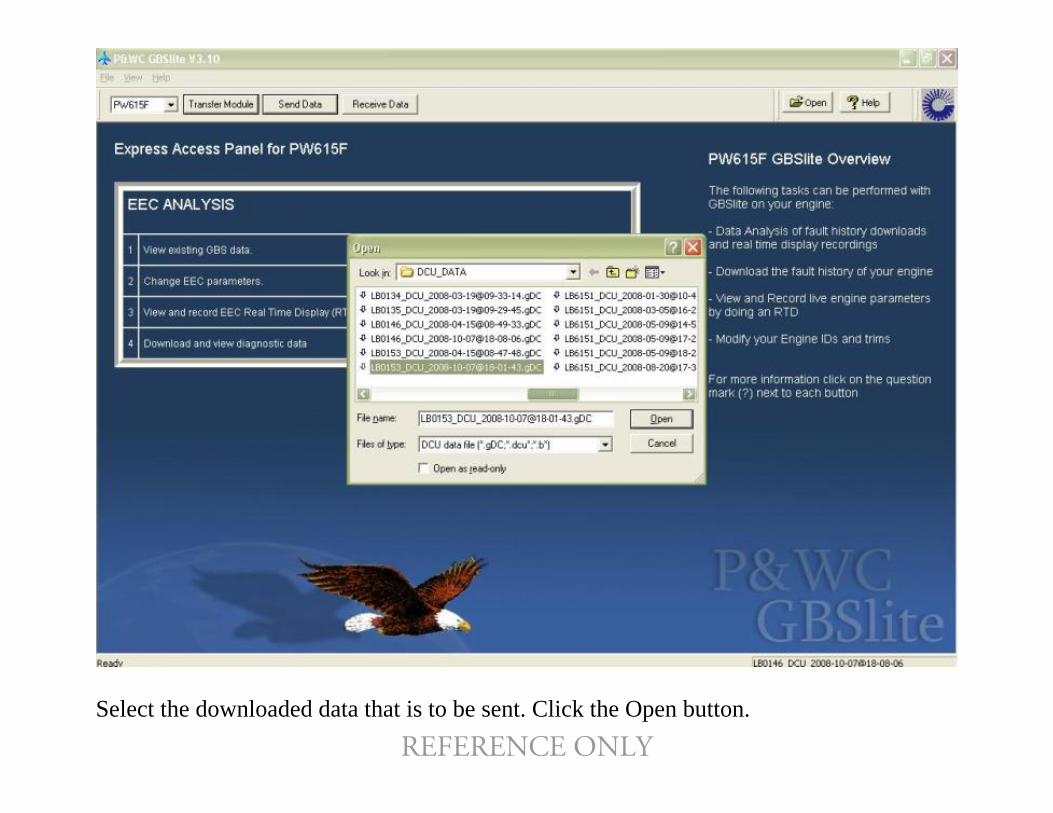
Select the downloaded data that is to be sent. Click the Open button.
REFERENCE ONLY

his will attach the GDC file directly to an e-mail. Type T
REFERENCE ONLY [email protected] in the To section. Click the Send button.

Select the Real Time Display Data button.
REFERENCE ONLY
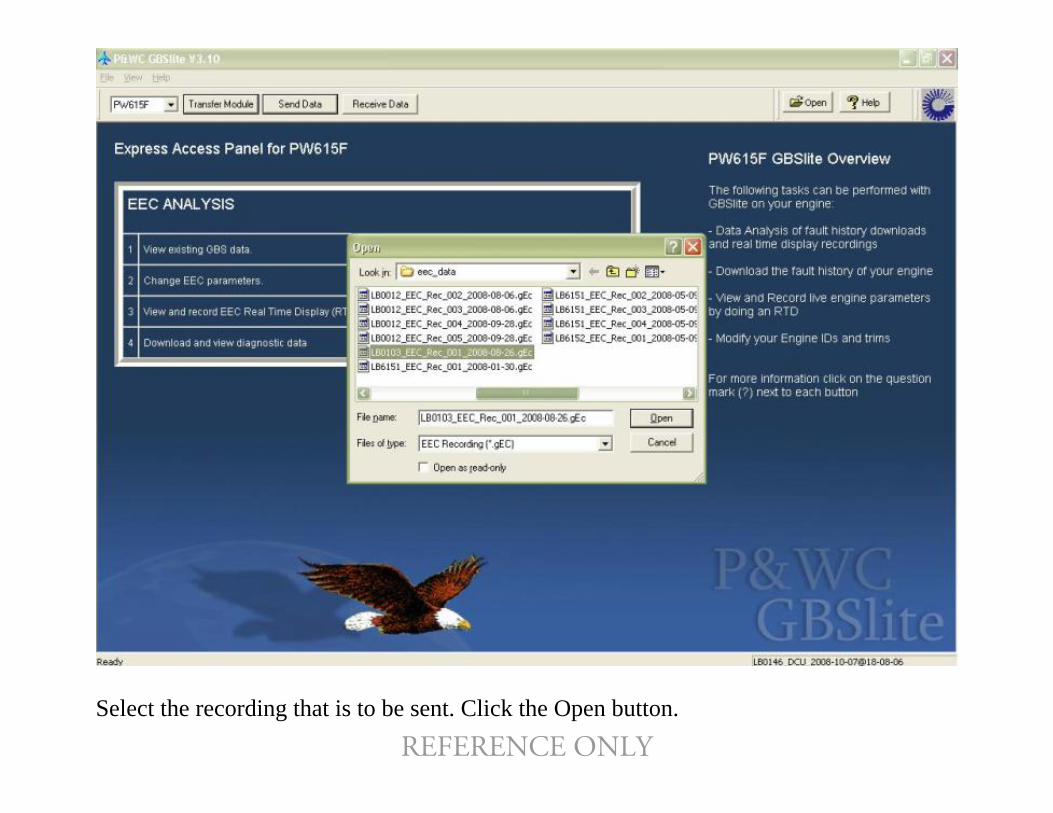
Select the recording that is to be sent. Click the Open button.
REFERENCE ONLY
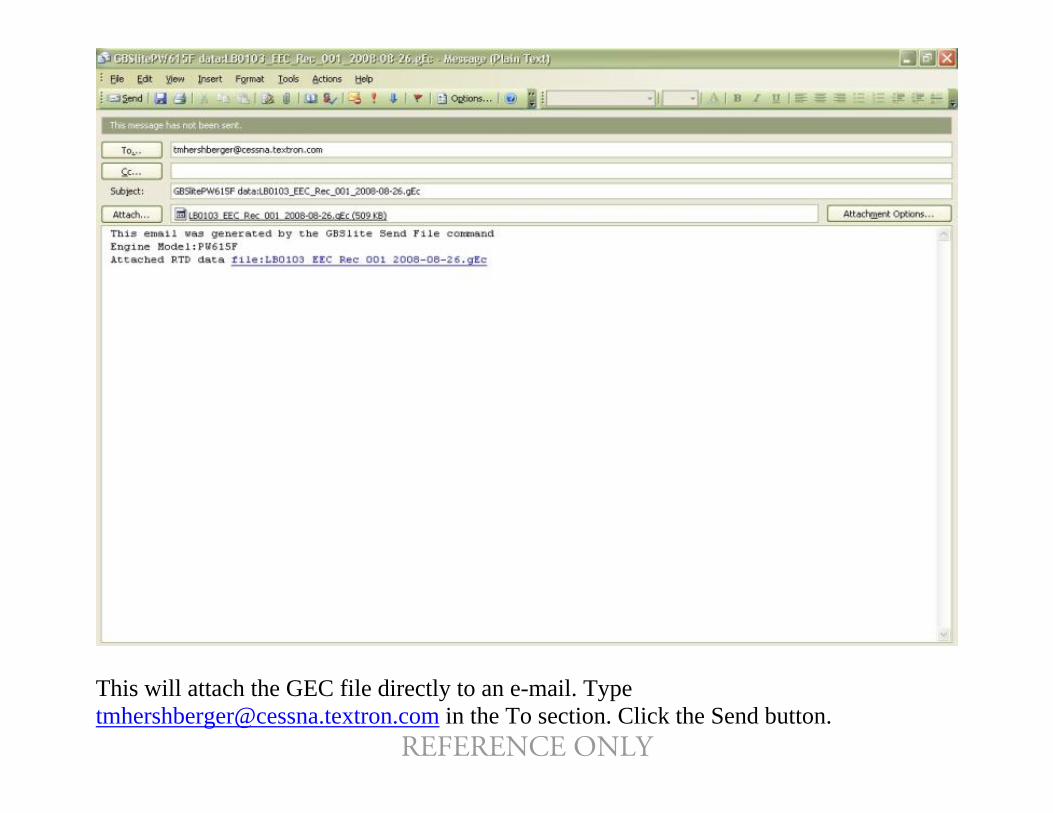
his will attach the GEC file directly to an e-mail. Type T
REFERENCE ONLY [email protected] in the To section. Click the Send button.

REFERENCE ONLY
Sending Data
Alternative Method

REFERENCE ONLY
ending Fault DownloadsS
• After the downloads are complete, close the GBSLite program. • Access the hard drive on the laptop and go to this address:
C:\GBS-PWC\Bin\gbstm\dcu\PW615F\DCU_DATA
• The file will have an extension of .gDc and will have an arrow in front of it.
ote: Your computer might have a different letter assigned to it. Modify as necessary. A omplete file will be approximately 152 KB in size.
Sending Real Time Disp
Nc
lay Recordings • After the recordings are taken, close the GBSLite program. • Access the hard driv
C:\GBS-PW • The file will have an extension of .gEc
Note: Your computer might have a different letter assigned to it. Modify as necessary. A complete file will be of varying size dependent on the length of the recording. Take these files and place on a flash drive to send through e-mail on another computer.
e on the laptop and go to this address: C\Bin\gbstm\eec\pw615F\eec_data