hack a code a robot game
TRANSCRIPT
Plus Build a Tempest clone in FUZE Basic
27BUILDDESIGN
CODEGet hands-on with your Raspberry PiGet hands-on with your Raspberry Pi
HACK A ROBOT
CODE A
IN PYGAME ZERO
+
SCORE0001200
LIVES BREAKOUT
GAME

WelcomeHow did you first get into
computing? Maybe, if you’re of a certain age, you were introduced to computers and programming
at school, university or work, but the likelihood is that if you got into computing at any point in the past 30 years then your first introduction to it was via a videogame. Maybe that was Pong, or The Hobbit text adventure; maybe it was a Legend of Zelda or Final Fantasy title, or perhaps a Half-Life, Battlefield or Call of Duty. Whatever it was, I’m sure you can attest to the power of videogames when it comes to engaging people with computers. The Raspberry Pi is no different, except in this case it allows you to make your own games. Find out how in this issue! Find out how in this issue!
Editor
From the makers of
@linuxusermag Linux User & Developer [email protected]
Join the conversation at…
Get inspiredDiscover the RasPi community’s best projects
Expert adviceGot a question? Get in touch and we’ll give you a hand
Easy-to-follow guidesLearn to make and code gadgets with Raspberry Pi
www.twitter.com/linuxusermagwww.twitter.com/linuxusermag@linuxusermag
www.twitter.com/linuxusermag@linuxusermag
www.twitter.com/linuxusermag https://www.facebook.com/LinuxUserUKhttps://www.facebook.com/LinuxUserUKhttps://www.facebook.com/LinuxUserUKLinux User & Developer
https://www.facebook.com/LinuxUserUKLinux User & Developer
https://www.facebook.com/LinuxUserUKhttps://www.facebook.com/LinuxUserUK [email protected]@[email protected]
[email protected]@imagine-publishing.co.uk
[email protected]@imagine-publishing.co.uk

PyGame ZeroCut out the boilerplate to turn your ideas into games instantly
Tron PiDesk“On the other side of the screen, it all looks so easy”
Hack a robot with Pi-MoteCode a program to control a toy robot
Code a Tempest clone in FUZE BASIC Part 1 Remake a classic game in FUZE BASIC
Add multimedia to your Pi Using the PyGame module is a one-stop fix
Contents
Talking PiYour questions answered and your opinions shared
SCORE0001200
LIVES BREAKOUT

Games are a great way of understanding a language: you have a goal to work towards, and each feature you add brings more fun. However,
games need libraries and modules for graphics and other essential games features. While the Pygame library made it relatively easy to make games in Python, it still brings in boilerplate code that you need before you get started – barriers to you or your kids getting started in coding.
Pygame Zero deals with all of this boilerplate code for you, aiming to get you coding games instantly. Pg0 (as we’ll abbreviate it) makes sensible assumptions about what you’ll need for a game – from the size of the window to importing the game library – so that you can get straight down to coding your ideas.
Pg0’s creator, Daniel Pope, told us that the library “grew out of talking to teachers at Pycon UK’s education track, and trying to understand that they need to get immediate results and break lessons into bite-size fragments, in order to keep a whole class up to speed.”
To give you an idea of what’s involved, we’ll build up a simple game from a Pong-type bat and ball through to smashing blocks Breakout-style. The project will illustrate what can be done with very little effort. Pg0 is in early development but still offers a great start – and is now included on the Pi in the Raspbian Jessie image. We’ll look at installation on other platforms, but first let’s see what magic it can perform.
Pygame Zero
Pygame Zero http://pygame-zero.
readthedocs.orgPygame
http://pygame.orgPip
https://pip-installer.orgPython 3.2 or later https://www.python.
org
THE PROJECTESSENTIALS
Pygame Zero cuts out the boilerplate to turn your ideas into games instantly, and we’ll show you how

01 Zero effortAlthough game writing is not easy, getting started
certainly is. If you’ve got Raspbian Jessie installed on your Pi, you’re ready to go. Open a terminal and type:
touch example.pypgzrun example.py
And you’ll see an empty game window open (Ctrl+Q will close the window). Yes, it’s that easy to get started!
02 Python 3If you haven’t got Raspbian Jessie, chances are
you’ll have neither Pg0 nor Pygame installed. The Python’s pip package installer will take care of grabbing Pg0 for you, but the preceding steps vary by distro. One thing you will
Above Breakout is a classic arcade game that can be reimagined in Pygame Zero
need is Python 3.2 (or newer). If you’ve been sticking with Python 2.x in your coding (perhaps because it’s used in a tutorial you’re following), make Pg0 your chance for a gentle upgrade to Python 3.
03 Older RaspbianIf you’re still running Raspbian Wheezy, you’ll
need to run the following steps to install Pygame Zero:
sudo apt-get updatesudo apt-get install python3-setuptools python3-pipsudo pip-3.2 install pgzero
04 No Pi?You don’t even need a Raspberry Pi to install
Pygame Zero – just install the Pygame library, then use pip to install Pygame Zero. Instructions vary by distro, but a good place to start is http://bit.ly/1GYznUB.
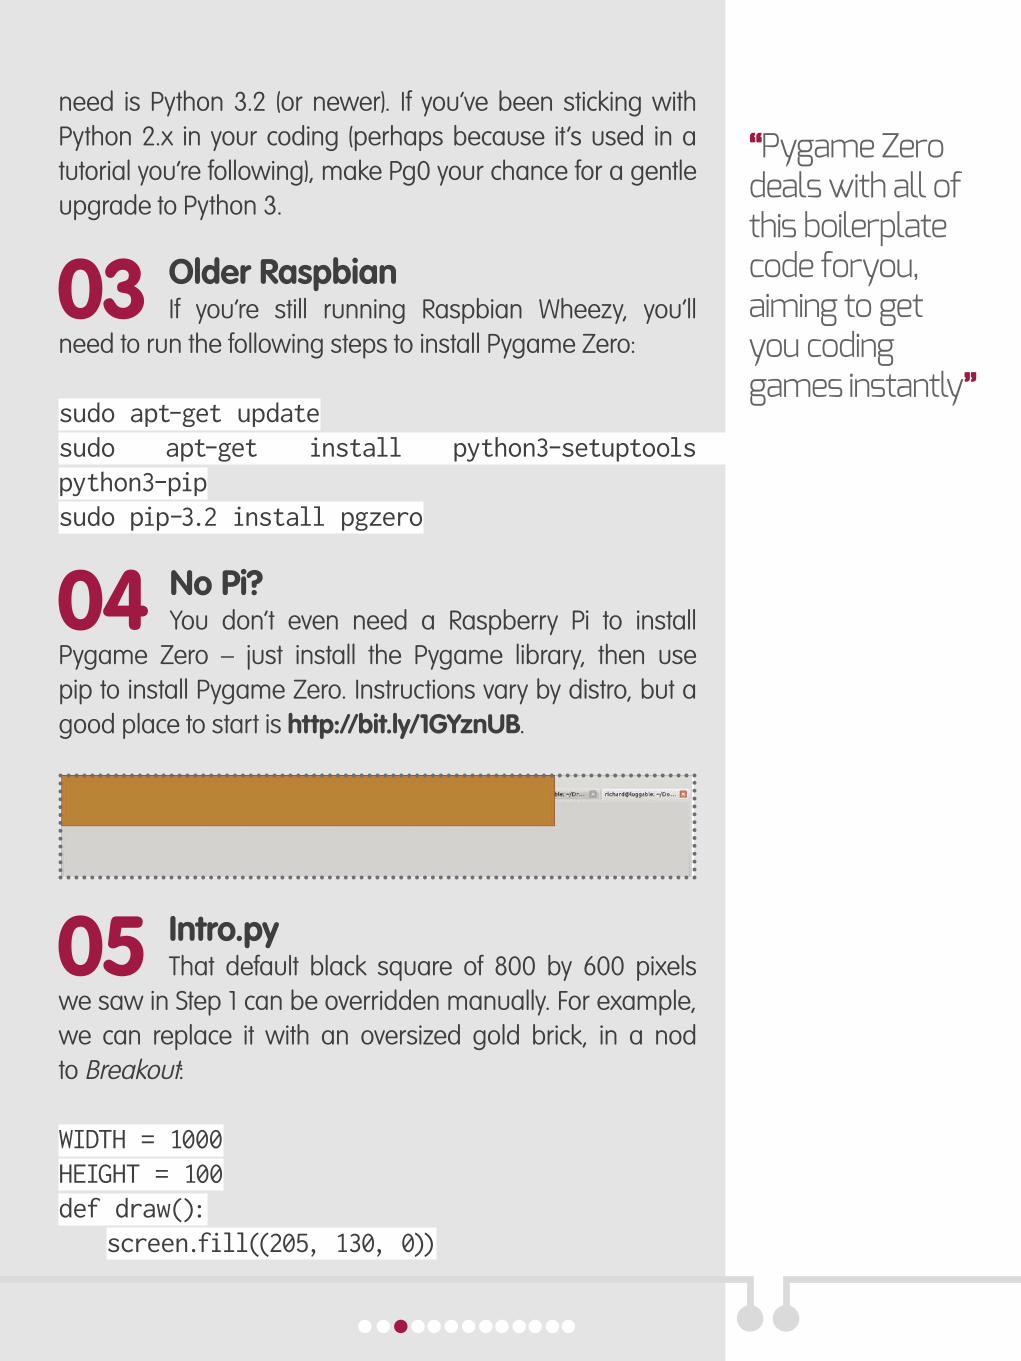
05 Intro.pyThat default black square of 800 by 600 pixels
we saw in Step 1 can be overridden manually. For example, we can replace it with an oversized gold brick, in a nod to Breakout:
WIDTH = 1000HEIGHT = 100def draw(): screen.fill((205, 130, 0))
“Pygame Zero deals with all of this boilerplate code foryou, aiming to get you coding games instantly”
That colour tuple takes RGB values, so you can quickly get colours off a cheatsheet; screen is built into Pg0 for the window display, with methods available for all sorts of different sprites…
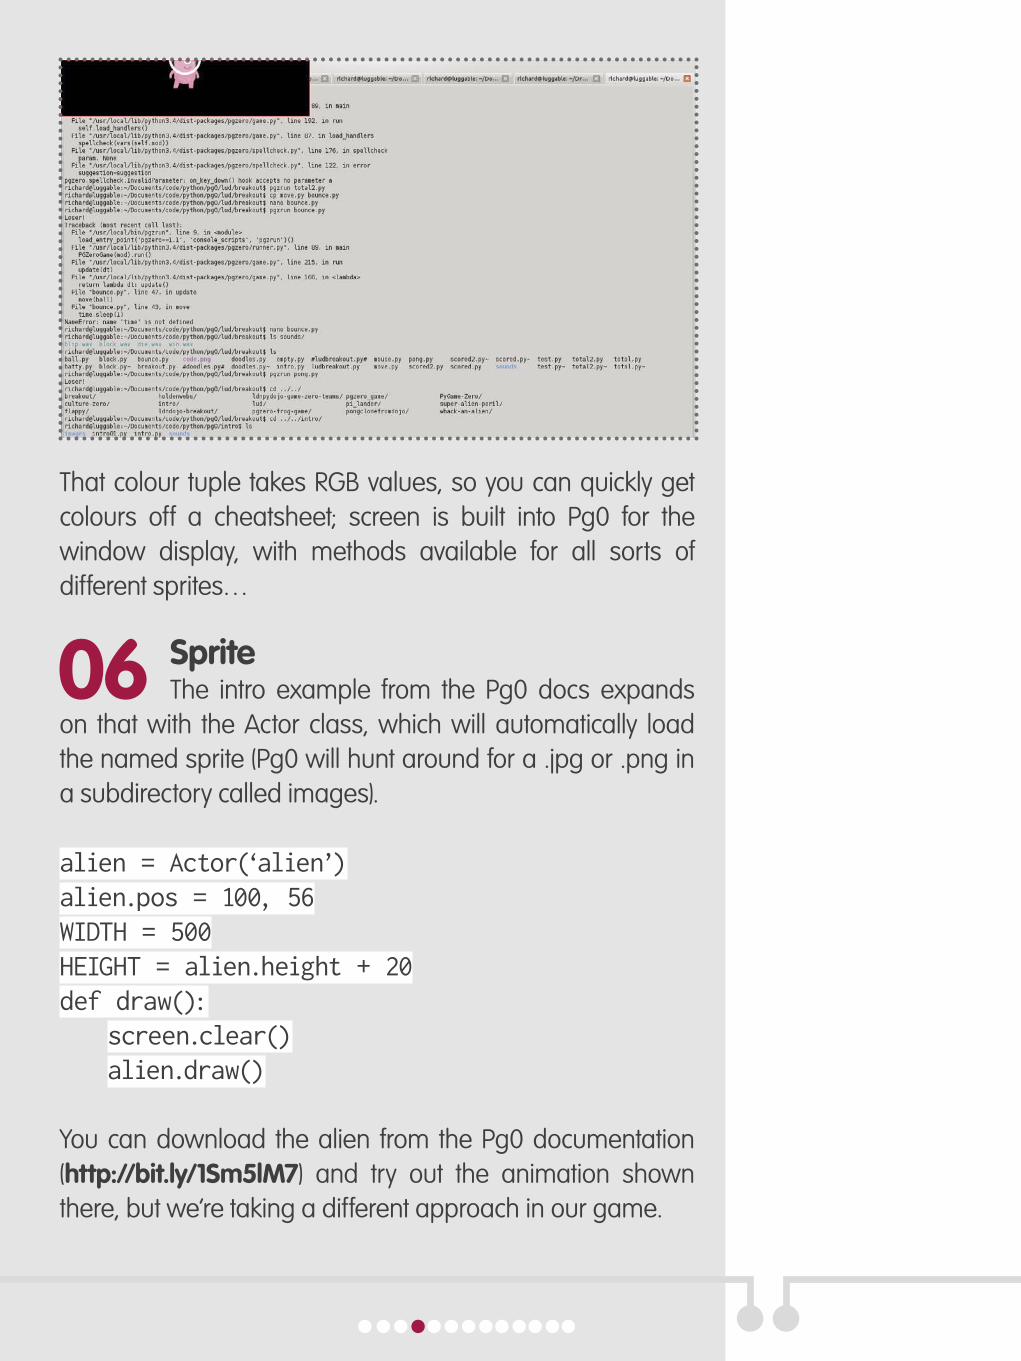
06 SpriteThe intro example from the Pg0 docs expands
on that with the Actor class, which will automatically load the named sprite (Pg0 will hunt around for a .jpg or .png in a subdirectory called images).
alien = Actor(‘alien’)alien.pos = 100, 56WIDTH = 500HEIGHT = alien.height + 20def draw(): screen.clear() alien.draw()
You can download the alien from the Pg0 documentation (http://bit.ly/1Sm5lM7) and try out the animation shown there, but we’re taking a different approach in our game.
07 Breakout via PongWhile the Pi is something of a tribute to 1980s
8-bit computers, Breakout comes from the 1970s and is a direct descendant of the early arcade classic Pong. We’ll follow the route from Pong to Breakout (which historically involved Apple founders Steve Wozniak and Steve Jobs) in the steps to creating our code, leaving you with the option of developing the Pong elements into a proper game, as well as refining the finished Breakout clone.
08 BattyYou can think of Breakout as essentially being a
moving bat – that is, you’re hitting a moving ball in order to knock out blocks. The bat is a rectangle, and Pygame’s Rect objects store and manipulate rectangular areas – we use Rect((left, top), (width, height)), before which we define the bat colour and then call upon the draw function to put the bat on the screen, using the screen function.
W = 800H = 600RED = 200, 0, 0bat = Rect((W/2, 0.96 * H), (150, 15))def draw():
screen.clear()screen.draw.filled_rect(bat, RED)
09 Mouse moveWe want to move the bat, and the mouse is
closer to an arcade paddle than the arrow keys. Add the following:
Young and old alikeIn situations where Pygame is used boilerplate-and-all with young people, great results can also be achieved (see Bryson Payne’s book), but Pygame and Pg0, despite their use as powerful educational tools, are also good for creating games for coders no matter what stage of learning they are at.

def on_mouse_move(pos):x, y = posbat.center = (x, bat.center[1])
Use pgzrun to test that you have a screen, bat and movement.
10 Square ballIn properly retro graphics-style, we define a
square ball too – another rectangle, essentially, with the (30, 30) size making it that subset of rectangles that we call a square.
We’re doing this because Rect is another built-in in Pg0. If we wanted a circular ball, we’d have to define a class and then use Pygame’s draw.filled_circle(pos, radius, (r, g, b)) - but Rect we can call directly. Simply add:
WHITE = 200,200,200ball = Rect((W/2, H/2), (30, 30))
… to the initial variable assignments, and:
screen.draw.filled_rect(ball, WHITE)
… to the def draw() block.
Young and old (cont.)Great games are all about the gameplay, driven by powerful imaginations generating images, animations, sounds and journeys through game worlds. Good frameworks open up this creative activity to people who are not traditional learners of programming, which is an area where Python has long excelled.

11 Action!Now let’s make the ball move. Download the tutorial
resources from the website and then add the code inside the ‘move.py’ file to assign movement and velocity. Change the 5 in ball_dir = Direction(5, -5) if you want the ball slower or faster, as your processor (and dexterity) demands – but it’s hard to tell now because the ball goes straight off the screen! Pg0 will call the update() function you define once per frame, giving the illusion of smooth(ish) scrolling if you’re not running much else.
12 def move(ball)To get the ball to move within the screen we
need to define move(ball) for each case where the ball meets a wall. For this we use if statements to reverse the ball’s direction at each of the boundaries. Refer to the full code listing.
Note the hardcoded value of 781 for the width of screen, minus the width of ball – it’s okay to hardcode values in early versions of code, but it’s the kind of thing that will need changing if your project expands. For example, a resizable screen would need a value of W - 30.

13 Absolute valuesYou might expect multiplying y by minus one
to work for reversing the direction of the ball when it hits the bat:
ball_dir = Direction(ball_dir.x, -1 * ball_dir.y)
… but you actually need to use abs, which removes any minus signs, then minus:
ball_dir = Direction(ball_dir.x, - abs(ball_dir.y))
Try it without in the finished code and see if you get some strange behaviour. Your homework is to work out why.
Above Tom Viner’s array of blocks negates the need for bordered rectangles

14 SoundsAlso upon bat collision, sounds.blip.play() looks
in the sounds subdirectory for a sound file called blip. You can download the sounds (and finished code) from the RasPi tutorial files website.
Actually, now we think about it, ignore the previous comment about homework – your real homework is to turn what we’ve written so far into a proper game of Pong! But first let’s finish turning it into Breakout!
15 Blockhead!If you’re not very familiar with the ancient computer
game Breakout, then:
apt-get install lbreakout2
… and have a play. Now, we haven’t set our sights on building something quite so ambitious in just these pages, but we do need blocks.
16 Building blocksThere are many ways of defining blocks and
distributing them onto the screen. In Tom Viner’s team’s version, from the London Python Dojo – which was the code that originally inspired this author to give this a go – the blocks are sized in relation to number across the screen, thus:
N_BLOCKS = 8BLOCK_W = W / N_BLOCKSBLOCK_H = BLOCK_W / 4BLOCK_COLOURS = RED, GREEN, BLUE
Object orientation David Ames, who uses Pg0 to teach younger children to code at events across the UK, told us: “One thing to avoid when it comes to teaching kids is Object Orientation.” OOP (object-oriented programming) is partly abstracted away by Pg0, but it can’t be ignored.

Using multicoloured blocks which are then built into an array means that blocks can join without needing a border. With its defining variables in terms of screen width, it’s good sustainable code, which will be easy to amend for different screen sizes – see https://github.com/tomviner/breakout.
However, the array of colour bricks in a single row is not enough for a full game screen, so we’re going to build our array from hard-coded values…
17 Going for goldCreate a Block class:
class Block(Rect):
def __init__(self, colour, rect):Rect.__init__(self, rect)self.colour = colour
… and pick a nice colour for your blocks:
GOLD = 205,145,0
18 Line up the blocksThis builds an array of 24 blocks, three rows
of eight:
blocks = []for n_block in range(24):
block = Block(GOLD, ((((n_block % 8)* 100) + 2, ((n_block // 8) * 25) + 2), (96, 23)))
blocks.append(block)
Object orientation (cont.)Perhaps the best approach is using Pg0 and some simple code to start, then dropping in a piece of OO when it’s needed to solve a particular problem you have. With the Code Club age group – about eight to eleven – feeding information to solve practical problems works well. It can work with adults, too – but there’s always someone who’s read ahead and has a few tricky questions.

19 Drawing blocksDraw_blocks() is added to def draw()
after defining:
def draw_blocks(): for block in blocks: screen.draw.filled_rect(block, block.colour)
20 Block bashingAll that remains with the blocks is to expand def
move(ball) – to destroy a block when the ball hits it.
to_kill = ball.collidelist(blocks)
if to_kill >= 0: sounds.block.play() ball_dir = Direction(ball_dir.x, abs(ball_dir.y)) blocks.pop(to_kill)
21 Game overLast, we need to allow for the possibility of
successfully destroying all blocks.
if not blocks: sounds.win.play() sounds.win.play() print(“Winner!”) time.sleep(1) sys.exit()
“To get the ball to move we need to define move(ball) for each case where the ball meets a wall”

22 Score drawTaking advantage of some of Pygame Zero’s
quickstart features, we’ve a working game in around 60 lines of code. From here, there’s more Pg0 to explore, but a look into Pygame unmediated by the Pg0 wrapper is your next step but one.
First refactor the code; there’s plenty of room for improvement – see the example ‘breakout-refactored.py’ in your tutorial resources. Try adding scoring, the most significant absence in the game. You could try using a global variable and writing the score to the terminal with print(), or instead use screen.blit to put it on the game screen. Future versions of Pg0 might do more for easy score keeping.
Above Test your game once it’s finished – then test other people’s Breakout games to see how the code differs

23 Class of nine livesFor adding lives, more layers, and an easier
life-keeping score, you may be better defining the class GameClass and enclosing much of the changes you wish to persist within it, such as self.score and self.level. You’ll find a lot of Pygame code online doing this, but you can also find Pg0 examples, such as the excellent pi_lander by Tim Martin: https://github.com/timboe/pi_lander.
24 Don’t stop hereThis piece is aimed at beginners, so don’t expect
to understand everything! Change the code and see what works, borrow code from elsewhere to add in, and read even more code. Keep doing that, then try a project of your own – and let us know how you get on.
Pg0+1 There’s a new version of Pg0 in development – it may even be out as you read this. Pg0 creator Daniel Pope tells us “a tone generation API is in the works,” and that at the Pg0 PyConUK sprint, “we finished Actor rotation.”Contributions are welcome – not only to the Pg0 code, but more examples are needed not just to show what can be done, but to give teachers tools to enthuse children about the creative act of programming.Pg0 has also inspired GPIO Zero, to make GPIO programming easier on the Raspberry Pi, with rapid development occurring on this new library all the time.
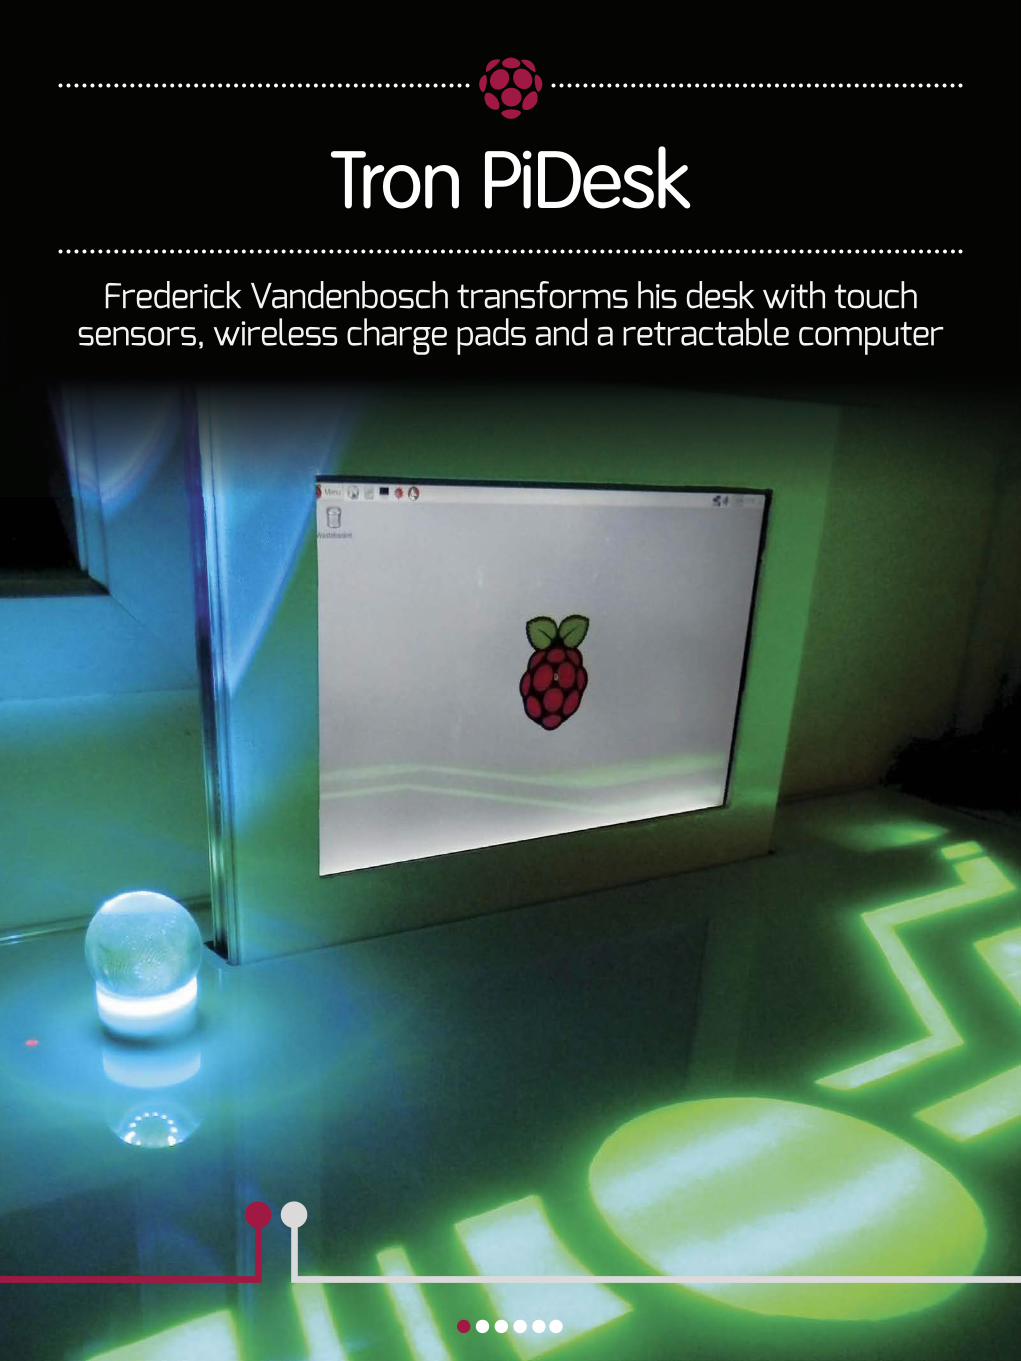
Tron PiDeskFrederick Vandenbosch transforms his desk with touch
sensors, wireless charge pads and a retractable computer

Tell us about the competition that you entered?Sci Fi Your Pi was a challenge launched
by element14 in collaboration with the Raspberry Pi Foundation. The goal was to create a sci-fi project centred around the Raspberry Pi, and it had to have a certain relation to a sci-fi movie. There were 25 finalists for the challenge and we had to build our projects in about 18 weeks.
Which movie did you choose?I had the idea for the project first and then I had to link it to a movie, so I had to reverse the thinking in that sense. I linked it to Tron because of different aspects: you have the lights, you have the costumes with embedded LEDs or light strips, and this is why I have this pattern in the desk surface, to try to represent that. You also have the desk that is used to transfer between the virtual world and the real world, which also has an embedded computer.
What are the features on your desk?The idea was to make it as futuristic as possible and also combine multiple features. The desk has to look like an ordinary desk, but once you start hovering your hand over the right side of the desk, you have embedded capacitive touch sensors which can trigger certain actions. For example, the main action is to make the computer pop up out of the desk, and this will then trigger some lights to let the user know that an action is in progress. When the computer is rising out of the desk you have the pattern light up in green.
Frederick Vandenbosch is an integration engineer by day and builder of electronic things by night. He likes to build things as a way of learning about a subject and have fun while doing so. Not all builds are successful, but that’s all part of the learning process!

The reverse happens when you decide to shut down the computer – the screen will lower into the desk and you will have a moving pattern in red. I decided to use green and red because they’re typical colours for starting and stopping. When you hover your hand over the capacitive touch sensors, it also triggers some sound effects based on MP3 files stored on the Raspberry Pi.
One of the other features is that I’ve embedded a wireless charger into the desk’s surface – I use it to light up a lamp, based on a glass ball and NeoPixels put into a certain container, but you could also use it to charge your phone.
Do the capacitive touch controls only pop up and retract the display?I have foreseen five buttons but I’m only using two. But there is a Python script on the Pi waiting for any input of those five buttons, and any action can be triggered. If I come up with an interesting idea then I will definitely expand the program.
How did you build the desk itself?I knew I wanted to embed things inside the desk’s surface, because I wanted it to look like a normal desk. I used an Ikea desk – the cheap ones are hollow – so I started drawing the patterns I wanted and some space to store the Raspberry Pi and the wireless charger, and then I started cutting into the top surface of the desk. I removed the cardboard structure, which then gave me space inside the height of the desk, and this was sufficient to hide components. For the sensors,
12V power supply
12V-to-5V DC-DC converter
2 WiPi USB dongles
Desk Raspberry Pi B+, USB
sound card, 2.5W Class D amplifier, Gertbot, 2
stepper motors, 2m LED strip, capacitive touch
sensor, 2 microswitches (on/off), mini speaker
Computer Raspberry Pi 2, 2.8W
Class D Amplifier, laptop LCD display, LCD display
controller, 2 speakers
Magic lamp Qi wireless charger, Qi wireless receiver,
Adafruit NeoPixel Ring, Adafruit Trinket
THE PROJECTESSENTIALS
because I wanted to keep them as flat as possible, I used conductive paint and copper tape to make the connections, so there’s no level difference between one side of the desk and the other. Finally, I had to close everything up, and for that I used a big sheet of Plexi. I first covered the desk with two layers of paper from a paper roll, to hide the components and make it non-visible, and then by putting a top layer of Plexi you have a full surface for the desk. The lights are bright enough to shine through the paper, and the capacitive touch sensors are sensitive enough to be able to trigger by placing your hands over the Plexi.
Do you have speakers embedded inside the desk for the sound effects?There are two parts for the audio: the Pi embedded in the desk, which is in charge of controlling the motors, lights and sound effects, so there is a small speaker
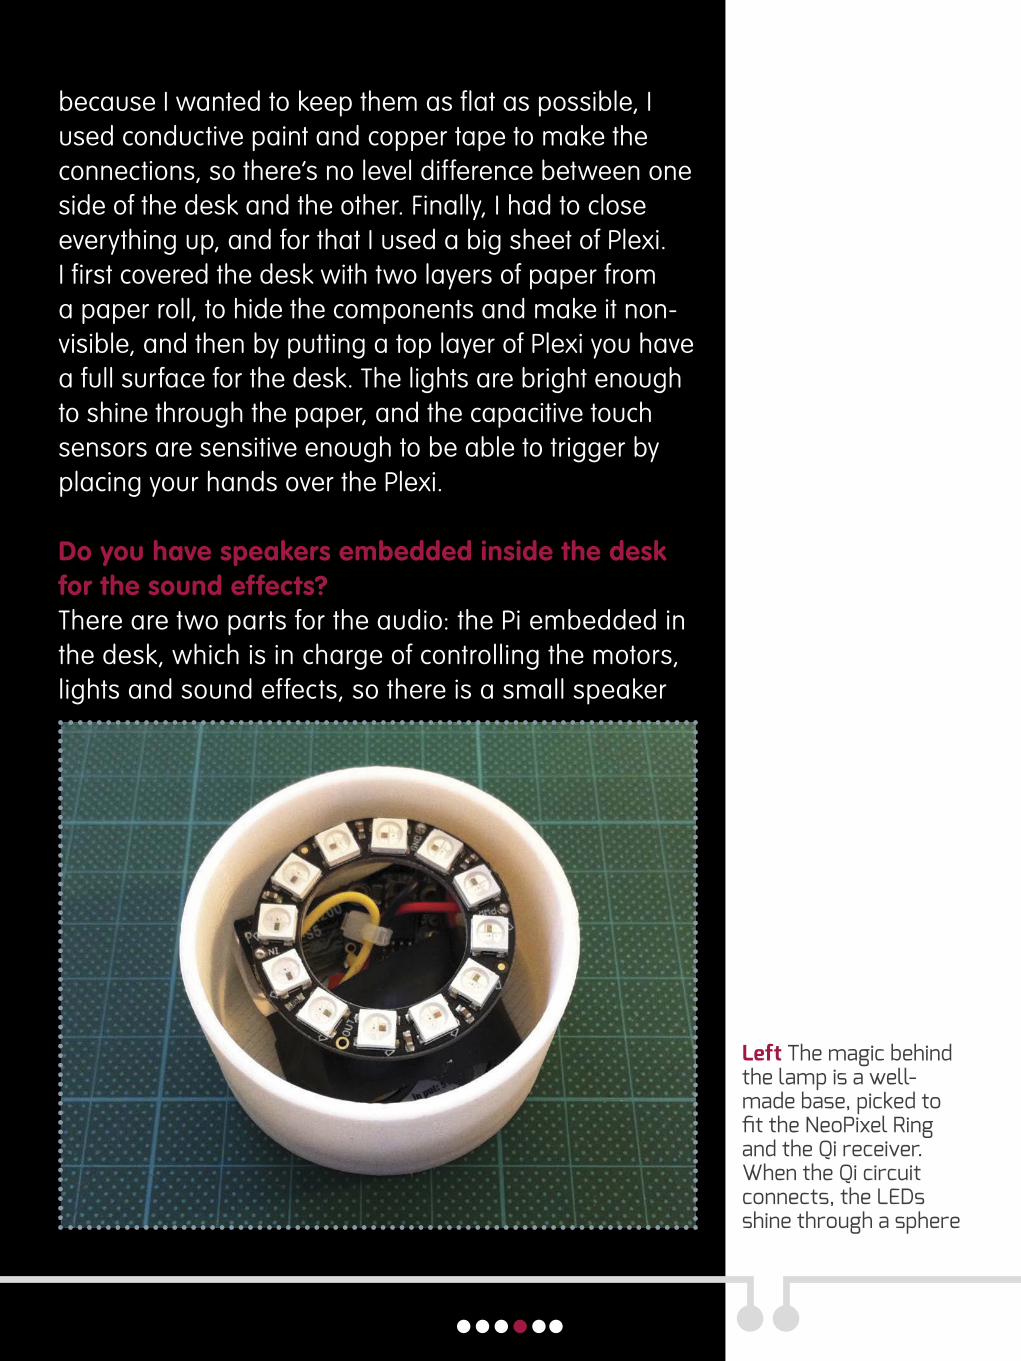
Left The magic behind the lamp is a well-made base, picked to fit the NeoPixel Ring and the Qi receiver. When the Qi circuit connects, the LEDs shine through a sphere

using an amplifier breakout board inside the desk to trigger the sound effects of the controls. Then you have the desktop computer, which slides in and out of the desk – this is a separate Raspberry Pi with a separate amplifier, separate speakers.
How did you go about creating the pop-up display?I had an old laptop from years ago and when it broke down, I decided to recoup the parts that I could – the display was one of them. I managed to find a control board on eBay, for exactly that type of LCD screen, and so I was able to re-use the screen using a 12V power supply. For the challenge, we received a kit containing a Raspberry Pi but also some add-on boards – one of those was a Gertbot, which is an add-on board specifically for the control of motors. I based the idea on the Z axis of 3D printers, where you have threaded rods which can then raise or lower a platform. I adapted the same principle by mounting two stepper
Left For the capacitive touch buttons, copper tape was laid down and then Bare Conductive paint was applied over the top

motors on the bottom side of the desk with threaded rods, with the whole screen assembly resting on that platform. When the stepper motors are triggered, the platform is raised, causing the whole frame to come out of the desk. To have some guidance for this frame I used some drawer sliders, also from Ikea. The stepper motors have good torque, so they can handle the weight of the entire frame, but the speed is a bit of a problem. But in the end, it turned out that the boot time of the desktop computer is exactly the same as the rising time of the entire frame.
What was the most challenging part of the project?I bumped into an issue where the control of the LEDs was impacting the audio, and vice versa. I ended up using an external USB dongle for the audio so that it wouldn’t impact the GPIO control for the LEDs. Time constraints make you figure out things in any way possible. So the most challenging part is really the integration, once you start putting everything together and making things interact with each other.
Like it?If you’d like to see more of Frederick’s work, check out his website: http://bit.ly/1XC8uu9. The rest of the Sci Fi Your Pi entries, including an actual Tricorder, can be found here: http://bit.ly/1kekbsc.
Further readingThinking of putting your own Tron desk together? There’s a great woodworking video here from Bob Clagett at Make that shows you how to craft a coffee table with embedded LED strips, which is a great starting point:http://bit.ly/1WlhVeI.

Hack a robot with Pi-Mote
Code a program to control a toy robot via your Raspberry Pi and the Energenie IR board

In the previous issue (26) we looked at how to create a hack to control your TV using the Energenie Pi-Mote IR board and a Raspberry
Pi. We return to the world of the IR board, only this time we use it to record signals from a remote controlled robotic toy and combine these with pygame commands to enable you to control your robot from your Raspberry Pi. Since the code is Python-based, you can then develop it further, use social media to control the robot with tweets, or install Flask to create a web interface accessible from your mobile phone.
Pi-Mote IR control board
http://bit.ly/1MdpFOU
Remote controlled robot
THE PROJECTESSENTIALS
01Update the boot fileBefore booting up your Raspberry Pi, attach the Energenie IR board to GPIO pins. The board slots onto the top of the pins, the default GPIO pins used when no pins are explicitly set are: input pin for received infrared signal = PIN12/GPIO18; output pin for transmitted infrared signal = PIN11/GPIO17. You are advised to use a fresh SD card image with no other software installed to reduce any software conflicts.
Boot up your Raspberry Pi and, in the LX Terminal, type:
sudo apt-get updatesudo apt-get upgrade
Then add a line of code to the /boot/config.txt file to enable the LIRC IR software and IR module to interact. In the LX Terminal, type sudo nano /boot/config.txt. This loads the config .txt file. Scroll to the bottom of the text and add the following line:

dtoverlay=lirc-rpi-overlay
Press Control and X to save the file, then reboot your Pi by typing sudo reboot.
02 Install the softwareNext, install the LIRC software; this stands for Linux Infrared Remote Control and is the program that enables you to interact with your robot and transmit commands. Open up the the LX Terminal again and type:
sudo apt-get install lirc sudo apt-get install lirc-x
Once the installation has finished, you need to restart your Pi using sudo reboot.
Above The Pi-Mote IR control board is hugely versatile and only costs £9.99

03 Edit the hardware fileNext, we need to edit the hardware.conf file located in the /etc/lirc/ folder and make the changes shown below. In the terminal window, type:
sudo nano /etc/lirc/hardware.conf
Find the DRIVER, DEVICE and MODULES lines in the file, then make the following changes:
DRIVER = “default”DEVICE = “/dev/lirc0”MODULES = “lirc_rpi”
Press Ctrl+X to save the file, don’t rename it, press Y and then return. Restart the LIRC daemon with the command sudo /etc/init.d/lirc restart.
04 Test the IR receiver is workingTo test that the IR receiver is installed and working correctly, you need to head to the LX Terminal and then stop the LIRC daemon (line 1), enable the test mode (line 2) and then start the mode 2 testing (line 3):
sudo /etc/init.d/lirc stop sudo modprobe lirc_rpi sudo mode2 -d /dev/lirc0
This runs a program to output the mark-space of the IR signal. It measures the pulse and space length of infrared signals, returning the values to the terminal. Grab the robot’s remote control, point it at the IR
Pygame buttonsPygame enables you to create buttons and assign actions to them. This means you can create and assign buttons to the pygame window. You could control the robot with buttons instead of keys. There is a simple tutorial here: http://pygame.org/project-Button+drawer-2541-.html, which covers how to create and assign some interaction to the various buttons.

receiver and then press some buttons. You should see something like this:
space 16300 pulse 95 space 28794 pulse 80 space 19395space 28794 pulse 80
05 Make the lircd.conf file: part 1The lircd.conf file contains the code or instructions to control your device. Although you can find these online, you’ll probably have to create one from scratch. This involves running the irrecord program, pointing your remote at the IR board and then pressing buttons! This records the signals from your remote and then you assign KEYS to each signal to transmit the signal to the robot. Stop the LIRC software by typing this into the terminal:
sudo /etc/init.d/lirc stop
06 Make the lirc.conf file: part 2Next create your new lircd.conf configuration file and save the output. In the LX Terminal, type:
irrecord -d /dev/lirc0 ~/lircd.conf
This will open the program, which will prompt you with instructions on how to record the signals from your remote. The first part involves you repeatedly pressing

the buttons on the remote until there are two lines of dots on the screen. This measures and records the signals being sent from the remote. Do this in a logical order starting at the top of the remote and working downwards. Once the two lines of dots have been completed, your remote has been recognised.
07 Make the lirc.conf file: part 3The second part of the program asks you to enter the names of the keys for each of the signals it has recorded. Follow each of the on-screen prompts, typing a suitable name for each of the remote buttons/ keys. For example, type ‘KEY_UP’ and then press the corresponding up key on the remote. You will then be prompted to type in the name of the next key – for example, ‘KEY_BACK’, in which case you would press the back key on the remote, and so on. Keep repeating this process until you have entered names for each of the recorded keys.
Above The infrared receiver on your robot will look something like this

08 Rename the remote Once saved, locate the new lircd.conf file in the /home/pi folder. By default, the name of the remote on line 14 will probably be named as /home/pi/lircd.conf. Change this: under the heading ‘begin remote’, find the ‘name’ label and rename /home/pi/lircd.conf to something more appropriate, such as ‘Robot’. Doing this helps ensure that it is an easier process to refer to it in the program whenever you call a movement instruction or key name.
09 Transfer the lircd.conf fileNow your lircd.conf file is ready to transfer to the /etc/lirc folder; this is the folder that holds the hardware and lirc files. The simplest method is to open your new lircd.conf, which is saved into the /pi/home folder, and then copy and paste over the code that you have just created. However, this will overwrite any old configuration file setup that you have. To save a previous file, see the next step. In the LX Terminal, type:
sudo nano /etc/lirc/lircd.conf
10 Transfer file without overwritingIf you have set up a lircd.conf file, or want to use a new one but keep the old one, create a new configuration file. This is saved in the /home/pi folder and can be copied over to /etc/lirc. Make a backup of the original lircd.conf file by creating a copy of it, then save it as lircd_orginal.conf. In the LX Terminal, type:
sudo /etc/init.d/lirc start
Robot variationYou can use a bunch of different robots with this tutorial, such as the Makeblock that’s pictured or the WowWee Roboquad that our author used. Pay attention to the event key setup in your code – different robots will have different native functions. The Roboquad, for example, has a ‘Dance’ command!

sudo mv /etc/lirc/lircd.conf /etc/lirc/lircd_original.conf
Then copy over your new configuration file:
sudo cp ~/lircd.conf /etc/lirc/lircd.conf
Your original configuration file will now be saved as lircd_original.conf.
11 Start to take controlNow your robot has a configuration file, you can use your remote control. Restart the LIRC with sudo /etc/init.d/lirc restart. Now test that the lircd file is working by listing all the registered KEYS stored in the file: irsend LIST Robot “ ”. This will list all the KEYS that are recorded in the lircd.conf file.
It’s time to control your device. This uses the irsend application that comes with LIRC to send the commands. The commands are very simple: irsend SEND_ONCE Remote_Name Remote_Button. For example, to make the robot walk forward, just type this into the LX Terminal: irsend SEND_ONCE Robot KEY_UP. This will send the ‘forward’ infrared signal and your robot will then walk forward.
12 Python OSThe LIRC program enables you to control the Pi-Mote IR control board via the command line. However, this is impractical for coding purposes because it limits the interactions with other hardware and software. However, good-old Python has an OS module that enables you to control the command line and execute
BREAKOUT

command line instructions from within a Python program. This enables you to create a program that can be controlled by pygame, which means you can move the robot with the arrow keys and keyboard.
13 Using Python OSOpen your Python editor and then import the OS module: import os. Now enter the command: os.system(“irsend SEND_ONCE Robot KEY_RIGHT”). This will permit interaction between Python code and the Raspberry Pi’s operating system. The code line will send the ‘move right’ command to the IR board and it will also transmit the assigned signal, instructing the robot to walk to the right. Test that all of the other movements work by changing the related ‘KEY’ name at the end of the line of code.
14 Get familiar with pygamePygame is a cross-platform library that was created to enable users to produce simple video games. It includes a number of graphics and sound libraries that have been specifically designed to be used with the Python programming language. Pygame also comes preinstalled on the Raspberry Pi. You can read more about the codes and creating games over in the official documentation: http://pygame.org/docs.
15 Not overwritingPygame runs in a window that has been preset by the user. Before adding the Python code to control the robot, you are going to have to set up the pygame structure. Although this program makes use of the controls on your keyboard, you still need to create the traditional pygame

window. See the first part of the listing to the right, from the first line down to runGame().
Set up the window dimensions first (lines 7 and 8). Next, initialise the pygame clock: FPSCLOCK = pygame.time.Clock(). The font size and typeface of the caption used in the window are next: BASICFONT = pygame.font.Font(‘freesansbold.ttf’, 18). Finally, set the caption for the window: pygame.display.set_caption(‘ROBOT’).
16 Restart the LIRCFor this bit, refer to the next section of code: from def runGame() onwards. Once the game is initialised, you can set the code to control your robot. This makes use of the get() pygame event (see the for loop) to return the key that has been pressed. The first elif sets the event type to wait for ‘keyboard’ presses, such as the ‘right’ key shown in the next line. Since the OS has been imported, we use os.system(“irsend SEND_ONCE Robot KEY_RIGHT”) to transmit the ‘move right’ signal. When you are running the program, ensure that you have selected the pygame window – this is small, as we have coded it to 100 x 100 pixels. Once working, add the rest of your movements in the same way.
17 Common errors and code recapNow that you can use Python code to control the robot, you can interface with a number of other modules. You could attach a Makey Makey (http://makeymakey.com) and use some spoons and forks to control your robot. You could even try installing and using the Tweepy module (a Twitter API) to make the robot respond to incoming tweets.

Welcome to our latest FUZE BASIC tutorial. If you haven’t already gotten hold of this programming language, FUZE BASIC can be downloaded for free
for both Linux and Raspberry Pi users from https://www.fuze.co.uk/getfuzebasic.
So why should you bother to learn BASIC? Well, BASIC (Beginner’s All-purpose Symbolic Instruction Code) was instrumental in starting the computing revolution back in the Seventies and Eighties. Thirty years on and BASIC, or in this case FUZE BASIC, presents a modernised version of the original classic. Now with updated commands for advanced sprite and media handling, the removal of goto and gosub commands as well as line numbers, and the fact that on modern hardware it races along, it still remains one of the easiest introductions for users wanting to jump into the world of programming.
To prove just how straightforward it is to use, in this tutorial we’re going to be looking at programming a classic arcade game. Then, over the next two issues we’ll take you from this basic graphics engine to introduce enemies, firing and collisions, and then finally refinements
Code a Tempest clone in FUZE BASIC Part 1Remake a classic game in FUZE BASIC and
delve into the world of programming
FUZE BASIC V3
https://www.fuze.co.uk/getfuzebasic
73MP357PART1.fuze
THE PROJECTESSENTIALS

such as an intro screen and hi-score tables, plus some tidy-ups and optimisations.
Our game, ‘73MP357’, is a remake of a true classic – Dave Theurer’s Tempest by Atari way back in 1981. We also couldn’t resist paying tribute to the incredible remake by Jeff Minter for the Atari Jaguar.
01 Get the program listingAs this is a fairly large program, we won’t be typing it line by line. Instead, you need to download the Part 1 code from https://www.fuze.co.uk/tutorials/73MP357PART1.fuze. We will then look at each section and explain what is happening.
Open FUZE BASIC and either load (with F8) ‘73MP357’ or copy and paste the code straight into the editor (F2 switches between the editor and immediate mode).

02 Try the code Before we take a look at the code, let’s see what it does. Run the program by pressing F3 or typing run in immediate mode. You’ll be presented with three core events: the star field, the level and, of course, the player. You can move the player around the level using left and right cursors.
Notice the playing field view perspective changes as you rotate around. This particular effect is from Tempest 2000 and not the arcade original.Right, now to the code. Press Escape to stop the program and then F2 to bring up the editor.
03 System set upYou’ll see that the code is well commented, with each section headlined with a single # and comment.
Our first section sets up our system and variables. We set the resolution and updatemode is set to zero so that nothing updates the screen other than an update command. In FUZE BASIC, if the mode is set to 1 or 2 then
print statements will also update the screen, which slows everything down.
Three variable arrays are set up to store the star angle, speed and distance. These could be combined into one array but it is easier to read when separated.
The while loop fills the star field arrays with randomly positioned points with random angles and speeds.
04 See to the displayNext up are the variables required for the playing field level display. The radius and radius2 variables define the outer and inner rings, and vertices sets up the number of sections our level is divided into. The minimum is four for a square, with a maximum of up to 13. The gap variable determines the step distance around the circumference so the player will always be positioned in the middle of each section.
05 Player variablesA few player variables are required to determine the location on-screen and its position in relation to the level.
Three centre X and Y coordinates are used: two moving ones for the level and a fixed one for the star field. The moving centres will make sense a bit further on, but it is thanks to these that we have the slick perspective effects.
A moveDelay variable (80 divided by the number of sections, ie vertices) is used to keep player movement consistent regardless of how many sections there are in the level.
06 Remove flicker Now we move onto the main loop. The cls2 statement is critical and is very different to the more standard cls
“The number of stars is adjusted depending on the display resolution”
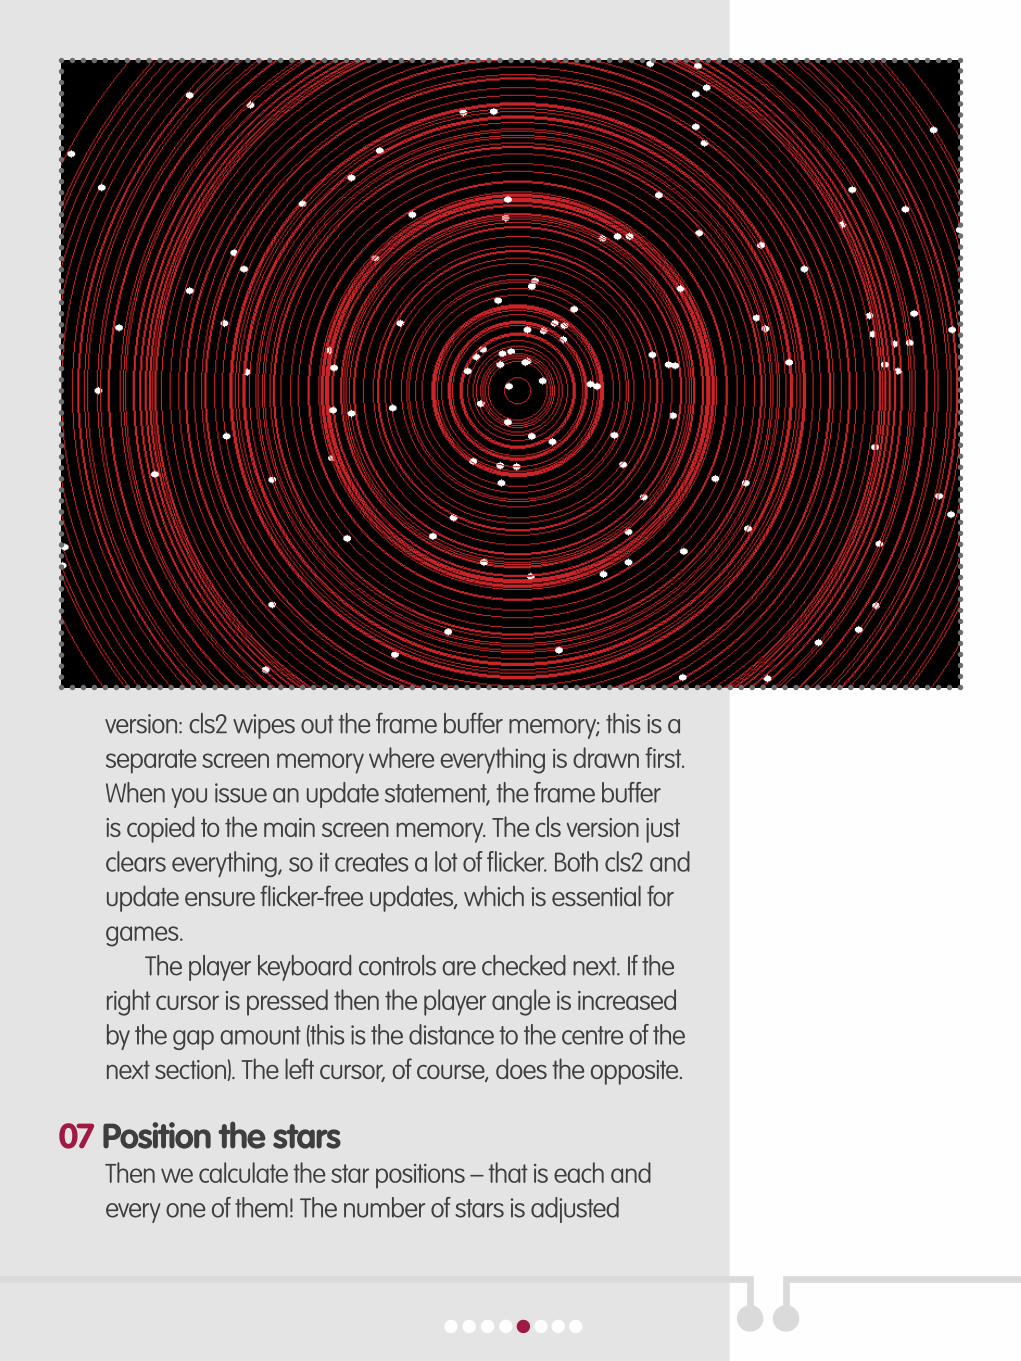
version: cls2 wipes out the frame buffer memory; this is a separate screen memory where everything is drawn first. When you issue an update statement, the frame buffer is copied to the main screen memory. The cls version just clears everything, so it creates a lot of flicker. Both cls2 and update ensure flicker-free updates, which is essential for games.
The player keyboard controls are checked next. If the right cursor is pressed then the player angle is increased by the gap amount (this is the distance to the centre of the next section). The left cursor, of course, does the opposite.
07 Position the starsThen we calculate the star positions – that is each and every one of them! The number of stars is adjusted

depending on the display resolution.White is selected and a loop to count through the stars
is initiated. Each star is a position on the circumference of a circle. The radius of the circle therefore determines the star’s distance from the centre. We take the distance from the centre, starsDist(starNum), and multiply it by the cosine of the angle, stars(starNum). We then add this to the centre position, starsCenterX, to give the new starX position. The starY position is the same but uses the sine instead.
08 Check the star movementWe check to see if a star has left the display area and if so, reset it back to the centre plus a small offset, as we don’t them to all appear from the dead centre.
Finally, the star is drawn using plot(starX, starY) and the while loop is repeated until all of the stars have been updated and plotted on the star field.
09 Make the levelOn to the level itself. Each segment is drawn one at a time. The first line of the first segment has inner and outer X and Y coordinates. The next line along (again, from centre to outer rim) is calculated and the two connecting lines are drawn from the old positions to the new ones.
10 Place the player Time to work out where we’re drawing the player and adjust the viewpoint. The player position is calculated twice in different positions and averaged to match the polygon and parallax effects. The position of a point on a circle is calculated:

x = cos( angle ) * radiusy = sin( angle ) * radius
Sin and cos have a centre at zero so we need to add the screen centre point to the player’s X and Y. The player centre is calculated from the radius multiplied by the cosine of the player angle plus the screen centre.
11 Fix a speedThe moveCount and moveDelay variables are used to fix the player’s movement speed around the level regardless of how many sections there are.The next section checks to see which quarter of the screen the player is in and moves the centre accordingly. The playing field is moved by a few pixels each frame until limited by:

if centerX < ( gwidth / 2 ) + ( gwidth / 20 )
Finally, the player’s position is calculated and drawn using the polyplot command. The angle is fixed so the player faces the centre and the size is scaled against the display resolution.
12 Build a polygonThe polystart command allows a polygon to be built up from a series of lines and is automatically filled in.
Rather than work out the heavy sums within every plot in the polystart statement, we have calculated them beforehand with c = cos( pAngle + 90 ) and s = sin( pAngle + 90 ) and u is the scale of the ship against the display resolution.
13 Polygon equationEach X point on the polygon is based on scale * line length multiplied by cos (playerAngle + 90), minus (scale * line length) multiplied by sin (playerAngle + 90), plus playerX. For the Y coordinate, it’s (scale * line length) multiplied by sin (playerAngle + 90) plus (scale * line length) multiplied by COS (playerAngle + 90) plus playerY.
14 Experiment with variablesThe update statement at the very end copies the temporary frame buffer to the screen display… and voíla!
There are plenty of variables to experiment with so feel free to change numbers and see what happens. Doing so will provide a great insight into what is going on.
Next month we will add enemies, firing and maybe a few sound effects, too. The Particle Laser is brilliant!
There may be many times when you want to use multimedia within your interactions with an end user. You may want to display a really
interesting bit of video or have your program chat audibly with the user. In both of these cases, there are lots of modules available to enable you to work all of these other forms of data. However, a truism about programming is to ‘find the easiest way to do something’. Here, this means if you can find a single framework that provides everything you need, you should probably use it. This is the role that the module pygame fills. This isn’t to say that you will be able to do everything you may want to do using pygame, but you should never undersell the worth of your time in learning and using multiple modules and the way multiple development groups think in their coding styles. This article will cover at least some of the various methods and techniques you can use to interact with your users in some form other than text.
Pygame is written to be as portable as possible. In order to do this, it supports many different graphic backends, from OpenGL to even using ASCII text to display graphics. It is designed to use all of the computing
Add multimedia to your PiYou can use separate specialised modules to handle
multimedia, but using the pygame module is a one-stop fix
resources, ie CPUs and GPUs, available to do the type of calculations required when playing with these types of files. In order to get the best performance out of your hardware, several of the heaviest functions are written in optimised C. This gets you a 10- to 20-fold speed increase. In the most sensitive code sections, optimised assembly language is used to get even more performance. This means that even your Raspberry Pi can get pretty impressive output with its limited resources.
Installing pygame can be pretty messy. Depending on which video and audio back-ends are to be supported, you need to have all of the optimised C and assembler code we mentioned compiled. For your Raspberry Pi, the simplest solution is to use sudo apt-get install python-pygame to deal with all of the potential headaches. The documentation available at the main home page (http://pygame.org) is very extensive. There are several tutorials available and there is even a recipe section where you can find recipes outlining techniques for specific effects and interactions.
The first step is to import the pygame module. Pygame provides a complete multimedia subsystem, so you need to call pygame.init() before being able to use any of the functionality it provides. This initialises everything and loads all of the module contents for you. We will start by looking at displaying video to your users. The first thing you need is somewhere to do the actual displaying of your video. When you called pygame.init(), the pygame subsystem should have created a display object with the best display mode available on your current device. You may want something else in order to make your program behave the way you want it to. You can create a new graphic display

with the function pygame.display.set_mode(), where you can give the function a sequence with a width and a height value. The actual object that you draw images on is called a surface in pygame. The display that you just created has a surface object associated with it. Anything that you draw on this surface is displayed immediately on the screen. However, this is usually not what you do. The usual technique is to create an off-screen drawing area and do your drawing there. Then you can dump the entire contents of the image onto the actual display in one movement. This is much more efficient than trying to draw on the screen fast enough to look good to the user. This dumping of image data to the screen is handled with the blit() function of the surface object. This takes data from one surface and moves it to a location on the second surface. In order to get this surface displayed on the physical monitor, you need to call the flip() function. This function takes the entire surface and dumps it into the physical hardware as the last step for display.
The first way to draw we will look at is to load an entire image file into Python. The function pygame.image.load() will read in an image file and load it into a new surface object. By default, pygame can only load uncompressed BMP files. The load function includes a translation layer that can handle converting and importing several other formats, such as JPEG, GIF, PNG and others. For some of these other formats, you may wish to call the image’s convert() method to convert it to the natural format. It will then be faster to use. When you wish to save images, your options are more limited as you can only save to the formats BMP, TGA, PNG and JPEG. If you need a different format, you can always convert it after it has been saved by pygame.

Whether you are starting with a loaded image or with a blank surface, you will probably want to be able to draw on it. There is a whole suite of drawing functions under the pygame.image namespace that gives you that functionality. The first parameter in all of these functions is a surface on which to draw. This surface could be a previously loaded image or a blank canvas. For example, you could draw a circle with the function pygame.image.circle(Surface, color, pos, radius, width=0). This function draws a circle with the given radius at the position given on the surface object. The width parameter tells pygame how wide to make the circumference of your circle. If the width is set to zero, then that means you want a solid, filled-in circle drawn.
This function will also return a rectangle object that represents the bounding rectangle of the pixels that changed. This is important if you are doing animation and need to track sprites as they move around. There are also functions to draw polygons, lines and rectangles, among other shapes.
Once you have finished all of the graphics you want to do, you will need to call pygame.quit(). This function cleans up all of the shared memory and graphics devices that had been created. You only need to worry about this if your program is going to continue doing work after you are done with the graphical display items. Otherwise, everything should be cleaned up properly when the Python interpreter exits at the end of your program run.
The other way of interacting with the users of your program is through audio. The required functionality is provided through pygame.mixer. Just as with the image system, the audio system must be initialised before

“Whether you are starting with a loaded image or with a blank surface, you will probably want to be able to draw on it”
you can use it. This is handled by the function pygame.mixer.init(frequency=22050, size=-16, channels=2,
buffer=4096), where the values shown here are the defaults. The first parameter gives the sampling frequency for the audio; the second gives the number of bits used to hold each sample; the third sets whether the audio is mono (channels=1) or stereo (channels=2); the last parameter sets the size of the internal buffer used by the mixer for audio processing. You can create a new sound object from an audio file with the function pygame.mixer.Sound(filename). This function loads the entire audio file into a buffer. This may be an issue if you are dealing with larger files, such as music files. In these cases, you can use a streaming function like pygame.mixer.music.load(filename). Both of these groups – pygame.mixer and pygame.mixer.music – contain several functions that help you manipulate audio data. The first thing to do is to start playing your audio file. The returned sound object from pygame.mixer.Sound() has a play method that starts the audio playing on the next available channel. The mixer portion of pygame can handle eight audio channels, so you can have multiple audio files playing at the same time. If you want to play audio on a specific channel, you can create a new channel object tied to a specific channel ID and then play specific sound objects on them. There are helper functions that can get and set the current volume for a playing sound object. You can also pause and play them. When you want things to go quiet, you can either call stop() to end it quickly or fadeout(time) where the sound will fade out over ‘time’ milliseconds before stopping. Just as with the image system, you need to call pygame.mixer.quit() to cleanly shut down the audio system and release all of the

resources that were used for your sound playback.The two previous sections describe how you can
produce output for your end users, but how can you get input from them? Pygame can help you out here as well. You can get image information using the pygame.camera.Camera object. The physical camera you want to use needs to be recognised by the operating system before you can use it. Once it is, you can get a list of all available cameras with the function pygame.camera.list_cameras(). Once you have selected a camera to use, you can create a new camera object that is tied to it with the constructor pygame.camera.Camera(). The camera object’s method start() connects to the camera, initialises it and then starts to record images from it. These images are placed into a buffer for further use. When you are ready to work with these images, you can start to pull them from this buffer with the function get_image(). This function returns the retrieved image into a new surface object. If you want to reuse an existing surface, you hand it in as a parameter to the function call. Unfortunately, pygame isn’t able to record audio directly. If you want to do this, you will need to use a different module in your program, such as pymedia.
Now that we’ve covered the basics, you should be able to use pygame to add multimedia functionality to your next Python project on your Raspberry Pi.

@linuxusermag Linux User & Developer [email protected]
The Raspberry Pi encourages a lot of hands-on work and this means it doesn’t quite
work like – or as easily as – your laser focus-tested smartphone interface, or even a normal computer. So we’re answering your burning Raspberry Pi questions each issue – get in touch with us on Twitter, Facebook or by email.
Join the conversation at…www.twitter.com/linuxusermagwww.twitter.com/linuxusermag
@linuxusermagwww.twitter.com/linuxusermag
@linuxusermagwww.twitter.com/linuxusermag https://www.facebook.com/LinuxUserUKhttps://www.facebook.com/LinuxUserUK
Linux User & Developerhttps://www.facebook.com/LinuxUserUK
Linux User & Developerhttps://www.facebook.com/LinuxUserUKhttps://www.facebook.com/LinuxUserUK [email protected]@[email protected]@imagine-publishing.co.uk
[email protected]@imagine-publishing.co.uk

Ah, Rob. Risc OS is an operating system that makes some of us all warm and fuzzy with nostalgia. Invented in the Eighties for Acorn Computers, it was, for many Brits, the first operating system we ever experienced. But why’s it on the Raspberry Pi, you ask? Well, the Pi, as you know, is built around
an ARM chipset, and ARM just happens to stand for Acorn Risc Machine. Risc OS (the acronym stands for Reduced Instruction Set Computing, and offers higher performance on certain CPU structures, like an ARM) is the closest that the Raspberry Pi has to a native environment. Any good? Check out Linux User & Developer issue 170’s guide and see!
What is RIsc OS? I found it under operating systems on the Pi website but I’ve never heard of it. Any good? Rob via email
>>
Keep up with the latest Raspberry Pi news by following @LinuxUserMag on
Twitter. Search for the hashtag #RasPiMag
Have you heard of Just A Score? It’s a new, completely free app that gives you all the latest review scores. You can score anything in the world, like and share scores, follow scorers for your favourite topics and much more. And it’s really good fun!

If they don’t look damaged (i.e there are no obvious bends, breaks or scorch marks) then there’s a diagnostic test that you can run. You can download the script from http://abyz.
co.uk/rpi/pigpio/code/gpiotest.zip. It will need to run the Pi GPIO library from the same site (download it from http://abyz.co.uk/rpi/pigpio/). Make sure that nothing is connected to any of the GPIOs when you run the test. It’s possible to straighten bent pins very gently using a small flat head screwdriver, as long as you take your time and do it carefully, but other pin errors may, sadly, result in you needing a new Pi.
I think I might have damaged some GPIO pins; how do I check?Ali via email
You can score absolutely anything on Just A Score. We love to keep an eye on free/libre software to see what you think is worth downloading…
10 LinuxUserMag scored 10 forKeybase
3LinuxUserMag scored 3 forFOSS That Hasn’t Been Maintained In Years
8 LinuxUserMag scored 8 forTomahawk
4 LinuxUserMag scored 4 forAnaconda installer
9 LinuxUserMag scored 9 forCinnamon Desktop
The curse of Sticky Keys is an annoying one, and it’s not confined to the Pi (Apple was the first to install this feature, so blame them). Lots of wireless keyboards can have this
problem when used with older Pis – they think you’re hitting Shift when you’re not. Fortunately, on an older Pi the fix is just an update away. Just type sudo rpi-update and once the firmware is updated then the problem should stop. You’ll need to do this for each SD card you use in the Pi 1.
My old Pi 1 keeps launching shortcuts I haven’t used! Joe via email
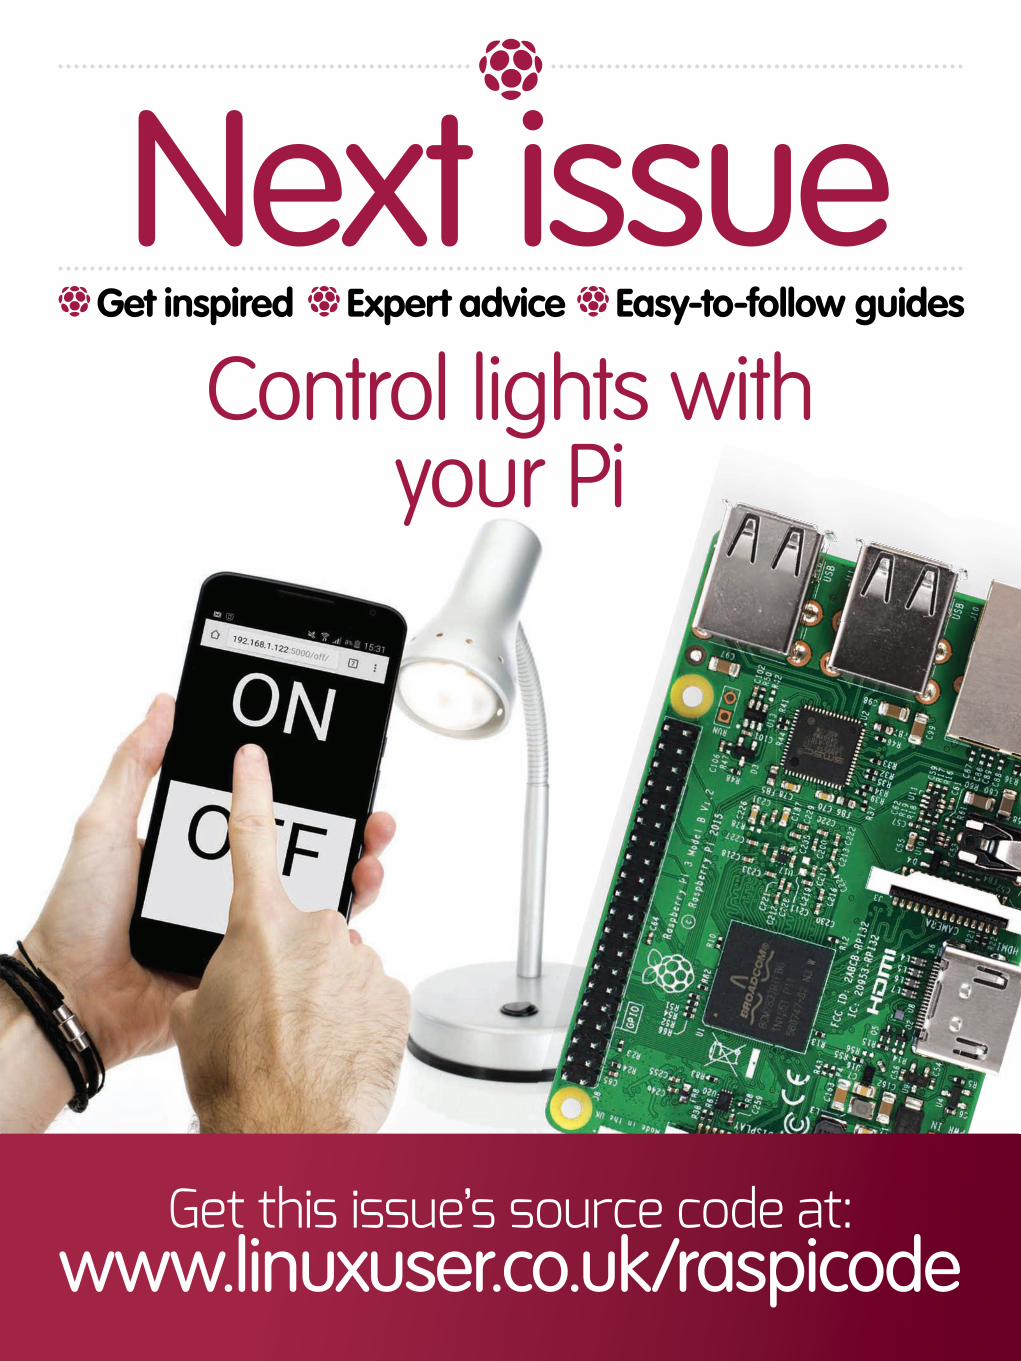
Next issue
Get this issue’s source code at: www.linuxuser.co.uk/raspicode
Control lights with your Pi
Get inspired Expert advice Easy-to-follow guides