hdipcamerauserguide - cpcamglobal.com · hdipcamerauserguide featurelists 24x7 online...
TRANSCRIPT
HD IP CAMERA USER GUIDE
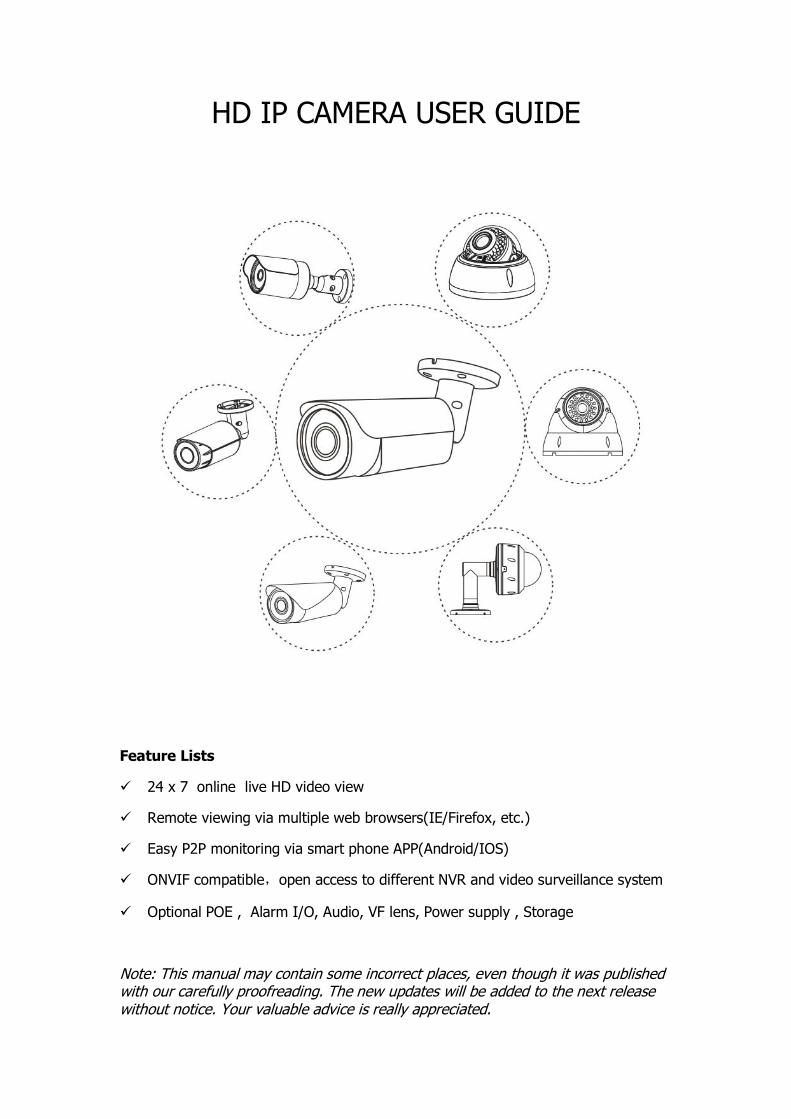
Feature Lists
24 x 7 online live HD video view
Remote viewing via multiple web browsers(IE/Firefox, etc.)
Easy P2P monitoring via smart phone APP(Android/IOS)
ONVIF compatible,open access to different NVR and video surveillance system
Optional POE , Alarm I/O, Audio, VF lens, Power supply , Storage
Note: This manual may contain some incorrect places, even though it was publishedwith our carefully proofreading. The new updates will be added to the next releasewithout notice. Your valuable advice is really appreciated.
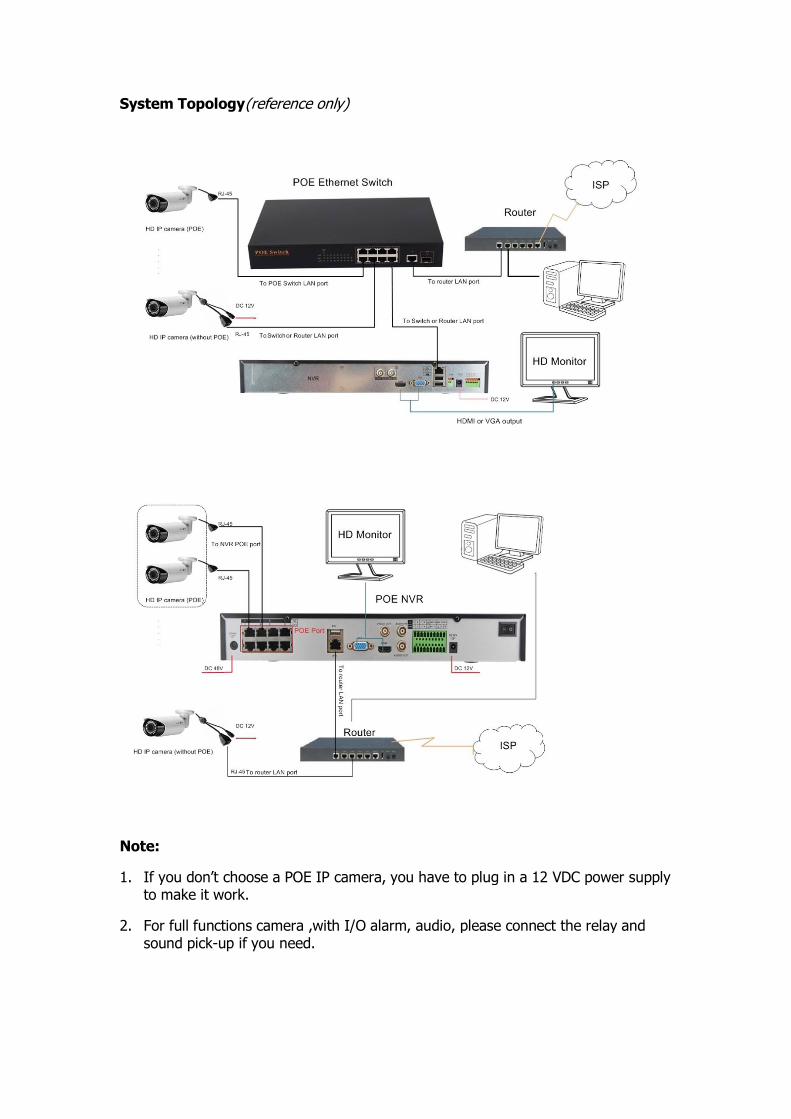
System Topology(reference only)
Note:
1. If you don’t choose a POE IP camera, you have to plug in a 12 VDC power supplyto make it work.
2. For full functions camera ,with I/O alarm, audio, please connect the relay andsound pick-up if you need.
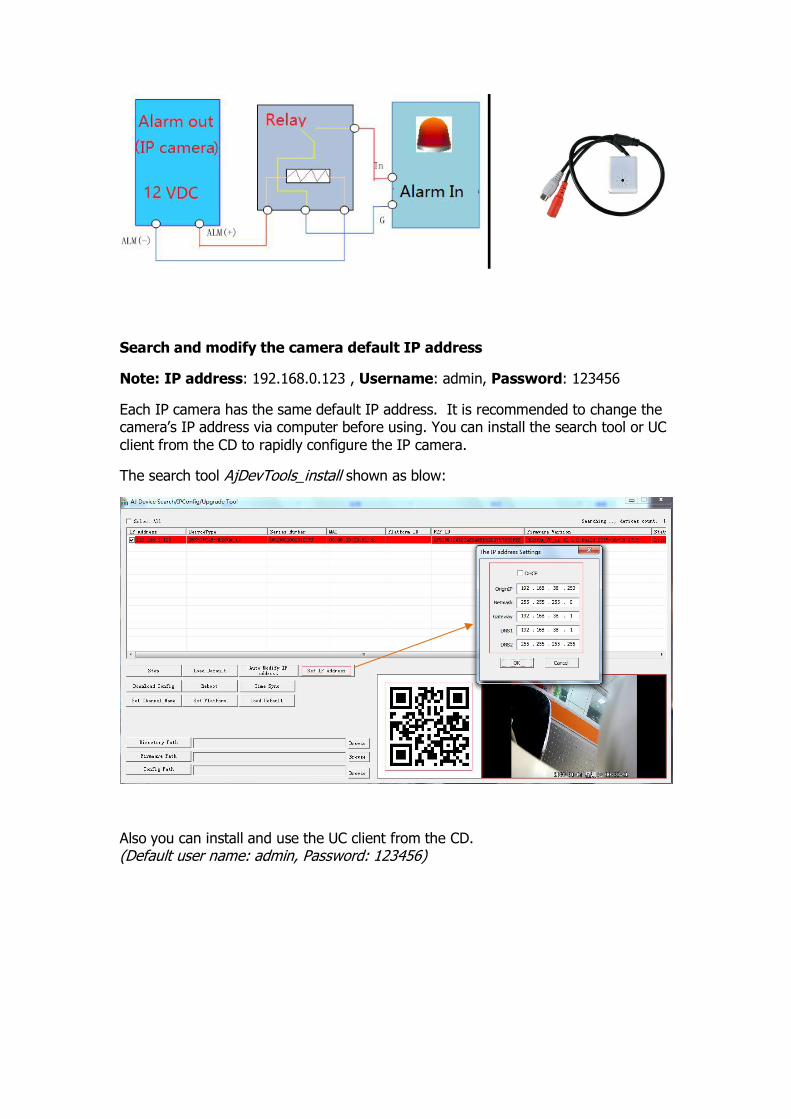
Search and modify the camera default IP address
Note: IP address: 192.168.0.123 , Username: admin, Password: 123456
Each IP camera has the same default IP address. It is recommended to change thecamera’s IP address via computer before using. You can install the search tool or UCclient from the CD to rapidly configure the IP camera.
The search tool AjDevTools_install shown as blow:
Also you can install and use the UC client from the CD.(Default user name: admin, Password: 123456)
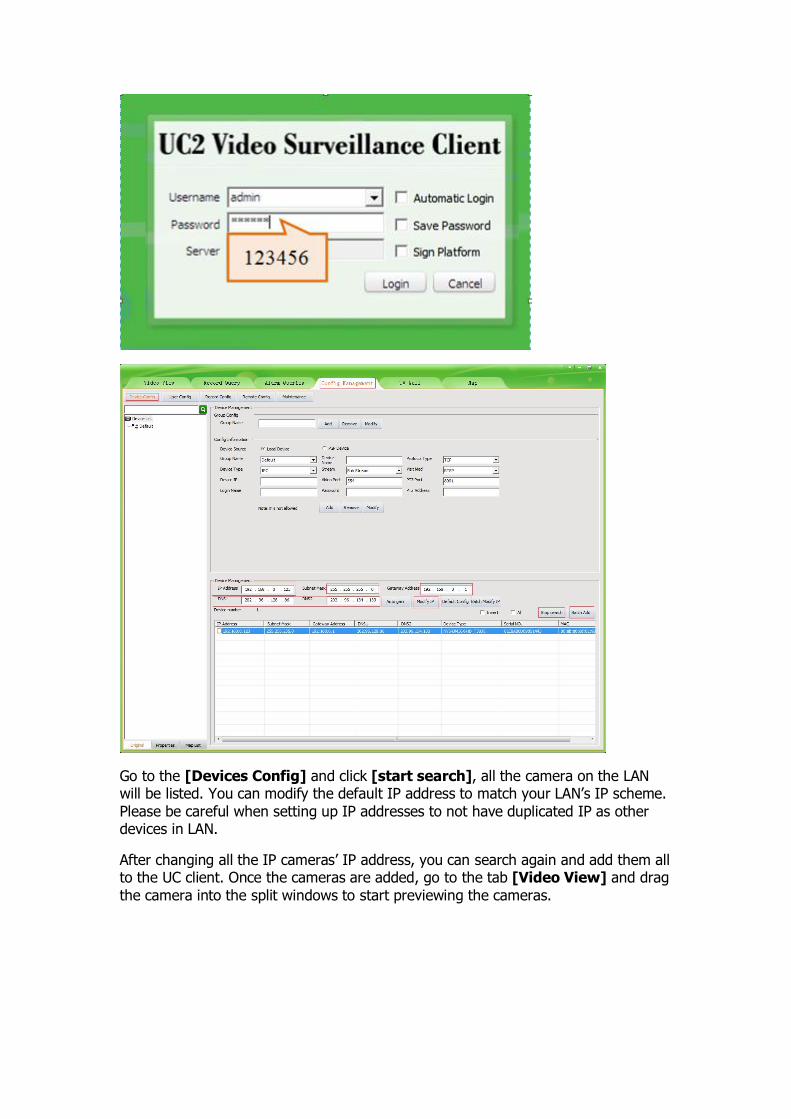
Go to the [Devices Config] and click [start search], all the camera on the LANwill be listed. You can modify the default IP address to match your LAN’s IP scheme.Please be careful when setting up IP addresses to not have duplicated IP as otherdevices in LAN.
After changing all the IP cameras’ IP address, you can search again and add them allto the UC client. Once the cameras are added, go to the tab [Video View] and dragthe camera into the split windows to start previewing the cameras.
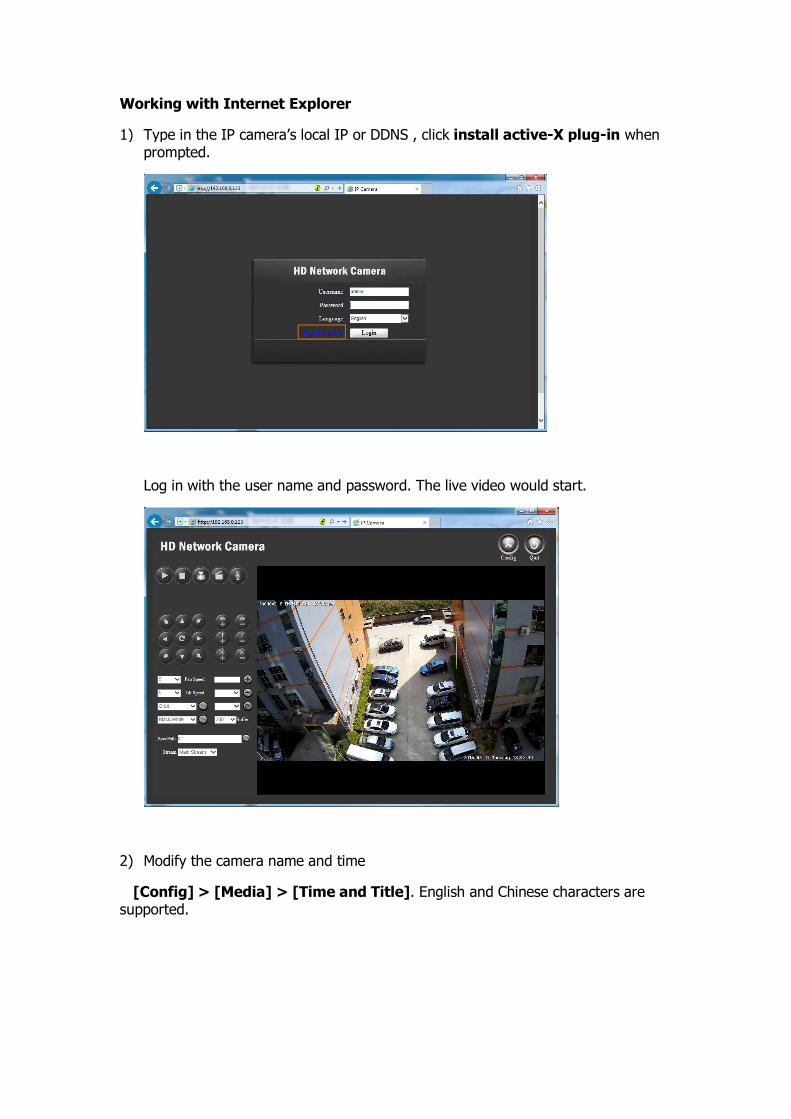
Working with Internet Explorer
1) Type in the IP camera’s local IP or DDNS , click install active-X plug-in whenprompted.
Log in with the user name and password. The live video would start.
2) Modify the camera name and time
[Config] > [Media] > [Time and Title]. English and Chinese characters aresupported.
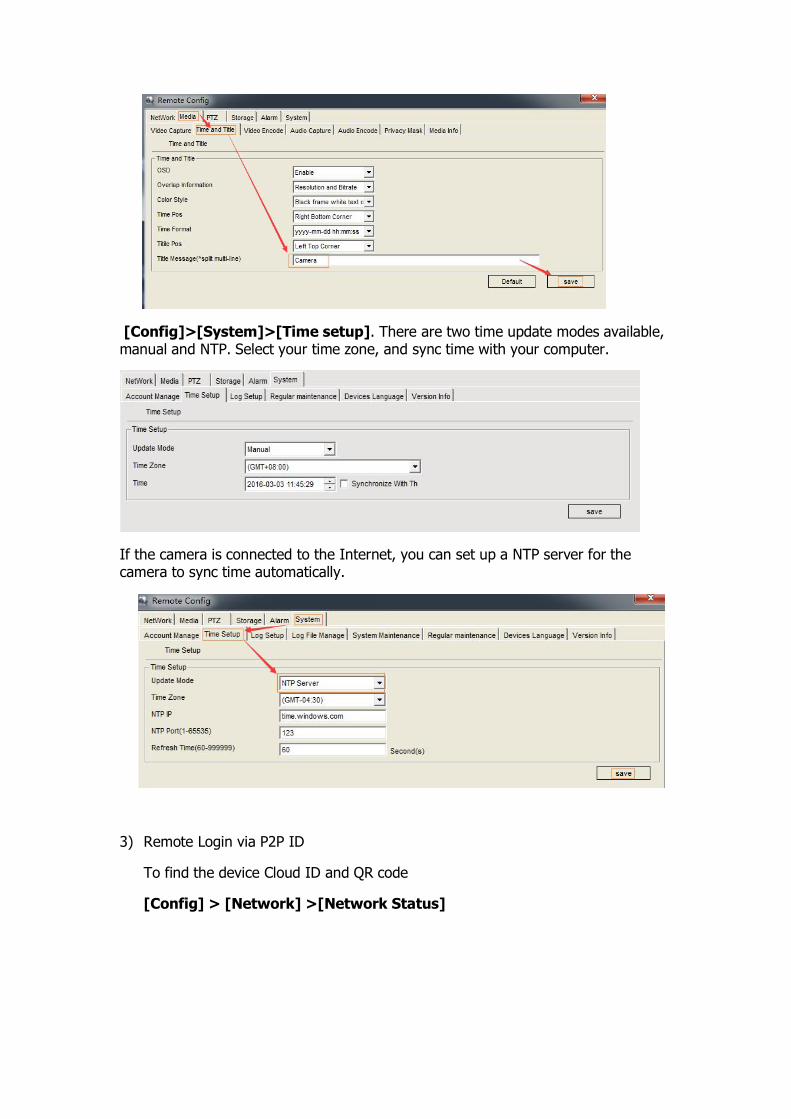
[Config]>[System]>[Time setup]. There are two time update modes available,manual and NTP. Select your time zone, and sync time with your computer.
If the camera is connected to the Internet, you can set up a NTP server for thecamera to sync time automatically.
3) Remote Login via P2P ID
To find the device Cloud ID and QR code
[Config] > [Network] >[Network Status]
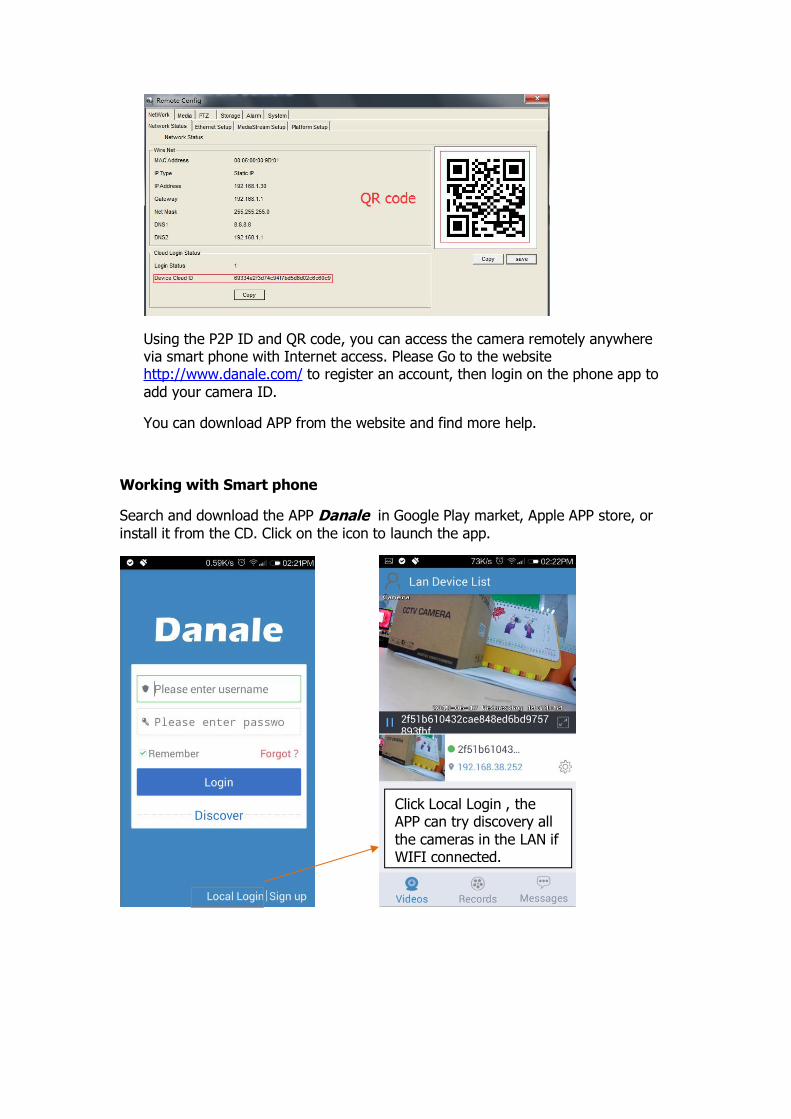
Using the P2P ID and QR code, you can access the camera remotely anywherevia smart phone with Internet access. Please Go to the websitehttp://www.danale.com/ to register an account, then login on the phone app toadd your camera ID.
You can download APP from the website and find more help.
Working with Smart phone
Search and download the APP Danale in Google Play market, Apple APP store, orinstall it from the CD. Click on the icon to launch the app.
Click Local Login , theAPP can try discovery allthe cameras in the LAN ifWIFI connected.
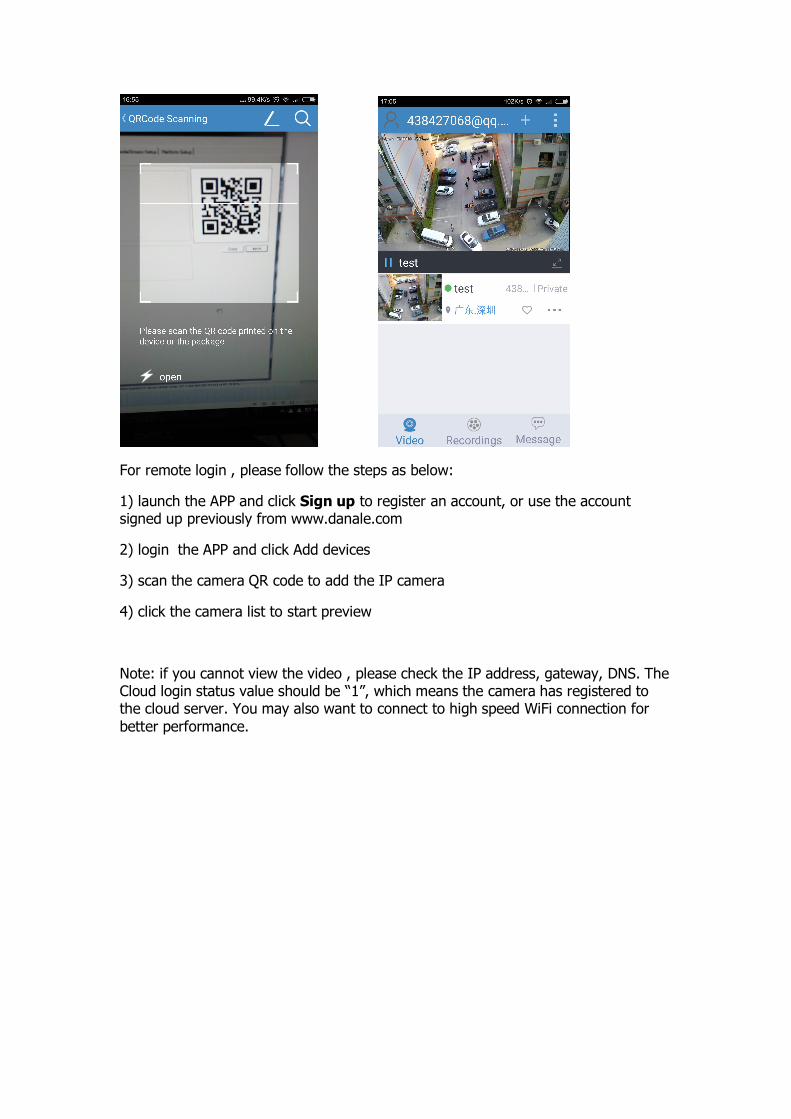
For remote login , please follow the steps as below:
1) launch the APP and click Sign up to register an account, or use the accountsigned up previously from www.danale.com
2) login the APP and click Add devices
3) scan the camera QR code to add the IP camera
4) click the camera list to start preview
Note: if you cannot view the video , please check the IP address, gateway, DNS. TheCloud login status value should be “1”, which means the camera has registered tothe cloud server. You may also want to connect to high speed WiFi connection forbetter performance.
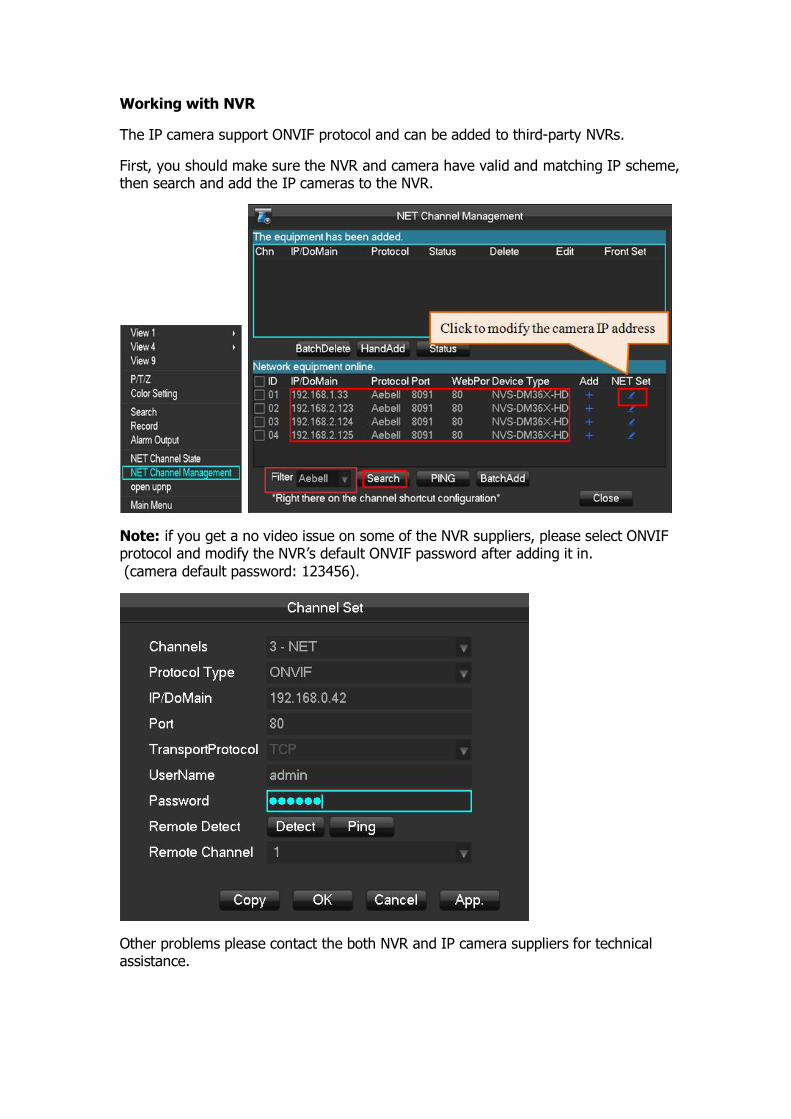
Working with NVR
The IP camera support ONVIF protocol and can be added to third-party NVRs.
First, you should make sure the NVR and camera have valid and matching IP scheme,then search and add the IP cameras to the NVR.
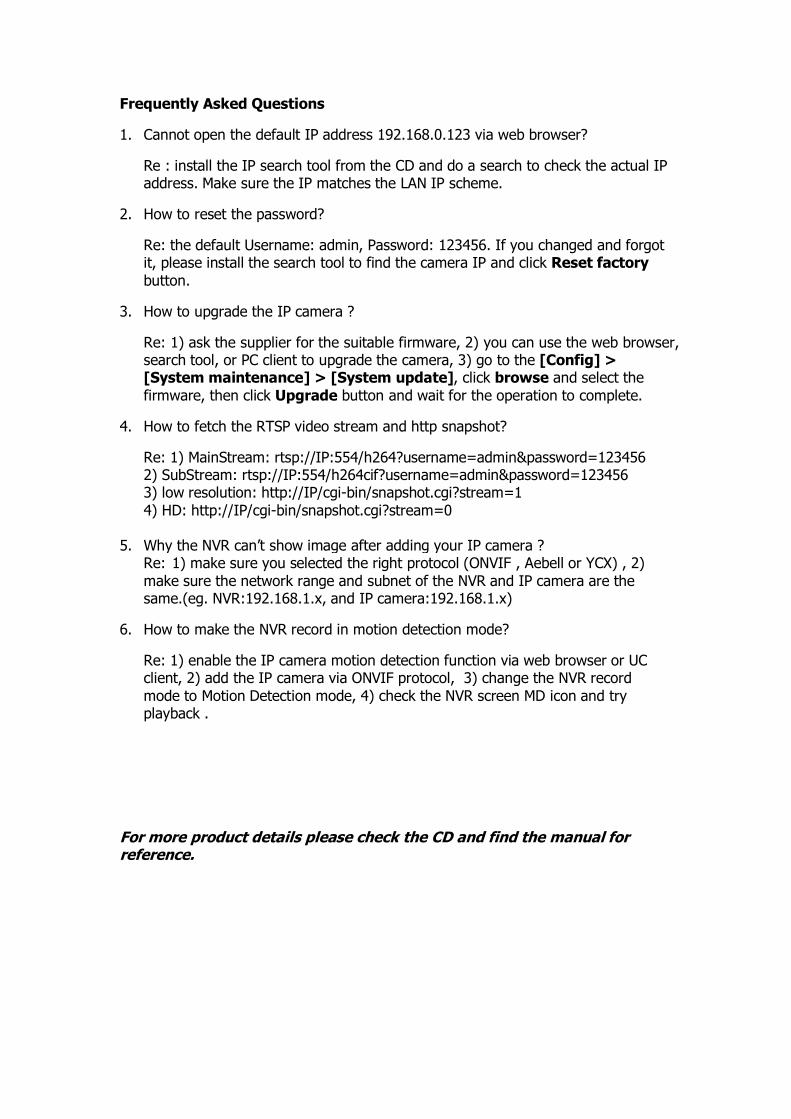
Note: if you get a no video issue on some of the NVR suppliers, please select ONVIFprotocol and modify the NVR’s default ONVIF password after adding it in.(camera default password: 123456).
Other problems please contact the both NVR and IP camera suppliers for technicalassistance.
Frequently Asked Questions
1. Cannot open the default IP address 192.168.0.123 via web browser?
Re : install the IP search tool from the CD and do a search to check the actual IPaddress. Make sure the IP matches the LAN IP scheme.
2. How to reset the password?
Re: the default Username: admin, Password: 123456. If you changed and forgotit, please install the search tool to find the camera IP and click Reset factorybutton.
3. How to upgrade the IP camera ?
Re: 1) ask the supplier for the suitable firmware, 2) you can use the web browser,search tool, or PC client to upgrade the camera, 3) go to the [Config] >[System maintenance] > [System update], click browse and select thefirmware, then click Upgrade button and wait for the operation to complete.
4. How to fetch the RTSP video stream and http snapshot?
Re: 1) MainStream: rtsp://IP:554/h264?username=admin&password=1234562) SubStream: rtsp://IP:554/h264cif?username=admin&password=1234563) low resolution: http://IP/cgi-bin/snapshot.cgi?stream=14) HD: http://IP/cgi-bin/snapshot.cgi?stream=0
5. Why the NVR can’t show image after adding your IP camera ?Re: 1) make sure you selected the right protocol (ONVIF , Aebell or YCX) , 2)make sure the network range and subnet of the NVR and IP camera are thesame.(eg. NVR:192.168.1.x, and IP camera:192.168.1.x)
6. How to make the NVR record in motion detection mode?
Re: 1) enable the IP camera motion detection function via web browser or UCclient, 2) add the IP camera via ONVIF protocol, 3) change the NVR recordmode to Motion Detection mode, 4) check the NVR screen MD icon and tryplayback .
For more product details please check the CD and find the manual forreference.