heart and soul sisters - fabshop hop · “heart and soul sisters” featuring fabrics by h...
TRANSCRIPT

QuiltÊ DesignÊ byÊ JamieÊ FingalÊ featuringÊ fabricsÊ fromÊ theÊ Ò HeartÊ andÊ SoulÊ SistersÓÊcollectionÊ byÊ HoffmanÊ CaliforniaÊ Fabrics
Heart and Soul Sisters
Free pattern available from www.HoffmanFabrics.comWallÊ HangingÊSi ze:Ê 18ÓÊ xÊ 33Ó
CALIFORNIA-INTERNATIONAL
Customer Service [email protected] us! http://hoffmanfabrics.com/Like us! www.facebook.com/HoffmanCaliforniaFabricsFollow us! https://twitter.com/#!/HoffmanFabricsPin us! http://pinterest.com/hoffmanfabrics/
1895 594- September
M3403 23- Fuchsia
M3403 228- Viola
M3402 181- Rainbow
L3380 494- Raven
M3403 110- Daffodil
M3403 301- Bluebird
L3380 269- Caterpillar
M3400 463- Daisy
M3401 181- Rainbow
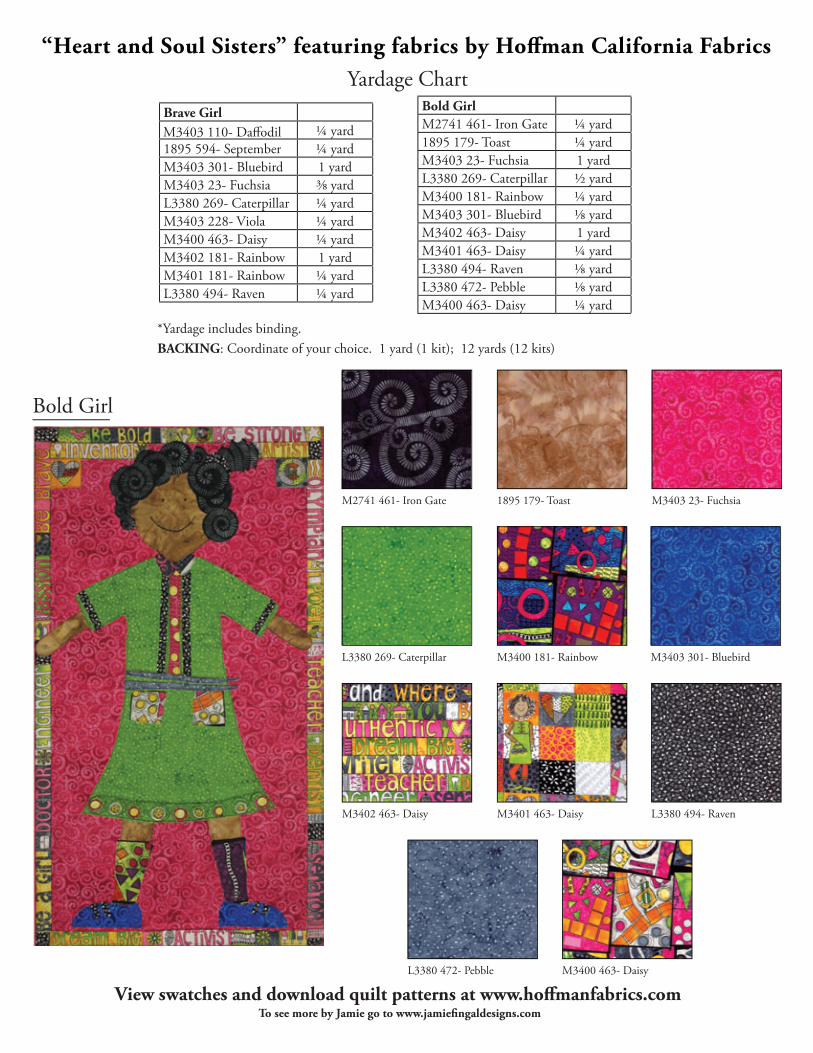
“Heart and Soul Sisters” featuring fabrics by H California FabricsYardage Chart
Bold Girl
1895 179- Toast M3403 23- Fuchsia
M3402 463- Daisy M3401 463- Daisy
L3380 472- Pebble
M2741 461- Iron Gate
M3403 301- BluebirdL3380 269- Caterpillar M3400 181- Rainbow
M3400 463- Daisy
L3380 494- Raven
*Yardage includes binding. BACKING: Coordinate of your choice. 1 yard (1 kit); 12 yards (12 kits)
Brave Girl¼ yard
1895 594- September ¼ yardM3403 301- Bluebird 1 yardM3403 23- Fuchsia ⅜ yardL3380 269- Caterpillar ¼ yardM3403 228- Viola ¼ yardM3400 463- Daisy ¼ yardM3402 181- Rainbow 1 yardM3401 181- Rainbow ¼ yardL3380 494- Raven ¼ yard
Bold GirlM2741 461- Iron Gate ¼ yard1895 179- Toast ¼ yardM3403 23- Fuchsia 1 yardL3380 269- Caterpillar ½ yardM3400 181- Rainbow ¼ yardM3403 301- Bluebird ⅛ yardM3402 463- Daisy 1 yardM3401 463- Daisy ¼ yardL3380 494- Raven ⅛ yardL3380 472- Pebble ⅛ yardM3400 463- Daisy ¼ yard

Heart & Soul Sisters
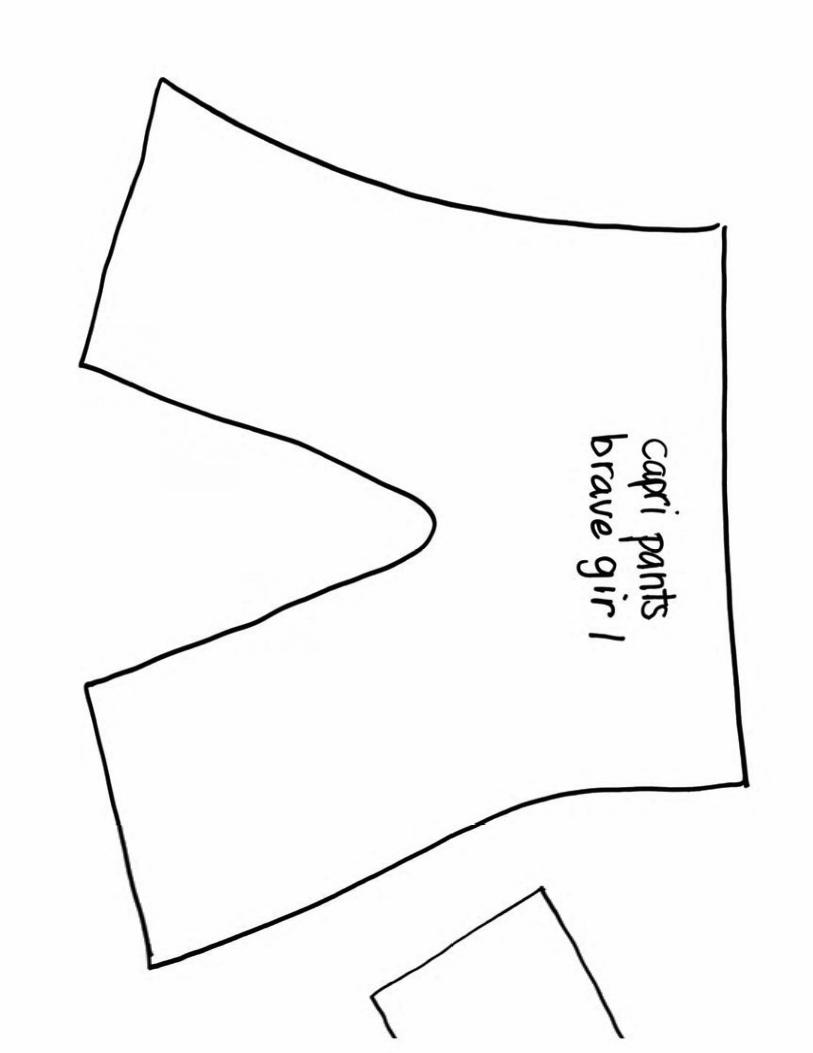
Fall Quilt Market 2014 by Jamie Fingal Brave Girl and Bold Girl This is so fun! Make a ‘girl’ wall hanging that is easy and fun to create with your own imagination and the inspiration of the fabrics from this line. This is a raw edge applique piece. Be bold, be brave, be strong, be a girl. Words to live by: be true to yourself…remember who you are, and where you began…be true to yourself…dream big. All of the fabrics in this project are intended to be fused to a wool blended felt foundation and backed with the same….the rebel way. I don’t use batting and don’t do binding. The felt acts as a finish for the edges of the quilts. I hope you enjoy this process! These quilts – you can make one or two or combine the two and make one large quilt with two girls on it. The one quilt measures 18” wide by 33” long, vertical format. Combine the two girls, and your quilt will be 36” wide by 33” high. Easy peasy. Two fun girls in colorful clothing and words that wrap around the piece that empower girls to dream big and find their passion. These are the things that you will need in order to make one Brave Girl Hair – ¼ yard of yellow swirl M3403 110-‐Daffodil Face and hands – ¼ yard 1895 594-‐September Background – 1 yard of blue swirl M3403 301-‐Bluebird Top – 3/8 yard Pink Swirl M3403 23-‐Fuchsia ¼ yard of each Skirt and Shoes – Lime Triangles L3380 269-‐Caterpillar Capris – Purple Swirls M3403 228-‐Viola Socks – Daisy Blocks M3400 463-‐Daisy Text – M3402 181-‐Rainbow -‐ buy a yard, otherwise you will kick yourself later. The words are the heart and soul of the fabric line. Accents – ¼ yard of Rainbow Girls M3401 181-‐Rainbow ¼ yard of Black and White Triangles L3380 494-‐Raven Bold Girl Hair – ¼ yard of brown or black – M2741 461-‐Iron Gate Face, hands and legs – ¼ yard 1895 179-‐Toast Background – 1 yard of pink swirl M3403 23-‐Fuchsia Outfit – ½ yard of Lime Triangle L3380 269-‐Caterpillar Socks – ¼ yard of Rainbow Blocks M3400 181-‐Rainbow Shoes – 1/8 yard of blue swirl M3403 301-‐Bluebird Text – M3402 463-‐Daisy color way – buy a yard, because the words to inspire girls are so great. You will be drawn to use this fabric more than you know. Accents – ¼ yard of Daisy Girls M3401 463-‐Daisy 1/8 yard of black and white triangles L3380 494-‐Raven 1/8 yard of gray triangle L3380 472-‐Pebble ¼ yard of Daisy blocks, or you might want more for other projects M3400 463-‐Daisy

Mistyfuse 1 pack for (1) 18 x 33” wallhanging Parchment Paper and/or Fat Goddess sheets (Made by Mistyfuse) Iron Cutting mat, ruler and rotary cutter 1 yard of wool blended felt by National Nonwovens TOY002 in black 1 yard of wool blended felt by National Nonwovens TOY002 in a fun color Note: This is enough felt to make a wall quilt with 2 girls on it, or to make two girl quilts. Or use it to make something totally different and fun. Do not wash the felt ahead of time. You want to use it right off the bolt, and press out all of the creases with a hot iron. Pentel Fabric Pen for eyes and mouth Sharp scissors This is a wall quilt, and won’t need to be washed ever. You don’t even need to pre-‐wash the fabric, just use it right off the bolt, pressing it to get all of the creases out, before the fabric is fused. Brave Girl and Bold Girl are made exactly the same, so you can use these instructions for both. The pattern pieces do change with the hair and clothing, but that is it. This is not about perfection, but all about you having fun making this, adding your own personal touches to the pattern design.
1. Press all of the printed fabrics, so they are flat, and have no folding creases with a hot iron. 2. To save fabric, cut only enough for the particular pattern piece. 3. With the wrong side up, lay a piece of Mistyfuse over the top, making sure that it doesn’t go
over the sides. Trim excess with your scissors. You don’t want the Mistyfuse on your ironing board/table and you don’t want it on your iron.
4. You can either use parchment paper or a Fat Goddess Sheet over the top of the Mistyfuse, making sure that you don’t have the iron come in contact with the Mistyfuse. If you are doing a large piece of fabric, you may have to do the fusing in stages. Run your iron over the surface in the circular motion, especially on the edges of the fabric. Let it cool completely, before removing the paper or Goddess Sheet. If, when you bring up the sheet, you see the web rising up, it is not a good seal, so lay down the sheet, and press again into place. You want to see a sheen to the web, and then you know you have a good fuse. Fuse all of the fabrics, and set them aside. Don’t fold them right away, because they need to cool flat somewhere in your studio.
5. Pattern pieces are marked with Brave or Bold, and some pieces are for both. Using straight pens to secure the pattern pieces onto the fabric, start cutting the pieces out with sharp scissors. If you are using light colored fabric for the face, you will need to cut 2. For the socks, I selected portions of the squares that I thought would make excellent socks, that don’t match.
6. For making the eyes and smile on the face, using one of the faces that you cut, take the pattern to a window in your house or studio, and trace the eyes and smile with the fabric pen, carefully. Then you can make the lines more bold with your pen. Fuse the duplicate face fabric to the back of your face with the eyes and smile, so that you have two layers of face, and still have Mistyfuse on the back of the face for fusing onto the background. The two layers make it so that the background fabric doesn’t become a part of her face.

7. You can slip the pattern of the girl under a piece of parchment paper or a Goddess Sheet, to see where everything lines up. Using your pattern pieces, build your Brave girl – hair, face, clothes, socks, and shoes.
8. Cut out the black wool blended felt 18x33 and press out all of the creases. 9. Cut out the fused blue swirl and iron it onto the black wool blended felt. You can trim the
excess, from the back, with a rotary cutter and rulers. You want to do it from the back, using the felt as your guide.
10. Carefully lay your girl onto the background. The head and feet should not be right to the top, or right to the bottom. But the hands should reach the outer edge. You can do some adjusting with the legs.
11. If she is positioned correctly, you can press her into place, but not her hands, leave those open. 12. Carefully cut the text fabric into strips, setting aside the words and phrases that you want to
use. The artwork of flowers, cups and saucers, houses, etc., make great spacers for the words. Also the black and white triangle fabric works well too.
13. Line them up on the edges of your quilt, and carefully overlapping them onto one another, just a tad. This will help secure them on your quilt. You may find that you have to cut some words apart in a sentence, to make room for them on the quilt, but that is okay. You will want to put something under the hands, such as a piece of the artwork, a flower or a house, etc., so it doesn’t break up the design. Add another row (if you want) at the top and the bottom. Iron them into place, carefully, and please don’t burn your fingers with the iron.
14. Accents. Using the Rainbow Girl fabric and the black and white triangle fabric, you can create pockets and trim. Then cut some hearts and other quilted drawings from the blocks to add to your text at the top. This is where your own creativity enters the picture. Add the elements that you desire to make her your Brave girl. For the Bold Girl, she has a dress, so you can ‘dress up’ her dress with accent fabrics to create a whimsical and fun look for her.
15. Cut another piece of wool blended felt, in a fun color. I used hot pink. Cut it about an inch larger than the black foundation. This piece will become your backing. Press all of the creases out, so it is flat. Place your fused quilt on top of the backing, making sure that it has a one inch border all of the way around. Using a straight pin at the top, sides and bottom, secure the 2 pieces of felt together.
16. Free motion machine quilting. Leave your iron on, because you will need it in stages during this process of sewing. This is an excellent way to practice FMQ’ing. First thing – sew all around her outfit, socks and shoes. Press with your iron. Now go and do her face and hair. Keep it simple is my advice. Loop – de – loop for hair, and you can even do the eyes and smile. Be sure to anchor your stitches at the beginning and end of all stitching to secure it into place. You can leave the eyes and smile to the end, if you so desire, or not do them at all. Your choice.
17. Go back into the socks and echo the designs in the fabric. Take it to the ironing board and press the entire quilt, so it remains flat.
18. Now you can FMQ the accents on her shirt. And then move to the background, and the greatest is that you can follow the swirls in the fabric, by making them larger with your stitching (big swirls). Quilt the entire background fabric, and then press. You can choose to leave the background alone and not quilt. I am not one that feels the need to quilt everything. The Brave Girl is quilted. The Bold Girl, I left the background un-‐quilted, and only did her face, hair and outfit. Now you can either do this next step by straight stitch or FMQ – attaching the text onto the quilt to secure the sides. I personally think it’s easier to do this with a free motion foot, because it frees you up to move from side to side and up and down. You could go around the letters, but that would make most people crazy, so pick and choose how you want to secure the text and motifs. Stitch around the hands when you get to that part of the quilt.

19. Press the entire piece. Using a rotary cutter and ruler, carefully trim the colored felt, making sure that it is visible from the front. It serves as a great accent. Trim is about 1/8th, if you want to be exact. All the way around. Now you have an amazing Brave Girl quilt and/or Bold Girl quilt. Put your label on the back with your name and date made. You can sew aluminum pop tops in the upper top for easy hanging. Note: If you want to make this a Brave and Bold Girl quilt with two girls (truly, the Heart and Soul Sisters), cut the black felt 36x33, and the color felt 36x34. You can use one color or two for the background. You will need a yard of felt for the foundation. Add the text around the entire edge of the quilt, and the girls hands should touch in the middle, since they are Heart and Soul Sisters. Make it your own and have fun with it! Thank you for allowing me to share my passion with you! Be bold, be brave, be strong, be a girl. Jamie Fingal