heat energy. what is heat? what is heat? how would you define or describe it?...
TRANSCRIPT

Heat Energy

What is Heat?
•What is heat? How would you define or describe it?______________________________________________________________________________________________________________________________________________________________________________

Heat:• Heat is thermal energy flowing from warmer to cooler
objects.• Thermal energy is the total energy of the particles of matter.• Heat energy is produced by the internal motion of particles in
matter.•Matter is made of particles called molecules.• The faster they move = the object is getting hotter.• The slower they move = the object is getting colder.

Activity:• Touch your hands to your cheeks. What do you feel?
_________• Rub your hands SLOWLY back and forth for 10 seconds.• Touch your hands to your cheeks. What do you feel?
_________• Rub your hands QUICKLY back and forth for 10 seconds.• Touch your hands to your cheeks. What do you feel?
_________•Why do you think the temperature changed? _________

Friction:• Friction is the resistance between two objects rubbed
together.
•More Motion = More Friction = More Heat
• The energy of motion is called Kinetic Energy.

Temperature:• Temperature is the measure of the average kinetic energy
of the molecules or particles of matter.• The higher the temperature, the faster the molecules are
moving.• The lower the temperature, the slower the molecules are
moving.• Temperature can be changed.• To increase the temperature, heat is added.• To decrease the temperature, heat is removed.

Measuring Heat:
• We can measure the amount of heat in an object using the unit calorie.• Calorie (food) vs. calorie (heat)• 1 calorie raises the temperature of 1 gram of water 1 degree Celsius.

Which would boil faster - a small or a large pan of water? Why?• _________________________________________________________
_____________________________________________________________________________________________________________________________________________________________________________________________________________

• A group of boy scouts arrived at camp and learned that their first task would be to build a fire. However, the scout masters wanted it to be a contest. The task was this, the first troop to build a fire and boil a pot of water would earn dinner cooked by the camp’s staff rather than having to cook their own meal for the evening.
• The scouts were given time to gather fire making supplies such as wood, and all the troops were given a pot the same size and made from the same material to make sure the contest was fair.
• Troop #13 was the very last group to get their fire started. They tried and tried, but it took them forever. However, they were the very first group to get their pot of water to boil. Why?

Answer!•Troop #13 understood science! All the other troops filled their pots to the very top with cold water from the creek. Troop #13 just placed a small amount of water in their pot. Even though they started their fire last, their pot of water boiled first. Having less water required fewer calories, and they won a great dinner!

Thermometers:
• How a thermometer works:
• A thermometer contains a special liquid such as Mercury or alcohol that has been dyed red.
• The liquid expands (gets bigger) when it gets hot.
• The liquid contracts (gets smaller) when it gets cold.

Thermometers:
• The liquid has been trapped inside a glass tube, so it can only expand and contract up and down.• Scientists know exactly how big or small the liquid will be at a
given temperature, so they label or calibrate the thermometer.•We can watch the level of the liquid inside the tube to
know the temperature of a location or substance we are testing.

Thermometers:
• The thermometer was invented by Gabriel Fahrenheit in 1724.• Fahrenheit’s scale is 32 F = Freezing and 212 F = Boiling.• A new scale was developed by Anders Celsius in 1742.• Celsius’ scale is 0 C = Freezing and 100 C = Boiling.

Thermostat:• A thermostat is a device used to control the temperature of a
room.
• The thermostat is set at the desired temperature. Ex: 70 F
• In the summer, if the room temperature rises above 70 F, the air conditioner turns on to cool down the room.
• In the winter, if the room temperatures falls below 70 F, the furnace turns on to warm up the room.

Your Body’s Thermostat:
• Your body also has a thermostat.• A healthy body stays very close to 98.6 F.• If you become too hot, you sweat. This cools down your
body.• If you become too cold, you shiver. This heats up your body.• This balancing act of keeping your body at the right
temperature is known as homeostasis. It helps keep you healthy.

Bolt and Screw Experiment
• Question:•Which will be hotter? The bolt or the screw?
• Hypothesis:• Record your hypothesis for the results of this experiment.• Example: I think the bolt will be hotter because it is bigger.• Example: I think the screw will be hotter because it has
ridges.

• Procedure:• Place 1 large metal bolt and 1 small metal screw in a sauce pan.• Fill with enough water to cover the bolts and screws. (Approximately half full.)• Place the sauce pan on a hot plate set to high. Bring the water to a boil.• measure 50 mL of room temperature water into each of the empty plastic
cups.• Place a thermometer in each cup and allow to stabilize.• Identify which cup will be used for the bolt and which will be used for the
screw. • Record the initial temperature (Celsius) of the water in each cup.• Identify your groups roles for this experiment.• Watch the clock and call out time every 10 seconds.• Watch and record the temperature for the bolt cup.• Watch and record the temperature for the screw cup.

Observations:• Once the bolts and screws in the sauce pan have had sufficient
time to boil (approximately 10-15 minutes), carefully remove them from the pan using tongs and place them in the cups for each group of students.• This experiment goes very quickly (readings every 10 seconds) and
the temperature change will be very small (a few degrees), so you need to be ready and very careful in your readings.
Conclusions:• Compare individual group data with the class.•Which was the hottest? Coolest?•Which cup stayed the hottest the longest?• How much of a temperature change occurred?

• Ideas for Future Research:• If we were to do this experiment again, what would you do
differently?• Examples:• Use a different liquid instead of water (milk, orange juice, etc.)
Change the amount of water (25 mL or 100 mL.)• Try a larger bolt.• Try multiple bolts or screws in one cup. Etc.

Insulators and Conductors
• Have you ever roasted marshmallows? What did you place the marshmallows on to hold them over the fire?
Why?• Heat energy can move through many objects.

Insulator:
• An insulator is an object through which heat does not move easily.• The molecules are far apart.• Examples: glass, wood, plastic, rubber, air, Styrofoam, etc.

Conductor:
• A conductor is an object through which heat moves easily.• The molecules are very close together.• Examples: metal, asphalt, etc.

Move It!• Insulator Movement:• Stand up and spread out throughout the classroom. • Raise your arms to your sides and gently turn to make sure your are not
in contact with anyone.• This represents the molecules in an insulator. They are far apart.• One student is the trigger. When I touch this student, he or she will begin
to sway back and forth in place. The rule is, if someone touches you, you will also begin moving. The movement represents heat traveling from one molecule to another.• 1 minute• Draw a picture of the students spread apart, record that the experiment
was done for 1 minute, and record the number of students that were moving at the end.

Move it!• Conductor Movement:• This time you need to form a block in one section of the classroom with
everyone’s shoulders lightly touching.• You now represent the molecules in a conductor; close together.• One student is the trigger. When you touch this student, he or she will
begin to sway back and forth in place. The rule is, if someone touches you, you will also begin moving. The movement represents heat traveling from one molecule to another.• Trigger student - he or she should begin to sway. • 1 minute• Draw a picture of the students standing very close together, record how
long the experiment lasted, and record the number of students that were moving at the end.

• Discussion of Movement:
• Review:• What do we use to roast marshmallows?• Why is a stick a good idea?• Why is a wire hanger not a great idea?• Why do some metal sticks have wooden handles? Is it for looks or
science?

Refrigerator Experiment• Introduction:•What is the purpose of a refrigerator?• Today we are going to make our own refrigerators to see if we
can prevent an ice cube from melting.
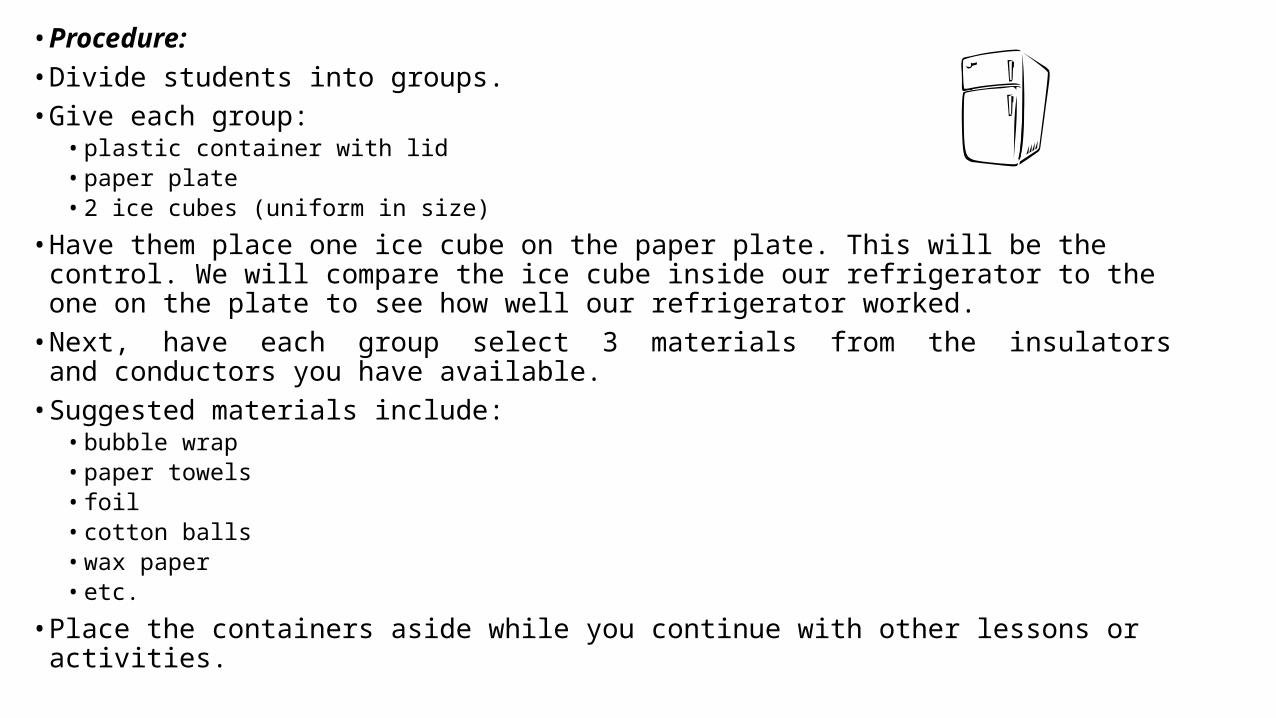
• Procedure:• Divide students into groups.• Give each group:
• plastic container with lid• paper plate• 2 ice cubes (uniform in size)
• Have them place one ice cube on the paper plate. This will be the control. We will compare the ice cube inside our refrigerator to the one on the plate to see how well our refrigerator worked.
• Next, have each group select 3 materials from the insulators and conductors you have available.
• Suggested materials include:• bubble wrap• paper towels• foil• cotton balls• wax paper• etc.
• Place the containers aside while you continue with other lessons or activities.

• Observations:• Unpack the refrigerators after 30-60 minutes• Compare it to the control ice cube left on the paper plate and
exposed only to the air. Which one is bigger? Why?• Discuss and compare results.

• Ideas for Future Research:• If we were to do this experiment again, what would you do
differently?• Brainstorm• Examples: Try a different size or type of ice cube. Try other insulating or
conducting materials. Try a larger or smaller plastic container

• What materials did you use in your refrigerator?
• Draw and label a picture showing how you created your refrigerator.

Conduction
• Today we are going to have a race! Let’s see who can melt an ice cube the fastest using only your hands.
•What did you do to melt the ice cube? What worked best? Why?

Conduction:
• Heat transfer is the movement of heat from warmer to cooler objects.• There are three methods of heat transfer. The first is
conduction.• Conduction is the transfer of heat by direct contact between
molecules of a solid.

Example #1: An Ice Cube held in a Hand (Illustrate and Label)
• A hand is hot from body heat.• The ice cube is placed in the hand.• The heat from the hand is transferred to the ice cube, and it melts.• (Note: The hand heats up the ice cube, the ice cube does not cool
down the hand. Heat always moves from warmer to cooler!)

Example #2: A Pan on a Stove (Illustrate and Label)• The burner gets hot.• The heat is transferred to the bottom of the pan by direct contact
between the pan and the burner.• The sides of the pan get hot.• The handle of the pan gets hot. (Unless it’s made from an insulator.)

Example #3: Pin held in a Flame (Illustrate and Label)• The end of a straight pin is held in the flame of a candle.• The heat from the flame is transferred to the end of the pin.• The heat moves from the end of the pin to the head of the pin as a
result of a collision between its molecules.• The head of the pin gets hot and can burn your fingers.

Example #4: (Student suggested) (Illustrate and Label)• brainstorm additional examples of conduction they may have seen or
experienced in their own lives.
• Possible Examples:• A metal spoon gets hot while stirring a pot of boiling water.• An egg cooking in a frying pan.• A metal cup gets hot when boiling water is poured into it.• A cheek is burned by a hot curling iron.• Etc.

Move it!
• Stand in a line side by side in the classroom with your arms to your sides.• Each student represents a molecule, and all together they form a solid rod.• Touch the student standing at the end. That student will move in an unusual way and then form a
creative shape which gently touches the student standing next to him.•
Once touched, the next students will move and form a shape gently touching the student standing next to her.
• The process of touching, moving, and touching continues with a domino affect to the end of the line.
• This dance shows how the heat (movement) is transferred by direct contact between the molecules (students).
• Try the dance two or three times encouraging students to be more creative and unusual with their movements and finishing shapes each time. As they watch each other perform, they will get new ideas to make the dance more interesting.

Spoons Experiment
• Introduction:• Have you ever cooked Macaroni and Cheese (or some other food item)?• What kind of a spoon do you use when you stir the noodles? Metal?
Plastic? Wood? Why?• (Briefly discuss student experiences and answers.)• Today we are going to experiment with three different types of spoons
and the heat transfer method of conduction.• (Go through the steps of a scientific method to conduct this experiment.
Have students record information for each step in their “Heat Energy” book.)

• Question:• Which spoon will be the hottest? Coldest?• • Hypothesis:• (Have students record their hypothesis for the results
of this experiment listing the spoons in order from hottest to coldest.)• Example: Plastic, Metal, Wood• Example: Metal, Wood, Plastic• Etc.

• Procedure:• Tape a thermometer to the handle of each spoon.• Record the initial temperature of each spoon.• Place the bowl of the spoon in a pan of water and turn on the hot
plate.

• Observations:• Continue with other science lessons while running the experiment.• Stop every 5 minutes and record the temperature of each spoon’s handle.• The experiment will run for 30 minutes.• • Conclusions:• Based on the final temperatures, draw a conclusion by listing the spoons in order from hottest to coldest.• Were the students right or wrong in their hypothesis? Why?• Encourage the students to use what they know about conductors and insulators to justify the results.• How is this experiment an example of conduction? (The bowl of the spoon is in the hot water. The heat transfers
from the bowl of the spoon to the handle by a collision of the molecules in the spoon.)• • Ideas for Future Research:• If we were to do this experiment again, what would you do differently?• (Brainstorm many different ideas with students.)• Examples:• Try different sized spoons.• Try spoons made of different materials. Try forks instead of spoons.• Try a pan of milk or orange juice instead of water. Etc.

• Conclusions: ____________________________________________________• _____________________________________________________________• This experiment is an example of which method of heat transfer? Explain.
_____• _____________________________________________________________• _____________________________________________________________• • • Ideas for Future Research:_________________________________________

Convection
• There are three methods of heat transfer.• So far we have learned about the first one: Conduction.• Today we will learn about the second one: Convection.

Convection
• Heat transfer is the movement of heat from warmer to cooler objects.• There are three methods of heat transfer. The second is convection.• Convection is the transfer of heat in liquids and gases through currents.• Hot air always rises and cold air always falls.• Why?• When air is heated, the molecules begin to move faster and they take up more
space. When the molecules begin to take up more space, the air becomes less dense. This makes the warmer air rise and the cooler air fall. This cycle is known as a convection current.
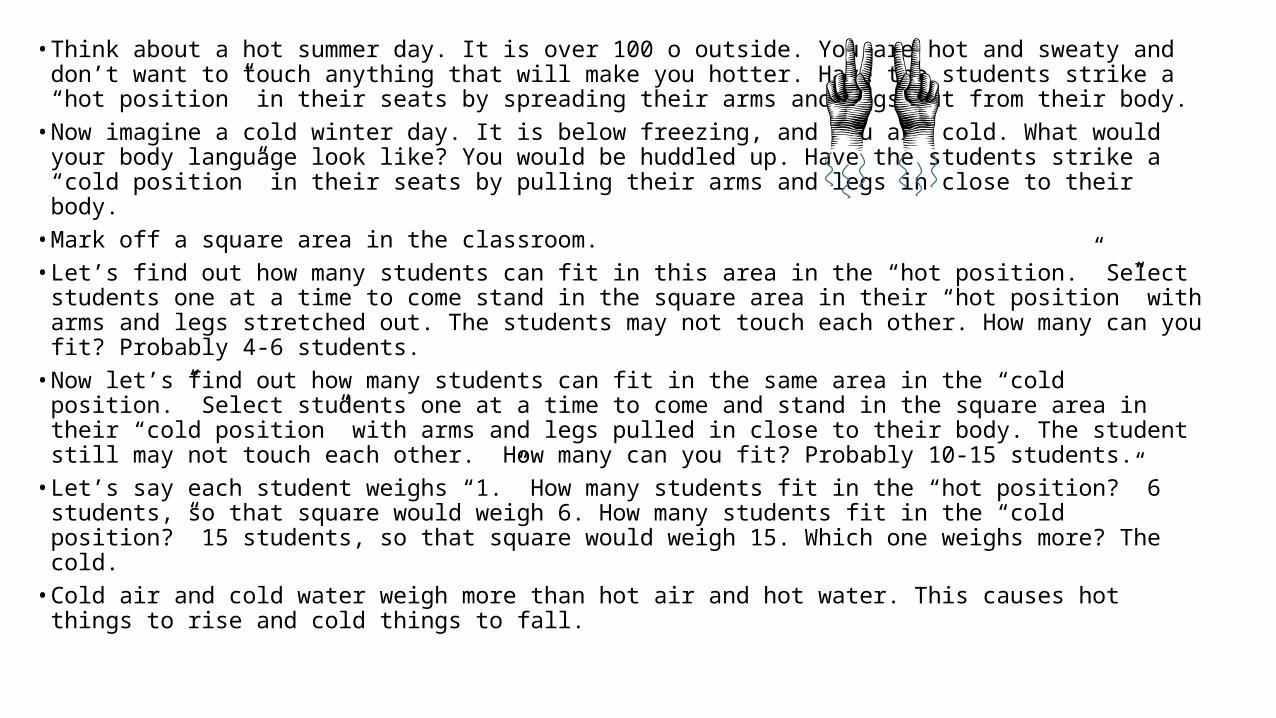
• Think about a hot summer day. It is over 100 o outside. You are hot and sweaty and don’t want to touch anything that will make you hotter. Have the students strike a “hot position” in their seats by spreading their arms and legs out from their body.
• Now imagine a cold winter day. It is below freezing, and you are cold. What would your body language look like? You would be huddled up. Have the students strike a “cold position” in their seats by pulling their arms and legs in close to their body.
• Mark off a square area in the classroom.• Let’s find out how many students can fit in this area in the “hot position.” Select students one at a
time to come stand in the square area in their “hot position” with arms and legs stretched out. The students may not touch each other. How many can you fit? Probably 4-6 students.
• Now let’s find out how many students can fit in the same area in the “cold position.” Select students one at a time to come and stand in the square area in their “cold position” with arms and legs pulled in close to their body. The student still may not touch each other. How many can you fit? Probably 10-15 students.
• Let’s say each student weighs “1.” How many students fit in the “hot position?” 6 students, so that square would weigh 6. How many students fit in the “cold position?” 15 students, so that square would weigh 15. Which one weighs more? The cold.
• Cold air and cold water weigh more than hot air and hot water. This causes hot things to rise and cold things to fall.

Example #1: A Pan of Boiling Water (Illustrate and Label)• A pan is placed on a hot burner.• The water near the bottom of the pan gets hot.• Hot things rise, so that water rises to the top.• This forces the cold water at the top to fall to the bottom of the pan.• The cold water is now near the burner, so it gets hot and rises to the top.• The water continues to rise and fall inside the pan until all the water is
hot and begins to boil.

Example #2: A Furnace (Illustrate and Label)• The furnace is in the basement of the house heating the air.• The hot air is now less dense and wants to rise. The hot air travels
through the ducts and out the hot air vent.• The hot air now enters the room and rises to the ceiling.• Once the hot air gets to the ceiling, it is far away from the furnace, so it
cools off.• The cold air now falls back to the floor. Some of the cold air stays on
the floor while some of it returns in the cold air register.• The cold air returns through the ducts to the basement where it is
heated by the furnace and rises again.

Example #3: Fire Safety (Illustrate and Label)• You’ve been taught that if you ever get caught in a building that is on
fire to crawl on the ground to safety. Why?• The fire is hot. It produces hot air and smoke.• The hot smoke will rise to the ceiling.• The coolest and cleanest air will remain on the ground.

Example #4: (Student suggested) (Illustrate and Label)• additional examples of convection they may have seen or experienced
in their own lives. • Possible Examples:• Melting a spoon of butter by holding it above a pot of boiling water.• Sleeping on the floor on a hot summer night instead of in bed.• Placing a heating vent in the floor versus the ceiling of a room.• Etc.

Move it!• Individual Convection Currents:• The ground will be our heat source.• Have the students crouch near the ground.• Since we are near the heat source, we get hot.•
Hot things rise. Have the students rise up to a standing position with their hands above their heads.• At the top, we are now away from the heat source, so we get cold.• Cold things fall. Have the students drop their arms and bodies back down to the ground.• At the bottom, we get hot.• Hot things rise.• At the top we get cold.• Cold things sink.• At the bottom, we get hot.• Hot things rise.• At the top we get cold.• Cold things sink.• At the bottom, we get hot.• Etc.• This process is called a convection current! (For liquids and gases.)

• Group Convection Currents:• This time identify a location in the room to be the heat source. (White board, left wall, etc.)• Have the students stand in a circle around the room.• Those near the heat source are being heated. We know that as things get hot, they expand and move quickly.
The students near the heat source will make big shapes and move their bodies fairly quickly as the circle turns.• Those away from the heat source, are cold. We know that as things get cold, they contract and move slowly.
The students away from the heat source will make small shapes close to the ground and move slowly as the circle turns.
• The students moving away from the heat source, will begin to shrink down lower to the ground getting smaller.• The student moving toward the heat source, will begin rising from the ground getting larger.• Have the circle of students rotate around the room allowing each student to experience all positions of the
circle from warm to cold and back again a few times.• Students will be able to see and feel the movement of the convection current through this activity.

Jelly Jar Convection
• Introduction:• We’ve learned that hot air/liquid rises and cold air/liquid falls.• This is because hot air/liquid is less dense than cold.• The cycle of hot rising and cold falling is called a convection current.• We’ve learned about a convection current, we’ve drawn one, we’ve
even danced one. Today we are going to see one!

Jelly Jar Convection
• Jelly Jar Convection #1 - Hot on Bottom:
• Illustrate and label this experiment
• Jelly Jar Convection #2 - Cold on Bottom:
• Illustrate and label this experiment.

Radiation
• What are some things that give us heat? How many can you think of? • You have 1 minute to brainstorm as many sources of heat as possible

Radiation:
• Heat transfer is the movement of heat from warmer to cooler objects.• There are three methods of heat transfer. The third is radiation.• Radiation is the transfer of heat through space in the form of waves.

Example #1: Sun heating the Earth (Illustrate and Label)• The Sun creates its own heat through the process of nuclear fusion.• That heat travels across space as waves and heats the surface of the
Earth.
Example #2: A Fire (Illustrate and Label)• A fire is radiant heat.• The flames of the fire are hot. The heat from the fire radiates across
space and warms us as we sit near it.

Example #3: Radiator or Electric Heater (Illustrate and Label)• A radiator or electric heater creates heat.• The heat is then radiated across the room in the form of waves.

Example #4: (Student suggested) (Illustrate and Label)• look at the brainstormed list of heat sources they created at the beginning of the
lesson. Are any of them examples of radiant heat? Discuss each sample suggested and use the definition to help determine if it is a valid example of radiation. • Possible Examples:• Toes warmed in front of a space heater.• Roasting marshmallows over hot coals.• Sun melting ice on a driveway.• Getting burned by the sun.• Toasting bread in a toaster.• Etc.

Move it!
• Variation #1:• Have the students spread out in the space available.• When the lights are off, there is no heat. They collapse to the ground
and form a small shape.• When the lights turn on, the sun is heating the room. The rise and
dance freely with large, bold movements.

Heat of Color Experiment
• Questions:• Which color is the hottest? Coldest?• Hypothesis:• (Have students record their hypothesis for the results
of this experiment listing the colors in order from hottest to coldest.)• Example: Black, Brown, Violet, Green, Blue, Red, Orange, Yellow, White• Example: Black, Violet, Blue, Green, Brown, Orange, Red, White, Yellow

Heat of Color Experiment
• Procedure:• Place 100 mL of water in 9 clear plastic cups.• Use food coloring or paint to create the following colors: White (clear), Red, Orange, Yellow,
Green, Blue, Violet, Brown, Black.• Place a thermometer in each cup and record their initial temperature.• Tape a 100 watt light bulb in the center of the bottom of an empty box. Run the cord through the
handle and plug it in.• Arrange the cups of colored water in a circle around the light bulb being sure they are equidistant
from the heat source.• Place the lid on the box.• • Observations:• For this experiment, we will stop and record observations every hour.

Heat of Color Experiment• Conclusions:• What were the results?• Which color water was hottest? Coldest? Do you know why? Was your hypothesis correct?• How is this experiment an example of radiation? (The light bulb radiated heat through the space of the box and heated the cups of colored water.)• • Ideas for Future Research:• If we were to do this experiment again, what would you do differently?• (Brainstorm many different ideas with students.)• Examples:• Try coloring milk instead of water.• Try using all paint instead of food coloring. Try larger or smaller amounts of water.• Try a larger box.• Try without a box - leave it open to the air. Etc.• • Variation:• Note: This experiment can also be done by placing thermometers in sleeves of colored paper which are placed outside to be heated by the sun. You
just have to be sure you can find a place outside that will not be disturbed and will be sunny all day.

Solar Cooker Experiment
• Introduction:• Can you cook food through conduction?• Yes, a pot or pan on the stove.• Can you cook food through convection?• Yes, a boiling pan of water.• Can you cook food through radiation?• Yes, cooking over an open fire OR a solar cooker!• We are going to build a solar cooker and use the sun’s energy to cook
ourselves a snack.

Solar Cooker Experiment
• Evaluation:• How did the solar cooker work? Was it successful? Why or why not?• What would you do differently next time? What design changes
would you make?• Have students record the experience in their “Heat Energy” book.

Solar Cooker Experiment
• Draw and label a picture showing how you created your solar cooker.
• Observations and Results:
• Did the food cook? Why or why not?
• This experiment is an example of which method of heat transfer? Explain.• Ideas for Future Research: