highlight alpha installation guide rev 1 · led status indicator lights window 2. 3 ... to clean...
TRANSCRIPT
I N S TA L L AT I O N G U I D E
HighLight ALPHA™

Contents
Introduction 4
Getting started ......................................................................................... 5
Before you begin ...................................................................................... 7
Installing the system 10
Stage 1: Unpacking the shipping crate ..................................................... 11
Stage 2: Connecting the LED light fixture to the light arm ........................... 13
Stage 3: Connecting the light arm to the pole tenon mount ........................ 16
Stage 4: Connecting the pole tenon mount to the solar engine ................... 18
Stage 5: Wiring the system ...................................................................... 20
Stage 6: Mounting the system on the pole ................................................ 21
Stage 7: Testing the installation ............................................................... 23
Maintaining the system 24
Wiring specifications 25
Introduction
In this section
Getting started .............................................................................5
Before you begin ..........................................................................7
Getting started
In this chapter
Who this manual is for ..................................................................5
System components overview ......................................................6
Who this manual is for
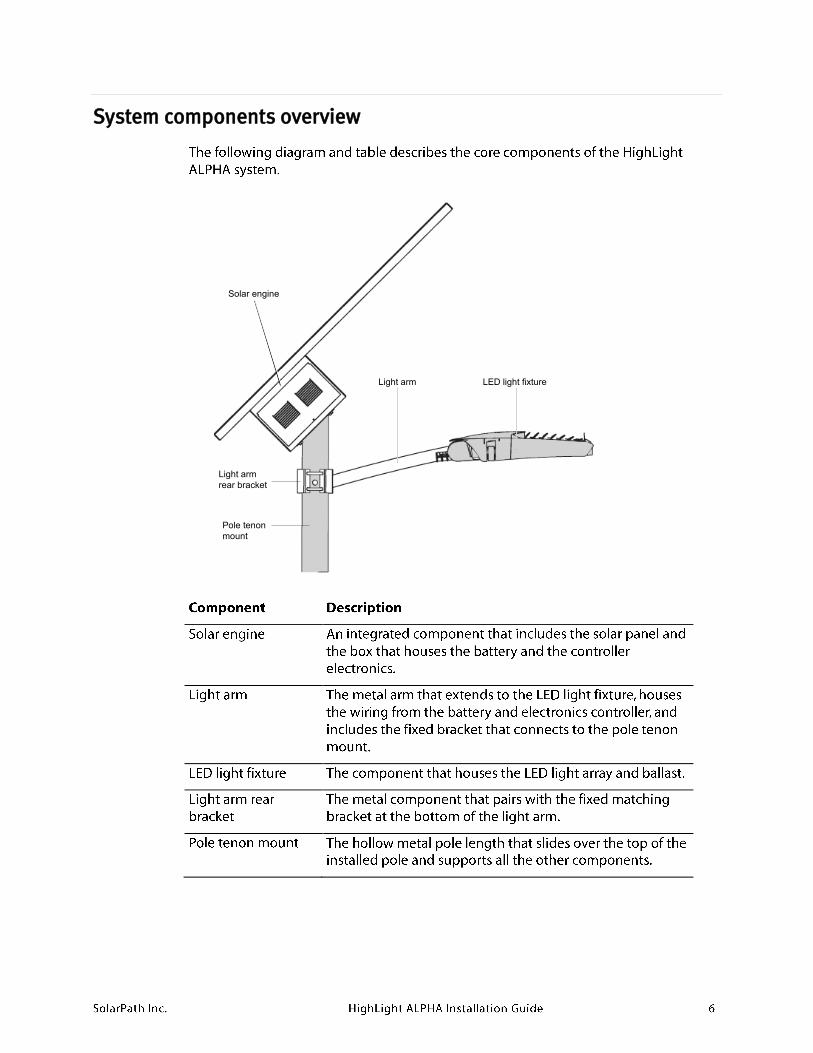
System components overview
Pole tenon
mount
Solar engine
LED light fixture
Light arm
rear bracket
Light arm
Before you begin
In this chapter
Required tools and equipment ......................................................7
Pole installation guidelines ..........................................................8
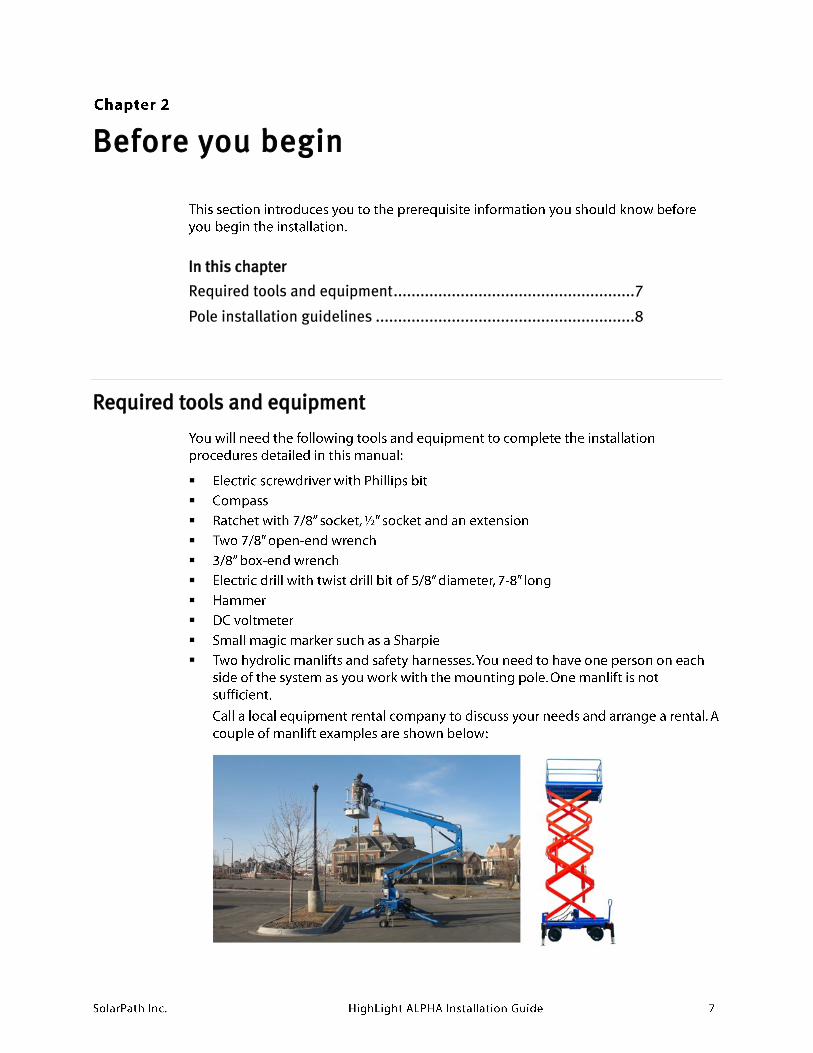
Required tools and equipment
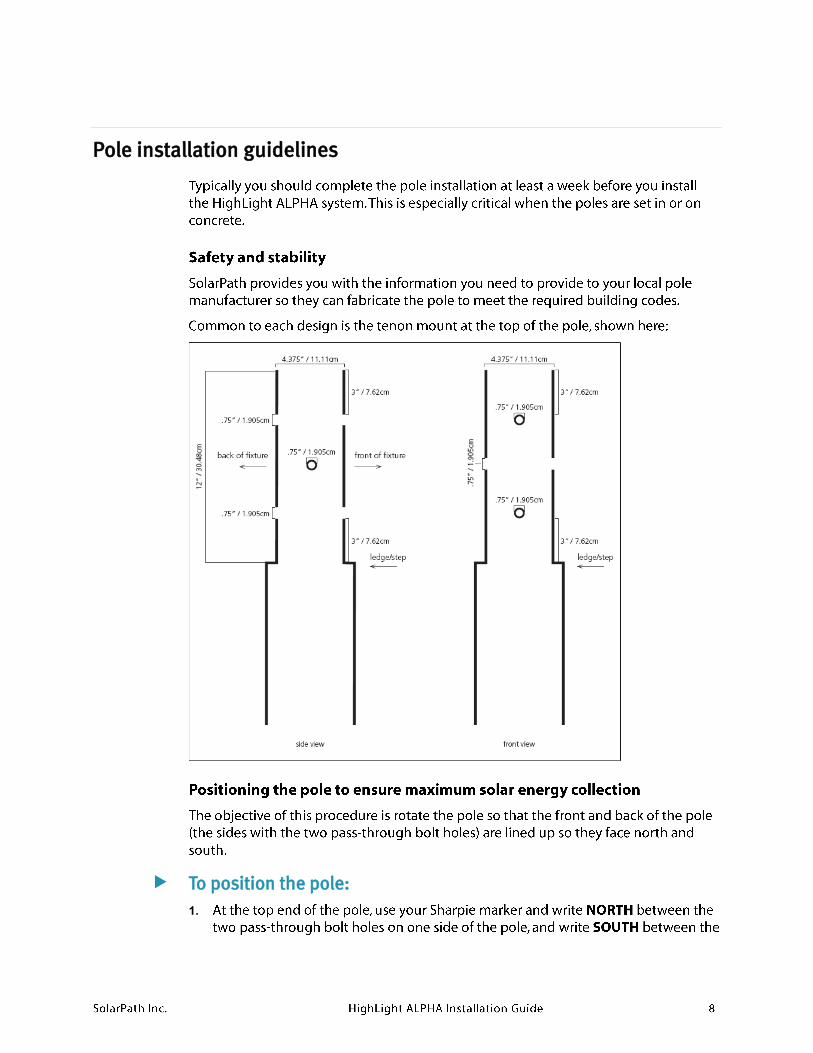
Pole installation guidelines
To position the pole:
1.

2.
3.
4.
Installing the system
In This Section
Stage 1: Unpacking the shipping crate ........................................11
Stage 2: Connecting the LED light fixture to the light arm.............13
Stage 3: Connecting the light arm to the pole tenon mount ..........16
Stage 4: Connecting the pole tenon mount to the solar engine .....18
Stage 5: Wiring the system .........................................................20
Stage 6: Mounting the system on the pole ..................................21
Stage 7: Testing the installation ..................................................23
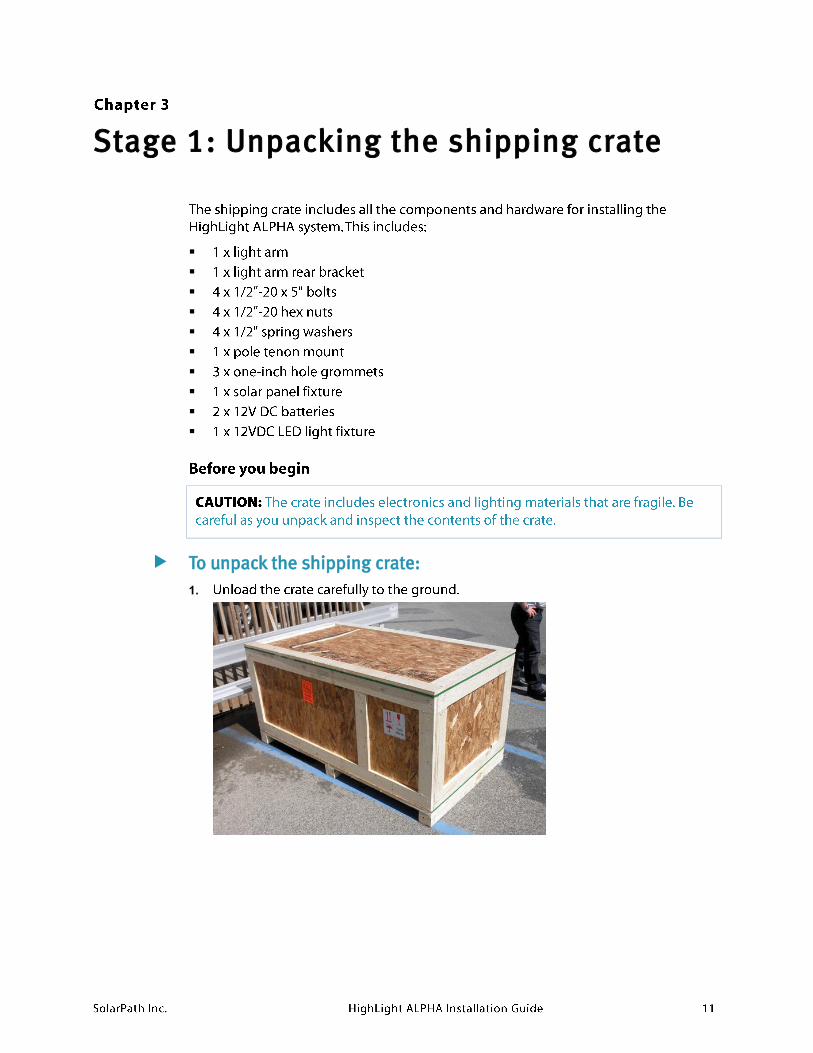
Stage 1: Unpacking the shipping crate
To unpack the shipping crate:
1.
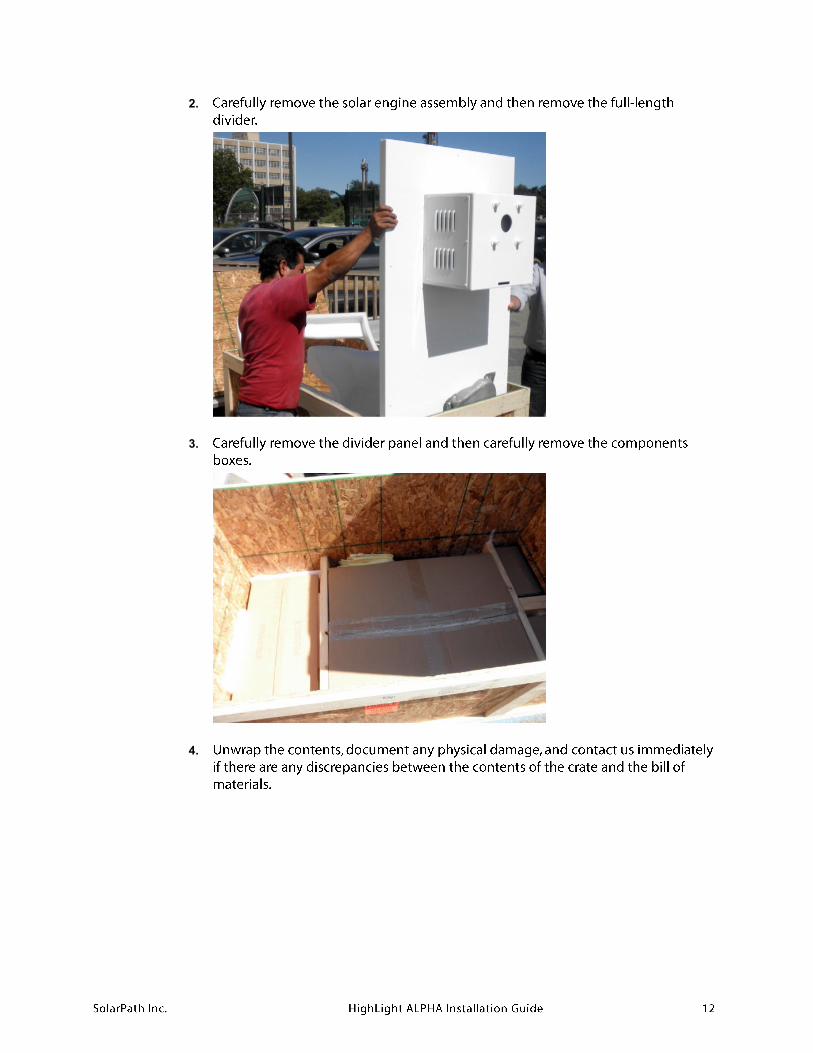
2.
3.
4.
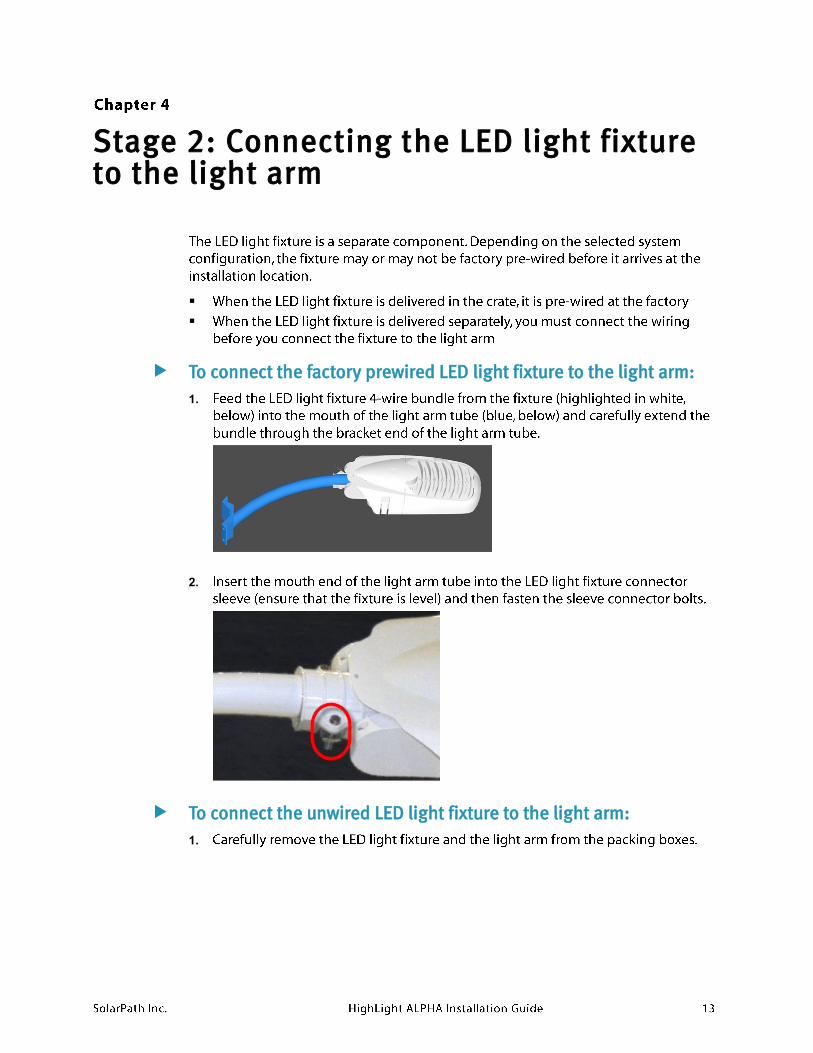
Stage 2: Connecting the LED light fixture to the light arm
To connect the factory prewired LED light fixture to the light arm:
1.
2.
To connect the unwired LED light fixture to the light arm:
1.
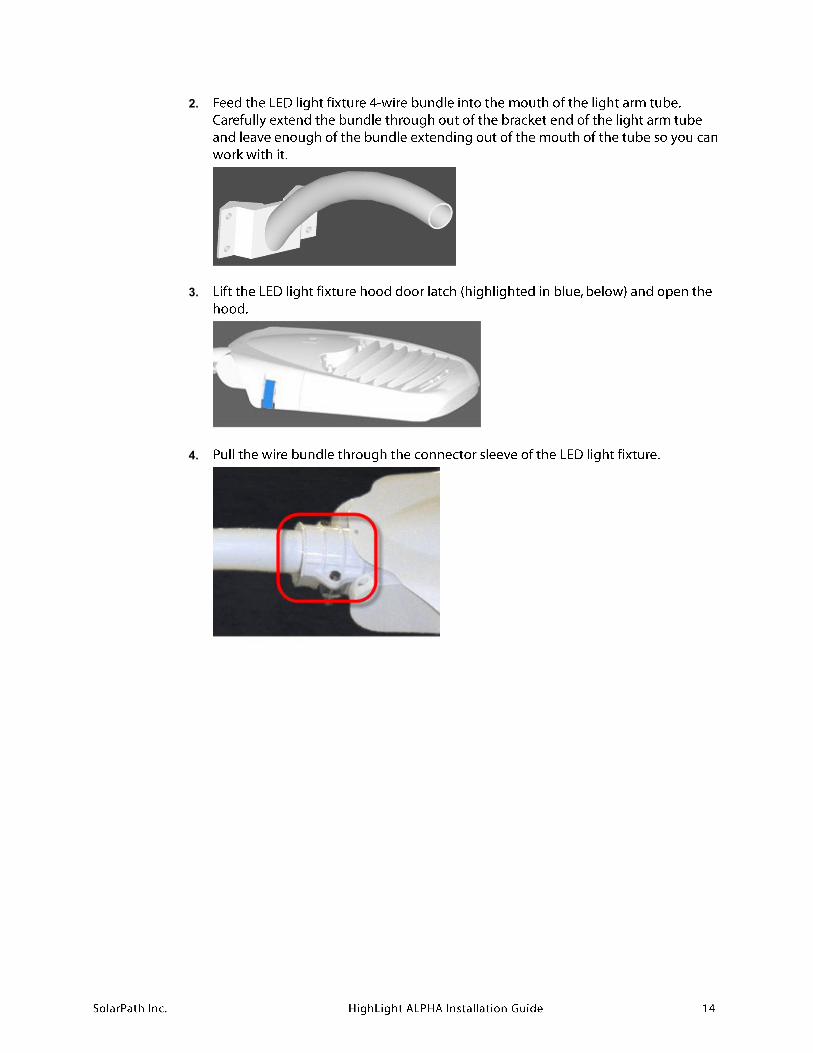
2.
3.
4.
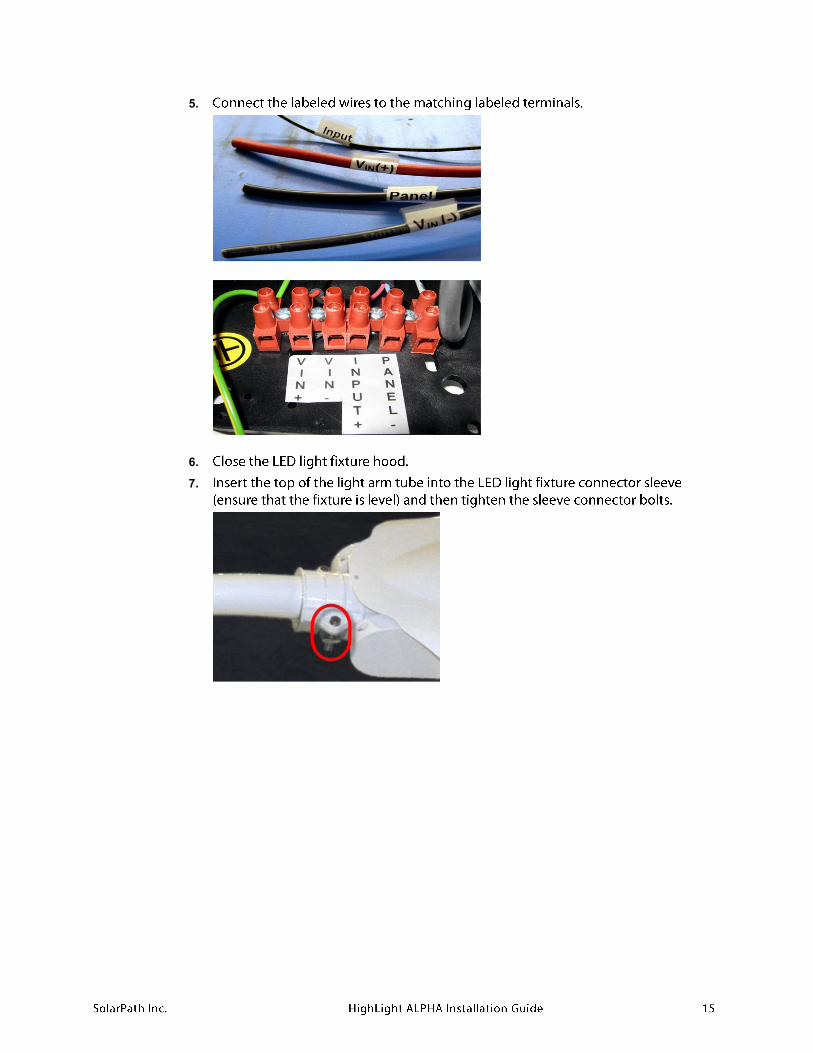
5.
6.
7.
Stage 3: Connecting the light arm to the pole tenon mount
To connect the light arm to the pole tenon mount:
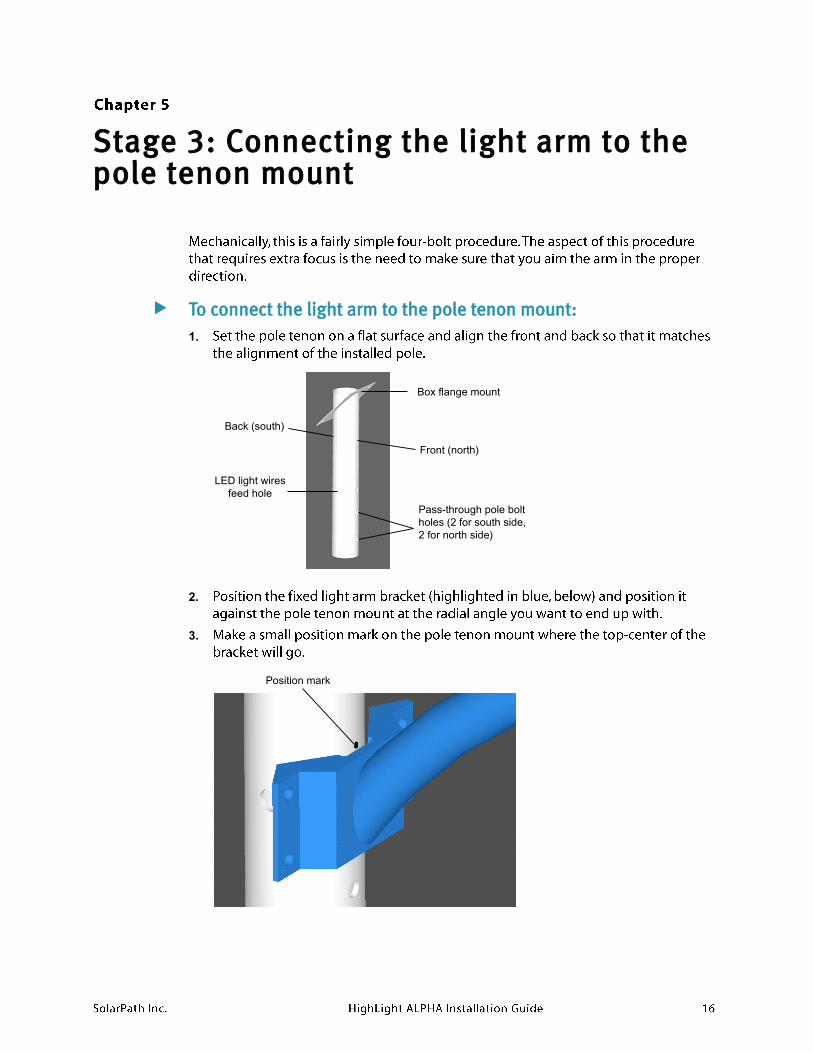
1.
Front (north)
Back (south)
Box flange mount
LED light wires
feed hole
Pass-through pole bolt
holes (2 for south side,
2 for north side)
2.
3.
Position mark
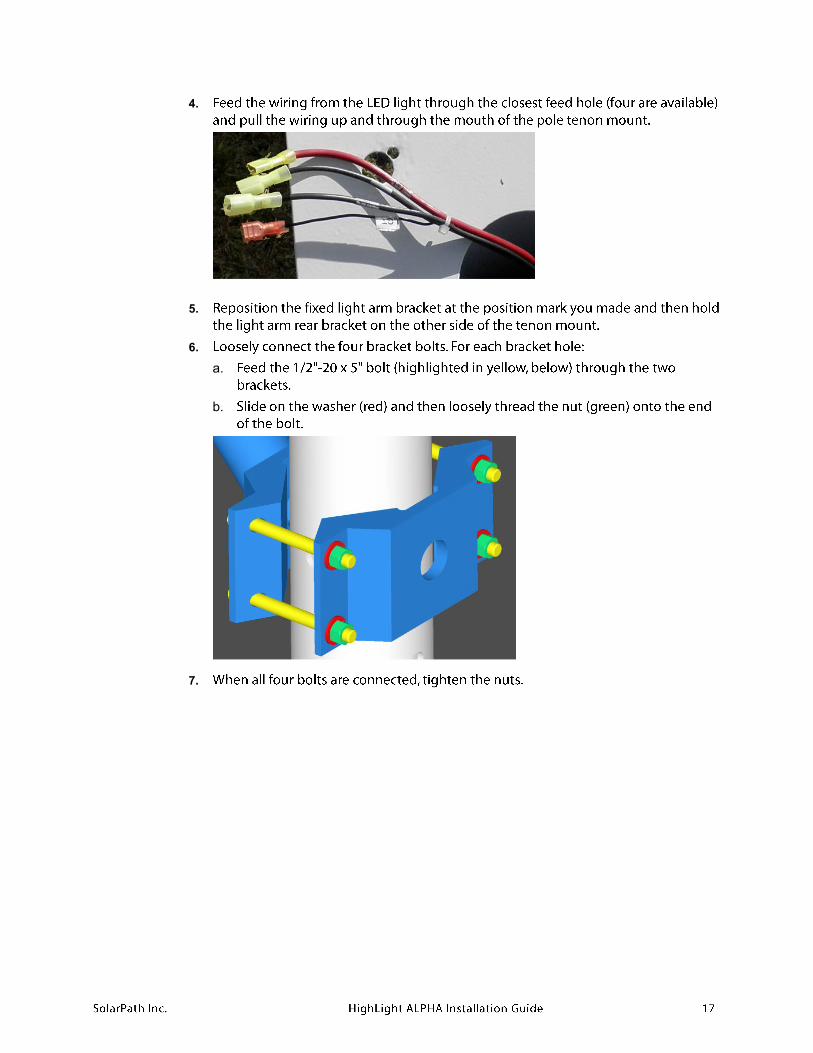
4.
5.
6.
a.
b.
7.
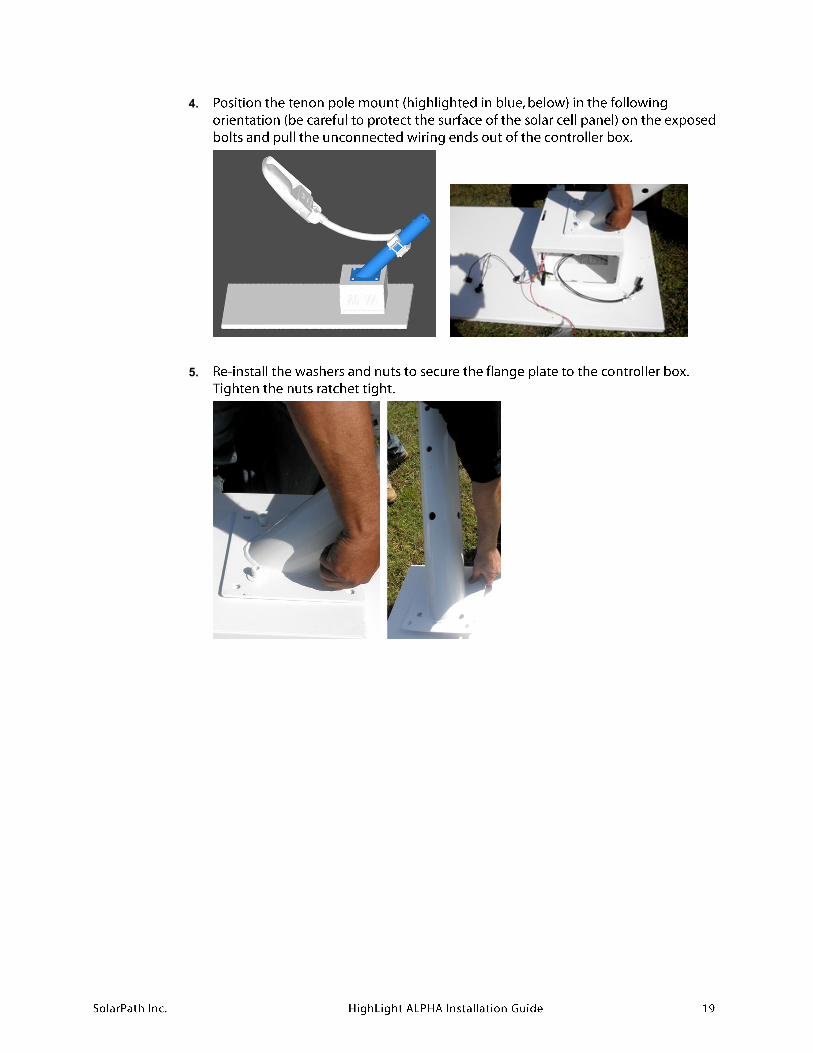
Stage 4: Connecting the pole tenon mount to the solar engine
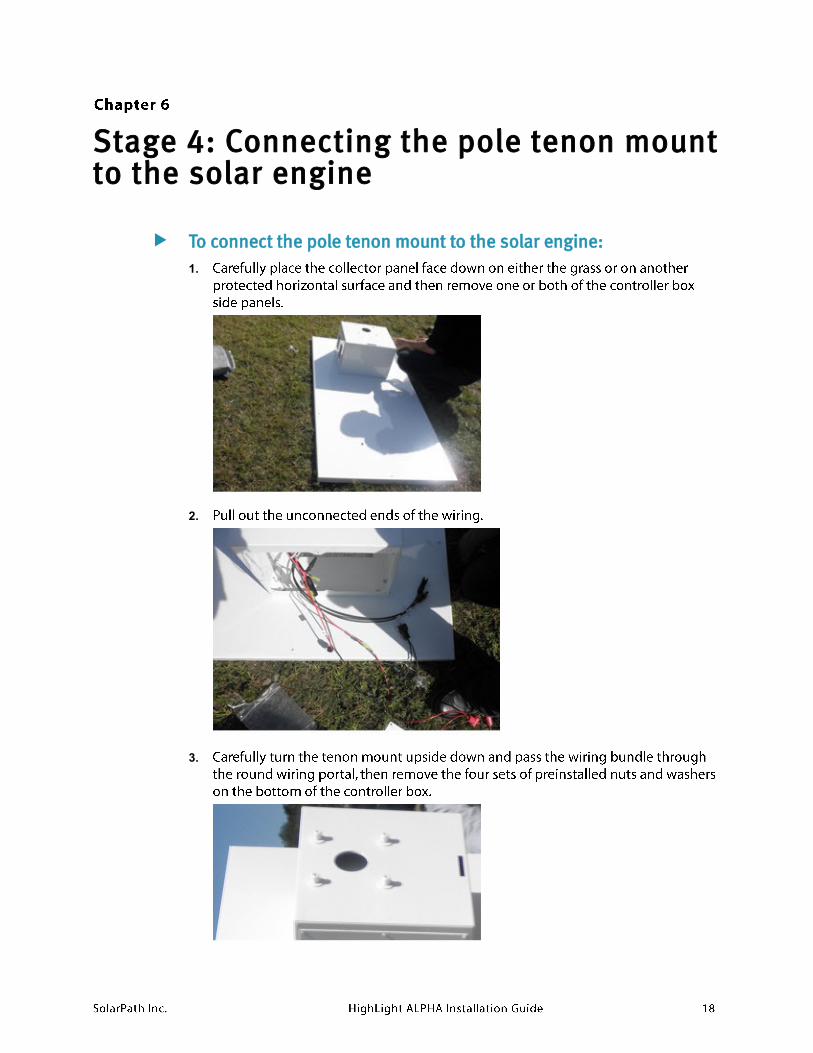
To connect the pole tenon mount to the solar engine:
1.
2.
3.
4.
5.
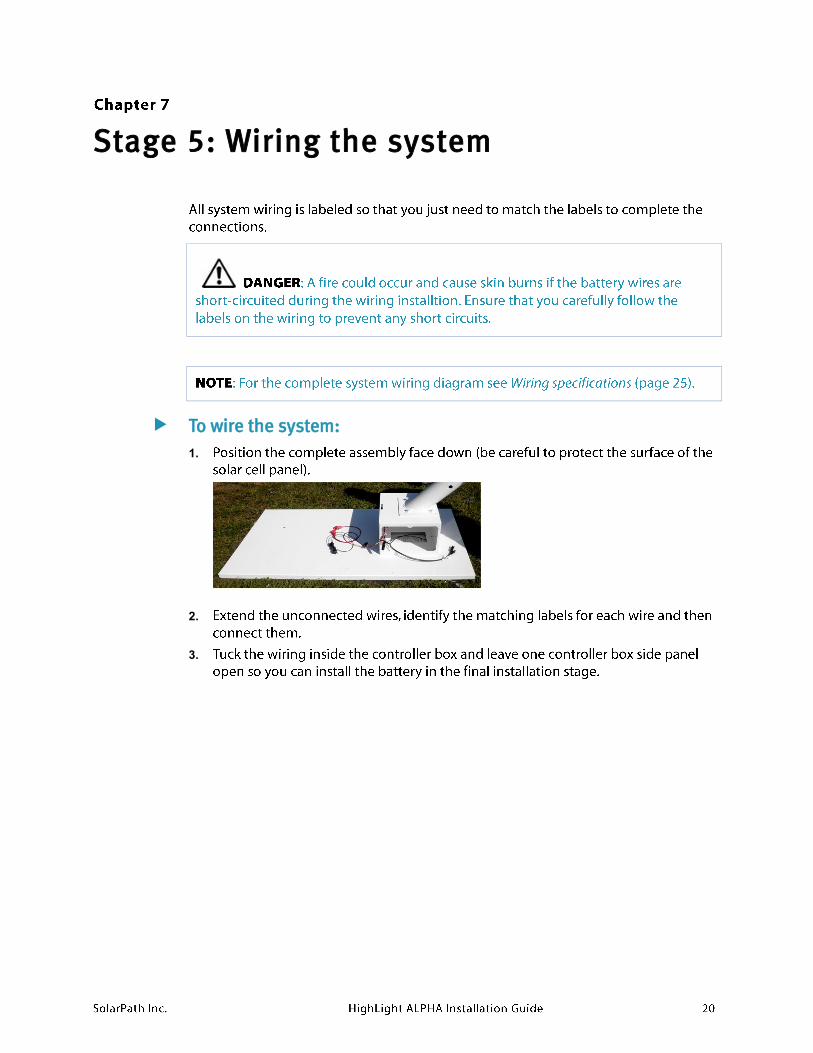
Stage 5: Wiring the system
To wire the system:
1.
2.
3.
Stage 6: Mounting the system on the pole
To mount the system on the pole:
1.
2.
3.
4.
5.
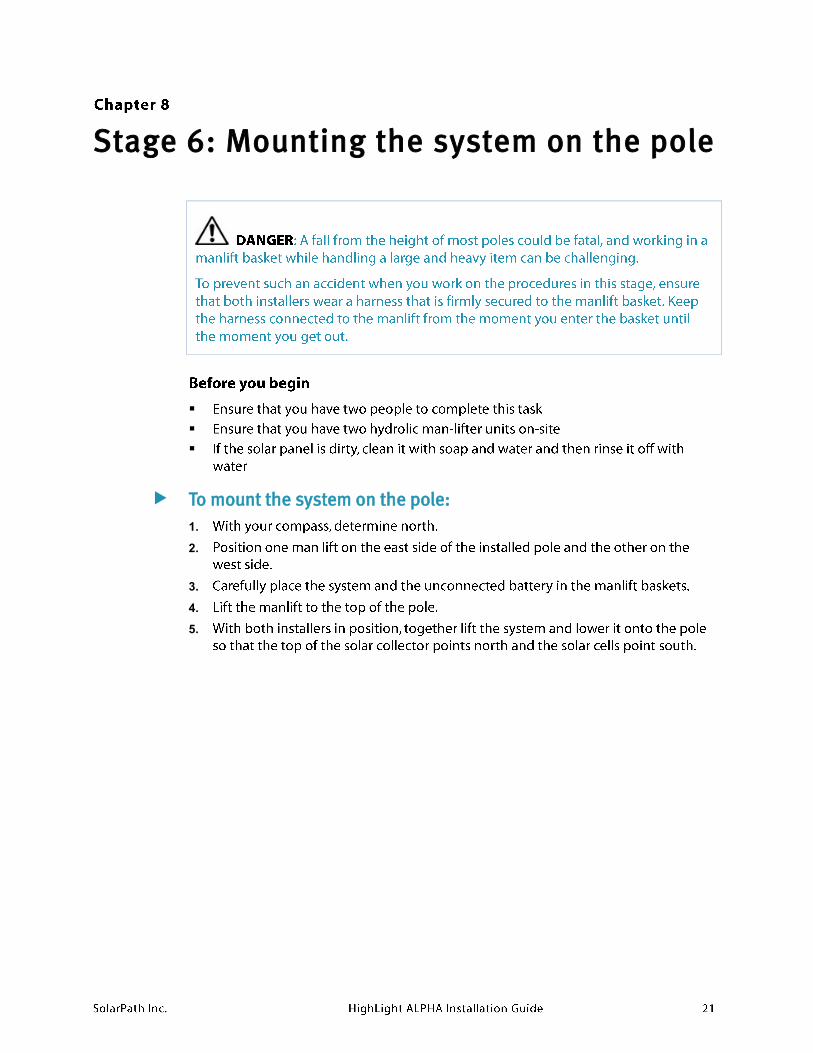
LED light fixture
aimed west
Solar engine
fixture aimed
south
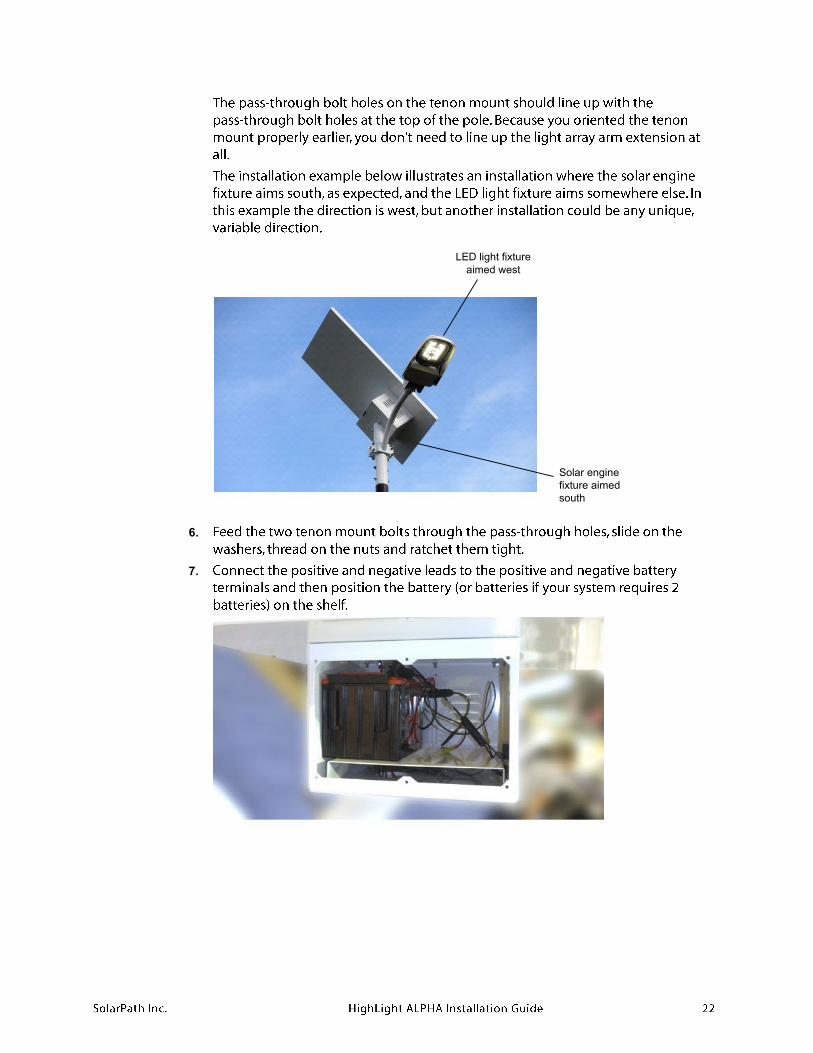
6.
7.
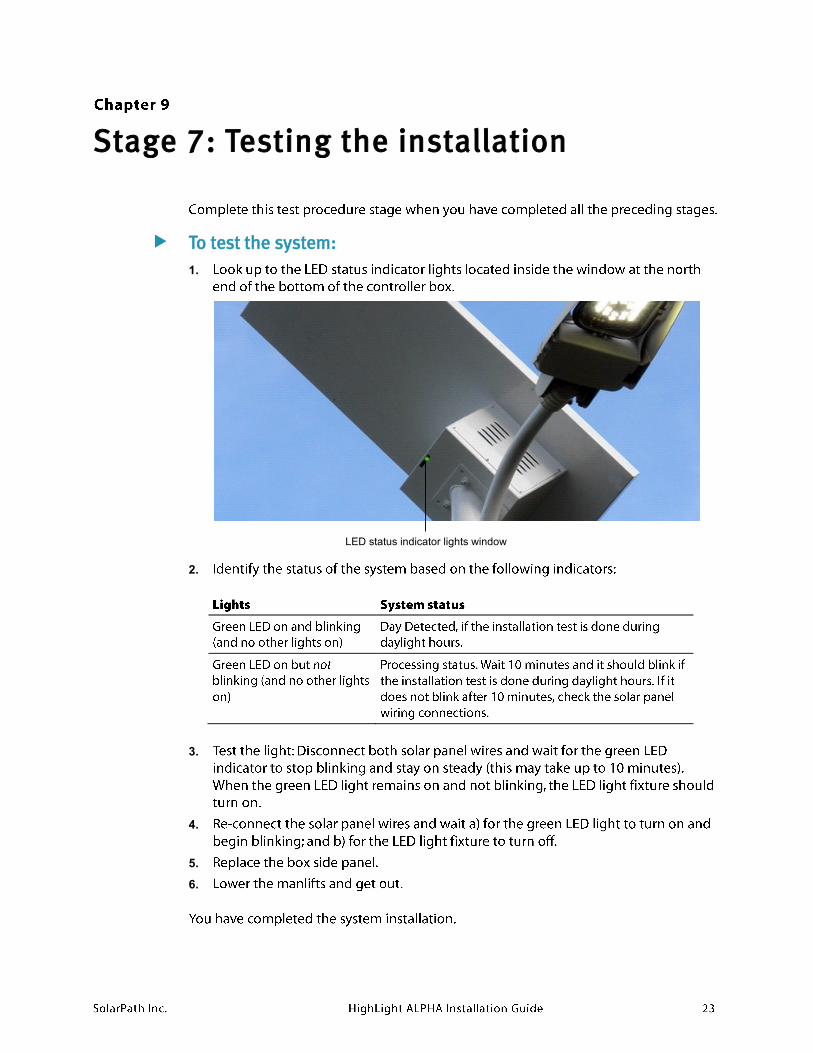
Stage 7: Testing the installation
To test the system:
1.
LED status indicator lights window
2.
3.
4.
5.
6.
Maintaining the system
To clean the solar collector:
1.
2.
3.
To replace the battery:
1.
2.
3.
4.
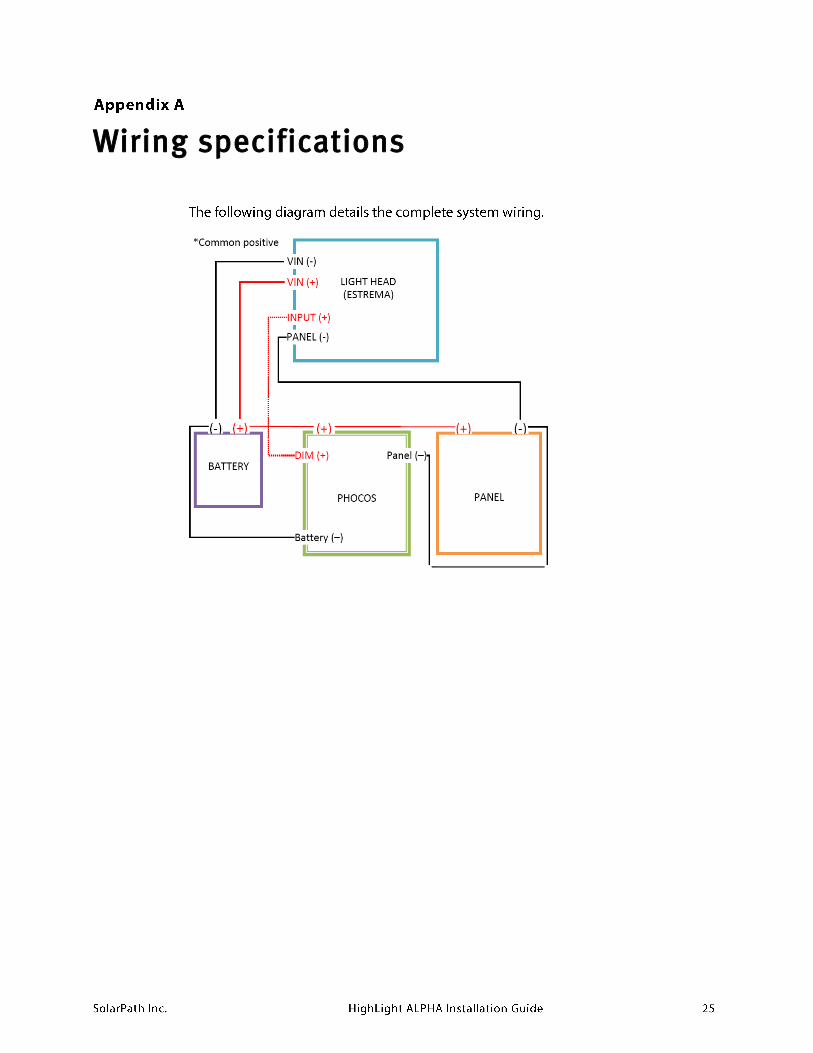
Wiring specifications