home appliances use and care - partselect€¦ · also, please complete and mail in the ownership...
TRANSCRIPT
Home Appliances
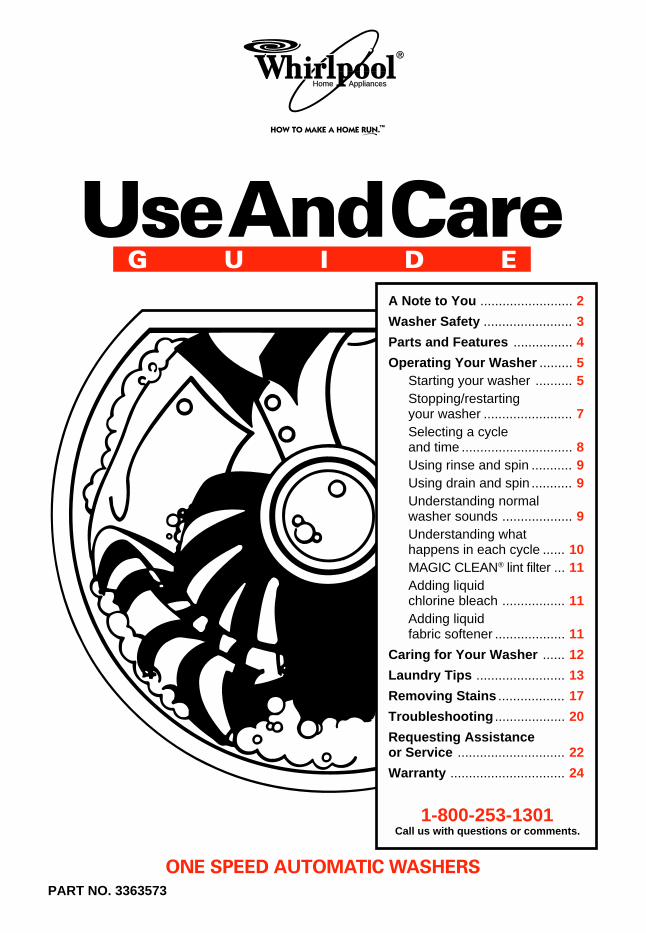
PART NO. 3363573
ONE SPEED AUTOMATIC WASHERS
Use And CareG U I D E
A Note to You ......................... 2
Washer Safety ........................ 3
Parts and Features ................ 4
Operating Your Washer ......... 5Starting your washer .......... 5Stopping/restartingyour washer ........................ 7Selecting a cycleand time .............................. 8Using rinse and spin ........... 9Using drain and spin ........... 9Understanding normalwasher sounds ................... 9Understanding whathappens in each cycle ...... 10MAGIC CLEAN® lint filter ... 11Adding liquidchlorine bleach ................. 11Adding liquidfabric softener ................... 11
Caring for Your Washer ...... 12
Laundry Tips ........................ 13
Removing Stains .................. 17
Troubleshooting ................... 20
Requesting Assistanceor Service ............................. 22
Warranty ............................... 24
1-800-253-1301Call us with questions or comments.

2
A Note to YouThank you for buying a WHIRLPOOL® appliance.Because your life is getting busier and more complicated, WHIRLPOOL washers are easyto use, save time, and help you manage your home better. To ensure that you enjoy yearsof trouble-free operation, we developed this Use and Care Guide. It contains valuable infor-mation about how to operate and maintain your washer properly and safely. Please read itcarefully.
Also, please complete and mail in the Ownership Registration Card provided with yourappliance. The card helps us notify you about any new information on your appliance.
Please record your model’s information.Whenever you call to request service onyour appliance, you need to know yourcomplete model number and serial number.You can find this information on the modeland serial number plate (see diagram onpage 4 for location of plate).
Please also record the purchase date ofyour appliance and your dealer’s name,address, and telephone number.
Keep this book and the sales slip together in a safe place for future reference.
Our Consumer Assistance Centernumber is toll-free.
Model Number _________________________
Serial Number _________________________
Purchase Date _________________________
Dealer Name __________________________
Dealer Address ________________________
Dealer Phone __________________________
1-800-253-1301

3
– SAVE THESE INSTRUCTIONS –
•Read all instructions before usingthe washer.
•Do not wash articles that havebeen previously cleaned in,washed in, soaked in, or spottedwith gasoline, dry-cleaningsolvents, other flammable, orexplosive substances as theygive off vapors that could igniteor explode.
•Do not add gasoline, dry-cleaningsolvents, or other flammable, orexplosive substances to the washwater. These substances giveoff vapors that could ignite orexplode.
•Under certain conditions, hydro-gen gas may be produced in ahot water system that has notbeen used for 2 weeks or more.HYDROGEN GAS IS EXPLO-SIVE. If the hot water system hasnot been used for such a period,before using a washing machine,turn on all hot water faucets andlet the water flow from each forseveral minutes. This will releaseany accumulated hydrogen gas.As the gas is flammable, do notsmoke or use an open flameduring this time.
•Do not allow children to play onor in the washer. Close supervi-sion of children is necessarywhen the washer is used nearchildren.
•Before the washer is removedfrom service or discarded, re-move the door.
•Do not reach into the washer ifthe tub or agitator is moving.
•Do not install or store the washerwhere it will be exposed to theweather.
•Do not tamper with controls.•Do not repair or replace any partof the washer or attempt anyservicing unless specificallyrecommended in this Use andCare Guide or in publisheduser-repair instructions that youunderstand and have the skills tocarry out.
•See Installation Instructions forgrounding requirements.
Washer SafetyYour safety is important to us.This guide contains safety statementsunder warning symbols. Please pay specialattention to these symbols and follow anyinstructions given. Here is a brief explana-tion of the symbol.
IMPORTANT SAFETY INSTRUCTIONSWARNING – To reduce the risk of fire, electric shock, or injury topersons when using the washer, follow basic precautions, includingthe following:
This symbol alerts you tohazards such as fire,electrical shock, orother injuries.

4
Extra RinseExcept Hand WashablesExcept Hand Washables
OnOff
Temperature
Load Size
7 Cycle - 1 Speed 7 Cycle - 1 Speed
Heavy Duty • Large Capacity Heavy Duty • Large Capacity
WashWashRinseRinse
WarmWarm
WarmCold
HotColdExtraExtra
LargeLarge
LargeLarge
SmallSmall
MediumMedium ColdCold Pull StartPull Start
Push StopPush Stop
PermanentPress
NormalNormal
Pre - Wash
Soak
Regular
LightLightNormalNormal
Heavy
Short
Spin
SpinSpin
SpinSpin Off
OOffff
OOffff
OOffff
Rinse
Rinse
CoolDown
Rinse
Soak
PausePause
8
1212
66
44
20208
4
Parts and FeaturesThe parts and features of your washer are illustrated on this page. Become familiar with allparts and features before using your washer.
NOTES:• The drawings in this book may vary from your washer model. They are designed to
show the different features of all models covered by this book. Your model may notinclude all features.
• Page references are included next to some features. Refer to those pages for moreinformation about the features.
Cycle control knob(pp. 7-9)
Model and serialnumber plate
(under lid)(p. 2)
Basket
Tub
Load sizeselector(p. 6)
Water temperatureselector(p. 7)

5
Operating Your WasherTo obtain the best washing results, you must operate your washer properly. This sectiongives you this important information. Page references are included for more information.
Starting your washer1. Add measured detergent to the
washer. Then place a sorted load ofclothes in the washer.• Sort and load clothes as described on
pages 13 and 14.• If desired, you may also add color safe
bleach to the wash load.2. Close the washer lid.
wWARNING
Explosion HazardNever place items in the washer thatare dampened with gasoline or otherflammable fluids.Do not wash or dry items soiled withvegetable or cooking oils becausethey may contain some oil afterlaundering.Doing so can result in death,explosion, or fire.
wWARNING
Electrical Shock HazardPlug into a grounded 3 prong outlet.Do not remove ground prong.Do not use an adapter.Failure to follow these instructionscan result in death, fire, or electricalshock.
continued on next page

6
3. Turn the Load Size Selector to thesetting that corresponds with the sizeof your wash load and the type offabric being washed.• Depending on your model, your
washer’s Load Size Selector has two,three, or four settings (see illustrations).
• To change the load size setting afterthe washer has started to fill, turn theSelector to the desired new setting.
OPERATING YOUR WASHER
Load Size
Small LargeMedium
OR
Small Large
Load Size
Load Size
Small ExtraLarge
Medium Large
OR

7
Temperature
ColdCold
HotCold
WashRinse
WarmCold
4. Select a wash-rinse temperature withthe Water Temperature Selector. Matchthe water temperatures with the typeof fabric and soils being washed.• See page 15 for water temperature
guidelines.• Depending on your model, your
washer’s Water Temperature Selectorhas either three or four settings (seeillustrations).
• The top temperature is the wash waterand the bottom temperature is therinse water.
5. Push in the Cycle Control Knob andturn it clockwise to the wash cycle youwant. See pages 8 and 9.
6. Pull out Cycle Control Knob to startthe washer.
7. (OPTIONAL STEP) If desired, add mea-sured liquid chlorine bleach after thewasher starts agitating. See page 11.
8. (OPTIONAL STEP) If desired, add mea-sured and diluted liquid fabric softenerto the final rinse cycle. See page 11.
Stopping/restarting your washer• To stop the washer at any time, push in
the Cycle Control Knob.• To restart the washer, close the lid (if open)
and pull out the Cycle Control Knob.
OR
Temperature
HotCold
ColdCold
WashRinse
WarmWarm
WarmCold
OPERATING YOUR WASHER

8
Selecting a cycle and timeThis section illustrates and describes thewash cycles you can select with the CycleControl Knob. Use this information to helpyou make the best cycle selections for yourwash loads. Each cycle is designed fordifferent types of fabrics and soil levels.
Normal CycleThe Normal cycle features longer spins to
shorten drying time.Use this cycle forcleaning cotton andlinen fabrics. Select 6(Regular) or 12(Heavy) minutes ofwash time, dependingon whether your load
is moderately or heavily soiled.
Permanent Press CycleThe Permanent Press cycle features a
cool-down rinse andshorter spins toreduce wrinkling. Usethis cycle for cleaningpermanent press andsome synthetic fabrics.Select 4 (Light) or 8(Regular) minutes of
wash time, depending on whether your washload is lightly or moderately soiled.
Short CycleThe Short cycle features brief wash and
soak periods, followedby shorter spins. Usethis 8-minute cycle toclean delicate itemsand washable knitsthat are lightly ormoderately soiled.
• The washer pauses briefly throughout eachcycle. These pauses are normal for washeroperation.
• Refer to page 9 to learn more about thesounds you may hear during a wash cycle.
• Refer to page 10 to help you understandwhat happens during a wash cycle.
OPERATING YOUR WASHER
Normal
Regular
Heavy
SpinRinse
6
12
Off
PermanentPress8
CoolDown
Pause
OffSpin
Rinse
Regular
Light
4
Soak CycleThe Soak cycle features brief periods of agi-
tation and soak timeto help remove heavysoils and stains thatneed pretreatment.• Use warm waterwhen soakinglaundry. Hot watercan set stains. See
pages 17-19 for stain removal information.• Use the amount of detergent or presoak
additive recommended by the manufacturer.• After the Soak cycle ends, add detergent
and set a new wash cycle.
Pre-Wash CycleThe 4-minute Pre-Wash cycle features a
brief period of agi-tation to help removeheavy soils andstains that needpretreatment. Seepages 17-19 forstain removal infor-mation. Once the
Pre-Wash cycle ends, add detergent andstart a new wash cycle.
Soak 20
Off
ShortSpinRinse
Soak
8
Off
Soak
Pre-Wash4
20
Off

9
Using rinse and spinWhen using extra detergent for heavily soiledclothes, or washing special-care items, youmay find an extra rinse and spin is needed.1. For an additional rinse, push in the Cycle
Control Knob and turn clockwise to Rinse,as illustrated.
2. Pull out the Cycle Control Knob. Thewasher fills to selected load size,agitates, drains, and spins.
Using drain and spinA drain and spin may help shorten dryingtimes for some heavy fabrics or special-careitems by removing excess water.1. Push in the Cycle Control Knob and turn
clockwise to Spin, as illustrated.2. Pull out the Cycle Control Knob. The
washer drains, then spins.
Understanding normal washer soundsYour new washer may make sounds thatyour old one didn’t. Because the sounds areunfamiliar, you may be concerned aboutthem. Don’t be; most of them are normal.
The following describes some of the soundsyou may hear and what causes them.
During washingWhen you select a small load size settingfor a small wash load, the water level in yourwasher is lower. With this lower water level,you may hear a clicking sound from theupper portion of the agitator.
OPERATING YOUR WASHER
8
Spin
Spin
Spin
Regular
Heavy
Soak4
20
6
8
12
CoolDown
Pause
Pull StartPush Stop
Regular
Light
4
PermanentPressNormal
Short
Pre-Wash
Rinse
Rinse
Off
Off
Off
Off
Rinse
Soak
Rinse
Rinse
Rinse
8
Regular
Heavy
Soak4
20
6
8
12
CoolDown
Pause
Pull StartPush Stop
Regular
Light
4
PermanentPressNormal
Short
Pre-Wash
Off
Off
Off
Off
Spin
Spin
Spin
Soak
During drainThe rate that water is drained from yourwasher depends on your installation. If wateris drained quickly from the washer, you mayhear air being pulled through the pump. Thishappens during the end of draining.
After drain and before spinWhen the cycle changes from draining tospinning, you may hear gears engaging.

10
Fill▼
Rinse▼
Drain-No agitation▼
Spin-Spray rinse▼
Spin▼
Off
Fill▼
Wash selected time▼
Drain*No agitation
▼
Spin▼
Understanding what happens in each cycleWhen the Cycle Control Knob is set to anumber and pulled out, the washer fills (tothe selected load size) before agitation andtiming start. The washer begins agitatingimmediately after filling; agitation occurs withthe washer lid up or down.
During agitation, the agitator creates acontinuous rollover actionthat provides a thoroughcleaning of the wash load.
After agitation starts, the Cycle Control Knobturns clockwise until it points to an OFF areaand the cycle ends.
The washer pauses briefly throughouteach cycle. These pauses are normal forwasher operation.
*The Permanent Press cycle partiallydrains, fills, agitates briefly, and drains.
WASH RINSE
OPERATING YOUR WASHER

11
MAGIC CLEAN® lint filterThe lint filter at the bottom of the washerbasket cleans itself. During agitation, washand rinse water passes over the filter,separating the lint from the water. The lint isthen spun away from the filter and out of thesystem during the spin part of the cycle.
If your washer drains into a tub, removeany lint collected in the tub or strainer.
Adding liquid chlorine bleachAlways measure liquid chlorine bleach. Donot guess. Never use more than 1 cup(250 mL) for a full load. Follow manu-facturer’s directions for safe use. Use a cupwith a pouring spout to avoid spilling.1. Let the washer fill and begin agitating
the load.2. Add bleach to wash cycle so it can be
removed in the rinse cycle. Pour bleacharound agitator, not directly on load.• Follow directions on care labels. Do not
use chlorine bleach on wool, silk,spandex, acetates, or some flame-retardant fabrics.
• When soaking with chlorine bleach, adddetergent to soak water.
Adding liquid fabric softener• Always dilute fabric softener with 1⁄2 to
1 cup (125 to 250 mL) warm water.Undiluted fabric softener can stain fabrics.
• Add diluted fabric softener only in thefinal rinse.
• Fabric softener should not be mixed withother laundry products because greasystains may form. If stains form, removethem by wetting the stain and rubbing withliquid detergent or a bar of soap. Rewashthe stained item.
• Too much fabric softener can make someitems (diapers and towels) nonabsorbent.If this happens, use less fabric softener ordo not use it every time.
MAGIC CLEANlint filter
Basketinterior
NOTE: Undiluted bleach will damage anyfabric it touches. The damage appears asrips, holes, tears, or color loss and may notshow up until several washings later.
OPERATING YOUR WASHER

12
Caring for Your WasherProper care of your washer can extend its life. This section explains how to care for yourwasher properly and safely.
Cleaning your washerExteriorWipe up detergent, bleach, and other spills
with a soft, damp cloth orsponge as they occur. Occa-sionally wipe the outside ofthe washer to keep it lookinglike new.
Do not put sharp or metal objects in yourwasher. They can damage thefinish. Check all pockets forpins, clips, money, bolts, nuts,etc. Do not lay these objectson your washer after emptyingpockets.
Winter storage or moving careInstall and store your washer where it will not freeze. Because some water may stay in thehoses, freezing can damage your washer. If storing or moving your washer during freezingweather, winterize it.
To winterize washer:1. Shut off both water faucets.2. Disconnect and drain water inlet hoses.3. Put 1 quart (1L) of R.V.-type antifreeze in
the basket.4. Run washer on a drain and spin setting
(see page 9) for about 30 seconds to mixthe antifreeze and water.
5. Unplug the power supply cord.
Non-use or vacation careOperate your washer only when you are athome. If you will be on vacation or not usingyour washer for an extended period of time,you should:• Unplug the power supply cord or turn off
electrical power to the washer.
To use washer again:1. Flush water pipes and hoses.2. Reconnect water inlet hoses.3. Turn on both water faucets.4. Reconnect power supply cord.5. Run the washer through a complete cycle
with 1 cup (250 mL) of detergent to cleanout antifreeze.
• Turn off the water supply to the washer.This helps avoid accidental flooding(due to a water pressure surge) whileyou are away.
InteriorClean interior with 1 cup (250 mL) of chlo-rine bleach mixed with 2 cups (500 mL) ofdetergent. Run washer through a completecycle using hot water. Repeat process ifnecessary.
NOTE: Remove hard water deposits usingonly cleaners labeled as washer safe.

13
• Separate dark colors from light colors,colorfast items from noncolorfast items.
• Sort by fabric and construction (sturdycottons, knits, delicate items).
• Tie strings and sashes so they will nottangle.
• Mend tears, loose hems, and seams.• Treat spots and stains. (See “Removing
Stains” on pages 17-19.)• Stained or wet garments should be
washed promptly for best results.
• Load by the amount of space items takeup, not by their weight.
• Mix large and small items in each load.Load evenly to maintainwasher balance. An off-balance load can make thewasher vibrate during spin.
• Use a large load size setting to reducewrinkling with permanent press clothes andsome synthetic knits. These items shouldhave more room to move in the water thanheavy items (towels, jeans).
• Reduce wash time when using a smallload size setting. Loads with only a fewsmall items need less wash time.
Laundry TipsThis section reviews proper laundering techniques and gives you additional washinginformation.
Preparing clothes for washing• Close zippers, snaps, and hooks to avoid
snagging other items. Removepins, buckles, and other hardobjects to avoid scratching thewasher interior. Remove non-washable trim and ornaments.
• Empty pockets and turn them inside out.• Turn down cuffs, brush away lint and dirt.• Turn synthetic knits inside out to avoid pilling.
Sorting• Separate heavily soiled items from lightly
soiled ones, even if they wouldnormally be washed together.Separate lint givers (towels,chenille) from lint takers(corduroy, synthetics, perma-
nent press). When possible, turn lint giversinside out.
Loading• Drop items into washer loosely. Fill to the
top of the basket (top row ofholes). Do not wrap itemsaround the agitator. Itemsshould move easily throughwash water for best cleaning
and wrinkle-free results. Items should sinkand reappear later.
• Load washer properly and select correctload size setting. Overloading or packingthe machine, and selecting a setting toosmall for the wash load can:– cause poor cleaning.– increase wrinkling.– create excessive lint.– wear out items faster (because of pilling).

14
Towels8 bath towels8 hand towels10 wash cloths1 bath mat
Delicates2 camisoles4 slips4 panties2 bras2 nighties
Towels10 bath towels10 hand towels14 wash cloths1 bath mat
Delicates3 camisoles1 quilted robe4 slips4 panties2 bras2 nighties1 baby’s dress
Mixed Load2 double or
1 king size sheet(s)4 pillowcases6 T-shirts6 pair shorts2 shirts2 blouses6 handkerchiefs
Mixed Load3 double sheets4 pillowcases8 T-shirts6 pair shorts2 shirts2 blouses8 handkerchiefs
Permanent Press1 double sheet1 tablecloth1 dress1 blouse2 slacks3 shirts2 pillowcases
Permanent Press2 double or
1 king size sheet(s)1 tablecloth1 dress1 blouse2 slacks3 shirts2 pillowcases
Heavy WorkClothes2 pair pants3 shirts3 pair jeans1 coverall
Knits2 slacks2 blouses4 shirts4 tops2 dresses
Heavy WorkClothes3 pair pants3 shirts4 pair jeans1 coverall1 overall
Knits3 slacks3 blouses6 shirts4 tops4 dresses
Loading suggestions
For these suggested full-sized loads, set the Load Size Selector to the highest load sizesetting.
LARGE CAPACITY WASHERS
SUPER CAPACITY WASHERS
Saving energy• Use warm or cold wash water for most
loads. Use hot water only when washingheavy, greasy soils or whites.
• On some models, use only cold rinses.• Wash full loads.• Use lower water levels when washing
small loads.
• Avoid rewashing. Use enough detergentand pretreat stains or heavy soils. Use thecycles and wash times recommended forthe fabric and soil.
• Use your washer during off-peak hours –usually early morning and late evening.(Ask your power company.)
LAUNDRY TIPS

15
LAUNDRY TIPS
SUGGESTED FABRICS
• Work clothes• Sturdy whites/colorfast
pastels• Diapers
• Dark/noncolorfast colors• Permanent press items• Nylon, polyester, acrylics,
silks, woolens• Knits/delicate fabrics
• Extra-sensitive colors• Noncolorfast items• Hand washables
COMMENTS
• Best cleaning for heavily soiled items• Removes oils, perspiration, greasy
soils, and stains• Prevents graying or yellowing
• Best for moderately soiled to lightlysoiled items
• Safe for most fabric finishes• Less fading and dye bleeding• Reduces wrinkling
• Best for very lightly soiled items• Saves hot water• Best rinse water temperature
WASH WATERTEMPERATURE*
HOT130°F (54°C)or above
WARM90-110°F(32-44°C)
COLD70-90°F(21-32°C)
Water guidelinesSelecting water temperatures
* The washer features cold rinses for all wash temperatures. In addition, on some models,warm rinses are available with warm washes. Warm rinse water provides better waterextraction than cold rinse water and shortens drying times. However, warm rinse water mayincrease wrinkling when line drying. In cold climates, warm rinse water also provides a morecomfortable temperature for handling the wash load.
Checking hot watertemperatureYour hot water should be 130°F (54°C) orabove. If you do not know your hot watertemperature, you can check it easily. Youmay need to raise the temperature of yourwater heater. To check your hot water:1. Fill a pan with the hottest water available
from the faucet that fills your washer.NOTE: If you do not have a faucet at yourwasher site, collect the water from thefaucet closest to your washer.
2. Place a candy thermometer or cookingthermometer in the water to check thetemperature.
NOTE: In wash water temperatures colderthan 70°F (21°C), detergents do not dissolvewell. Also, soils may be difficult to remove,and some fabrics may retain wear wrinklesand may have increased pilling.
Water hardnessMany poor washing results can be traced tothe hardness of the wash water. To checkyour water hardness:• City water – ask the city water company.• Well water – ask the local water authority.
Ask for the mineral content in grains/gallonor parts/million. If your water is more than8 grains/gallon or more than 137 parts/million, you should consider:• Installing a water softener.• Using more detergent.• Using a packaged water conditioner.• Not using soap.

16
Washing special-care itemsMost garments and household textiles have care labels with laundering instructions. Alwaysfollow care label directions when they are available. Below are general washing instruc-tions for some special washables.
ITEM
Blankets(electric or woolen)
Curtains, drapes,slipcovers
Diapers
Elastic, spandex
Flame-retardantclothing
Knits
Pillows, stuffedtoys
Plastic, rubberitems
Quilts, bedspreads
Scatter rugs
Snowsuits, jackets
CARE INSTRUCTIONS
Pretreat spots and stains. Select water temperature, cycle, andtime according to the type of blanket being washed. Two rinsesmay be necessary. Check care label to see if manufacturerrecommends machine washing.
Wash small loads. Crowding may cause wrinkling. Replaceslipcovers while still slightly damp. They will dry to fit tightly.
NOTE: Sun-damaged curtains and draperies will tear whetherhand or machine washed.
When using chlorine bleach for soaking, add extra detergent tothe load. Avoid overuse of fabric softeners – absorbency will bereduced.
Elastic picks up oil from the body. Oil can damage elastic. Washoften to reduce the damage. Use warm water and sufficientdetergent to remove oils. Do not use chlorine bleach.
Items will be clearly labeled as flame-retardant. Followmanufacturer’s instructions to retain flame-retardant qualities.
Knits are comfortable to wear because they stretch. However,this means that knits are more likely to be stretched and dam-aged when washed (especially bulky knits). Knits made ofsynthetic fabrics such as polyester, nylon, and acrylic tend tokeep their original shape more than knits made of cottonor ramie.
Washing feather pillows is not recommended unless they will bedried in a dryer.
Treat as delicate items. Wash in warm water. Wash small itemsin a mesh bag.
Do not wash cotton-filled comforters unless they are quilted orstitched. Tucked cotton batting tends to slip and become lumpy.An extra rinse may be necessary.
Shake or vacuum rugs to remove loose dirt. Wash more than onerug at a time. If washing only one rug, add bath towels to balancethe load.
Wash only one or two items at a time. You may need to stop thewasher occasionally to press air from the items being washed. Anextra rinse may be necessary.
LAUNDRY TIPS

17
• When bleach is recommended, use ableach that is safe for the fabric.
• Test stain removers on an inside seam orhidden corner of the item to see if the coloris removed.
• Put the stained area face down on a papertowel or white cloth. Apply the stainremover to the back of the stain. Thisforces the stain off the fabric instead ofthrough it.
• Meat tenderizer or enzyme presoaks helpbreak down some protein stains so theyare easier to remove.
TO REMOVE
These stains turn brown with age, so treat immediately. Sponge or soakfresh stains with cold water. Wash. If stain remains, soak 15 minutes in asolution of lukewarm water, liquid detergent, and a few drops of whitevinegar. Rinse. Wash.
Rinse immediately or soak in cold water with enzyme presoak for 30minutes or longer. Rinse. Rub detergent into any remaining stains. Rinse.If stain remains, put a few drops of 3% hydrogen peroxide on stain for 3-5minutes. Rinse thoroughly. Wash.
Use ice to make gum hard. Scrape off what you can. Sponge with anonflammable fabric cleaner. Let dry. Wash.
Sponge immediately with a nonflammable fabric cleaner or apply a prewashsoil and stain remover. Rinse. Wash. If stain remains, apply a liquid deter-gent to stain or soak in warm water with an enzyme presoak. Rewash.
Scrape off excess with a dull knife. Place fabric between two blotters orfacial tissue. Press with warm iron. Remove color stain with nonflammablefabric cleaner. Hand wash until stain is gone. If full load is crayon stained,take to cleaners or coin-operated dry cleaning machine.
Sponge with a nonflammable fabric cleaner, or a prewash soil and stainremover. Rinse. Wash. Repeat if necessary. If stain remains, apply a fewdrops of liquid detergent and a few drops of ammonia. Blot dry and rinse.If stain remains, soak in an enzyme presoak. Wash.
Removing StainsStained, heavily soiled, or greasy items may need to be prewashed or soaked for bestresults. Soaking helps remove protein-type stains like blood, milk, or grass. Prewashing helpsloosen soil before washing.
Stain removal rules• Use warm water for soaking or prewashing
stained laundry. Hot water can set stains.• Most stains are easier to remove when
they are fresh. Old or set stains may notcome out. Follow package directions forpretreatment products.
• Before treating any stain, find out whatkind of stain it is, how old the stain is, whatkind of fabric it is, and if the fabric iscolorfast. (Check the care label.)
• Washing and drying can set some stains.• Start with cold or warm water. Hot water
can set some stains.
Stain removal guideSTAIN
Alcoholicbeverage
Blood
Chewinggum
Chocolateor coffee
Crayon andcandle wax
Cream,milk, orice cream
continued on next page

18
REMOVING STAINS
STAIN
Deodorantsand anti-perspirants
TO REMOVE
Light stain: Treat with liquid detergent or your regular laundry detergent.Wash in hottest water safe for fabric.
Heavy stain: Place face down on towel and treat with a paste of ammo-nia and color safe bleach. Let stand for 30 minutes. Wash in hottest watersafe for fabric.
wWARNINGFire Hazard
Do not wash or dry items soiled with vegetable or cooking oilsbecause they may contain some oil after laundering.Doing so can result in death or fire.
Items soiled with vegetable or cooking oil should not be washed or dried.For other types of greasy stains, use one of the methods below:• Use pretreatment stain remover. Follow label directions. Wash in hottest
water safe for fabric.• Use talcum powder to absorb as much grease as possible. Sponge with
a nonflammable fabric cleaner. Rinse. Wash.• Treat with liquid detergent or rub a detergent paste on the stain. Wash
using hottest water safe for fabric.
Fresh stains: Soak immediately in cool water. Wash. If stain remains,cover area with a paste made of color safe bleach, a few drops of hotwater, and a few drops of ammonia. Wait 15 to 30 minutes. Wash.Old stains: Sponge with white vinegar. Rinse. Repeat procedure forfresh stains.
Soak in warm or cold water with an enzyme presoak for at least 30 min-utes, or sponge with denatured alcohol. Wash in water temperature andbleach safe for the fabric. For colored fabrics, check colorfastness beforeapplying alcohol. For acetate, sponge with a nonflammable fabric cleaner.If stain remains, bleach with 3% hydrogen peroxide. Rinse. Rewash.
Spray stain with an aerosol hair spray or rubbing alcohol. Sponge staincontinuously until all bleeding stops. Let dry. Repeat if necessary. Wash.If stain remains, bleach if safe for fabric. (India and other indelible inks arealmost impossible to remove completely.)
Colored or noncolorfast items: Apply lemon juice and salt. Place in thesun to dry. Rinse thoroughly. Repeat if necessary.White or colorfast items: Try a rust remover. Test first on inside seam orhem. Some rust removers are not washer safe. Follow package directions.
Fat, grease,or oil
Fruit stains
Grass orgreenvegetables
Ink orballpointpen ink
Iron or rust

19
REMOVING STAINS
TO REMOVE
Sponge immediately with a nonflammable fabric cleaner or apply aprewash soil and stain remover. Rinse. Wash. If stain remains, apply aliquid detergent to stain or soak in warm water with an enzyme presoak.Rewash.
Apply nonflammable fabric cleaner or prewash soil and stain remover.Blot with absorbent material. Repeat if necessary. Rinse. If stain stillremains, rub with liquid detergent. Wash.
Scrape off excess with a dull knife. Soak in cold or warm water withenzyme presoak at least 30 minutes, or treat stains with a nonflammablefabric cleaner. Wash.
Wash in hottest water safe for fabric. If stain remains, soak in warm waterand a color safe bleach for 15 to 30 minutes. Rewash. (Old mildew stainsare almost impossible to remove. Mildew fungus destroys or weakensfabrics.) An alternative to bleach is to treat with salt and lemon juice anddry in direct sunlight. Rinse and rewash. Mildew may form if wet or damplaundry remains in your washer for extended periods of time. To preventmildew, promptly dry laundry after washing.
Treat immediately. Scrape off excess mustard. Sponge with a nonflam-mable fabric cleaner or a prewash soil and stain remover. Rinse. Workliquid detergent and a few drops of vinegar into stain. Rinse. If stainremains, apply 3% hydrogen peroxide. Rinse and wash.
Hand wash paint-stained items.Water base: Treat stains while still wet. (These paints cannot be removedafter they have dried.) Rinse in warm water to flush out paint. Sponge witha nonflammable fabric cleaner. Rinse. Wash.Oil base: Scrape off fresh paint. Sponge with a nonflammable fabriccleaner. While stain is still wet with solvent, rub liquid detergent into it.Wash with hottest water safe for fabric.
Remove stains before ironing. Perspiration stains may weaken fabric.Wash or sponge stain thoroughly with detergent and warm water. Ifperspiration has changed the color of the fabric, use one of the followingtreatments:Fresh stains: Apply ammonia to stain. Rinse. Launder to removeammonia odor.Old stains: Apply white vinegar to stain. Rinse. Launder to removevinegar odor.
Severe scorch cannot be removed. Wet stain with 3% hydrogen peroxide.Cover with a dry cloth and press with an iron as hot as is safe for fabric.Rinse well. Wash.ORWet with lemon juice and spread in the sun to dry. Wash.
Sponge immediately with cold water and alcohol. Heat and detergent mayset stain.
STAIN
Ketchupor tomatoproducts
Lipstick
Meat juice,egg
Mildew
Mustard
Paint
Perspiration
Scorch
Soft drinks

20
CAUSE
• Chlorine staining• Iron in water heater or pipes; iron and manganese in water
• Improper sorting• Load not immediately removed from washer after end of cycle
• Improper sorting• Water temperature too low• Not enough detergent• Using soap in very hard water (use detergent in hard water)
• Fabric softener poured directly on clothes• Not enough detergent
• Improper sorting• Paper or tissue in pockets• Pilling being mistaken for lint• Not enough detergent
• Cold rinses• Cycle stopped before spinning is complete
• Fabric type (some knits stretch during manufacturing –laundering returns fabric to original size)
• Care label directions not followed
• Items damaged before washing• Misuse of chlorine bleach (do not pour directly on clothes)• Sharp items not removed from pockets; fasteners not fastened
• Using soap in very hard water (use detergent in hard water)• Not enough detergent• Line drying
• Overloading• Clothes wrapped around agitator
• Overloading (leave more room for permanent press and knits)• Load not immediately removed from washer after cycle• Warm rinse water• Cycle selection incorrect
• Water temperature too low• Not enough detergent
PROBLEM
Brown, yellowstains
Dye transfer
Gray whites,dingy colors
Greasy lookingspots
Lint
Load too wetafter spin
Shrinking
Snags, rips,and holes
Stiff, roughfabrics
Twisting/Tangling
Wrinkling
Yellow areas(from body oils)
TroubleshootingMost laundering problems are easily solved if you understand the cause. Check the followinglist for common laundry problems and the next page for common washer problems. If youneed further assistance, see page 22.
Common laundry problems

21
TROUBLESHOOTING
Common washer problemsBefore calling for service, check these:
Is the lid closed?
▼
Is the Cycle Control Knob set and pulled out?
▼
Is the power cord firmly plugged into a live outlet with proper voltage?
▼
Have you blown a household fuse or tripped a circuit breaker?
▼
Are both the hot and cold water faucets turned on?
▼
Are the water hoses kinked or clogged?
▼
Is the drain hose higher than the water level in the washer? It must be higher forproper operation.
▼
Is the washer making noises (see page 9), or vibrating?
Is the wash load properly distributed around the agitator?
NOTE: Washer stops briefly during a wash cycle. These pauses are normal.
If none of these items was causing your problem, see “Requesting Assistance or Service” onpage 22.

22
Requesting Assistanceor ServiceBefore calling for assistance or service, please check “Troubleshooting” on pages 20-21. Itmay save you the cost of a service call. If you still need help, follow the instructions below.
1. If you need assistance* …Call the Whirlpool Consumer Assistance
Center telephone number.Dial toll-free from anywherein the U.S.A.:1-800-253-1301and talk with one of our trained
consultants. The consultant can instruct youin how to obtain satisfactory operation fromyour appliance or, if service is necessary,recommend a qualified service company inyour area.
If you prefer, write to:
Whirlpool Brand Home AppliancesConsumer Assistance Centerc/o Correspondence Dept.2000 North M-63Benton Harbor, MI 49022-2692
Please include a daytime phone number inyour correspondence.
2. If you need service* …Whirlpool has a nationwide network of
authorized Whirlpool servicecompanies. Whirlpool servicetechnicians are trained to fulfillthe product warranty andprovide after-warranty service,
anywhere in the United States. To locate theauthorized Whirlpool service company inyour area, call our Consumer AssistanceCenter telephone number (see Step 1) orlook in your telephone directory YellowPages under:•APPLIANCE-HOUSEHOLD- • WASHING MACHINES &MAJOR, SERVICE & REPAIR DRYERS, SERVICE & REPAIR
- See: Whirlpool Appliances or - See: Whirlpool Appliances orAuthorized Whirlpool Service Authorized Whirlpool Service(Example: XYZ Service Co.) (Example: XYZ Service Co.)
3. If you need FSP®
replacement parts …FSP is a registered trademark of WhirlpoolCorporation for quality parts. Look for thissymbol of quality whenever you need areplacement part for your WHIRLPOOL®
appliance. FSP replacement parts will fitright and work right, because they are madeto the same exacting specifications used tobuild every new WHIRLPOOL appliance.
To locate FSP replacement parts in yourarea, refer to Step 2 or call the WhirlpoolConsumer Assistance Center number inStep 1.
4. If you are not satisfiedwith how the problemwas solved …
• Contact the Major Appliance ConsumerAction Program (MACAP). MACAP is agroup of independent consumer expertsthat voices consumer views at the highestlevels of the major appliance industry.
• Contact MACAP only when the dealer,authorized servicer, and Whirlpool havefailed to resolve your problem.
Major Appliance Consumer Action Program20 North Wacker DriveChicago, IL 60606
• MACAP will in turn inform us of youraction.
Gearcase assemblycovered by your
warranty
* When asking for help or service:Please provide a detailed description of the problem, your appliance’s complete modeland serial numbers, and the purchase date. (See page 2.) This information will help usrespond properly to your request.

23
NOTES

WHIRLPOOL®
Automatic Washer WarrantyLENGTH OF WARRANTY WHIRLPOOL WILL PAY FOR
FULL ONE-YEARWARRANTYFROM DATE OFPURCHASE
LIMITED FIVE-YEARWARRANTYFROM DATE OFPURCHASE
LIMITED TEN-YEARWARRANTYFROM DATE OFPURCHASE
FSP® replacement parts and repair labor to correct defects inmaterials or workmanship. Service must be provided by anauthorized Whirlpool service company.
FSP replacement parts for any part of gearcase assembly ifdefective in materials or workmanship. The gearcase assemblyis shown in the “Requesting Assistance or Service” section ofthis book.FSP replacement parts for any top and lid rust.
FSP replacement parts for outer tub should it crack, or fail tocontain water, due to defective materials or workmanship.
A. Service calls to:1. Correct the installation of your washer.2. Instruct you how to use your washer.3. Replace house fuses or correct house wiring or plumbing.
B. Repairs when your washer is used in other than normal, single-family household use.C. Pickup and delivery. Your washer is designed to be repaired in the home.D. Damage to your washer caused by accident, misuse, fire, flood, acts of God, or use of
products not approved by Whirlpool.E. Any labor costs during the limited warranties.F. Repairs to parts or systems caused by unauthorized modifications made to the
appliance.
WHIRLPOOL WILL NOT PAY FOR
WHIRLPOOL CORPORATION SHALL NOT BE LIABLE FOR INCIDENTAL OR CONSE-QUENTIAL DAMAGES. Some states do not allow the exclusion or limitation of incidental orconsequential damages, so this exclusion or limitation may not apply to you. This warrantygives you specific legal rights, and you may also have other rights which vary from stateto state.
Outside the United States, a different warranty may apply. For details, please contactyour authorized Whirlpool dealer.If you need service, first see the “Troubleshooting” section of this book. After checking“Troubleshooting,” additional help can be found by checking the “Requesting Assistanceor Service” section or by calling our Consumer Assistance Center telephone number,1-800-253-1301, from anywhere in the U.S.A.
2-96
PART NO. 3363573© 1996 Whirlpool Corporation ® Registered Trademark/TM Trademark of Whirlpool, U.S.A. Printed in U.S.A.
3/96