homemade transmitter tubes - free flight
TRANSCRIPT
MAKING HOMEMADE TRANSMITTER TUBES
By David Mills
Building balsa boxes for my Walston retrieval unit was always a chore, and finding suitable cut-outs in commercial packaging, a random process. I always wanted something better and knew I’d have to build it myself, but a quick and easy means of fabricating a suitable tube always escaped me. I knew a tube at least 7/16 in. ID was needed for a mold of some sort. As fate would have it, I had a bit of inspiration over at Wal-Mart the other day.
While taking a shortcut down the school supplies aisle, I spotted the small box of large crayons for sale. The term “lost wax process” popped into my head and I knew I had the solution. I borrowed a ruler on sale nearby and checked their diameter—perfect! I bought the crayons, went home, and set up a workstation with a small sheet of window glass, some ¾ oz. fiberglass cloth, a new razor blade, a can of spray lacquer, and some generic 20-minute epoxy. It took a couple of tries, but the method that follows works like a charm. The tubes come out only ½ gram per inch, plenty light enough, and very strong.
Interested? Let’s get busy then. Remove the paper wrapper off a crayon. Spray some lacquer onto some fiberglass cloth can to set the weave, and after it dries, cut a swatch about one foot long, on a 45-degree bias, a little wider than the crayon is long. Mix a small portion of epoxy and stir well, as always. Set the fiberglass on the glass and coat the crayon with a good smear of epoxy. Very carefully, start rolling the crayon down the cloth, being very careful to get a good, square start. The glass makes an ideal surface because its smooth surface doesn’t snag the cloth and gives a very flat and hard surface to compress the cloth as you roll. As you roll, keep an eye on the cloth for dryness and voids. Add epoxy as required. After the cloth is all rolled, dab the tube very carefully with a paper towel to absorb any extra epoxy. Eyeball everything and then set it aside to cure completely, as in overnight.
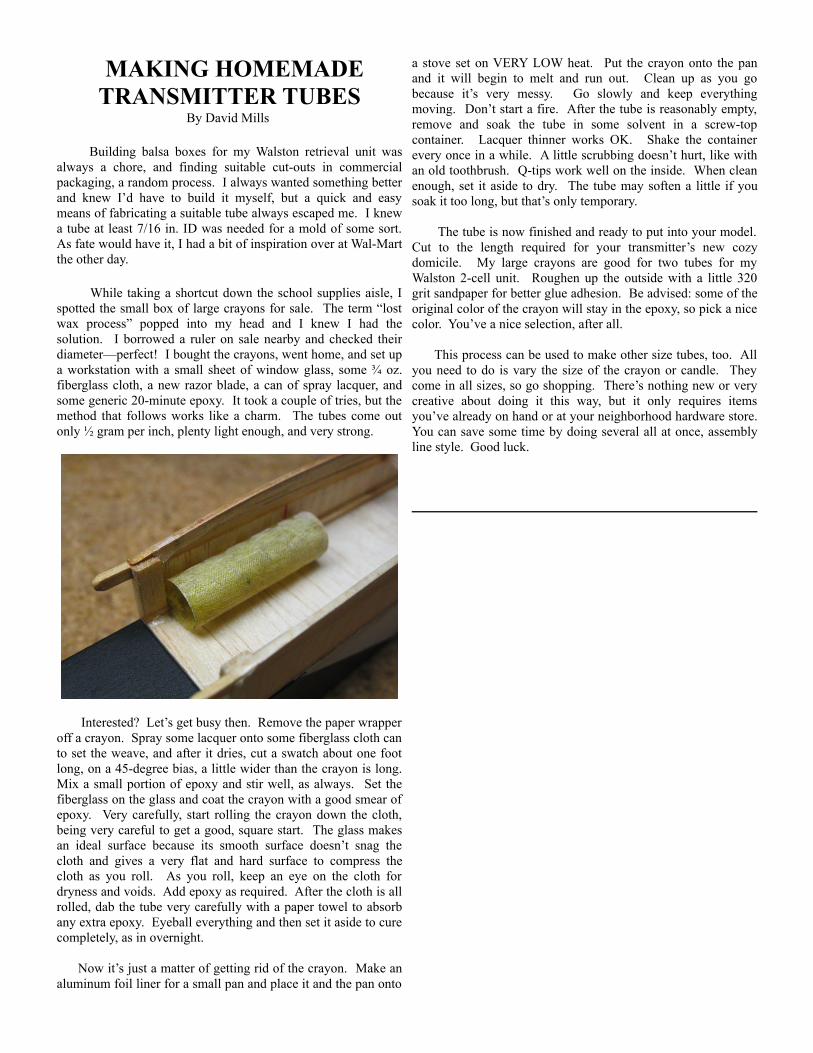
Now it’s just a matter of getting rid of the crayon. Make an aluminum foil liner for a small pan and place it and the pan onto
a stove set on VERY LOW heat. Put the crayon onto the pan and it will begin to melt and run out. Clean up as you go because it’s very messy. Go slowly and keep everything moving. Don’t start a fire. After the tube is reasonably empty, remove and soak the tube in some solvent in a screw-top container. Lacquer thinner works OK. Shake the container every once in a while. A little scrubbing doesn’t hurt, like with an old toothbrush. Q-tips work well on the inside. When clean enough, set it aside to dry. The tube may soften a little if you soak it too long, but that’s only temporary. The tube is now finished and ready to put into your model. Cut to the length required for your transmitter’s new cozy domicile. My large crayons are good for two tubes for my Walston 2-cell unit. Roughen up the outside with a little 320 grit sandpaper for better glue adhesion. Be advised: some of the original color of the crayon will stay in the epoxy, so pick a nice color. You’ve a nice selection, after all.
This process can be used to make other size tubes, too. All you need to do is vary the size of the crayon or candle. They come in all sizes, so go shopping. There’s nothing new or very creative about doing it this way, but it only requires items you’ve already on hand or at your neighborhood hardware store. You can save some time by doing several all at once, assembly line style. Good luck.