honda j series conversions for mazda mx-5 miatas 1989 …superfastmiatas.com/miata/jv6 miata...
TRANSCRIPT
JV6 Miata Kit:Honda J Series Conversions
for Mazda MX-5 Miatas1989-2005
JV6 Installation Manual
2
Dear Customer,
We welcome you to the Honda Powered Miata World. Thank you andCongratulations for your purchase. You can be certain that you have made a wisechoice with this upgrade. This kit was designed to help put you on the right trackwhen building your ultimate Miata. With the help of this JV6 Kit, you will be drivingyour Super Fast Miata soon.
We’ll do all we can to help keep your project moving along. Please keep inmind that pictures will be of great help, so if you don’t have a digital camera, (oralways wanted one) now is a good time to get one. In fact, you should take LOTS ofpictures to document your project.
The purpose of this kit is to make your Honda VTEC installation easy andhassle free. We have taken the research and development headaches out of the installso that you do not have to deal with any of that. The sub-frame mounts to the car.The engine mounts to the sub-frame. And after a few other small connections, youare ready to crank and drive your Super Fast Miata.
We have broken the whole VTEC Miata build up into sections, from start tofinish. We hope that this will be a pleasurable experience for you and we will doeverything that we can to make it that. Just remember, we are available to help you 5days a week. Just give us a call or drop us an email.
Thanks and have fun,
Mini Tec
3
Parts required
This Section contains a list and description of the parts included in the JV6 Kit, and alist of parts that you will need in addition to this kit.
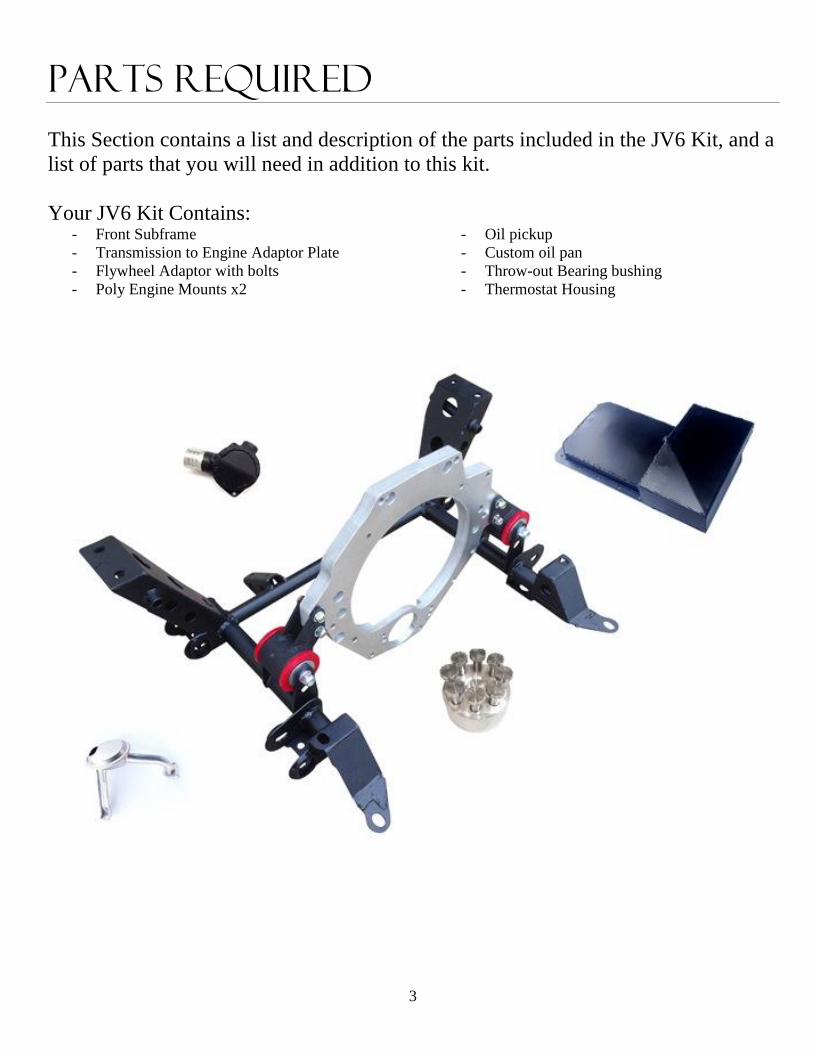
Your JV6 Kit Contains:- Front Subframe- Transmission to Engine Adaptor Plate- Flywheel Adaptor with bolts- Poly Engine Mounts x2
- Oil pickup- Custom oil pan- Throw-out Bearing bushing- Thermostat Housing
4
Additional Parts Needed:- Honda J Series Engine complete: 2001-2003 Acura CL Type S, or 2002-2004 Honda Odyssey- Engine computer: You can use the stock ecu from the 2001-2003 Acura CL Type S 6 Speed with that
engine. For best performace, use AEM’s Series 2 Engine Management System for Honda J series.- Miata Steering Rack, clamps, and universal joints- Custom Exhaust (Front Manifold and downpipes available from Mini Tec)- Honda B Series Flywheel, Clutch Pressure Plate, Pilot Bearing, and Throw-out bearing (2000 Honda Civic
SI)- 1.8L Miata Clutch Disc- Starter: 1984-1995 Honda Civic SOHC
PreparationRemove stock Miata engine and subframe. Retain all hardware until you are
completely finished with the conversion.
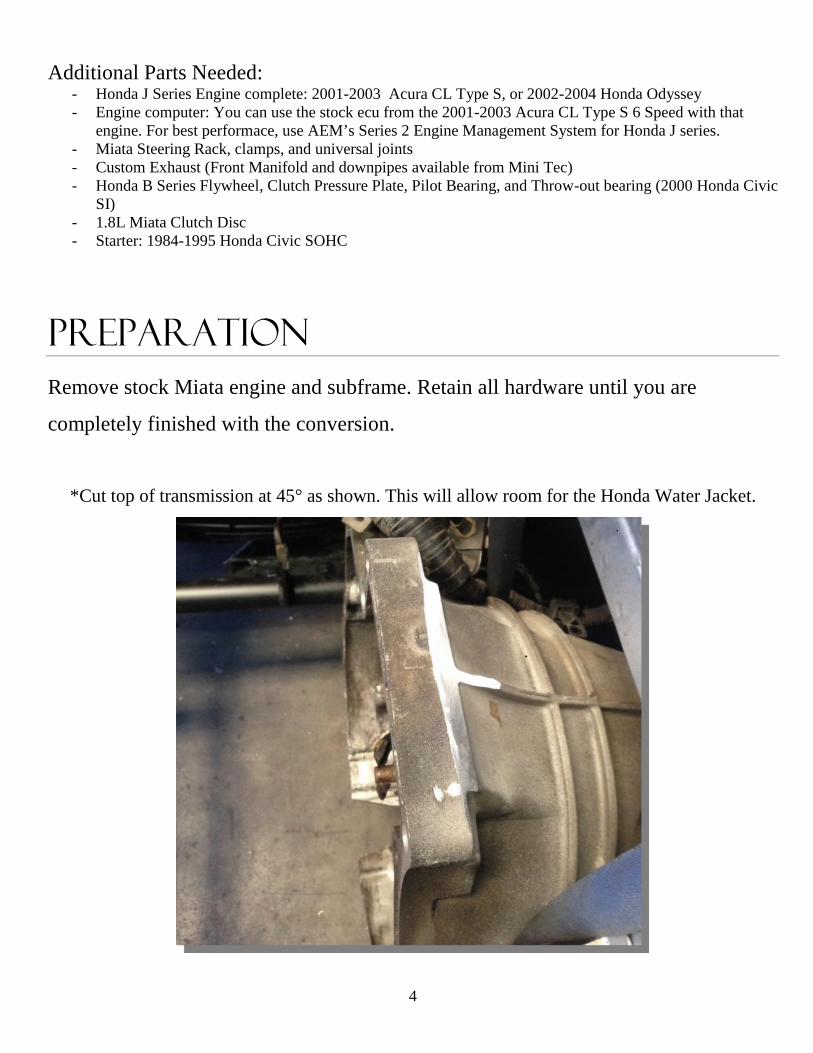
*Cut top of transmission at 45° as shown. This will allow room for the Honda Water Jacket.

5
6
Flip flywheel ring to align with reverse mounted starter. The easiest way to do this is
to put your flywheel in an oven for 30 minutes at 450°. Remove the flywheel and tap
the gear ring off. Using a file or flap disc, you will want to match the inside bevel of
the gear ring so that it will fit flush against the flywheel after being flipped and
reinstalled.Put only the gear ring back in the oven for about 5 minutes before
attempting to reinstall it onto the flywheel. Flip the gear ring and reinstall it. (Note: If
you purchased the JV6 Package, this step has already been done for you.)
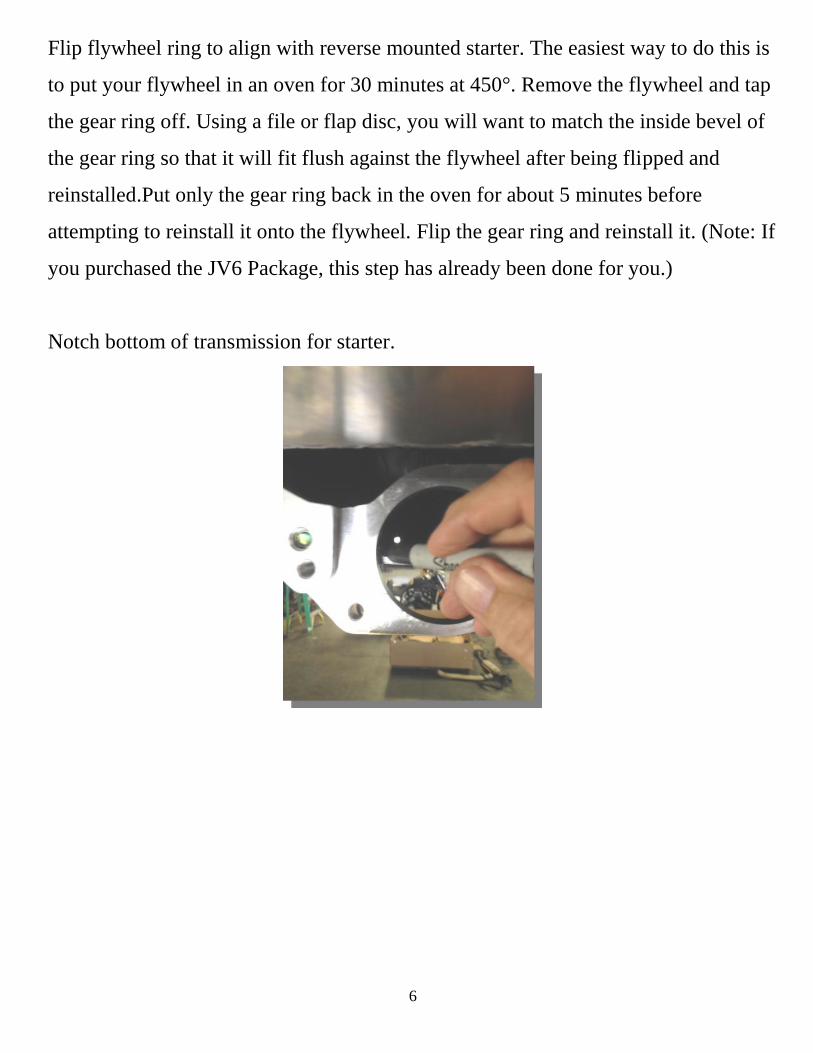
Notch bottom of transmission for starter.
7
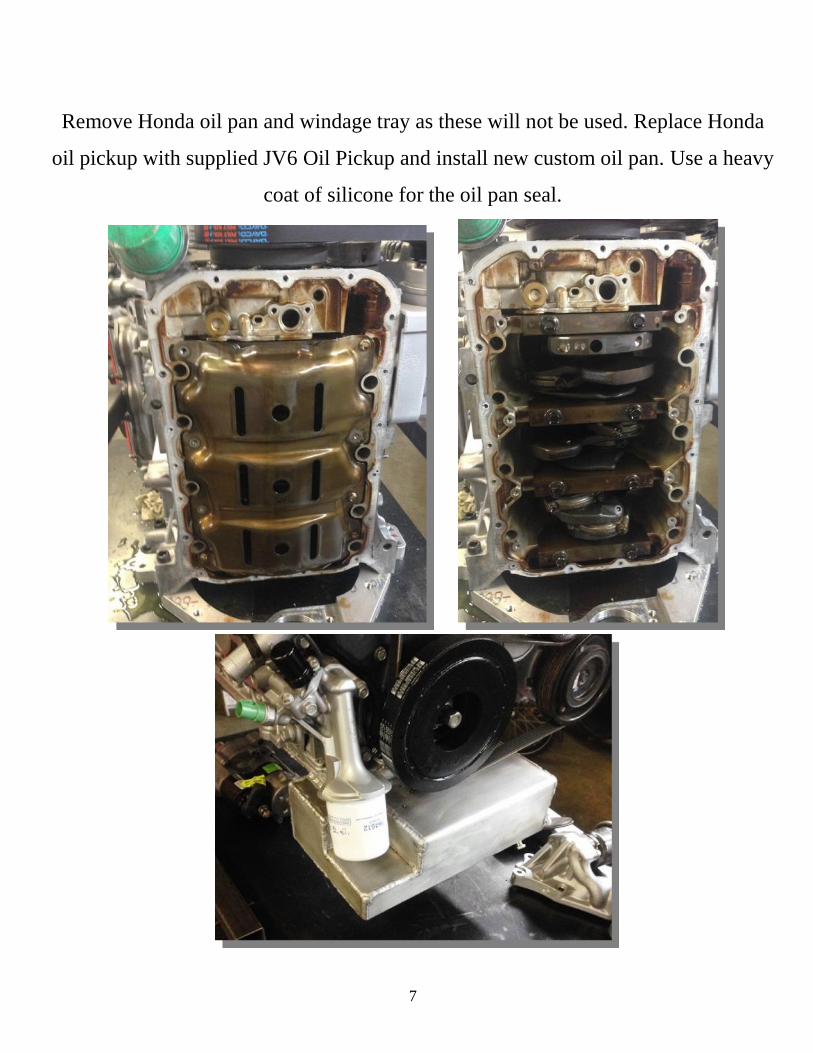
Remove Honda oil pan and windage tray as these will not be used. Replace Honda
oil pickup with supplied JV6 Oil Pickup and install new custom oil pan. Use a heavy
coat of silicone for the oil pan seal.
8
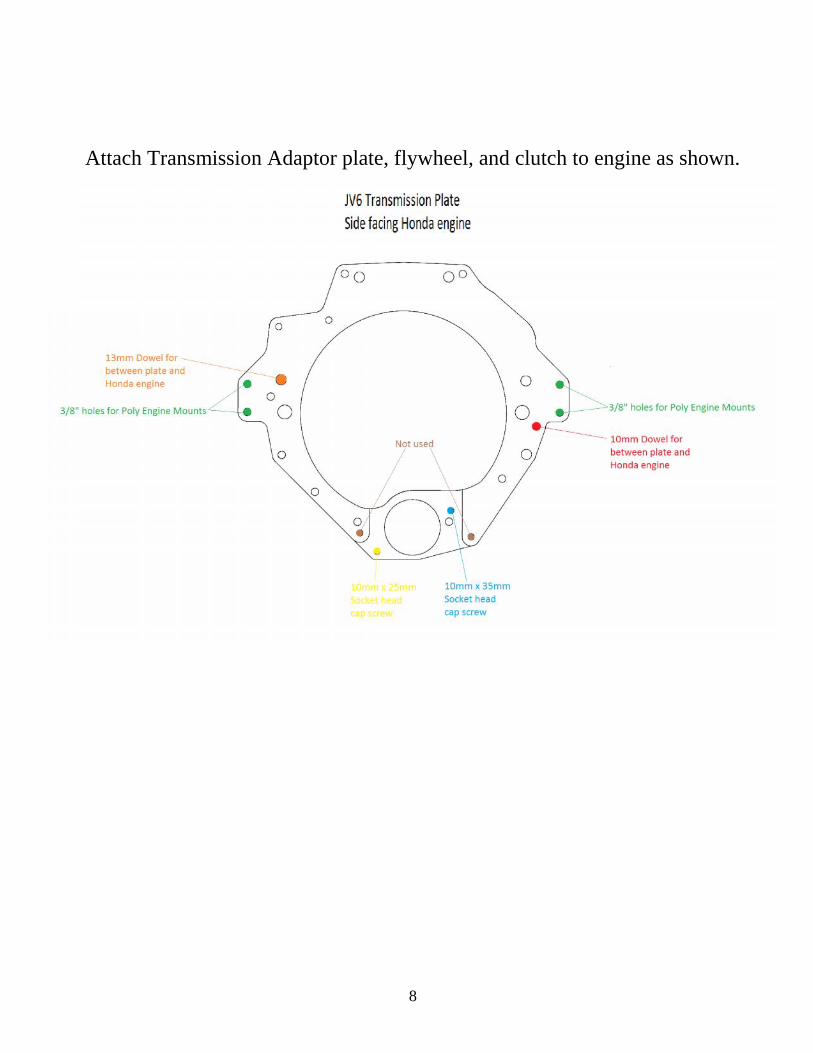
Attach Transmission Adaptor plate, flywheel, and clutch to engine as shown.

9
Lightly coat the shank of flywheel bolts with anti-seize. Use a thread locking
compound on all threads of flywheel bolts (e.g. Loctite Threadlocker #262 or
10
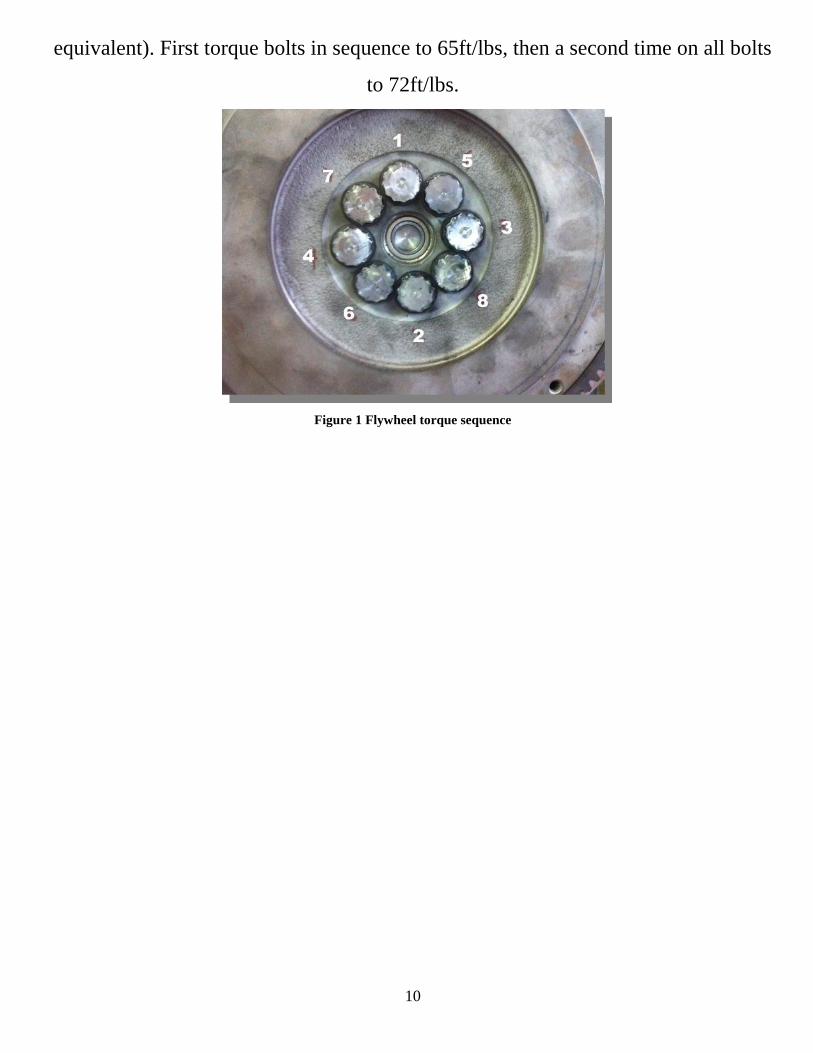
equivalent). First torque bolts in sequence to 65ft/lbs, then a second time on all bolts
to 72ft/lbs.
Figure 1 Flywheel torque sequence
11
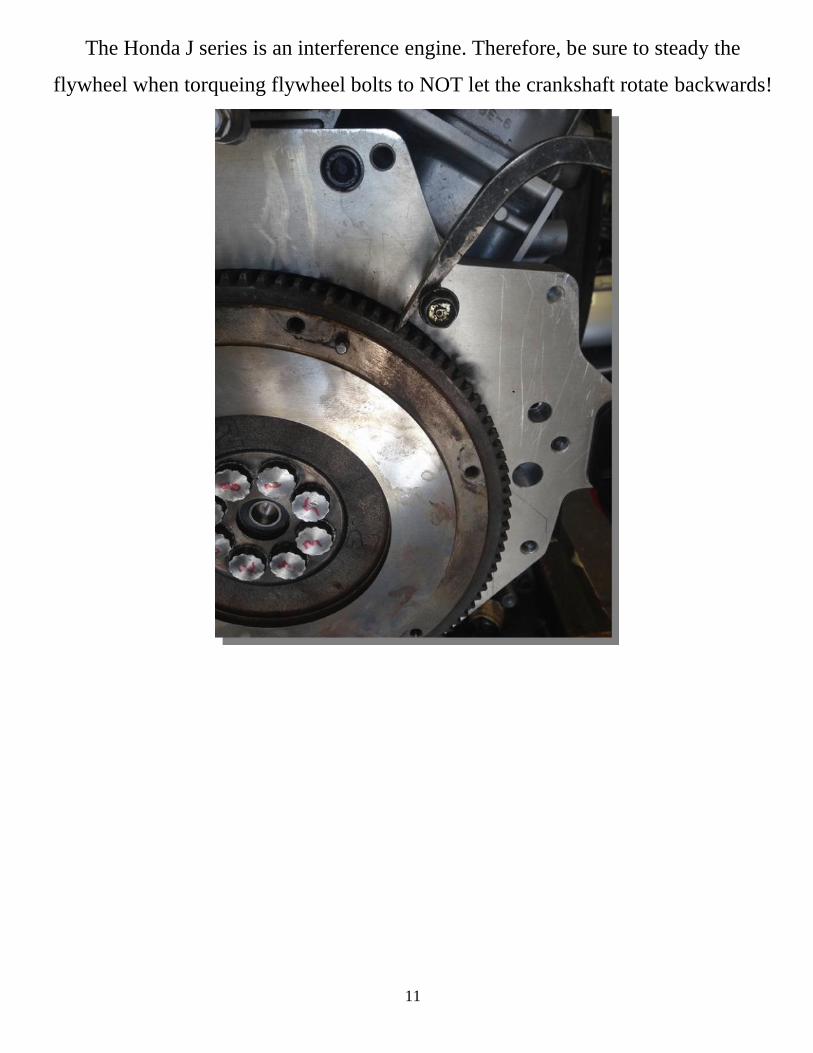
The Honda J series is an interference engine. Therefore, be sure to steady the
flywheel when torqueing flywheel bolts to NOT let the crankshaft rotate backwards!
12
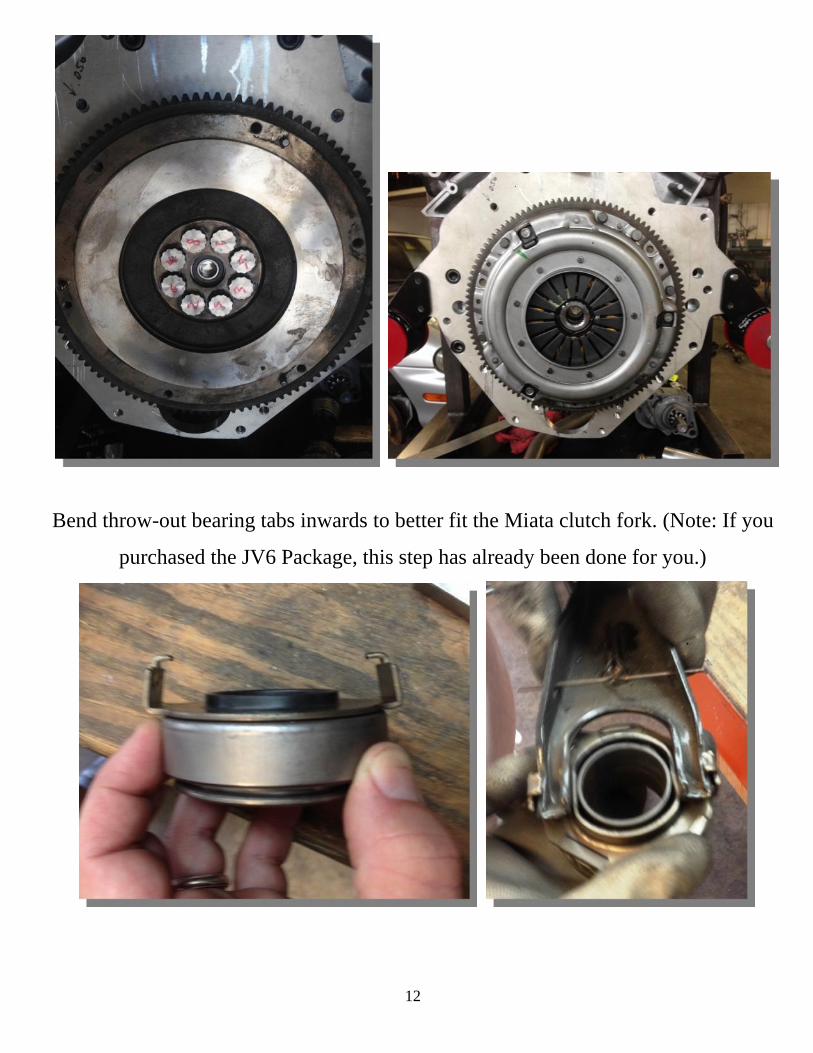
Bend throw-out bearing tabs inwards to better fit the Miata clutch fork. (Note: If you
purchased the JV6 Package, this step has already been done for you.)
13
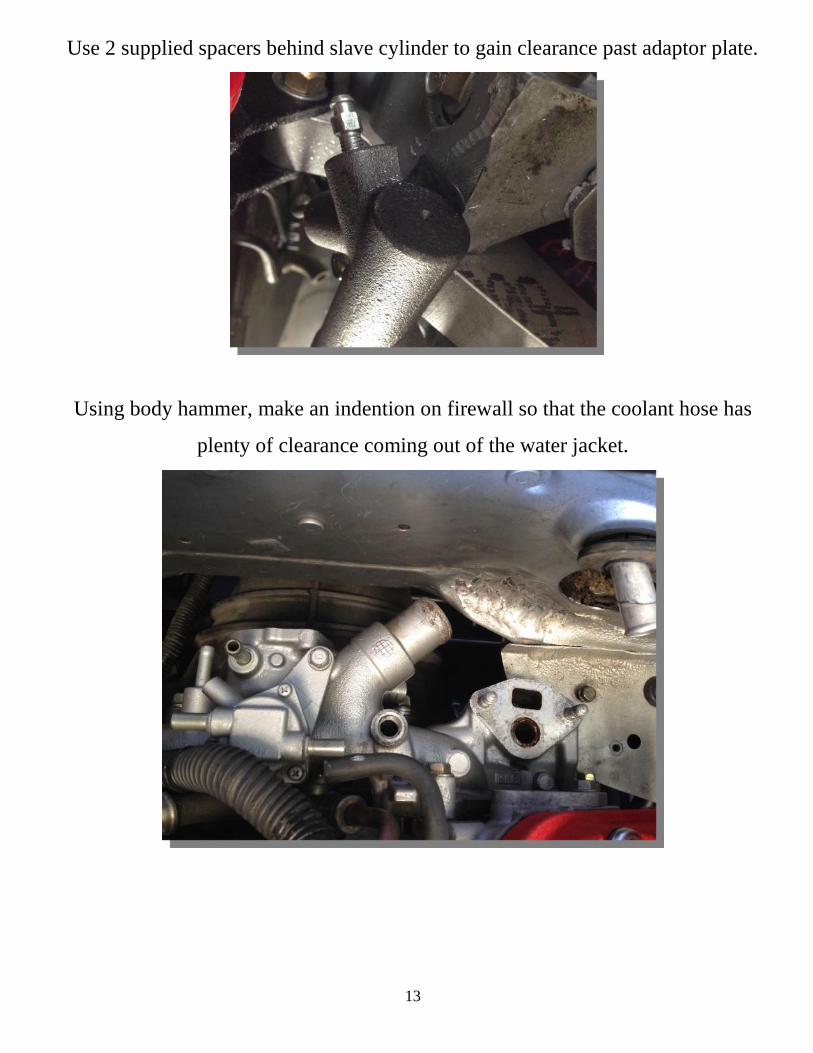
Use 2 supplied spacers behind slave cylinder to gain clearance past adaptor plate.
Using body hammer, make an indention on firewall so that the coolant hose has
plenty of clearance coming out of the water jacket.
14
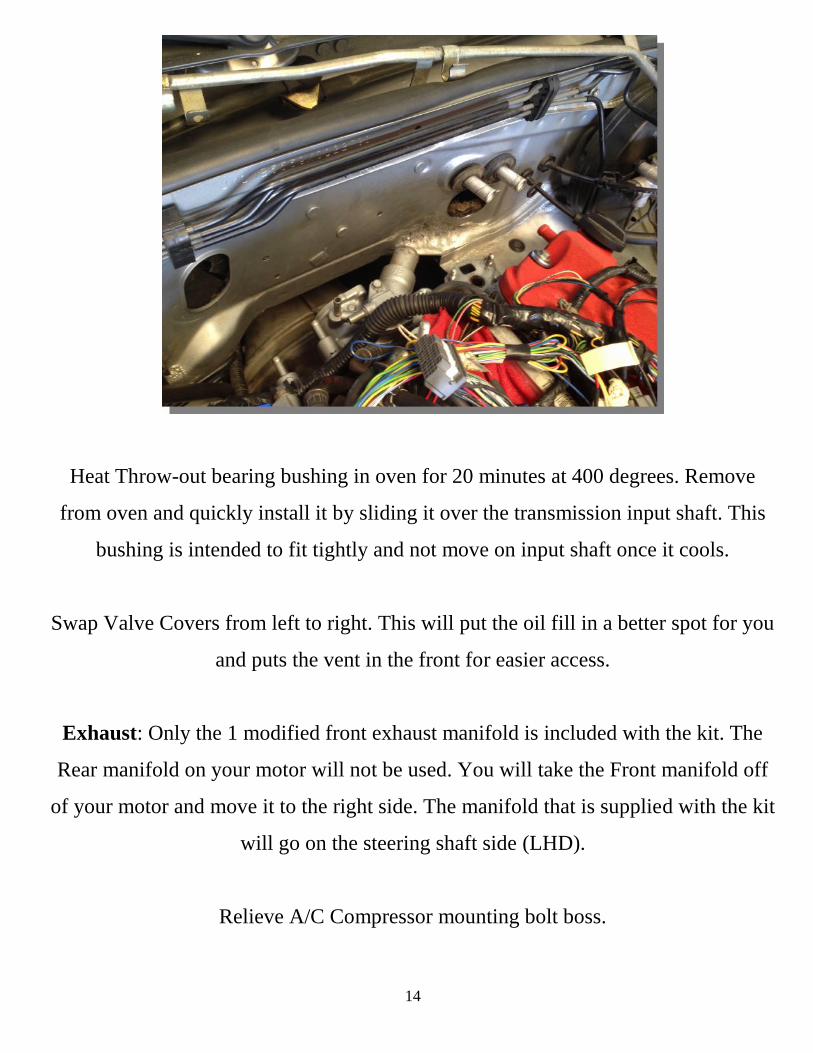
Heat Throw-out bearing bushing in oven for 20 minutes at 400 degrees. Remove
from oven and quickly install it by sliding it over the transmission input shaft. This
bushing is intended to fit tightly and not move on input shaft once it cools.
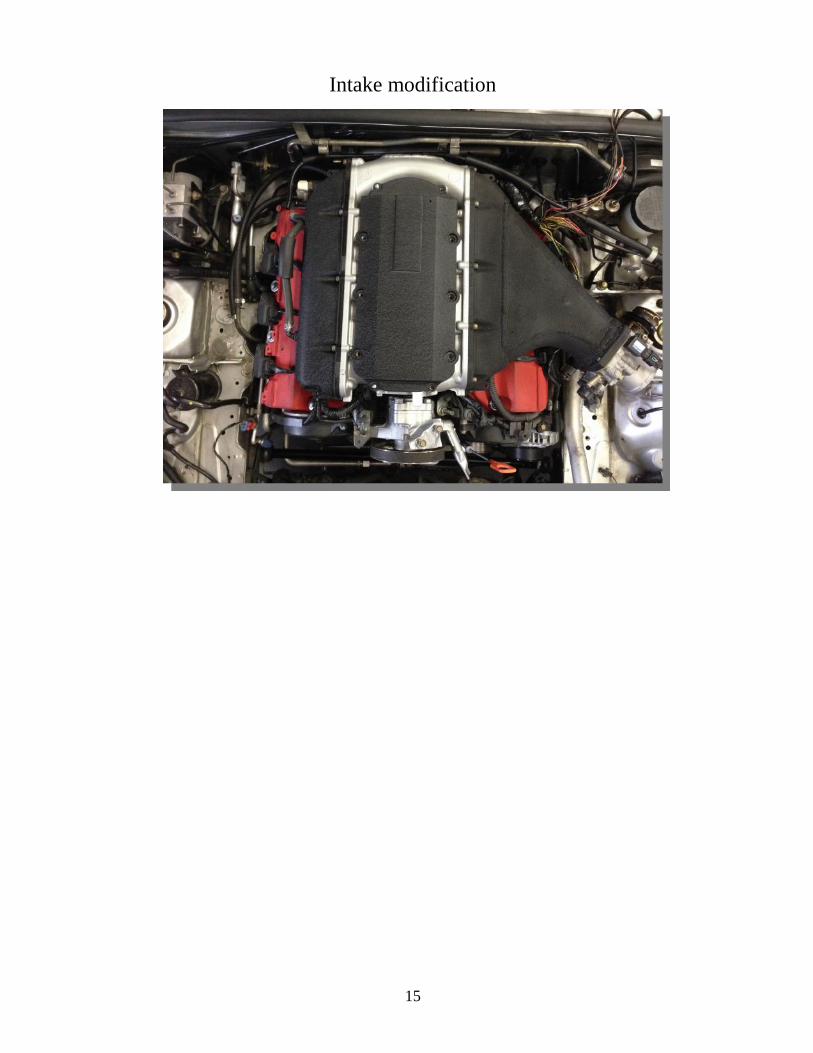
Swap Valve Covers from left to right. This will put the oil fill in a better spot for you
and puts the vent in the front for easier access.
Exhaust: Only the 1 modified front exhaust manifold is included with the kit. The
Rear manifold on your motor will not be used. You will take the Front manifold off
of your motor and move it to the right side. The manifold that is supplied with the kit
will go on the steering shaft side (LHD).
Relieve A/C Compressor mounting bolt boss.
15
Intake modification

16
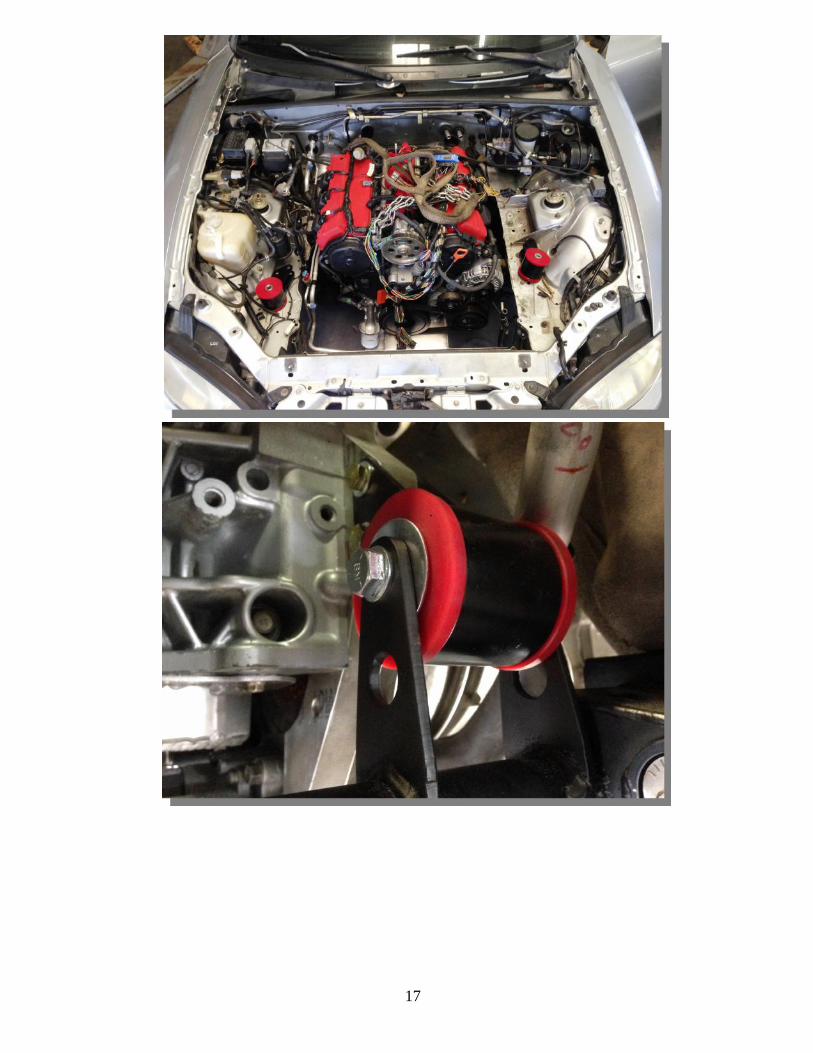
InstallationInstall JV6 frame into car just as the original frame was removed using the factoryhardware. Do the same for the suspension. Use 3 washers on each side of the uppersuspension arms for factory Miata caster setting.
Remove radiator before installing engine. Lower engine into car carefully. Make surethat the PPF is attached to the transmission and rear differential before installing
engine. This is vital to locate the engine properly.
17

18

19
20
21
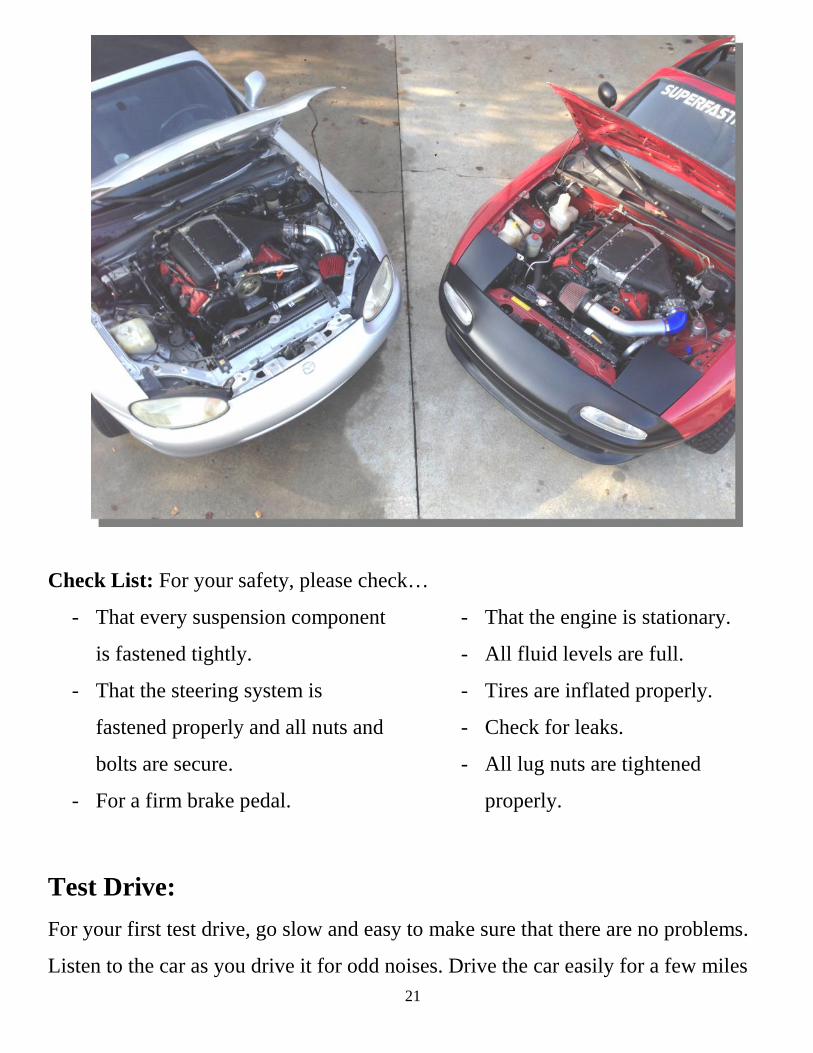
Check List: For your safety, please check…
- That every suspension component
is fastened tightly.
- That the steering system is
fastened properly and all nuts and
bolts are secure.
- For a firm brake pedal.
- That the engine is stationary.
- All fluid levels are full.
- Tires are inflated properly.
- Check for leaks.
- All lug nuts are tightened
properly.
Test Drive:
For your first test drive, go slow and easy to make sure that there are no problems.
Listen to the car as you drive it for odd noises. Drive the car easily for a few miles
22
and then go over the Check List again. After driving the car for 100 miles, check
front suspension alignment again.
Periodically, you will need to check all of your suspension components for wear.
After that, have fun!
Disclaimer of WarrantyNeither the seller nor the manufacturer will be liable for any loss, damage or injury directly or indirectly arisingfrom the use or inability to determine the use of this product.Before using, the use shall determine the suitability of the products for its intended use, and the user shouldassume full responsibility and risk in connection herewith.
Copyright 2014 Mini Tec, L.L.C. All rights reserved.