how to install and use paperport...
TRANSCRIPT

How to install and use PaperPort Anywhere
Installing and configuring PaperPort Anywhere:
Once the installation of PaperPort 14 has completed, the following dialog will be displayed which
prompts you to create a PaperPort Anywhere account:
If you already have an existing PaperPort Anywhere account, click the “Login now” link.
If you want to create a new account, click the “Next” button to display the following screen:
To create an account, provide your Full Name, Username, Password and email address. After specifying
the required information, click the “Next” button.

2
The next screen summarizes the different account types that can be created:
After deciding the account type to sign up for, click the corresponding “Get Started” button.
The next step is to specify the computer name that will be used. The default name will be the Windows
Computer name. If necessary, this can be changed to another name.
Click “Next” and the PaperPort Anywhere guided Tour will be available. Click “Next” to view additional
information on PaperPort Anywhere.
3
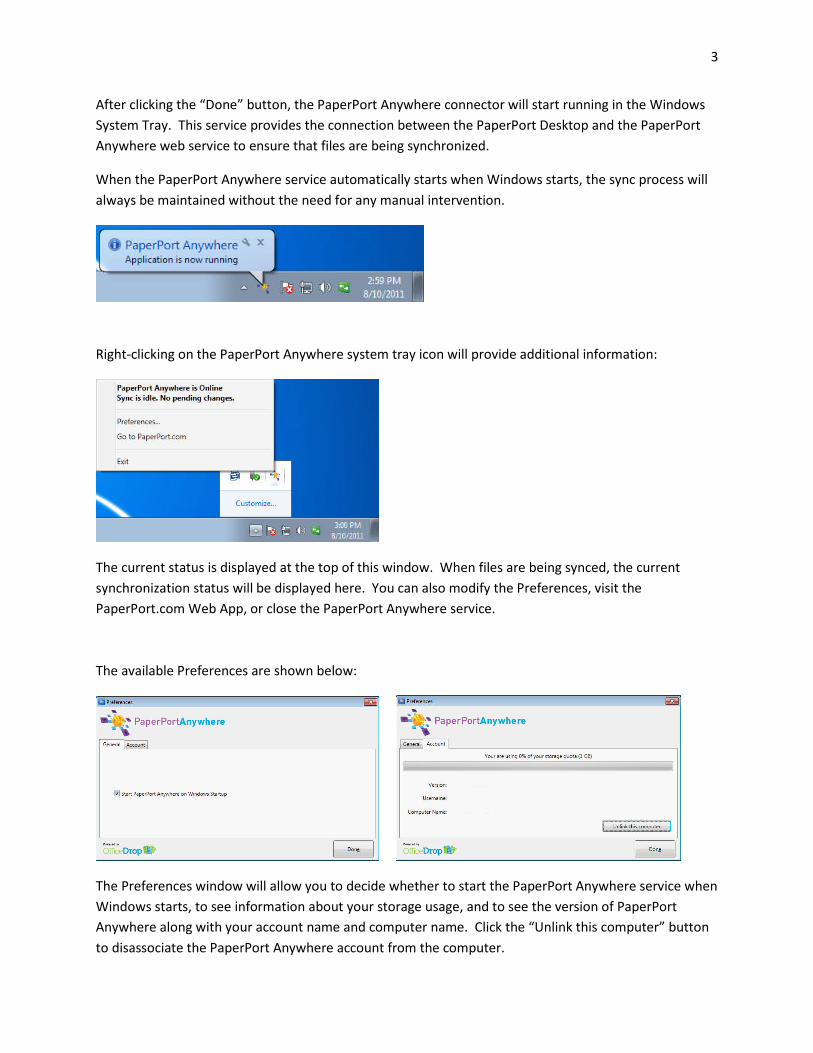
After clicking the “Done” button, the PaperPort Anywhere connector will start running in the Windows
System Tray. This service provides the connection between the PaperPort Desktop and the PaperPort
Anywhere web service to ensure that files are being synchronized.
When the PaperPort Anywhere service automatically starts when Windows starts, the sync process will
always be maintained without the need for any manual intervention.
Right-clicking on the PaperPort Anywhere system tray icon will provide additional information:
The current status is displayed at the top of this window. When files are being synced, the current
synchronization status will be displayed here. You can also modify the Preferences, visit the
PaperPort.com Web App, or close the PaperPort Anywhere service.
The available Preferences are shown below:
The Preferences window will allow you to decide whether to start the PaperPort Anywhere service when
Windows starts, to see information about your storage usage, and to see the version of PaperPort
Anywhere along with your account name and computer name. Click the “Unlink this computer” button
to disassociate the PaperPort Anywhere account from the computer.
4
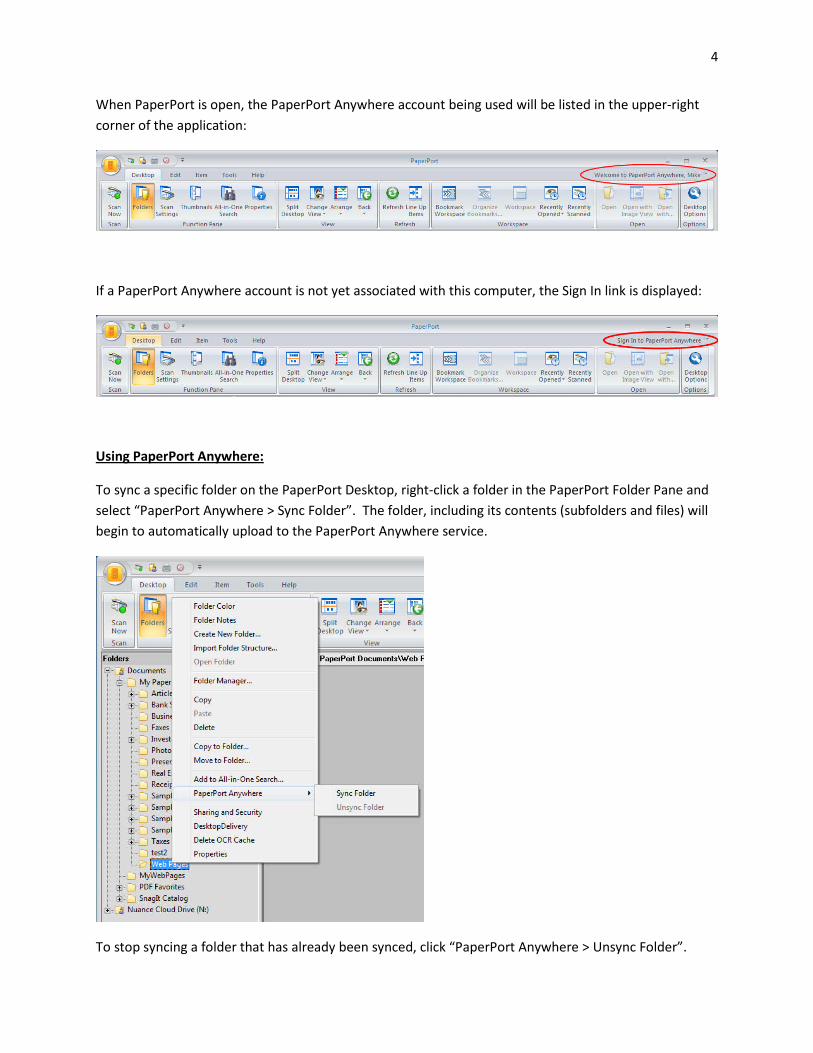
When PaperPort is open, the PaperPort Anywhere account being used will be listed in the upper-right
corner of the application:
If a PaperPort Anywhere account is not yet associated with this computer, the Sign In link is displayed:
Using PaperPort Anywhere:
To sync a specific folder on the PaperPort Desktop, right-click a folder in the PaperPort Folder Pane and
select “PaperPort Anywhere > Sync Folder”. The folder, including its contents (subfolders and files) will
begin to automatically upload to the PaperPort Anywhere service.
To stop syncing a folder that has already been synced, click “PaperPort Anywhere > Unsync Folder”.

5
After a folder has been synced with PaperPort Anywhere, the folder name will be displayed in bold text
on the PaperPort Folder Pane:
The files will sync automatically, so the files that are located on the local PaperPort Desktop will be
uploaded to the PaperPort Anywhere service: