how to make animated graphics for hologram displays...preparing the graphic first up, find an...
TRANSCRIPT
How to Make Animated Graphics for Hologram DisplaysCreated by Isaac Wellish
Last updated on 2019-10-23 02:50:30 AM UTC

Overview
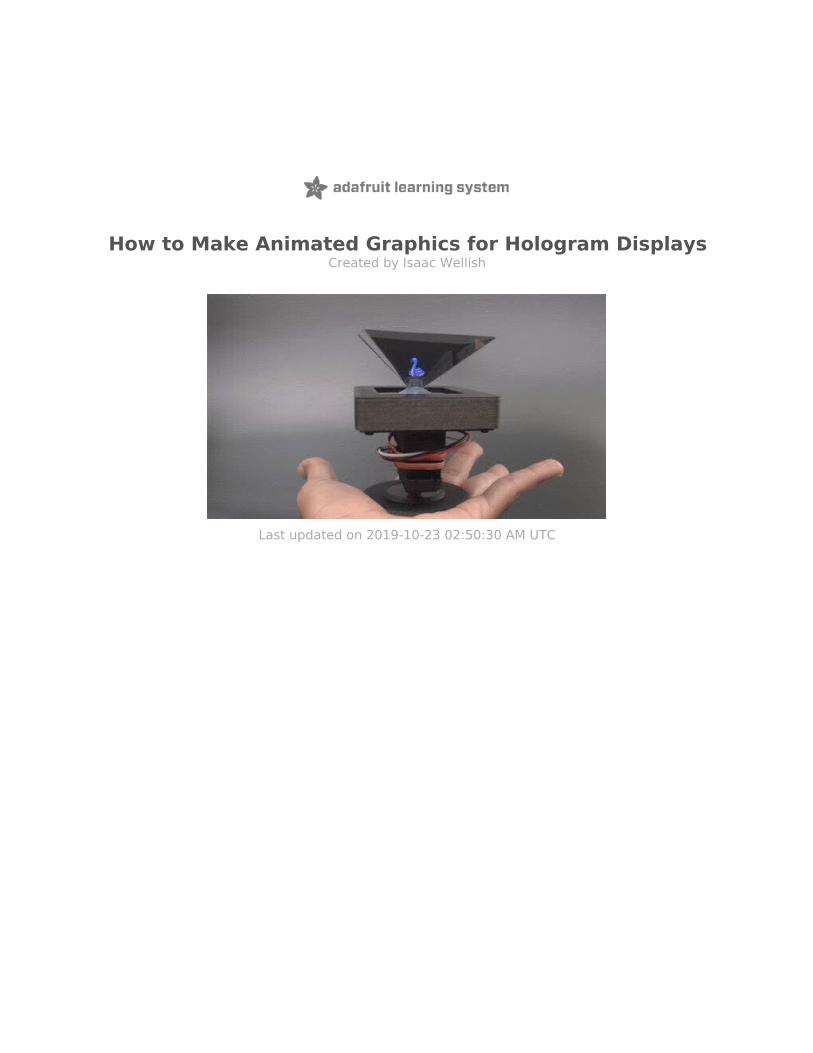
Turn your favorite character into a hologram! Strap a PyPortal to a continuous rotation servo and watch in awe. With afew edits and some formatting, you'll have floating animations in no time.
In this guide we'll go through an example of our own animation starring Blinka, the CircuitPython mascot.
We have a custom 3D printed enclosure you can use as a "vertical holder" which attaches to the servo.
To display the graphics and project onto the hologram module, you can also use a smart phone, or tablet, however you won't be able to attach to the servo to rotate freely�
© Adafruit Industries https://learn.adafruit.com/how-to-make-animated-graphics-for-hologram-displays Page 3 of 26
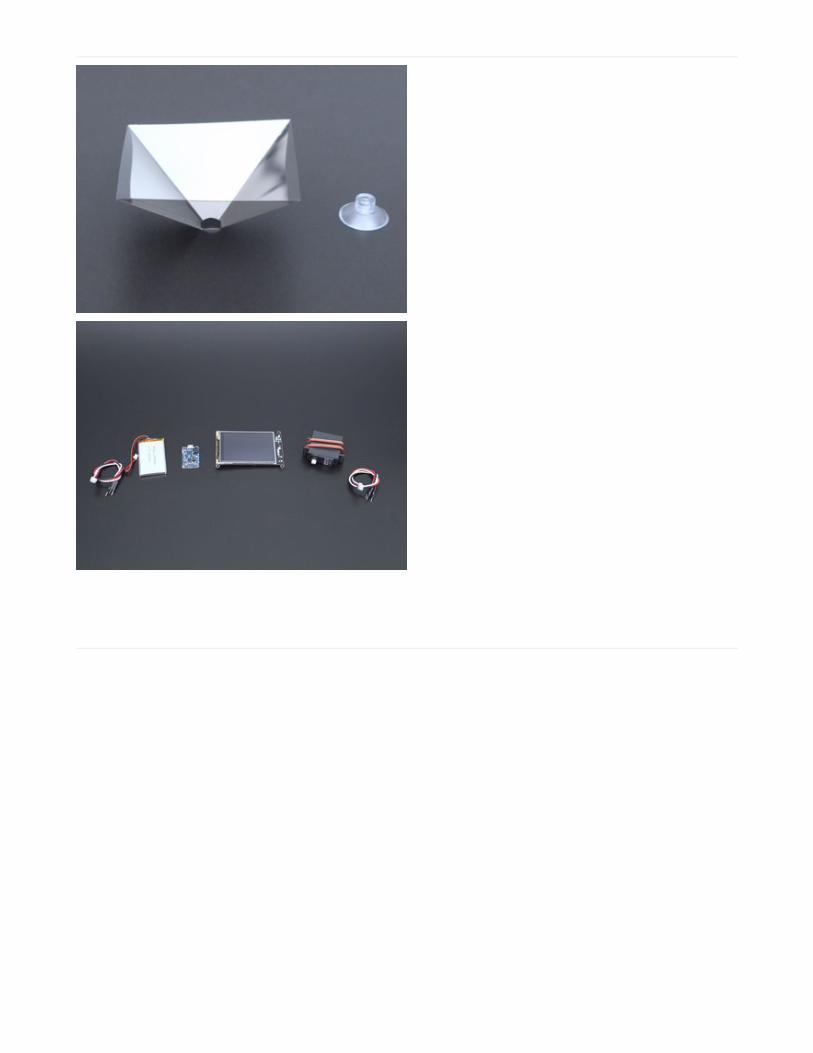
PartsAdafruit PyPortal (https://adafru.it/pyportal)
PowerBoost 1000C (https://adafru.it/f9N)
3.7v 1200mAh Battery (https://adafru.it/dyW)
2X 3-pin JST cable (https://adafru.it/CVg)
SPDT Slide Switch (https://adafru.it/drN)
M2.5 Thread Screw (https://adafru.it/wsc)
(PowerBoost 1000C)
Continuous Rotation Servo (https://adafru.it/Dtv)
Hologram Prism for mobile
devices (https://adafru.it/Gf2)
Adafruit PyPortal - CircuitPython Powered Internet Display
$54.95IN STOCK
Add To Cart
© Adafruit Industries https://learn.adafruit.com/how-to-make-animated-graphics-for-hologram-displays Page 4 of 26
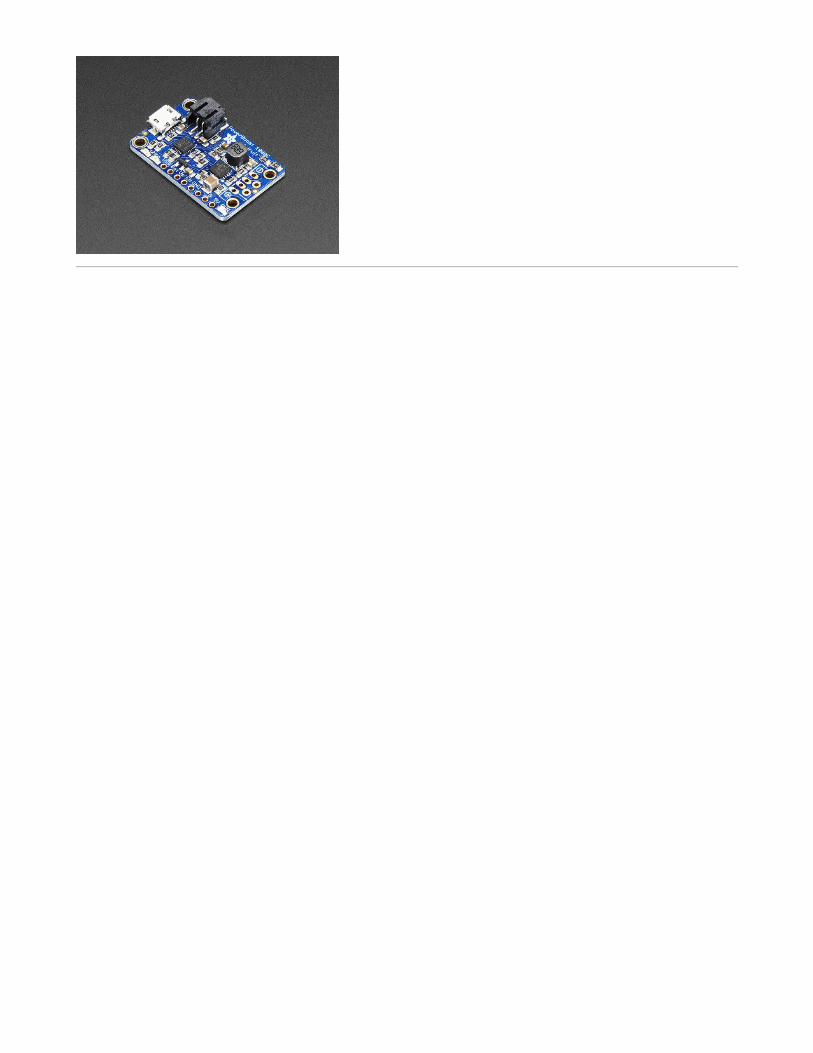
PowerBoost 1000 Charger - Rechargeable 5V Lipo USBBoost @ 1A
$19.95IN STOCK
Add To Cart
Continuous Rotation Servo
$11.95IN STOCK
Add To Cart
Fully Reversible Pink/Purple USB A to micro B Cable - 1mlong
$3.95IN STOCK
Add To Cart
JST PH 3-Pin to Male Header Cable - 200mm
$1.25IN STOCK
Add To Cart
© Adafruit Industries https://learn.adafruit.com/how-to-make-animated-graphics-for-hologram-displays Page 5 of 26

Breadboard-friendly SPDT Slide Switch
OUT OF STOCK
Out Of Stock
Lithium Ion Polymer Battery - 3.7v 1200mAh
OUT OF STOCK
Out Of Stock
Black Nylon Screw and Stand-off Set – M2.5 Thread
$16.95IN STOCK
Add To Cart
© Adafruit Industries https://learn.adafruit.com/how-to-make-animated-graphics-for-hologram-displays Page 6 of 26

Circuit Diagram
Circuit Diagram
The diagram below provides a visual reference for wiring the components. This isn't true to scale, it is just meant to beused as reference. This diagrams was created using Fritzing software (https://adafru.it/oEP).
Adafruit Library for Fritzing
Use our Fritzing parts library to create circuit diagrams for your projects. Download the library or just grab theindividual parts. Get library and parts from GitHub Adafruit Fritzing Parts (https://adafru.it/AYZ).
Wired Connections
Slide switch to PowerBoost
Switch to enable and ground
Servo to PyPortal
Ground to ground (D3)Signal (D3)Voltage to voltage (D3)
Battery to PowerBoost
JST to JST port
PyPortal to PowerBoost
Ground to ground (D4)Voltage to voltage (D4)
© Adafruit Industries https://learn.adafruit.com/how-to-make-animated-graphics-for-hologram-displays Page 7 of 26

Preparing the Graphic
First up, find an animation you'd like to turn into a hologram.
You can use videos or GIFs.
In order for the hologram to work properly, try and find something that is a stand alone object or character rather thana landscape etc. If you can get the subject to be against a black background, that helps too.
Giphy (https://adafru.it/GeU) has some great options to choose from.
If you can find multiple angles of the animation that is a huge plus, but if not, the same graphic can just be rotated foreach angle.
Please make sure the animation is in GIF format.
If the animation is a video file, you can convert it to GIF format with ezgif.com (https://adafru.it/Ekt). Headhere (https://adafru.it/GeV) to convert video to a GIF. Simply upload the video file, make any changes you might wantand output as a gif. You can right click and save the file somewhere handy.
We will be using the below GIFs to make the hologram animation featured in the guide.
© Adafruit Industries https://learn.adafruit.com/how-to-make-animated-graphics-for-hologram-displays Page 8 of 26

GIF placement
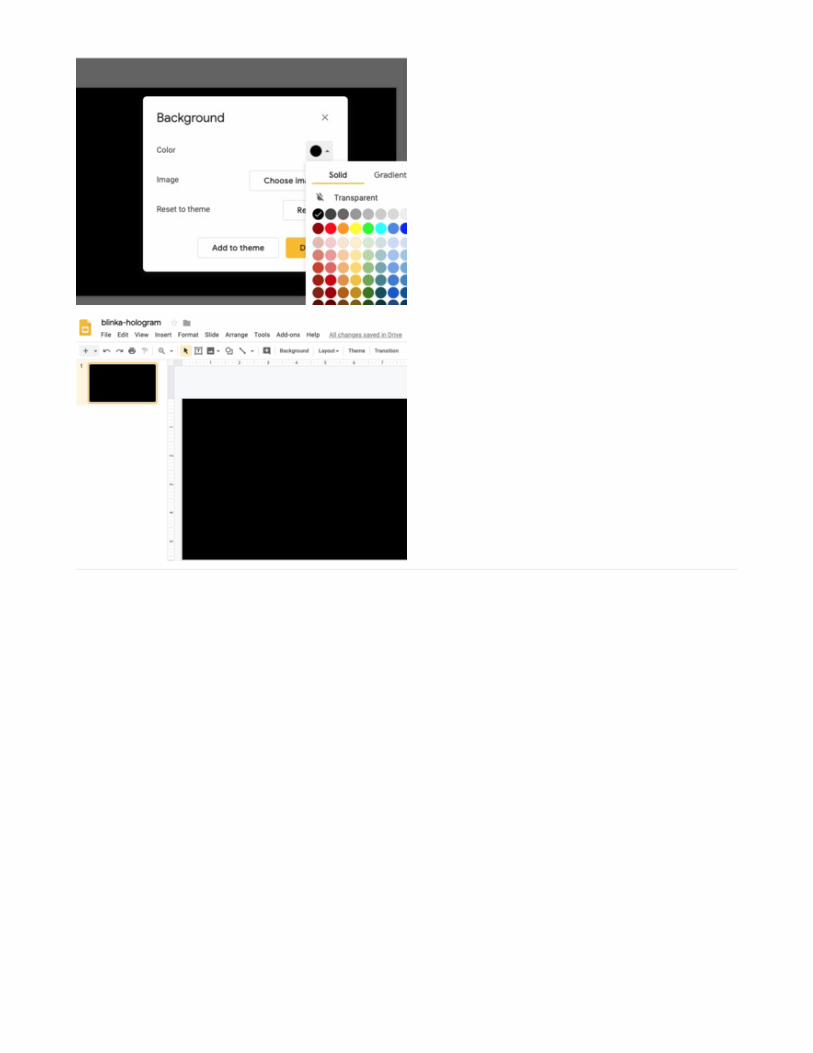
We're going to use Google Slides to place the GIFs the in the right orientation for the hologram.
If you have a Google account head to the Slides site (https://adafru.it/GeW).
If you don't have a Google account you will need to make one to use Slides.
Under "Start a new presentation", click "Blank"
Delete the default text elements and change the
background of the slide to black.
© Adafruit Industries https://learn.adafruit.com/how-to-make-animated-graphics-for-hologram-displays Page 9 of 26
Orient the GIFs
© Adafruit Industries https://learn.adafruit.com/how-to-make-animated-graphics-for-hologram-displays Page 10 of 26

Drag the GIFs onto the slide.
Orient them accordingly. They must be opposite and
equidistant from each other as best as possible.
Screen recording
© Adafruit Industries https://learn.adafruit.com/how-to-make-animated-graphics-for-hologram-displays Page 11 of 26

Take a screen recording of the GIFs playing for 2 seconds or so.
If you have a Mac you can use QuickTime (https://adafru.it/GeX) to screen record. For PC you can use Apowersoft'sscreen recorder (https://adafru.it/GeY) or another free screen recorder of your choice.
Create the GIF
Head to ezgif.com (https://adafru.it/GeZ) and select
"Video to GIF"
Upload the video, and click "Convert to GIF"
Next click the "resize" tool
Change the size of the GIF to 320 (height) x 240
(width) and click "Resize image"
Lastly save the GIF somewhere on your computer
© Adafruit Industries https://learn.adafruit.com/how-to-make-animated-graphics-for-hologram-displays Page 12 of 26

Below is the GIF we made for the guide, if you'd like to use for an example hologram. Right click the GIF and save itsomewhere handy on your computer.
Next we'll prepare the PyPortal to upload the GIF.
© Adafruit Industries https://learn.adafruit.com/how-to-make-animated-graphics-for-hologram-displays Page 13 of 26

Software
Upgrade FirmwareLet's get the PyPortal setup with latest firmware. The
simplest way is to download the UF2 file from
circuitpython.org and drop it on to the PORTALBOOT
drive.
Plug in your PyPortal via a known good
data+power USB cable.
Double press the reset button and wait for the
NeoPixel to turn green.
The PORTALBOOT drive should show up on your
computer.
Download the UF2 file below and drop it onto the
root of the PORTALBOOT drive.
https://adafru.it/Egk
https://adafru.it/Egk
Loading GIFsThe drive will automatically reboot and load as a USB
drive titled CIRCUITPY. Open the drive and create a
new folder named gifs. Download our demo images and
drop them into the gifs folder.
© Adafruit Industries https://learn.adafruit.com/how-to-make-animated-graphics-for-hologram-displays Page 14 of 26

Playing GIFsMake sure you have added all of your desired gifs to the
folders. After that, you will need to download
the GIF_SERVO.UF2 file below.
Double press the reset button and wait for the
NeoPixel to turn green.
The PORTALBOOT drive will show up on your
computer.
Upload the GIF_SERVO.UF2 file to
the PORTALBOOT drive, making sure you rename
the file to code.py.
https://adafru.it/Ge-
https://adafru.it/Ge-
GIF ConfigurationThe screen should turn blue with a dialog box and text.
By default, the GIF player uses a configuration file that
lets you specify how to play back the GIF. The
configuration file can be optional, but if you'd like to use
one use the link below to get it. It's not necessary, so
press the TAP icon to proceed and play back your GIFs.
https://adafru.it/E-l
https://adafru.it/E-l
© Adafruit Industries https://learn.adafruit.com/how-to-make-animated-graphics-for-hologram-displays Page 15 of 26

3D Printing
3D Printed PartsParts are designed to be 3D printed with FDM based
machines. STL files are oriented to print "as is". Parts are
listed below with file name and description. Parts
require tight tolerances that might need adjusting slice
setting. Reference the suggested settings below.
https://adafru.it/svF
https://adafru.it/svF
https://adafru.it/Gf0
https://adafru.it/Gf0
Slice SettingsUse these settings as reference. Values listed were
used in Ultimaker's CURA
3.X (https://adafru.it/C26) slicing software.
0.2mm Layer Height / 0.4mm nozzle
0.4mm Line Width (inner & outer widths)
40mm/s printing speed
20% infill
Supports: No
Brim Line Count: 5
© Adafruit Industries https://learn.adafruit.com/how-to-make-animated-graphics-for-hologram-displays Page 16 of 26

Assembly
Prep WiresI used two JST PH 3-Pin to Male Header
Cables, (https://adafru.it/CVg) one to solder to the
PowerBoost and the other cables to connect the servo.
For the PowerBoost cable, we'll only need the red and
black wire. I removed the third white wire. Trim and tin
the ends of the red and black wires.
Solder PowerBoostSolder the red wire to the + side and the black wire to
the - side of the PowerBoost.
© Adafruit Industries https://learn.adafruit.com/how-to-make-animated-graphics-for-hologram-displays Page 17 of 26
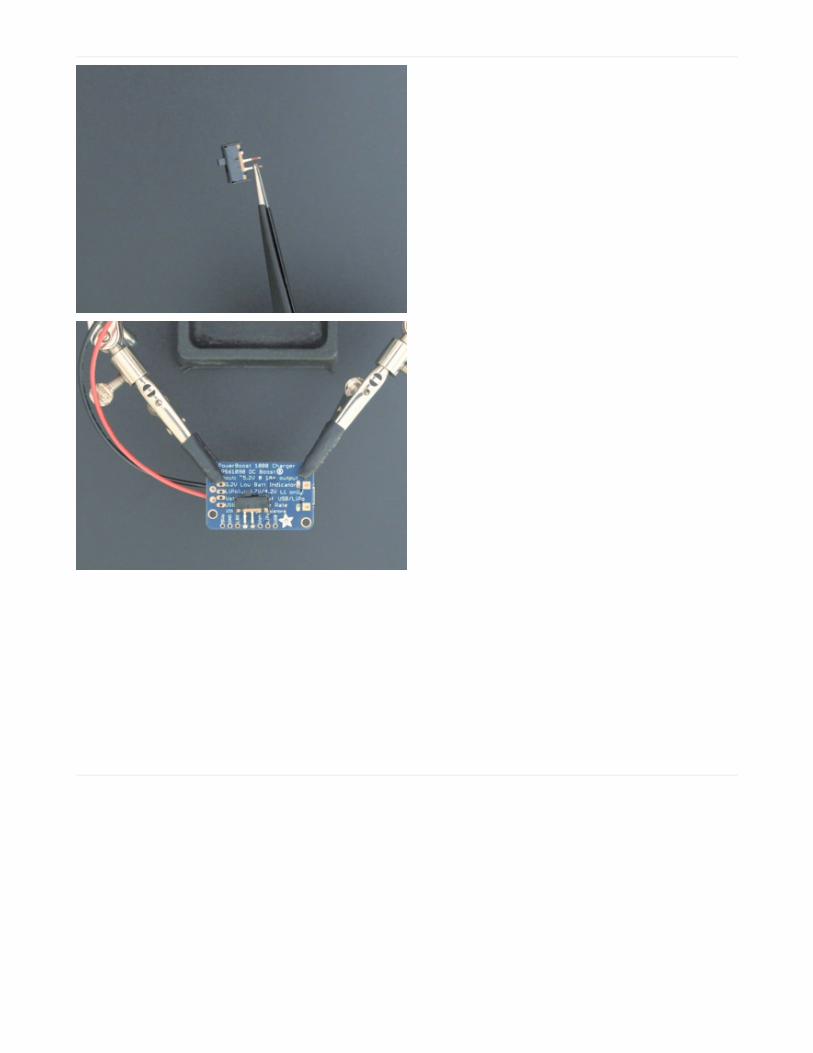
Prep Slide Switch We can add a slight bend to the slide switch pins so it
can sit on the back of the through holes on the
PowerBoost. I then trimmed off the third pin to easily fit
it on the board.
Solder Slide SwitchTin the EN and GND on the PowerBoost and then solder
the slide switch into place.
© Adafruit Industries https://learn.adafruit.com/how-to-make-animated-graphics-for-hologram-displays Page 18 of 26
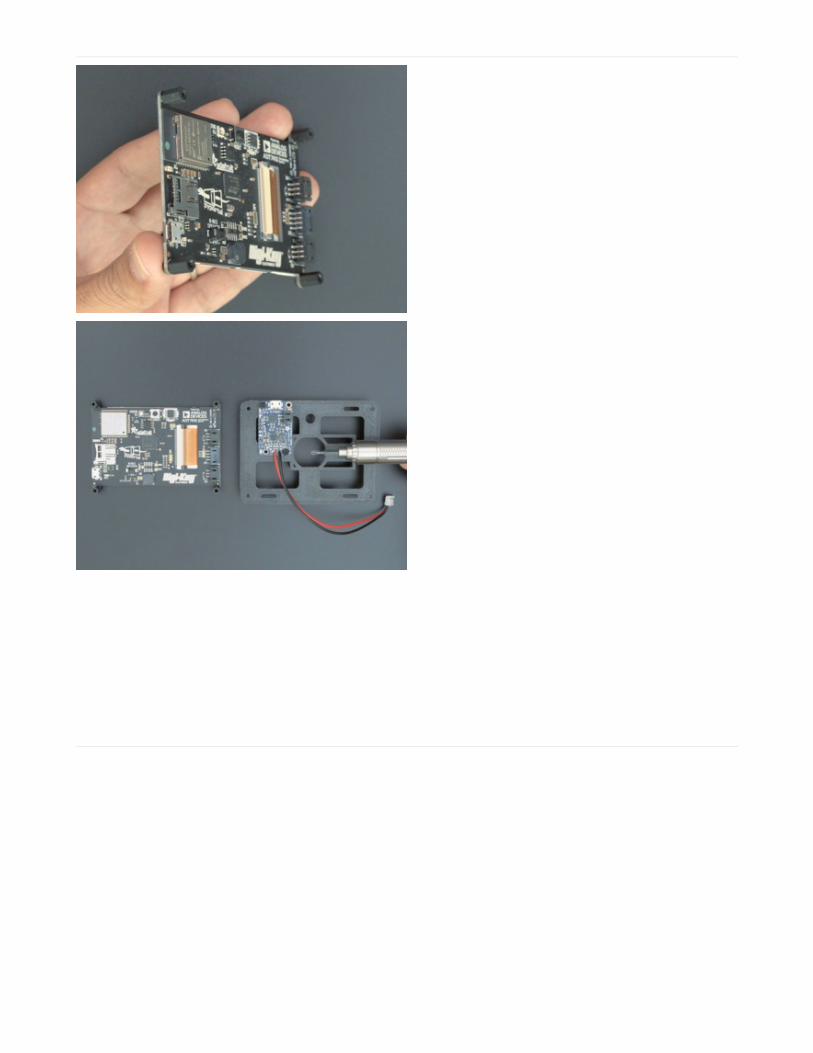
PyPortal Standoffs We'll need to elevate the PyPortal so it can sit over the
PowerBoost and Battery. I used 8mm long nylon
standoffs with 5mm M2.5 screws to the mounting tabs
on the PyPortal.
Mount PowerBoostAlign the printed PyPortal mount to the reset button
cutout. The PowerBoost mounts with the USB port
pointing out so we can easily access it for charging the
battery.
I used M2.5 5mm screws to mount the PowerBoost.
© Adafruit Industries https://learn.adafruit.com/how-to-make-animated-graphics-for-hologram-displays Page 19 of 26
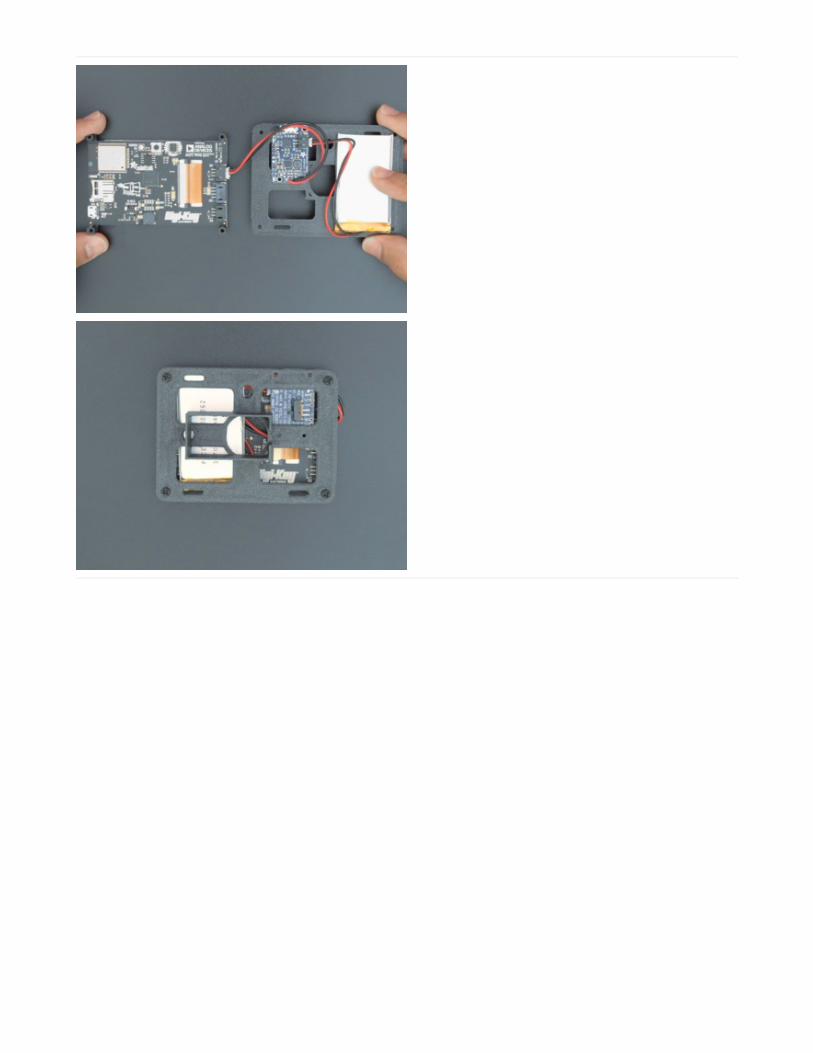
Mount BatteryOrient the battery so the wires can plug into the
PowerBoost. Plug the battery into the Power Boost and
the wire on the PowerBoost to the D4 port on the
PyPortal.
Mount PyPortalAlign the PyPortal with the printed mount and use four
more M2.5 5mm screws to secure it to the mount.
© Adafruit Industries https://learn.adafruit.com/how-to-make-animated-graphics-for-hologram-displays Page 20 of 26
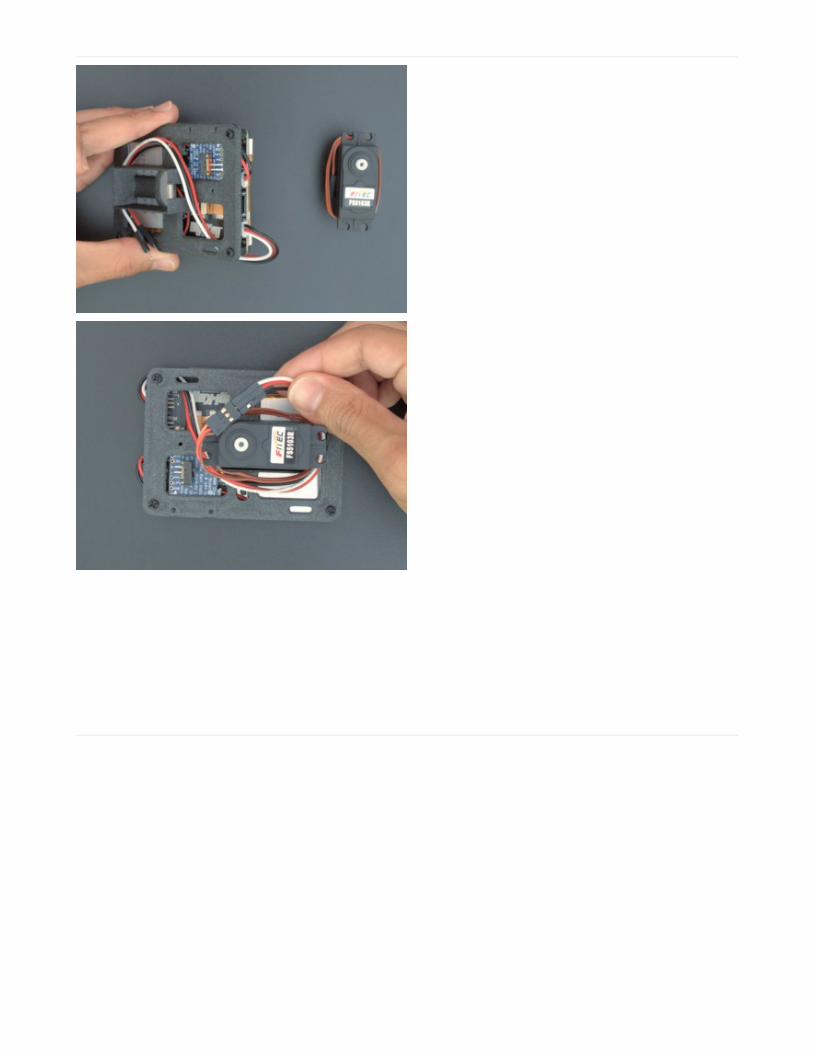
Servo cablePass the JST cable for the servo through the printed
mount and connect it to the D3 port on the PyPortal.
Mount and connect servoAlign the servo with the wire cut out on the walls on the
printed mount.
Plug the male ends into the female ends of the servo.
The white wire connects to the orange wire on the
servo. Black connects to brown and red connect to the
red wire on the servo.
© Adafruit Industries https://learn.adafruit.com/how-to-make-animated-graphics-for-hologram-displays Page 21 of 26
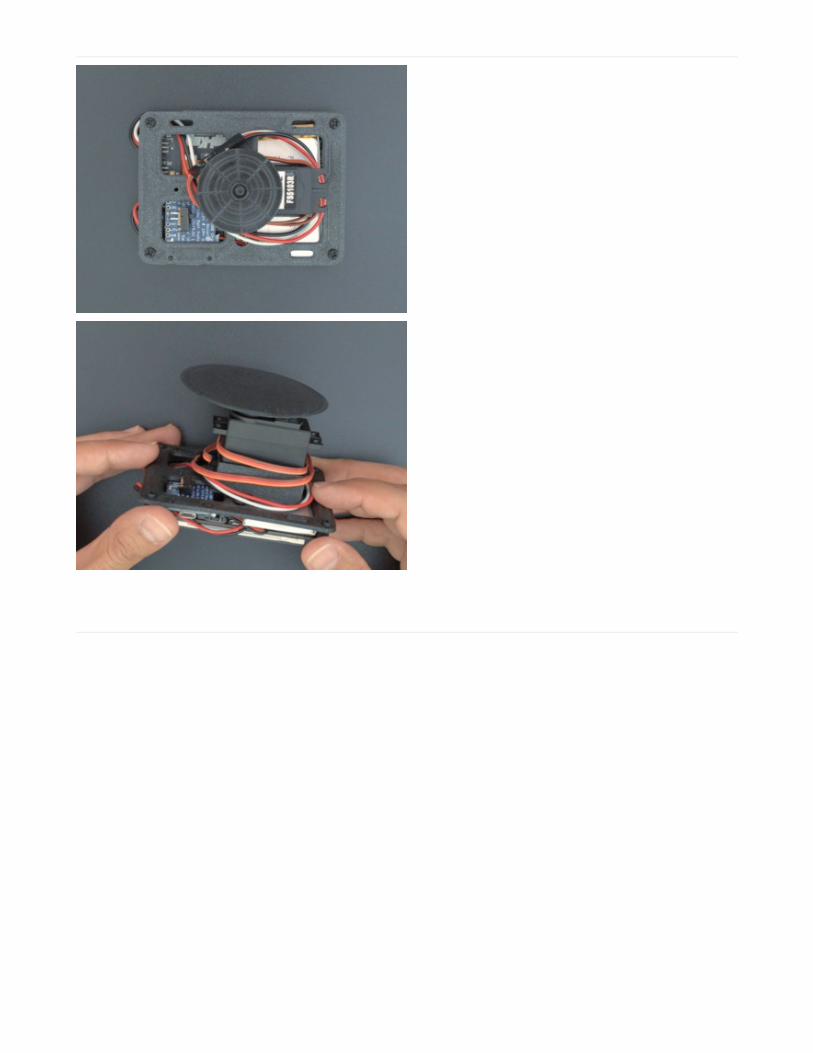
Servo hornThe servo includes a circular horn that press fits into the
servo. I wrapped the excess wires around the servo
body.
Horn baseThe circular servo horn is then press fitted into the larger
printed circular base.
© Adafruit Industries https://learn.adafruit.com/how-to-make-animated-graphics-for-hologram-displays Page 22 of 26
Place CoverTo prevent light leaking on the sides of the PyPortal, we
can place the front cover of the display.
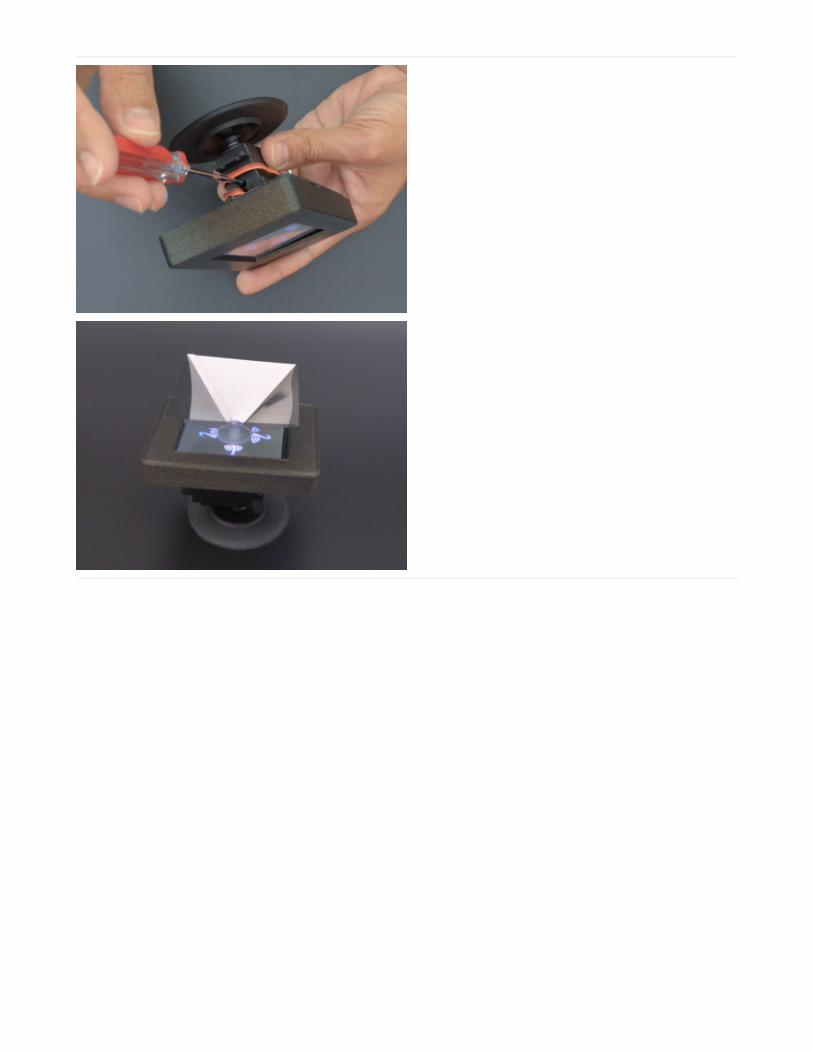
Servo Speed If your servo has a Potentiometer, we can adjust the
speed and direction with a screw driver.
Complete!
Fit the prism in the center of the hologram graphics so the four quadrants align and reflections can project on eachside of the prism.
© Adafruit Industries https://learn.adafruit.com/how-to-make-animated-graphics-for-hologram-displays Page 23 of 26

© Adafruit Industries https://learn.adafruit.com/how-to-make-animated-graphics-for-hologram-displays Page 24 of 26

Test Out the Hologram
To try out the hologram, place the projector prism on top of and in the center of the screen with the animation.
If the hologram is faint, try turning the brightness up on the screen or moving some place darker.
Smart Phone / Tablet Examples
Here are a couple of slick examples from the Spectre website to test out your prism with a phone or tablet.
Robot
Rocket
Bee
Fairy
Octopus
For more info, here's a video from Specre on how to use the prism:
© Adafruit Industries https://learn.adafruit.com/how-to-make-animated-graphics-for-hologram-displays Page 25 of 26

© Adafruit Industries Last Updated: 2019-10-23 02:50:30 AM UTC Page 26 of 26