how to make arawhide drum - spirit passages | shamanic ... · pdf filethis process will take...
TRANSCRIPT
Making your own frame drum can be very rewarding and only involves a moderateamount of crafting skills to accomplish. If you are a real beginner it may be best to get aframe drum kit. Good suppliers include CedarMountain drums, /www.cedarmtndrums.comand Centralia Fur and Hide http://www.furand-hide.com.
Whether you choose a kit or assemble the sup-plies on your own, choose a hoop size that fitsyou well. Most people can use a 16-inch in di-ameter frame drum with relative ease. If you areslightly built or shorter in stature you might wanta 13 or 14-inch hoop. If you are very tall or havelonger arms, then you might want to scale up toa 18 or 20-inch frame. Whatever the diameter,choose a frame that is 3 to 4-inches deep.
Hoops also come in various different variety ofwoods and may be made from either plywoodor from one solid piece that has been steam-bent into a circle or may be pieced to form ahexagonal or octagonal shape. Oak, maple,cedar and pine hoops are readily available.
The surface of your drum will be of raw hide,that is an animal hide that has been dehaired,cleaned, stretched and dried but not tanned.Good hides to use for drums are deer, horse,reindeer, goat, steer, bear, buffalo and moose.The latter two require a bit more skill as theyneed to be stretched more tautly to sound rightwhen finished. If you are using buffalo ormoose, use a heavier plywood frame as it willmore likely hold it’s shape when the hide dries.
The day before you are going to make yourdrum, soak the rawhide overnight in coldwater. Place weights on the hide to keep itsubmerged.
Gather your supplies:• A yardstick• A soft lead pencil• A pair of heavy-duty scissors• A bucket to keep hide pieces pliable whileworking on your drum• A water-proof surface to work on or a plastictable cloth to protect your work surfaces frombeing damaged by the wet hide• Wooden clothes pins• Ball of twine• Leather punch to make 3/8” holes• Hammer• Board to safely hammer holes without marringthe table• A piece of thin, soft leather or buckskin abouttwo foot square (this is for making your drumstick head and for padding the drum’s handles)• A sturdy stick 14” long• An old wool blanket that you can cut intopieces or quarter yard of heavy wool at least36-inches wide• White glue
This process will take you a few hours over twodays so make sure you can be patient and notdisturbed while you work.
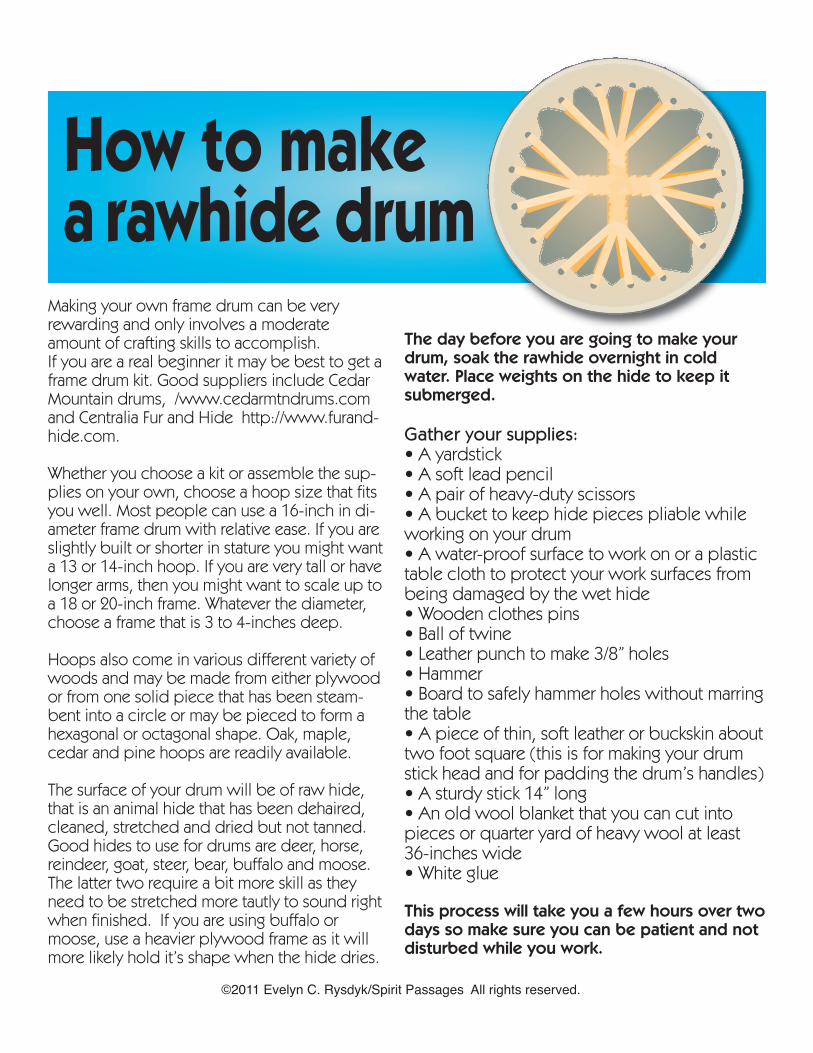
How to make a rawhide drum
©2011 Evelyn C. Rysdyk/Spirit Passages All rights reserved.
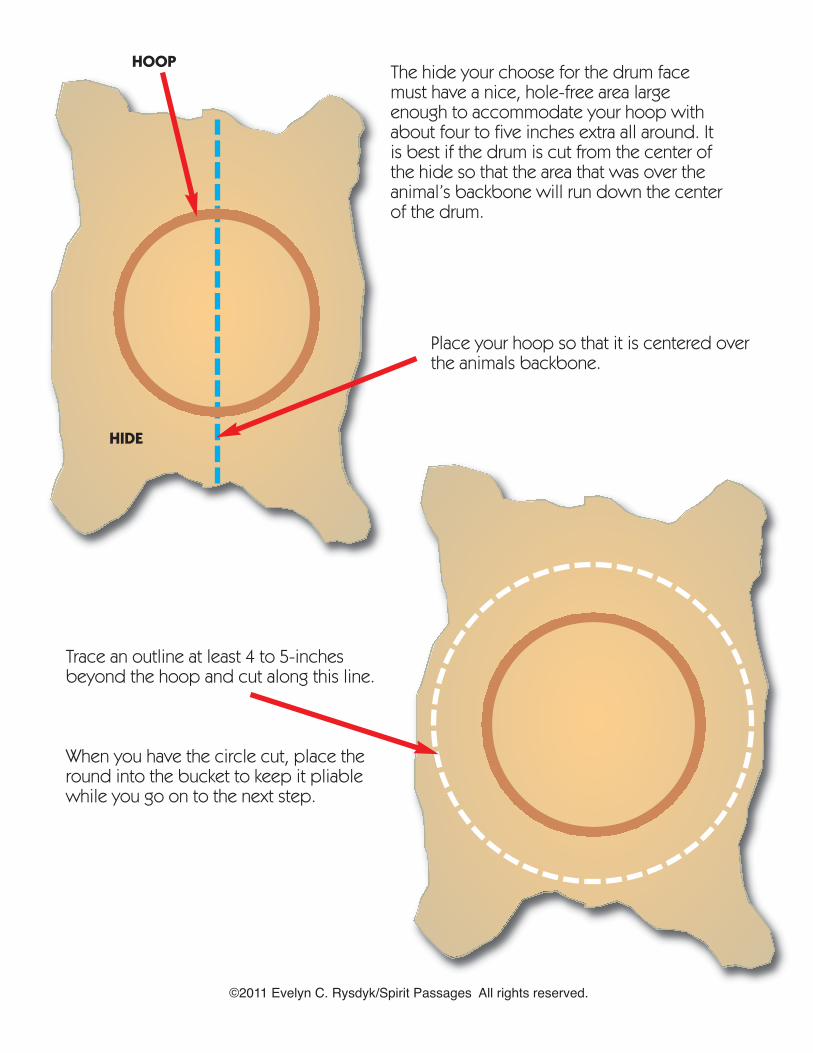
The hide your choose for the drum facemust have a nice, hole-free area largeenough to accommodate your hoop withabout four to five inches extra all around. Itis best if the drum is cut from the center ofthe hide so that the area that was over theanimal’s backbone will run down the centerof the drum.
Place your hoop so that it is centered overthe animals backbone.
HOOP
HIDE
Trace an outline at least 4 to 5-inches beyond the hoop and cut along this line.
When you have the circle cut, place theround into the bucket to keep it pliablewhile you go on to the next step.
©2011 Evelyn C. Rysdyk/Spirit Passages All rights reserved.
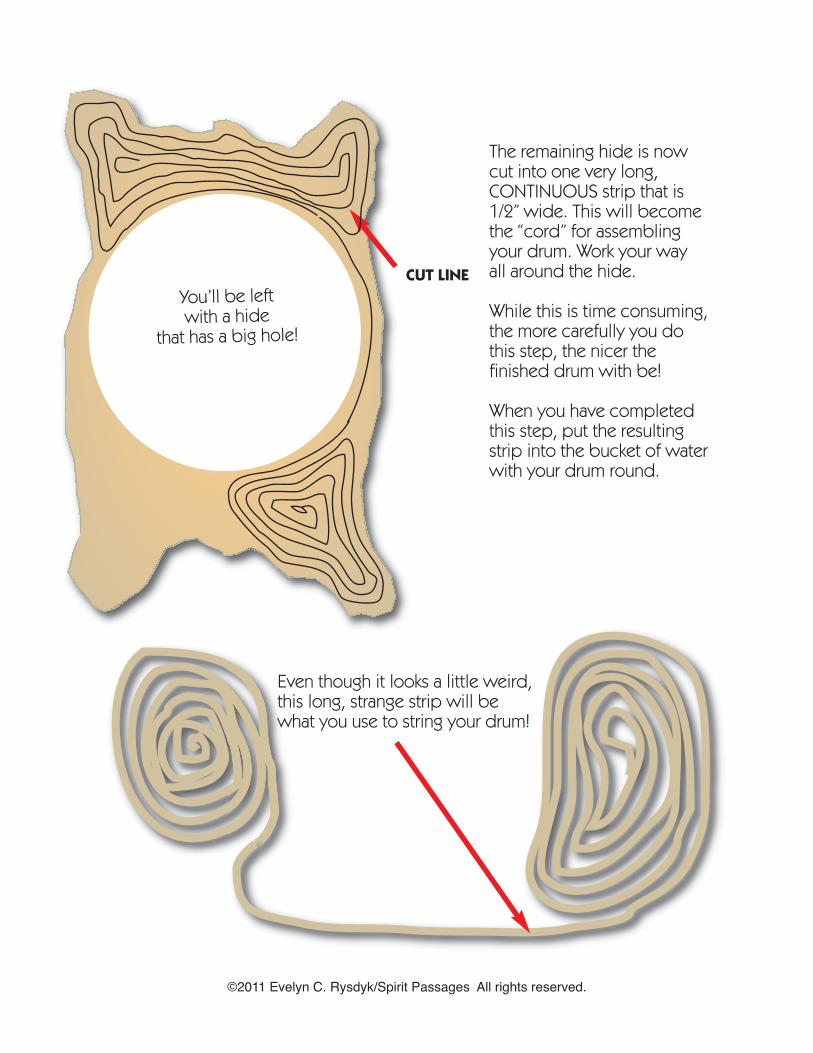
You’ll be left with a hide
that has a big hole!
Even though it looks a little weird, this long, strange strip will be what you use to string your drum!
The remaining hide is nowcut into one very long, CONTINUOUS strip that is1/2” wide. This will becomethe “cord” for assemblingyour drum. Work your way all around the hide.
While this is time consuming,the more carefully you dothis step, the nicer the finished drum with be!
When you have completedthis step, put the resultingstrip into the bucket of waterwith your drum round.
CUT LINE
©2011 Evelyn C. Rysdyk/Spirit Passages All rights reserved.
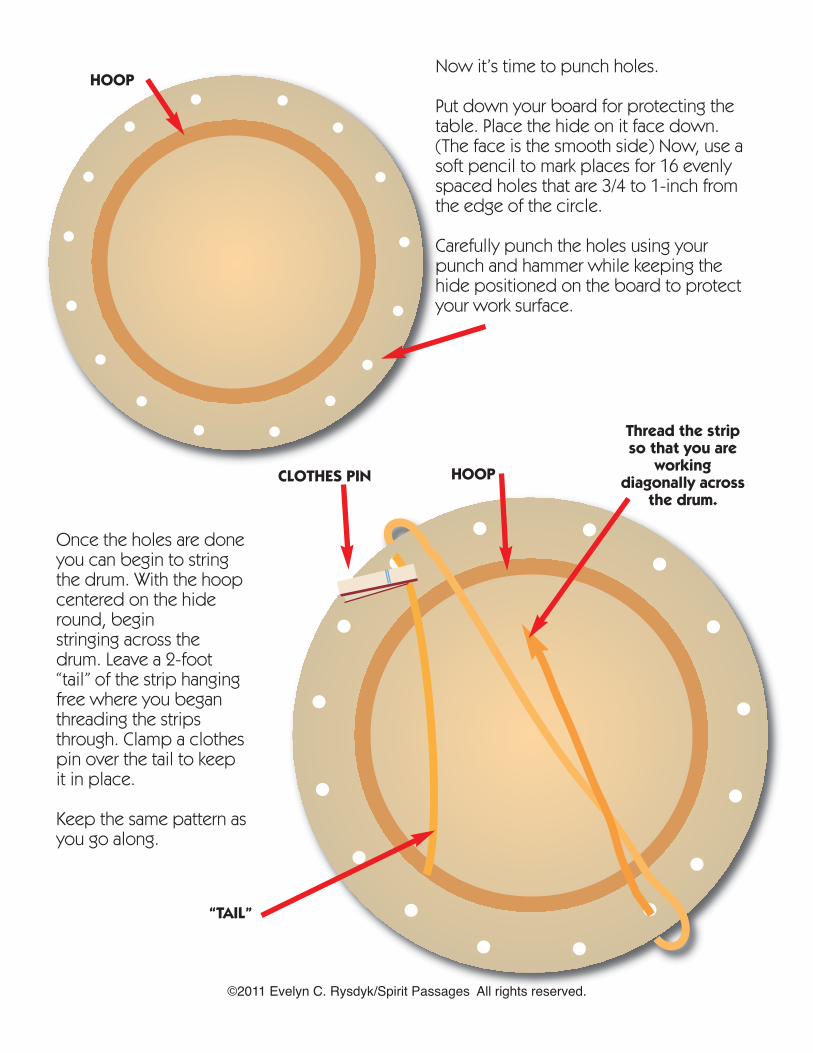
Now it’s time to punch holes.
Put down your board for protecting thetable. Place the hide on it face down.(The face is the smooth side) Now, use asoft pencil to mark places for 16 evenlyspaced holes that are 3/4 to 1-inch fromthe edge of the circle.
Carefully punch the holes using yourpunch and hammer while keeping thehide positioned on the board to protectyour work surface.
HOOP
Once the holes are doneyou can begin to stringthe drum. With the hoopcentered on the hideround, begin stringing across thedrum. Leave a 2-foot“tail” of the strip hangingfree where you beganthreading the stripsthrough. Clamp a clothespin over the tail to keepit in place.
Keep the same pattern asyou go along.
“TAIL”
HOOP
Thread the stripso that you are
working diagonally across
the drum.
CLOTHES PIN
©2011 Evelyn C. Rysdyk/Spirit Passages All rights reserved.
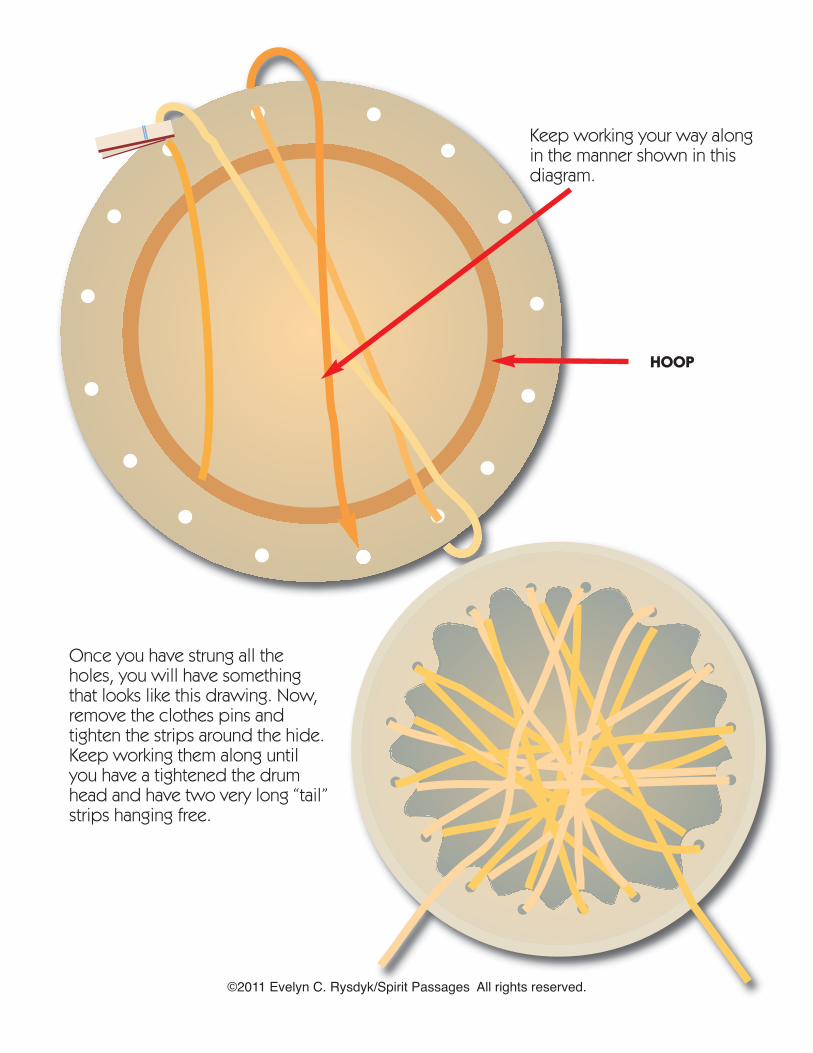
Keep working your way along in the manner shown in this diagram.
HOOP
Once you have strung all theholes, you will have somethingthat looks like this drawing. Now,remove the clothes pins andtighten the strips around the hide.Keep working them along untilyou have a tightened the drumhead and have two very long “tail”strips hanging free.
©2011 Evelyn C. Rysdyk/Spirit Passages All rights reserved.
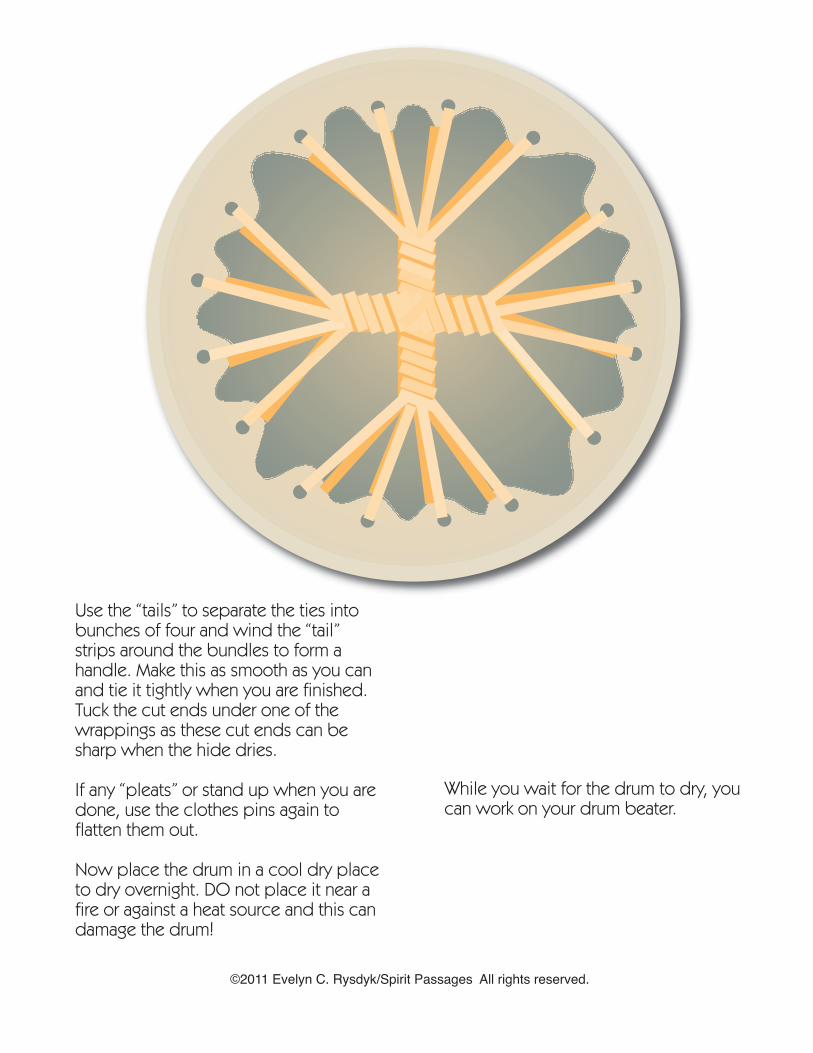
Use the “tails” to separate the ties intobunches of four and wind the “tail”strips around the bundles to form a handle. Make this as smooth as you canand tie it tightly when you are finished.Tuck the cut ends under one of thewrappings as these cut ends can besharp when the hide dries.
If any “pleats” or stand up when you aredone, use the clothes pins again to flatten them out.
Now place the drum in a cool dry placeto dry overnight. DO not place it near afire or against a heat source and this candamage the drum!
While you wait for the drum to dry, youcan work on your drum beater.
©2011 Evelyn C. Rysdyk/Spirit Passages All rights reserved.
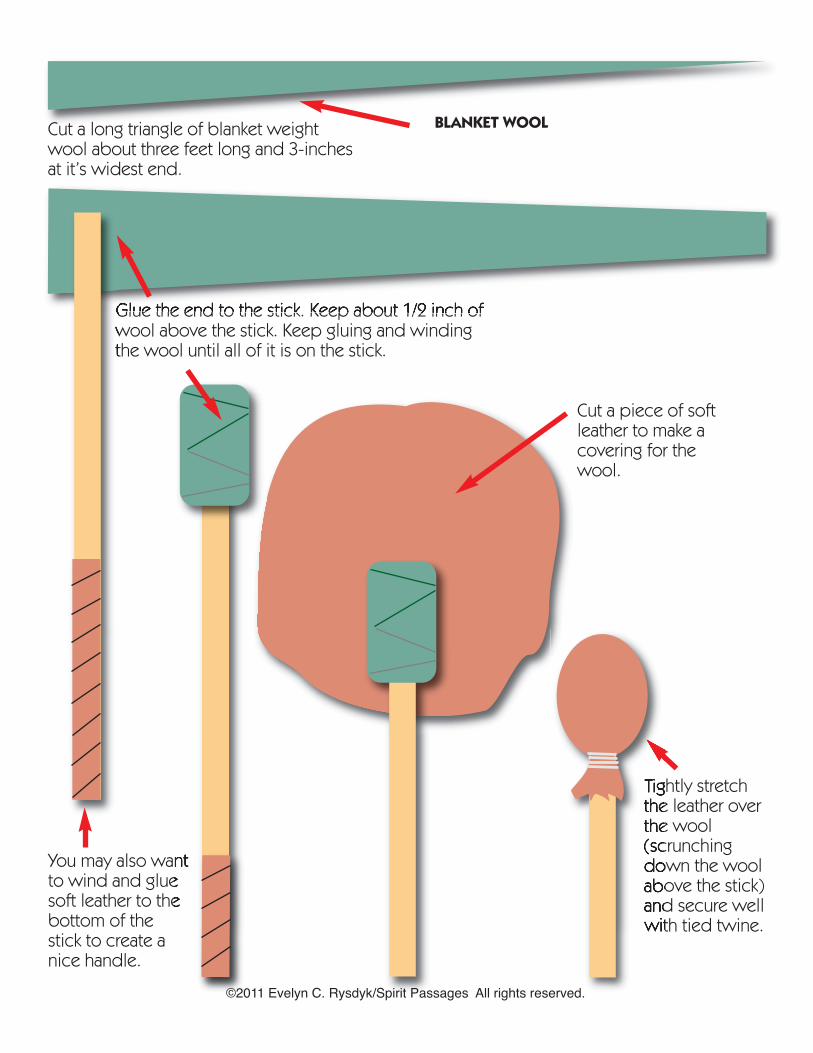
BLANKET WOOLCut a long triangle of blanket weightwool about three feet long and 3-inchesat it’s widest end.
Glue the end to the stick. Keep about 1/2 inch ofwool above the stick. Keep gluing and windingthe wool until all of it is on the stick.
Tightly stretchthe leather overthe wool(scrunchingdown the woolabove the stick)and secure wellwith tied twine.
You may also wantto wind and gluesoft leather to thebottom of thestick to create anice handle.
Cut a piece of softleather to make acovering for thewool.
©2011 Evelyn C. Rysdyk/Spirit Passages All rights reserved.
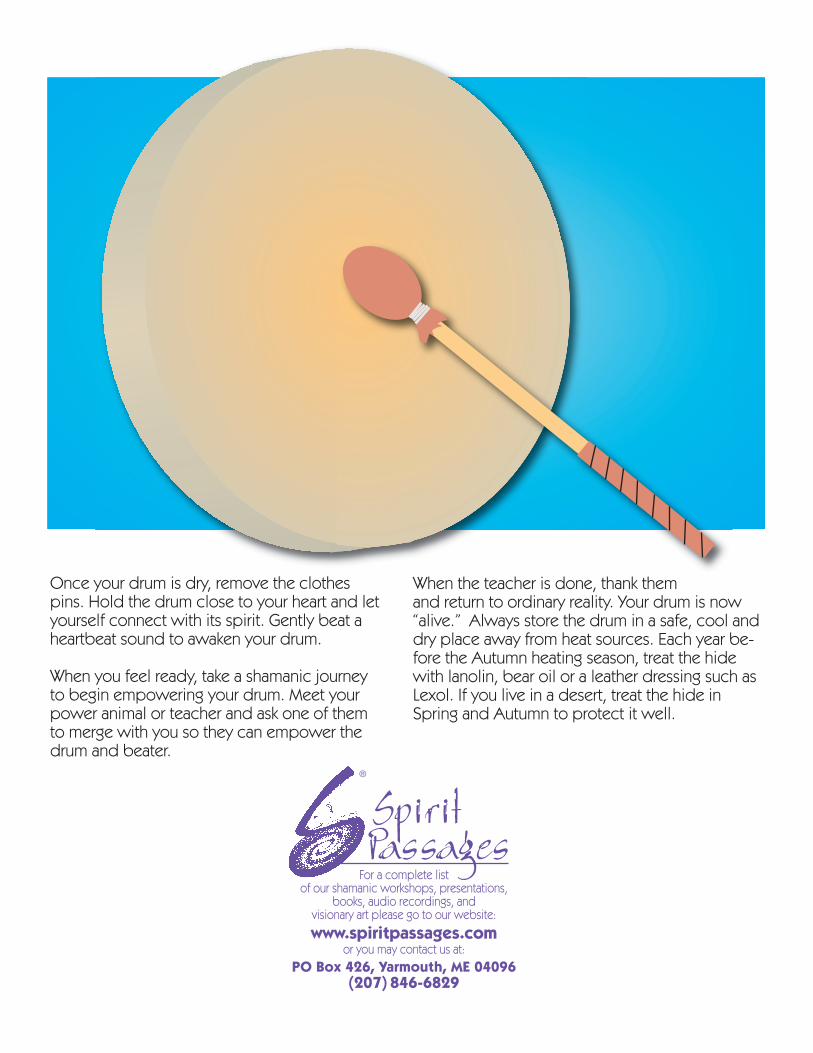
Once your drum is dry, remove the clothespins. Hold the drum close to your heart and letyourself connect with its spirit. Gently beat aheartbeat sound to awaken your drum.
When you feel ready, take a shamanic journeyto begin empowering your drum. Meet yourpower animal or teacher and ask one of themto merge with you so they can empower the drum and beater.
When the teacher is done, thank them and return to ordinary reality. Your drum is now“alive.” Always store the drum in a safe, cool anddry place away from heat sources. Each year be-fore the Autumn heating season, treat the hidewith lanolin, bear oil or a leather dressing such asLexol. If you live in a desert, treat the hide inSpring and Autumn to protect it well.
®
For a complete listof our shamanic workshops, presentations,
books, audio recordings, andvisionary art please go to our website:
www.spiritpassages.comor you may contact us at:
PO Box 426, Yarmouth, ME 04096(207) 846-6829
SpiritPassages

The hide your choose for the drum facemust have a nice, hole-free area largeenough to accommodate your hoop withabout four to five inches extra all around. Itis best if the drum is cut from the center ofthe hide so that the area that was over theanimal’s backbone will run down the centerof the drum.
Place your hoop so that it is centered overthe animals backbone.
HOOP
HIDE
Trace an outline at least 4 to 5-inches beyond the hoop and cut along this line.
When you have the circle cut, place theround into the bucket to keep it pliablewhile you go on to the next step.
©2011 Evelyn C. Rysdyk/Spirit Passages All rights reserved.