how to: setup your email address in windows vista · pdf filehow to: setup your email address...
TRANSCRIPT
WEB & MOBILE DEVELOPMENT
How To: Setup your email address in Windows Vista Mail

How To: Setup your email address in Windows Vista Mail
P a g e | 1
Contents Windows Vista Mail: Setting up Email for the First Time ...................................... 2 Windows Vista Mail: Checking Existing Email Settings ...................................... 10
Checklist Ensure you have the following details with you that are required to complete the process:
• Your full email address (eg. [email protected]) • Your email password • Your domain name. This is used as both your incoming and outgoing mail
server. If your website address was http://www.spectrumwired.com your incoming and outgoing mail servers would be “spectrumwired.com” (we ignore the ‘http://www.’)
Overview This document’s aim is to assist with email setup for the companies and businesses that have website hosting through Spectrum Wired. Instructions will be provided for email setup with Windows Vista Mail in step-by-step point form with accompanying screen-grabs. This document is for clients of Spectrum Wired hosting services only
Please Note: If after following these instructions you find that you can receive but not send emails; you must contact your ISP’s technical support
and use their outgoing mail (SMTP) server.
How To: Setup your email address in Windows Vista Mail
P a g e | 2
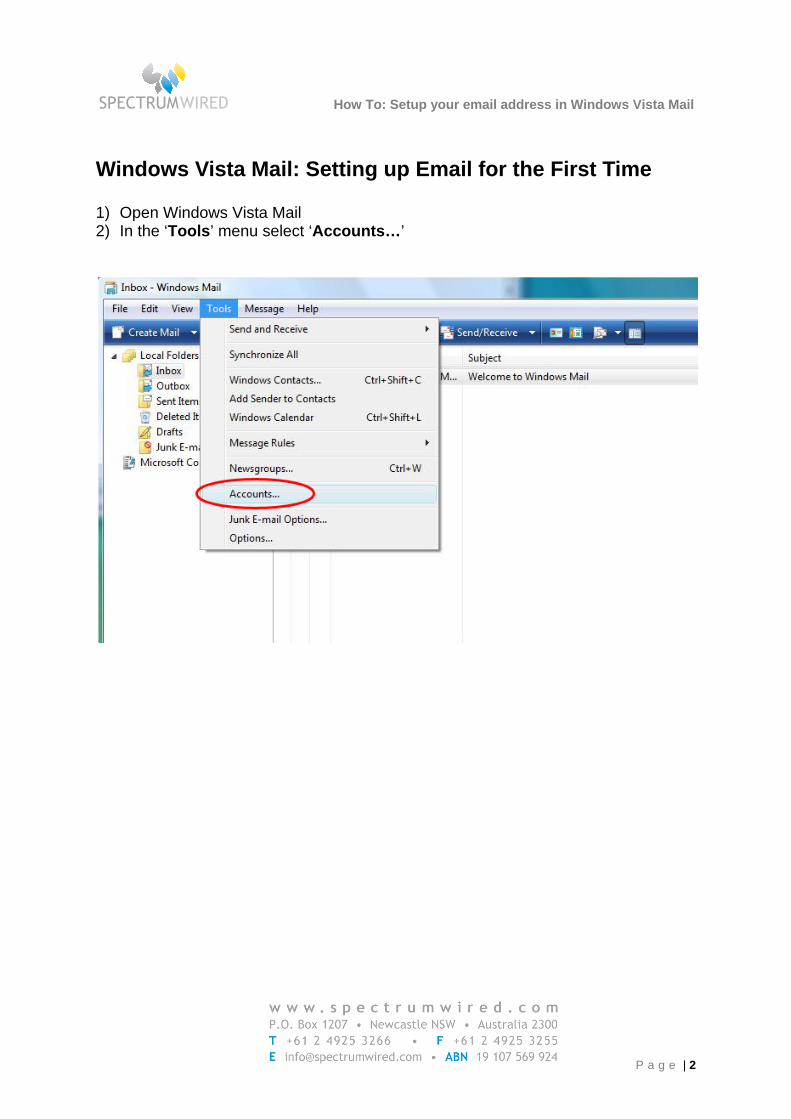
Windows Vista Mail: Setting up Email for the First Time 1) Open Windows Vista Mail 2) In the ‘Tools’ menu select ‘Accounts…’
How To: Setup your email address in Windows Vista Mail
P a g e | 3
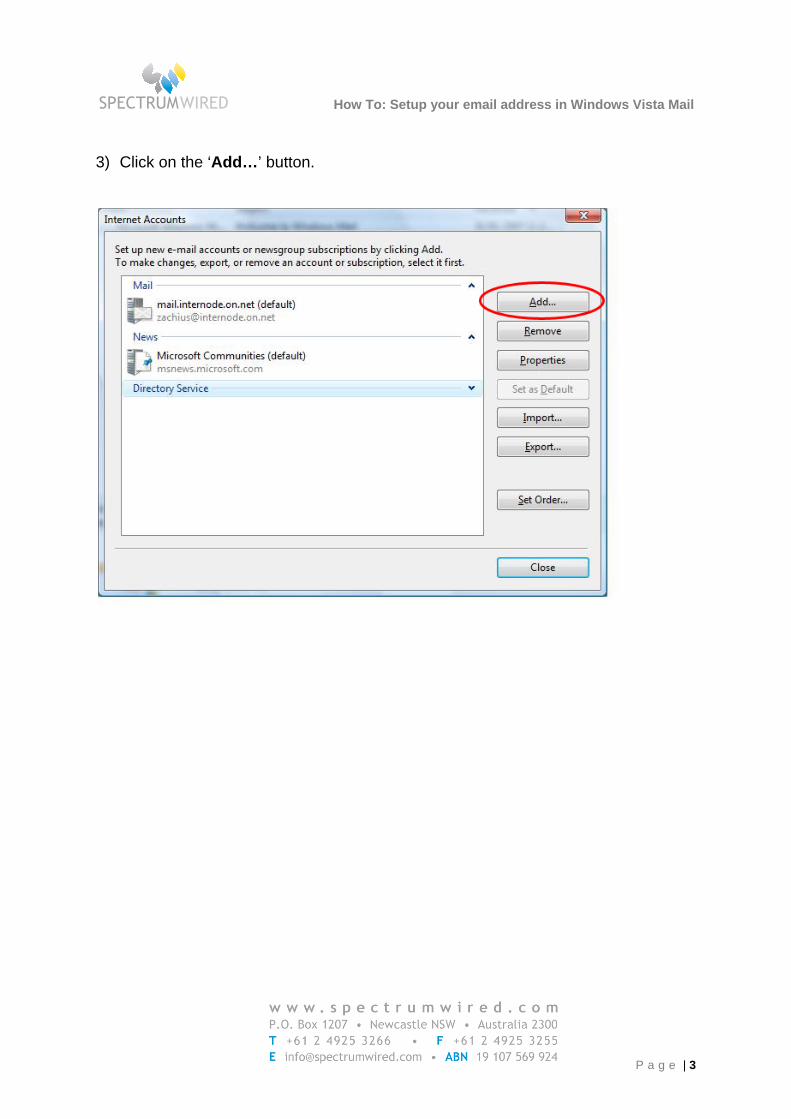
3) Click on the ‘Add…’ button.
How To: Setup your email address in Windows Vista Mail
P a g e | 4
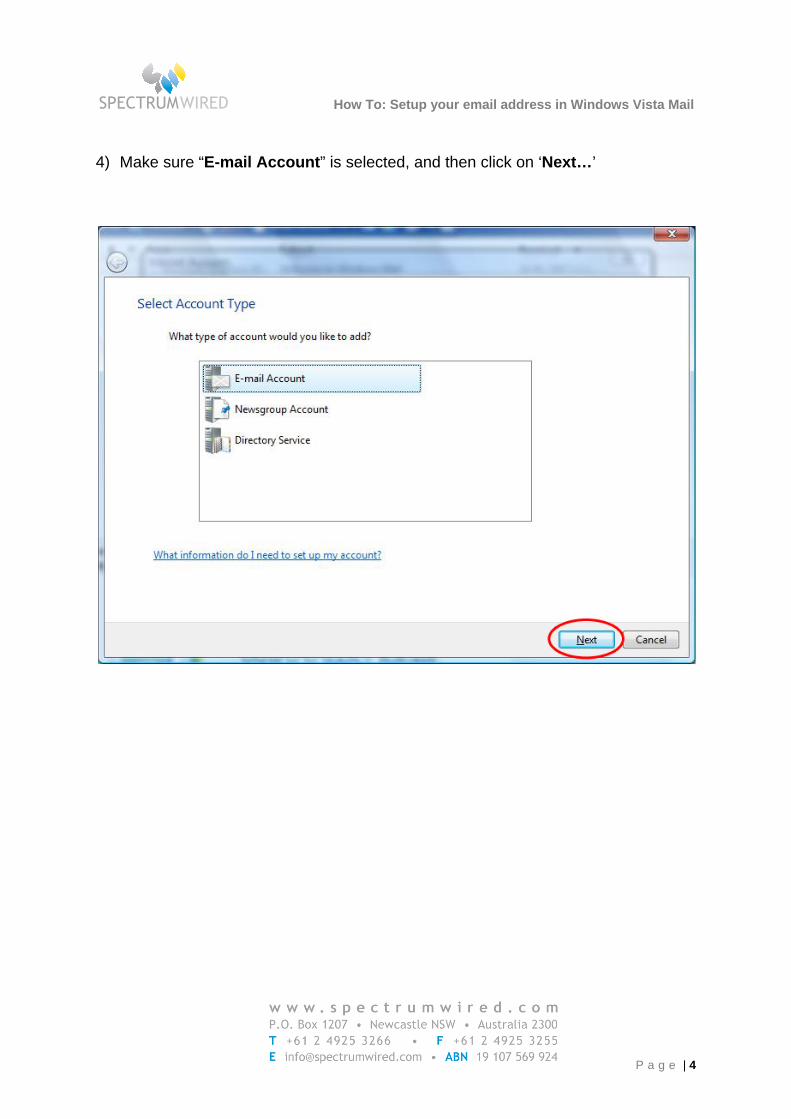
4) Make sure “E-mail Account” is selected, and then click on ‘Next…’
How To: Setup your email address in Windows Vista Mail
P a g e | 5
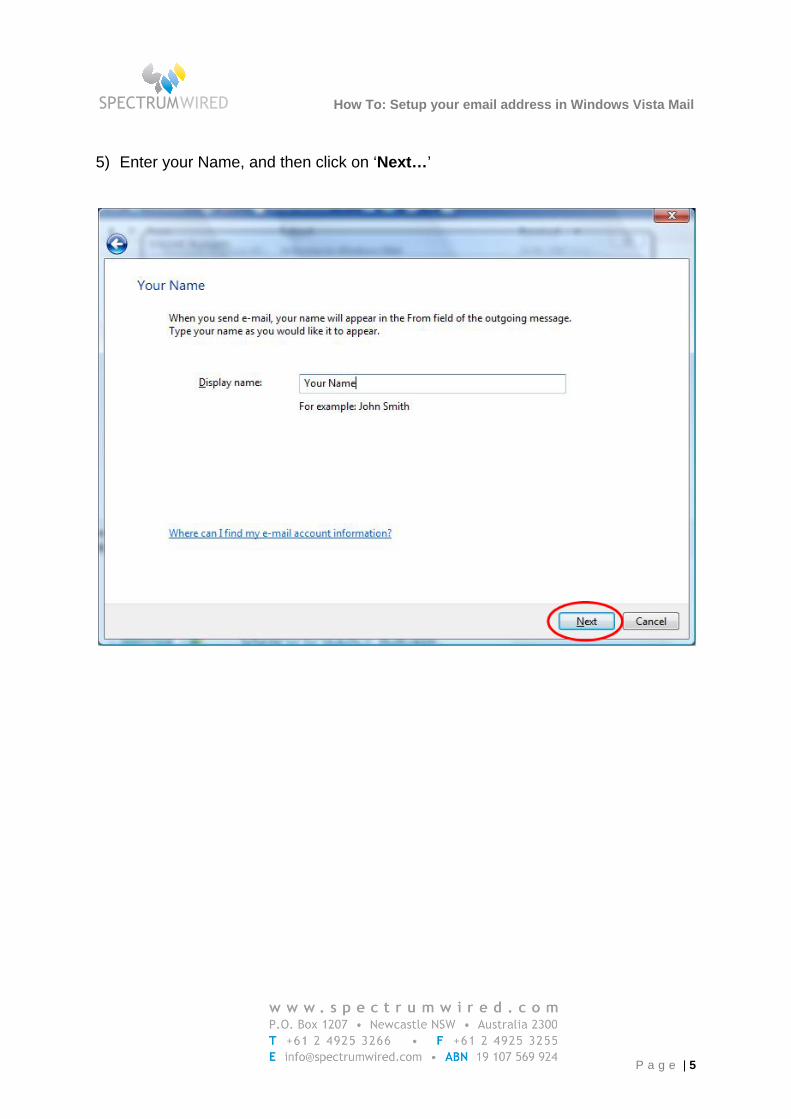
5) Enter your Name, and then click on ‘Next…’
How To: Setup your email address in Windows Vista Mail
P a g e | 6
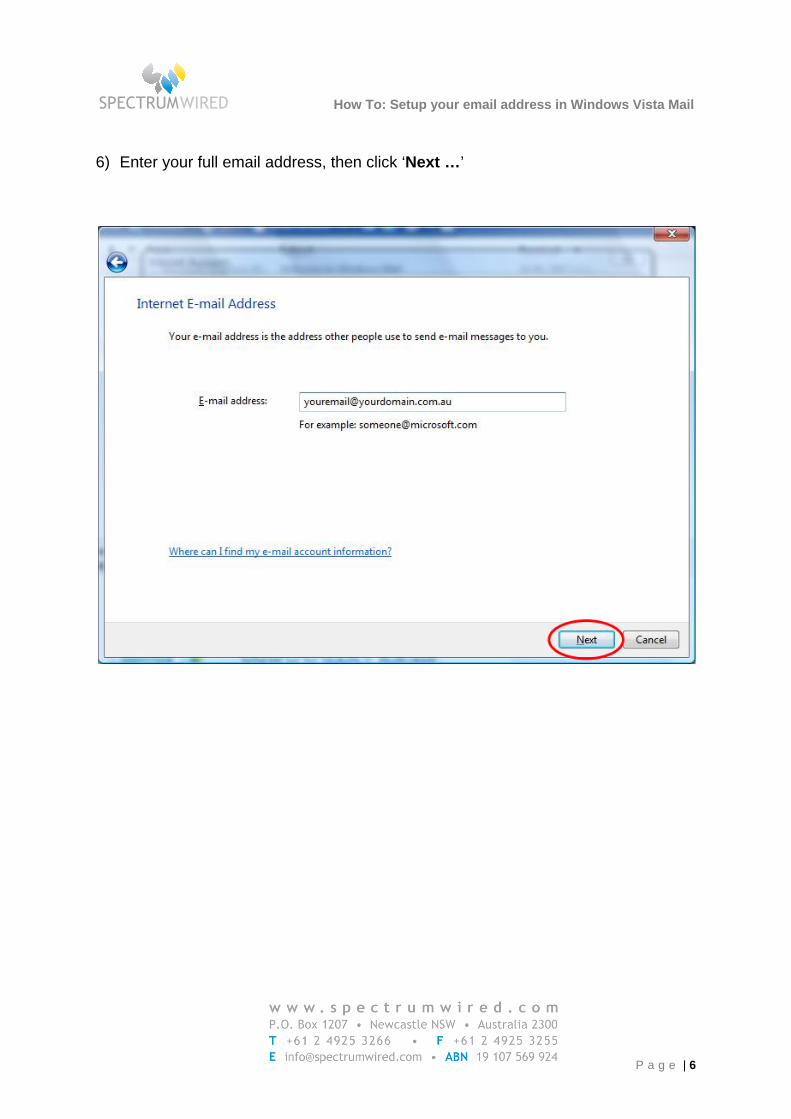
6) Enter your full email address, then click ‘Next …’
How To: Setup your email address in Windows Vista Mail
P a g e | 7
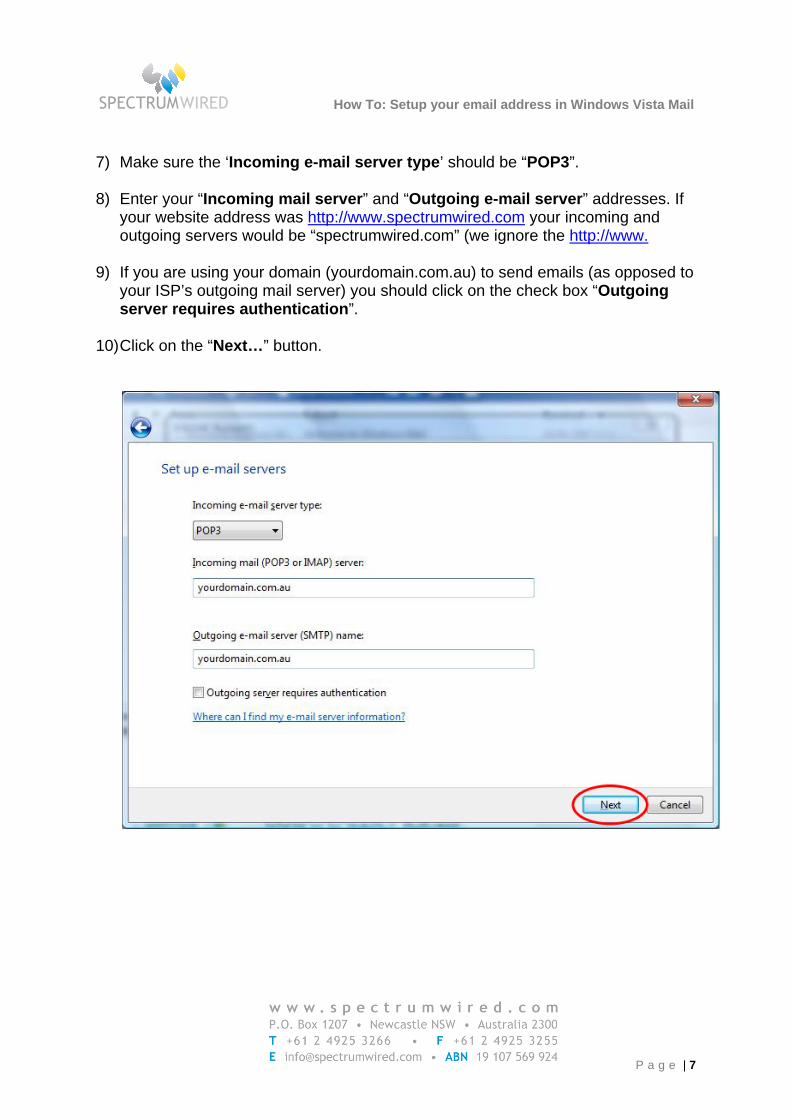
7) Make sure the ‘Incoming e-mail server type’ should be “POP3”. 8) Enter your “Incoming mail server” and “Outgoing e-mail server” addresses. If
your website address was http://www.spectrumwired.com your incoming and outgoing servers would be “spectrumwired.com” (we ignore the http://www.
9) If you are using your domain (yourdomain.com.au) to send emails (as opposed to
your ISP’s outgoing mail server) you should click on the check box “Outgoing server requires authentication”.
10) Click on the “Next…” button.

How To: Setup your email address in Windows Vista Mail
P a g e | 8
11) Enter your email settings. The important points to remember are:
a. E-mail username: If your email address was [email protected] your username would be “youremail” (we ignore the ‘@yourdomain.com.au’)
b. Password: Make sure this has your password entered. 12) Click on the “Next…” button.
How To: Setup your email address in Windows Vista Mail
P a g e | 9
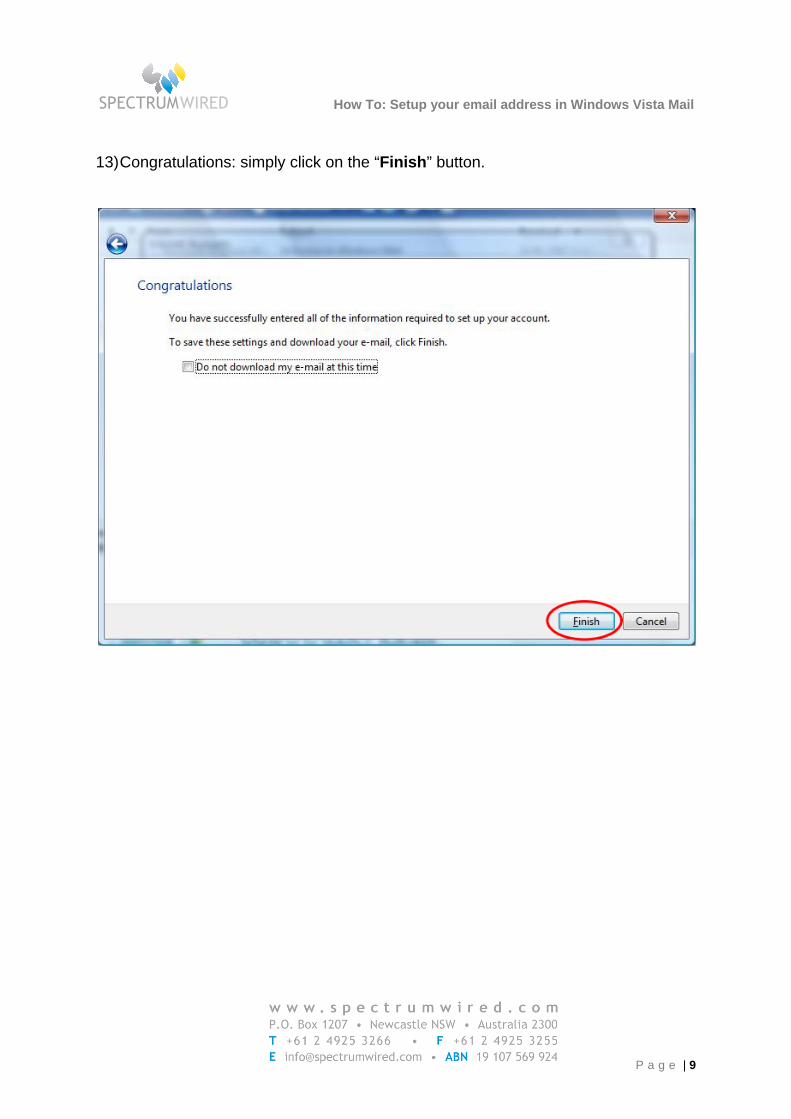
13) Congratulations: simply click on the “Finish” button.

How To: Setup your email address in Windows Vista Mail
P a g e | 10
Windows Vista Mail: Checking Existing Email Settings
1) Open Windows Vista Mail 2) In the ‘Tools’ menu select ‘Accounts…’
How To: Setup your email address in Windows Vista Mail
P a g e | 11
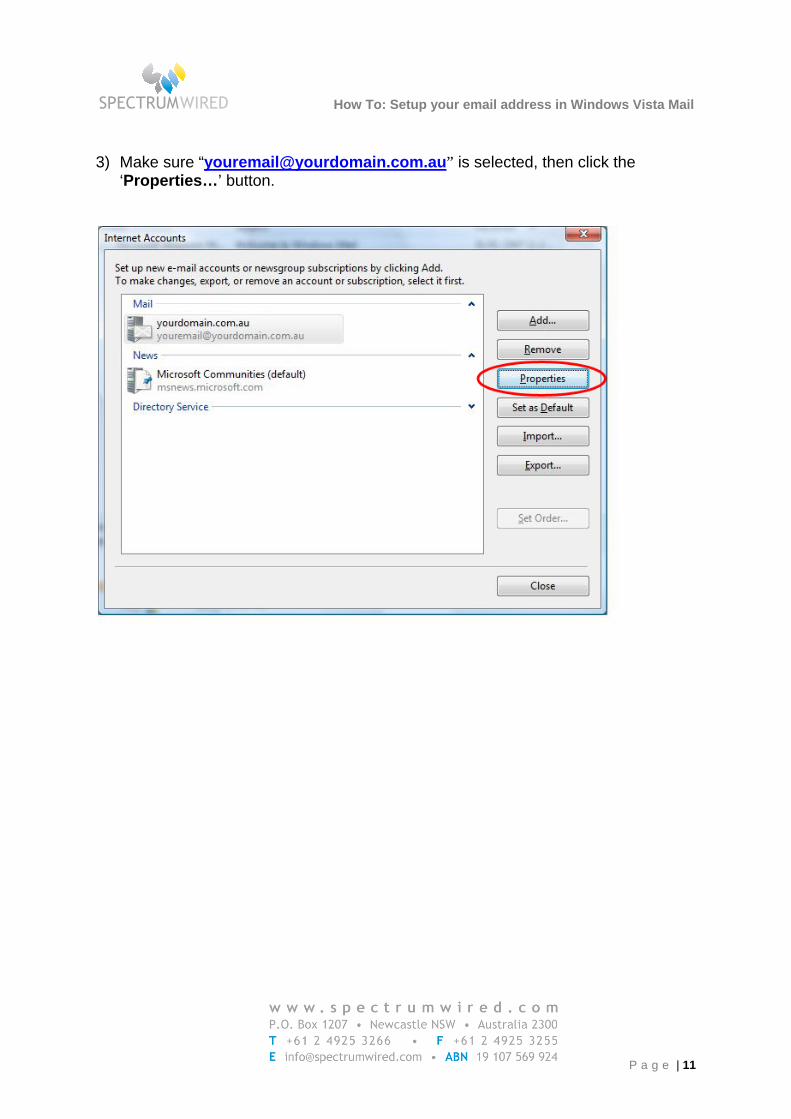
3) Make sure “[email protected]” is selected, then click the
‘Properties…’ button.

How To: Setup your email address in Windows Vista Mail
P a g e | 12
4) Click on the “Servers” tab.
How To: Setup your email address in Windows Vista Mail
P a g e | 13
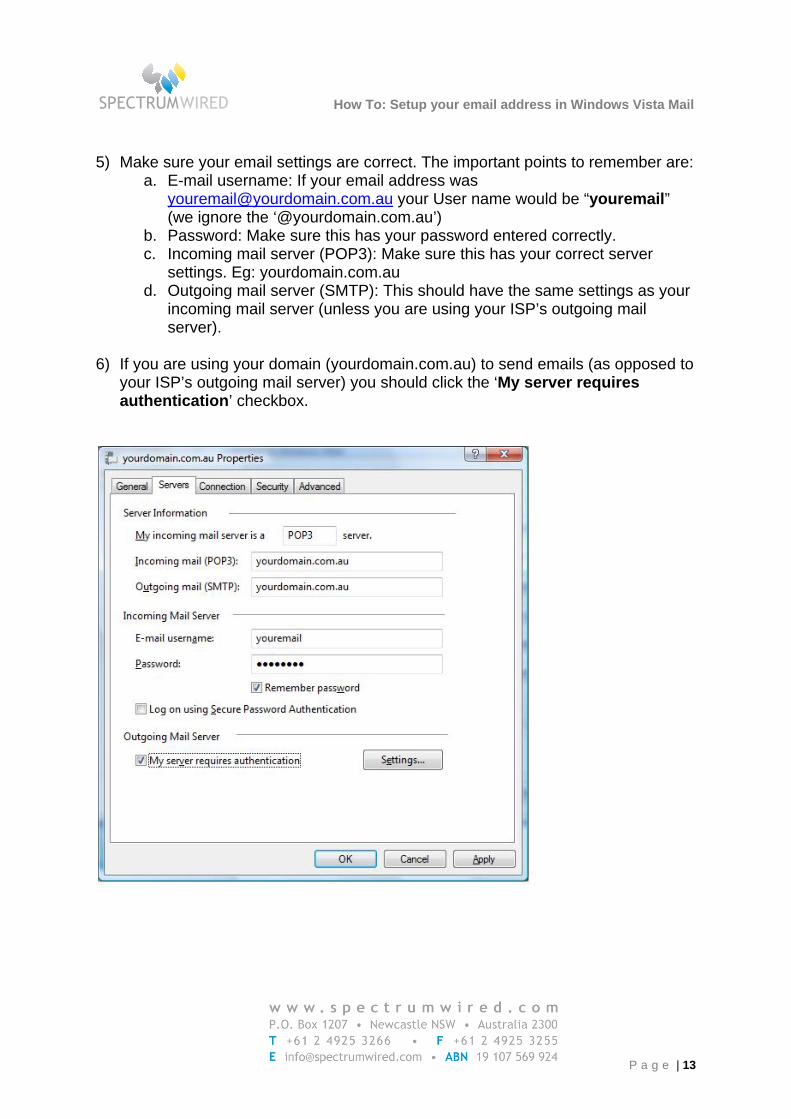
5) Make sure your email settings are correct. The important points to remember are:
a. E-mail username: If your email address was [email protected] your User name would be “youremail” (we ignore the ‘@yourdomain.com.au’)
b. Password: Make sure this has your password entered correctly. c. Incoming mail server (POP3): Make sure this has your correct server
settings. Eg: yourdomain.com.au d. Outgoing mail server (SMTP): This should have the same settings as your
incoming mail server (unless you are using your ISP’s outgoing mail server).
6) If you are using your domain (yourdomain.com.au) to send emails (as opposed to
your ISP’s outgoing mail server) you should click the ‘My server requires authentication’ checkbox.