how to use android sensors
TRANSCRIPT
8/13/2019 How to Use Android Sensors
http://slidepdf.com/reader/full/how-to-use-android-sensors 1/26
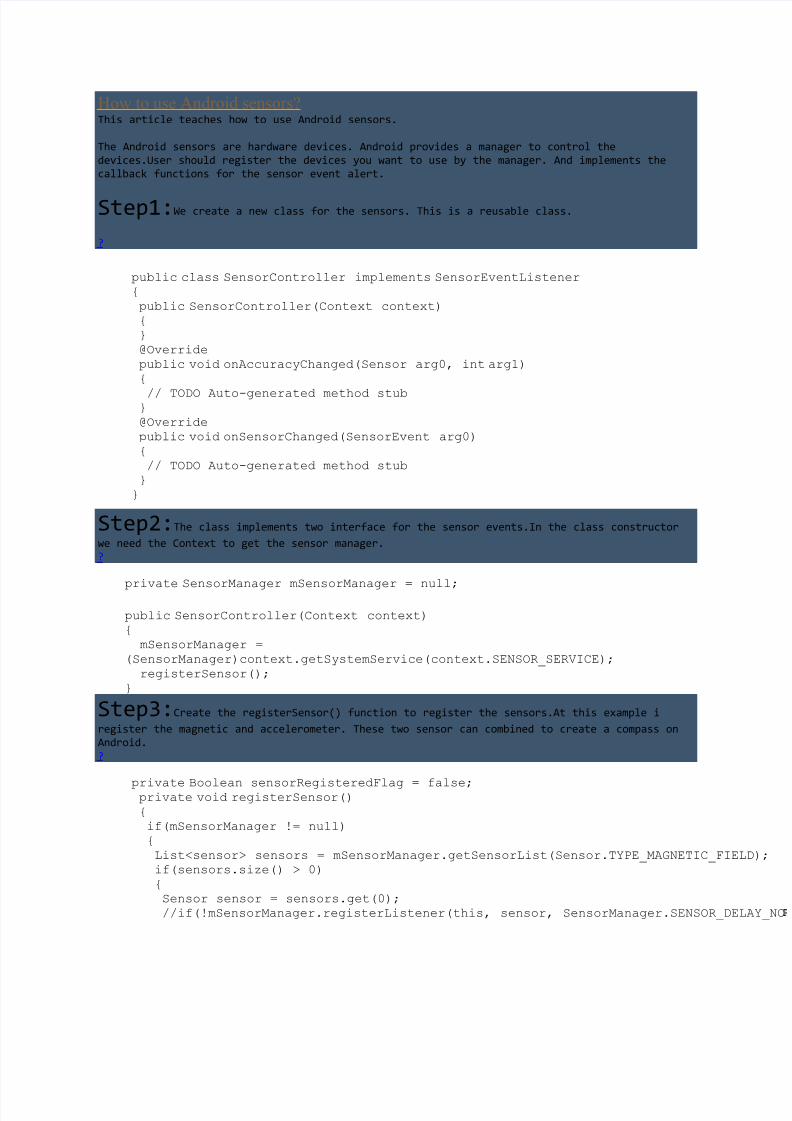
How to use Android sensors? This article teaches how to use Android sensors.
The Android sensors are hardware devices. Android provides a manager to control the
devices.User should register the devices you want to use by the manager. And implements the
callback functions for the sensor event alert.
Step1:We create a new class for the sensors. This is a reusable class.
?
public class SensorController implements SensorEventListener{ public SensorController(Context context) { } @Override public void onAccuracyChanged(Sensor arg0, int arg1){
// TODO Auto-generated method stub } @Override public void onSensorChanged(SensorEvent arg0){ // TODO Auto-generated method stub } }
Step2:The class implements two interface for the sensor events.In the class constructor
we need the Context to get the sensor manager.
?
private SensorManager mSensorManager = null;
public SensorController(Context context) { mSensorManager =
(SensorManager)context.getSystemService(context.SENSOR_SERVICE); registerSensor();
}
Step3:Create the registerSensor() function to register the sensors.At this example i
register the magnetic and accelerometer. These two sensor can combined to create a compass on
Android.
?
private Boolean sensorRegisteredFlag = false; private void registerSensor() { if(mSensorManager != null) { List<sensor> sensors = mSensorManager.getSensorList(Sensor.TYPE_MAGNETIC_FIELif(sensors.size() > 0) { Sensor sensor = sensors.get(0); //if(!mSensorManager.registerListener(this, sensor, SensorManager.SENSOR_DE

8/13/2019 How to Use Android Sensors
http://slidepdf.com/reader/full/how-to-use-android-sensors 2/26
if(!mSensorManager.registerListener(this, sensor, SensorManager.SENSOR_DELAYSENSOR_DELAY_NORMAL
{ return; } } sensors = mSensorManager.getSensorList(Sensor.TYPE_ACCELEROMETER); if(sensors.size() > 0) { Sensor sensor = sensors.get(0); //if(!mSensorManager.registerListener(this, sensor, SensorManager.SENSOR_DE
if(!mSensorManager.registerListener(this, sensor, SensorManager.SENSOR_DELAYSENSOR_DELAY_NORMAL
{ return; } } sensorRegisteredFlag = true;
} }
</sensor> Step4:The onAccuracyChanged() method is called when the sensor accuracy has changed. The
first parameter is the sensor of the registered. And the other parameter is the new accuracy
of the sensor.There are four value of the accuracy.At this example we does not care thechanges.
?
SensorManager.SENSOR_STATUS_ACCURACY_HIGH// This sensor is reporting data with maximum accuracy
SensorManager.SENSOR_STATUS_ACCURACY_MEDIUM// This sensor is reporting data with an average level of accuracy,
// calibration with the environment may improve the readings
SensorManager.SENSOR_STATUS_ACCURACY_LOW// This sensor is reporting data with low accuracy,// calibration with the environment is needed
SensorManager.SENSOR_STATUS_UNRELIABLE// The values returned by this sensor cannot be trusted,// calibration is needed or the environment doesn't allow readings
Step5:The onSensorChanged() method is whole thing we want.We collect the magnetic and
accelerometer values and convert to the human readable values.
?
private final double RADIANS_TO_DEGREES = 180/Math.PI; private final float[] sZVector = { 0, 0, 1, 1 }; private float R[] = new float[16]; private float remapR[] = new float[16]; private float remapR_inv[] = new float[16]; private float AccelerometerValues_last[] = new float[3]; private float MagneticFieldValues_last[] = new float[3]; private float orientationValues[] = new float[3];

8/13/2019 How to Use Android Sensors
http://slidepdf.com/reader/full/how-to-use-android-sensors 3/26
private float orientationVector[] = new float[4]; private float azimuthVector[] = new float[4]; boolean bHaveAccelerometer = false; boolean bHaveMagneticField = false; private float orientation;//up direction private float azimuth;//aim to north private float pitch;
public void onSensorChanged(SensorEvent event){ if(event.sensor.getType() == Sensor.TYPE_MAGNETIC_FIELD) { MagneticFieldValues_last[0] = event.values[0]; MagneticFieldValues_last[1] = event.values[1]; MagneticFieldValues_last[2] = event.values[2];
bHaveMagneticField = true; } if(event.sensor.getType() == Sensor.TYPE_ACCELEROMETER) { AccelerometerValues_last[0] = event.values[0]; AccelerometerValues_last[1] = event.values[1]; AccelerometerValues_last[2] = event.values[2];
bHaveAccelerometer = true; } if(bHaveMagneticField && bHaveAccelerometer) { if(SensorManager.getRotationMatrix(R, null, AccelerometerValues_last,
MagneticFieldValues_last)) { SensorManager.remapCoordinateSystem(R, SensorManager.AXIS_Y, SensorManager.AX
remapR);
SensorManager.getOrientation(remapR, orientationValues);
Matrix.multiplyMV(orientationVector, 0, remapR, 0, sZVector, 0); pitch = (float) (-Math.atan2(orientationVector[1], orientationVector[2]) *
RADIANS_TO_DEGREES);
Matrix.multiplyMV(orientationVector, 0, remapR, 0, sZVector, 0); orientation = (float) (-Math.atan2(orientationVector[0], orientationVector[1]
RADIANS_TO_DEGREES);
Matrix.invertM(remapR_inv, 0, remapR, 0); Matrix.multiplyMV(azimuthVector, 0, remapR_inv, 0, sZVector, 0); azimuth = (float) (180 + Math.atan2(azimuthVector[0], azimuthVector[1]) *
RADIANS_TO_DEGREES); } } }
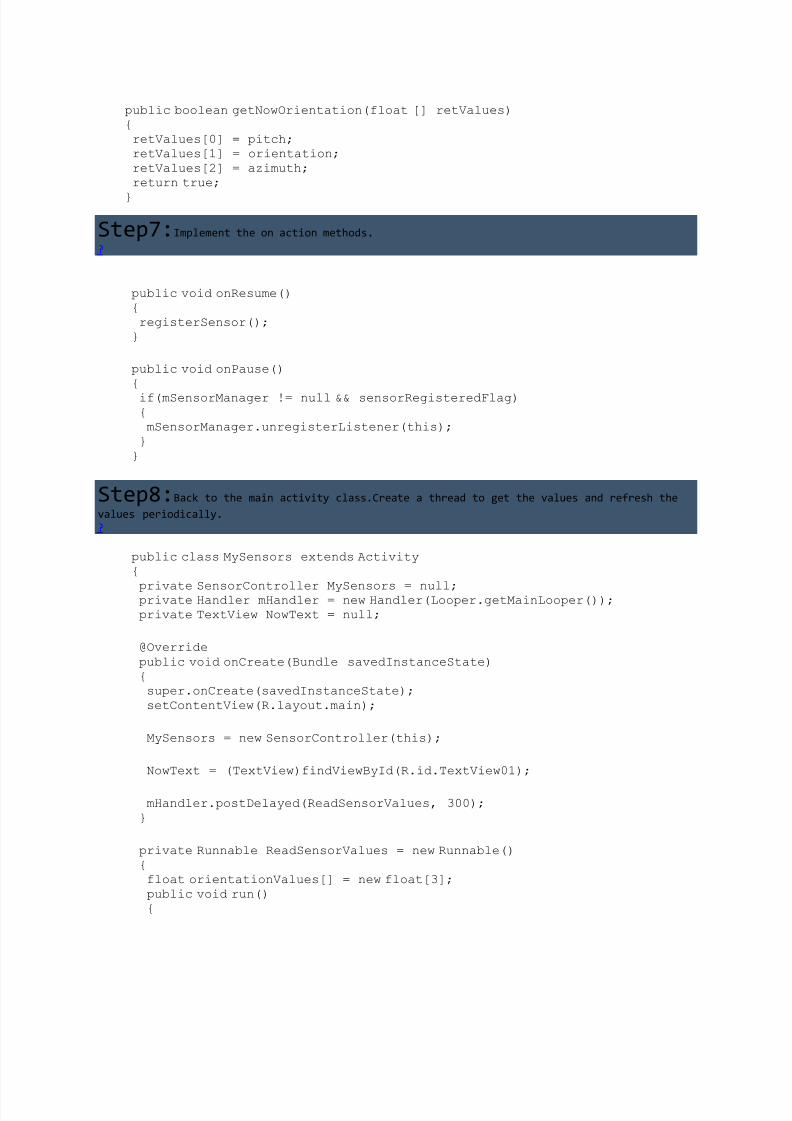
Step6:Three important values we want are ready. Provide get method for the other class.
?
8/13/2019 How to Use Android Sensors
http://slidepdf.com/reader/full/how-to-use-android-sensors 4/26
public boolean getNowOrientation(float [] retValues){ retValues[0] = pitch; retValues[1] = orientation; retValues[2] = azimuth; return true; }
Step7:Implement the on action methods.
?
public void onResume() { registerSensor(); }
public void onPause() { if(mSensorManager != null && sensorRegisteredFlag) { mSensorManager.unregisterListener(this); } }
Step8:Back to the main activity class.Create a thread to get the values and refresh the
values periodically.
?
public class MySensors extends Activity{
private SensorController MySensors = null; private Handler mHandler = new Handler(Looper.getMainLooper()); private TextView NowText = null;
@Override public void onCreate(Bundle savedInstanceState){ super.onCreate(savedInstanceState); setContentView(R.layout.main);
MySensors = new SensorController(this);
NowText = (TextView)findViewById(R.id.TextView01);
mHandler.postDelayed(ReadSensorValues, 300); }
private Runnable ReadSensorValues = new Runnable(){ float orientationValues[] = new float[3]; public void run(){

8/13/2019 How to Use Android Sensors
http://slidepdf.com/reader/full/how-to-use-android-sensors 5/26
MySensors.getNowOrientation(orientationValues);
NowText.setText("pitch:" + orientationValues[0] + "\n" + "orientation:" + orientationValues[1] + "\n" + "azimuth:" + orientationValues[2]);
mHandler.postDelayed(ReadSensorValues, 100); }}; protected void onResume() { super.onResume(); MySensors.onResume(); }
protected void onPause() { super.onPause(); MySensors.onPause();
}}
Step9:Run the application, you should see the values beat in the TextView.
How to use camera in Android? This article teaches how to use Android camera.
Step1:Camera preview needs a surface to show.And needs some callback function to handle
the take picture processes.We create a class named CameraPreivew, and implement the SurfaceHolder.Callback and
CameraPreviewCallback.
?

8/13/2019 How to Use Android Sensors
http://slidepdf.com/reader/full/how-to-use-android-sensors 6/26
public class CameraPreview implements SurfaceHolder.Callback,Camera.PreviewCallback {
public CameraPreview(int PreviewlayoutWidth, int PreviewlayoutHeight) { // TODO }@Override public void onPreviewFrame(byte[] arg0, Camera arg1){ // At preview mode, the frame data will push to here. // But we do not want these data. }
@Override public void surfaceChanged(SurfaceHolder arg0, int arg1, int arg2, int arg3)
{ // TODO Auto-generated method stub }
@Override public void surfaceCreated(SurfaceHolder arg0){ // TODO Auto-generated method stub }
@Override public void surfaceDestroyed(SurfaceHolder arg0){
// TODO Auto-generated method stub }
// Take picture interface public void CameraTakePicture(String FileName) { // TODO}
// Set auto-focus interface public void CameraStartAutoFocus() { // TODO
} }
Step2: At the class constructor, we set the preview size.
?

8/13/2019 How to Use Android Sensors
http://slidepdf.com/reader/full/how-to-use-android-sensors 7/26
public CameraPreview(int PreviewlayoutWidth, int PreviewlayoutHeight) { PreviewSizeWidth = PreviewlayoutWidth; PreviewSizeHeight = PreviewlayoutHeight; }
Step3:At the SurfaceHolder callback functions, we handle the camera instance.
?
@Override public void surfaceChanged(SurfaceHolder arg0, int arg1, int arg2, int arg3){ Parameters parameters; mSurfHolder = arg0;
parameters = mCamera.getParameters(); // Set the camera preview size parameters.setPreviewSize(PreviewSizeWidth, PreviewSizeHeight); // Set the take picture size, you can set the large size of the camera
supported. parameters.setPictureSize(PreviewSizeWidth, PreviewSizeHeight);
// Turn on the camera flash.String NowFlashMode = parameters.getFlashMode(); if ( NowFlashMode != null ) parameters.setFlashMode(Parameters.FLASH_MODE_ON); // Set the auto-focus.String NowFocusMode = parameters.getFocusMode (); if ( NowFocusMode != null ) parameters.setFocusMode("auto");
mCamera.setParameters(parameters);
mCamera.startPreview(); }
@Override public void surfaceCreated(SurfaceHolder arg0){ mCamera = Camera.open(); try { // If did not set the SurfaceHolder, the preview area will be black. mCamera.setPreviewDisplay(arg0); mCamera.setPreviewCallback(this);
}catch (IOException e) { mCamera.release(); mCamera = null; } }
@Override public void surfaceDestroyed(SurfaceHolder arg0)

8/13/2019 How to Use Android Sensors
http://slidepdf.com/reader/full/how-to-use-android-sensors 8/26
{ mCamera.setPreviewCallback(null); mCamera.stopPreview(); mCamera.release(); mCamera = null; }
Step4:In the PreviewCallback, we call the myAutoFocusCallback to handle the take picture
processes after the auto-focus.
?
// Take picture interface public void CameraTakePicture(String FileName) {
TakePicture = true; NowPictureFileName = FileName; mCamera.autoFocus(myAutoFocusCallback); }
// Set auto-focus interface public void CameraStartAutoFocus() { TakePicture = false; mCamera.autoFocus(myAutoFocusCallback); }
Step5:Create a instance to implement the AutoFocusCallback.
?
AutoFocusCallback myAutoFocusCallback = new AutoFocusCallback() { public void onAutoFocus(boolean arg0, Camera NowCamera){ if ( TakePicture ) { NowCamera.stopPreview();//fixed for Samsung S2 NowCamera.takePicture(shutterCallback, rawPictureCallback,
jpegPictureCallback);
TakePicture = false; } } };
Step6:Implement 3 callback instance to handle the takepicture processes.
?

8/13/2019 How to Use Android Sensors
http://slidepdf.com/reader/full/how-to-use-android-sensors 9/26
ShutterCallback shutterCallback = new ShutterCallback() { public void onShutter(){ // Just do nothing. } };
PictureCallback rawPictureCallback = new PictureCallback() { public void onPictureTaken(byte[] arg0, Camera arg1){ // Just do nothing. } };
PictureCallback jpegPictureCallback = new PictureCallback() { public void onPictureTaken(byte[] data, Camera arg1){ // Save the picture. try { Bitmap bitmap = BitmapFactory.decodeByteArray(data, 0,data.length); FileOutputStream out = new FileOutputStream(NowPictureFileName); bitmap.compress(Bitmap.CompressFormat.JPEG, 90, out);
}catch (IOException e){ e.printStackTrace();
} }
};
Step7:The camera basic function we all implemented, now we go back to the main activity
to use the CameraPreview.
?
1
2
3
4
56
78
9
1011
12
public class MyCamera extends Activity { private CameraPreview camPreview;private FrameLayout mainLayout;
private Handler mHandler = new Handler(Looper.getMainLooper());
@Override public void onCreate(Bundle savedInstanceState){ super.onCreate(savedInstanceState); //Set this SPK Full screen getWindow().setFlags(WindowManager.LayoutParams.FLAG_FULLSCREEN,WindowManager.LayoutParams.FLAG_FULLSCREEN);

8/13/2019 How to Use Android Sensors
http://slidepdf.com/reader/full/how-to-use-android-sensors 10/26
13
14
15
1617
181920
21
2223
24
25
2627
28
2930
31
32
33
//Set this APK no title requestWindowFeature(Window.FEATURE_NO_TITLE);setContentView(R.layout.main);
SurfaceView camView = new SurfaceView(this); SurfaceHolder camHolder = camView.getHolder();
camPreview = new CameraPreview(640, 480);
camHolder.addCallback(camPreview); camHolder.setType(SurfaceHolder.SURFACE_TYPE_PUSH_BUFFERS);
mainLayout = (FrameLayout) findViewById(R.id.frameLayout1); mainLayout.addView(camView, new LayoutParams(640, 480)); }
@Override public boolean onTouchEvent(MotionEvent event){if (event.getAction() == MotionEvent.ACTION_DOWN)
{int X = (int)event.getX();if ( X >= 640 ) mHandler.postDelayed(TakePicture, 300); else camPreview.CameraStartAutoFocus();
} return true; };
private Runnable TakePicture = new Runnable(){ String extStorageDirectory =
Environment.getExternalStorageDirectory().toString(); String MyDirectory_path = extStorageDirectory; String PictureFileName; public void run(){ File file = new File(MyDirectory_path); if (!file.exists())file.mkdirs(); PictureFileName = MyDirectory_path + "/MyPicture.jpg"; camPreview.CameraTakePicture(PictureFileName);
} };}
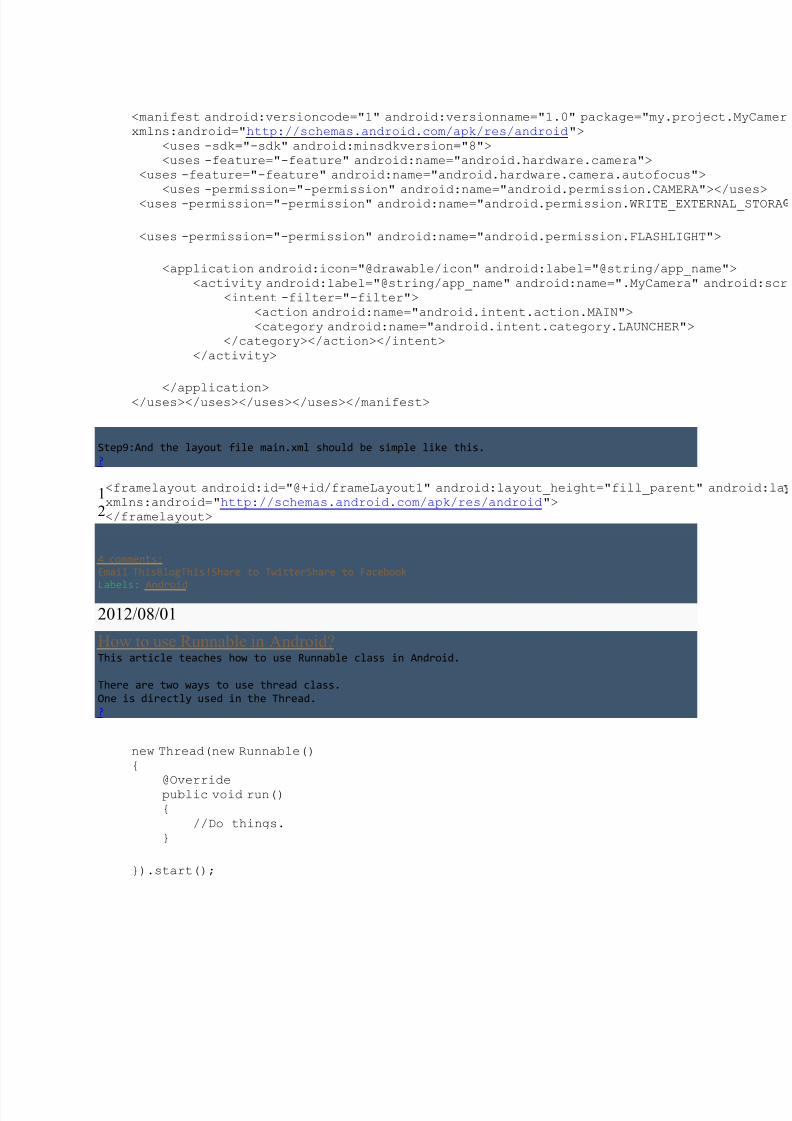
Step8:The code is all done here, now is to setup the Android configuration to active the
Camera hardware.Edit AndroidManifest.xml to active the function we need.
?
8/13/2019 How to Use Android Sensors
http://slidepdf.com/reader/full/how-to-use-android-sensors 11/26
<manifest android:versioncode="1" android:versionname="1.0" package="my.project.Mxmlns:android="http://schemas.android.com/apk/res/android">
<uses -sdk="-sdk" android:minsdkversion="8"> <uses -feature="-feature" android:name="android.hardware.camera">
<uses -feature="-feature" android:name="android.hardware.camera.autofocus">
<uses -permission="-permission" android:name="android.permission.CAMERA"></us<uses -permission="-permission" android:name="android.permission.WRITE_EXTERNAL_
<uses -permission="-permission" android:name="android.permission.FLASHLIGHT">
<application android:icon="@drawable/icon" android:label="@string/app_name"> <activity android:label="@string/app_name" android:name=".MyCamera" andro
<intent -filter="-filter"> <action android:name="android.intent.action.MAIN"> <category android:name="android.intent.category.LAUNCHER">
</category></action></intent> </activity>
</application> </uses></uses></uses></uses></manifest>
Step9:And the layout file main.xml should be simple like this.
?
12
<framelayout android:id="@+id/frameLayout1" android:layout_height="fill_parent" andrxmlns:android="http://schemas.android.com/apk/res/android"> </framelayout>
4 comments:
Email ThisBlogThis!Share to TwitterShare to Facebook
Labels: Android
2012/08/01
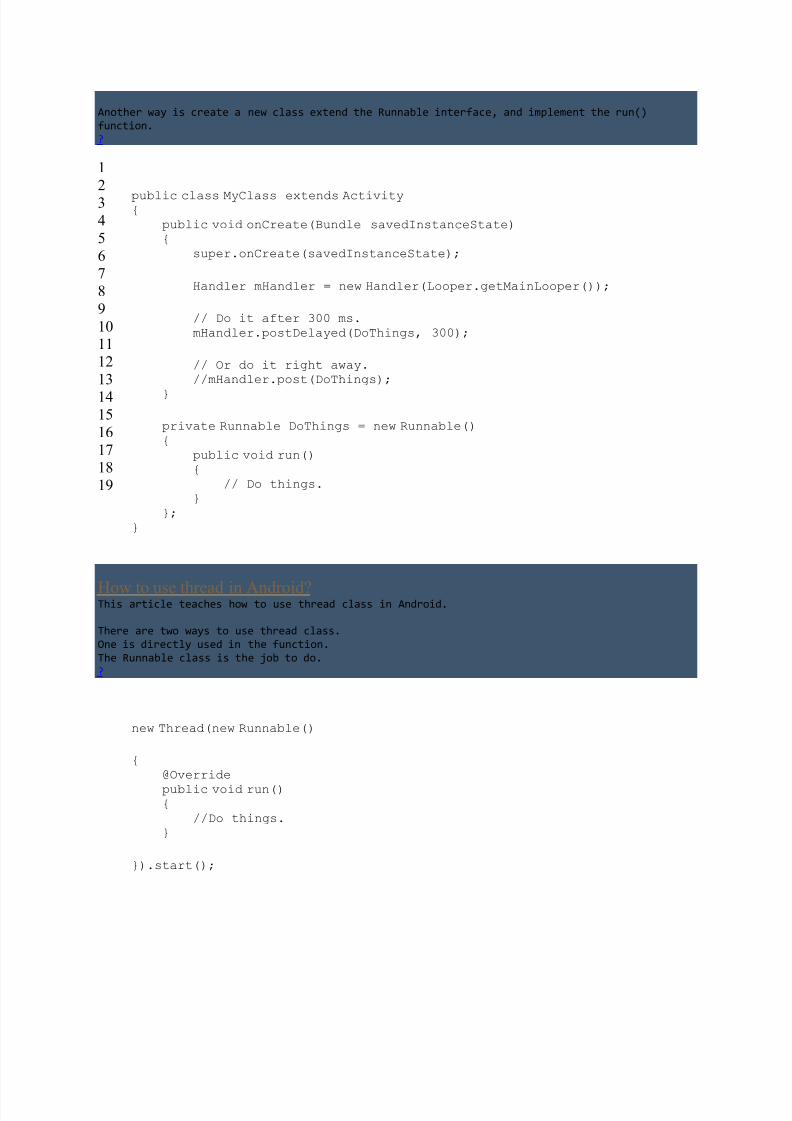
How to use Runnable in Android? This article teaches how to use Runnable class in Android.
There are two ways to use thread class.
One is directly used in the Thread.
?
new Thread(new Runnable(){
@Override public void run(){
//Do things. }
}).start();
8/13/2019 How to Use Android Sensors
http://slidepdf.com/reader/full/how-to-use-android-sensors 12/26

8/13/2019 How to Use Android Sensors
http://slidepdf.com/reader/full/how-to-use-android-sensors 13/26
8/13/2019 How to Use Android Sensors
http://slidepdf.com/reader/full/how-to-use-android-sensors 14/26
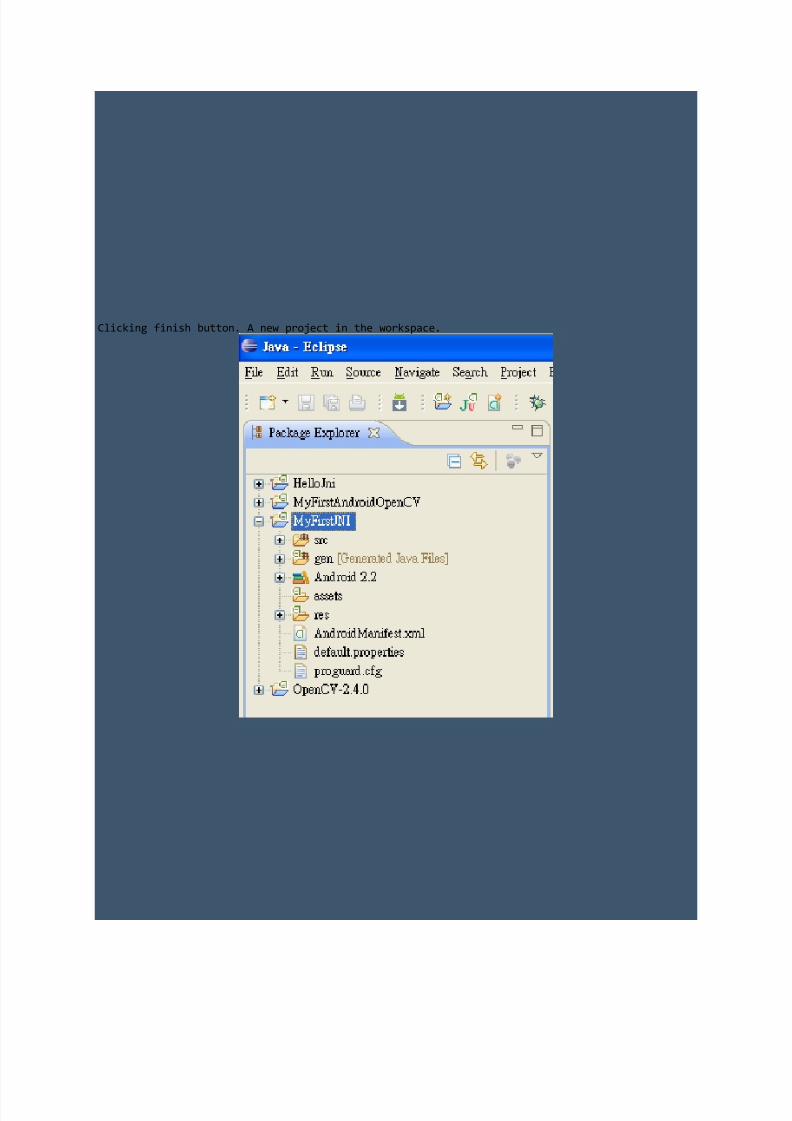
Clicking finish button. A new project in the workspace.

8/13/2019 How to Use Android Sensors
http://slidepdf.com/reader/full/how-to-use-android-sensors 15/26
Step3:Manually create 2 directories in the project directory, JNI and libs.
Step4:Creating Andoird.mk file in the JNI directory.Android.mk is just a text file.
Android.mk file contents:
?
LOCAL_PATH := $(call my-dir) include $(CLEAR_VARS) LOCAL_MODULE := first-jni LOCAL_SRC_FILES := first-jni.cpp include $(BUILD_SHARED_LIBRARY)
Step5:Creating your jni C/C++ file in the JNI directory.Aftercompile the jni code
successfully . There is a dynamatic link library(libfirst-jni.so) will be created in the libs
directory we create manually before.The jni code has two different type, C and C++.The difference is C++ file must export it's JNI
function to C.
The code explains it self.
?
/* * first-jni.c */ #include <string.h>
#include <jni.h>
jstring Java_my_project_MyFirstJNI_MyFirstJNI_stringFromJNI( JNIEnv* env,
jobject thiz ) {
return (*env)->NewStringUTF(env, "My first JNI!"); }
<
?
/*
* first-jni.cpp */ #include <string.h>#include <jni.h>
extern "C" jstring Java_my_project_MyFirstJNI_MyFirstJNI_stringFromJNI( JNIEnv* env,
jobject thiz ) {
8/13/2019 How to Use Android Sensors
http://slidepdf.com/reader/full/how-to-use-android-sensors 16/26
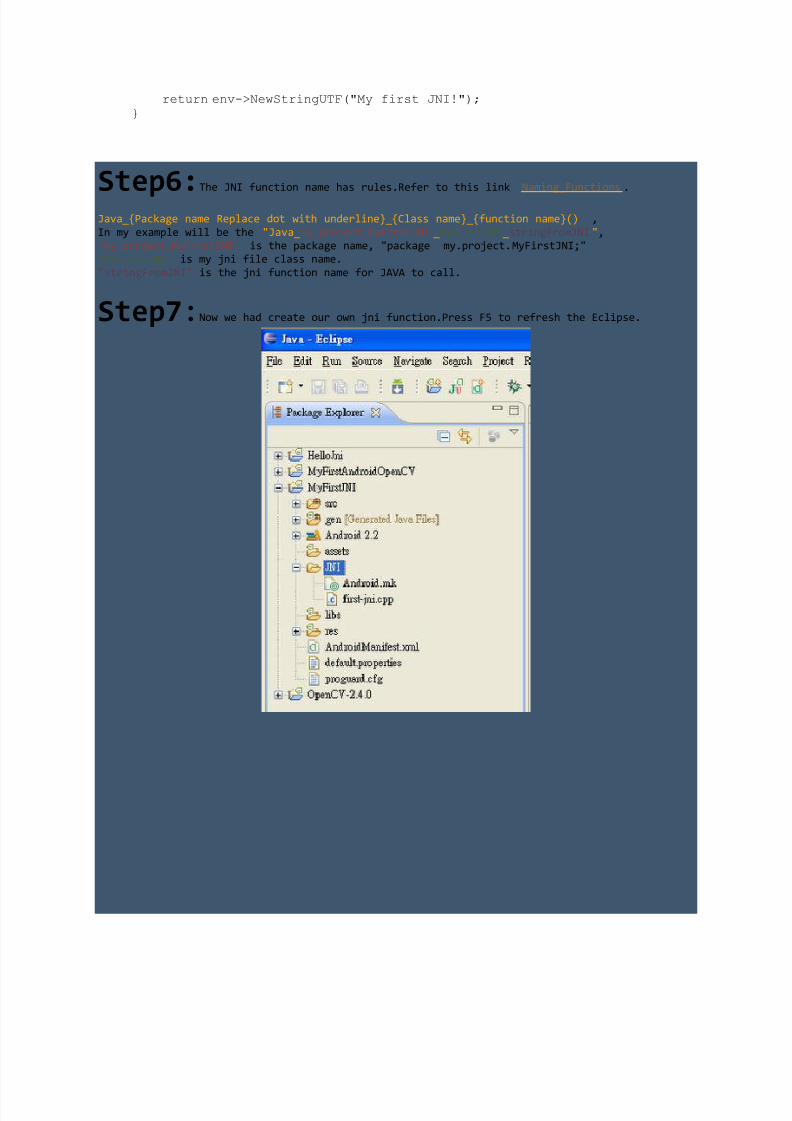
return env->NewStringUTF("My first JNI!"); }
Step6:The JNI function name has rules.Refer to this link Naming_Functions.
Java_{Package name Replace dot with underline}_{Class name}_{function name}() ,
In my example will be the "Java_my_project_MyFirstJNI_MyFirstJNI_stringFromJNI","my_project_MyFirstJNI" is the package name, "package my.project.MyFirstJNI;""MyFirstJNI" is my jni file class name.
"stringFromJNI" is the jni function name for JAVA to call.
Step7:Now we had create our own jni function.Press F5 to refresh the Eclipse.

8/13/2019 How to Use Android Sensors
http://slidepdf.com/reader/full/how-to-use-android-sensors 17/26
Step8:Setup the Auto-build configuration, Please flow the steps in this article How
to install Android NDK on windows. Starting from Step11.
Step9:Modify the JAVA code to call our JNI function.
?
1
2
34
5
678
9
1011
12
13
1415
16
1718
19
2021
22
23
2425
26
27
2829
30
3132
33
34
package my.project.MyFirstJNI;
import android.app.Activity; import android.os.Bundle; import android.widget.TextView;
public class MyFirstJNI extends Activity{
// Called when the activity is first created. @Override public void onCreate(Bundle savedInstanceState){
super.onCreate(savedInstanceState); TextView tv = new TextView(this); tv.setText( stringFromJNI() ); setContentView(R.layout.main);
} // A native method that is implemented by the // 'first-jni' native library, which is packaged // with this application. //
public native String stringFromJNI();
// this is used to load the 'first-jni' library on application // startup. The library has already been unpacked into // /data/data/my.project.MyFirstJNI/libs/libfirst-jni.so at // installation time by the package manager. // static {
System.loadLibrary("first-jni"); }
}
8/13/2019 How to Use Android Sensors
http://slidepdf.com/reader/full/how-to-use-android-sensors 18/26
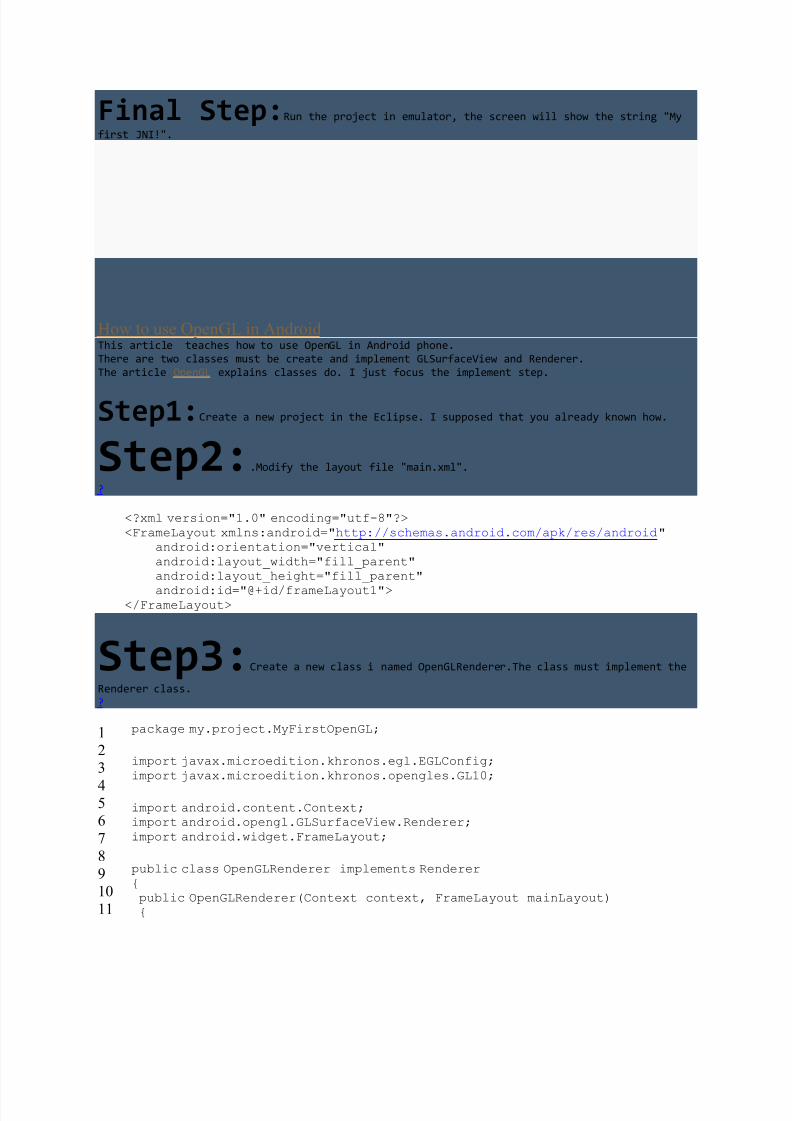
Final Step:Run the project in emulator, the screen will show the string "My
first JNI!".
How to use OpenGL in Android This article teaches how to use OpenGL in Android phone.
There are two classes must be create and implement GLSurfaceView and Renderer.
The article OpenGL explains classes do. I just focus the implement step.
Step1:Create a new project in the Eclipse. I supposed that you already known how.
Step2:.Modify the layout file "main.xml".
?
<?xml version="1.0" encoding="utf-8"?> <FrameLayout xmlns:android="http://schemas.android.com/apk/res/android"
android:orientation="vertical" android:layout_width="fill_parent" android:layout_height="fill_parent" android:id="@+id/frameLayout1">
</FrameLayout>
Step3:Create a new class i named OpenGLRenderer.The class must implement the
Renderer class.
?
1
23
456
7
8
910
11
package my.project.MyFirstOpenGL;
import javax.microedition.khronos.egl.EGLConfig;
import javax.microedition.khronos.opengles.GL10;
import android.content.Context; import android.opengl.GLSurfaceView.Renderer; import android.widget.FrameLayout;
public class OpenGLRenderer implements Renderer { public OpenGLRenderer(Context context, FrameLayout mainLayout) {

8/13/2019 How to Use Android Sensors
http://slidepdf.com/reader/full/how-to-use-android-sensors 19/26
12
13
14
1516
171819
20
2122
23
24
2526
27
2829
30
31
3233
34
3536
37
}
@Override public void onDrawFrame(GL10 arg0){ // TODO Auto-generated method stub
}
@Override public void onSurfaceChanged(GL10 arg0, int arg1, int arg2){ // TODO Auto-generated method stub
}
@Override public void onSurfaceCreated(GL10 arg0, EGLConfig arg1){
// TODO Auto-generated method stub
}
}
Step4:In the OpenGLRenderer constructor, we need the Context and FrameLayout
parameters. And create the GLSurfaceView add to the frameLayout.
?
1
2
34
5
6
7
89
10
1112
13
public OpenGLRenderer(Context context, FrameLayout mainLayout) {this.context = context; // // Create GLSurfaceView and set this class as the renderer. // GLSurfaceView glView = new GLSurfaceView(context); glView.setRenderer(this);
//put to Main layout mainLayout.addView(glView, new LayoutParams(LayoutParams.FILL_PARENT, LayoutParams.FILL_PARENT)); }

8/13/2019 How to Use Android Sensors
http://slidepdf.com/reader/full/how-to-use-android-sensors 20/26
Step5:Put some basic OpenGL code to the other functions.
?
1
23
4
5
67
8
9
10
public void onDrawFrame(GL10 gl){ // Clear the whole screen and depth. gl.glClear(GL10.GL_COLOR_BUFFER_BIT | GL10.GL_DEPTH_BUFFER_BIT);
// Setting the GL_MODELVIEW matrix gl.glMatrixMode(GL10.GL_MODELVIEW);// Load the Identity matrix gl.glLoadIdentity(); }
?
12
3
45
6
78
9
10
1112
13
1415
public void onSurfaceChanged(GL10 gl, int width, int height){ // Set OpenGL viewport gl.glViewport(0, 0, width, height);
// Setting the GL_PROJECTION matrix gl.glMatrixMode(GL10.GL_PROJECTION); // Load the Identity matrix gl.glLoadIdentity();
float ratio = (float) width / height; // Set the fovy to 45 degree. near depth is 0.1f and far depth is 100.f.
// And maintain the screen ratio. GLU.gluPerspective(gl, 45, ratio, 0.1f, 100.f); }
?
1
2
34
5
public void onSurfaceCreated(GL10 gl, EGLConfig arg1){ // Set the background to black gl.glClearColor(0, 0, 0, 0); }
Step6:And now we can add OpenGLRenderer class to the main code.
?
12
3
4
public void onCreate(Bundle savedInstanceState){ super.onCreate(savedInstanceState); setContentView(R.layout.main); FrameLayout mainLayout = (FrameLayout) findViewById(R.id.frameLayout1);

8/13/2019 How to Use Android Sensors
http://slidepdf.com/reader/full/how-to-use-android-sensors 21/26
5
6
7
89
10
// // Create OpenGL surface and render //OpenGLRenderer gl3DView = new OpenGLRenderer(this, mainLayout);
}
Step7:OK, We put the necessarily code to the project.Now we can run this
project on emulator.But there is nothing in the screen but the black.
Step8:At this stage, we create a OpenGL environment, but we did not put
things in there.
I want load a picture and map to a plane , then rotate it.
?
8/13/2019 How to Use Android Sensors
http://slidepdf.com/reader/full/how-to-use-android-sensors 22/26
1
2
3
45
678
9
1011
12
13
1415
16
1718
19
20
2122
23
2425
26
27
2829
30
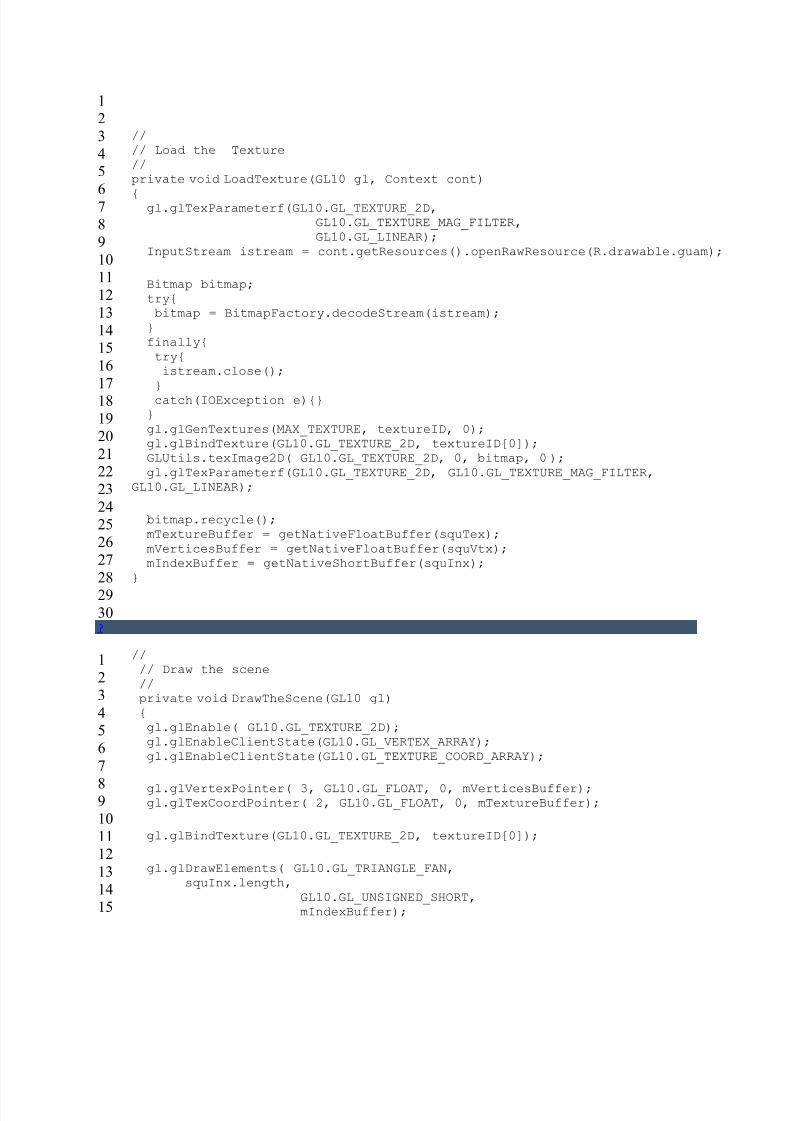
// // Load the Texture // private void LoadTexture(GL10 gl, Context cont)
{ gl.glTexParameterf(GL10.GL_TEXTURE_2D,GL10.GL_TEXTURE_MAG_FILTER,GL10.GL_LINEAR);
InputStream istream = cont.getResources().openRawResource(R.drawable.guam);
Bitmap bitmap; try{ bitmap = BitmapFactory.decodeStream(istream);
} finally{ try{ istream.close();
} catch(IOException e){} }gl.glGenTextures(MAX_TEXTURE, textureID, 0); gl.glBindTexture(GL10.GL_TEXTURE_2D, textureID[0]); GLUtils.texImage2D( GL10.GL_TEXTURE_2D, 0, bitmap, 0 );gl.glTexParameterf(GL10.GL_TEXTURE_2D, GL10.GL_TEXTURE_MAG_FILTER,
GL10.GL_LINEAR);
bitmap.recycle(); mTextureBuffer = getNativeFloatBuffer(squTex); mVerticesBuffer = getNativeFloatBuffer(squVtx); mIndexBuffer = getNativeShortBuffer(squInx);
}
?
1
2
3
45
6
7
89
10
1112
13
1415
// // Draw the scene // private void DrawTheScene(GL10 gl) {gl.glEnable( GL10.GL_TEXTURE_2D); gl.glEnableClientState(GL10.GL_VERTEX_ARRAY);gl.glEnableClientState(GL10.GL_TEXTURE_COORD_ARRAY);
gl.glVertexPointer( 3, GL10.GL_FLOAT, 0, mVerticesBuffer); gl.glTexCoordPointer( 2, GL10.GL_FLOAT, 0, mTextureBuffer);
gl.glBindTexture(GL10.GL_TEXTURE_2D, textureID[0]);
gl.glDrawElements( GL10.GL_TRIANGLE_FAN, squInx.length,
GL10.GL_UNSIGNED_SHORT,mIndexBuffer);

8/13/2019 How to Use Android Sensors
http://slidepdf.com/reader/full/how-to-use-android-sensors 23/26
16
17
18
1920
212223
24
gl.glDisable(GL10.GL_TEXTURE_2D); gl.glDisableClientState(GL10.GL_TEXTURE_COORD_ARRAY); gl.glDisableClientState(GL10.GL_VERTEX_ARRAY); }
Step9:We need some variables.
?
1
2
3
45
67
8
9
1011
12
1314
1516
171819
2021
22
23
2425
2627
2829
30
3132
33
private float orientation = 0.0f;;
final int MAX_TEXTURE = 20;
private int[] textureID = new int[MAX_TEXTURE];
// UV Coordinates// _________// v0(0,0) | | v3(1,0)// | | // | | // v1(0,1) |_________| v2(1,1) // // // plane vertices // _________
// p0 | | p3// | | // | | // p1 |_________| p2 //
float squVtx[] = {-1.0f, 1.0f, 0.0f, //p0 Left-Top corner -1.0f, -1.0f, 0.0f, //p1 Left-bottom corner1.0f, -1.0f, 0.0f, //p2 Right-bottom corner1.0f, 1.0f, 0.0f };//p3 Right-top corner
// USE GL_TRIANGLE_FAN
short squInx[] = { 0, 1, 2, 3}; //0-1-2 first triangle //0-2-3 second trianglefloat squTex[] ={ 0.0f, 0.0f, //v0 Left-Top corner
0.0f, 1.0f, //v1 Left-bottom corner1.0f, 1.0f, //v2 Right-top corner 1.0f, 0.0f };//v3 Right-bottom corner
// Our UV texture buffer. private FloatBuffer mTextureBuffer;private FloatBuffer mVerticesBuffer;

8/13/2019 How to Use Android Sensors
http://slidepdf.com/reader/full/how-to-use-android-sensors 24/26
34
35
36
3738
394041
private ShortBuffer mIndexBuffer;
Step10:Add LoadTexture() and DrawTheScene() to the code.
?
1
23
4
56
7
8
public void onSurfaceCreated(GL10 gl, EGLConfig arg1){ // Set the background to black gl.glClearColor(0, 0, 0, 0);
//Load the texture LoadTexture(gl, context);}
?
12
3
4
56
7
89
10
1112
13
14
1516
17
18
1920
21
2223
24
public void onDrawFrame(GL10 gl){ // Clear the whole screen and depth. gl.glClear(GL10.GL_COLOR_BUFFER_BIT | GL10.GL_DEPTH_BUFFER_BIT);
// Setting the GL_MODELVIEW matrix gl.glMatrixMode(GL10.GL_MODELVIEW);// Load the Identity matrix gl.glLoadIdentity();
// Move to Z = -10 gl.glTranslatef(0, 0, -10f); // Rotate y-asix gl.glRotatef(orientation, 0, 1.0f, 0);
//every time plus 1 defgee. orientation += 1.0f; if ( orientation >= 360 ) orientation = 0.0f;
// Draw the scene DrawTheScene(gl); }

8/13/2019 How to Use Android Sensors
http://slidepdf.com/reader/full/how-to-use-android-sensors 25/26
Step11:Another functions.
?
1
23
4
5
67
8
9
1011
12
1314
15
1617
18
1920
21
private FloatBuffer getNativeFloatBuffer(float[] buffer) { ByteBuffer ibb = ByteBuffer.allocateDirect(buffer.length*4); ibb.order(ByteOrder.nativeOrder()); FloatBuffer fbf = ibb.asFloatBuffer();
fbf.put(buffer); fbf.position(0); return fbf; }
private ShortBuffer getNativeShortBuffer(short[] buffer)
{ ByteBuffer ibb = ByteBuffer.allocateDirect(buffer.length*2); ibb.order(ByteOrder.nativeOrder()); ShortBuffer sbf = ibb.asShortBuffer();
sbf.put(buffer); sbf.position(0); return sbf; }
Step12:Finally, we put the picture to the OpenGL texture resources and
draw 2 triangles to show the picture. Then rotate it frame by fame.

8/13/2019 How to Use Android Sensors
http://slidepdf.com/reader/full/how-to-use-android-sensors 26/26