how to use friendlyarm micro 2440 boardceit.aut.ac.ir/~badamchi/micro2440/micro2440-english.pdfhow...
TRANSCRIPT
How to use Friendlyarm
Micro 2440 Board
Amir Badamchi Ghandi Information Technology Msc (Multimedia Systems)
Amirkabir University of
Technology
Computer and Information
Technology Department
Laboratory of Intelligent
Multimedia Processing
(LIMP)
How to use Friendlyarm Micro 2440 Amirkabir University of Technology
Computer and Information Technology Dep
Laboratory of Intelligent Multimedia Processing (LIMP)
Author: Amir Badamchi Ghandi
Ver: 1.0 ● Date: 09/01/2012
1
1 Introduction
This report is based on Master of Science project in Laboratory of Intelligent Multimedia Processing
(LIMP)1 of Computer and Information Technology Department2 in Amirkabir University of
Technology3 (Tehran Polytechnic). It supervised by Dr. Mohammad Mehdi Homayounpour4. First
section describes Friendlyarm Micro 2440 board. Next section is about how to use it and how to install
operating systems such as Linux, Windows, and Android. To use this board, you need some software
that is available on DVD in package of board. If you do not have access to that DVD, you can download
them5.Images of Linux and Windows CE is distributed through Friendlyarm. For Installing android,
you should create image and this document shows how to do it. Also, you can download the said image
created by me from the following link: http://ceit.aut.ac.ir/~badamchi/micro2440/micro2440W35-
android.img.
Notice: This report is free to use for everyone. If you want to use any content of it, you should coordinate
with the laboratory supervisor.
Do not hesitate contacting the author for any comment on this document through
[email protected]. Moreover, you can access the latest version of this document from
following link: http://ceit.aut.ac.ir/~badamchi.
Ultimately, I thank the almighty God for helping in furthering this project. In addition, I should thank
Dr. Mohammad Mehdi Homayounpour and all member of LIMP lab for their endless support.
Amir Badamchi Ghandi
2 Micro 2440 board Specification
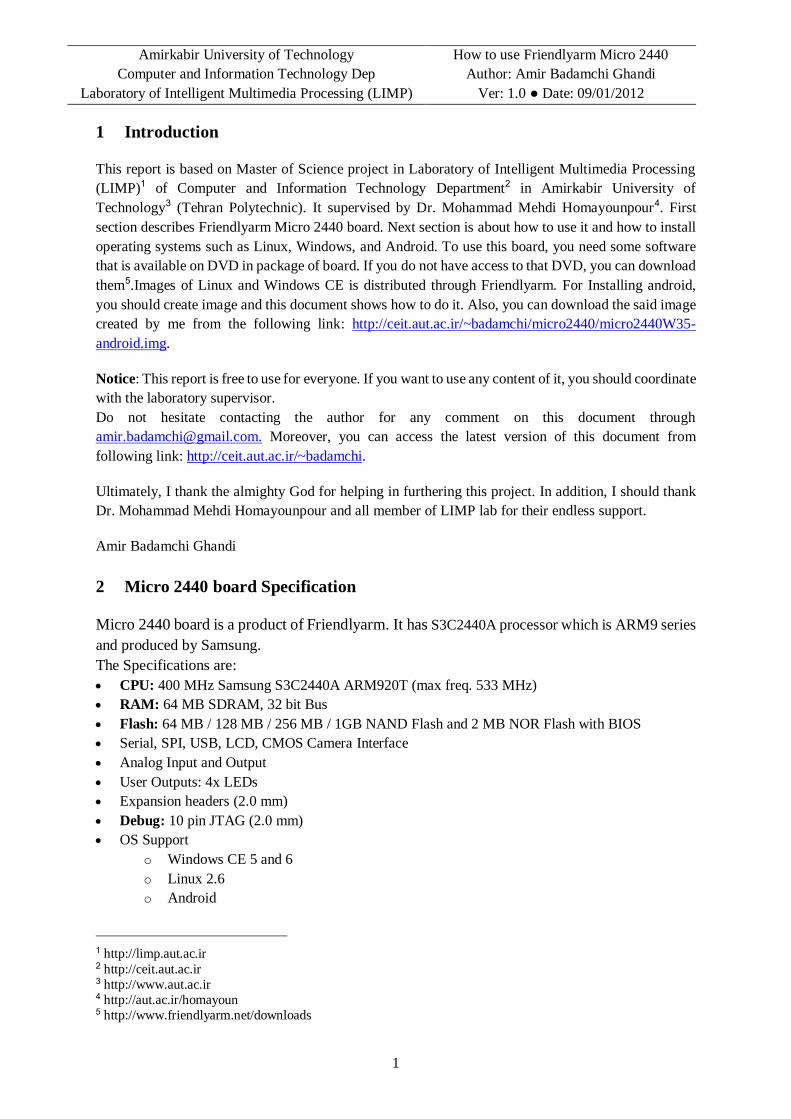
Micro 2440 board is a product of Friendlyarm. It has S3C2440A processor which is ARM9 series
and produced by Samsung.
The Specifications are:
CPU: 400 MHz Samsung S3C2440A ARM920T (max freq. 533 MHz)
RAM: 64 MB SDRAM, 32 bit Bus
Flash: 64 MB / 128 MB / 256 MB / 1GB NAND Flash and 2 MB NOR Flash with BIOS
Serial, SPI, USB, LCD, CMOS Camera Interface
Analog Input and Output
User Outputs: 4x LEDs
Expansion headers (2.0 mm)
Debug: 10 pin JTAG (2.0 mm)
OS Support
o Windows CE 5 and 6
o Linux 2.6
o Android
1 http://limp.aut.ac.ir 2 http://ceit.aut.ac.ir 3 http://www.aut.ac.ir 4 http://aut.ac.ir/homayoun 5 http://www.friendlyarm.net/downloads

How to use Friendlyarm Micro 2440 Amirkabir University of Technology
Computer and Information Technology Dep
Laboratory of Intelligent Multimedia Processing (LIMP)
Author: Amir Badamchi Ghandi
Ver: 1.0 ● Date: 09/01/2012
2
EEPROM: 1024 Byte (I2C)
Ext. Memory: SD-Card socket
Serial Ports: 3x DB9 connector (RS232)
USB: 4x USB-A Host 1.1, 1x USB-B Device 1.1
Audio Output: 3.5 mm stereo jack
Audio Input: 3.5mm jack (mono) + Condenser microphone
Ethernet: RJ-45 10/100M (DM9000)
RTC: Real Time Clock with battery (CR1220)
Beeper: PWM buzzer
Camera: 20 pin Camera interface (2.0 mm)
LCD: 41 pin connector for FriendlyARM Displays and VGA Board
Touch Panel: 4 pin (resistive)
User Inputs: 6x push buttons and 1x A/D pot
Expansion headers (2.0 mm)
Power: regulated 5V (DC-Plug: 1.35mm inner x 3.5mm outer diameter)
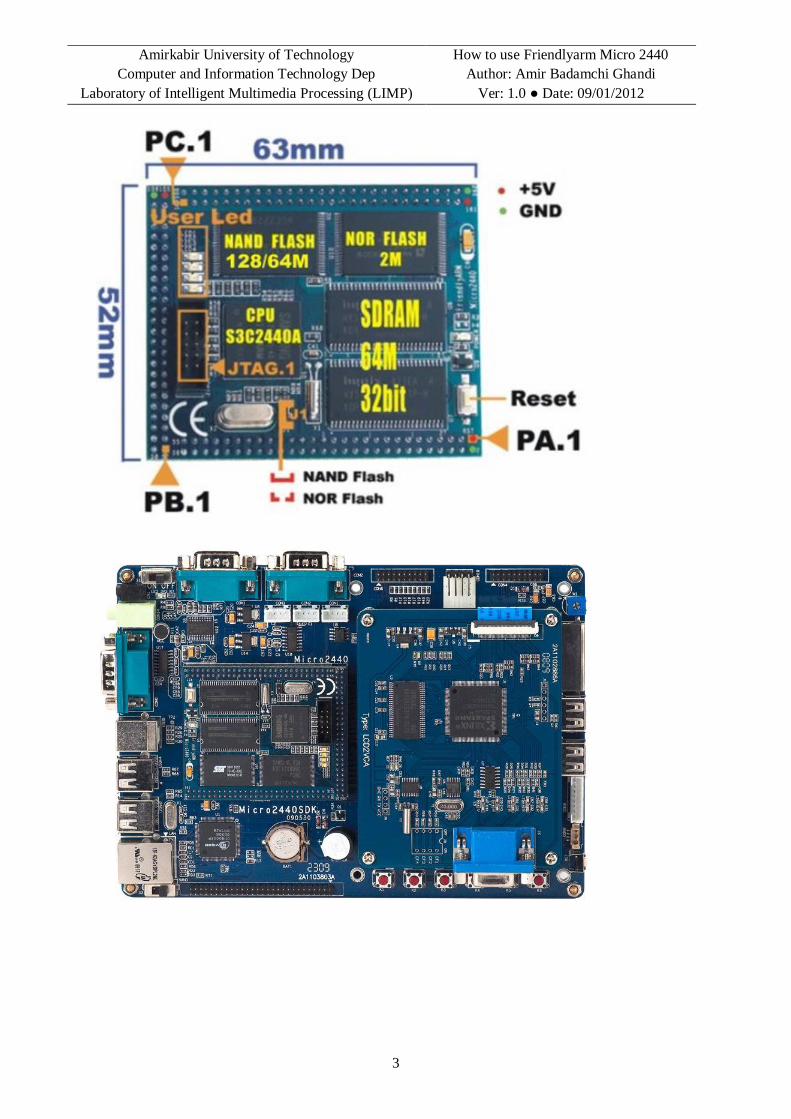
You can see some figures from this board herein below.
How to use Friendlyarm Micro 2440 Amirkabir University of Technology
Computer and Information Technology Dep
Laboratory of Intelligent Multimedia Processing (LIMP)
Author: Amir Badamchi Ghandi
Ver: 1.0 ● Date: 09/01/2012
3
How to use Friendlyarm Micro 2440 Amirkabir University of Technology
Computer and Information Technology Dep
Laboratory of Intelligent Multimedia Processing (LIMP)
Author: Amir Badamchi Ghandi
Ver: 1.0 ● Date: 09/01/2012
4
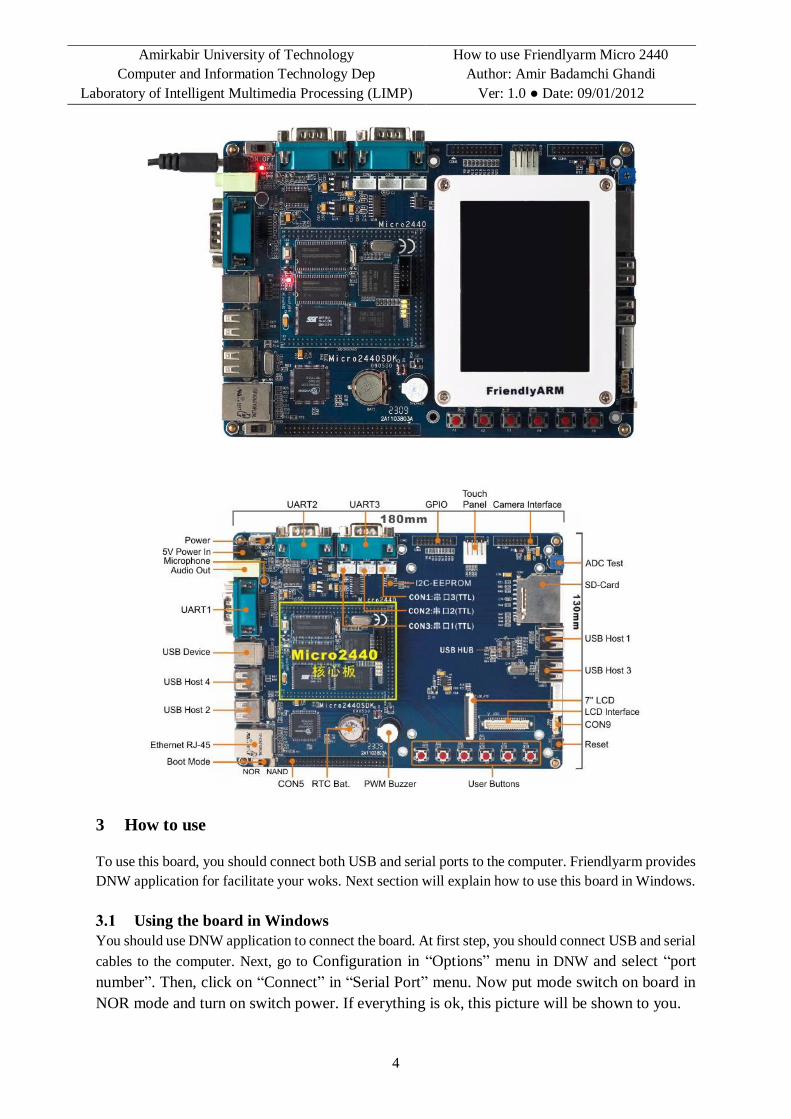
3 How to use
To use this board, you should connect both USB and serial ports to the computer. Friendlyarm provides
DNW application for facilitate your woks. Next section will explain how to use this board in Windows.
Using the board in Windows
You should use DNW application to connect the board. At first step, you should connect USB and serial
cables to the computer. Next, go to Configuration in “Options” menu in DNW and select “port
number”. Then, click on “Connect” in “Serial Port” menu. Now put mode switch on board in
NOR mode and turn on switch power. If everything is ok, this picture will be shown to you.
How to use Friendlyarm Micro 2440 Amirkabir University of Technology
Computer and Information Technology Dep
Laboratory of Intelligent Multimedia Processing (LIMP)
Author: Amir Badamchi Ghandi
Ver: 1.0 ● Date: 09/01/2012
5
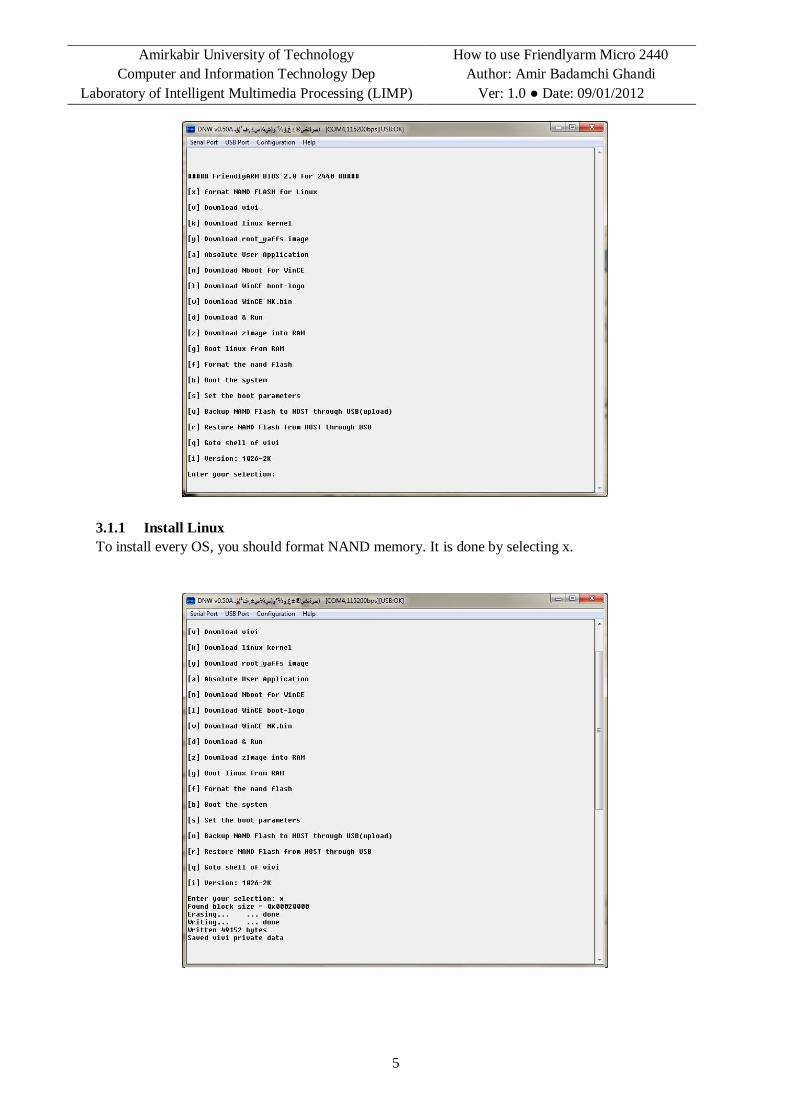
3.1.1 Install Linux
To install every OS, you should format NAND memory. It is done by selecting x.
How to use Friendlyarm Micro 2440 Amirkabir University of Technology
Computer and Information Technology Dep
Laboratory of Intelligent Multimedia Processing (LIMP)
Author: Amir Badamchi Ghandi
Ver: 1.0 ● Date: 09/01/2012
6
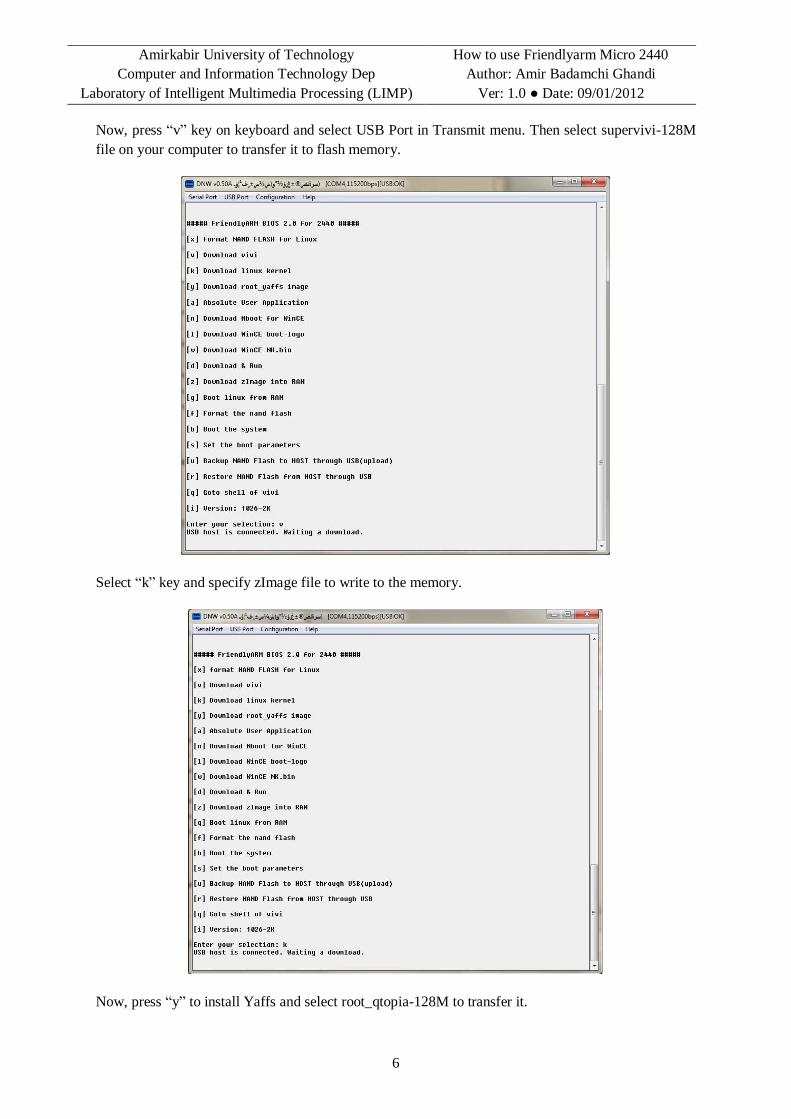
Now, press “v” key on keyboard and select USB Port in Transmit menu. Then select supervivi-128M
file on your computer to transfer it to flash memory.
Select “k” key and specify zImage file to write to the memory.
Now, press “y” to install Yaffs and select root_qtopia-128M to transfer it.

How to use Friendlyarm Micro 2440 Amirkabir University of Technology
Computer and Information Technology Dep
Laboratory of Intelligent Multimedia Processing (LIMP)
Author: Amir Badamchi Ghandi
Ver: 1.0 ● Date: 09/01/2012
7
Now, turn off the board and put boot mode switch on NAND. Then, turn on the board. You are in qtopia
now.
3.1.2 Install Windows CE
Similar to linux installation, first format NAND flash memory by selecting x. Type “v” key, then select
supervivi-128M. Next, select “n” and nboot_W35. Now, press “l” to select Windows CE logo. Finally,
type “w” and select NK_W35 to write on NAND flash. Put boot mode switch on NAND and reset board
to use windows.
3.1.3 Install Android
To install android, you should create images in Linux and port it on NAND flash. in this step, Ubuntu
12.04 is used. These files are needed for creating image files:
arm-linux-gcc-4.4.3.tar.gz
android-kernel_20090825.tgz
android-fs_20090825.tgz
mkyaffs2image.tgz
We use gcc linux and arm version. Extract the file whose name is arm-linux-gcc-4.4.3.tar.gz. Go to
terminal in Ubuntu and run this command.
tar –xvzf arm-linux-gcc-4.4.3.tar.gz –C/
After running this command, Friendlyarm directory will be created in “opt” folder.
3.1.3.1 Create Android kernel image
Enter this command to extract file android-kernel_20090825.tgz by typing this command in terminal:
How to use Friendlyarm Micro 2440 Amirkabir University of Technology
Computer and Information Technology Dep
Laboratory of Intelligent Multimedia Processing (LIMP)
Author: Amir Badamchi Ghandi
Ver: 1.0 ● Date: 09/01/2012
8
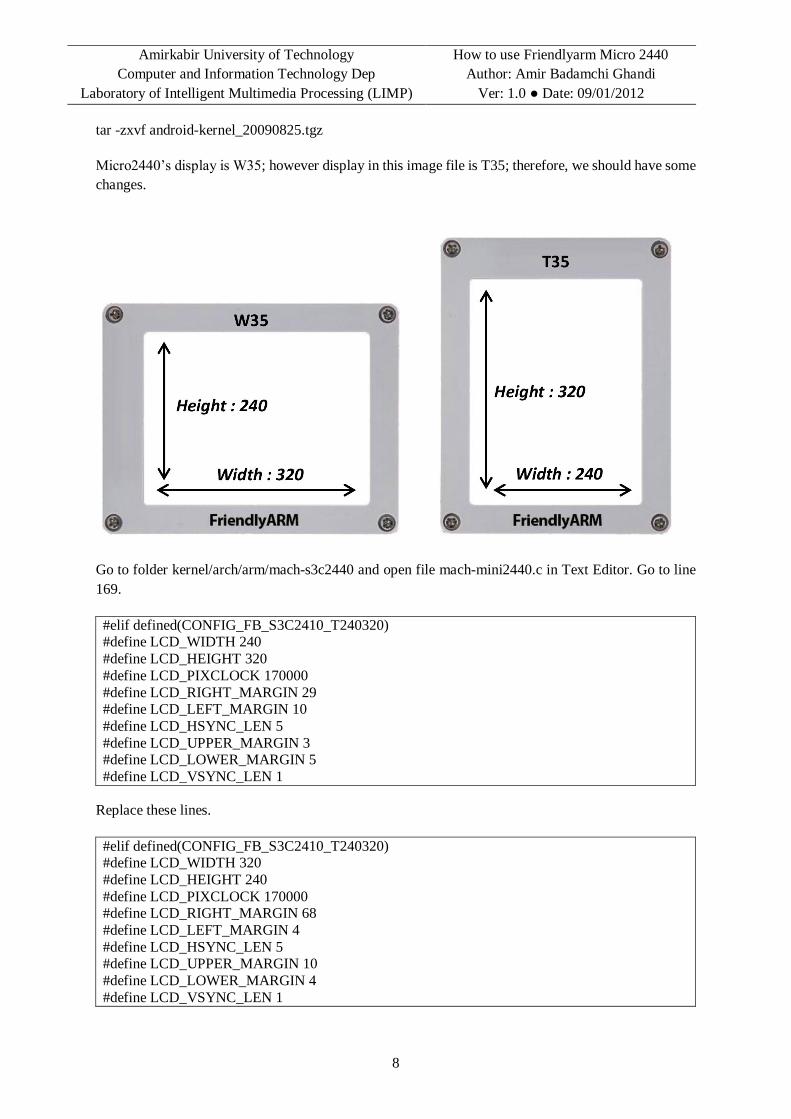
tar -zxvf android-kernel_20090825.tgz
Micro2440’s display is W35; however display in this image file is T35; therefore, we should have some
changes.
Go to folder kernel/arch/arm/mach-s3c2440 and open file mach-mini2440.c in Text Editor. Go to line
169.
#elif defined(CONFIG_FB_S3C2410_T240320) #define LCD_WIDTH 240
#define LCD_HEIGHT 320
#define LCD_PIXCLOCK 170000
#define LCD_RIGHT_MARGIN 29 #define LCD_LEFT_MARGIN 10
#define LCD_HSYNC_LEN 5
#define LCD_UPPER_MARGIN 3 #define LCD_LOWER_MARGIN 5
#define LCD_VSYNC_LEN 1
Replace these lines.
#elif defined(CONFIG_FB_S3C2410_T240320) #define LCD_WIDTH 320
#define LCD_HEIGHT 240
#define LCD_PIXCLOCK 170000 #define LCD_RIGHT_MARGIN 68
#define LCD_LEFT_MARGIN 4
#define LCD_HSYNC_LEN 5 #define LCD_UPPER_MARGIN 10
#define LCD_LOWER_MARGIN 4
#define LCD_VSYNC_LEN 1
How to use Friendlyarm Micro 2440 Amirkabir University of Technology
Computer and Information Technology Dep
Laboratory of Intelligent Multimedia Processing (LIMP)
Author: Amir Badamchi Ghandi
Ver: 1.0 ● Date: 09/01/2012
9
Now go to kernel/drivers/input/touchscreen and open s3c2410_ts.c file in editor, go to line 99.
disX = disX * 1024 / 240;
disY = disY * 1024 / 320;
Replace these lines.
disX = disX * 1024 / 320;
disY = disY * 1024 / 240;
Save your changes.
Now go to terminal and enter this command to specify compiler path.
export PATH=/opt/FriendlyARM/toolschain/4.4.3/bin:$PATH
Go to kernel folder and enter these commands
cp config_mini2440 .config
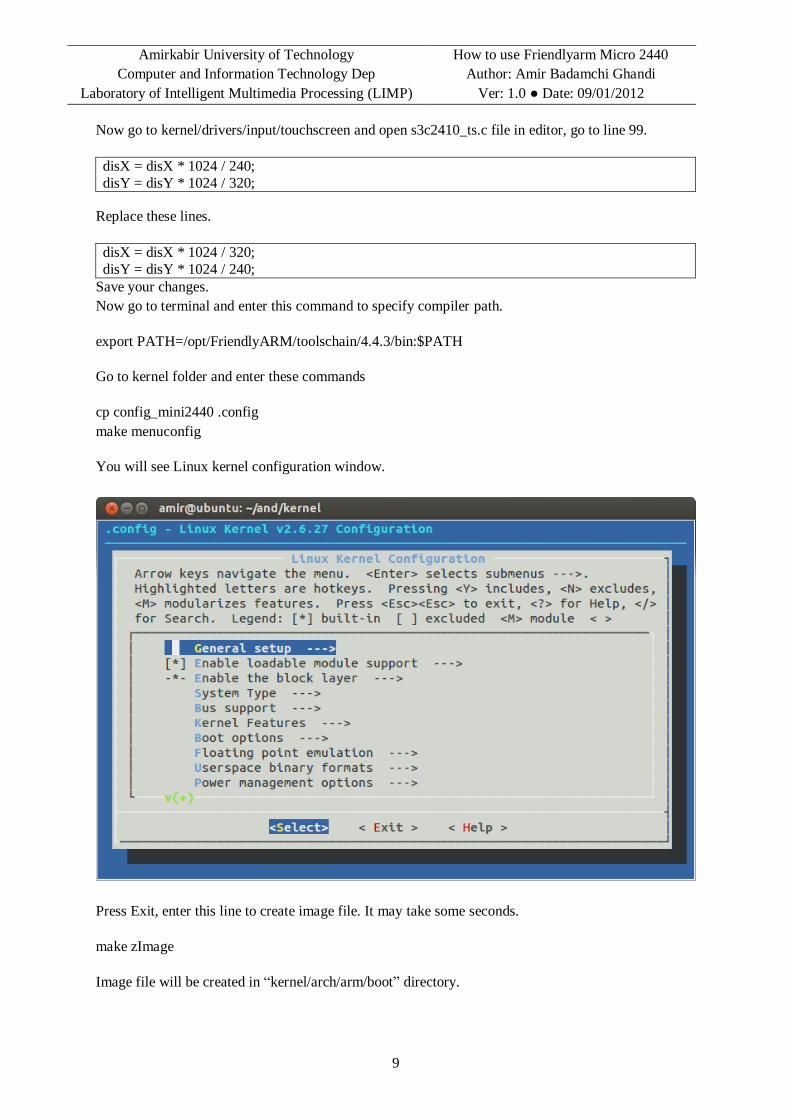
make menuconfig
You will see Linux kernel configuration window.
Press Exit, enter this line to create image file. It may take some seconds.
make zImage
Image file will be created in “kernel/arch/arm/boot” directory.
How to use Friendlyarm Micro 2440 Amirkabir University of Technology
Computer and Information Technology Dep
Laboratory of Intelligent Multimedia Processing (LIMP)
Author: Amir Badamchi Ghandi
Ver: 1.0 ● Date: 09/01/2012
10
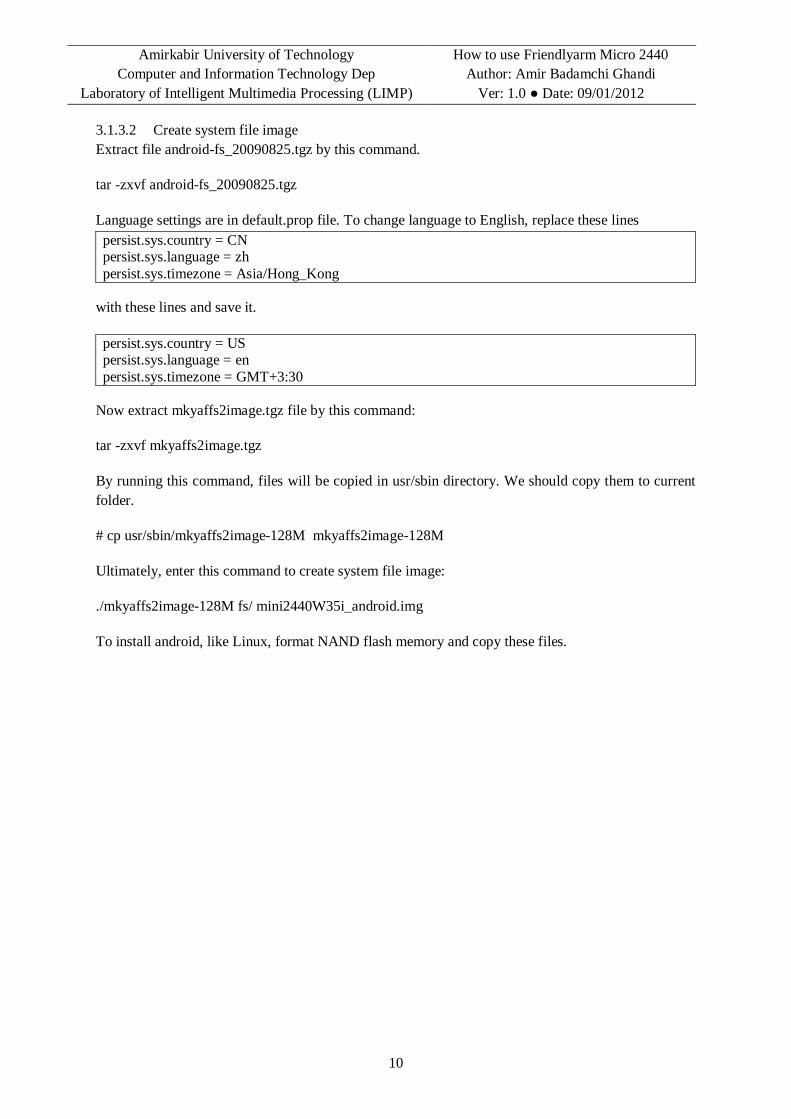
3.1.3.2 Create system file image
Extract file android-fs_20090825.tgz by this command.
tar -zxvf android-fs_20090825.tgz
Language settings are in default.prop file. To change language to English, replace these lines
persist.sys.country = CN persist.sys.language = zh
persist.sys.timezone = Asia/Hong_Kong
with these lines and save it.
persist.sys.country = US persist.sys.language = en
persist.sys.timezone = GMT+3:30
Now extract mkyaffs2image.tgz file by this command:
tar -zxvf mkyaffs2image.tgz
By running this command, files will be copied in usr/sbin directory. We should copy them to current
folder.
# cp usr/sbin/mkyaffs2image-128M mkyaffs2image-128M
Ultimately, enter this command to create system file image:
./mkyaffs2image-128M fs/ mini2440W35i_android.img
To install android, like Linux, format NAND flash memory and copy these files.