hp g71t-300 cooling fan replacement...hp g71t-300 cooling fan replacement the cooling fan allows air...
TRANSCRIPT

HP G71t-300 Cooling Fan ReplacementThe cooling fan allows air to circulate through the system, reducing the chance of system
overheating. This guide serves to assist the user in replacing a broken or unresponsive coolingfan.
Written By: Rohan Mathew
HP G71t-300 Cooling Fan Replacement Draft: 2016-12-20Guide ID: 71541 -
This document was generated on 2019-09-18 07:19:04 AM (MST).
© iFixit — CC BY-NC-SA www.iFixit.com Page 1 of 9
INTRODUCTION
Make sure that you have a cooling fan with the same voltage/amperage settings to prevent abnormaloperation.
TOOLS:Phillips #0 Screwdriver (1)Metal Spudger (1)
PARTS:Arctic Silver Thermal Paste (1)
HP G71t-300 Cooling Fan Replacement Draft: 2016-12-20Guide ID: 71541 -
This document was generated on 2019-09-18 07:19:04 AM (MST).
© iFixit — CC BY-NC-SA www.iFixit.com Page 2 of 9
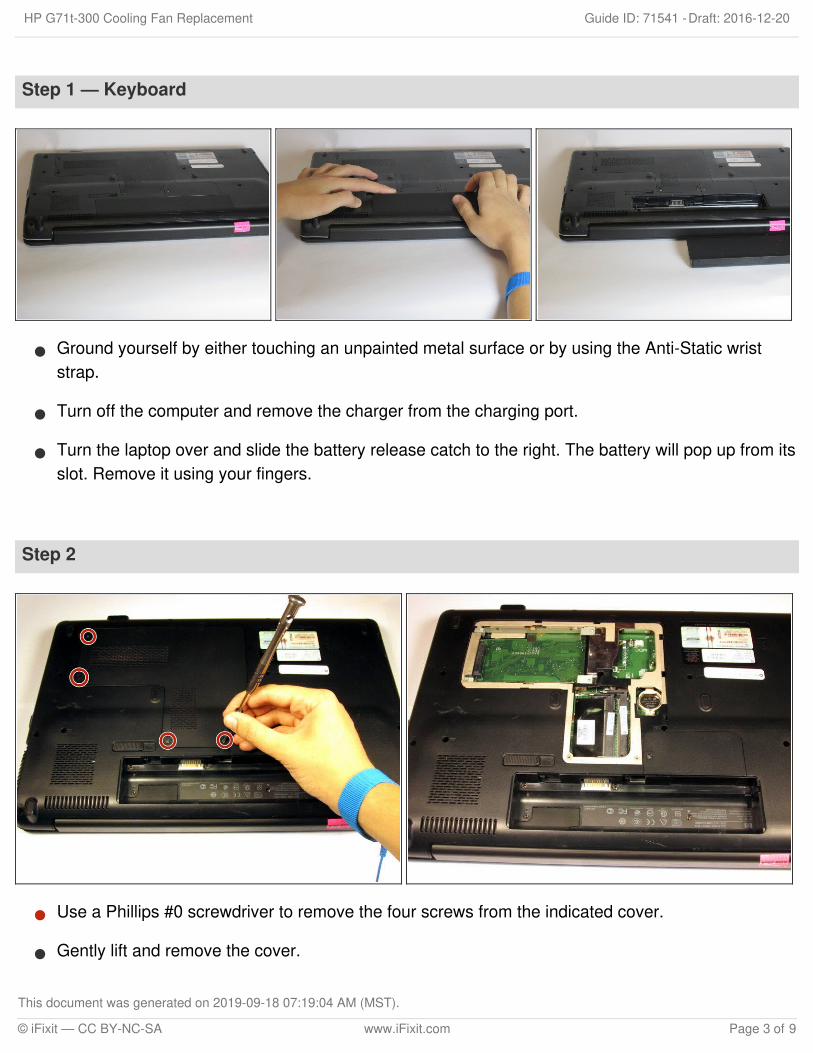
Step 1 — Keyboard
Ground yourself by either touching an unpainted metal surface or by using the Anti-Static wriststrap.
Turn off the computer and remove the charger from the charging port.
Turn the laptop over and slide the battery release catch to the right. The battery will pop up from itsslot. Remove it using your fingers.
Step 2
Use a Phillips #0 screwdriver to remove the four screws from the indicated cover.
Gently lift and remove the cover.
HP G71t-300 Cooling Fan Replacement Draft: 2016-12-20Guide ID: 71541 -
This document was generated on 2019-09-18 07:19:04 AM (MST).
© iFixit — CC BY-NC-SA www.iFixit.com Page 3 of 9
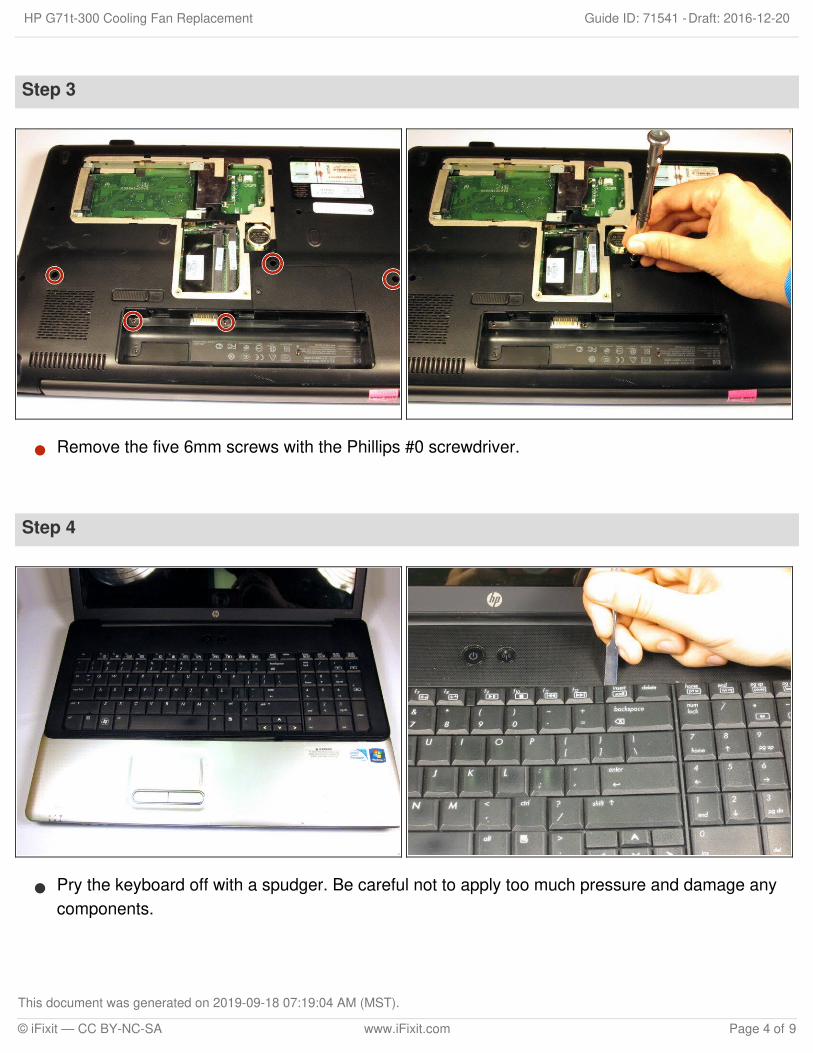
Step 3
Remove the five 6mm screws with the Phillips #0 screwdriver.
Step 4
Pry the keyboard off with a spudger. Be careful not to apply too much pressure and damage anycomponents.
HP G71t-300 Cooling Fan Replacement Draft: 2016-12-20Guide ID: 71541 -
This document was generated on 2019-09-18 07:19:04 AM (MST).
© iFixit — CC BY-NC-SA www.iFixit.com Page 4 of 9
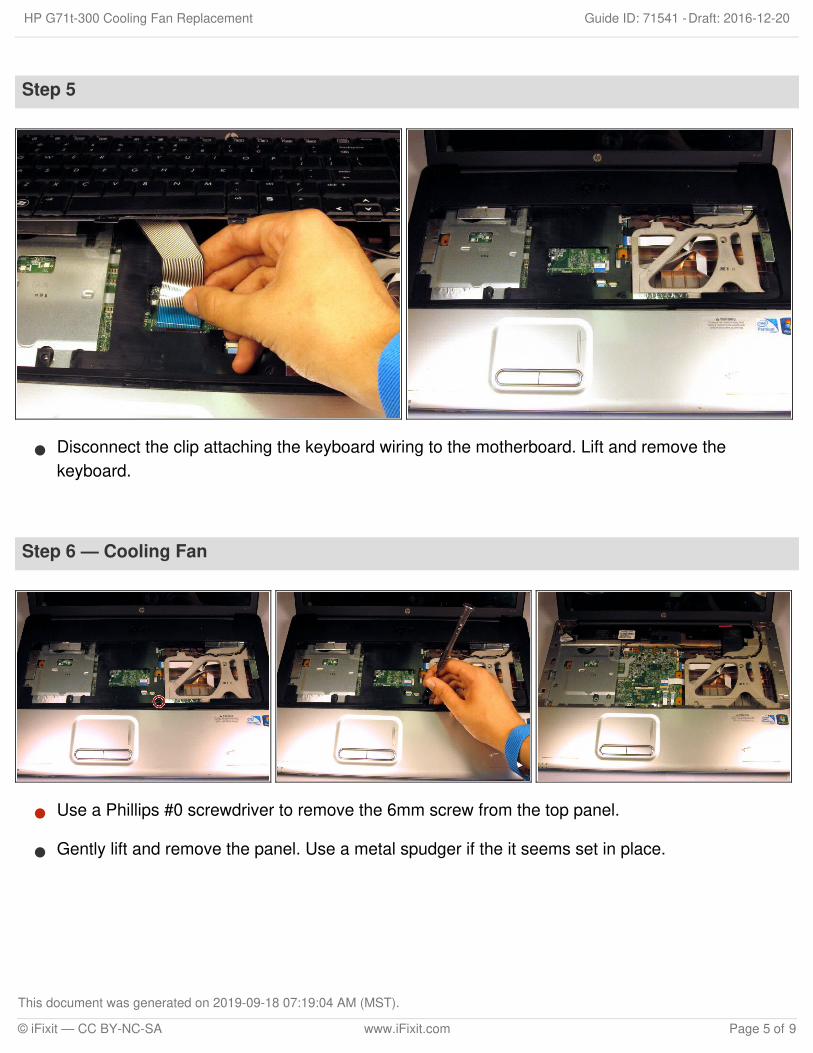
Step 5
Disconnect the clip attaching the keyboard wiring to the motherboard. Lift and remove thekeyboard.
Step 6 — Cooling Fan
Use a Phillips #0 screwdriver to remove the 6mm screw from the top panel.
Gently lift and remove the panel. Use a metal spudger if the it seems set in place.
HP G71t-300 Cooling Fan Replacement Draft: 2016-12-20Guide ID: 71541 -
This document was generated on 2019-09-18 07:19:04 AM (MST).
© iFixit — CC BY-NC-SA www.iFixit.com Page 5 of 9

Step 7
Use a Phillips #0 screwdriver to remove the 6mm screw for the Wi-Fi module cover.
Remove the cover.
Step 8
Remove all fourteen 6mm screws using a Phillips #0 screwdriver.
HP G71t-300 Cooling Fan Replacement Draft: 2016-12-20Guide ID: 71541 -
This document was generated on 2019-09-18 07:19:04 AM (MST).
© iFixit — CC BY-NC-SA www.iFixit.com Page 6 of 9

Step 9
Partially separate the two panels until connectors are visible.
Unclip the wires that attach the trackpad module to the motherboard.
Step 10
Remove the five highlighted screws using a Phillips #0 screwdriver.
HP G71t-300 Cooling Fan Replacement Draft: 2016-12-20Guide ID: 71541 -
This document was generated on 2019-09-18 07:19:04 AM (MST).
© iFixit — CC BY-NC-SA www.iFixit.com Page 7 of 9

Step 11
Disconnect the five cables by gently pulling them from their slots.
Step 12
Press a metal spudger between the VGA port and the plastic housing to pry up the motherboard.
Remove the motherboard and turn it so that the fan is facing upward.
HP G71t-300 Cooling Fan Replacement Draft: 2016-12-20Guide ID: 71541 -
This document was generated on 2019-09-18 07:19:04 AM (MST).
© iFixit — CC BY-NC-SA www.iFixit.com Page 8 of 9

To reassemble your device, follow these instructions in reverse order.
Step 13
Use a Phillips #0 screwdriver to loosen the three screws attaching the heatsink to themotherboard.
Remove the heatsink and fan assembly by unclipping the fan from the motherboard.
HP G71t-300 Cooling Fan Replacement Draft: 2016-12-20Guide ID: 71541 -
This document was generated on 2019-09-18 07:19:04 AM (MST).
© iFixit — CC BY-NC-SA www.iFixit.com Page 9 of 9